

Page 1
OM509-LS User Manual
10-YEAR BATTERY
MICRO SMOKE ALARM
Read the instruction manual before usage.
0086-CPR-550646
Page 2

CONTENTS
1. Alarm Specifications....2
2. General Information..... 2
3. Package Contents.......3
4. Alarm Features ............3
5. How to Power On ........4
1. Alarm Specifications
Dimension: Φ45x42 mm
Weight: 50g
Operational Temperature: 5°C-50°C
Working Voltage: 3V
Standby Current: ≤7uA
Humidity: 10%-90%
Service Environment: Residential dwelling
Designed Life: 10 years
2. General Information
This smoke alarm uses the photoelectric principle.
It’s designed for detecting smoke particles in the air.
If the smoke alarm is properly mounted and
maintained, it will be activated at the very start of
smoke buildup. The alarm is designed to detect
smoke, it cannot prevent a fire. Please read the
instruction manual carefully before you use this
smoke alarm.
6. Mounting the Alarm.....5
7. Alarm Operation ..........9
8. Maintenance..............13
9. Troubleshooting .........16
(with normal use)
2
Page 3
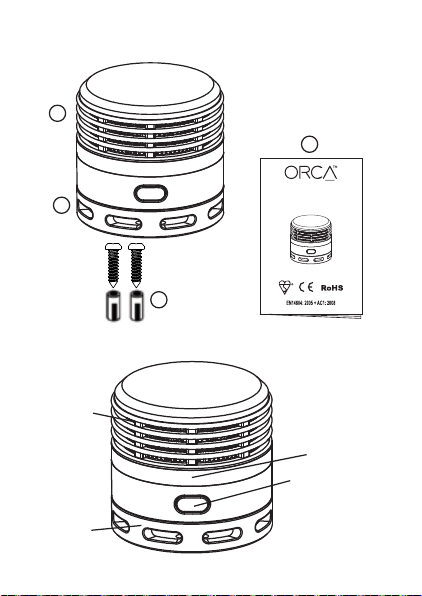
3. Package Contents
1
2
3
4. Alarm Features
Smoke inlet
1-Smoke Alarm
2-Mounting Bracket
3-Screws and Anchor Plugs
4-User Manual
4
OM509-LS User Manual
10-YEAR BATTERY
MICRO SMOKE ALARM
Read the instruction manual before usage.
Fig.1
0086-CPR-550646
LED indicator
Test/Hush button
Mounting
bracket
Fig.2
3
Page 4
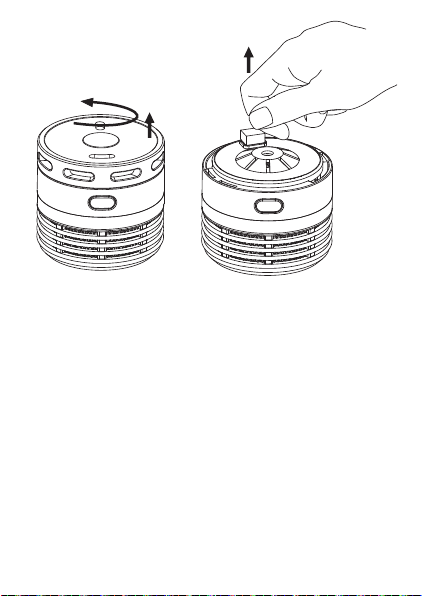
5. How to Power On
Remove mounting plate
Magnet
Fig.3
Unscrew the mounting plate, remove the small
magnet, the power is automatically switched on
(Fig.3). Note: Do not dispose of the small magnet see page 8.
CAUTION: built-in Lithium battery cannot be
replaced. Standby time is 10 years in normal use
conditions.
The alarm is energised and working if the LED
indicator is flashing and the alarm siren is activated
by pressing the Test/Hush button.
Note: In the event of a product malfunction, to
silence the alarm, put the small magnet back in
place to switch into power off mode.
4
Page 5

6. Mounting the Alarm
Smoke alarms should be situated in the following
places:
• at least one in each room
• at least one on each floor level
• in the hallway, in the staircase (if the hallway is too
long, there should be two or more smoke alarms
mounted)
• in the living room
• in all bedrooms and sleeping areas
• in storage rooms or spaces with electrical
equipment
The alarm should not be situated in the following
places:
• a room in which the temperature can drop below
5°C or rise above 50°C
• in damp rooms such as the laundry or bathroom
• in front of doors or windows
• near a ventilator or radiator
• in an enclosed kitchen
• within 3m of cooking appliances or rangehoods
• within 30cm of standard light fittings or within
1.5m of fluorescent light fittings
• in areas likely to be infested with insects
5
Page 6
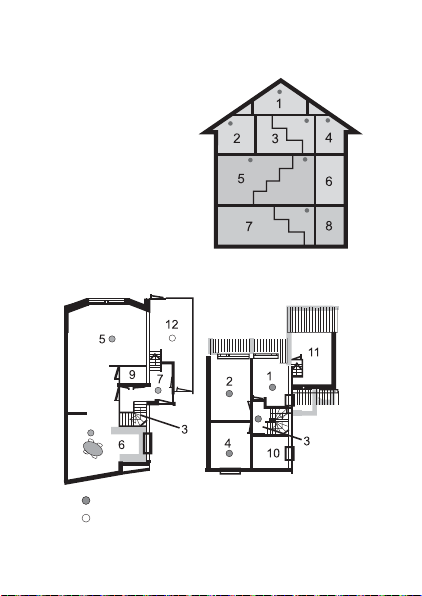
1. Bedroom
2. Bedroom
3. Staircase
4. Bedroom
5. Livingroom
6. Kitchen
7. Entrance
8. Hobby area
9. Guest bathroom
10. Bathroom
11. Storage
12. Garage
Smoke alarm for minimal protection
Smoke alarm for extra protection
6
Fig.4
Fig.5
Page 7
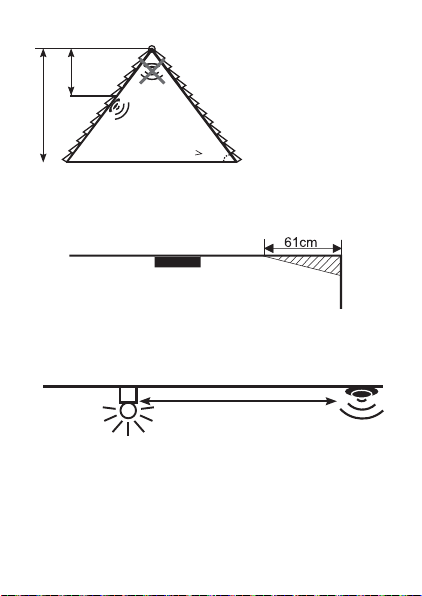
30-50cm
Do not install at the apex of a
sloping ceiling as smoke will
not collect in these areas.
If the ceiling angle is over
6m
Fig.6
30° and has a total
height of up to 6m, a
30°
distance of
30-50cm from the
apex is to be observed. If the angle is up to 45°
the smoke alarm can be installed on the sloped
ceiling.
smoke alarm
Fig.7
The install distance should be 61cm at least from
the corner of the wall
50 cm
Fig.8
Install at a distance of at least 50cm from
fluorescent light sources.
7
Page 8
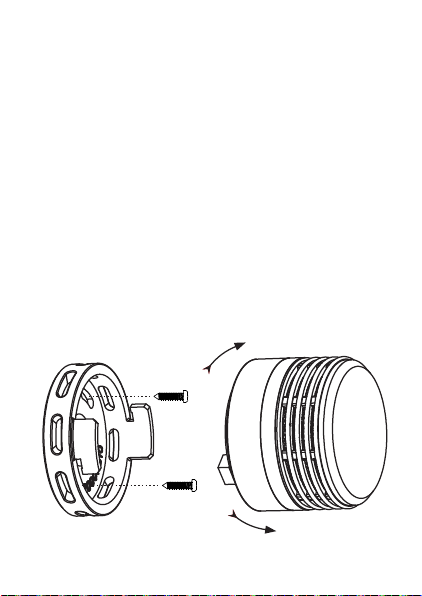
To mount the smoke alarm, proceed as follows:
• Position mounting plate on the ceiling and mark
screw positions with pencil. Pay attention to Fig.4
to Fig.8 for correct alarm locations.
• Drill holes at the marked positions with a 5mm drill.
• Insert the anchor plugs and gently tap with a
hammer until flush with ceiling.
• Screw the mounting plate to the ceiling - do not
overtighten.
• Remove the small magnet from the designated
position and reposition elsewhere within the cavity
for later use (see Fig.3).
• Gently screw the alarm onto the mounting bracket
making sure the small magnet is retained inside.
• Please Note: NEVER paint the smoke alarm.
Bracket
SCREWS
SCREWS
Fig.9
8
Twist to tighten
Twist to loosen
Page 9
7. Alarm Operation
7.1 This alarm is designed to self-calibrate its
photoelectric chamber to ensure long-term
stability.
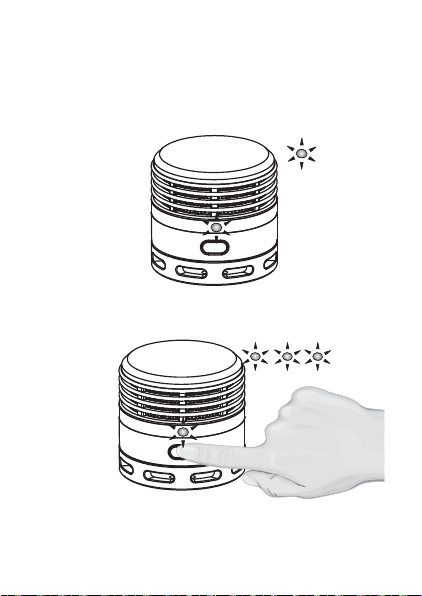
7.2 Standby Mode
Fig.10
The alarm goes into Standby Mode once powered
on, with the LED blinking every 5-6 minutes.
7.3 Test
~
Beep Beep Beep Beep ...
9
Fig.11
Page 10
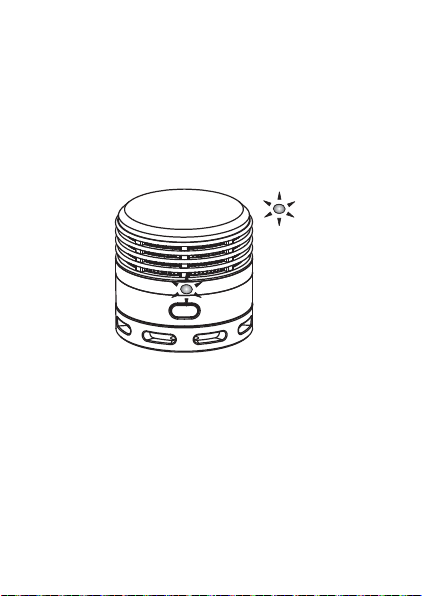
To check operation, the “Test/Hush” button should be
depressed until the alarm siren sounds and the red
strobe light ashes. When the “Test/Hush” button is
released, the audible and visible alarm stops, and the
alarm goes into Hush Mode. Repeat the above steps to
exit Hush Mode.
7.4 Hush Mode
every 10 seconds
Fig.12
1. In Standby Mode, press the “Test/Hush” button to put
the alarm into Hush Mode.
2. If the alarm is activating, press the “Test/Hush” button
to put the alarm into Hush Mode.
3. The Hush Mode lasts for 9 minutes.
4. In the Hush Mode, hold the “Test/Hush” button until
acoustic alarm signal sounds, the alarm will then exit
the Hush Mode and return to Standby Mode.
10
Page 11

Attention:
1. Whether the alarm is in Standby or Alarm Mode, if the
“Test/Hush” button is depressed, the alarm enters
Hush Mode. LED indicator light ashes once every 10
seconds. Hold the “Test/Hush” button until acoustic
alarm signal sounds, the alarm then exits the Hush
Mode.
2. If the Test/Hush button is depressed long enough to
make the alarm emit sound, then the alarm won’t
enter into Hush Mode. The alarm will only enter into
Hush Mode if the Test/Hush button is depressed and
released quickly.
3. When the alarm is in Standby Mode or Hush Mode,
please pay close attention to the LED ashing time
interval. If the LED ashes once every 10 seconds, it’s
in Hush Mode, while if LED ashes once every 5-6
minutes, it’s in Standby Mode.
4. In Hush Mode, the alarm will again activate if the
smoke concentration in the air is more than 4 times
that of the normal activation level.
11
Page 12
7.5 Low Battery
BEEP
Fig.13
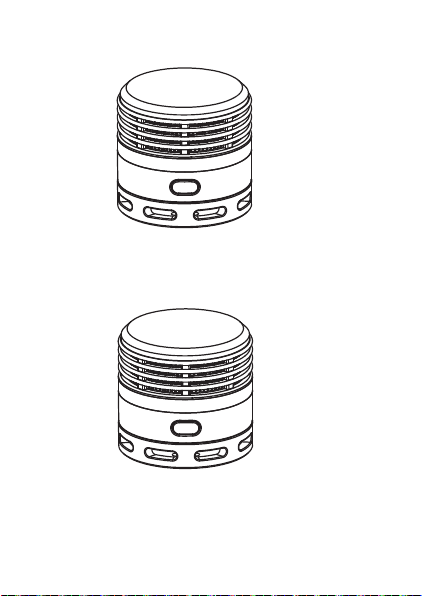
When the alarm is in low-battery condition
(2.4v±0.1v), it sounds one “beep” every 43 seconds.
7.6 Malfunction or End-of-Life
BEEP
BEEP
BEEP
Fig.14
When the alarm malfunctions or has reached
End-of-Life status, it sounds a regular “beep” every
43 seconds. Note: reposition the small magnet (see
page 3) to power off the alarm before disposal.
12
Page 13
Please replace the alarm if it malfunctions
or reaches the end of its life.
8. Maintenance
• Test the alarm weekly.
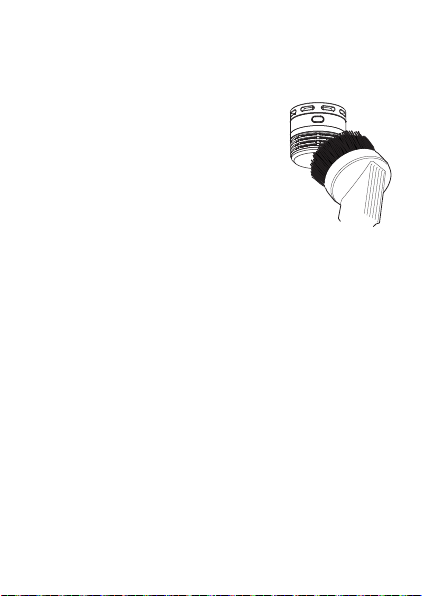
• Detach the alarm monthly and
clean with a vacuum cleaner
brush attachment, particularly
underneath the alarm and around
the grill (see Fig.15)
• Do not paint the alarm.
• Do not locate the alarm in dusty, steamy or smoky
areas of the dwelling.
• Both designed alarm lifetime and battery standby
time (including weekly test) is 10 years. The
battery service time decreases if the alarm is
frequently activated for longer periods.
• Smoke alarms have limitations. This smoke alarm
is not foolproof and is not warranted to protect
lives or property from fire. Smoke alarms are not a
substitute for insurance. Homeowners and renters
are responsible to insure their own lives and
property. In addition, it is possible for the smoke
alarm to fail at any time. For this reason, you must
test the smoke alarm weekly and replace every 10
years.
Fig.15
13
Page 14

• Smoke alarms may not alert every household
member every time. The alarm siren is loud in
order to alert individuals to a potential danger.
However, there may be limiting circumstances
where a household member may not hear the
alarm (i.e., outdoor or indoor noise, sound
sleepers, drug or alcohol usage, the hard of
hearing, etc.). If you suspect that this smoke alarm
may not alert a household member, install and
maintain specialty smoke alarms. Household
members must hear the alarm's warning sound
and quickly respond to it to reduce the risk of
damage, injury, or death that may result from fire.
If a household member is hard of hearing, install
special smoke alarms with lights or vibrating alarms
to alert occupants.
IMPORTANT
Newfield Group NZ warrants to the original
purchaser each new smoke alarm to be free from
defects in material and workmanship under normal
use and service for a period of seven years from the
date of purchase.
This warranty does not cover damage resulting from
accident, misuse or abuse or lack of reasonable
care of the product. This warranty is in lieu of all
other express warranties, obligations or liabilities.
14
Page 15

THE IMPLIED WARRANTIES OF
MERCHANTABILITY AND FITNESS FOR A
PARTICULAR PURPOSE ARE LIMITED TO A
PERIOD OF SEVEN YEARS FOR THE SMOKE
ALARM FROM PURCHASE DATE.
IN NO CASE SHALL WE BE LIABLE FOR ANY
INCIDENTAL OR CONSEQUENTIAL DAMAGES
FOR BREACH OF THIS OR ANY OTHER
WARRANTY, EXPRESS OR IMPLIED,
WHATSOEVER, EVEN IF THE LOSS OR DAMAGE IS
CAUSED BY ITS NEGLIGENCE OR FAULT.
Distributed in New Zealand by
Newfield Group
www.newfield.co.nz
15
Page 16

9. Troubleshooting Guide
PROBLEM
Smoke alarm does not
respond when Test
button depressed.
Red LED flashes and the
alarm sounds one beep
every 43 seconds.
Smoke alarm sounds
unwanted alarms
intermittently or when
you are cooking, taking
a shower etc.
SOLUTION
Check that small magnet on back
of alarm has been removed (see
page 3 & 4).
Battery is low - REPLACE ALARM
IMMEDIATELY!
1. Some dust or a small insect has
entered the alarm - see cleaning
instructions on page 13.
2. Move smoke alarm to a new
location. See Wrong Locations
page 5.
360° Strobe Warning Light
Visible from any angle when alarm is activated
Photoelectric Sensor
Good at detecting both slow smouldering & fast flaming fires
Hush/Test Button
To quieten false alarms or check alarm functioning
Low Battery Warning
Indicates alarm end-of-life or alarm malfunction
Extra Loud Warning Tone
85db at 3 metres industry standard
Sealed Long Life Battery
Tamper-proof & designed to last the life of the alarm
 Loading...