

Page 1
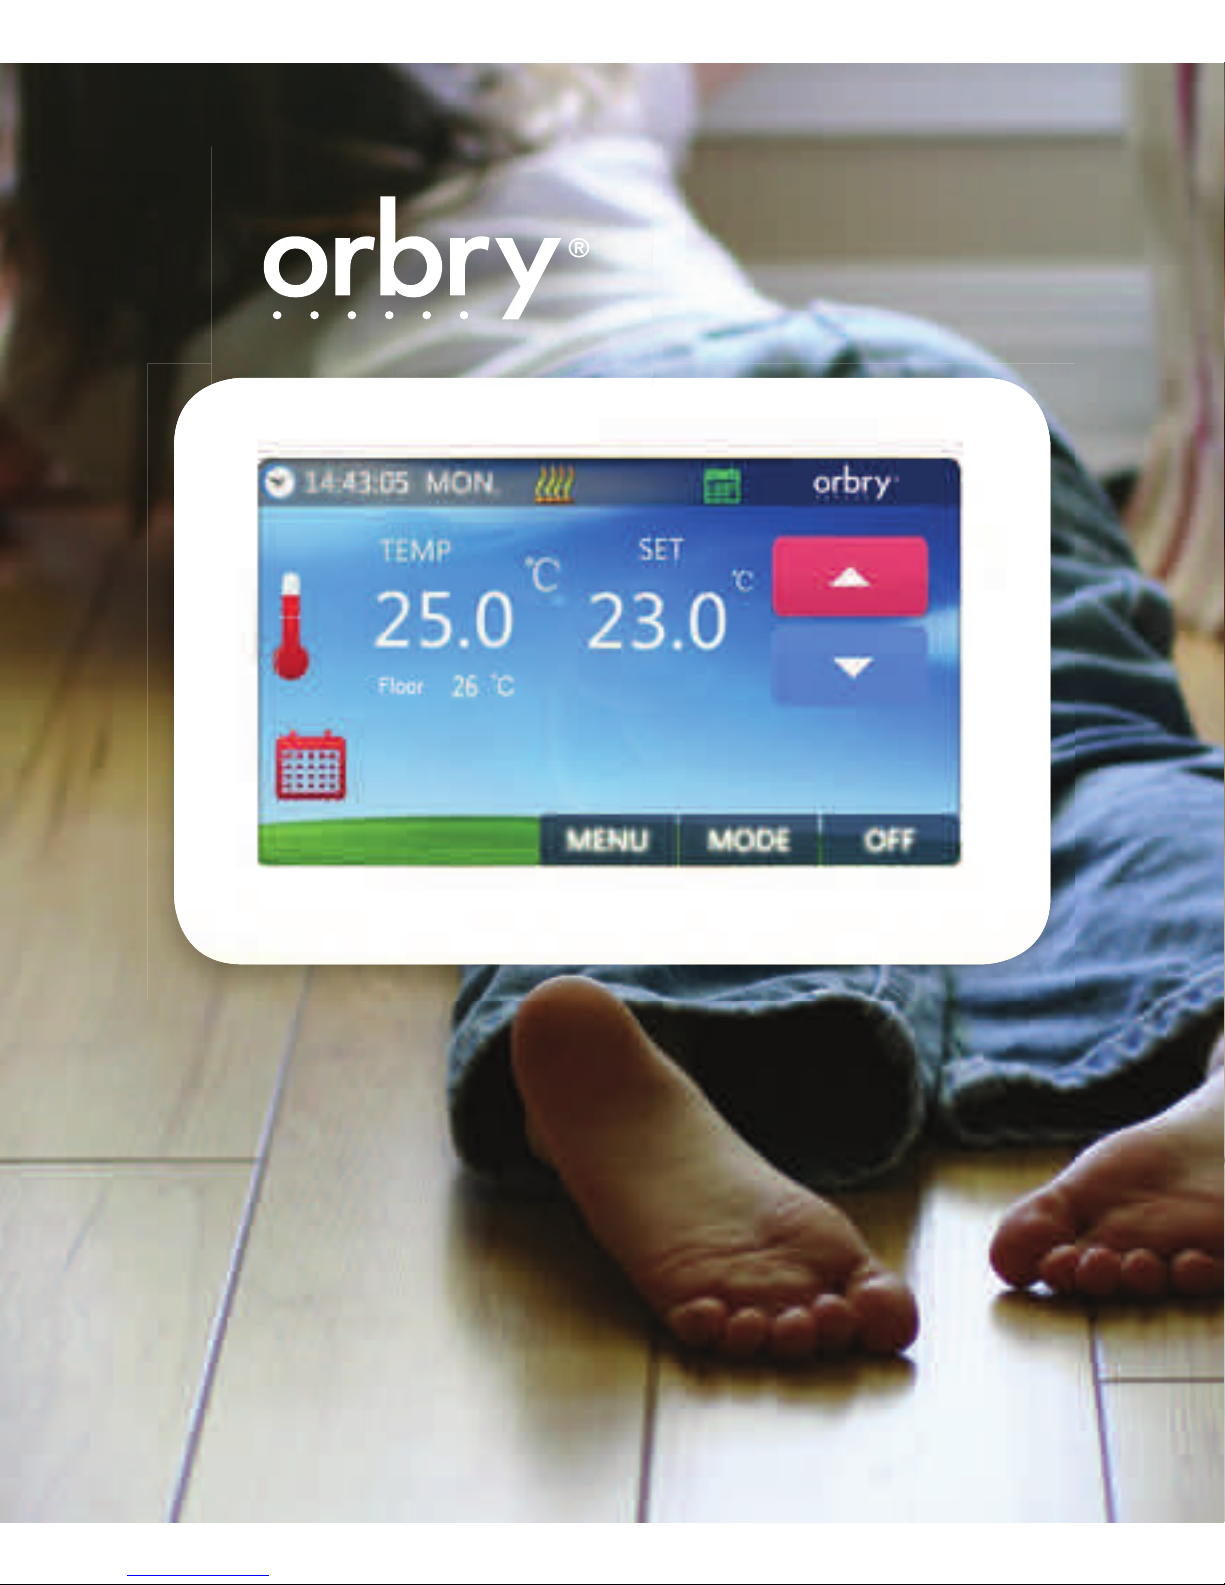
Smart Touch
Thermostat
Colour
Touchscreen
Thermostat
OBSMART
Page 2

DO DO NOT
Install a conduit for your
sensor probe before thermostat installation.
Ignore electrical regulations.
Install this thermostat in
a wet zone.
The Orbry Smart Touch Thermostat is IP30 rated and suitable for
safe installation in bathrooms. It is not suitable for use in special locations, such as wet zones. All electrical circuits in bathrooms must
be protected by a 30mA RCD. The instructions we supply include as
much information as possible to ensure that all installations comply
with current electrical regulations. Please call our customer support
line, if in any doubt, on 0845 208 0221.
The Orbry Smart Touch Thermostat is a digital thermostat, which is
designed for electric underoor heating systems with a maximum
load of up to 16A (3600W). The Orbry Smart Touch features a 4.3”
colour touchscreen display and four (4) languages.
ALL WIRING MUST CONFORM TO
IEE 17TH EDITION PART P REGULATIONS.
THIS PRODUCT IS RATED IP30.
Orbry Smart Touch Thermostat
INTRODUCTION
IMPORTANT SAFETY REGULATIONS
Page 3
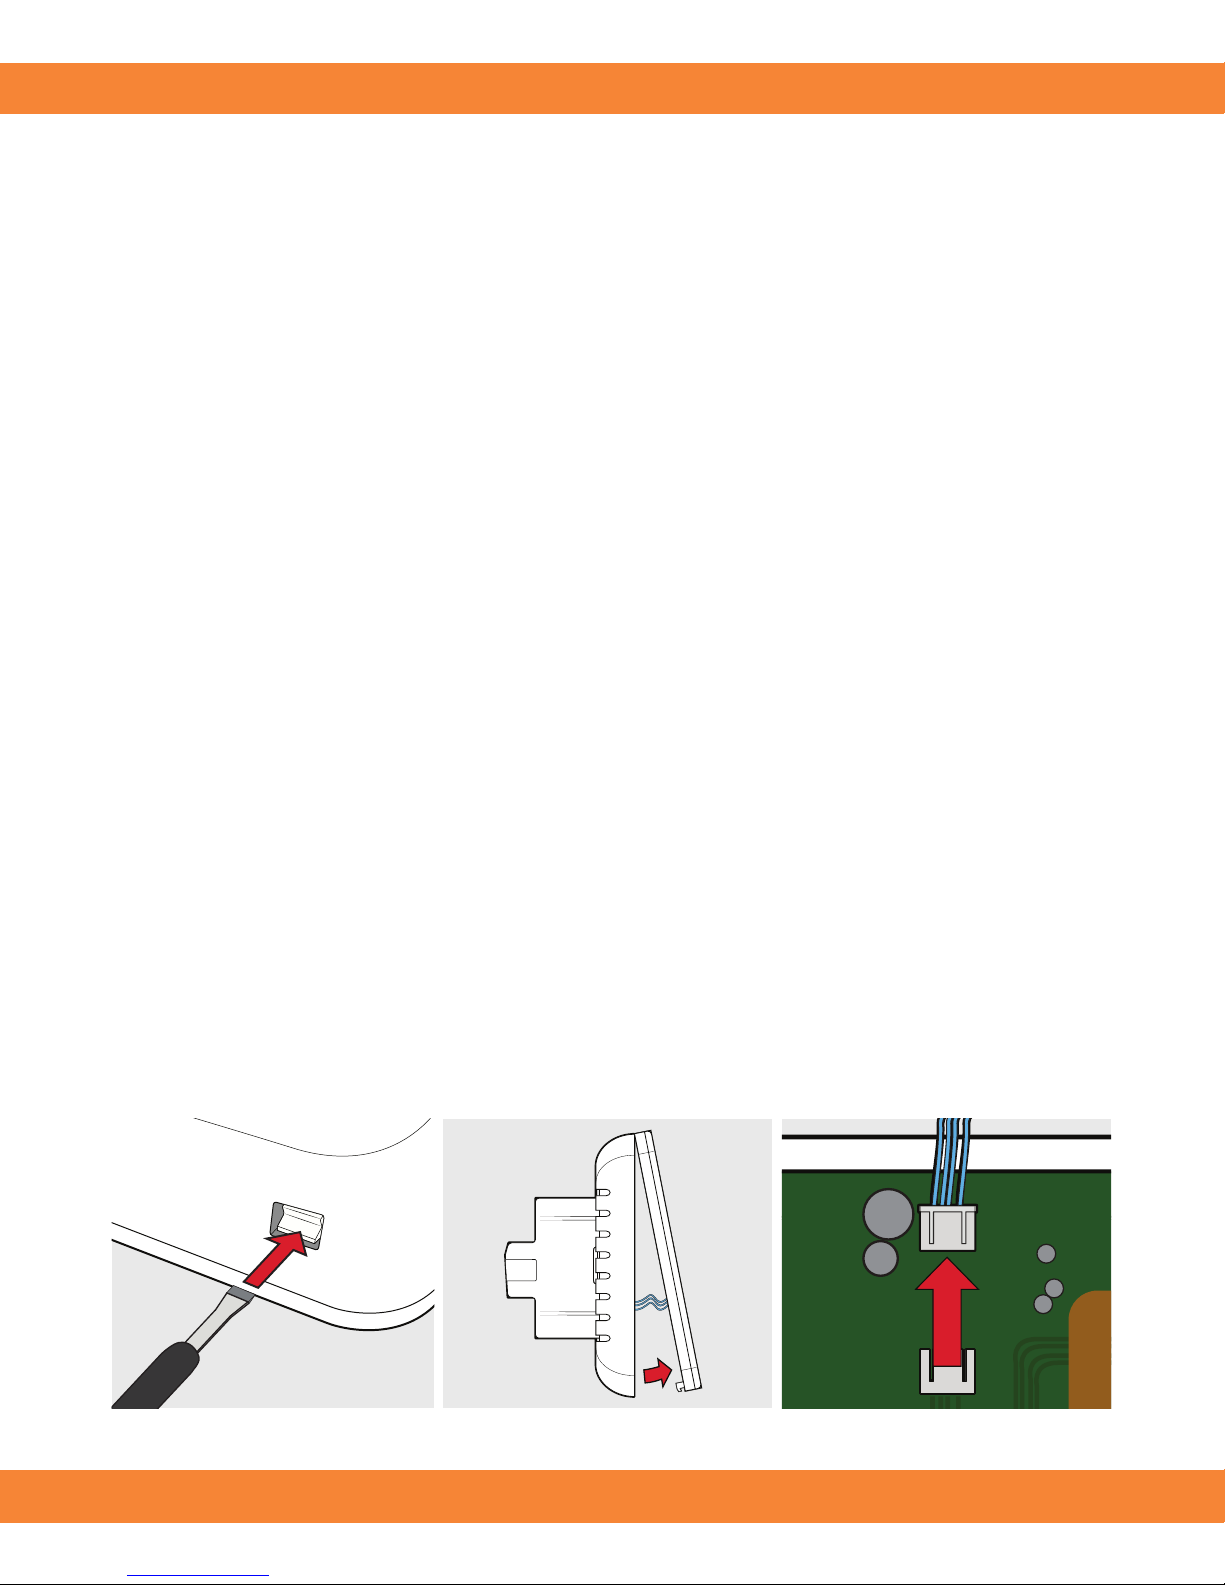
Place the unit face down on a hard surface and push the three (3)
clips located on the bottom of the Orbry Smart Touch in with
a screwdriver to release the face plate.
Once the face plate has been gently opened disconnect the ribbon
cable to release the face plate.
Step 1: Release the face plate
Step 2: Disconnect ribbon cable & remove face plate
The sensor conduit and deep back box must be tted before
installation of the actual thermostat can begin. Feed the sensor
probe provided down through the sensor conduit into
a representive area of the oor. For technical advice or help with
any queries, please call our customer support team
on 0845 208 0221 or visit www.orbry.com/orbry-downloads.
Before you begin
Installation
INSTALLING THE ORBRY SMART TOUCH
Page 4
1. 4.
2. 5.
3.
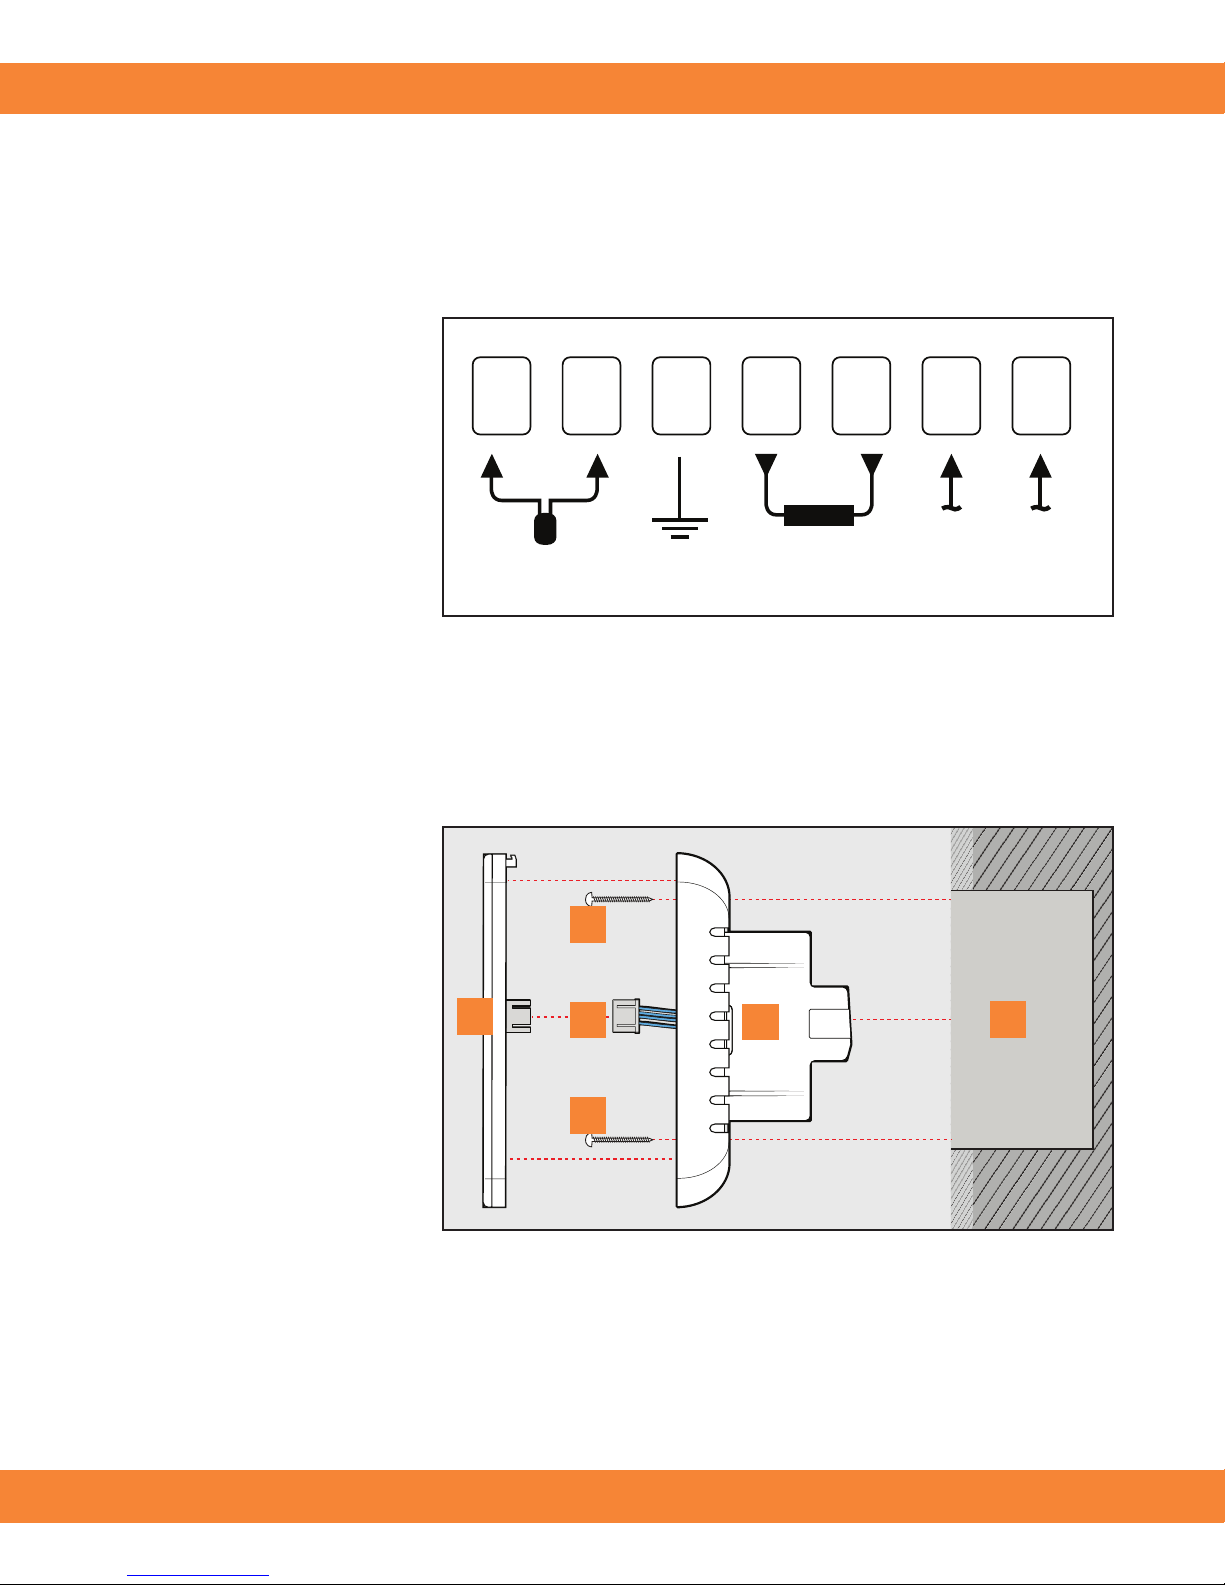
Fix the Orbry Smart Touch Thermostat to the wall
Align the Orbry
Smart Touch with
your back box and
x in place with the
screws provided.
Now, reconnect the
ribbon connections
and reseat the face
plate (bottom edge
rst). Ensure the
Orbry Smart Touch
is securely xed
before continuing.
Faceplate
Provided screws
Ribbon connectors
Back plate
Back box
Wire and replace the face plate
Sensor
7 6 4 3 2 15
LL
3600W/16A
230V/AC
NN
Loosen the tension
screws to allow the
wires to be inserted
and xed. Position
the cables as shown
in the wiring diagram
and ensure each
screw is tightened
correctly.
Ensure system is correctly earthed.
WIRING THE ORBRY SMART TOUCH
1
5
4
3
2
2
Page 5
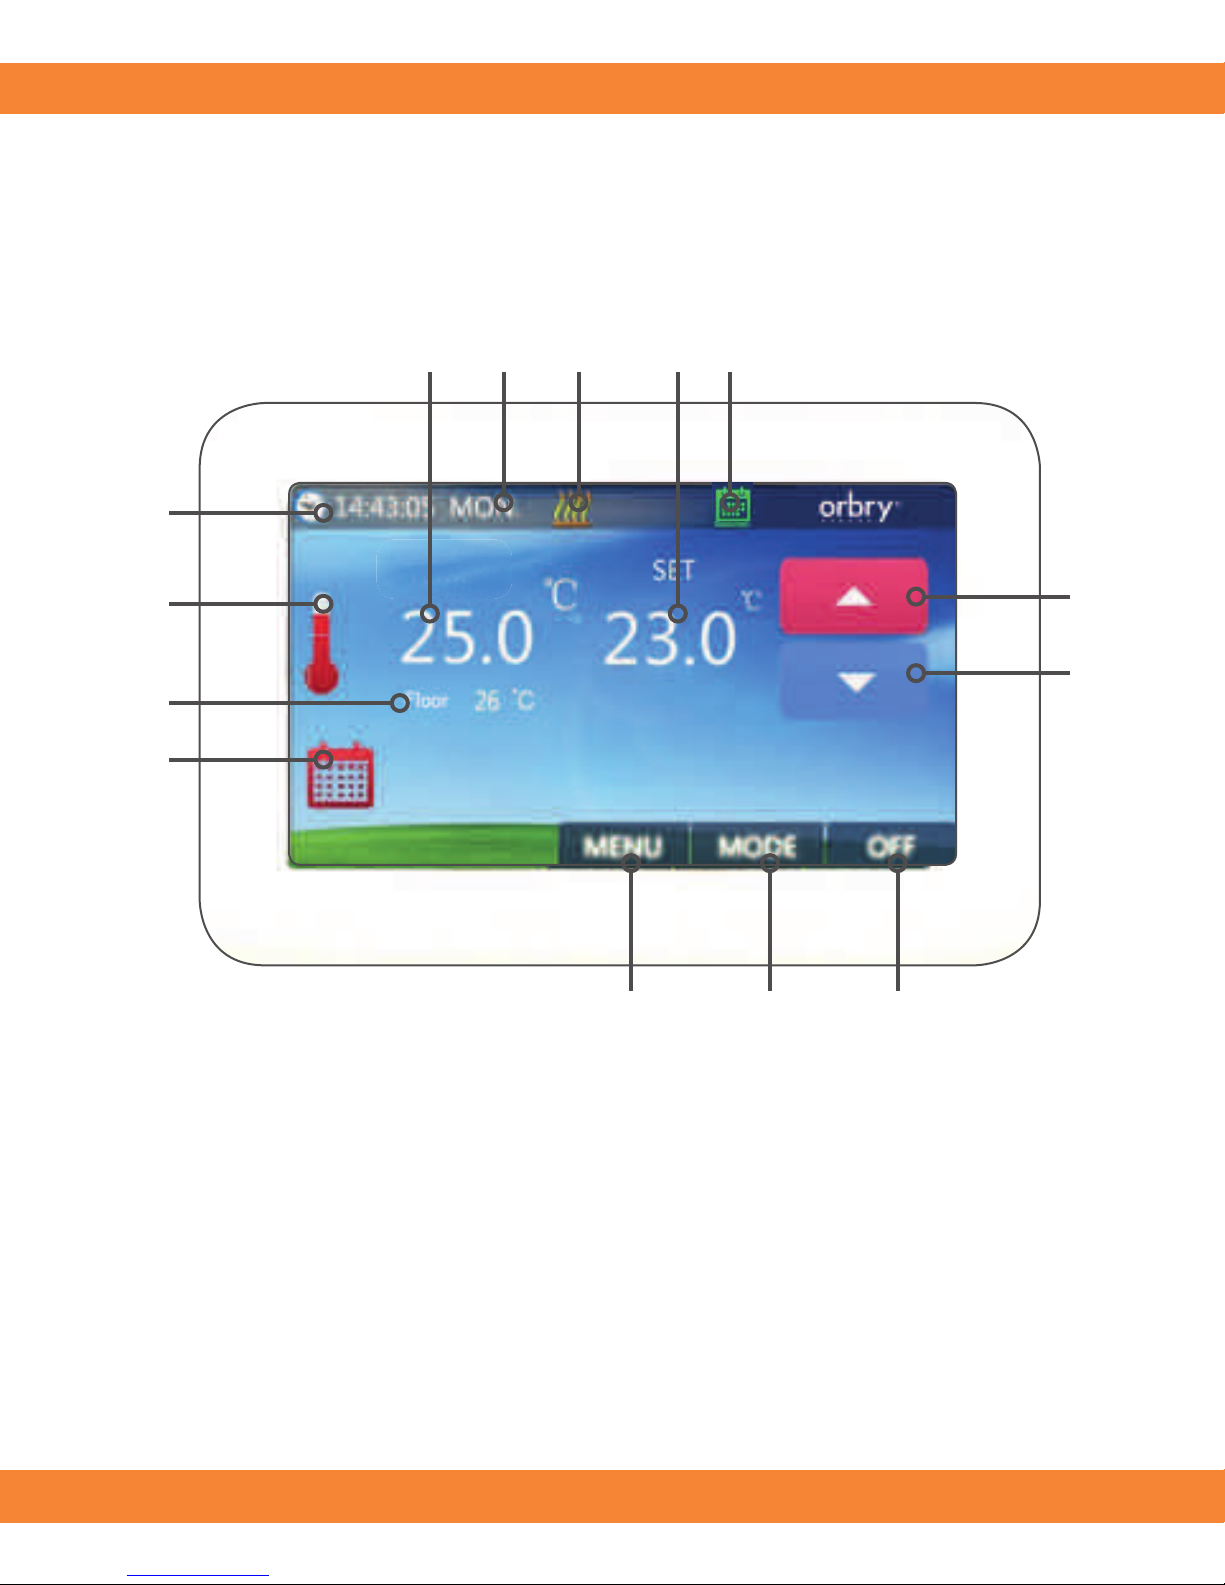
Heating icon
Menu button Ambient temperature
Up button Temperature icon
Mode button Weekday icon
Down button Clock icon
Mode icon
Set temperature
Floor temperature
Mode icon area
ROOM
5
4
1
1. 8.
2. 9.
3. 10.
4. 11.
5. 12.
6. 13.
7. 14.
23
14
13
12
11
10 9 8 7 6
Orbry Smart Touch Thermostat Interface
On / O button
PROGRAMMING THE ORBRY SMART TOUCH
Page 6
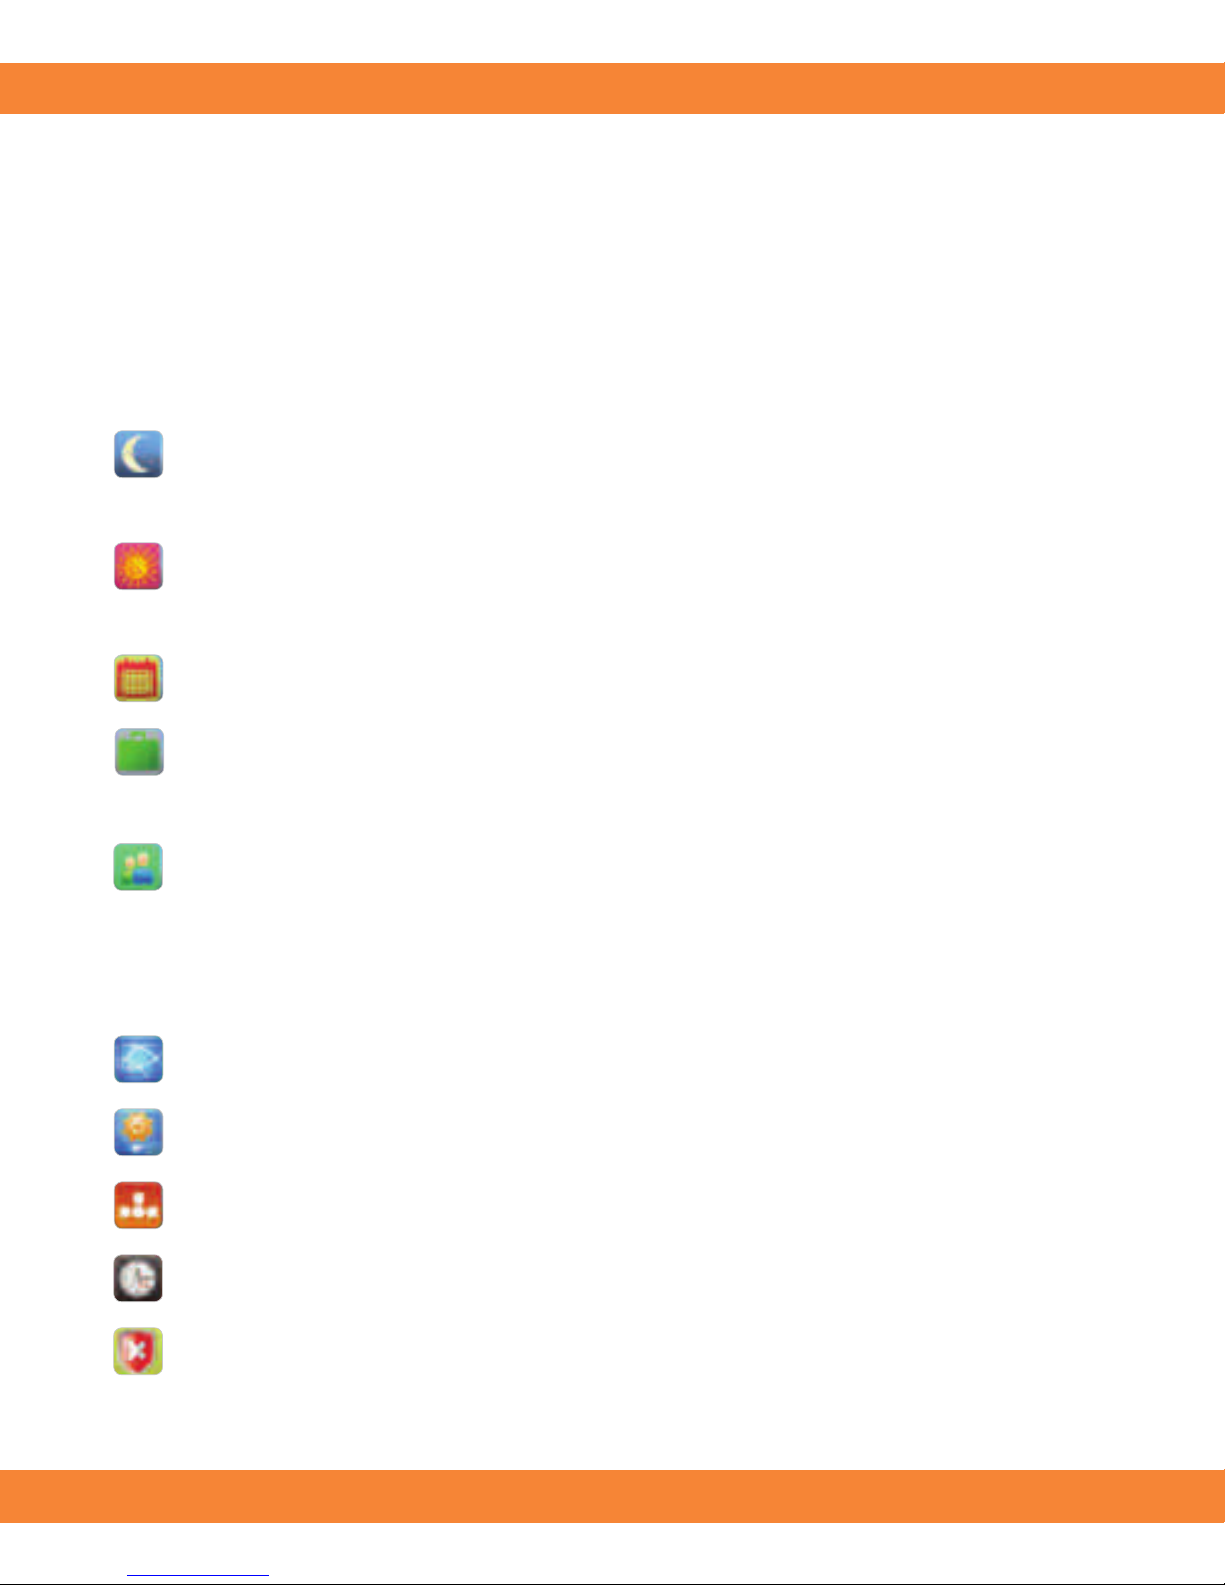
Preset Modes
Settings
Language selection – Press to choose one of four (4) languages.
Economy mode – Preset a low energy saving temperature
18°C for economical comfort and energy savings.
Comfort mode – Preset a comfort temperature (e.g. 25°C)
and enjoy warmth outside of your heating schedule.
Program mode –
Your own customisable heating schedule.
Holiday mode –
Automatically maintain a preset low energy
saving temperature (e.g. 8°C) while you’re away.
Boost mode –
Set a high temperature (e.g. 27°C) and quickly
switch to this high temperature on demand.
Preset temperatures –
Use to dene pre-set temperatures.
Program review –
Use to check your 5+1+1 day schedule.
Date & time button –
Use to set the correct weekday and time.
Protection temperatures –
Use to dene minimum and
maximum temperatures.
Manually switch between these preset temperature modes to allow
exibility outside of your heating schedule.
PROGRAMMING THE ORBRY SMART TOUCH
Page 7
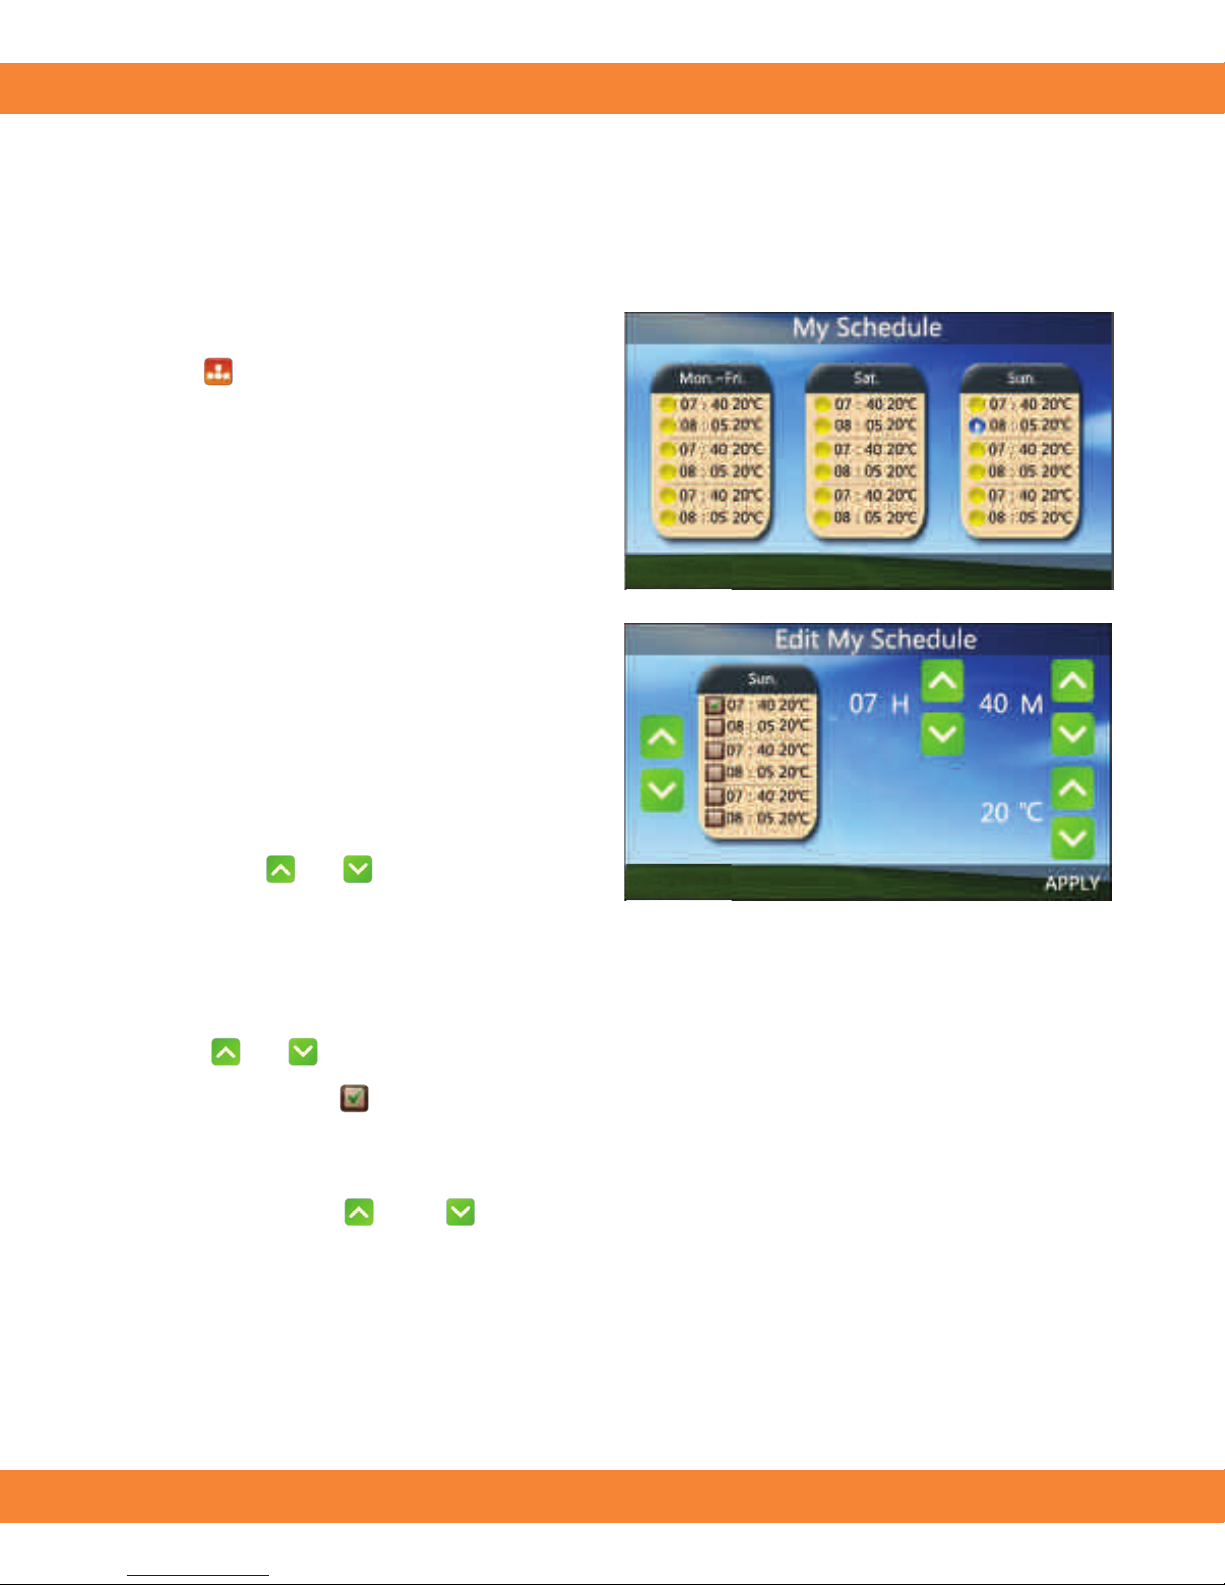
Press the MENU Button, then
press
to review your weekly
schedule.
Select Mon – Fri, Sat or Sun
to edit your custom heating
schedule.
Example: If you would like to
edit your Sunday schedule,
then press the Sun column to
enter the edit page (as shown).
Every setting can be edited
using the
or buttons.
In the Sun column, there are six (6) periods. You can press
the
or buttons to choose the period you are going to
change. The
button will display beside the period selected.
Finally, press APPLY to save your new schedule.
Next, you can set the start time and desired temperature by
pressing the
and buttons.
Schedule settings
RETURN
RETURN
PROGRAMMING THE ORBRY SMART TOUCH
1.
2.
3.
Page 8
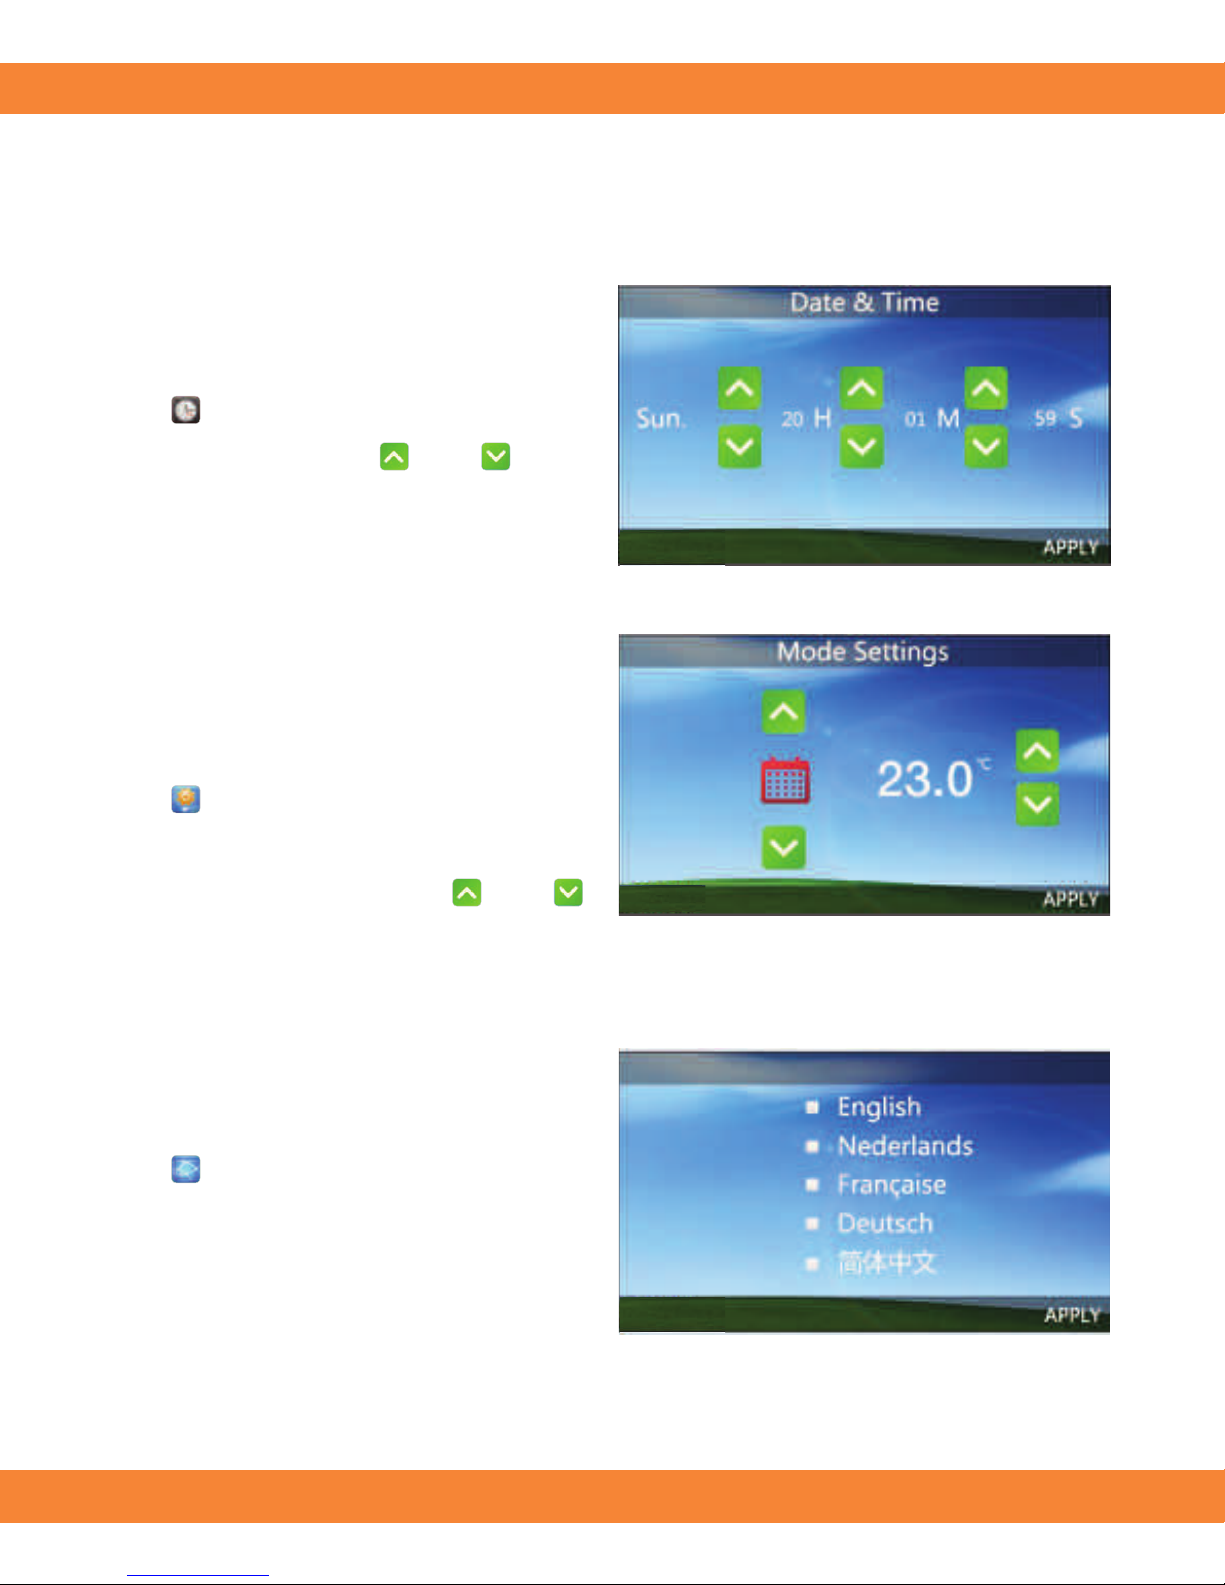
Press the MENU button, then
the
button to edit the date
and time with the
and
buttons. Press APPLY to save
the changes.
Press the MENU button, then
the
button to select a mode.
Now, edit that mode setting’s
temperature using the
and
buttons. Press APPLY to save
the changes.
Press the MENU button, then
the
button to enter the
language page. Choose the
desired language and press
APPLY to save the changes.
Edit date & time
Preset temperature
mode
Language select
PROGRAMMING THE ORBRY SMART TOUCH
RETURN
RETURN
RETURN
Page 9
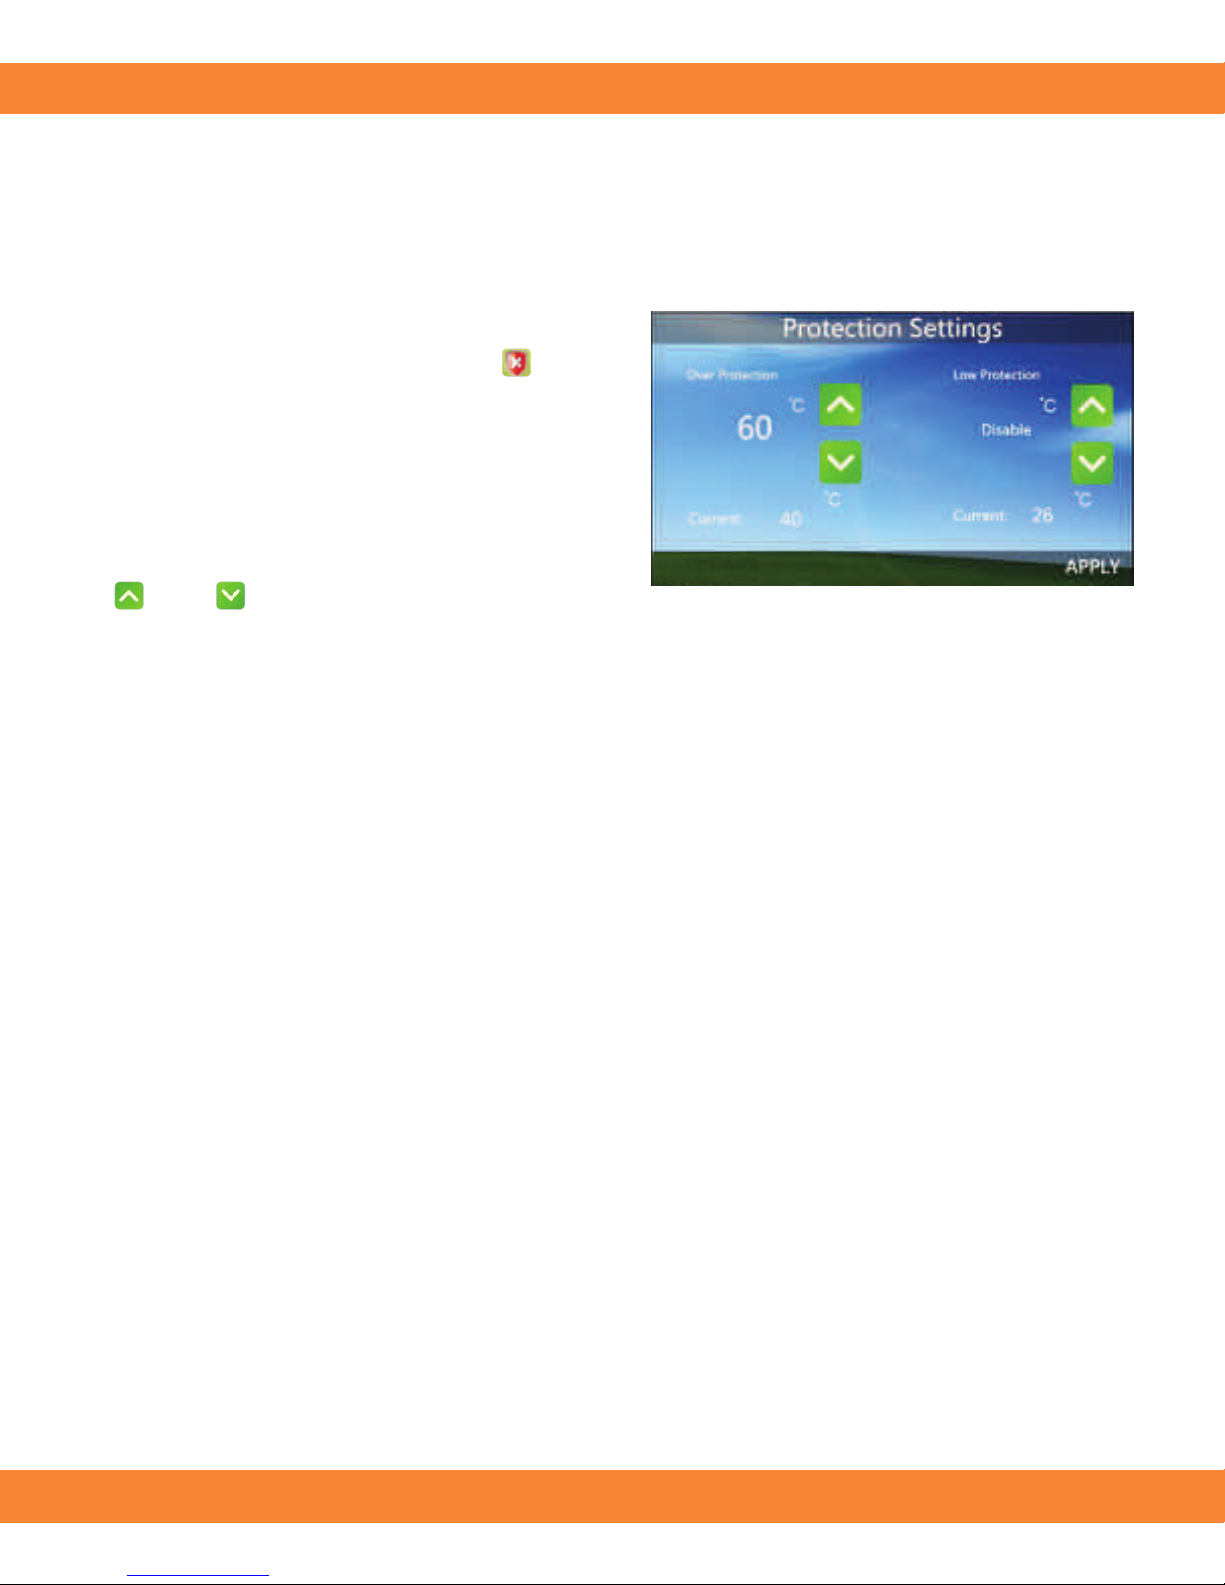
Press the MENU then the
button to enter the protection
settings page. You can set an over
protection temperature and a low
protection temperature using the
and buttons. Press APPLY
to save the changes.
Protection settings
High protection:
This is an over heat protection setting designed
to monitor the oor temperature and set a limit dened by you.
If the system reaches the set protection temperature, the system
will shut o automatically.
Low protection: This is a frost protection mode designed to
function when the Orbry Smart Touch is switched o. If the ambient
temperature reaches the set protection temperature, the system
will automatically switch on to maintain a minimum temperature.
Please note: The upper limit should be no higher than 28°C
to conform with European regulations.
PROGRAMMING THE ORBRY SMART TOUCH
RETURN
Page 10

Parameter settings
To access the parameter settings, switch the Orbry Smart Touch
OFF and immediately press the
button for two (2) seconds. You
can set the desired values by pressing << OR >>. Go to the other pages by pressing PRE or NEXT. The upper limit should not exceed 28°C.
PROGRAMMING THE ORBRY SMART TOUCH
Menu
01
-8°C ~ 8°C
Temperature Offset
03
5°C ~ 35°CSet Point Maximum
05
I only, E only,
I & E, I or E
NTC Select (Ambient – I, Floor – E)
07 5°C ~ 10°C
Low Protection Minimum
09
5°C ~ 90°CHigh Protection Minimum
11
1% ~ 100%Min. Backlight Brightness of Standby Status
13 Normal (NO);
Inverted (NC)
Relay Output
02
0°C ~ 3°CDead Zone
04 5°C ~ 35°C
Set Point Minimum
06
5°C ~ 10°C
Low Protection Maximum
08
5°C ~ 90°C
High Protection Maximum
10 3s ~ 180sBacklight off Time after Operation
12
0s ~ 250s
Relay Delay Time
14 << or >>
Restore
Description Range
Page 11
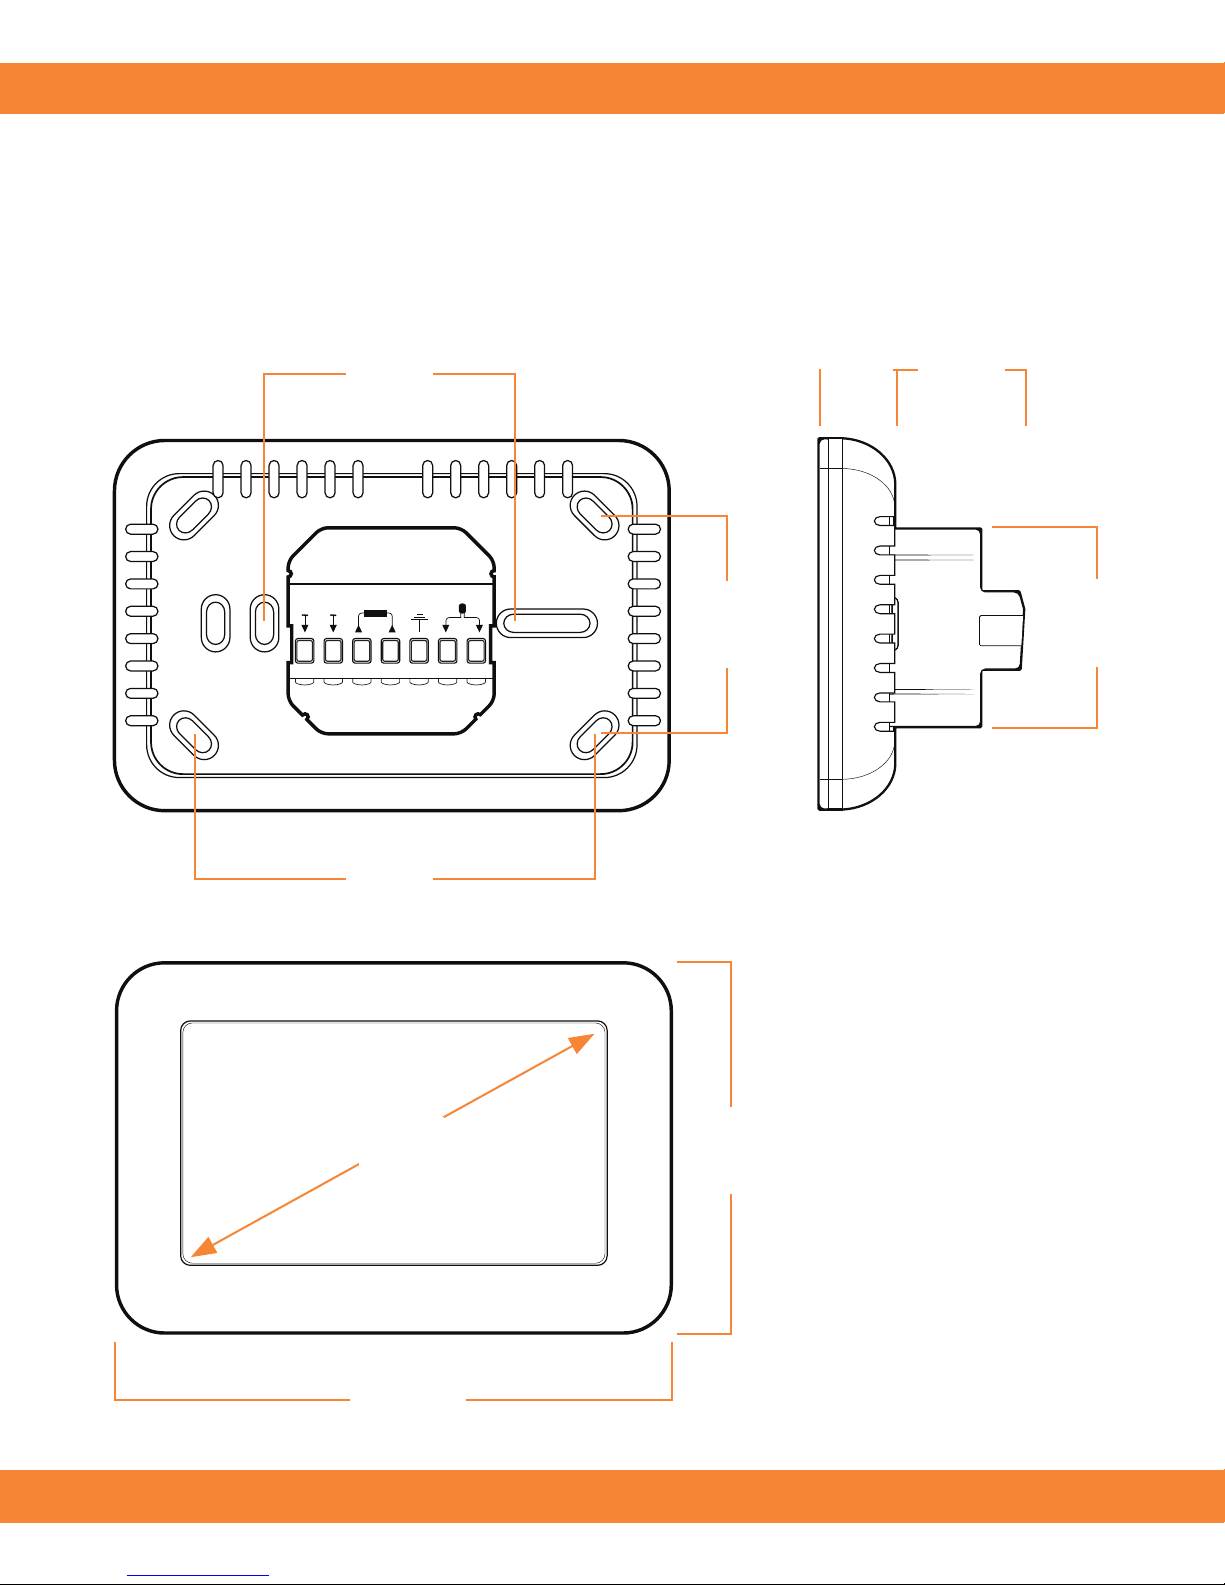
Dimensions
Sensor
7 6 4 3 2 15
LL
3600W/16A 230V/AC
NN
94mm
60mm
52mm
50mm
31mm
19mm
130mm
87mm
4.3”
TECHNICAL SPECIFICATIONS
Page 12

Product features
• 4.3 inch colour touchscreen display
• Control electric underoor heating systems up to 16A (3600W)
• Adjustable comfort mode, economy mode, boost mode,
holiday mode, and program mode control
• 5+1+1 days, 6 event programmable schedule
• Ambient and/or oor sensors
• Four languages: English, French, German, and Dutch
• Clock and date display
• Temperature calibration
• Overheat and frost protection modes
• Single gang extra deep back box
www.orbry.com
[email protected] 0845 208 0221
Voltage
Maximum load
Temperature range
Ambient
Sensor
Accuracy
Warranty
IP Rating
Width
Height
Depth
230V 50/60Hz
16A (3600W)
5 ~ 35OC
0 ~ 50OC
NTC 10k 10kΩ at 25OC
± 0.5OC
3 years
IP30
130mm
87mm
50mm (31mm in wall)
 Loading...