

Page 1
orbitor 47 Piece
1200X DIE-CAST METAL MICROSCOPE SET
WARNING: Only for use by children over 8 years old. Only for use
under the supervision of an adult. This toy contains sharp edges.
Always wash your hands carefully after handling any samples and always dispose of any samples
in a safe manner. When working with samples keep your hands away from your mouth and eyes.
Read all instructions before use. Follow them and keep them for future reference. Keep small
children and animals away from any experiments or projects. Store your microscope set out of
reach of small children. Eye protection is not included.
Welcome to the Microscopic World
We take great pleasure in introducing you to the world of the microscope. Your new microscope is
an instrument with lenses for making very small objects appear much larger so they can be
studied. There are millions of tiny living plants and animals that can be easily seen with your
microscope.
In today’s technological world every science from the most fundamental biology to the highly skilled
field of astro-physiology use microscopes. Microscopes are used by geologists, archaeologists,
police departments and even astronomers when they study fallen meteorites. Your microscope will
let you see the basic building blocks of life on our Earth.
Your microscope has been designed to provide hours of enjoyment. Have Fun!
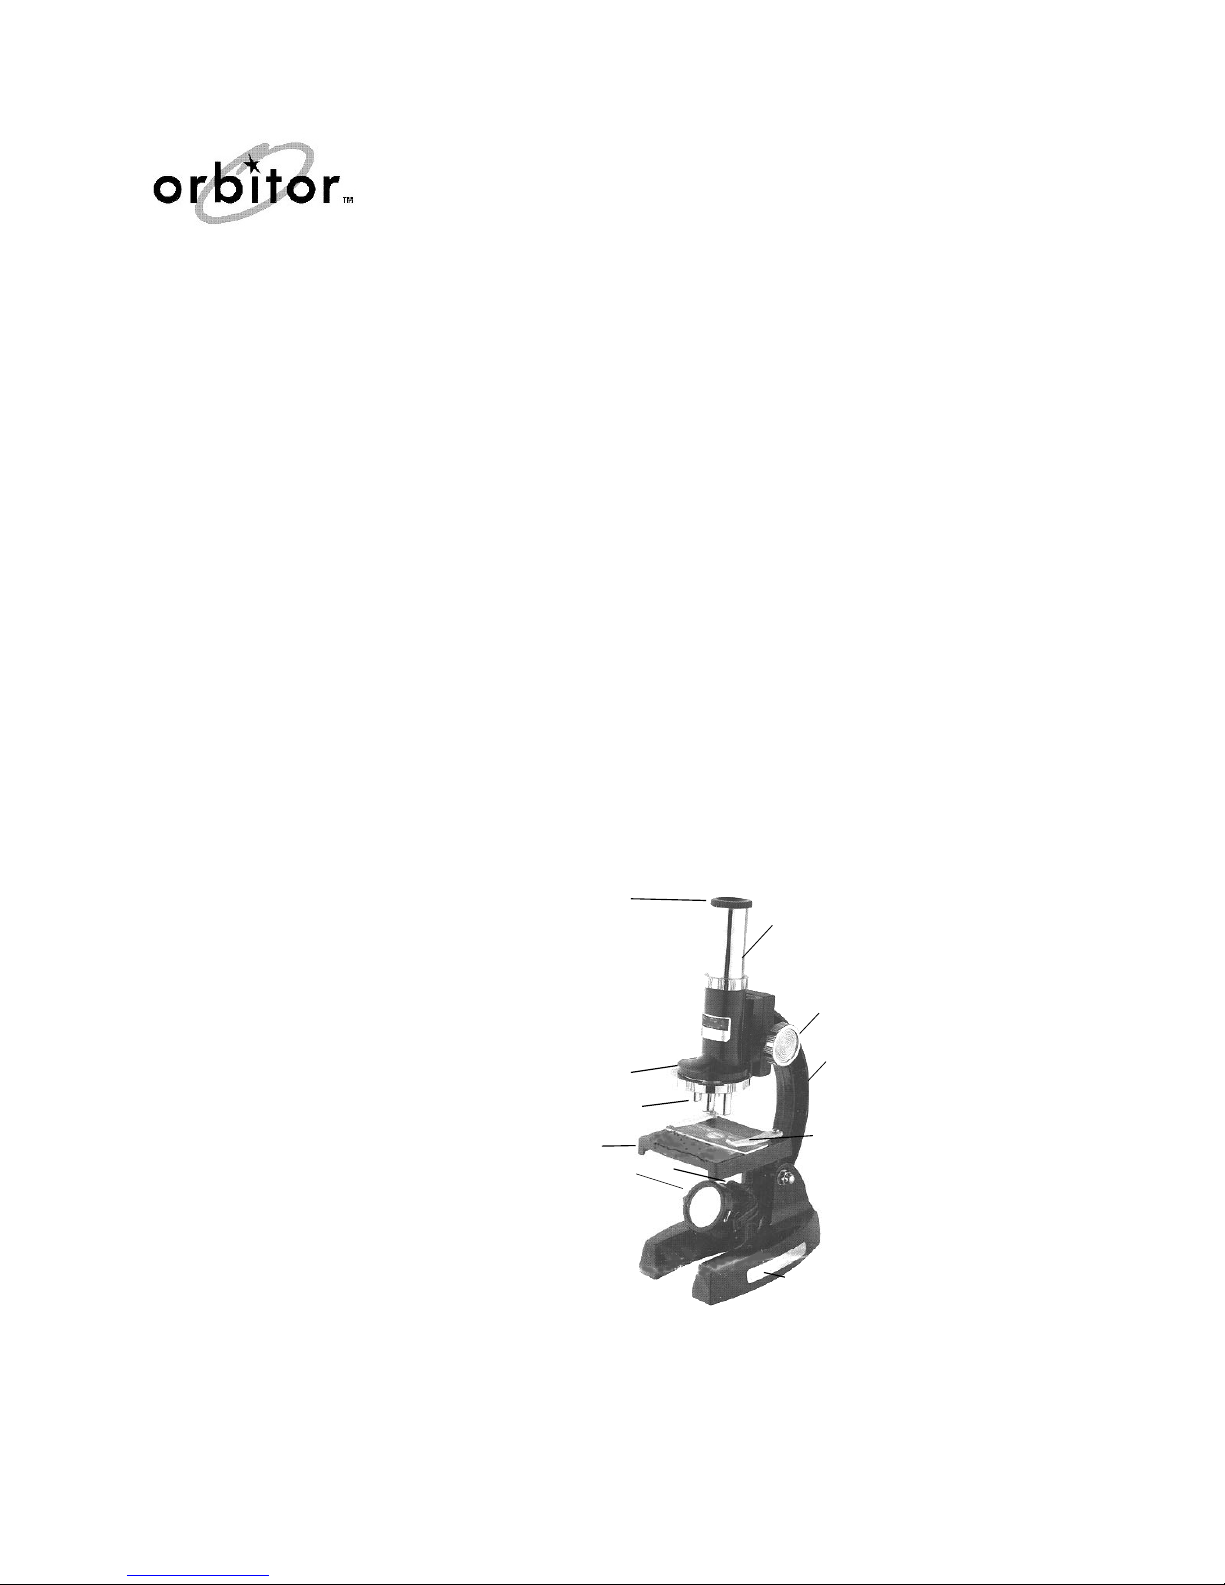
Parts of Your Microscope
1 Eyepiece
2 Focusing Knob
3 Body Tube
4 Revolving Turret
5 Objective Lens
6Arm
7Stage
8 Clip
9 Mirror
10 Illuminator Lamp
11 Base (Battery Case)
1
3
2
4
5
7
10
9
6
8
11
We constantly improve and update our products. Sometimes, as a result of these improvements, what is seen on the
package, or in the instructions may differ somewhat in color or content from the product in the package.
1
Page 2
Helpful Hints
1) The most important parts of your microscope are the lenses. Handle them with care. If the
lenses are dirty or dusty you can clean them with a soft cotton cloth or a special lens cleaning
tissue. Do not wipe them with a finger or a regular facial tissue.
2) If you are not going to use your microscope for a week or more take out the two AA batteries
that power the illuminator.
3) Protect your microscope from dust and moisture by always storing it in its case.
Getting Started
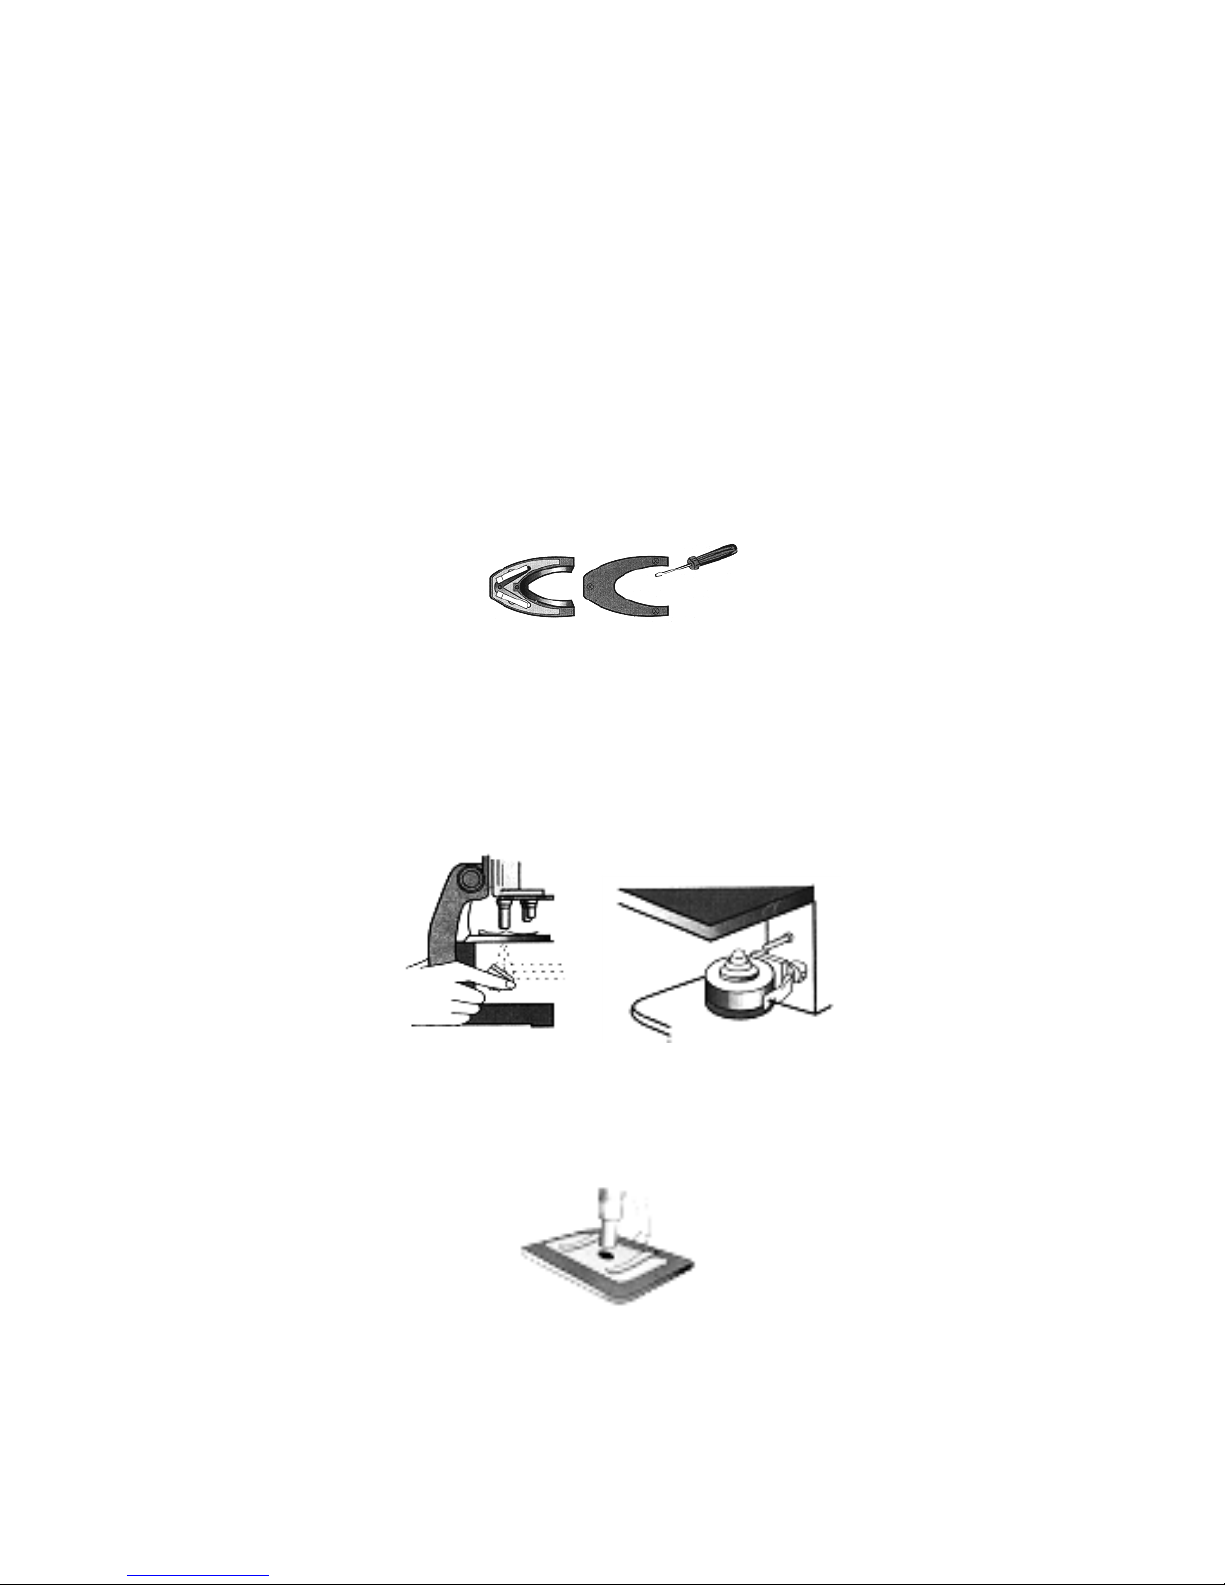
1) First, insert 2 “AA” alkaline batteries in the base of the microscope. In order to remove the
bottom cover of the microscope you will need a Phillips head (+) screwdriver. Insert the batteries
as shown, making sure that the (+) and (-) terminals are properly identified. Replace the bottom
cover and re-insert the screw. Do not over-tighten.
2) Place the microscope on a flat surface near a bright light or in the daytime, a window. Locate the
mirror and adjust the angle so that when you look into the eyepiece you see a bright circle of
light. Do not point the mirror towards the sun as eye damage may result. If there is no
bright light available, or if the room lighting is poor you can use the microscope’s electric
illuminator. To turn on the illuminator flip the mirror over so that the light bulb is aimed upward.
The light will come on by itself. Look through the eyepiece and adjust the angle of the light until
you see a bright circle.
3) Once you can see a bright light circle in the eyepiece your microscope is ready for use.
4) Choose one of the prepared sample slides from your set. Place it under the two spring clips on
top of the stage.
5) Next, choose the magnifying power you want to use. Your microscope can provide magnifying
powers of 300X. 600X and 1200X. Remember that the longer objective lenses provide the
higher powers. Most observing is done at low power.
6) To change the magnifying strength turn the revolving lens turret until you hear a click.
2
Page 3
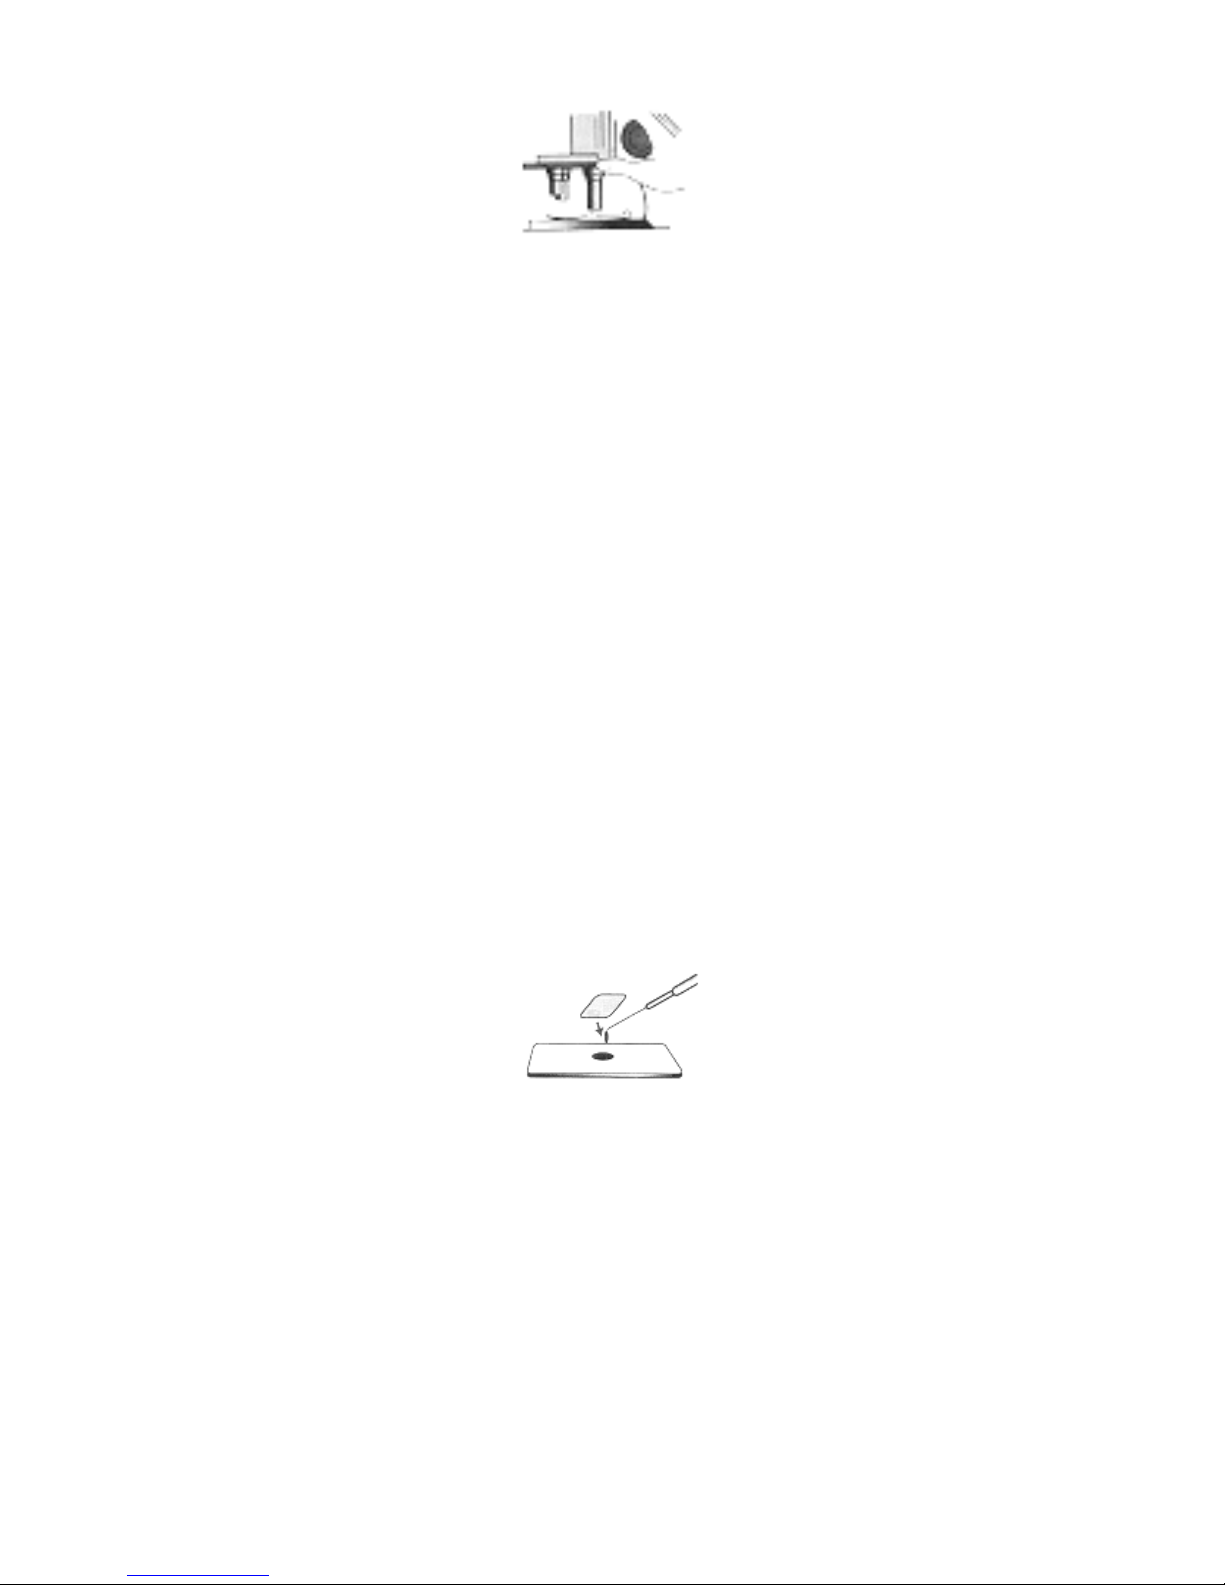
7) Turn the focusing knob until the objective lens is almost touching the slide. Don’t let the lens
touch the slide as you may break the slide and damage the lens. Now look through the eyepiece
and slowly turn the focusing knob back until you see the sample clearly.
How to Make a Prepared Slide
Samples for examination should be very thin so that light can pass through them. If the sample is
too thick it will appear dark in the microscope.
Cloth fibers, pollen, dust or salt crystals will be easy to see and make good samples for beginners
to observe.
A) Making a Temporary Slide
1) Wipe the slide clean.
2) Prepare a thin sample. You may have to slice it with a scalpel or a razor blade. Be
very careful. You may want to ask for adult help.
3) Pick up your sample with the tweezers and put it on the center section of the slide.
Add one drop of water.
4) Gently place a temporary slide cover (plastic) over the sample, being careful not to
allow any air bubbles in.
5) Remove any excess water with a piece of paper towel by pressing it down gently
over the slide cover.
6) Now you can observe your slide.
B) Making a Permanent Slide
1) Start with a clean slide and cover glass. The cover glasses are very thin and can
break easily. Take care when handling these slide covers.
2) Follow Steps 2 and 3 as above.
3) Before placing the cover glass over your sample add several drops of Gum Media,
Canada Balsam or transparent glue.
4) Place the cover glass gently over the sample and gently squeeze out any air
bubbles.
5) Place your new slide away in a safe place and let it dry for a day.
3
Page 4

BATTERY INFORMATION:
This unit uses two AA batteries. Always use fresh batteries. If the unit will not be used for an
extended term remove the batteries. Do not try and recharge non-rechargeable batteries. Do not
take batteries apart. Do not short circuit the terminals. Do not dispose of batteries in fire. They may
explode.
WARNING! CHOKING HAZARD – Small parts. Not suitable for children under
!
Made in China
Manual Part # 260968
3 years.
4
 Loading...