Page 1

T- DualScan
T-DualScan
Page 2

I T-DualScan
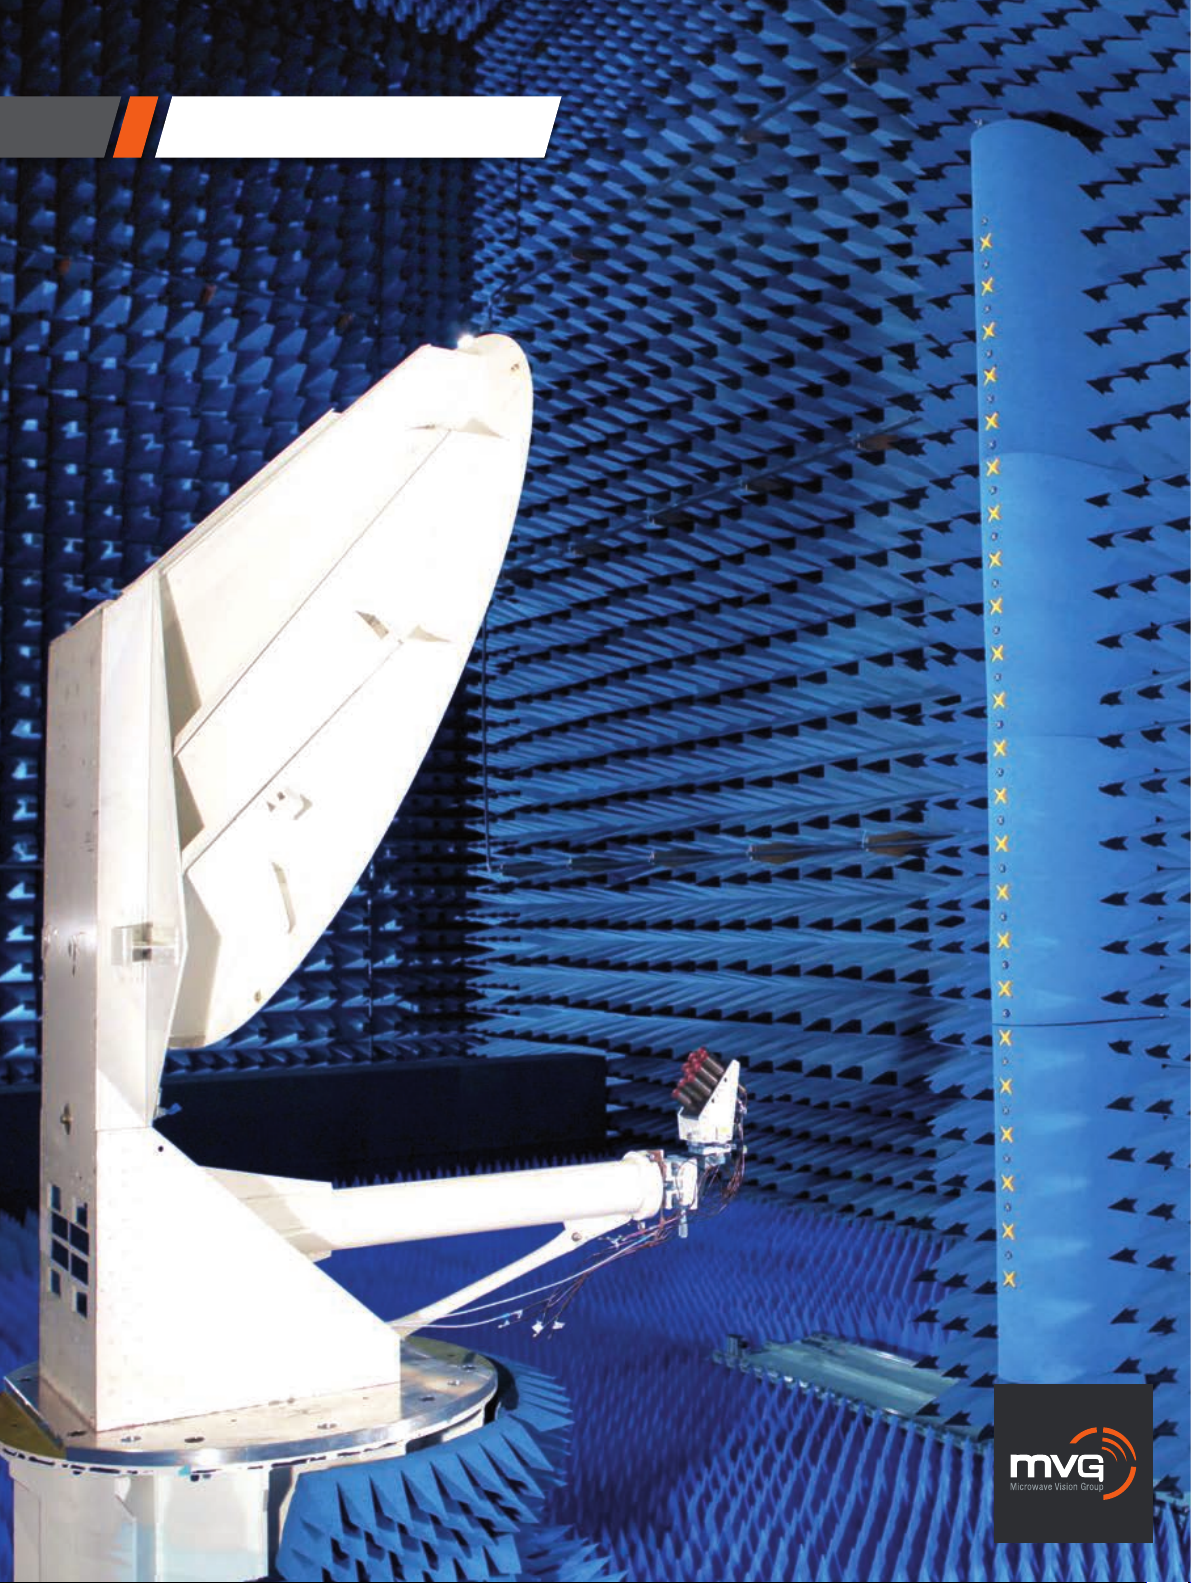
T-DualScan is an innovative planar near-field system that offers the best compromise between
accuracy, flexibility and measurement speed. The tower positioner can rotate 180° to switch easily
from the single-probe set-up (0.8 - 110 GHz) to the multi-probe set-up (0.8 - 18 GHz). T-DualScan
can also be offered as an upgrade to existing installations.
+
Easily switch from a single probe
to a multi-probe set-up
SOLUTION FOR
• Antenna Measurement
• Pulsed Measurement
• Phased Array Antenna Measurement
Main features
Technology
• Near-field / Planar
• Near-field / Cylindrical
Measurement capabilities
• Gain
• Directivity
• Beamwidth
• Cross polar discrimination
• Sidelobe levels
• 3D radiation pattern
• Radiation pattern in any polarization (linear or circular)
• Antenna efficiency
• Beam pointing properties
Frequency bands
• Single-probe: 800 MHz - 110 GHz
• Multi-probe: 800 MHz - 18 GHz
• Multi-probe: 70 - 800 MHz on request
Scan area
• Multi-probe: up to 12 m Y axis (1 m module)
• Single-probe: up to 15 m Y axis (1 m module)
• X-axis length depends on customer requirement
Probe array oversampling capability
• Movement of the probe array on the vertical axis
System configurations
Software
Measurement control, data acquisition and post processing
■ MiDAS
SatEnv
959 Spectrum (North America only)
Equipment
■ Amplification unit
■ Mixer unit
■ N-PAC
■ Primary synthesizer
■ Auxiliary synthesizer
■ Transfer switching unit
■ Power and control unit
■ Probe array power supply
■ Heavy DUT positioner
■ Elevation positioner for gantry arm
■ Positioner controller**
■ E-Stop unit
■ Local control unit**
■ Real time controller**
■ Control interface unit
■ Uninterruptible power supply
■ Instrumentation rack
■ Ethernet switch
AUT Port switch
Add on
■ Calibration kit (arm, reference antenna, positioner and interface)
Laser alignment instrumentation (laser inclinometer, laser tracker,
spin diode laser, laser pointer, digital spirit level and dial-indicator)
Absorbers*
Shielded anechoic chambers*
Accessories
Reference antennas (horns, standard gain horns, etc.)****
Probes****
Services
■ Installation and calibration
■ Warranty
■ Training
■ Project management
Post warranty service plans*****
MV-CorTM correction table service***
* See AEMI/ Rainford EMC Included Optional Required
Systems catalogs for more information
** See ORBIT/FR positioning equipment catalog for more information
*** See MV-CorTM service sheet for more information
**** See SATIMO & ORBIT/FR antenna catalog for more information
***** Refer to Orbit/FR service brochure for more information
119
2
Page 3

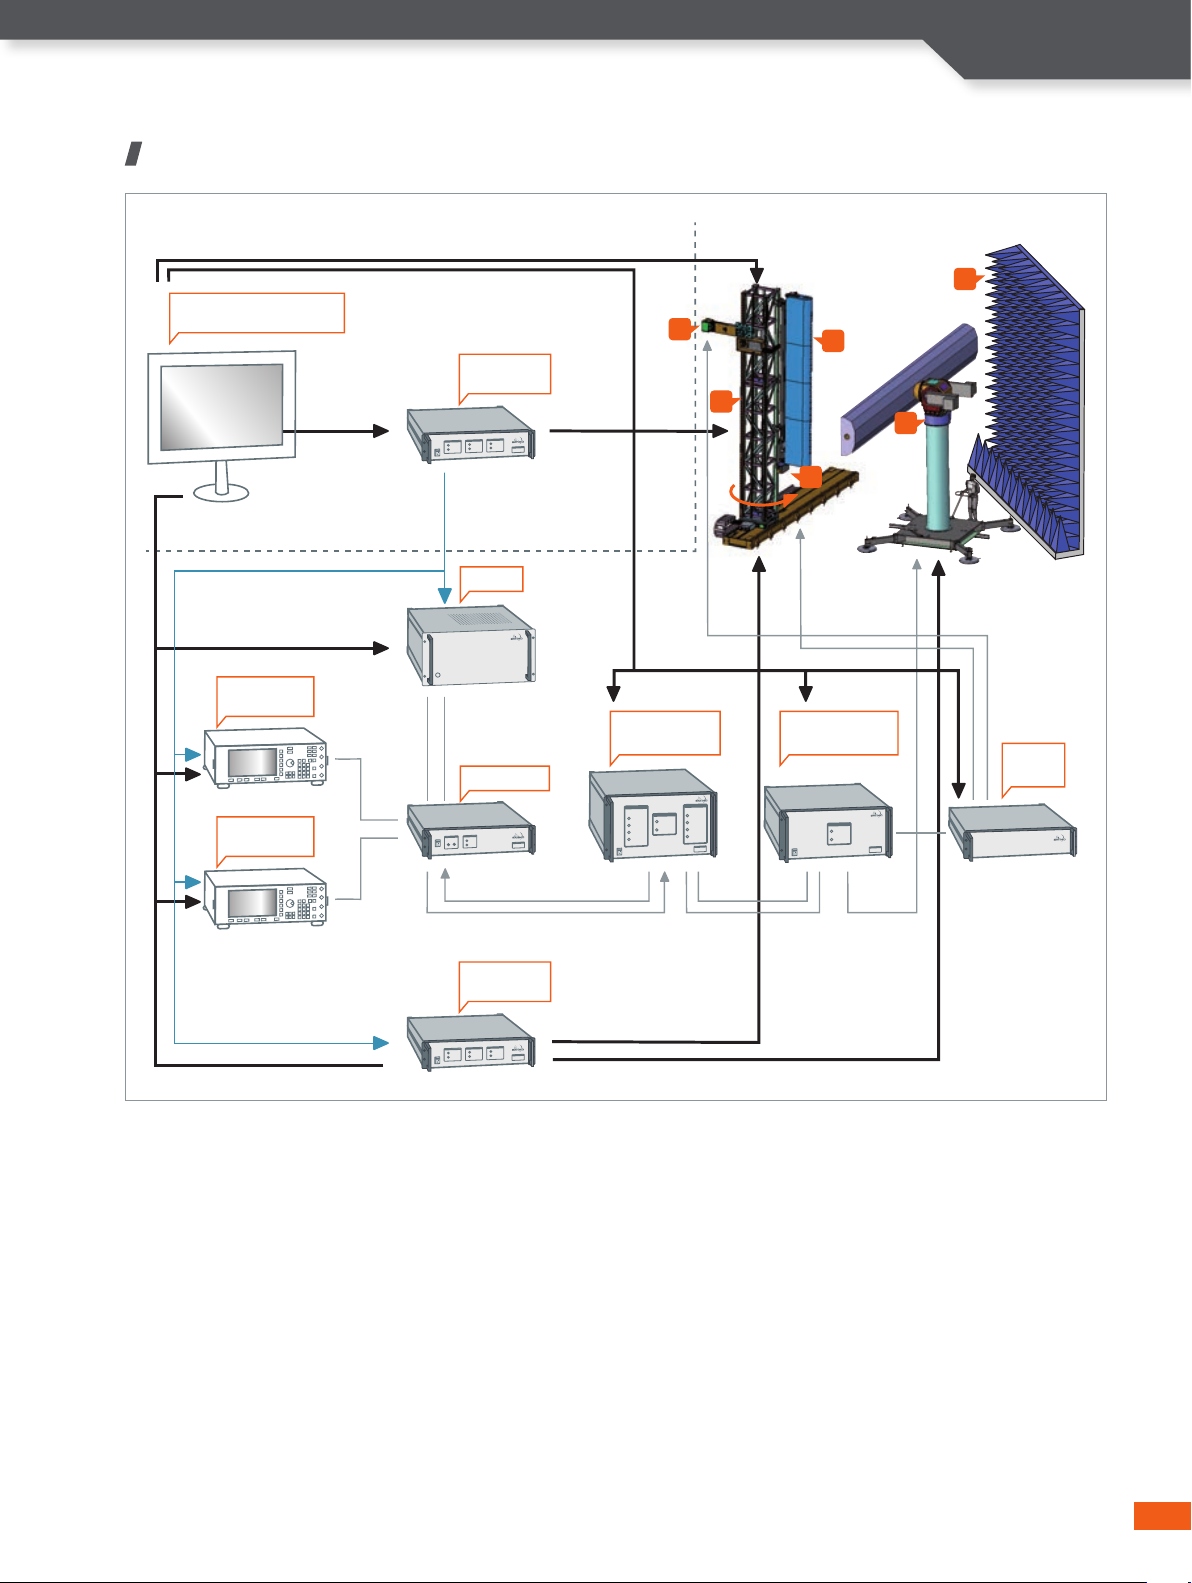
System overview
I T-DualScan
INSTRUMENTATION ROOM CHAMBER
Data Acquisition
& Processing Platform
Triggers
Primary
Synthesizer
Real Time
Controller
N-PAC
Mixer Unit
USB
Triggers
4
GPIB
Amplication
Unit
5
1
2
6
3
Transfer
Switching Unit
RF
Switch
Auxiliary
Synthesizer
Rx
Tx
Positioner
Controller
Measurements can be performed in both continuous wave
and pulsed mode. In the case of phased array antenna
measurement, the system utilizes the real time controllers
to control and synchronize the measurement system with
the device under test.
120
3
Page 4

Standard system components
I T-DualScan
Linear probe
array
• From 1 to 12 meters long
probe-array (StarLine)
It includes by default interleaved
probes to cover 0.8 to 18 GHz.
• 70 - 400 MHz probe array
available on demand
Y axis scanner
• 1 to 15 meter high tower scanner
• Probe roll positioner
ORBIT/FR positioning
equipment catalog
X axis scanner
• X Axis length depends
on customer requirement
Antennas
• A complete range of measurement
probes (single or dual polarized)
and reference antennas (horns,
standard gain horns) are
available
MVG antenna catalog
Absorbers
and anechoic
chamber
Quick guide to evaluate scan
area requirement
The required scan area is calculated according to the following
formula: Scan length = D + 2 L tg (a)
Where:
- a is the relevant data angle in far-field
- L, the distance between the probe and the AUT
- and D, the antenna size.
Probe
a
A
U
D
T
L
Distance from
AUT to Probe
Scan Length
a
Probe
Sampling principle
Sampling step is based on the minimum measured
wavelength (
D
= (
sampling
).
min
l
/2)
min
l
• An optimized combination of
standard, adapted and specialty
absorbers
• Anechoic chamber with
integrated design, production,
installation and testing services
AEMI absorber catalog
6
DUT positioning
equipment
• A complete range of rotary
positioners and model towers are
available with air cushion (optional)
ORBIT/FR positioning
equipment catalog
121
43
Page 5

I T-DualScan
System specifications Multi-probe set-up*
30 dBi AUT
PEAK GAIN ACCURACY
0.8 GHz - 1 GHz ± 0.5 dB
1 GHz - 6 GHz ± 0.5 dB
6 GHz - 18 GHz ± 0.5 dB
Repeatability ± 0.3 dB
- 20 dB SIDELOBES ACCURACY
0.8 GHz - 1 GHz ± 0.6 dB
1 GHz - 6 GHz ± 0.6 dB
6 GHz - 18 GHz ± 0.7 dB
- 30 dB SIDELOBES ACCURACY
0.8 GHz - 1 GHz ± 1.3 dB
1 GHz - 6 GHz ± 1.2 dB
6 GHz - 18 GHz ± 1.3 dB
* Table refers to radiation pattern < ± 60 deg. Specications given according
to the following assumptions:
• Controlled temperature and humidity during measurement
• Specications on radiation patter n are given for a normalized pattern
• Measurements inside an anechoic chamber
• Peak gain is given for a ± 0.3 dB gain error on the reference antenna
• No averaging
System specifications Single-probe set-up*
30 dBi AUT
PEAK GAIN ACCURACY
0.8 GHz - 1 GHz ± 0.5 dB
1 GHz - 6 GHz ± 0.5 dB
6 GHz - 18 GHz ± 0.5 dB
18 GHz - 40 GHz ± 0.5 dB
Repeatability ± 0.3 dB
- 20 dB SIDELOBES ACCURACY
0.8 GHz - 1 GHz ± 0.5 dB
1 GHz - 6 GHz ± 0.5 dB
6 GHz - 18 GHz ± 0.5 dB
18 GHz - 40 GHz ± 0.5 dB
- 30 dB SIDELOBES ACCURACY
0.8 GHz - 1 GHz ± 1.2 dB
1 GHz - 6 GHz ± 1.0 dB
6 GHz - 18 GHz ± 1.1 dB
18 GHz - 40 GHz ± 1.3 dB
* Table refers to radiation pattern < ± 60 deg. Specications given according
to the following assumptions:
• Controlled temperature and humidity during measurement
• Specications on radiation patter n are given for a normalized pattern
• Measurements inside an anechoic chamber
• Peak gain is given for a ± 0.3 dB gain error on the reference antenna
• No averaging
Measurement time comparison
Typical measurement time for single beam antenna
Multi-probe set-up*
Frequency Number of measured Measurement
frequencies time (in hours)
3 GHz 5 0.1
3 GHz 10 0.2
18 GHz 5 3
18 GHz 10 4.5
(1) AUT size 5 x 5 m
(1)
Typical measurement time for single beam antenna
Single-probe set-up*
Frequency Number of measured Measurement
frequencies time (in hours)
3 GHz 5 2
3 GHz 10 2.5
18 GHz 5 21
18 GHz 10 23
(1) AUT size 5 x 5 m
(1)
122
5
Page 6

Probe positioning system
I T-DualScan
Scanner horizontal slide
- Horizontal translation of the scanner
on the x axis
Scanner vertical slide
- Vertical translation of the measurement
probe and the calibration arm
Probe roll
- Rotation of the measurement
or calibration probe on the z axis
Probe horizontal slide
- Horizontal positioning of the probe
on the z axis
Mechanical characteristics
Single-probe
HORIZONTAL AXIS (x)
Number of modules 1 to 6 6 to 12
Positioner series AL-4952 T AL-4953 T
Scan area Slide length - 2 m Slide length - 1.4 m
Planarity (RMS)* 0.15 mm 0.12 mm
Frequency range 0.8 - 110 GHz 0.8 - 110 GHz
Slide length Up to 20 m Up to 100 m
Weight 160 kg/m 350 kg/m
Velocity 300 mm/sec 300 mm/sec
Accuracy 0.13 mm 0.13 mm
Repeatability 0.025 mm 0.050 mm
* Better than stated. Further accuracy can be achieved with MV-CorTM,
please see our MV-CorTM brochure for more information.
Probe array vertical slide
- Vertical translation of the probe array
for oversampling
Azimuth rotation of the tower
VERTICAL AXIS (y)
Number of modules 1 to 6 6 to 12
Positioner series AL-4952 T AL-4953 T
Scan area Slide length - 1 m Slide length - 1.2 m
Planarity (RMS)* 0.15 mm 0.12 mm
Frequency range 0.8 - 110 GHz 0.8 - 110 GHz
Height (slide length) Up to 10 m Up to 16 m
Weight 170 kg/m 250 kg/m
Velocity 350 mm/sec 350 mm/sec
Accuracy 0.13 mm 0.13 mm
Repeatability 0.025 mm 0.050 mm
* Better than stated. Further accuracy can be achieved with MV-CorTM,
please see our MV-CorTM brochure for more information.
123
65
Page 7

I T-DualScan
Probe array
Number of Probe array Scan area Number of probes
modules length (cm) (cm) 0.8 - 6 Ghz 6 - 18 Ghz
1 126 84 7 7
2 238 196 15 15
3 350 308 23 23
4 462 420 31 31
5 574 532 39 39
6 686 644 47 47
7 798 756 55 55
8 910 868 63 63
9 1022 980 71 71
10 1134 1092 79 79
11 1246 1204 87 87
12 1358 1316 95 95
• The distance between a 0.8 - 6 GHz and a 6 - 18 GHz probe is of 70 mm
• Distance between two 0.8 - 6 GHz probes: 140 mm
• Distance between two 6 - 18 GHz probes: 140 mm
Calibration process
The probe array system calibration allows for both
consistency in amplitude and in phase as well as the
radio-electric axis alignment of each probe. The calibration
procedure consists of the rotation of a reference antenna
along a roll axis in front of each probe. This is performed
with a dedicated calibration arm supporting the reference
antenna and its motorized roll axis. Mounted on one of
the linear axes of the scanner, the calibration arm moves
linearly to position the reference antenna in front of each
probe of the array.
124
The engineer is mounting the arm for calibration
7
Page 8

I T-DualScan
H
DUT positioning system
(optional)
DUT positioning
system with
air cushion
for easier
movement.
The DUT positioner is composed of standard ORBIT/FR
positioning equipment that can be adapted to the specific requirements of each customer. An innovative DUT
positioner base allows for easy movement of the DUT
positioning equipment, thanks to four air cushion pads.
To move the DUT linearly, a simple air hose is connected to the four air pads' central manifold, and the system
is slightly elevated on a thin air cushion (0.08 mm). The
system has virtually no friction and can be moved simply
by pushing it to its new position.
Air cushion base
Azimuth over Elevation over Azimuth
positioner (AL-45xx series)
Able to move the DUT in 3 directions:
- horizontal
- polarization
- vertical
Single-probe Base tower with rail
Watch a T-DualScan video to find out more:
http://www.youtube.com/watch?feature=player_embedded&v=VLp4wMakVvY
Product specications and descriptions in this datasheet are subject to change without notice.
Actual products may differ in appearance from images shown.
Copyright MVG 2014
125
87
 Loading...