

Orbit OBRPR5 Owner's Manual
Owner's manual
OBRPR5
CAUTION: 1. Weight on this product should not exceed 150kg
2 Exercise of a strenuous nature, as is customarily done on this equipment,
Should not be undertaken without first consulting a physician.
No specific health claims are made or implied as they relate to the equipment.
Measurements made by the equipment are believed to be accurate, but only the
measurements of your physician should be relied upon.
IMPORTANT: Read all instruction carefully before using this product. Retain this product owner's
manual for future reference.
• Warranty
• Assembly
• Parts
OBRPR5
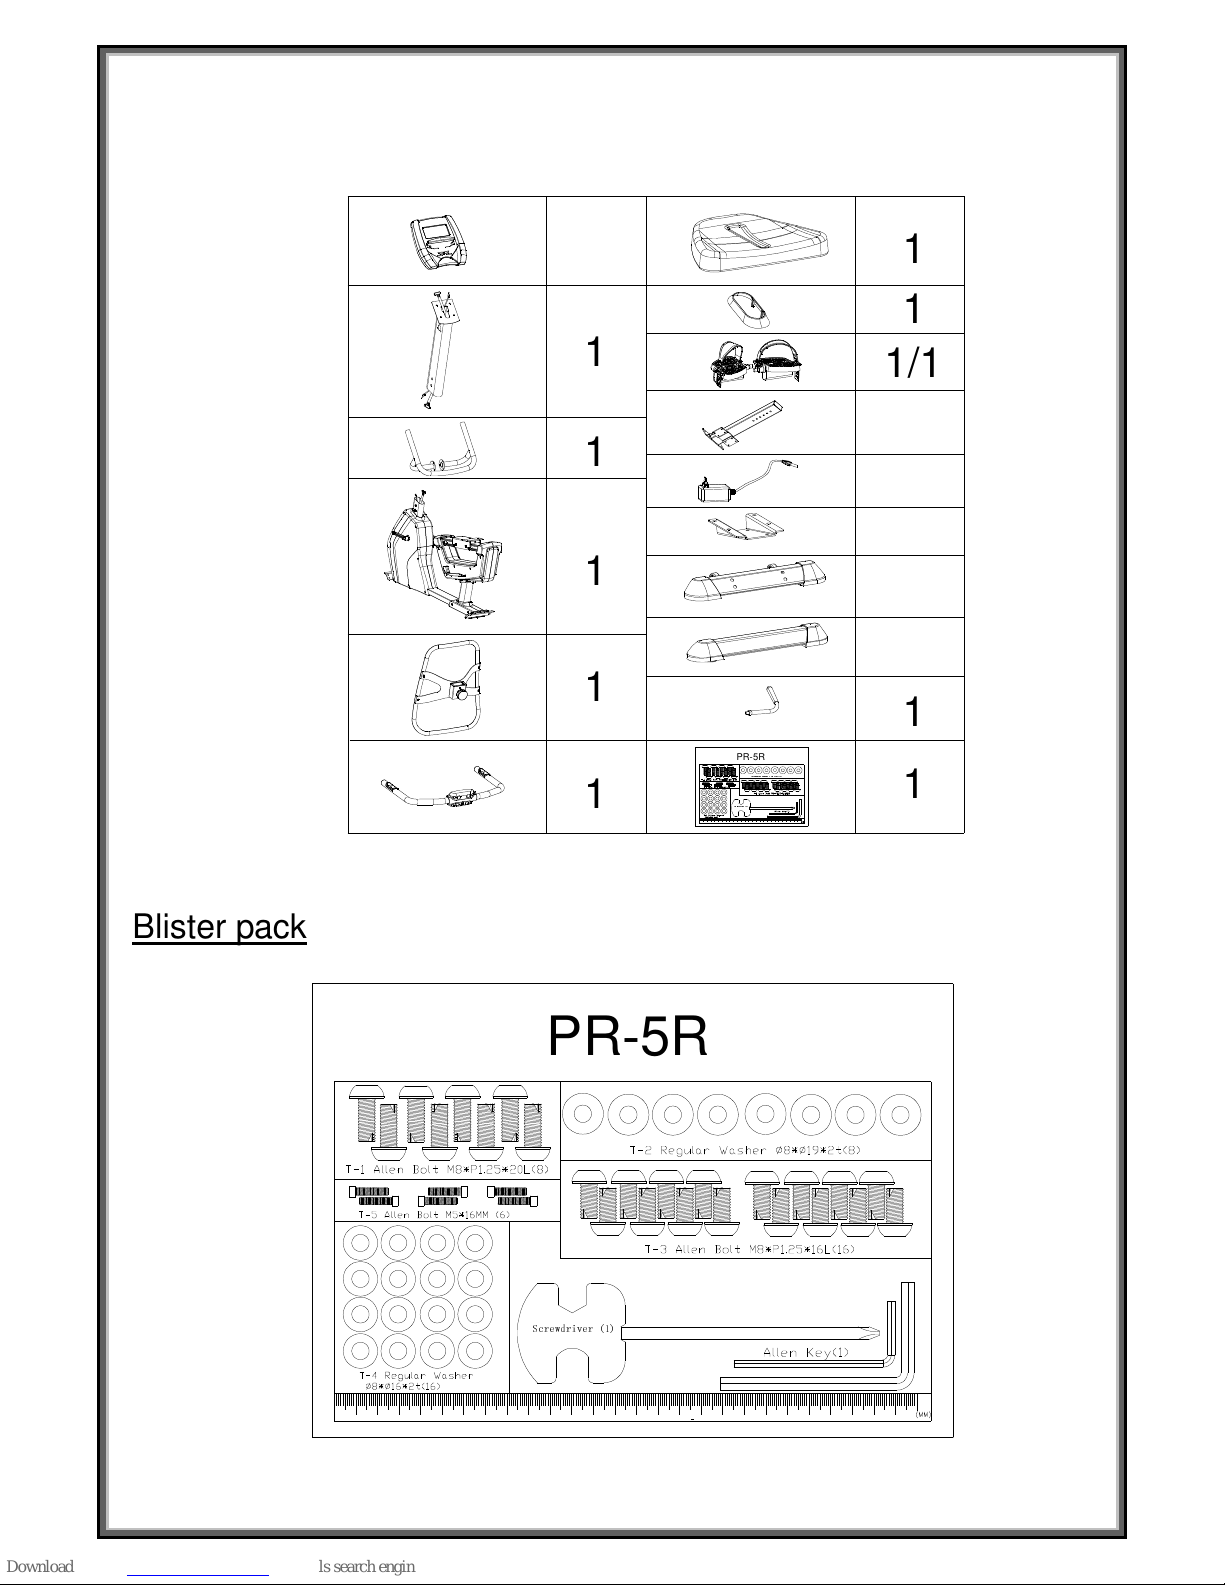
Unpack the carton, make sure you have the following parts:
1
Screwdriver (1)
PR-5R
T-2 Regular Washer φ8*φ19*2t(8)
1
1
1
1
1
1
1
1/1
1
1
1
1
1
1
1
Blister pack
Screwdriver (1)
PR-5R
ASSEMBLY INSTRUCTIONS
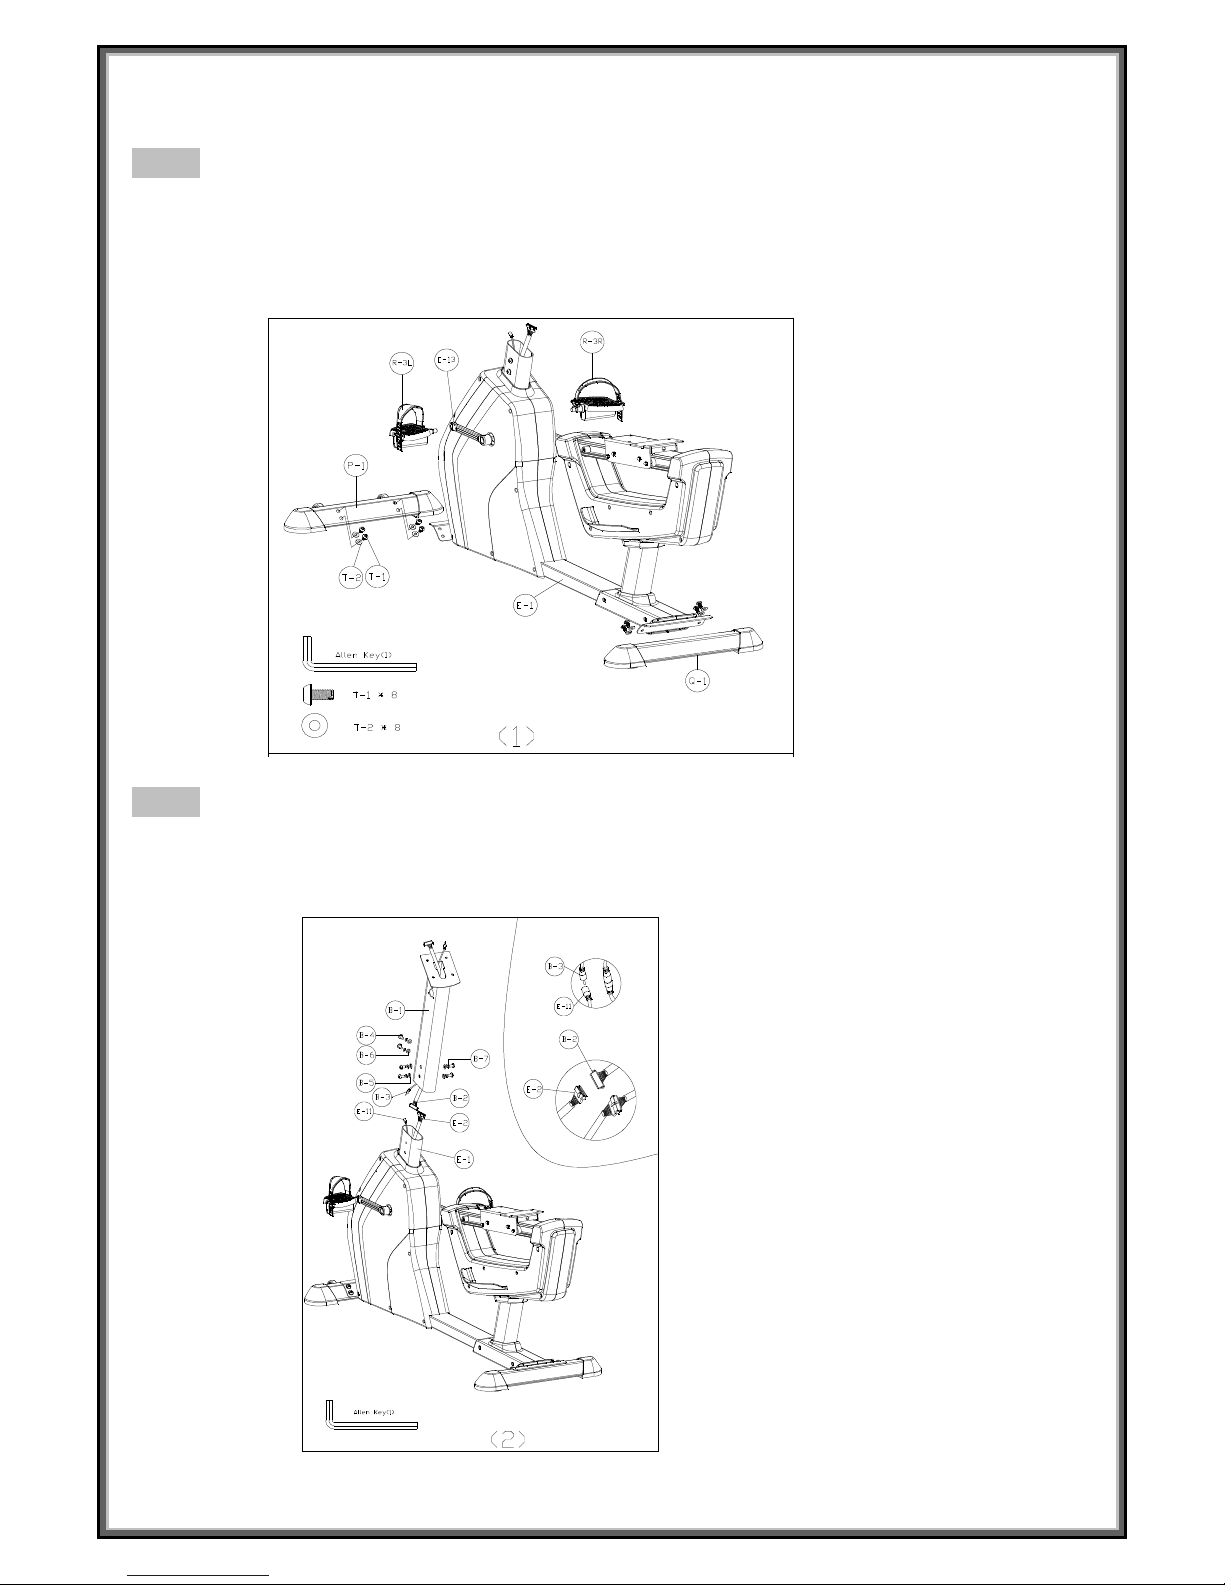
Step 1
1. Take screws (T-1) and washers (T-2) from the blister pack.
2.
Install and fasten front and rear stabilizers (P-1 & Q-1) each with 2 screws and 2 washers, to the main frame.
3.
Screw the pedal set (R-3L, R-3R) onto cranks. Pedals are marked with R and L at the screw side.
4.
Tighten the left pedal anti-clockwise, the right pedal clockwise
.
Step 2
1. Unscrew and take off the screws & washers (B-4, -5, -6, -7) attached on the front post holder of main frame.
2. Connect the pulse wires (B-3, C-11) and computer wires (B-2, E-2), as image of picture below.
3. Place the handlebar post (B-1) onto main frame and fix it with screws and washers (B-4, -5, -6, -7).

Step 3
1. Unscrew and take off the screws (T-5) attached on the front post.
2. Place and fix the handlebar (C-1) at the upper of front post with screws (T-5).
Step 4
1. Use 4 screws & 4 washers (T-3, T-4) to fix the seat bracket (K-8) onto seat slider (K-1).
2. User 4 screws & 4 washers (T-3, T-4) to fix the backrest sliding rail (M-1) onto seat slider (K-1).
3. Install the locking bar handle at side of seat slider, and fix tight as small photos image as below.
 Loading...