

Orbit Nexans Installation Instructions Manual
ORBIT MANUFACTURING COMPANY
1507 B WEST PARK AVE. PERKASIE, PA 18944
PHONE: 215-453-9228
FAX: 215-257-7399
Quality & Comfort from the Ground Up
Nexans Electric Floor Heating Mat Installation Instructions
Installing The Heating Mats
IMPORTANT NOTE: THESE MATS ARE NOT TO BE INSTALLED IN WALLS OR CEILINGS FOR ANY
REASON AND MUST BE WIRED BY A QUALIFIED, LICENSED ELECTRICIAN.
NEVER:
Cross the blue heating cable over itself.
Cut the blue heating cable for any reason.
Run heating cable directly to the junction box.
Subject the blue heating cable to harmful surfaces.
ALWAYS:
Follow local and national electrical codes.
Test the mat for the proper readings before, during and
after the installation.
Make certain the splice is completely buried in the pour.
Fill out the warranty card and return it to Orbit.
******DO NOT CUT THE HEATING CABLE******
GENERAL INSTALLATION GUIDELINES
Electrical Code and Safety:
Code (NEC) Article 424 for space heating.
regulations of all authorities having jurisdiction.) Caution:
qualified personnel, who are familiar with the construction, operation, and installation.
Product Description:
poly mesh mat. The cable is spaced at a fixed 3.15” On Center Spacing with tape and comes with 8 feet of cold
lead on one end . The Millimats are designed to provide 12 watts per square foot.
TO NEVER CUT THE HEATING CABLE
dimensions, load, voltage, etc. are given on the UL Tag.
cable and minimum bending radius are 2 inches).
Plan the installation by identifying the area you would like to heat minus the permanent fixtures. The distance
between the mat and non-heated areas shall be no closer than 1 inch. Select the correct Millimat(s) with
respect to the heated area and the 1 inch margin as specified. The heating cable cannot cross or touch itself
and cannot be placed in or under a wall, therefore
the area of the Millimat(s) must be slightly smaller
than the heated area. When cutting and adjusting
the mesh,ensure that the cables are kept at the
same distance from each other as the cables on the
mat itself. The heating cable shall not touch or
overlap itself. The splice MUST be buried in the
masonry. This is the point at which the heating
cable is attached to thecold lead. Only the cold
lead can be out of the Masonry or concrete and run
into the conduit.
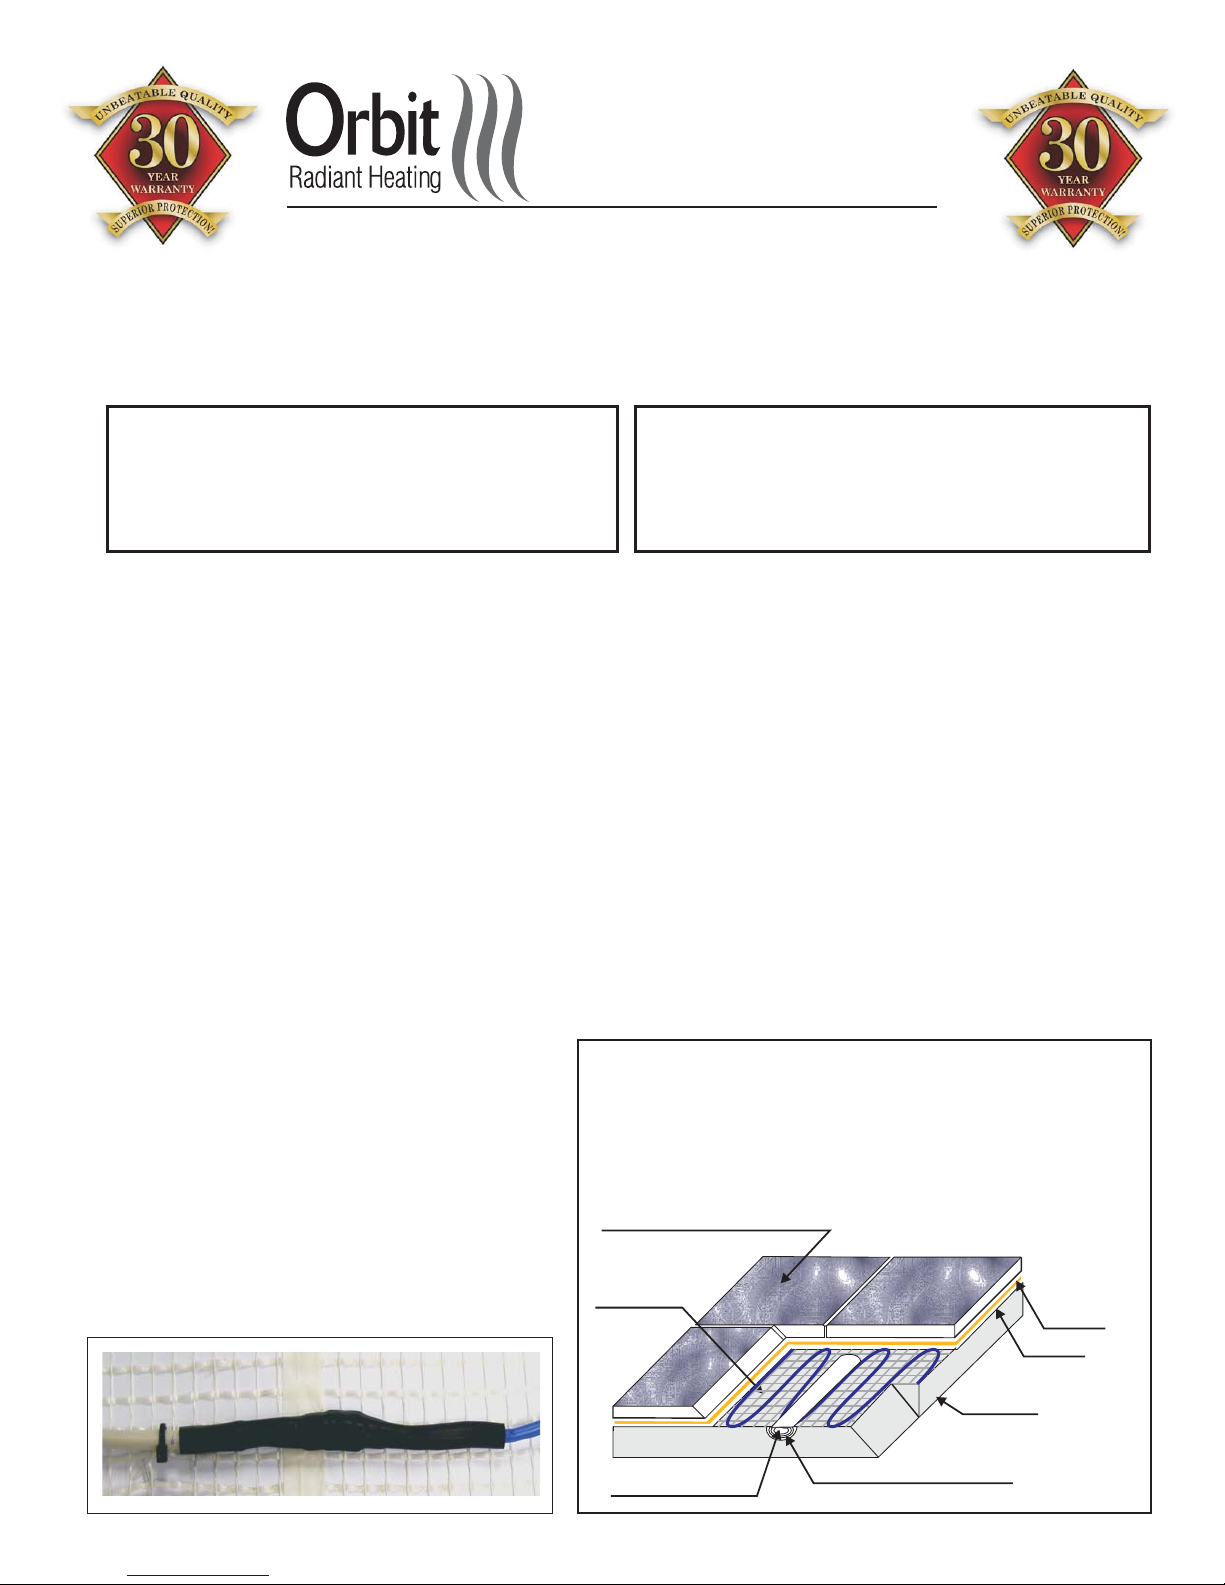
The Nexans Millimat is constructed of a blue twin conductor cable attached to a white
Millimat Splice
All heating mat installations shall be installed according to the National Electric
(In addition, the installation shall be in accordance with the
This equipment shall only be installed by
IT IS VERY IMPORTANT
as this will damage the mat and void the warranty. Details of mat
(Minimum distance between adjacent runs of
Millimat
application methods for
thin set installations
Tile, Stone, Marble, Laminates
Heating Mat
Thin Set
Leveling Agent
Floor Sensor
Non combustible
1/2 Conduit for Floor Sensor
Sub-Floor
*
Backer Board
*Slab
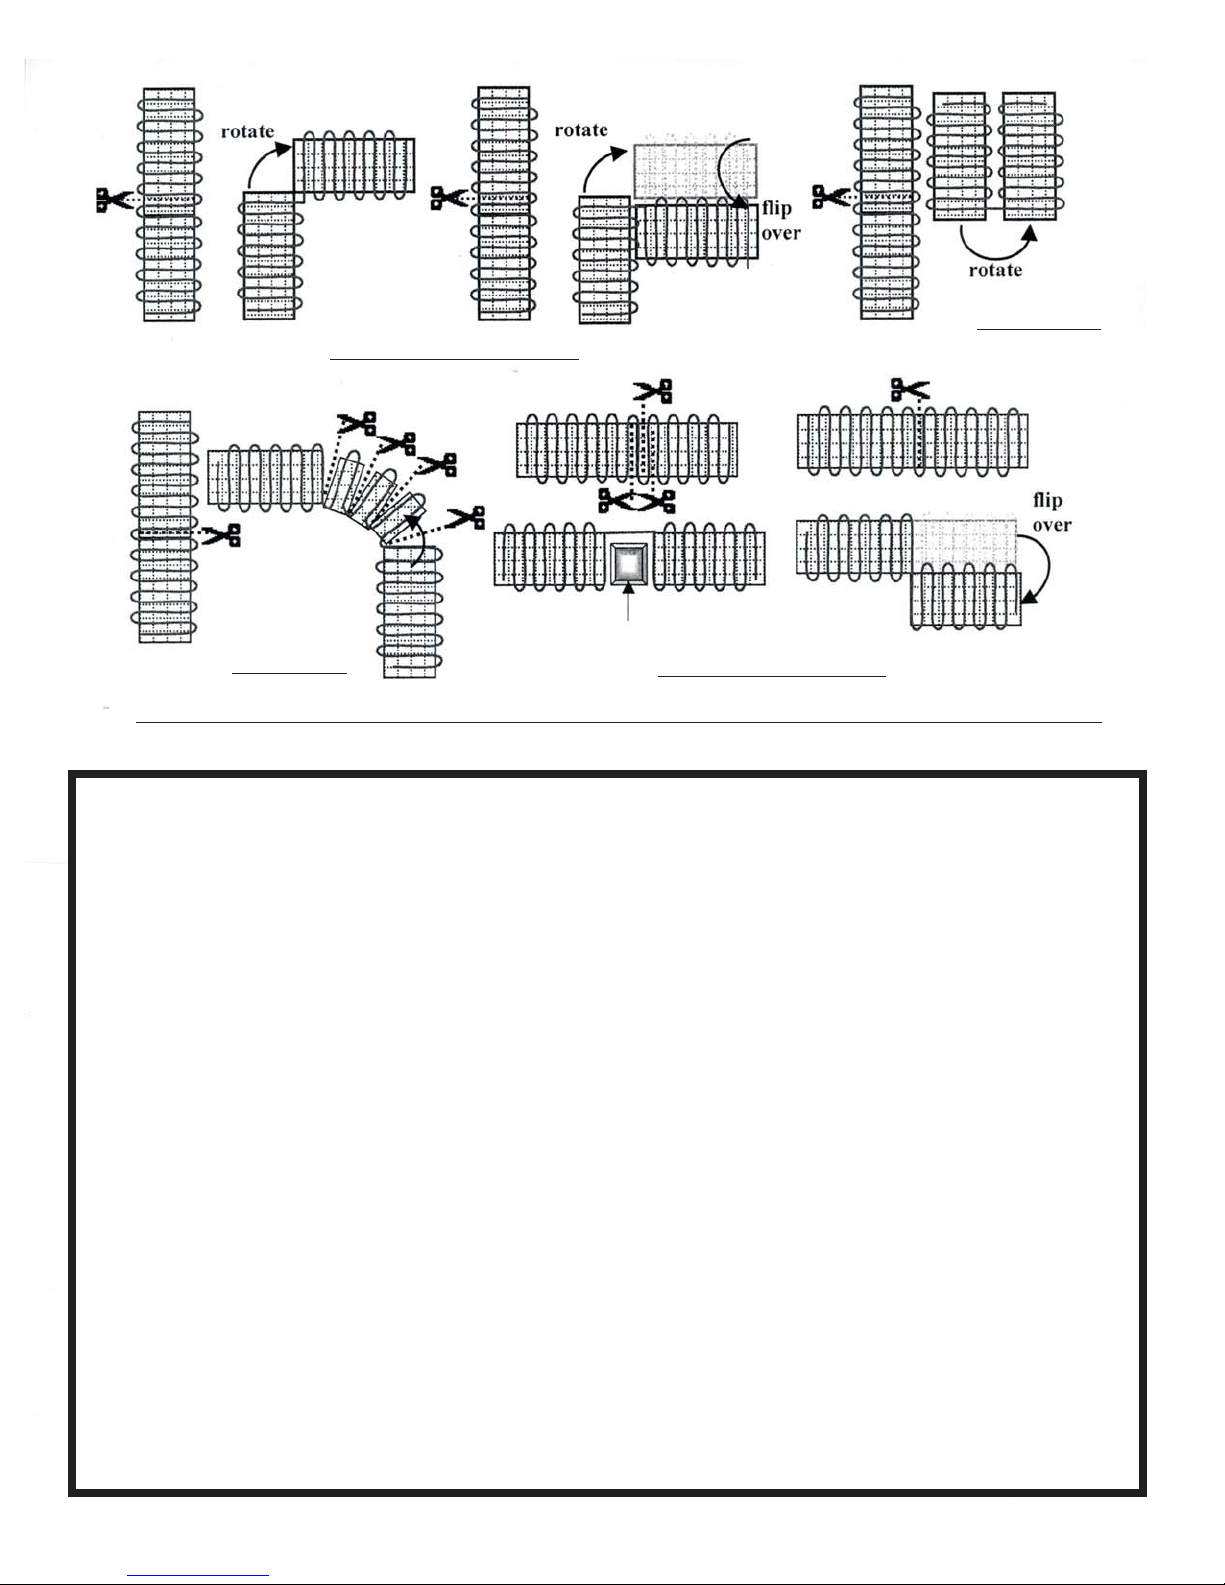
TYPICAL CONFIGURATIONS
Back to Back Turns
Flip Turn
shelf
Fan Turn
Around Fixed Objects
ONLY CUT THE MESH THAT THE CABLE IS ATTACHED TO. DO NOT CUT THE HEATING CABLE!
STEP BY STEP INSTALLATION INSTRUCTIONS
1. Measure the area to be heated and verify that the mat you received is correct. Compare your net square
footage to the Mat information located within table 1 on page 3. Perform testing procedure located on
page 3 before beginning the installation. Caution: Handle the product with care and do not press or drop
any sharp objects into the Millimat.
2. If the subfloor is made of combustible material, a non-combustible layer must be laid prior to installing
the heating mat. The non-combustible lay must be leveled and stable.
3. Determine the thermostat location and install your double gang box as required by code. Electrical
conduit sized by code are recommended for mat cold leads and thermostat floor sensor.
4. Start on the floor close to where the thermostat is going to be. When making adjustments for placement,
do not cut the cable, only the mesh. When cutting and adjusting mat, ensure that he cables are kept at
the same distance from each other as the cables on the mat itself. The heating cable shall not touch,
cross, or overlap itself. Make sure that the splice (the connection between cold and hot part of the cable)
is placed in the floor and embedded. Note: The splice is much wider and thicker than the cable and is
easily identified. It may have to be recessed into the sub-floor to provide a level surface for the tile
installer.
5. If a floor sensor is used, it must be connected at equal distance between two cable runs. It is
recommended to install the floor sensor inside a conduit.
6. Starting on the sub-floor beneath the junction box, arrange the mat in the area to be heated per the
above configurations. Cut only the white mesh, and not the heating cable. When arranging the mat,
ake sure the heating wire straddles the floor sensing conduit evenly.
m When mat is in place, it is
recommended to repeat the testing procedure.
7. Take a photo to document the mat layout and pour your mortar. Keep the photo as record of the cable
locations with the product warranty card.
2.
 Loading...