

Orbit Industries, Inc.
INSTALLATION INSTRUCTIONS
WARNING: All work must be performed by qualified electrician. Luminaire must be installed and grounded in
accordance with the National Electrical Code (NEC) and local codes. Failure to do so may result in serious
injury and/or damage to the luminaire.
WARNING: Debris must be kept clear from top and interior of in-grade fixtures. Excessive heat could occur that
may create a fire hazard and/or harm the fixtures components. Specific attention must be made to never
install in-grade fixture in mulch, wood chips or other potentially ignitable materials. For installation in potentially
ignitable materials, such as mulch and wood chips, installer must use an above-grade mounted fixtures. Failure
to do so will void the warranty and may result in serious injury and/or damage the fixture and/or property.
SAFETY WARNING: Luminaire can become very hot depending on the lamp wattage used. Lens and housing
around the lamp can become hot enough to blister hands. Particular care should be taken not to locate
luminaires where small children can reach them if high wattage lamps are used.
NOTE: Save these instructions for future reference.
NOTE:
LFL3 - Series
Operating Voltage: 120~277VAC
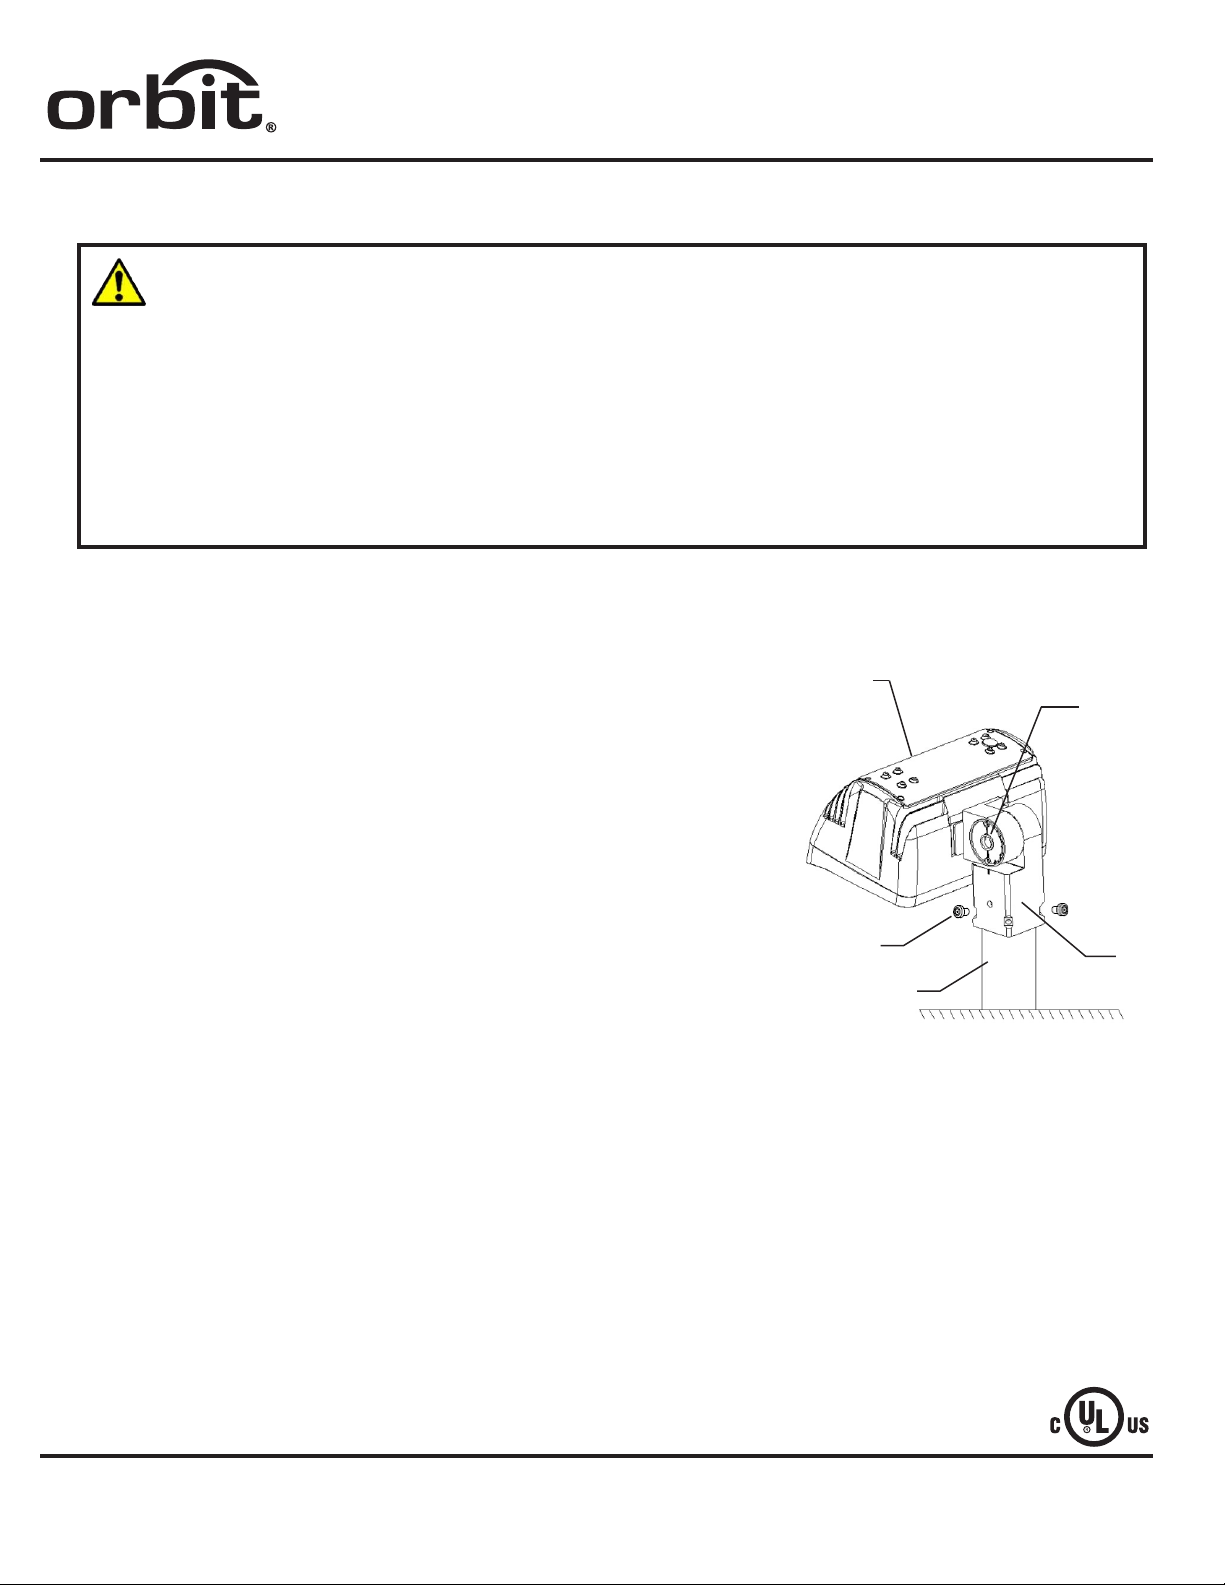
SLIP FITTER TYPE
Category:
LFL3 - Series
LED Fixture
Adjustable Angle Screw
PRECAUTION:
This luminaire is designed to be mounted on a pole
or post up to 2” diameter only.
MOUNTING FOR POLE OR POST:
1. To prevent electrical shock, disconnect power
from electrical supply before installation or
service.
2. Check the pole or post size before start any
installation. The split fitter can be used up to
2” diameter only.
3. Attach luminaire leads first to line and observing
polarity, black to black, white to white and green to
ground by using wire nuts (not included).
4. Insert the luminaire Split Fitter to the pole or post.
5. Tighten the four bolts / screws of the split fitter
evenly.
6. To adjust luminaire aiming angle, un-tighten the
adjustable angle screw. Do not disengaged totally.
Hold luminaire at selected angle and tighten the
screw firmly.
7. Turn ON power and check for proper operation.
Bolt / Screw
Pole or Post
SLIP FITTER TYPE
NOTE: Illustrations are used for reference
purposes only; actual fixture may differ on
each luminaire.
Slip Fitter
2100 S. Figueroa St. Los Angeles, CA 90007
Tel (213) 745-8884 Fax (213) 745-2015
www.orbitelectric.com
Orbit Industries, Inc.
INSTALLATION INSTRUCTIONS
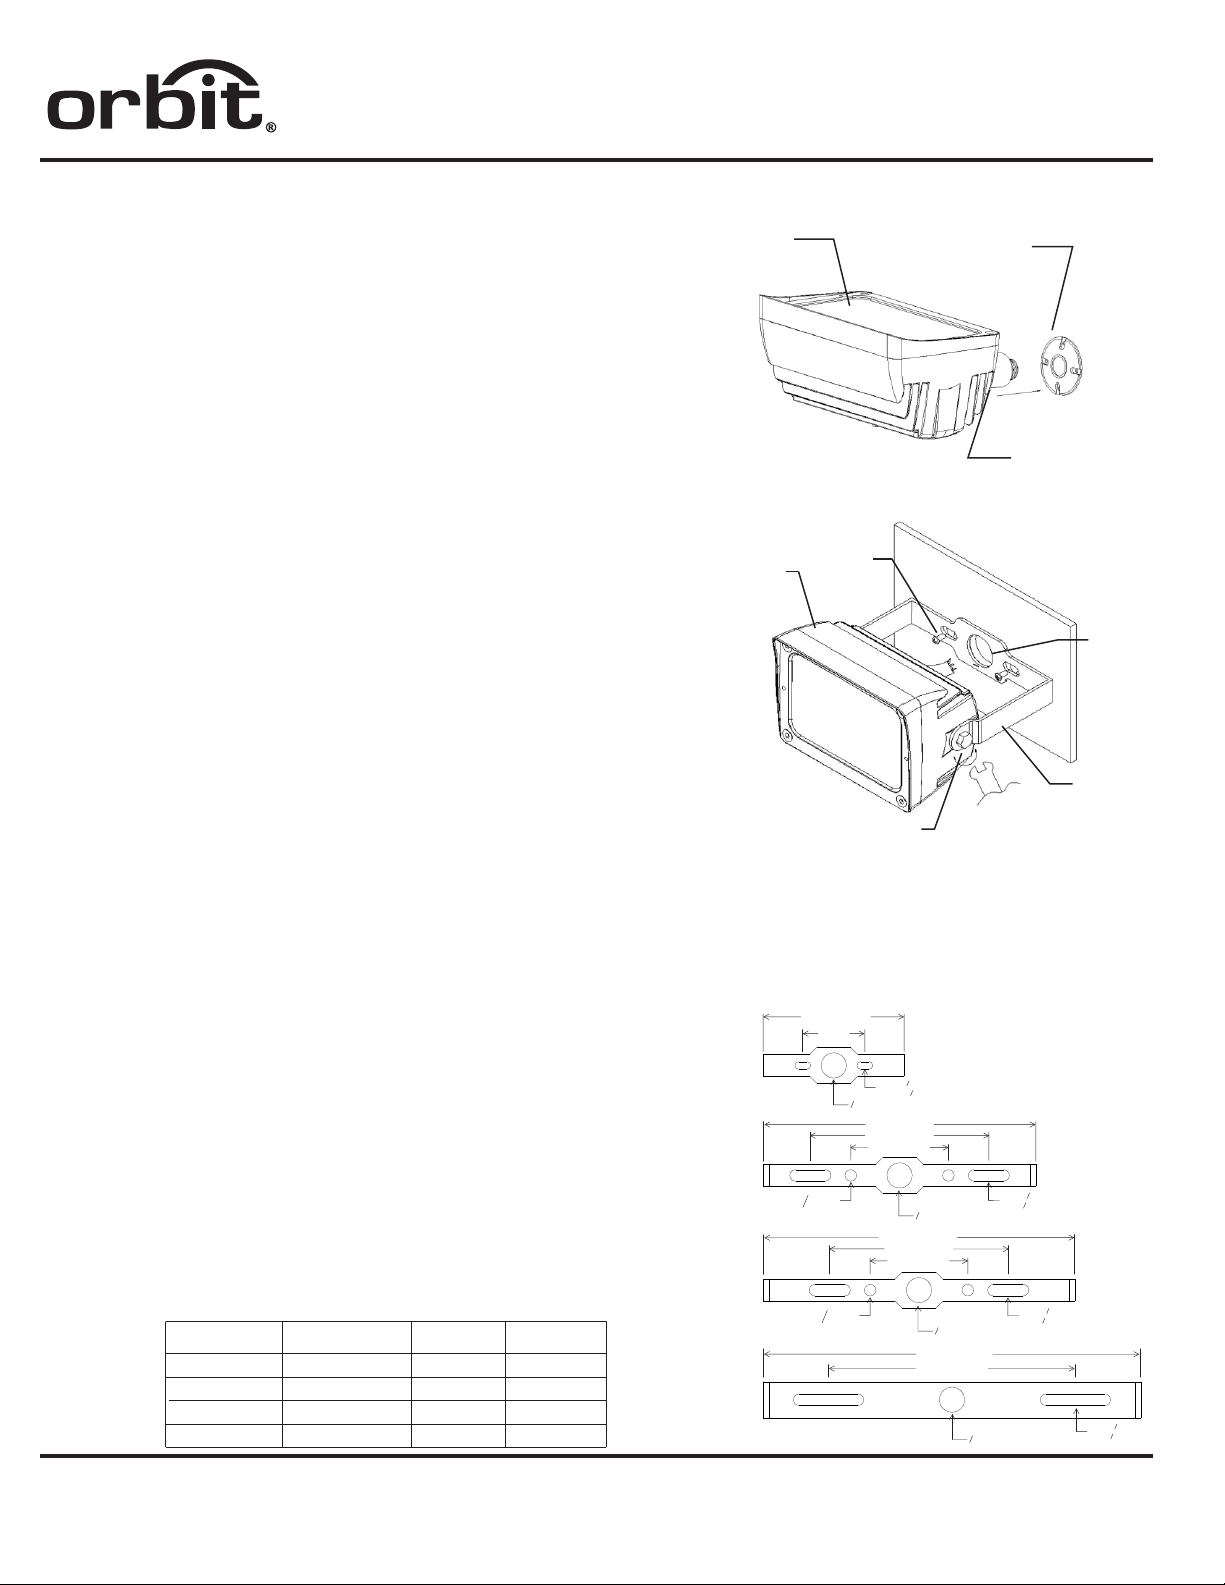
KNUCKLE TYPE
PRECAUTION:
This luminaire is designed to be mounted on a weatherproof
cover with 1/2” hole.
MOUNTING FOR WALL/SURFACE:
1. To prevent electrical shock, disconnect power from electrical
supply before installation or service.
2. Check the weatherproof cover hole size before start any
installation. The luminaire has 1/2” threaded knuckle.
3. Install the weatherproof cover to the luminaire knuckle.
4. Attach luminaire leads to line observing polarity, black to
black, white to white and green to ground to weatheproof
box.
5. To adjust luminaire aiming angle, un-tighten the adjustable
screw of knuckle. Do not disengaged totally. Hold
luminaire at selected angle and tighten the screw firmly.
6. Turn ON power and check for proper operation.
LED Fixture
LED Fixture
Category:
KNUCKLE TYPE
Bolt / Screw
LFL3 - Series
Weatherproof Cover
Knuckle
W
ALL/SURFACE
Wiring Hole
TRUNNION TYPE
PRECAUTION:
This luminaire is designed to be mounted directly to
the wall or surface.
MOUNTING FOR WALLS/SURFACE:
1. To prevent electrical shock, disconnect power from
electrical supply before installation or service.
2. Check bracket screw hole and distance before start any
installation. Screw/bolt is not provided. See bracket hole
size/distance table and bracket dimensions according to
model number.
3. Drill a hole and install luminaire.
4. Attach luminaire leads to line observing polarity,
black to black, white to white and green to ground.
5. To adjust luminaire aiming angle, un-tighten the
adjustable screw of trunnion. Do not disengaged
totally. Hold luminaire at selected angle and
tighten the screw firmly.
6. Turn ON power and check for proper operation.
BRACKET HOLE SIZE/DISTANCE
MODEL NO.:
LFL3-10W
LFL3-30W
LFL3-50W
LFL3-80W/100W
SCREW HOLE DIA.
inch (mm)
0.26 (6.5)
0.39 (10)
0.39 (10)
0.39 (10)
C DISTANCE
L
inch (mm)
2.09 (53)
5.98 (152)
5.98 (152)
8.27 (210)
ADDT’L. HOLE
DIA. inch (mm)
-
0.39 (10)
0.39 (10)
-
2100 S. Figueroa St. Los Angeles, CA 90007
Tel (213) 745-8884 Fax (213) 745-2015
www.orbitelectric.com
Trunnion
Adjustable Angle Screw
TRUNNION TYPE
NOTE: Illustrations are used for reference
purposes only; actual fixture may differ on
each luminaire.
BRACKET DIMENSIONS
4.72 in (120 mm)
2.09 in
(53 mm)
O
LFL3-10W
0.39 in
TYP.
O
10 mm)
LFL3-30W
TYP.
O
LFL3-50W
LFL3-80W/100W
0.39 in
10 mm)
O
0.53X 0.26 in
(13.5X 6.5 mm)
0.85 in (21.5 mm)
9.13 in (232 mm)
5.98 in (152 mm)
3.27 in (83 mm)
10.43 in (265 mm)
5.98 in (152 mm)
O
O
0.85 in (21.5 mm)
3.27 in (83 mm)
12.64 in (321 mm)
8.27 in (210 mm)
TYP.
O
0.85 in (21.5 mm)
O
0.85 in (21.5 mm)
O
1.38X 0.39 in
O
(35X 10 mm)
1.38X 0.39 in
O
(35X 10 mm)
TYP.
O
TYP.
O
2.36X 0.39 in
O
(60X 10 mm)
TYP.
Ver. 1
 Loading...