

Page 1
VEGETABLE GARDEN
SOAKER SYSTEM
STEP-BY-STEP GUIDE
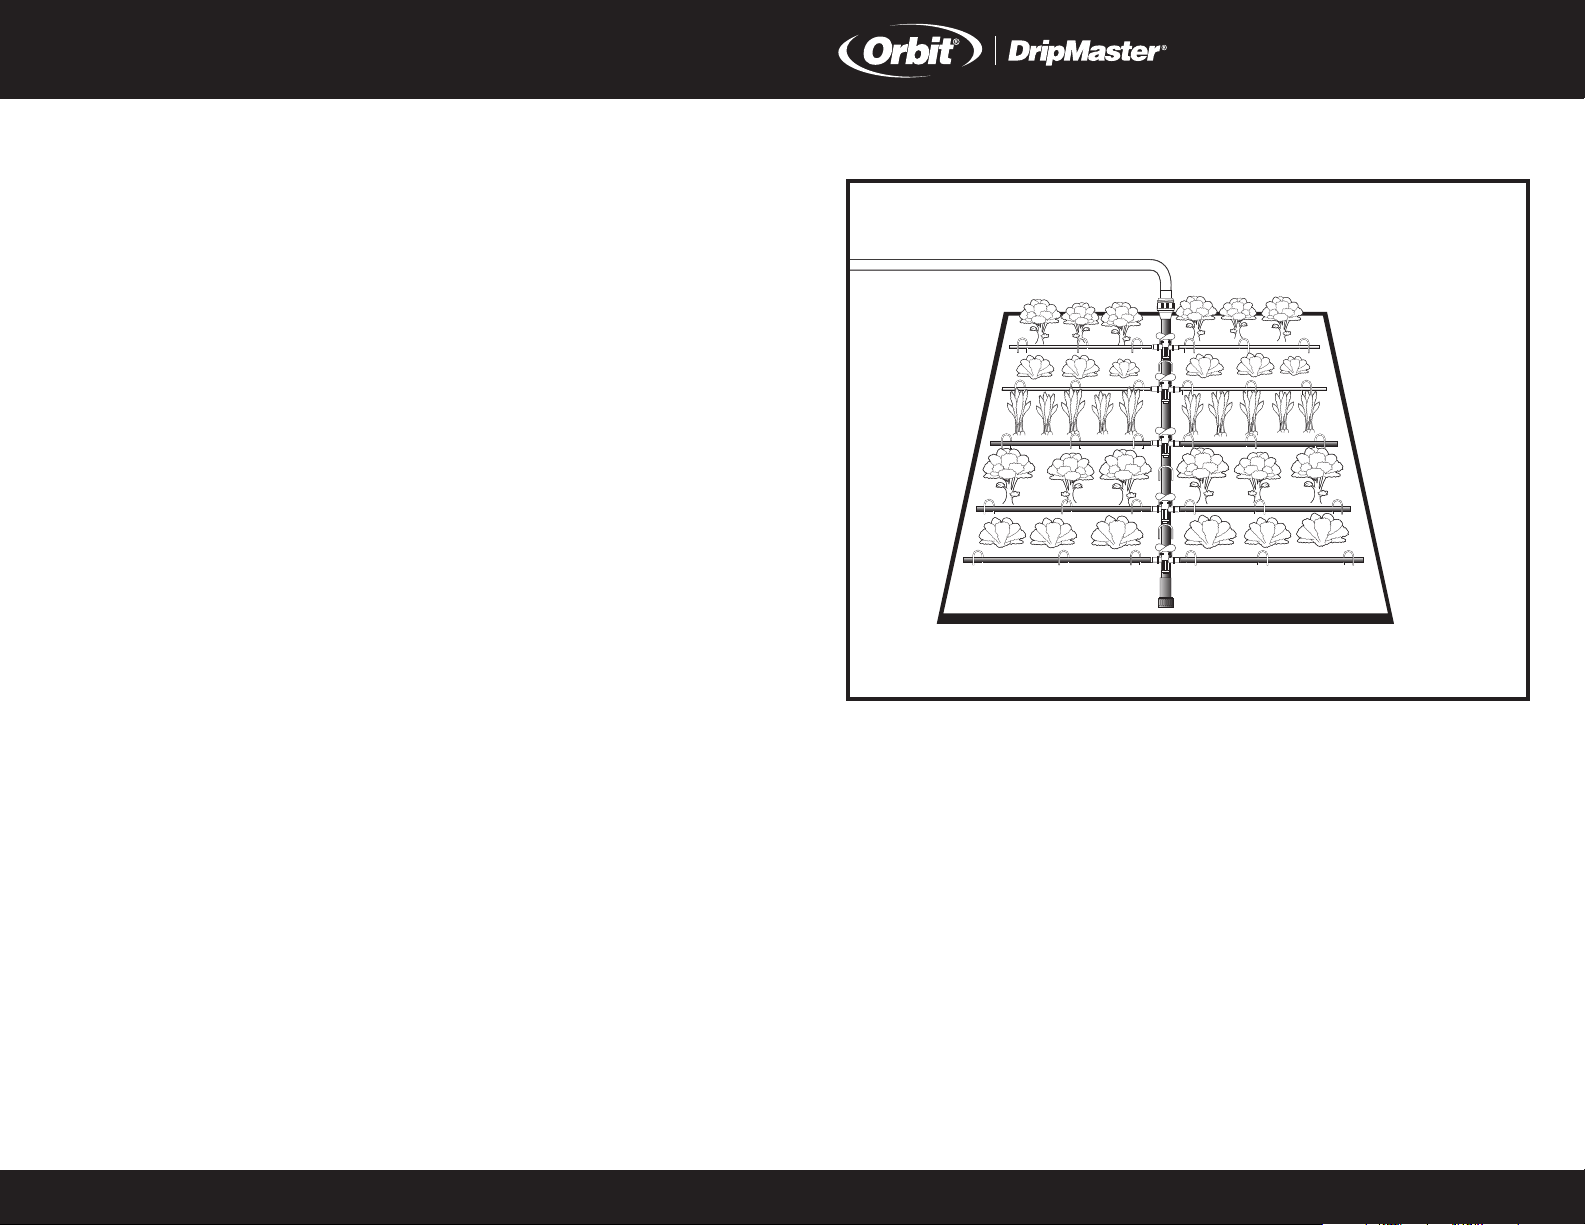
This expandable Vegetable Garden Soaker System is also ideal for
general landscape watering. To expand your system, simply purchase
additional kits and connect them together or purchase additional tubing
and fittings separately. Up to 35 soaker lines can run off one 1/2”
distribution tube.
KIT CONTENTS
1 3-in-1 faucet adapter—pressure
regulator, filter and 1/2” drip tube
adapter
5 1/2” tubing hold down stake
1 1/2” tubing end cap
12 4 gallons per hour flag dripper
1 hole punch
50’ 1/4” soaker tubing
24 1/4” tubing hold down stake
12 1/4” tubing end plug
1 pipe thread to hose thread adapter
Orbit® Irrigation Products, Inc.
North Salt Lake, UT 84054 USA
www.orbitonline.com | 1-800-488-6156
Printed in USA
PN 67527-24 Rev B
© 2008 Orbit Irrigation Products, Inc.
All rights reserved. All trade names are registered
trademarks of respective manufacturers listed.
*Note: 1/2” distribution tubing is not included in this kit. Be sure to purchase/use
1/2” distribution tubing with an outside diameter of .690 or larger.
Page 2

1a
Tips for successful soaker layout
• Soaker tubing run on level
Follow these seven steps to
create a plant-enhancing,
water-conserving,
and time-saving system.
ground provides the most even
water distribution.
• Lay soaker straight, loop
around plants, or wind through
closely planted areas.
1b
1
2 3
(a) Attach the 3-in-1 faucet
1.
adapter to an outdoor
faucet or garden hose.
This contains a pressure
regulator, removable filter
and 1/2” drip tubing adapter.
(b) Push 1/2” tubing (not
included) into adapter.
2.
Roll out 1/2” distribution
tubing and secure with
1/2” stakes.
3.
Cap the 1/2” distribution line
with 1/2” tubing end fitting.
4.
(a) Using the hole punch, punch
a hole in the 1/2” distribution
line where you want the first
soaker line to begin.
(b) Insert the flag dripper as
shown in figure 4.
Remove 1/2” tubing end
6.
cap and flush water
through the system for
one minute.
(a) Reinstall 1/2” tubing end
7.
cap.
(b) Insert a 1/4” end plug at
the end of each soaker
6
line.
7
4 5
(a) Attach 1/4” soaker tubing
5.
to the flag dripper.
(b) Run 1/4” soaker out from the
flag dripper, up to 15’,
and secure with stakes.
Cut tubing from roll with
garden clippers.
(c) Continue running soaker lines
until system is completed.
SOAKER SYSTEM IS READY FOR USE!
12
Soaker tubing waters slowly, providing deep root
watering and helping eliminate waste and runoff.
9
3
For best results, water between 1/2 hour (6-8” root
6
depth) and 4 hours (5’ root depth).
 Loading...