

Page 1
WIFI SPRINKLER TIMER
Users Manual
57946-50 rA
Page 2

2 3
Contents in the Box ......................4
Getting Started ..........................5
Timer Installation......................... 6
Uninstalling/Reinstalling ..................8
The B-hyve App ..........................9
Timer Controls/Features................. 10
Simple Controls ..........................11
Using the Dial ............................12
Using the Back and Clear Buttons .........13
Using the Program (PROG ABC) Button....14
Using the Rain Delay Button...............15
Timer LCD...............................16
Programming the Timer ...................17
Manual Operation.......................23
Thank you for purchasing the Orbit®
B-hyve™ wifi sprinkler timer. At Orbit, we
share your passion for a beautiful landscape
while protecting our most valuable resource–
water. For over 40 years, this passion has
driven us to deliver top of the line irrigation
products to millions of customers all around
the world. Our slogan, “Conservation
through Innovation,” has driven our product
development in timers for decades and
continues to define our direction today with
the B-hyve™ smart wifi sprinkler timer.
Nature is a wonderful gardener and is always
subtly working with you to take care of your
landscape. Bees provide a great example
of this remarkable, unseen effort to help
your plants grow. The beehive is the central
hub where this effort is coordinated, and
the communication happens. While nature
does a great job, sometimes a little help is
needed. That is where we come in. When
you connect your B-hyve™ timer to your
wifi, you are plugging in to nature. The local
weather, along with some inputs about your
landscape, will work together to deliver
the right amount of water to your plants,
eliminating water waste and saving you
money. Thanks for connecting and welcome
to B-hyve™!
Welcome to B-hyve™ Connecting with B-hyve™ Table of Contents
Page 3
4 5
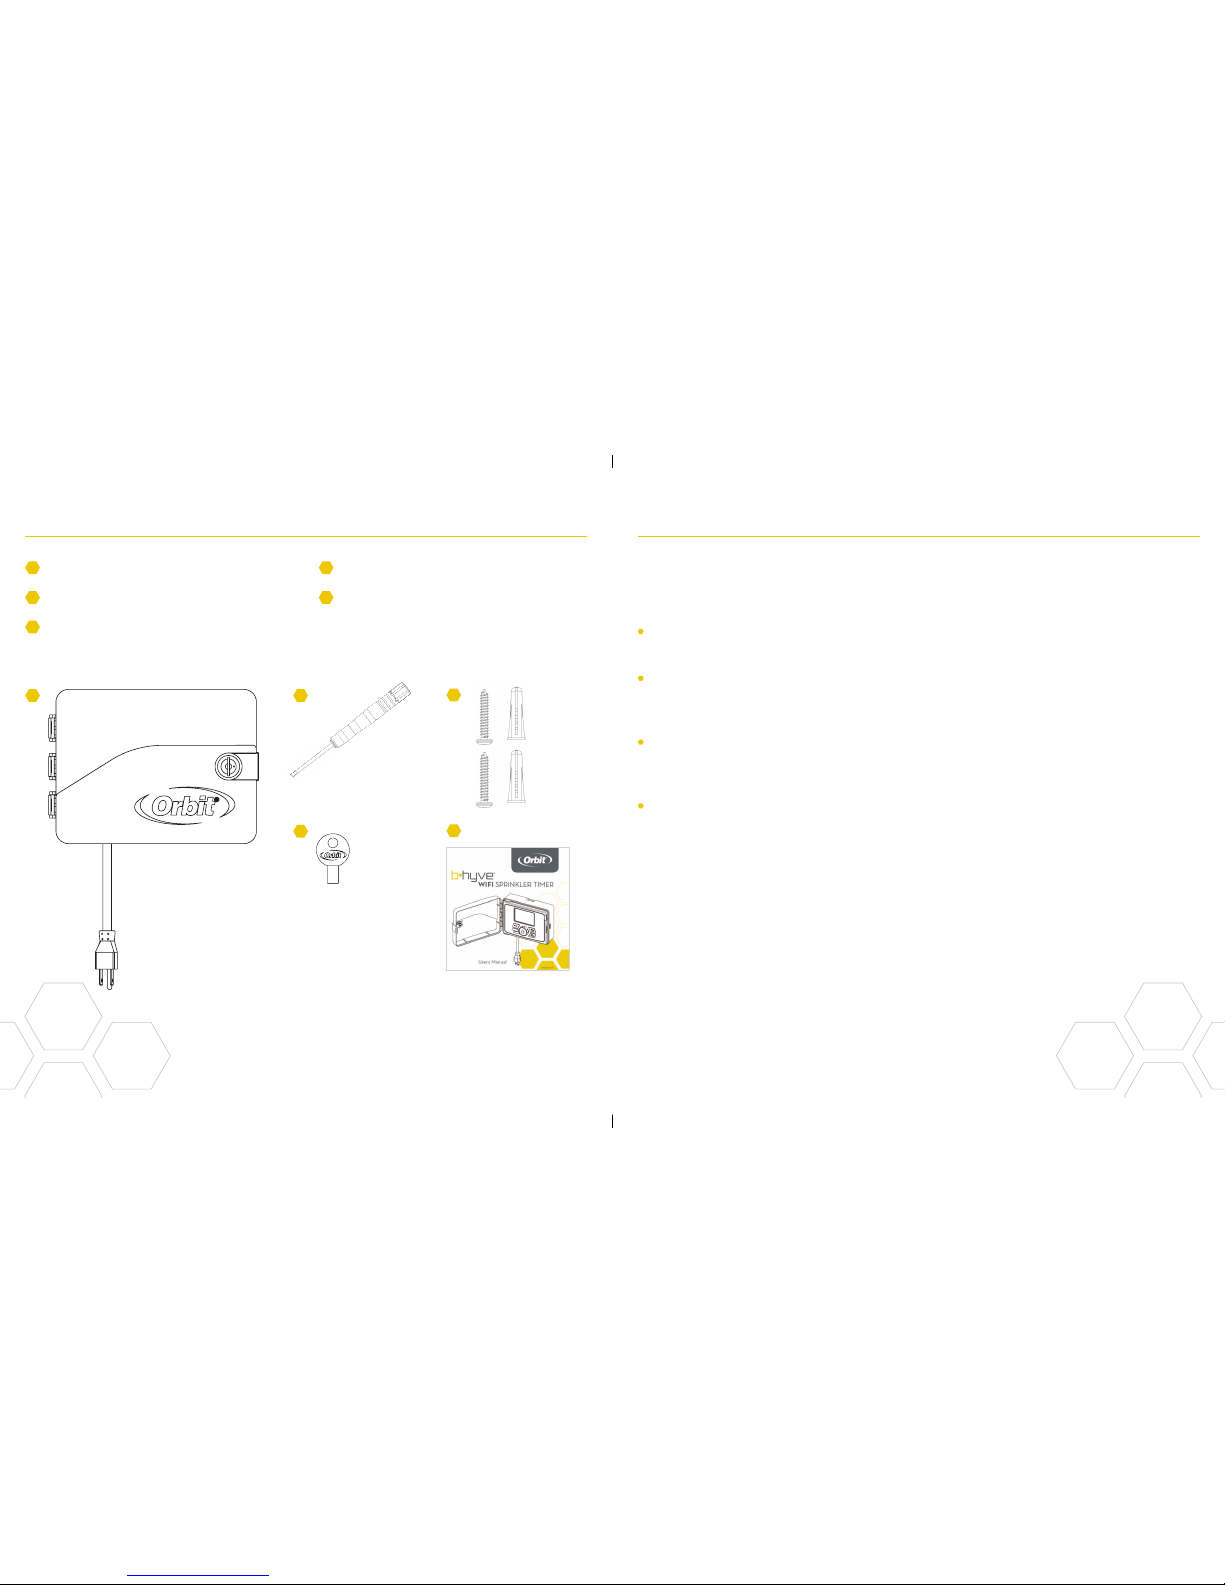
Contents in the Box Getting Started
Wifi Sprinkler Timer
Screwdriver
Installation Hardware
Keys
Quick Start Guide
Your B-hyve™ sprinkler timer is great for new installations or for
replacing an old sprinkler timer. Here are some basic steps to get
your timer set up and get you closer to saving water and money.
Install the timer
Choose a location on your property with a good wifi signal.
Install the B-hyve™ app on your smart device
You will need a smart device to connect the timer to wifi. After the
timer is paired, you can also use a computer to adjust your timer.
Setup your timer with the app or at the timer
Your timer works with and without wifi–it can be programmed
with your smart device or at the timer interface.
Note : If replacing a timer, it is helpful to take a photo of the wires
before you remove them from the old timer.
A
A
D
B
B
D
E
C
C
E
Page 4
6 7
Timer Installation Timer Installation–Connecting to WIFI
Select a location
Choose a location near power and away
from direct sunlight, if possible. Make sure
to leave room for the timer door to open
completely.
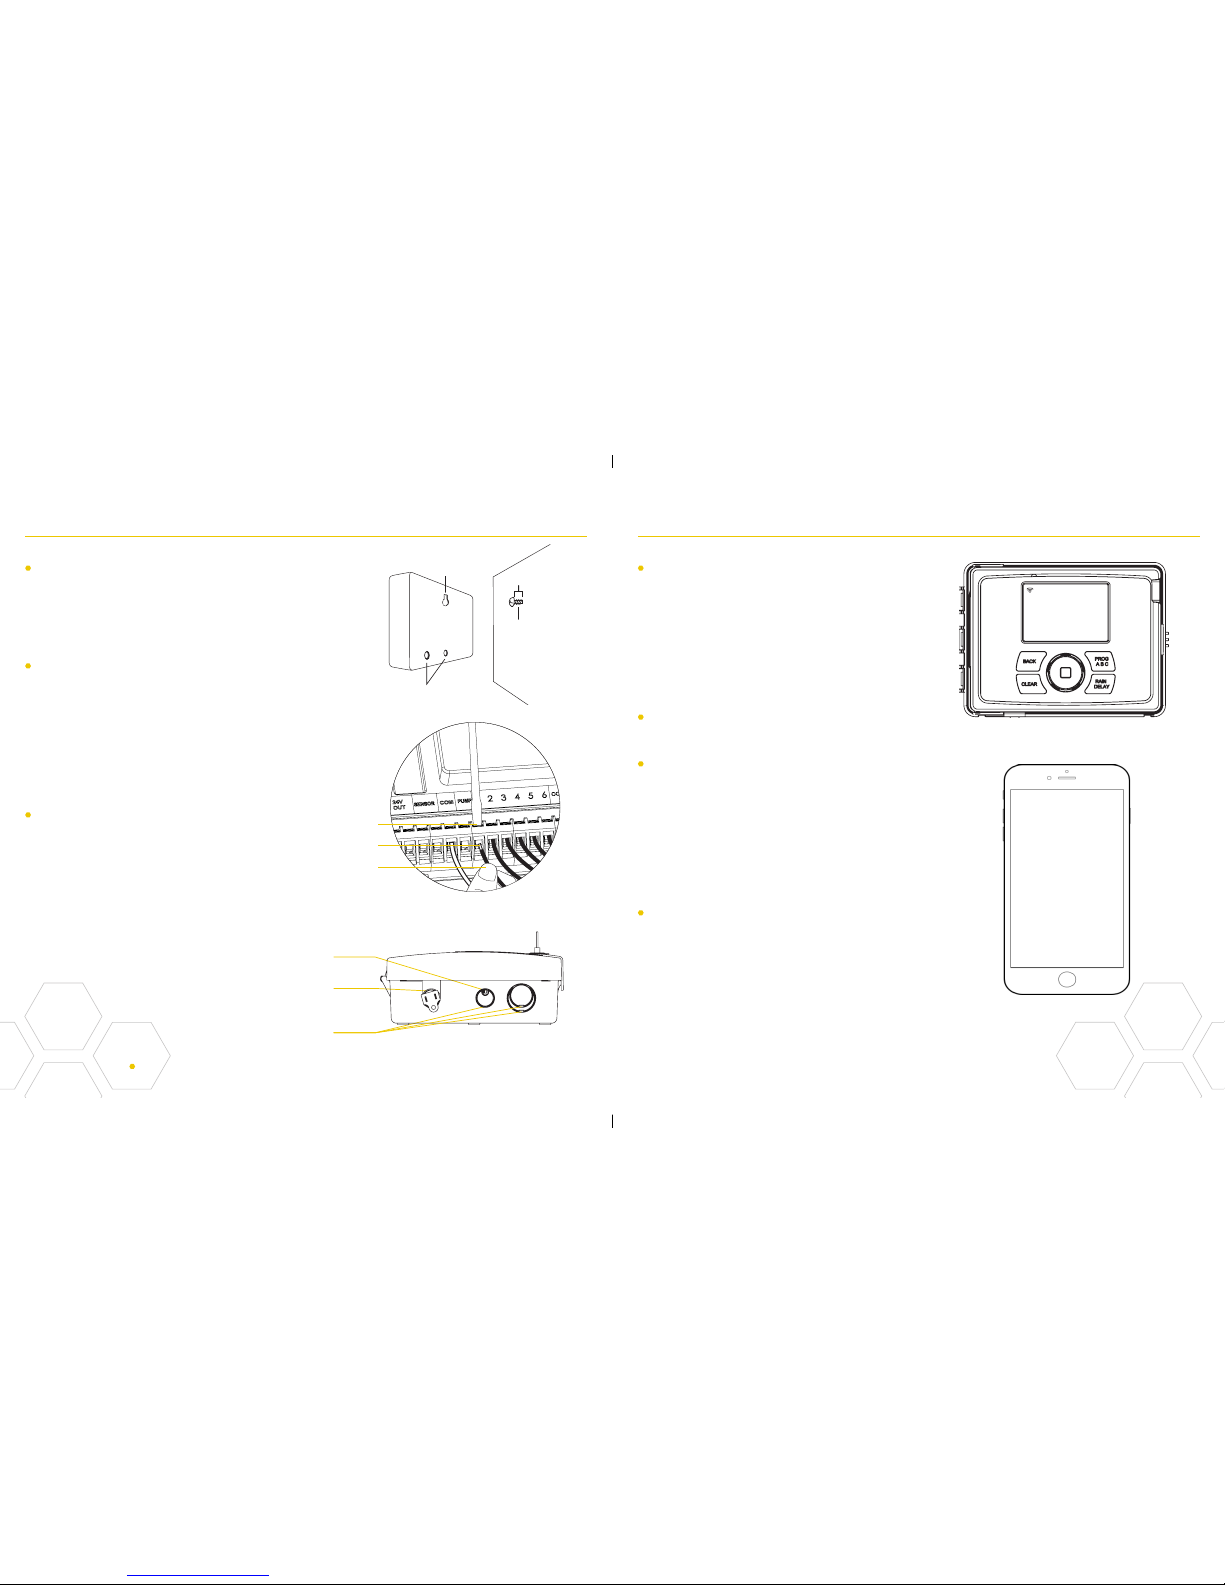
Mount the timer
Install a screw (included) into the wall.
Use the expanding anchors (included) for
plaster, masonry or drywall installations.
Hang the timer on the installed screw using
the keyhole slot. Level the timer and use
the second screw in one of the preformed
mounting holes to secure the timer.
Connect valve wires
Strip 1/2" (12 mm) of insulation from each
wire. Connect one wire from each valve
to a “Common” (COM) wire and the other
wires to a numbered terminal (only one
wire per terminal.)
Plug in your Orbit® B-hyve™ timer
Once your Orbit® timer is plugged into the
power source, it will automatically look to
pair with your smart device. In the top left
corner of the timer screen the “wifi” icon
will begin a graduated blinking sequence.
This indicates that your timer is ready to
pair with a smart device.
Install the Orbit® B-hyve™ app and
create an account on your smart device
Find Orbit_SmartHome_XXXX
in your wifi list
The B-hyve™ timer will create its own
network that will appear in your list of
available wifi connections on your smart
device. Connect to the Orbit SmartHome
network and then return to the Orbit®
B-hyve™ app.
Enter your wifi settings
After returning to the app, you will see
a list of available networks. Choose your
network and then enter the password for
the network to connect your timer to your
wifi signal. When connected, the wifi icon
on the timer will stop blinking and show
solid lines.
Keyhole
Pre-formed
Mounting Holes
No. 8 Screw
Wall
1/8"
Small Hole–for running 5 or 7
strand wire straight into the box
1/2 ", 3/4" and 1" knock-outs for larger
systems with more wire bundles
Knock-out for hardwired installations
Bottom View
Strip Wire
Push In
Loosen Screw
Tighten Screw
Note: We recommend you consult an electrician for hardwired installations.
Page 5
8 9
Uninstalling/Reinstalling The B-hyve™ App
How to re-pair with wifi
You can re-pair your smart device with
your B-hyve™ timer by turning the dial to
“Off” and pressing the reset button on the
back of the swing panel. The timer display
will show “Pair.”
Deleting the timer from the app
You may need to the delete the timer
from a smart device. Go to settings to
deauthorize the timer, after which it will
ask for confirmation to remove the timer.
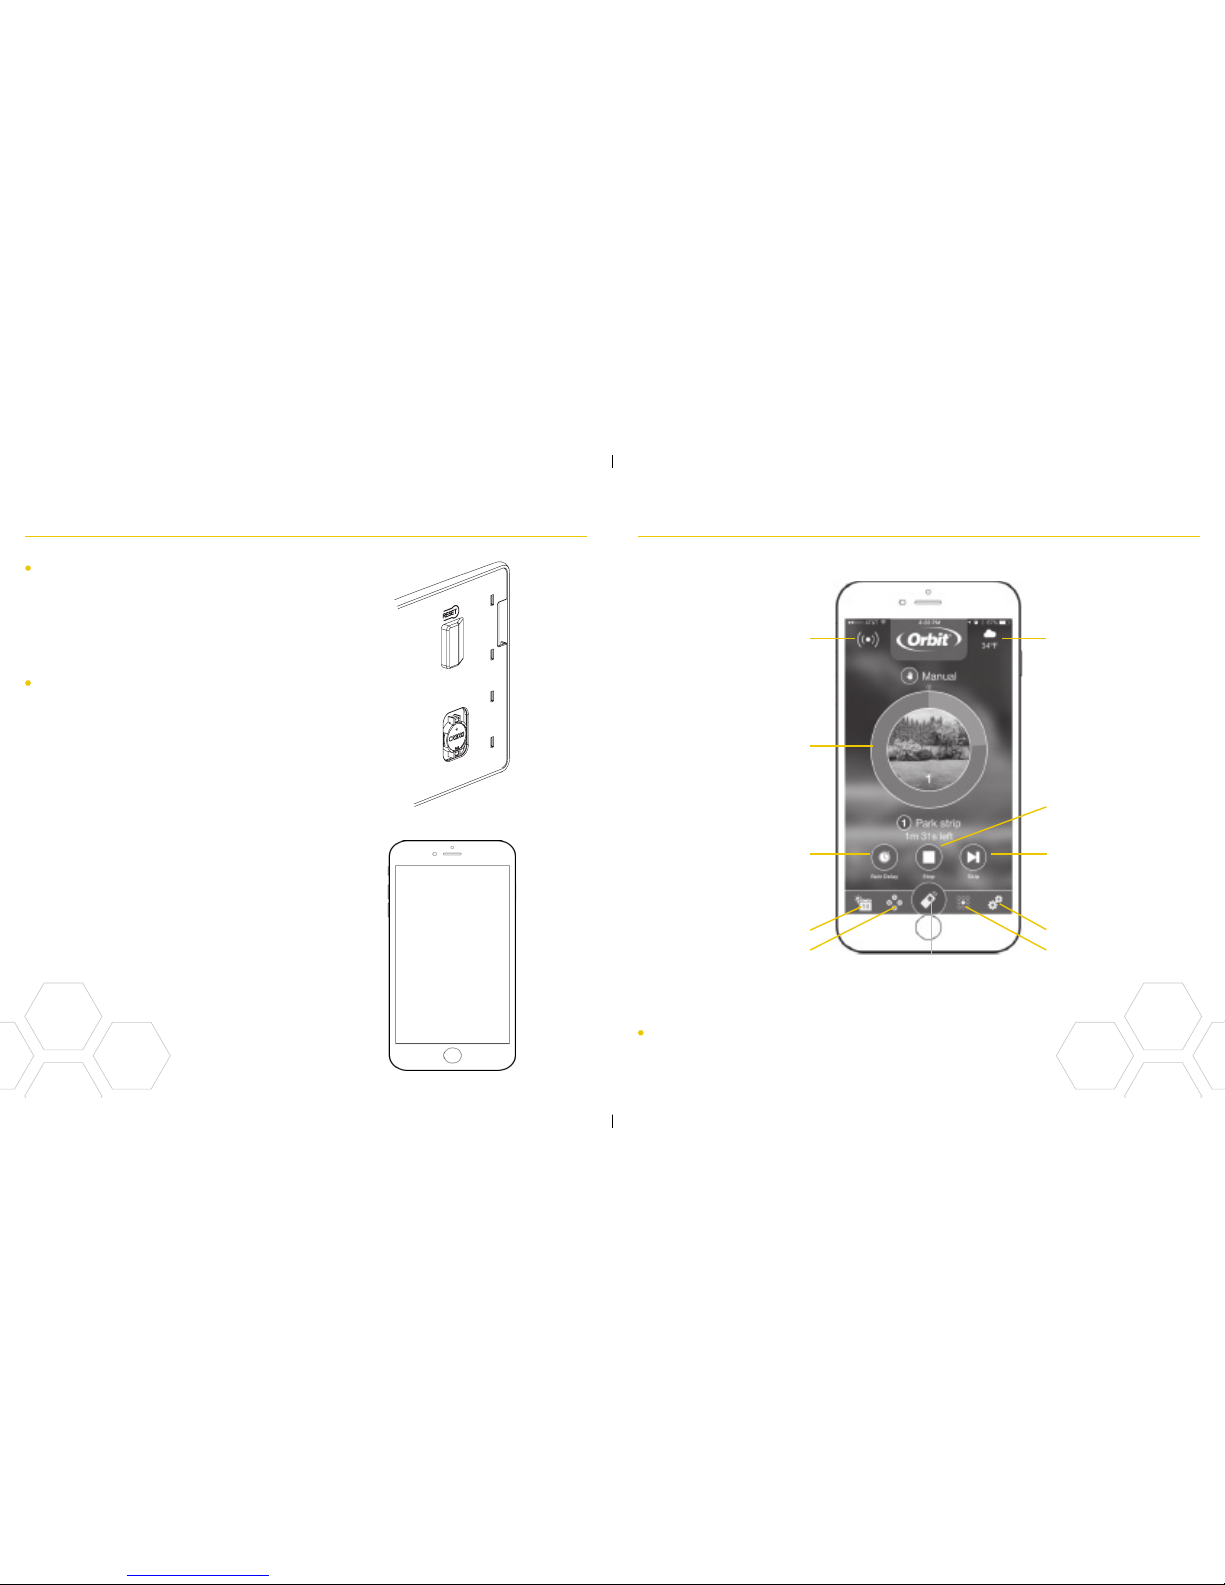
Timer Connected Symbol
Rain Delay
Calendar
Programs
Remote Control
or Home Button
Zone List
Settings
Next Zone
Stop Watering
Running Status/Messaging
Weather/Temp.
Note: There is a wizard in the app to guide you through initial
set up of your sprinkler timer. In addition, there are help icons
throughout the app with more information and useful tips.
Page 6
10 11
Timer Controls/Features Simple Controls
Your timer was built to make installation
easy and fast, while providing convenient
controls to make adjustments from
anywhere in the world, or when you’re
standing in front of the timer.
Programming at the timer can be done
whether you are connected to wifi or not.
It allows the gardener who left their phone
inside to run a manual cycle, or adjust
programming as needed and keep dirty
hands away from the phone.
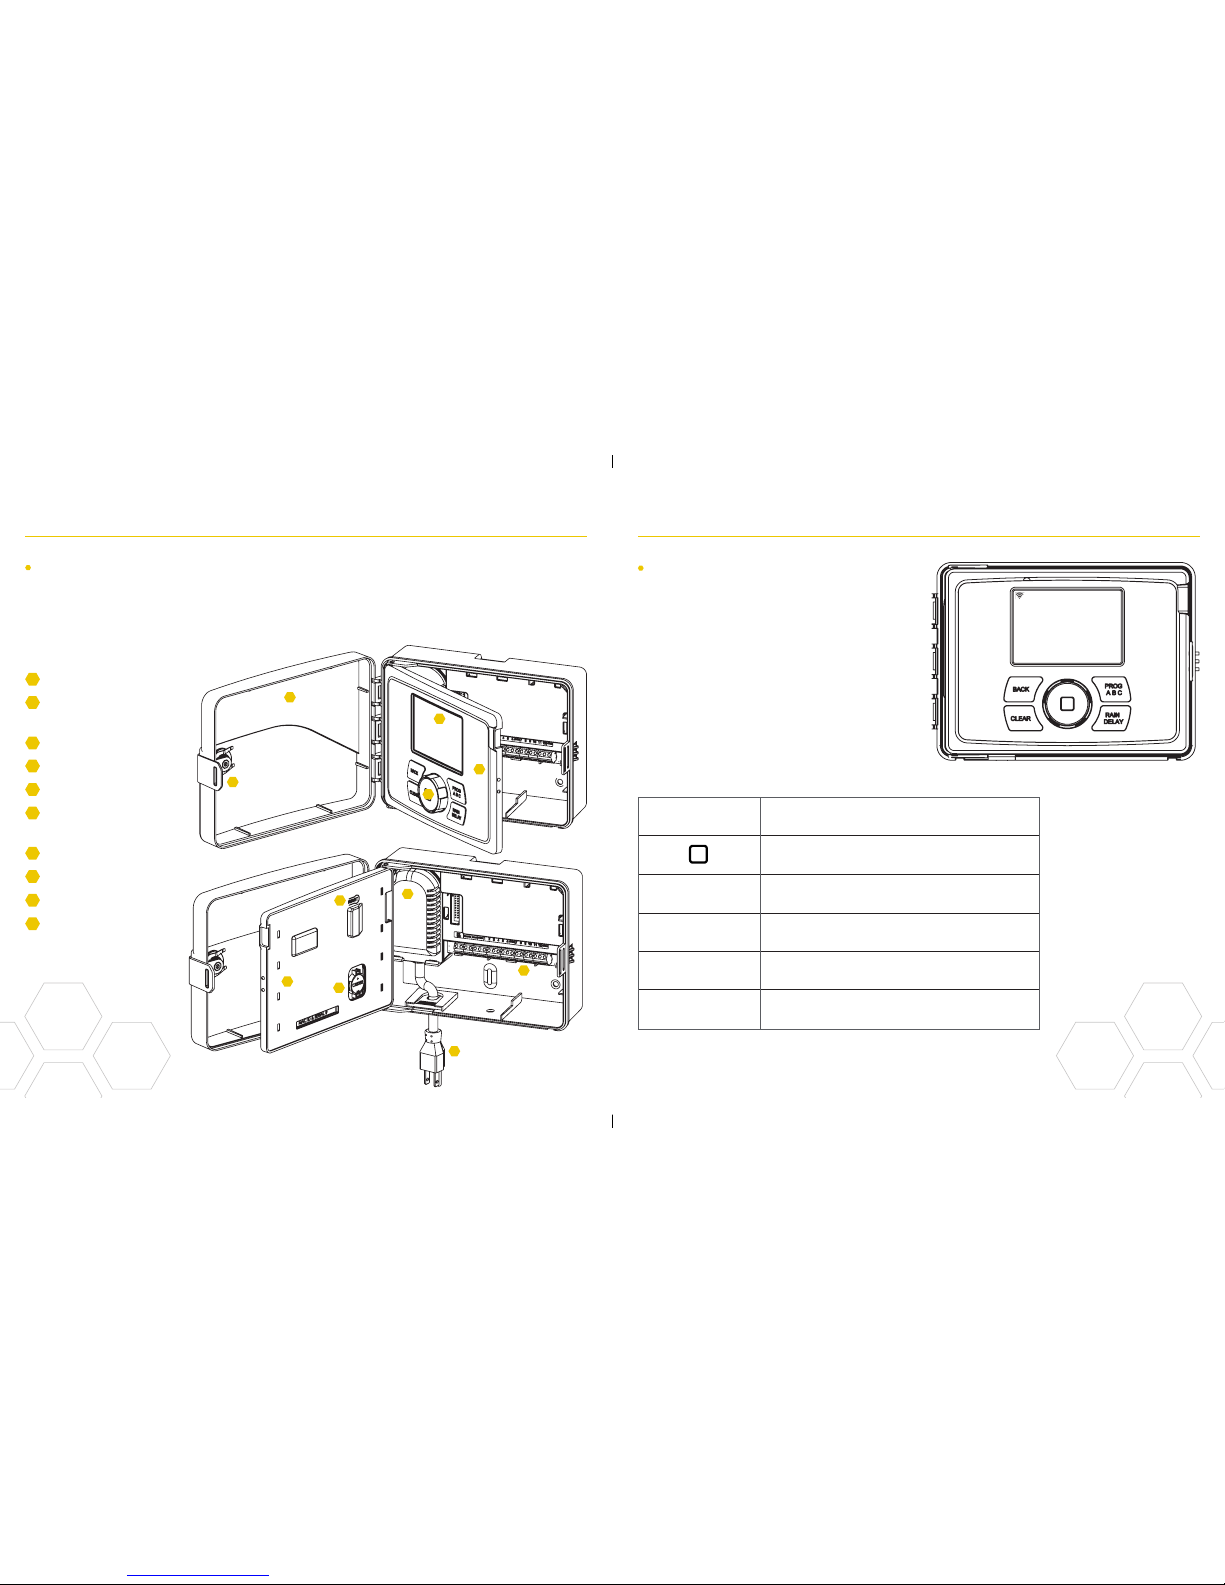
Lock and Latch
Weather Resistant
Cover
Dial
Digital Display
Swing Door Panel
Battery
Compartment
Transformer
Wiring Terminals
Reset Button
Line Cord
Buttons Function
Scroll up or down, left or right and
push to make a selection
CLEAR To clear a setting
PROG ABC To move to different programs: A, B, and C
BACK To go back a step
RAIN DELAY
To pause operation for 1 to 32 days
due to rain or other factors
A
A
B
B
C
C
D
D
E
E
E
F
F
G
G
H
H
I
I
J
J
Page 7
12 13
Using the DIAL Using the BACK and CLEAR Buttons
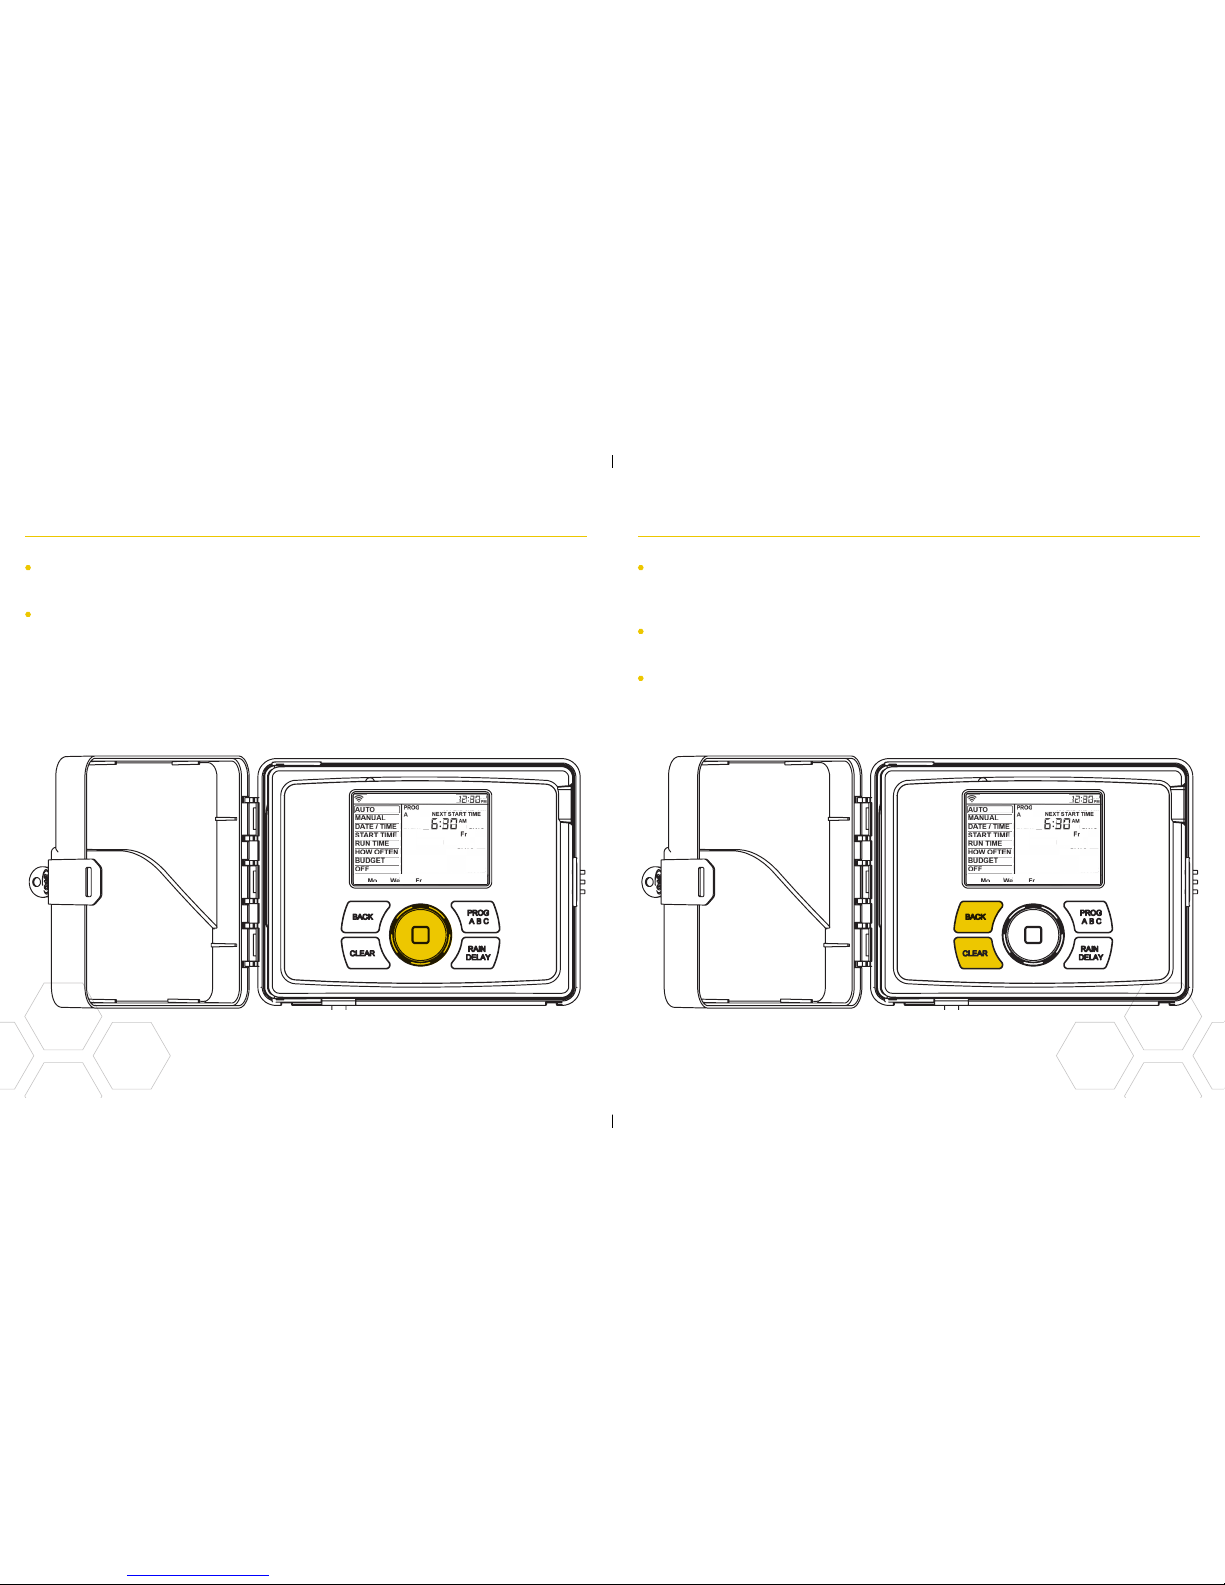
The DIAL can be used to scroll up or down, left
or right on menus, dates and times.
Press the DIAL to confirm a selection, to
deselect or to skip a running station.
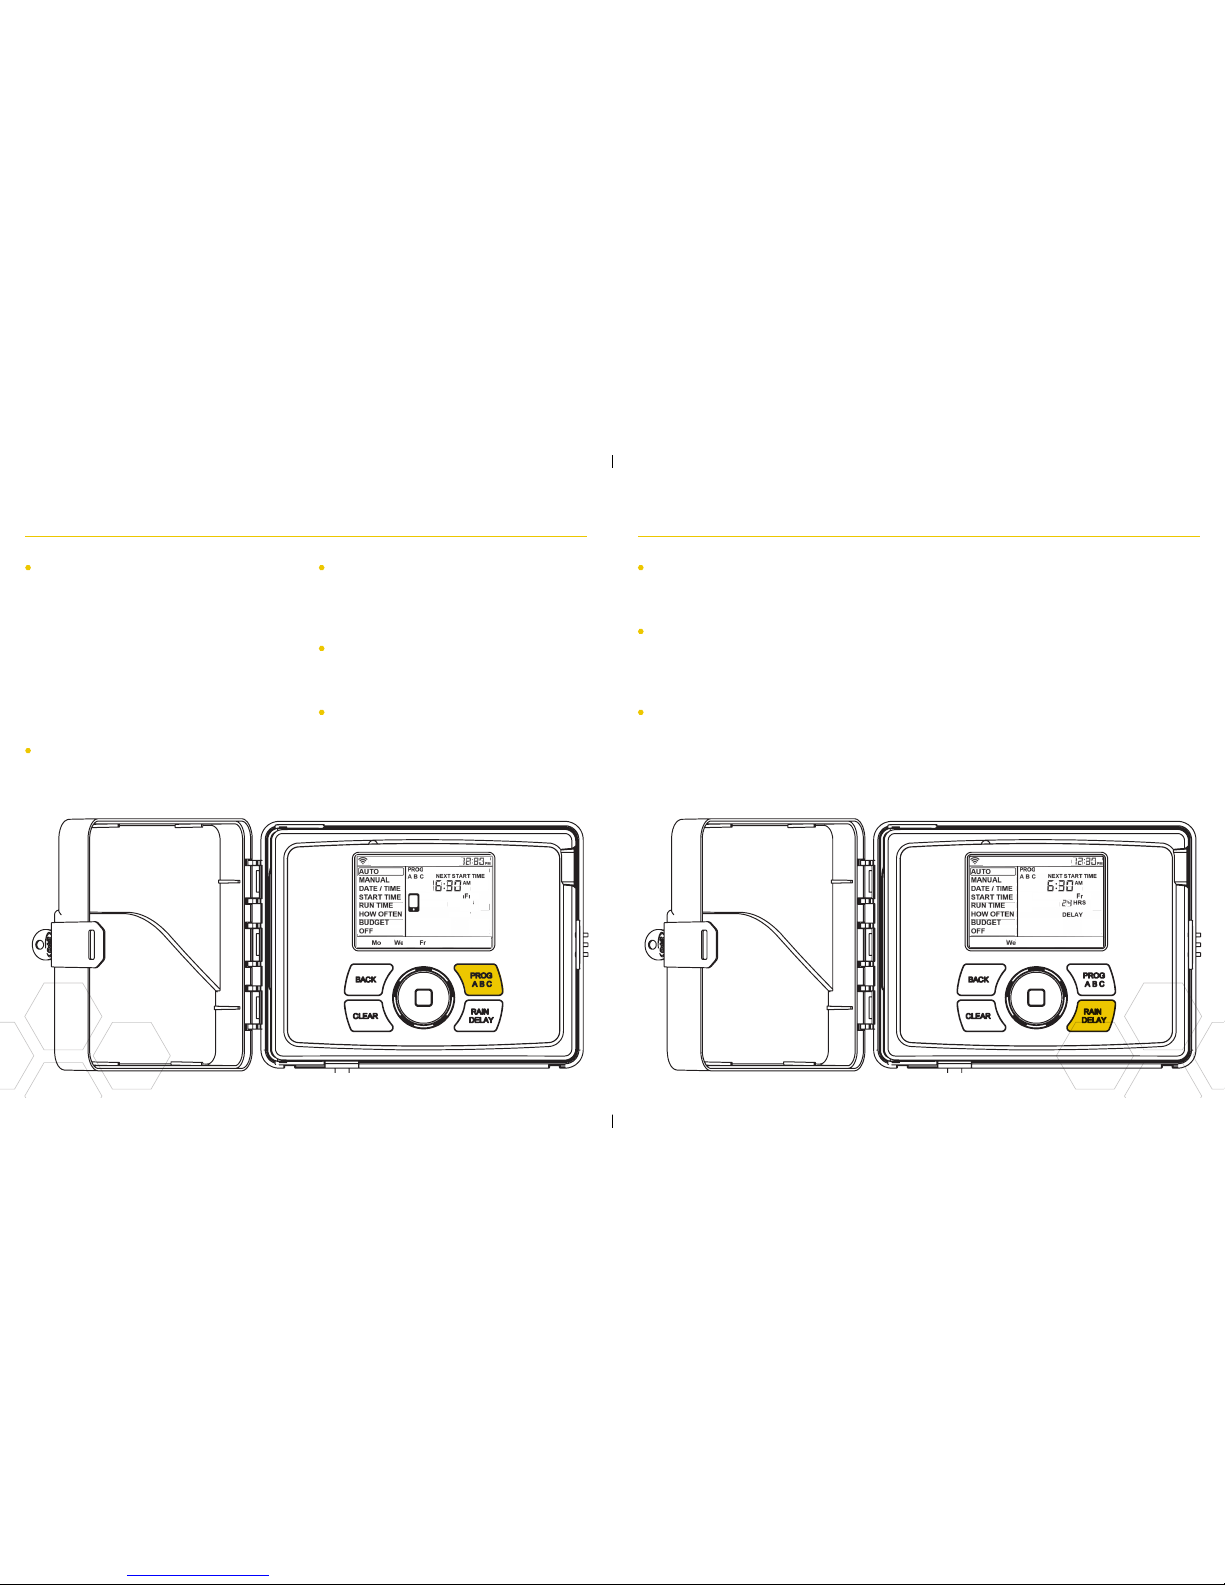
The BACK button can be used return to
the main menu, or can be pushed twice to
return to auto.
The CLEAR button can be used to clear
entries in a selected screen.
The CLEAR button may also be used
to cancel Rain Delay, cancel a running
program or cancel a manual watering cycle.
Page 8
14 15
Using the PROGRAM (PROG ABC) Button Using the RAIN DELAY Button
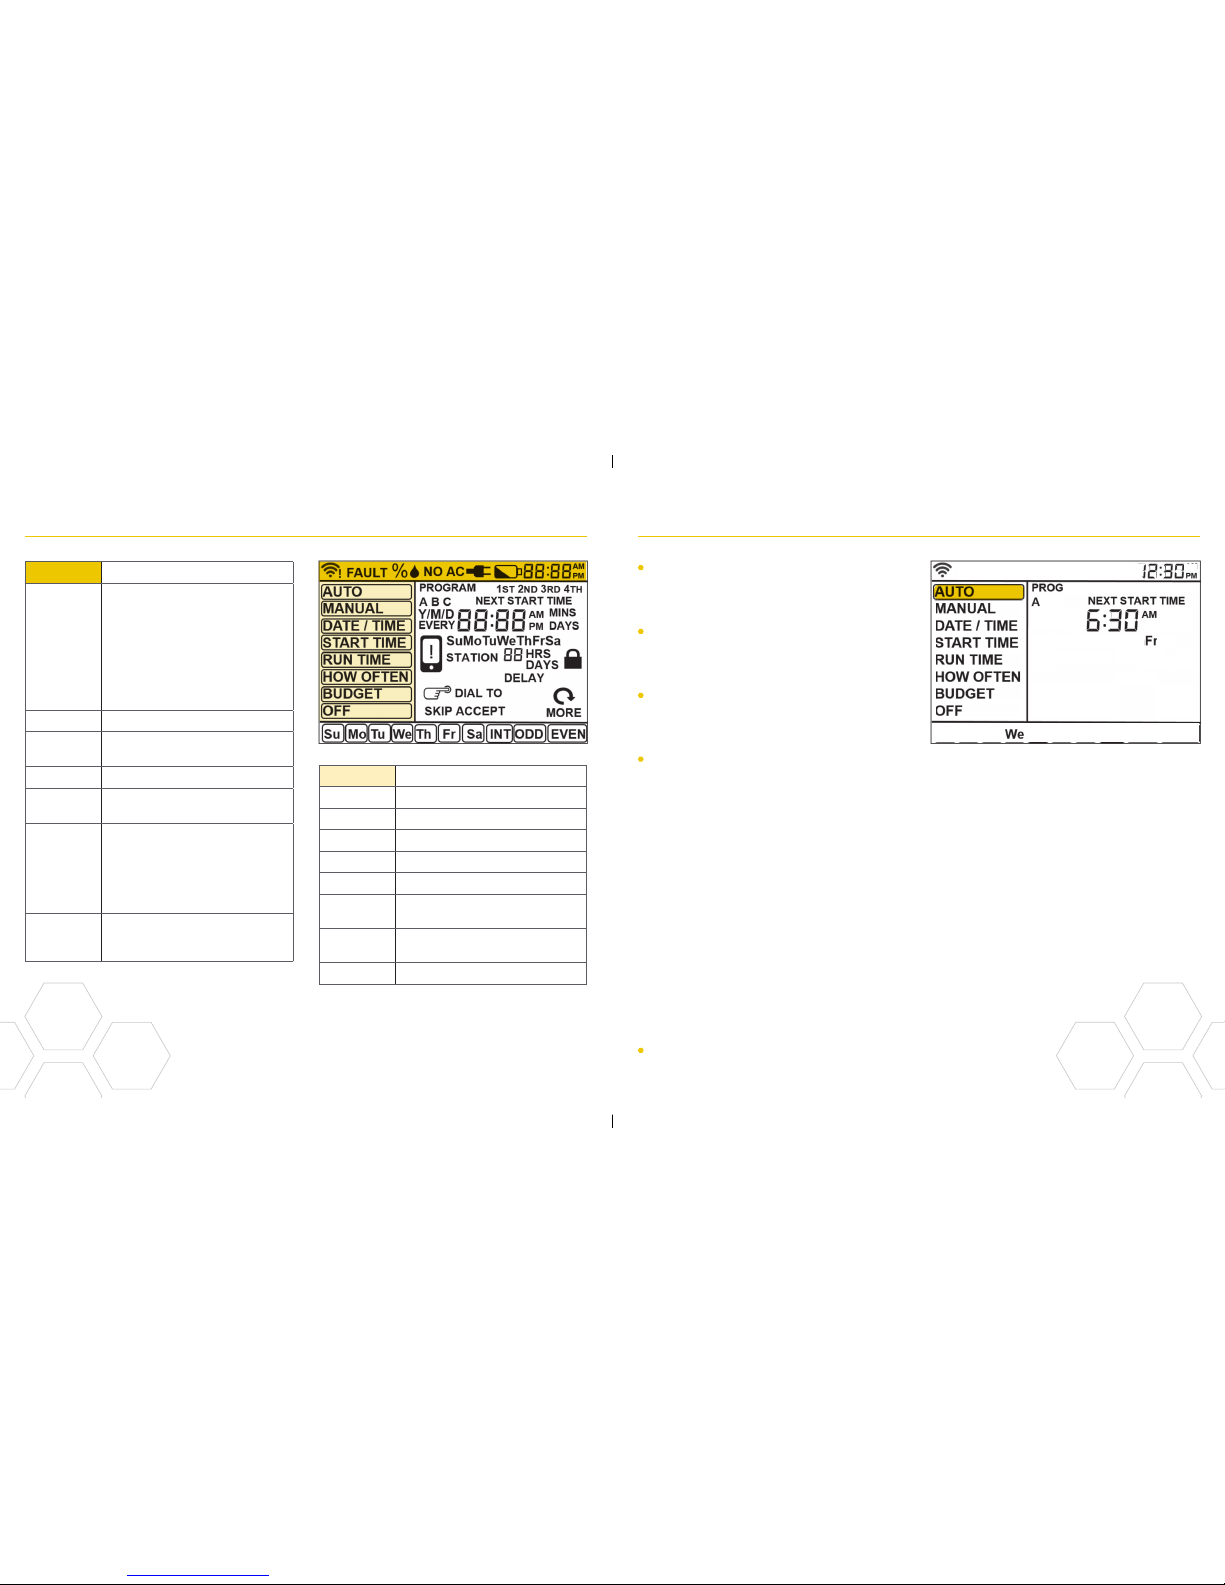
The A, B, C and Smart programs provide
the flexibility to set up and run different
programs for plants with different watering
needs. For example: you could set your lawn
zones to run on program A, your flowerbeds
to run on program B and your garden to run
on program C. Or, you can set up your zones
to use smart watering and the timer will use
local weather and on-site information to
automatically set a watering schedule for you.
The PROG ABC button toggles between
programs when setting up or modifying start
times, run times, how long and budget.
Press PROG ABC to turn on or off
programs that have been set-up. A, B, C or
Smart will illuminate to show programs that
are active and will water.
Note: To water in smart mode only, the
Phone icon is the only program that should
be showing in the LCD.
Note: If you do not see the program letter
(A, B, C or the phone) in the LCD, that
program will not water. Press PROG ABC
until you see the program(s) that you wish
to water.
The RAIN DELAY button can be used to
turn off all watering for a duration of 1 to
32 days.
Press RAIN DELAY repeatedly, or turn the
dial after pressing rain delay once, until the
desired number of days is showing in the
LCD.
To cancel a rain delay, press CLEAR.
Page 9
17
Programming the Timer–AUTO and OFF
16
Timer LCD
Main Menu Function
AUTO Set program is running
MANUAL To water stations manually
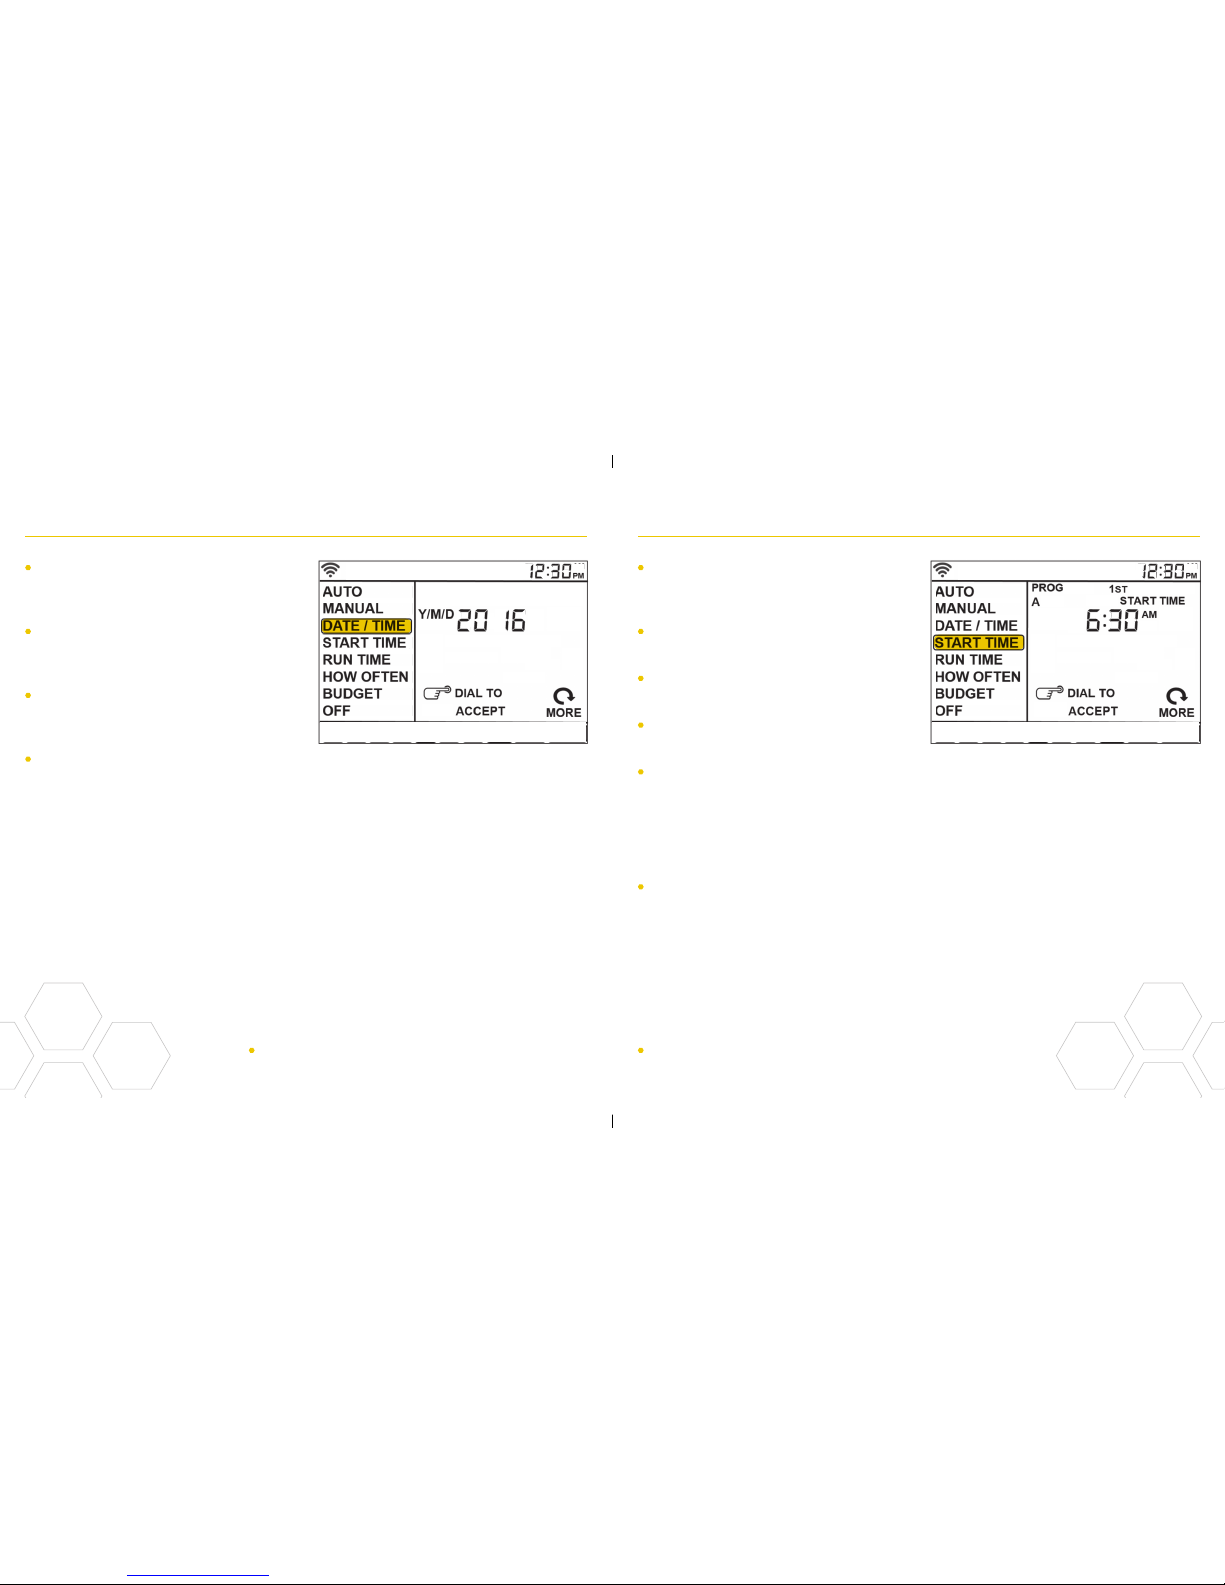
DATE/TIME Set clock time, Year, Month, and Day
START TIME Set time to begin watering
RUN TIME Set watering duration for each station
HOW
OFTEN
Set frequency of watering days
BUDGET
Adjust overall watering as a
percentage
OFF Turn all stations/functions off
Status Bar Function
WIFI
Solid–shows signal strength of wifi
and indicates that it is connected.
Graduated Blinking–indicates the
timer is in pairing mode.
Blinking–it is not connected to wifi.
Solid, with an exclamation point–
communicating with wifi, but not
communicating with Orbit’s servers.
FAU LT Indicates a short in a zone
%
Indicates that water budgeting has
been adjusted
RAIN DROP Indicates a zone is watering
NO AC
There is no AC power getting to the
timer
BATTERY
Indicates a low battery. The battery
only functions to keep the time and
date in the event of power loss. Your
program is stored in non-volatile
memory and will not be lost if your
timer loses power.
CURRENT
TIME
If connected to wifi, this is set
automatically. Or it can be set
manually in Date/Time.
Note: Programming for each of the features covered
here can be accomplished at the timer or with the app.
The timer should be in AUTO during the
irrigation season and OFF in the winter
months or the non-irrigation months.
Turn the dial to the AUTO position and
press the dial or just leave it there to keep
it in AUTO.
If the dial selection is left in any position
other than OFF, it will revert back to
AUTO after approximately 20 seconds.
To turn your timer OFF, turn the dial to
OFF and press the dial or just leave it in
the OFF position.
Page 10
18 19
Programming the Timer–DATE/TIME Programming the Timer–START TIME
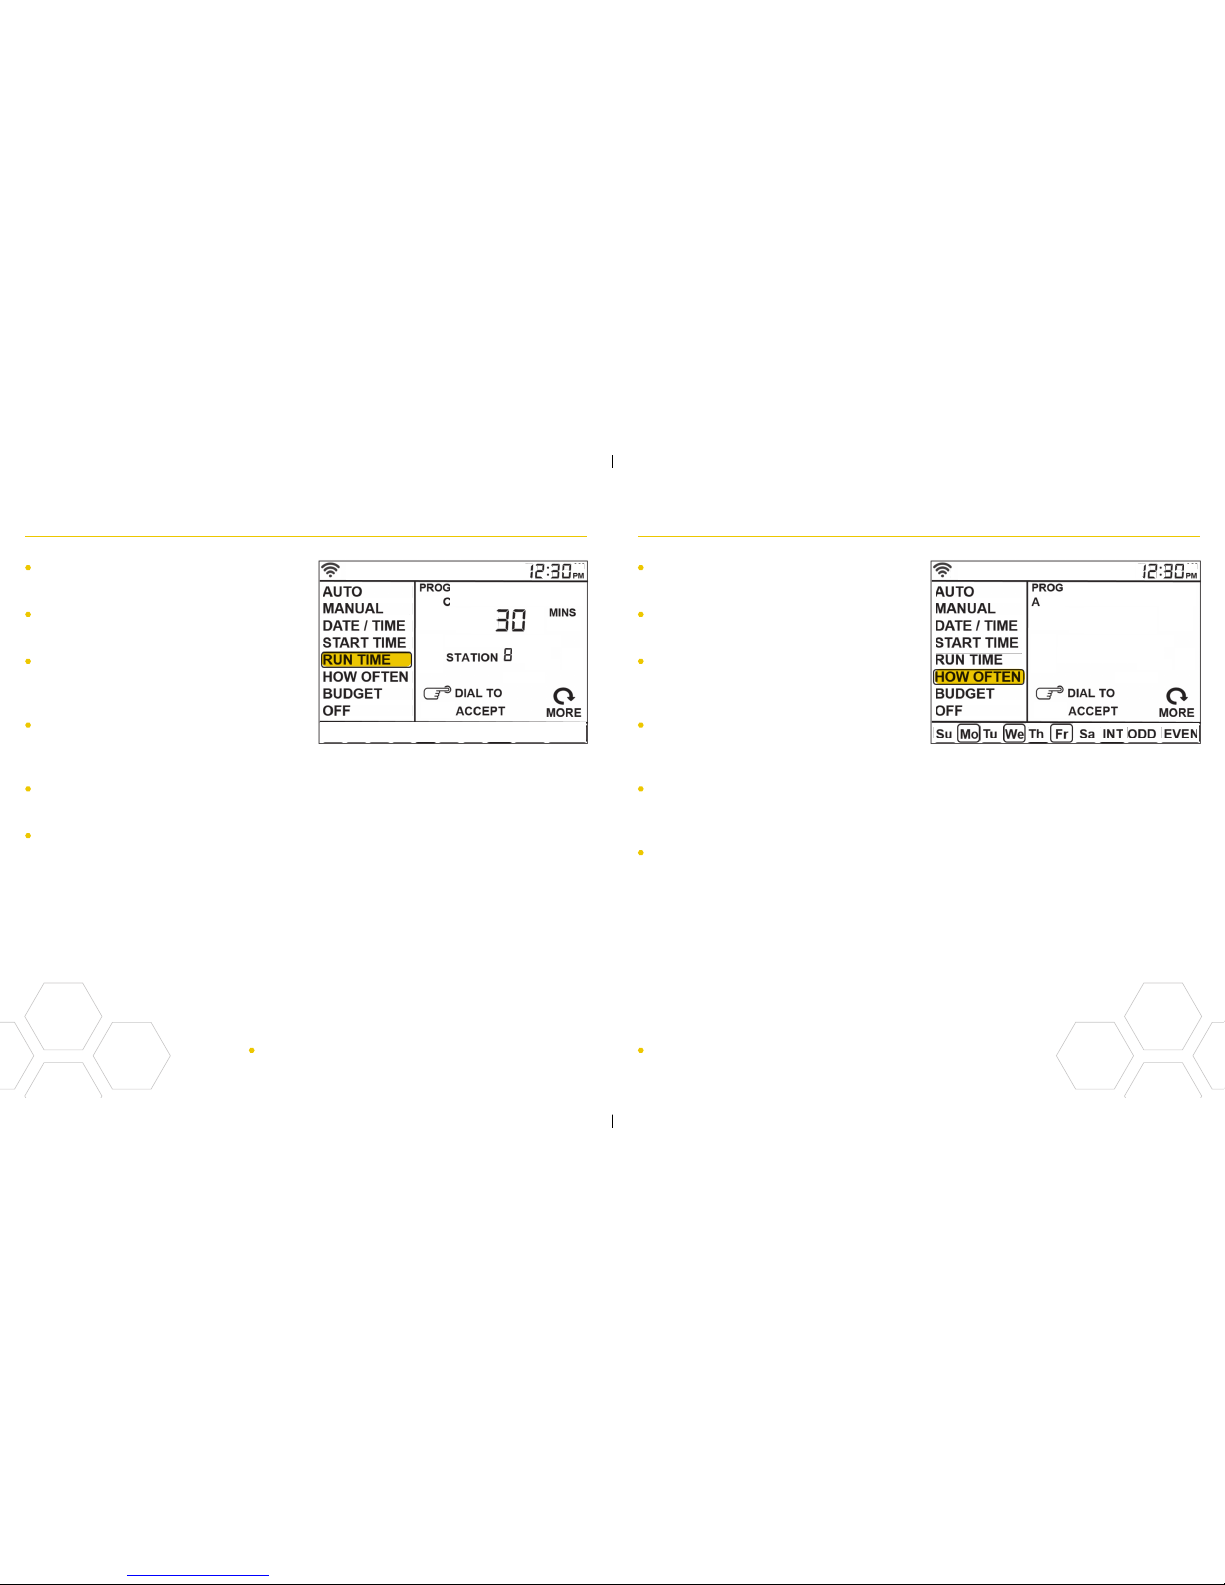
This is the time that the first zone will
begin watering. Only one start time is
needed to run each station in the program.
Turn the dial until the selection box is on
START TIME and press the dial.
Turn the dial to the desired start hour and
press the dial to confirm the selection.
Turn the dial to the desired start minute
and press the dial to confirm the selection.
Note: only one start time is needed to run
all of your zones and that start time will
show up as 1st. If additional start times are
needed, repeat this process. Additional
start times are helpful to avoid run off and
allow time for the soil to absorb the water.
Press PROG ABC to set up start times for
additional programs.
If you are connected to wifi, the time
and date will automatically be sent to the
sprinkler timer.
To set the date and time manually, turn the
dial until the selection box is on DATE/
TIME and press the dial.
Set the date by turning the dial until the
correct year, month and day are shown and
press the dial to confirm each selection.
When setting the time, press the dial when
the right time is set. Be careful to make
sure that the am/pm selection is correct.
Note: Programming for each of the features covered
here can be accomplished at the timer or with the app.
Note: Programming for each of the features covered
here can be accomplished at the timer or with the app.
Page 11
20 21
Programming the Timer–RUN TIME Programming the Timer–HOW OFTEN
This will determine HOW OFTEN (what
days or interval) the timer will water.
Turn the dial until the selection box is on
HOW OFTEN and press the dial.
Rotate the dial until the desired day of the
week or Odd/Even or Int is flashing and
press the dial.
If days of the week are chosen, repeat this
process until all of the desired watering
days have a box around them.
If INT (interval) is chosen, rotate the dial
until the desired number of days between
waterings is showing.
If you are setting up additional programs, A
B or C, press the PROG ABC button until
the program is showing in the LCD and
repeat this process.
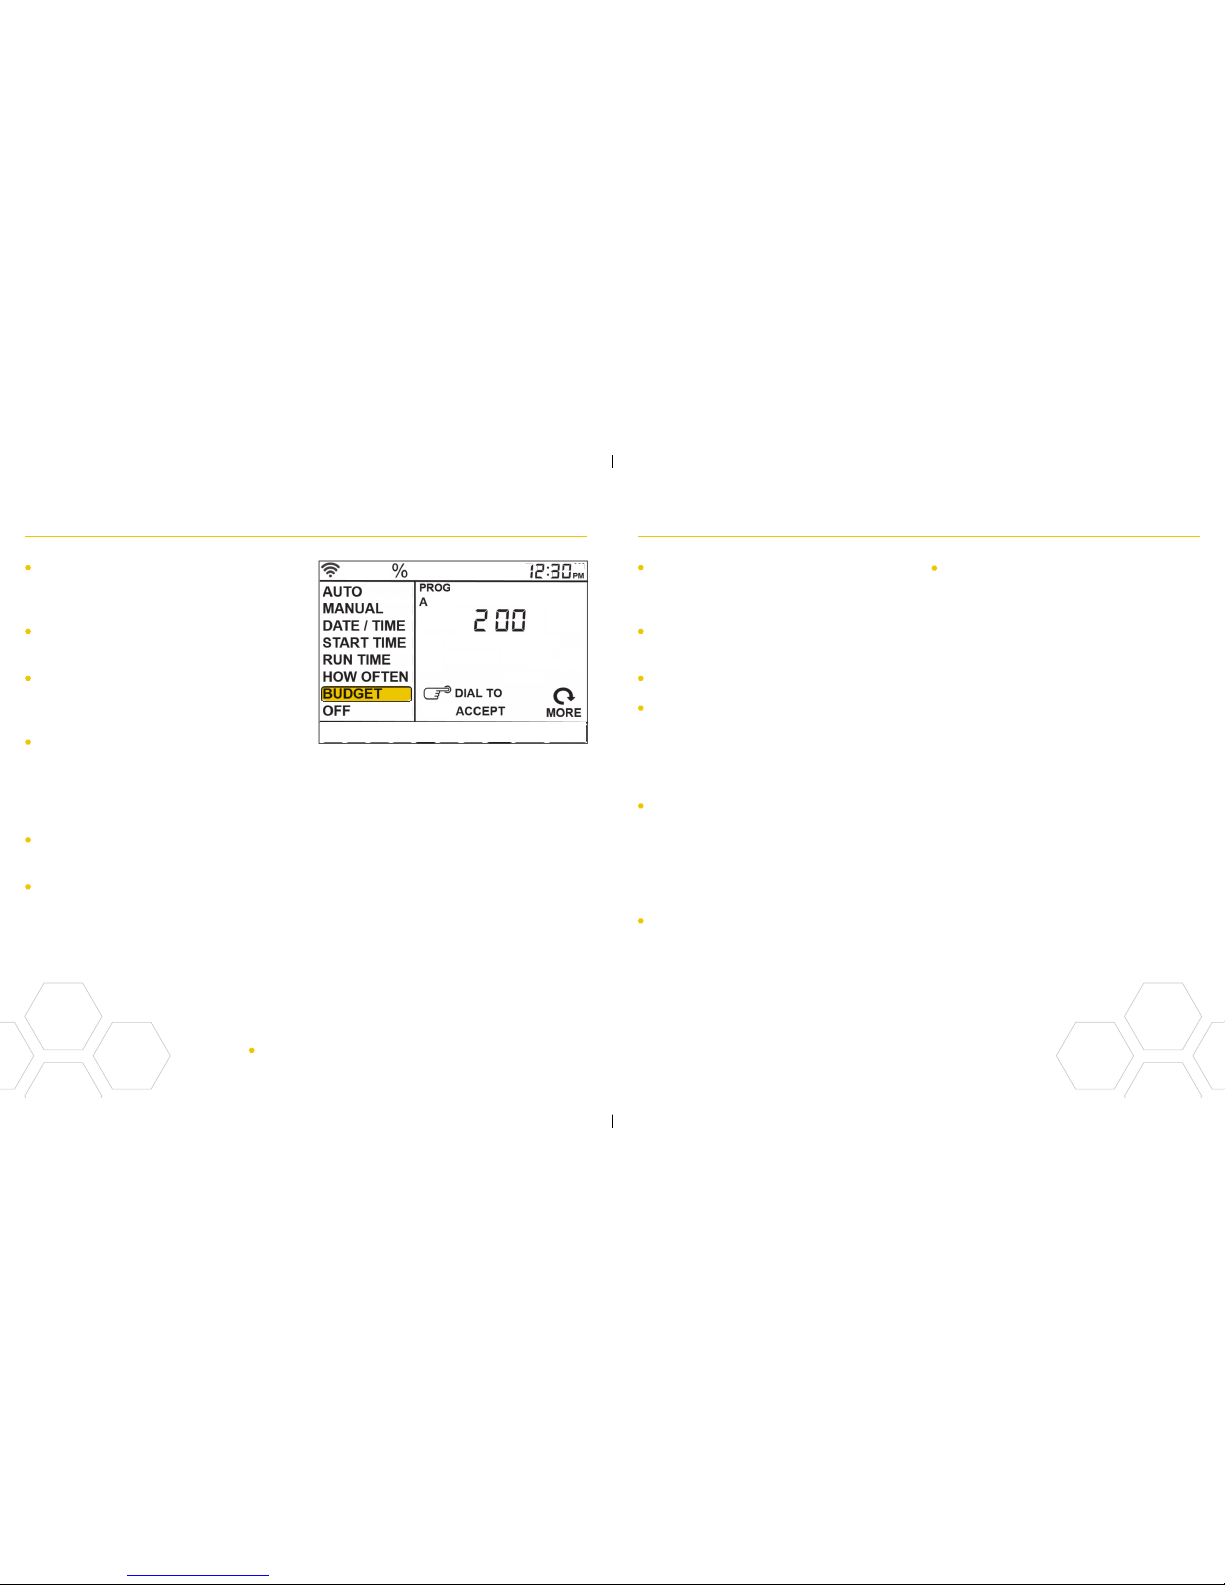
This is where you will set up how long
each zone will run
Turn the dial until the selection box is on
RUN TIME and press the dial.
The station number will flash–turn the
dial until the desired zone is flashing and
press the dial.
The duration for that zone will flash–turn
the dial until the desired duration is
showing and press the dial.
Repeat this process for each zone you
wish to set up.
If you wish to set-up zones in different
programs, A B or C, press the PROG
ABC button until the program is
showing in the LCD.
Note: Programming for each of the features covered
here can be accomplished at the timer or with the app.
Note: Programming for each of the features covered
here can be accomplished at the timer or with the app.
Page 12
22 23
Programming the Timer–BUDGET Manual Operation
Budget makes it easy to change all of your
run times without having to change them
one by one.
Turn the dial until the selection box is on
BUDGET and press the dial.
Adjusting budget will adjust all of the run
times in a program by the percentage
chosen.
Example: If you have zones set up to water
for 10 minutes and you adjust your budget
from 100% to 150%, those same zones
will water for 15 minutes without having to
change each run time.
Budget is an easy way to adjust all zones
for seasonal changes.
If you are setting up additional programs, A
B or C, press the PROG ABC button until
the program is showing in the LCD and
repeat this process.
Manual is used to test zones or run an
extra cycle for a zone, a program or for all
zones.
Turn the dial until the selection box is on
MANUAL and press the dial.
ALL will be displayed in the LCD.
To water all zones–
• Press the dial while ALL is displayed
and it will ask for a duration.
• Rotate the dial to the desired duration.
• Press the dial to begin watering.
To water a specific program-A, B or C–
• When ALL is displayed, rotate the dial
until the program you wish to water is
showing.
• Press the dial to begin watering the
specified program.
To water a specific zone–
• When ALL is displayed, rotate the dial
past the A, B, C programs until Station
and a number appear and press the dial.
• Rotate the dial to the desired zone and
press the dial to enter a duration.
• Rotate the dial to the desired duration
and press the dial to begin watering.
Note: Programming for each of the features covered
here can be accomplished at the timer or with the app.
Note: you can program more than one
specific zone using this process. Repeat
the steps for zone selection and duration
to water additional zones.
Page 13

Help
1-800-488-6156 or 1-801-299-5555
www.orbitonline.com
bhyve.orbitonline.com
Before returning this sprinkler timer
to the store, contact Orbit® Technical
Service at: 1-800-488-6156, 1-801-299-5555
Remember, you can set your timer up with
the app. But, if you don’t have wifi or just
want to make an adjustment while you are
outside, you can do it at the timer. Timer
changes will be reflected in the app, and
app changes will be reflected at the timer.
For more detailed instructions or
troubleshooting information, visit
bhyve.orbitonline.com
Also, the app has help screens and
video to assist you with wifi connections,
programming, smart watering and other
general questions you may have.
If the app and the website don’t have what
you’re looking for, please call our technical
support line.
 Loading...