

Page 1
67795-24 rA
sellado.
Advertencia: NO use aditivos para tubos en las roscas; use cinta de
tubería y el cable de control del temporizador.
Compruebe la presión de todas las tuberías de agua antes de cubrir la
regulador de presión en la tubería del regador principal.
Si la presión estática del agua sobrepasa los 80 PSI, se debe instalar un
Revise los códigos locales para conocer los requisitos de instalación.
Para uso en exteriores con agua fría solamente.
www.orbitonline.com
1-800-488-6156
North Salt Lake, UT 84054
Orbit
Irrigation Products, Inc.
®
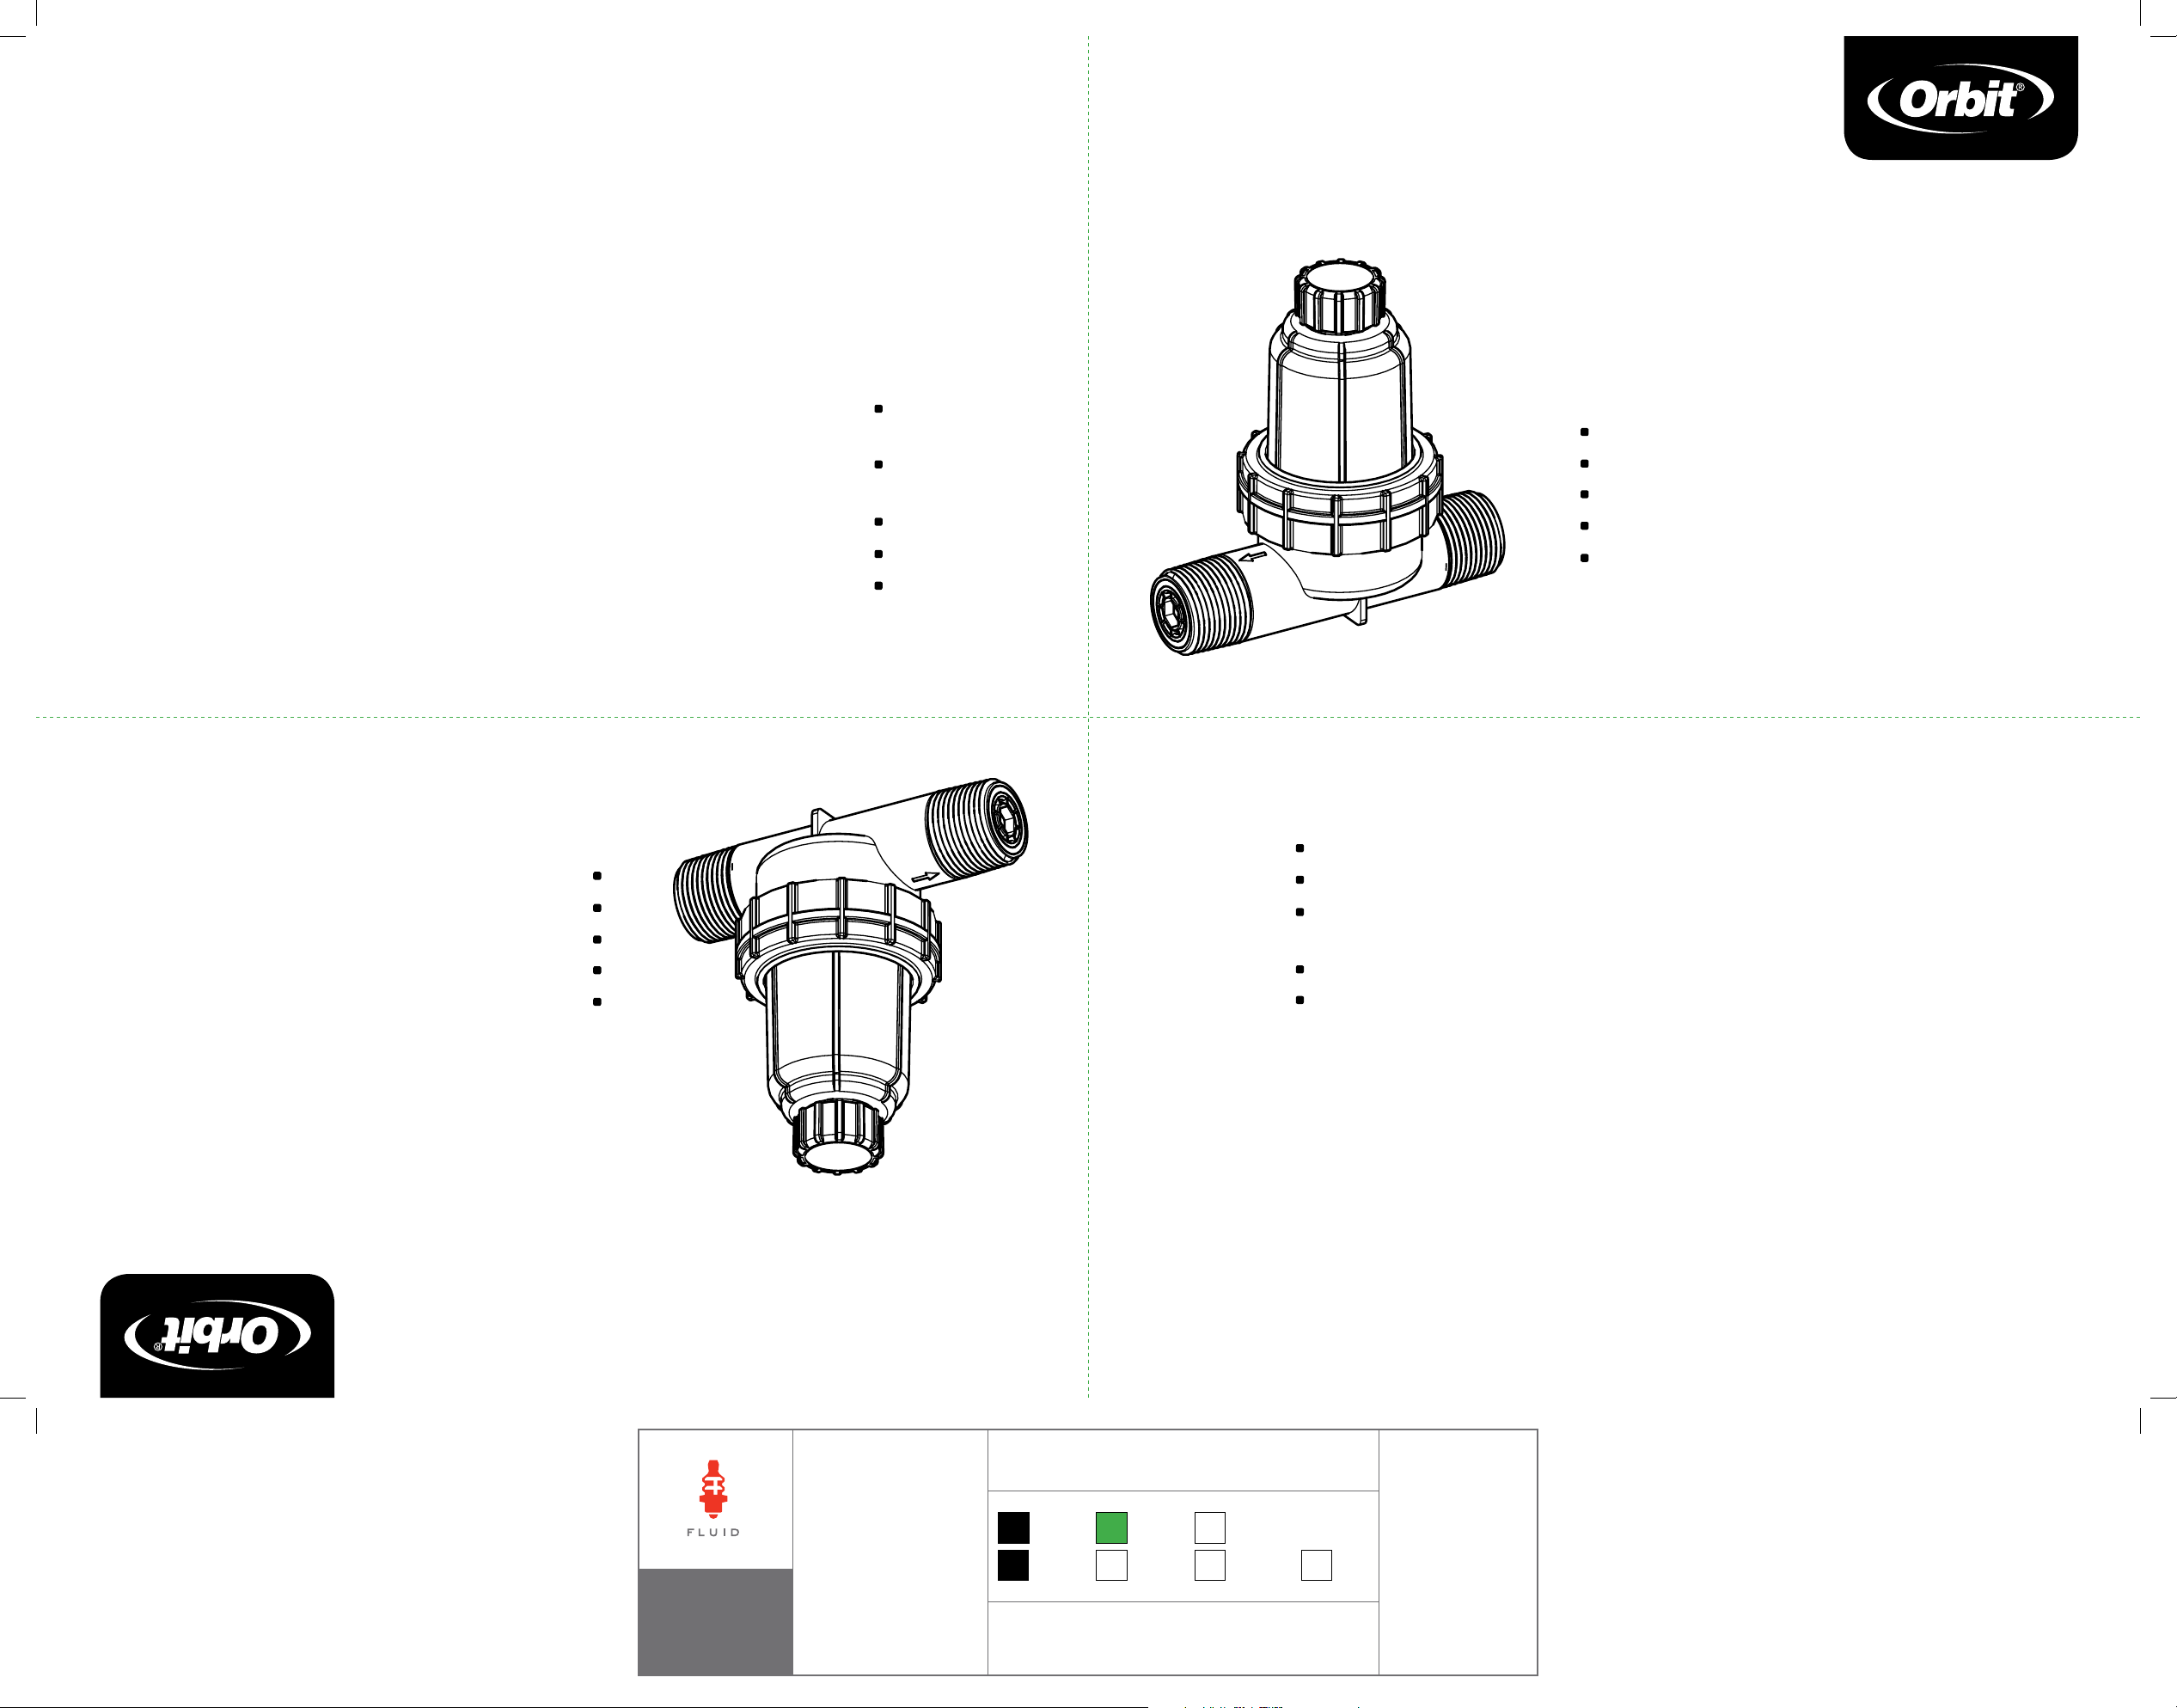
2-IN-1 DrIp FIlter/
pressure regulator
Instructions
Congratulations on your purchase of the Orbit® 2-in-1 Filter
Pressure Regulator. This revolutionary product allows you
to convert your 3/4" female threaded inline or Anti-Siphon
irrigation valve into a low pressure drip valve.
Features:
200 Mesh (removable) filter
30 PSI pressure regulator
Flush Port for easy cleaning
¾" NPT Inlet x 1" NPT Outlet
½" Drip tubing adapter (fits .690 to .710 OD Drip Tubing)
Pautas importantes
Model 67795
Modelo 67795
Important Guidelines
tuberías para goteo de diámetro exterior de 0,690 a 0,710)
Adaptador para tubería de goteo de 1/2” (se adapta a
Entrada NPT de 3/4" x salida NPT de 1"
Puerto de descarga para una limpieza fácil
Regulador de presión de 30 PSI
Filtro (desmontable) de malla 200
Características:
hembra de 3/4" en una válvula de goteo de baja presión.
convertir su válvula de riego antisifón o en línea roscada
. Este producto revolucionario le permite
®
filtro 2 en 1 Orbit
Felicitaciones por la compra del regulador de presión de
For outdoor use with cold water only.
Check local codes for installation requirements.
If static water pressure exceeds 80 PSI, a pressure regulator should be
installed on the main sprinkler line.
Pressure test all water lines before covering pipe and timer control wire.
Warning: DO NOT use pipe dope on threads, use thread seal tape.
p 801 295 9820
f 801 951 5815
www.fluid-studio.net
1065 South 500 West
Bountiful, Utah 84010
proof no: 8
date: 11.22.10
des: MZ
client: Orbit
sku: 67795
upc: N/A
file name: 67795-24 rA.indd
software: InDesign CS5
Instrucciones
y FIltro De goteo 2 eN 1
regulaDor De presIóN
dimensions:
flat: w: 11" h: 17"
finished: w 11" d: " h 17"
colors
fold lie
Registration
K
additional instructions:
· LB 600686
·
·
non printing
PMS
????
Orbit® Irrigation Products, Inc.
North Salt Lake, UT 84054
1-800-488-6156
www.orbitonline.com
Printers are responsible for
meeting print production
requirements. Any changes
must be approved by the
client and Fluid Studio.
color
non printing
PMS
????
PMS
????
printed piece must meet
designated specifications
on this form.
© 2010 Fluid Studio. This
work is the property of Fluid
Studio, and cannot be used,
reproduced or distributed
in any way without their
express permission.
67795-24 rA
Page 2
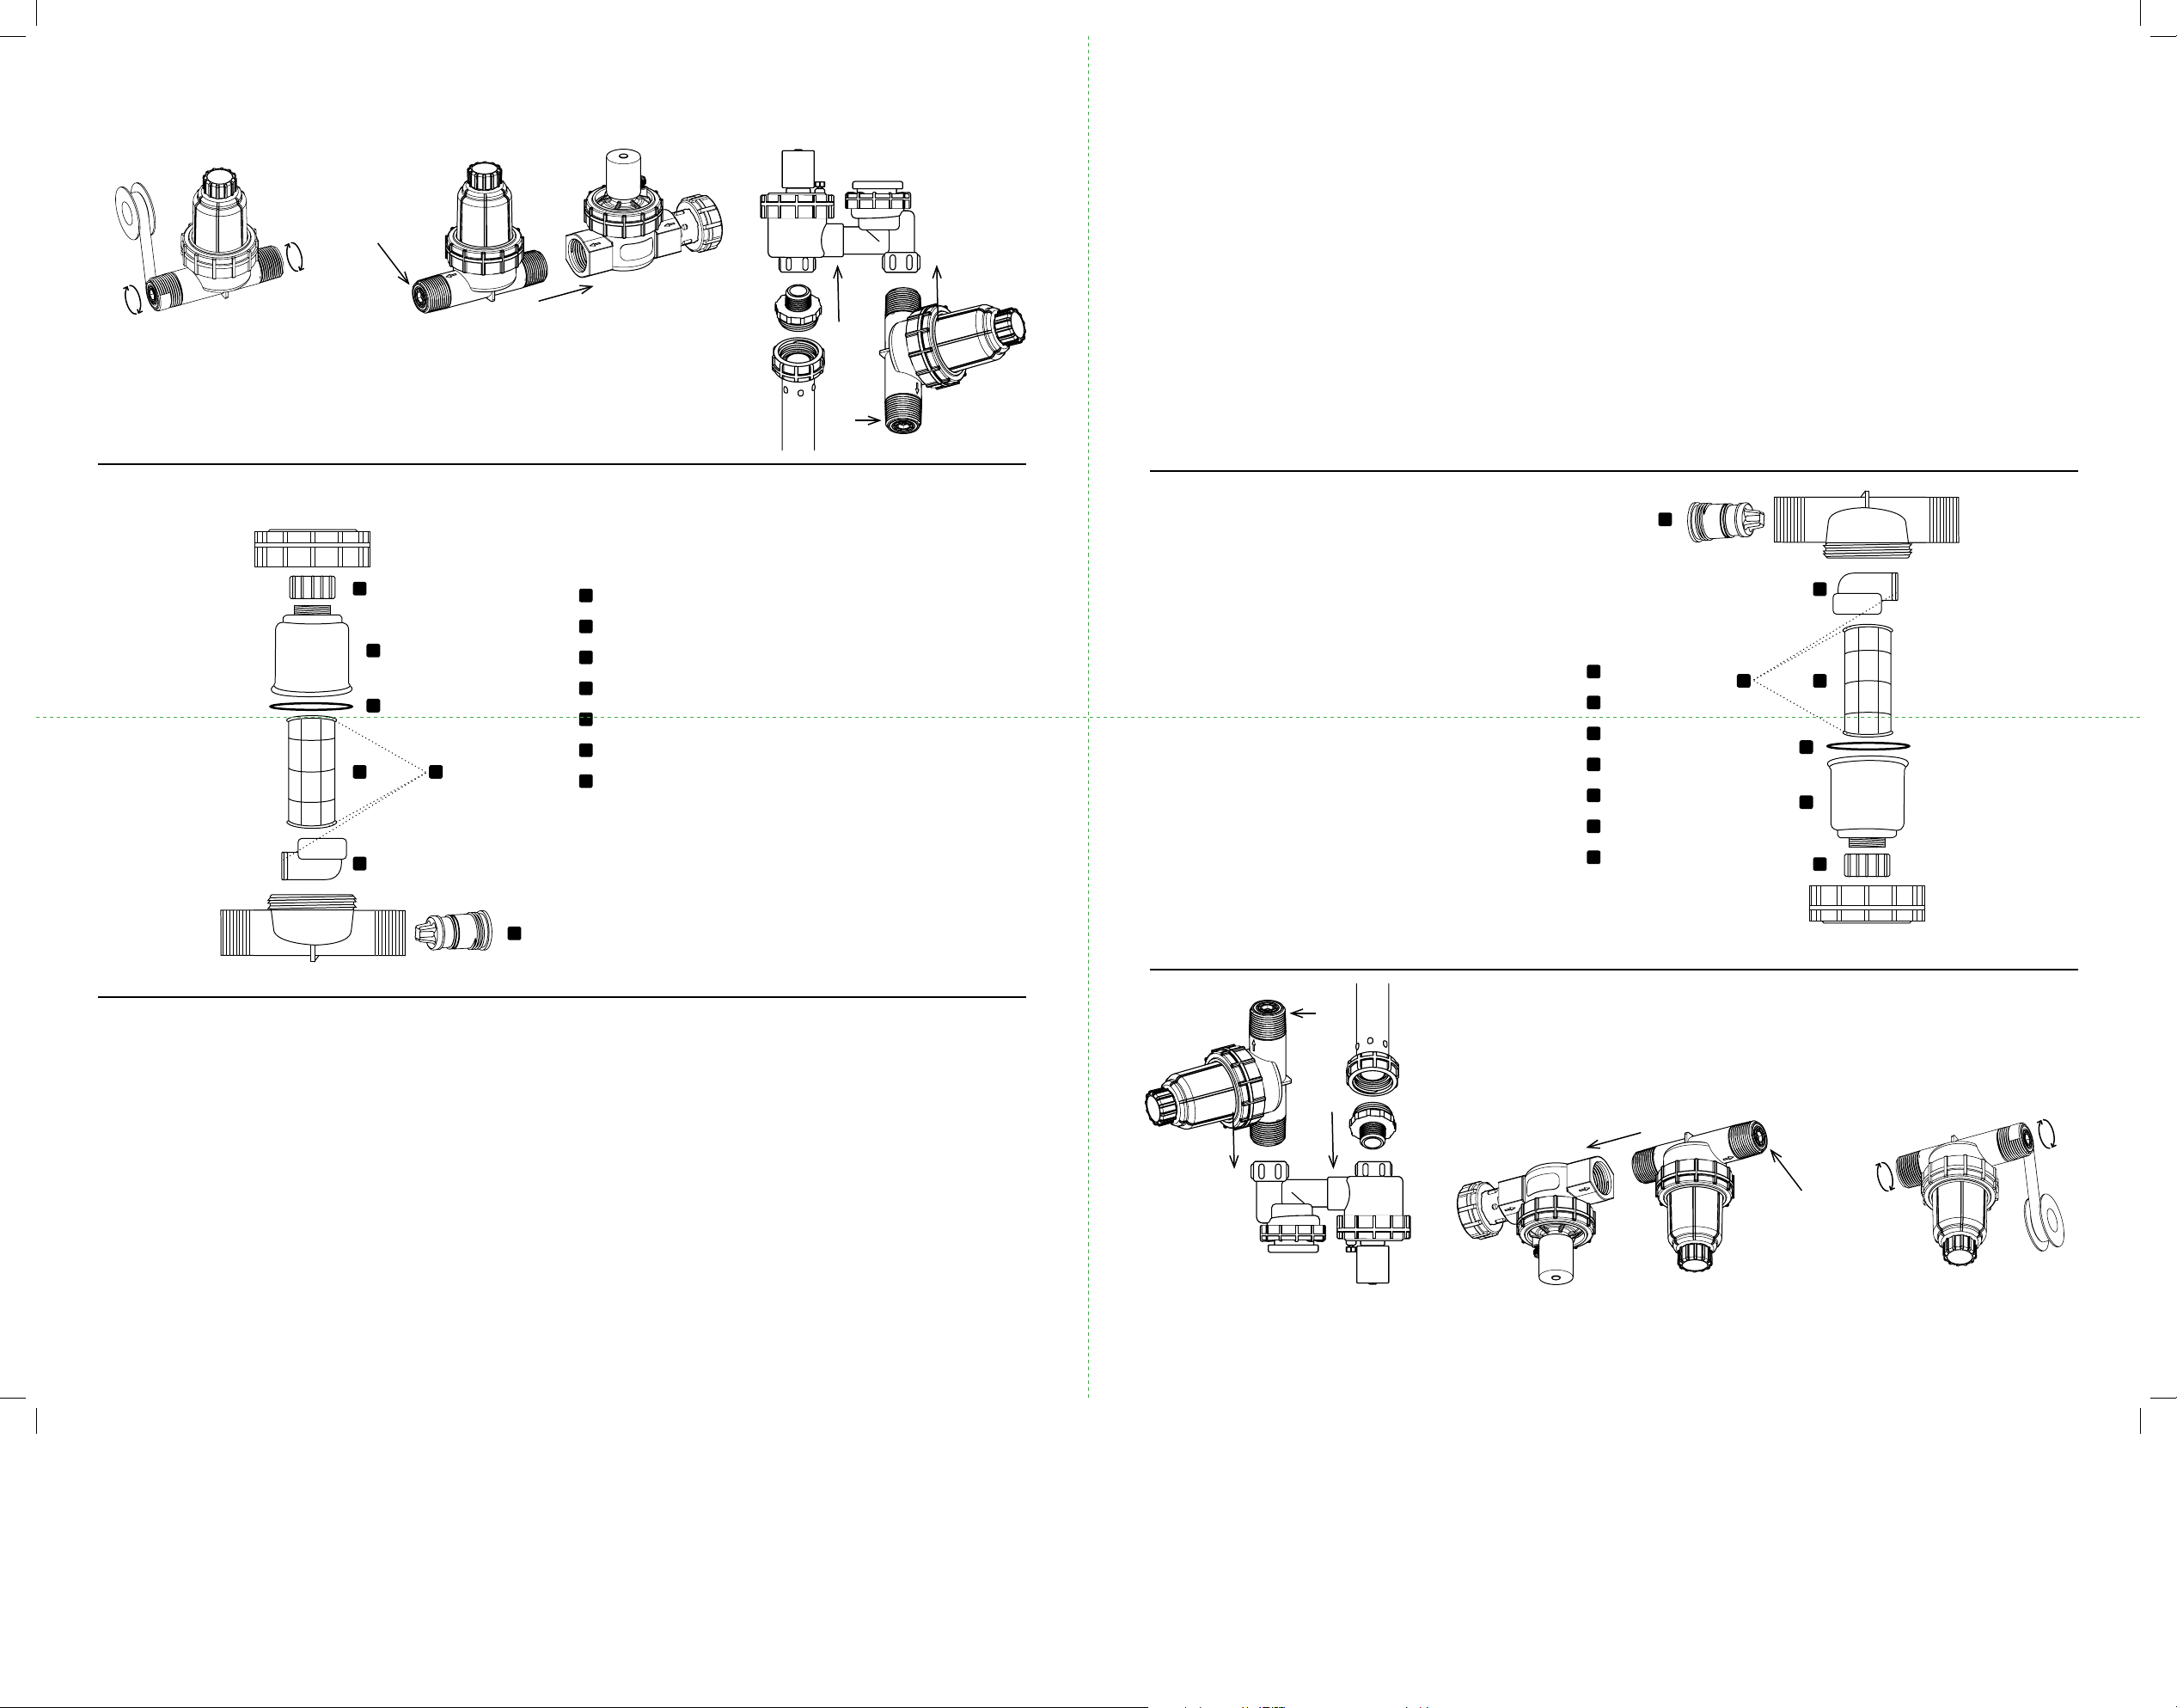
Installation Instructions
anti-siphon
valve
el anillo de la carcasa con la mano.
limpia. Asegúrese de que todas las juntas tóricas estén en su lugar. Vuelva a poner la carcasa y apriete
carcasa del filtro desenroscando el anillo de la carcasa. Retire suavemente el filtro y enjuague con agua
Elimine la suciedad de menor tamaño del filtro. Con el temporizador en la posición OFF, retire la
Step 1: Put 5 complete
turns of tape around the
threads of each end of the
Filter Pressure Regulator.
pressure
regulator
inline valve
Step 2: Thread the Filter Pressure Regulator
into the valve until snug. Important: ensure
that the water flow arrow and pressure
regulator point away from the valve and
towards the sprinkler pipe.
Parts Listing
A
B
C
D
F
E
A
Flush Cap
B
Filter Housing
C
Filter Housing O-Ring
D
Filter Body
E
Filter O-Rings
F
Filter Receiver
G
Pressure Regulator Assembly
pressure
regulator
Cada año
de las manecillas del reloj para cerrar la válvula y vuelva a poner la tapa del rebosadero.
manualmente la válvula y deje que el agua corra por 30 segundos. Gire la perilla de purga en el sentido
la carcasa del filtro. Gire la perilla de purga en sentido contrario a las manecillas del reloj para abrir
la posición OFF. A continuación, saque la tapa del rebosadero y conecte una manguera para jardín a
según la condición del agua). Antes de descargar, asegúrese de que el temporizador se encuentre en
Use el puerto de descarga para eliminar la suciedad de gran tamaño del filtro (regule la frecuencia
Una vez al mes
Mantenimiento
G
F
Conjunto del regulador de presión
G
Receptor del filtro
F
Juntas tóricas del filtro
E
Cuerpo del filtro
D
Junta tórica de la carcasa del filtro
C
Carcasa del filtro
B
Tapa del rebosadero
A
E
D
C
B
A
G
Maintenance
Monthly
Use the flush port to clean large debris from the filter (adjust frequency based on water
conditions). Before flushing ensure that the timer is in the OFF position. Next, remove the flush
cap and attach a garden hose to the filter housing. Rotate the bleed screw counter-clockwise to
manually open the valve and let the water run for 30 seconds. Turn the bleed screw clockwise to
close the valve and replace the flush cap.
Annually
Removing fine debris from the filter. With your timer in the OFF position, remove the filter
housing by unscrewing the housing ring. Gently remove the filter and flush with clean water.
Ensuring that all four o-rings are in place. Replace housing and hand tighten the housing ring.
de presión
Regulador
antisifón
Válvula
línea
Válvula en
Listado de piezas
válvula, sino mas bien hacia la tubería del regador.
agua y el regulador de presión no apunten hacia la
Asegúrese de que la flecha que indica el flujo de
la válvula hasta lograr un ajuste ceñido. Importante:
Paso 2: Enrosque el regulador de presión de filtro en
de presión
Regulador
Instrucciones de instalación
de presión de filtro.
cada extremo del regulador
alrededor de las roscas de
completas de cinta
Paso 1: Dé 5 vueltas
 Loading...