


SP600
Spectrophotometer
Instruction Manual


Safety precautions
CAUTION
Reagents are formulated exclusively for chemical analysis and must not be used for
any other purpose. Reagents must not get into the hands of children. Some of the
reagents contain substances which are not entirely harmless environmentally. Be
aware of the ingredients and take proper care when disposing of the test solution.
CAUTION
Please read this instruction manual before unpacking, setting up or using the
photometer. Please read the method description completely before performing
the test. Be aware of the risks of using the required reagents by reading the MSDS
(Material Safety Data Sheets). Failure could result in serious injury to the operator or
damage to the instrument.
MSDS:
www.orbeco.com
SP600 Spectrophotometer_Revision 1 01/2008
SP600 Spectrophotometer 01/2008
1

2
SP600 Spectrophotometer 01/2008
Table of contents
Part 1 Methods
1.1 Table of Methods .................................................................................................8
Acid demand to pH 4.3 ....................................................................................................14
Alkalinity-p (p-value) ........................................................................................................16
Alkalinity-total (Alkalinity-m, m-Value) ..............................................................................18
Aluminum with Tablets ....................................................................................................20
Aluminum (Powder Pack) ................................................................................................. 22
Ammonium with Tablets ..................................................................................................24
Ammonium (Powder Pack) ...............................................................................................26
Ammonium LR .................................................................................................................28
Ammonium HR ................................................................................................................30
Arsenic ............................................................................................................................32
Boron ..............................................................................................................................36
Bromine ...............................................................................................................38, 40, 42
Cadmium .........................................................................................................................44
Chloride with Tablets .......................................................................................................46
Chloride ...........................................................................................................................48
Chlorine ...........................................................................................................................50
Chlorine with Tablet
differentiated determination (free, combined, total) .........................................52, 55, 58
free Chlorine ....................................................................................................53, 56, 60
total Chlorine ...................................................................................................54, 57, 61
Chlorine with Liquid Reagent
differentiated determination (free, combined, total) .....................................................62
free Chlorine ................................................................................................................64
total Chlorine ...............................................................................................................65
Chlorine (Powder Pack)
differentiated determination (free, combined, total) .....................................................66
free Chlorine ................................................................................................................68
total Chlorine ...............................................................................................................69
Chlorine HR (Kl) ...............................................................................................................70
Chlorine dioxide, in absence of Chlorine ..........................................................................72
Chlorine dioxide ...............................................................................................................74
in presence of Chlorine ................................................................................................76
in absence of Chlorine .................................................................................................79
Chromium (Powder Pack) .................................................................................................80
differentiated determination ..................................................................................82, 86
Chromium (VI) .......................................................................................................84, 88
total (Cr(III) + Cr(VI)) ............................................................................................... 85, 89
....................................................................................................7

3
SP600 Spectrophotometer 01/2008
COD LR ............................................................................................................................90
COD MR ..........................................................................................................................92
COD HR ...........................................................................................................................94
Copper with tablet ...........................................................................................................96
differentiated determination (free, combined, total) .............................................98, 102
free Copper .......................................................................................................100, 104
total Copper ......................................................................................................101, 105
Copper PP ......................................................................................................................106
Cyanide .................................................................................................................108, 110
Cyanuric acid ................................................................................................................. 112
DEHA T ..........................................................................................................................114
DEHA PP ........................................................................................................................116
Fluoride .........................................................................................................................118
Formaldehyde ................................................................................................ 120, 122, 124
Hardness, total ...............................................................................................................126
Hardness, total HR .........................................................................................................128
Hazen ............................................................................................................................130
Hydrazine ......................................................................................................................132
Hydrazine with Liquid Reagent .......................................................................................134
Hydrogen peroxide ................................................................................................136, 138
Iodine ............................................................................................................................140
Iron ................................................................................................................................142
Iron with Tablets .........................................................................................144, 146, 148
Iron (Powder Packs) ....................................................................................................150
Iron (TPTZ) (Powder Packs) ..........................................................................................152
Lead ..............................................................................................................................154
Lead, Procedure A ..................................................................................................156, 158
Lead, Procedure B .................................................................................................. 156, 159
Mangenese with Tablet ..................................................................................................160
Manganese LR (Powder Packs) .......................................................................................162
Manganese HR (Powder Packs) ......................................................................................164
Molybdate with Tablets ..................................................................................................166
Molybdate HR (Powder Packs) ........................................................................................168
Nickel ....................................................................................................................170, 172
Nitrate ...........................................................................................................................174
Nitrate LR .......................................................................................................................176
Nitrite with Tablets .........................................................................................................178
Nitrite LR (Powder Packs) ................................................................................................180
Nitrite LR ........................................................................................................................182
Nitrite HR .......................................................................................................................184

4
SP600 Spectrophotometer 01/2008
Nitrogen, total LR ...........................................................................................................186
Nitrogen, total HR ..........................................................................................................188
Nitrogen, total LR 2 ........................................................................................................190
Nitrogen, total HR 2 .......................................................................................................192
Oxygen, active ...............................................................................................................194
Ozone ............................................................................................................................196
in presence of Chlorine ......................................................................................198, 202
in absence of Chlorine .......................................................................................200, 204
pH-Value with Tablet ...................................................................................................... 206
pH-Value with Liquid Reagent ........................................................................................208
Phenol with Tablets ........................................................................................................210
Phosphate ......................................................................................................................212
Phosphate, total (Tube Test) ........................................................................................214
Phosphate, total LR (Tube Test) ................................................................................... 216
Phosphate, total HR (Tube Test) ..................................................................................218
Phosphate, ortho LR with Tablets ................................................................................220
Phosphate, ortho HR with Tablets ............................................................................... 222
Phosphate, ortho (Powder Packs) ...............................................................................224
Phosphate, ortho (Tube Test) ......................................................................................226
Phosphate, ortho (Tube Test) ......................................................................................228
Phosphate, hydrolysable (Tube Test) ............................................................................230
Potassium ......................................................................................................................232
S Abs, Spectral Absorption Coefficient ........................................................................... 234
Silica ..............................................................................................................................236
Silica LR PP .....................................................................................................................238
Silica HR PP ....................................................................................................................240
Sulfate (Powder Pack) ....................................................................................................242
Sulfide ...........................................................................................................................244
Sulfite ....................................................................................................................246, 248
Surfactants, anionic .......................................................................................................250
TOC HR .........................................................................................................................252
Turbidity ........................................................................................................................254
Urea ..............................................................................................................................256
Zinc ...............................................................................................................................258
1.2 Important notes ...........................................................................................260
1.2.1 Correct use of reagents ..................................................................................260
1.2.2 Cleaning vials and accessories for analysis ........................................................261
1.2.3 Guidelines for photometric measurements .......................................................262
1.2.4 Sample dilution teqniques ...............................................................................263
1.2.5 Correcting for volume additions ......................................................................263

5
SP600 Spectrophotometer 01/2008
Part 2 Operating manual ...........................................................................265
2.1 Operating ..................................................................................................... 266
2.1.1 Start Up ..........................................................................................................266
2.1.2 Batteries .......................................................................................................... 266
2.1.3 blank because of technical requirements
2.1.4 Cell chamber and cells .....................................................................................267
2.2 Overview of function keys .........................................................................268
2.2.1 Overview ......................................................................................................... 268
2.2.2 Displaying time and date .................................................................................268
2.2.3 User-countdown ..............................................................................................269
2.3 Operation mode ..........................................................................................270
2.3.1 Self-test ..........................................................................................................270
2.3.2 Selecting a method ..........................................................................................271
2.3.2.1 Method-Information ........................................................................................271
2.3.2.2 Chemical Species Information ..........................................................................271
2.3.3 Differentiation ................................................................................................. 272
2.3.4 Performing Zero ..............................................................................................272
2.3.5 Performing Test ...............................................................................................273
2.3.6 Ensuring reaction periods (countdown) ............................................................273
2.3.7 Changing chemical species .............................................................................. 274
2.3.8 Storing results .................................................................................................274
2.3.9 Printing results .................................................................................................275
2.3.10 Perform additional measurements ...................................................................276
2.3.11 Selecting a new method .................................................................................. 276
2.4 Photometer settings <Mode-Menu>. ......................................................... 277
2.4.1 blank because of technical requirements
2.4.2 Instrument basic settings 1 ..............................................................................278
2.4.3 Printing of stored results ..................................................................................282
2.4.4 Recall / delete stored results .............................................................................287
2.4.5 Calibration ......................................................................................................291
2.4.6 Lab function .................................................................................................... 296
2.4.7 User operations ...............................................................................................304
2.4.8 Special functions .............................................................................................314
2.4.9 Instrument basic settings 2 ..............................................................................316
2.4.10 Instrument special functions /service ................................................................ 317

6
SP600 Spectrophotometer 01/2008
2.5 Data transfer ................................................................................................318
2.5.1 Connection to a printer ...................................................................................319
2.5.2 Data transfer to a personal computer (PC) .......................................................319
2.5.3 Internet-Updates .............................................................................................320
Part 3 Enclosure ................................................................................................321
3.1 Unpacking ......................................................................................................321
3.2 Delivery content .............................................................................................321
3.3 blank because of technical requirements
3.4 Technical data .................................................................................................322
3.5 Abbreviations .................................................................................................323
3.6 Troubleshooting ...............................................................................................324
3.6.1 Operating messages in the display / error display .............................................324
3.6.2 General problems ............................................................................................ 326
3.6.3 Service / Maintenance ......................................................................................327
3.6.3.1 Handling & Cleaning .......................................................................................327
3.6.3.2 Changing the light source ...............................................................................327
3.6.3.3 blank because of technical requirements
3.6.3.4 Changing the batteries .................................................................................... 329
3.7 Declaration of CE-Conformity ..........................................................................330

7
SP600 Spectrophotometer 01/2008
Part 1
Methods

8
SP600 Spectrophotometer 01/2008
Part 1 Methods
1.1 Table of Methods
No. Analysis Reagent Range Displayed asMethod
[nm]
20 Acid demand
tablet 0.1-4 mmol/l Acid /Indicator
1,2, 5
615 14
to pH 4.3 T
35 Alkalinity-p T tablet 5-300 mg/l
CaCO
30
Alkalinity, total T
tablet 5-200 mg/l
CaCO
Acid/Indicator
3
Acid/Indicator
3
40 Aluminum T tablet 0.01-0.3 mg/l Al Eriochrome
Cyanine R
50 Aluminum PP
powder pack
0.01-0.25 mg/l Al Eriochrome
Cyanine R
60 Ammonium T tablet 0.02-1 mg/l N
62
Ammonium PP
65
Ammonium LR TT
66
Ammonium HR TT
68 Arsenic
powder pack
0.01-0.8 mg/l N Salicylate
tube test 0.02-2.5 mg/l N Salicylate
tube test 1-50 mg/l N Salicylate
see test
0.02-0.6 mg/l As
instructions
Indophenol blue
Silverdiethyldithiocarbamate
85 Boron T tablet 0.1-2 mg/l B Azomethine
78 Bromine 10 T tablet 0.1-3 mg/l Br
79 Bromine 50 T tablet 0.05-1 mg/l Br
80 Bromine T tablet 0.05-6.5 mg/l Br
87 Cadmium TT tube test
0.025-0.75
mg/l Cd Cadion
90 Chloride T tablet 0.5-25 mg/l Cl
91 Chloride L liquid 5-60 mg/l Cl
98
Chlorine 10 T *
99
Chlorine 50 T *
tablet 0.1-6 mg/l Cl2DPD
tablet 0.02-0.5 mg/l Cl2DPD
100 Chlorine T * tablet 0.02-3 mg/l Cl
101 Chlorine L * liquid 0.02-3 mg/l Cl
110 Chlorine PP *
105 Chlorine HR
powder pack
0.01-2 mg/l Cl2DPD
tablet 5-200 mg/l Cl
(Kl) T
119 Chlorine
tablet 0.05-1 mg/l ClO
dioxide 50 T
120 Chlorine
tablet 0.05-2.5 mg/l ClO
dioxide T
2
2
2
-
-
2
2
2
5
DPD
5
DPD
5
DPD
Silver nitrate/turbidity
Iron(III)-thiocyanate
1, 2, 3
1, 2, 3
1, 2, 3
DPD
1, 2, 3
DPD
1, 2
KI/Acid
DPD, Glycine
2
DPD, Glycine
2
1, 2, 5
551 16
1, 2, 5
615 18
2
2
2
2
2
1
535 20
535 22
2,3
676 24
655 26
655 28
655 30
507 32
3
450 36
510 38
510 40
510 42
6
525 44
450 46
4
455 48
510 50, 52
510 50, 55
510 50, 58
510 50, 62
510 50, 66
5
1,2
1, 2
470 70
510 72
510 74, 76
Page
* = free, combined, total; PP = powder pack; T = tablet;
L = liquid; TT = tube test; LR = low range; MR = middle range; HR = high range;

9
SP600 Spectrophotometer 01/2008
Part 1 Methods
1.1 Table of Methods
No. Analysis Reagent Range Displayed asMethod
[nm]
124 Chromium
powder pack
50 PP
125 Chromium PP
powder pack
130 COD LR TT tube test 0-150 mg/l O
131 COD MR TT tube test 0-1500 mg/l O
132 COD HR TT tube test 0-15 g/l O
149 Copper 50 T tablet 0.05-1 mg/l Cu Biquinoline
150 Copper T * tablet 0.5-5 mg/l Cu Biquinoline
153 Copper PP
powder pack
156 Cyanide 50 L powder +
liquid
157 Cyanide L
powder pack
+ liquid
Cyanuric acid T
160
tablet 2-160 mg/l Cys Melamine 530 112
165 DEHA T tablet +
0.005-0.5 mg/l Cr 1,5-Diphenylcarbohydrazide
0.02-2 mg/l Cr 1,5-Diphenylcarbohydrazide
Dichromate/H2SO
2
Dichromate/H2SO
2
Dichromate/H2SO
2
4
4
542 80, 82
1,2
542 80, 86
1,2
1, 2
420 90
4
1, 2
620 92
4
1, 2
620 94
4
559 96, 98
559 96, 102
0.05-5 mg/l Cu Bicinchoninate 560 106
0.005-0.2
0.01-0.5 mg/l CN Pyridine barbituric
20-500 μg/l DEHA PPST
mg/l CN Pyridine barbituric
acid
acid
1
1
3
585 108
585 110
562 114
liquid
167 DEHA PP powder +
20-500 μg/l DEHA PPST
3
562 116
liquid
170 Fluoride L liquid 0.05-1.5 mg/l F SPADNS
175 Formaldehyde 10powder +
liquid
176 Formaldehyde 50powder +
liquid
1-5 mg/l
HCHO
0.02-1 mg/l
HCHO
177 Formaldehyde TTtube test 0.1-5 mg/l
HCHO
200 Hardness,
total T
201 Hardness, total
HR T
203 Hazen 50
tablet 2-50 mg/l
CaCO
tablet 20-500 mg/l
CaCO
direct
0-500 mg/l Pt-Co Pt-Co-Scale
H2O2/Chromotropic
6
acid
H2O2/Chromotropic
6
acid
H2O2/Chromotropic
6
acid
Metallphthalein3 571 126
3
Metallphthalein3571 128
3
2
580 118
585 120
585 122
575 124
1,2
455 130
reading
205 Hydrazine P powder 0.05-0.5 mg/l N
206 Hydrazine L liquid
0.005-0.6
mg/l N2H44-(Dimethylamino)-
4-(Dimethylamino)-
2H4
benzaldehyde
benzaldehyde
3
3
455 132
455 134
Page
* = free, combined, total; PP = powder pack; T = tablet;
L = liquid; TT = tube test; LR = low range; MR = middle range; HR = high range;

10
SP600 Spectrophotometer 01/2008
Part 1 Methods
1.1 Table of Methods
No. Analysis Reagent Range Displayed asMethod
Page
[nm]
209 Hydrogen
peroxide 50 T
210 Hydrogen
peroxide T
tablet 0.01-0.5 mg/l H
tablet 0.03-1.5 mg/l H
2O2
2O2
DPD/Catalyst
DPD/Catalyst
215 Iodine T tablet 0.05-3.6 mg/l I DPD
218 Iron 10 T tablet 0.1-1 mg/l Fe PPST
219 Iron 50 T tablet 0.01-0.5 mg/l Fe PPST
220 Iron LR T tablet 0.01-1 mg/l Fe PPST
222 Iron PP
223 Iron (TPTZ) PP
powder pack
powder pack
0.1-3 mg/l Fe
1,10-Phenantroline3510
0.1-1.8 mg/l Fe TPTZ 590
232 Lead 10 liquid 0.1-5 mg/l Pb 4-(2-Pyridylazo)-
resorcin
234 Lead (A) TT tube test 0.1-5 mg/l Pb 4-(2-Pyridylazo)-
resorcin
235 Lead (B) TT tube test 0.1-5 mg/l Pb 4-(2-Pyridylazo)-
resorcin
5
510 136
5
510 138
5
3
3
3
510 140
562
142, 144
562
142, 146
562
142, 148
142, 150
142, 152
6
6
6
520 154
515
156, 158
515
156, 159
240 Manganese T tablet 0.2-4 mg/l Mn Formaldoxime 450 160
242 Manganese
LR PP
243 Manganese
HR PP
250 Molybdate T tablet 1-30 mg/l
252 Molybdate
HR PP
255 Nickel 50 L powder +
256 Nickel L powder +
265 Nitrate TT tube test 1-30 mg/l N
267 Nitrate LR TT tube test 0.5-14 mg/l N 2,6-Dimethyl-
270 Nitrite T tablet 0.01-0.5 mg/l N N-(1-Naphthyl)-
272 Nitrite PP
powder pack
+ liquid
powder pack
powder pack
liquid
liquid
powder pack
0.01-0.7 mg/l Mn PAN 558 162
0.1-18 mg/l Mn Periodate
oxidation
Thioglycolate
MoO
4
0.5-66 mg/l
MoO
4
Mercaptoacetic
acid
0.02-1 mg/l Ni Dimethylglyoxime
0.2-7 mg/l Ni Dimethylglyoxime
Chromotropic acid
2,3
phenol
ethylendiamine
2
2,3
2,3
4
525 164
366 166
420 168
443 170
443 172
410 174
340 176
545 178
2,3
0.01-0.3 mg/l N Diazotization 507 180
* = free, combined, total; PP = powder pack; T = tablet;
L = liquid; TT = tube test; LR = low range; MR = middle range; HR = high range;

11
SP600 Spectrophotometer 01/2008
Part 1 Methods
1.1 Table of Methods
No. Analysis Reagent Range Displayed asMethod
275 Nitrite LR TT tube test 0.03-0.6 mg/l N Sulfanilic acid/
Naphthylamine
276 Nitrite HR TT tube test 0.3-3 mg/l N Sulfanilic acid/
Naphthylamine
total
280 Nitrogen,
LR TT
281 Nitrogen,
HR TT
283 Nitrogen, total
LR 2 TT
284 Nitrogen, total
HR 2 TT
Oxygen, active T
290
299 Ozone
(DPD) 50
300 Ozone
(DPD) T
tube test 0.5-25 mg/l N Persulfate
digestion method
total
tube test 5-150 mg/l N Persulfate
digestion method
tube test 0.5-14 mg/l N 2,6 Dimethyl-
phenol
tube test 5-140 mg/l N 2,6 Dimethyl-
phenol
tablet 0.1-10 mg/l O2DPD 510 194
tablet 0.02-0.5 mg/l O
tablet 0.02-1 mg/l O
3
3
DPD/Glycine
DPD/Glycine
330 pH-Value T tablet 6.5-8.4 — Phenol red
331 pH-Value L liquid 6.5-8.4 — Phenol red
315 Phenol T tablet 0.1-5 mg/l
C
326 Phosphate,
tube test 0.02-1.1 mg/l P
6H5
total TT
317 Phosphate,
tube test 0.07-3 mg/l P
total LR TT
4-Aminoantipyrine 1507 210
OH
Acid persulf. digestion,
Ascorbic acid
Phosphomolybdic
acid /
Ascorbic acid
318 Phosphate,
total HR TT
tube test 1.5-20 mg/l P
Phosphomolybdic
acid/
Ascorbic acid
320 Phosphate,
ortho LR T
321 Phosphate,
ortho HR T
323 Phosphate,
tablet 0.05-4 mg/l PO
tablet 1-80 mg/l PO
powder pack
0.06-2.5 mg/l PO4Ascorbic acid
Ammonium-
4
molybdate
Vanando
4
molybdate
1
1
2,3
2,3
5
5
5
5
2
2
2
2, 3
-
2
2
ortho PP
324 Phosphate,
tube test 0.06-5 mg/l PO4Ascorbic acid
2
ortho TT
322 Phosphate,
ortho (VM) TT
tube test 3-60 mg/l PO
Vanadomolybdate 2438 212,
4
Page
[nm]
545 182
545 184
410 186
410 188
340 190
340 192
510 196,
198
510 196,
202
558 206
558 208
890 212,
214
690 212,
216
690 212,
218
710 212,
220
470 212,
222
890 212,
224
890 212,
226
228
* = free, combined, total; PP = powder pack; T = tablet;
L = liquid; TT = tube test; LR = low range; MR = middle range; HR = high range;

12
SP600 Spectrophotometer 01/2008
Part 1 Methods
1.1 Table of Methods
No. Analysis Reagent Range Displayed asMethod
[nm]
325 Phosphate,
hydr. TT
340 Potassium T tablet 1-10 mg/l K
345 S Abs 436 nm
(Colour)
346 S Abs 525 nm
(Colour)
347 S Abs 620 nm
(Colour)
350 Silica T tablet 0.05-3 mg/l SiO
351 Silica LR PP
352 Silica HR PP
360 Sulfate PP
365 Sulfide tablet 0.04-0.5 mg/l S
368 Sulfite 10 T tablet 0.1-10 mg/l SO
370 Sulfite T tablet 0.05-4 mg/l SO
375
Surfactants
tube test 0.02-1.6 mg/l P
direct
0-50 m-1 EN ISO
reading
direct
0-50 m-1 EN ISO
reading
direct
0-50 m-1 EN ISO
reading
powder pack
powder pack
powder pack
tube test 0.05-2
0.1-1.6 mg/l SiO2Heteropolyblue 2815 238
1-100 mg/l SiO2Silicomolybdate 452 240
2-100 mg/l SO4Bariumsulfate-
mg/l MBAS Methylene blue
Acid digestion/
Ascorbic acid
TetraphenylborateTurbidity
7887:1994
7887:1994
7887:1994
Silicomolybdate
2
Turbidity
–
DPD/Catalyst
DTNB 405 246
3
DTNB 405 248
3
2
4
1
1
1
2, 3
2
3,4
6,1
890 212,
730 232
436 234
525 234
620 234
820 236
450 242
668 244
653 250
(anionic) TT
381 TOC HR TT tube test 50-800 mg/l TOC
385 Turbidity 50 direct
5-500 FAU Attenuated
reading
390 Urea T tablet +
0.1-2 mg/l Urea Indophenol/
liquid
400 Zinc T tablet 0.02-0.5 mg/l Zn Zincon
H2SO4 /Persulfate /
6
Indicator
Radiation Method
Urease
3
596 252
860 254
676 256
616 258
Page
230
* = free, combined, total; PP = powder pack; T = tablet;
L = liquid; TT = tube test; LR = low range; MR = middle range; HR = high range;

13
SP600 Spectrophotometer 01/2008
1.1 Methods
Literature
The reagent formulations are based on internationally recognised test methods. Some are
described in national and/or international guidelines.
1) Deu tsche Einh eitsverfahren zur Wasser-, Abw asser- und Sc hlammuntersuchung
2) Standard methods for the Examination of Water and Wastewater; 18th Edition, 1992
3) Photometrische Analysenverfahren, Schwedt,
Wissenschaftliche Verlagsgesellschaft mbH, Stuttgart 1989
4) Photometrische Analyse, Lange / Vejdelek,
Verlag Chemie 1980
5) Colorimetric Chemical Analytical methods,
9th Edition, London
6) adapted from Merck,
for more information see instructions delivered with the test
Notes for searching:
Active Oxygen -> Oxygen, activ
Alkalinity-m -> Alkalinity, total
Alkalinity, total -> Alkalinity, total
Colour -> Hazen or Spectral Absorption Coefficient (S Abs)
Total Hardness -> Hardness, total
m-Value -> Alkalinity, total
p-Value -> Alkalinity-p
Phosphate, reactive -> Phosphate, ortho
Silicon dioxide -> Silica
Langelier Saturation -> Mode function 70
Index (Water Balance)

14
SP600 Spectrophotometer 01/2008
1.1 Methods
Acid demand to pH 4.3
2
0
with Tablet
0.1 – 4 mmol/l
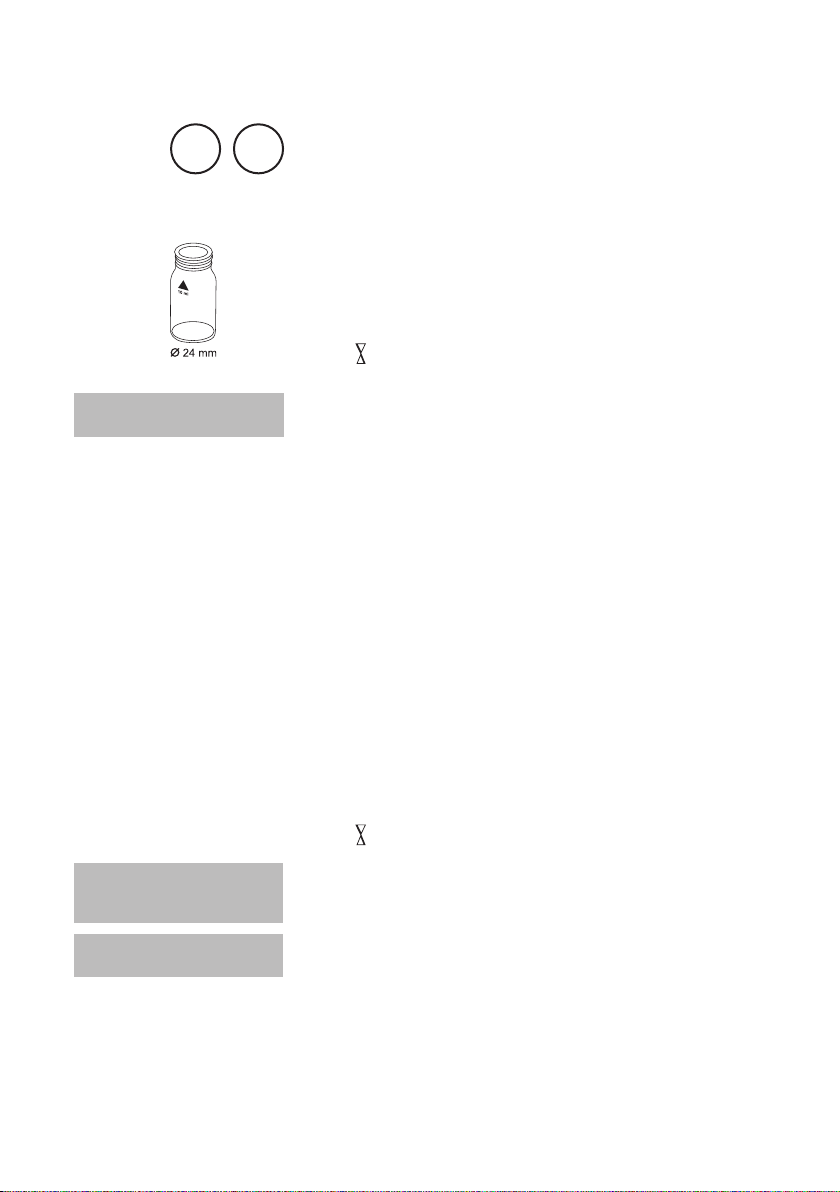
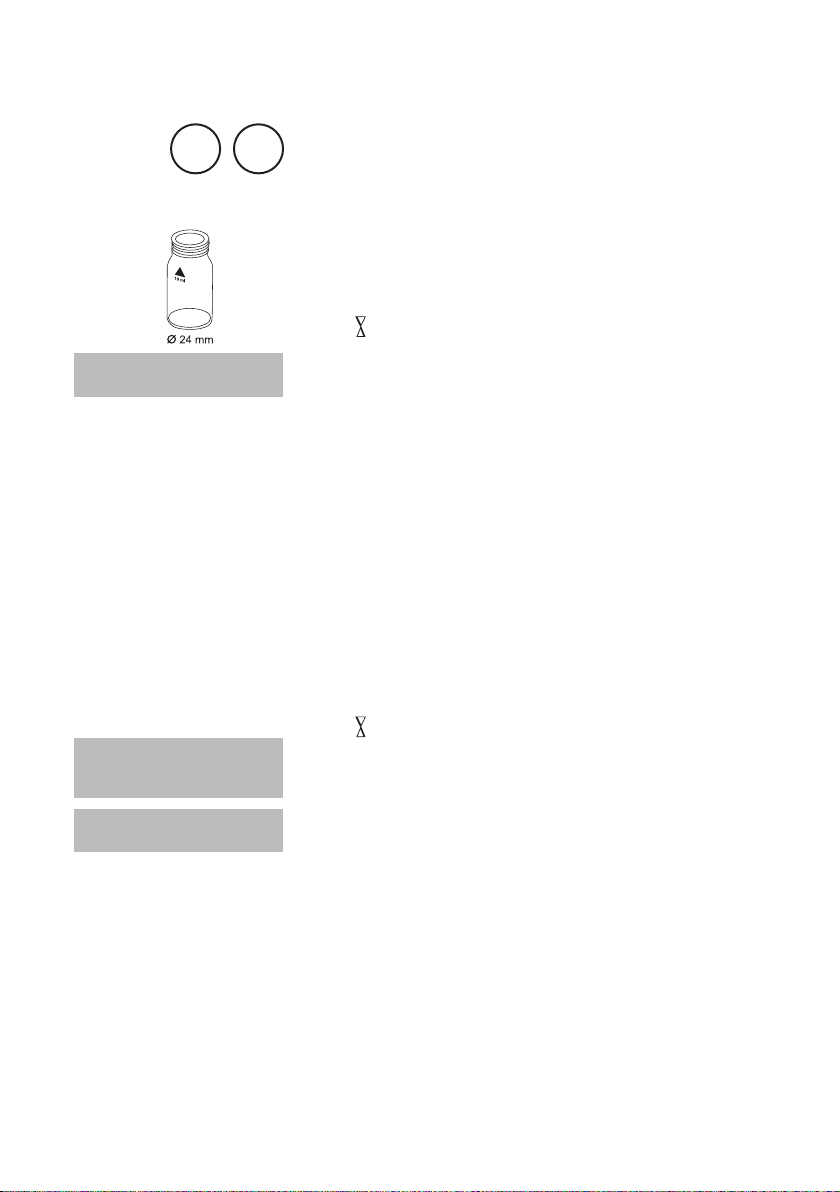
1. Fill a clean vial (24 mm Ø) with 10 ml of the water sample,
close tightly with the cap.
prepare Zero
press ZERO
Zero accepted
prepare Test
press TEST
2. Place the vial in the sample chamber making sure
that the
3. Press ZERO key.
4. Remove the vial from the sample chamber.
5. Add one ALKA-M-PHOTOMETER tablet straight
from the foil to the water sample and crush the tablet
using a clean stirring rod.
6. Close the vial tightly with the cap and swirl several
times until the tablet is dissolved.
7. Place the vial in the sample chamber making sure that
the
8. Press TEST key.
The result is shown in the display as
Acid demand to pH 4.3 in mmol/l.
marks are aligned.
marks are aligned.

15
SP600 Spectrophotometer 01/2008
1.1 Methods
Notes:
1. The terms total Alkalinity, Alkalinity-m, m-Value and Acid demand to pH 4.3 are
identical.
2. For accurate results exactly 10 ml of water sample must be taken for the test.

16
SP600 Spectrophotometer 01/2008
1.1 Methods
Alkalinity-p = p-value
3
5
with Tablet
5 – 300 mg/l CaCO
1. Fill a clean vial (24 mm Ø) with 10 ml of the water sample,
close tightly with the cap.
2. Place the vial in the sample chamber making sure that
marks are aligned.
the
3
prepare Zero
press ZERO
Zero accepted
prepare Test
press TEST
3. Press ZERO key.
4. Remove the vial from the sample chamber.
5. Add one ALKA-P-PHOTOMETER tablet straight
from the foil to the water sample and crush the tablet
using a clean stirring rod.
6. Close the vial tightly with the cap and swirl several
times until the tablet is dissolved.
7. Place the vial in the sample chamber making sure that
marks are aligned.
the
8. Press TEST key.
The result is shown in the display as Alkalinity-p.

17
SP600 Spectrophotometer 01/2008
1.1 Methods
Notes
1. The terms Alkalinity-p, p-Value and Alkalinity to pH 8.2 are identical.
2. For accurate test results exactly 10 ml of water sample must be taken for the test.
3. This method was developed from a volumetric procedure for the determination of
Alkalinity-p. Due to undefined conditions, the deviations from the standardised method
may be greater.
4. Conversion table:
1 mg/l CaCO
mg/l CaCO
3
3
---- 0.056 0.10 0.07
1 °dH 17.8 ---- 1.78 1.25
1 °fH 10.0 0.56 ---- 0.70
1 °eH 14.3 0.80 1.43 ----
CaCO
3
°dH
°eH
°fH
°aH
5. By determining Alkalinity-p and Alkalinity-m it is possible to classify the alkalinity as
Hydroxide, Carbonate and Hydrogencarbonate.
The following differentiation is only valid if:
a) no other alkalis are present and
b) Hydroxide und Hydrogen are not present in the same water sample.
If condition b) is not fulfilled please get additional information from
”Deutsche Einheitsverfahren zur Wasser-, Abwasser- und Schlammuntersuchung, D 8”.
Case 1: Alkalinity-p = 0
Hydrogen carbonate = m
Carbonate = 0
Hydroxide = 0
Case 2: Alkalinity-p > 0 and Alkalinity-m > 2p
Hydrogen carbonate = m – 2p
Carbonate = 2p
Hydroxide = 0
Case 3: Alkalinity-p > 0 and Alkalinity-m < 2p
Hydrogen carbonate = 0
Carbonate = 2m – 2p
Hydroxide = 2p – m
°dH °fH °eH

18
SP600 Spectrophotometer 01/2008
1.1 Methods
Alkalinity, total = Alkalinity-m =
3
0
m-Value
with Tablet
5 – 200 mg/l CaCO
1.
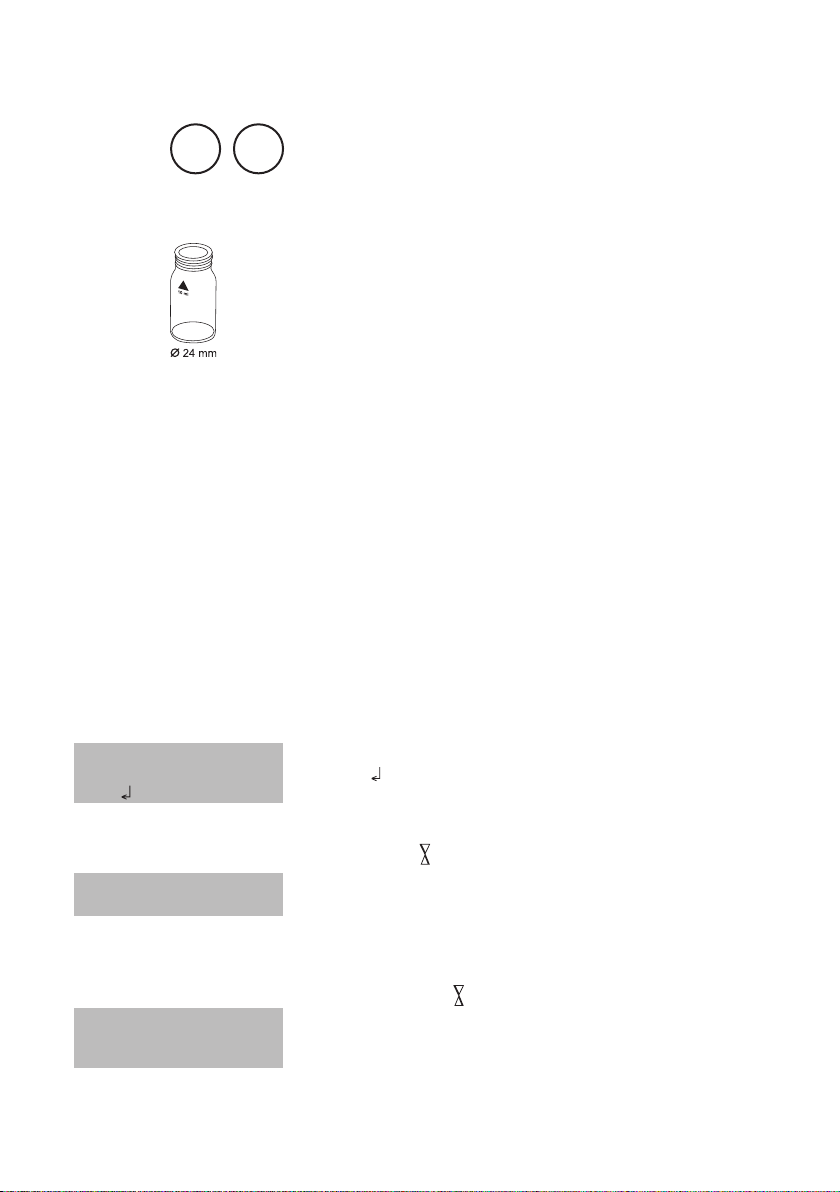
Fill a clean vial (24 mm Ø) with 10 ml of the water sample,
close tightly with the cap.
3
prepare Zero
press ZERO
Zero accepted
prepare Test
press TEST
2. Place the vial in the sample chamber making sure that
the
3. Press ZERO key.
4. Remove the vial from the sample chamber.
5. Add one ALKA-M-PHOTOMETER tablet straight
from the foil to the water sample and crush the tablet
using a clean stirring rod.
6. Close the vial tightly with the cap and swirl several
times until the tablet is dissolved.
7. Place the vial in the sample chamber making sure that
the
8. Press TEST key.
The result is shown in the display as total Alkalinity.
marks are aligned.
marks are aligned.

19
SP600 Spectrophotometer 01/2008
1.1 Methods
Notes:
1. The terms total Alkalinity, Alkalinity-m, m-Value and Alkalinity to pH 4.3 are
identical.
2. For accurate results exactly 10 ml of water sample must be taken for the test.
3. Conversion table:
1 mg/l CaCO
Acid demand to pH 4.3
DIN 38 409 (KS4.3)
3
0.02 0.056 0.07 0.1
German
°dH*
*Carbonate hardness (reference = Hydrogencarbonate-anions)
Example:
10 mg/l CaCO
= 10 mg/l x 0.056 = 0.56 mg/l °dH
3
10 mg/l CaCO3 = 10 mg/l x 0.02 = 0.2 mmol/l
CaCO
4.
3
°dH
°eH
°fH
°aH
English
°eH*
French
°fH*
20
SP600 Spectrophotometer 01/2008
1.1 Methods
Aluminum
4
0
with Tablet
0.01 – 0.3 mg/l Al
1. Fill a clean vial (24 mm Ø) with 10 ml of the water sample,
close tightly with the cap.
2. Place the vial in the sample chamber making sure that
marks are aligned.
the
prepare Zero
press ZERO
Zero accepted
prepare Test
press TEST
Countdown
5:00
3. Press ZERO key.
4. Remove the vial from the sample chamber.
5. Add one ALUMINIUM No. 1 tablet straight from the
foil to the water sample and crush the tablet using a
clean stirring rod (dissolve the tablet).
6. Add one ALUMINIUM No. 2 tablet straight from the
foil to the same water sample and crush the tablet using
a clean stirring rod.
7. Close the vial tightly with the cap and swirl gently
several times until the tablets are dissolved.
8. Place the vial in the sample chamber making sure that
marks are aligned.
the
9. Press TEST key.
Wait for a reaction period of 5 minutes.
After the reaction period is finished the measurement starts
automatically.
The result is shown in the display in mg/l Aluminium.

21
SP600 Spectrophotometer 01/2008
1.1 Methods
Notes:
1. Before using clean the vials and the measuring beaker with Hydrochloric acid
(approx. 20%). Rinse then thoroughly with deionized water.
2. To get accurate results the sample temperature must be between 20°C and 25°C.
3. A low test result may be given in the presence of Fluorides and Polyphosphates.
The effect of this is generally insignificant unless the water has fluoride added
artificially. In this case, the following table should be used:
Fluoride
[mg/l F]
Displayed value: Aluminium [mg/l Al]
0.05 0.10 0.15 0.20 0.25 0.30
0.2 0.05 0.11 0.16 0.21 0.27 0.32
0.4 0.06 0.11 0.17 0.23 0.28 0.34
0.6 0.06 0.12 0.18 0.24 0.30 0.37
0.8 0.06 0.13 0.20 0.26 0.32 0.40
1.0 0.07 0.13 0.21 0.28 0.36 0.45
1.5 0.09 0.20 0.29 0.37 0.48 ---
Example: If the result of Aluminium determination is 0.15 mg/l Al and the Fluoride
concentration is known to be 0.4 mg/l F, the true concentration of Aluminium is
0.17 mg/l Al.
4.
Al
Al2O
3
22
SP600 Spectrophotometer 01/2008
1.1 Methods
1 2
3 4
Aluminum
5
0
with Powder Pack
0.01 – 0.25 mg/l Al
Use two clean vials (24 mm Ø) and mark one as blank
for zeroing.
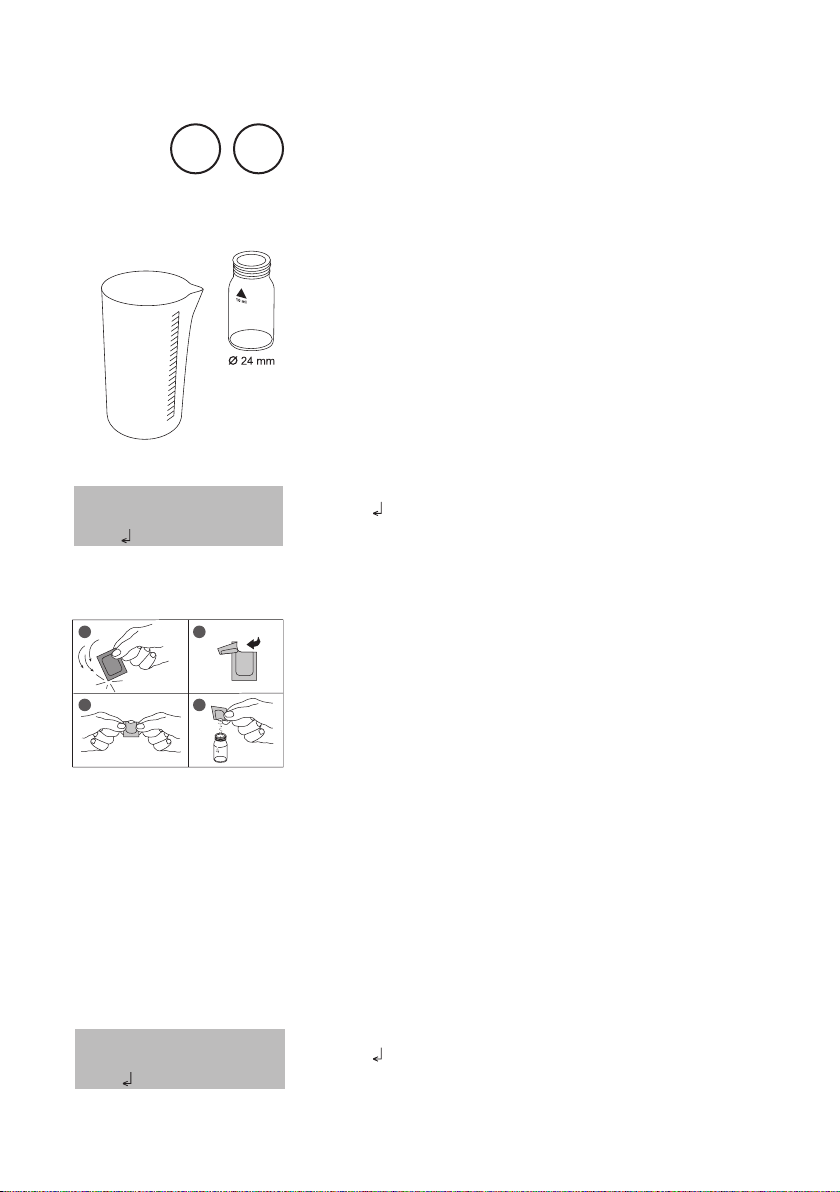
1. Fill 20 ml of water sample in a 100 ml beaker.
2. Add one Vario Aluminum ECR F20 powder pack
straight from the foil to the water sample.
3. Dissolve the powder using a clean stirring rod.
Countdown 1
0:30
start:
Countdown 2
5:00
start:
4. Press [
Wait for a reaction period of 30 seconds.
After reaction period is finished proceed as follows:
5. Add one Vario Hexamine F20 powder pack straight
from the foil to the same water sample.
6. Dissolve the powder using a clean stirring rod.
7. Add 1 drop of Vario Aluminum ECR Masking Re-
agent in the vial marked as blank.
8. Add 10 ml of the prepared water sample to the vial
(this is the blank).
9. Add the remaining 10 ml of the prepared water sample
in the second clean vial (this is the sample).
10. Close the vials tightly and swirl several times to mix the
contents.
11. Press [
Wait for a reaction period of 5 minutes.
] key.
] key.
23
SP600 Spectrophotometer 01/2008
1.1 Methods
After reaction period is finished proceed as follows:
12. Place the vial (the blank) in the sample chamber
marks are aligned.
prepare Zero
press ZERO
making sure that the
13. Press ZERO key.
14. Remove the vial from the sample chamber.
15. Place the vial (the sample) in the sample chamber
making sure that the
marks are aligned.
Zero accepted
prepare Test
16. Press TEST key.
press TEST
The result is shown in the display in mg/l Aluminium.
Notes:
1. Before using clean the vials and the measuring beaker with Hydrochloric acid
(approx. 20%). Rinse then thoroughly with deionized water.
2. To get accurate results the sample temperature must be between 20°C and 25°C.
3. A low test result may be given in the presence of Fluorides and Polyphosphates.
The effect of this is generally insignificant unless the water has fluoride added
artificially. In this case, the following table should be used:
Fluoride
[mg/l F]
Displayed value: Aluminium [mg/l Al]
0.05 0.10 0.15 0.20 0.25 0.30
0.2 0.05 0.11 0.16 0.21 0.27 0.32
0.4 0.06 0.11 0.17 0.23 0.28 0.34
0.6 0.06 0.12 0.18 0.24 0.30 0.37
0.8 0.06 0.13 0.20 0.26 0.32 0.40
1.0 0.07 0.13 0.21 0.28 0.36 0.45
1.5 0.09 0.20 0.29 0.37 0.48 ---
Example: If the result of Aluminium determination is 0.15 mg/l Al and the Fluoride
concentration is known to be 0.4 mg/l F, the true concentration of Aluminium is
0.17 mg/l Al.
4.
Al
Al2O
3

24
SP600 Spectrophotometer 01/2008
1.1 Methods
Ammonium
6
0
with Tablet
0.02 – 1 mg/l N
1. Fill a clean vial (24 mm Ø) with 10 ml of the water sample,
close tightly with the cap.
2. Place the vial in the sample chamber making sure that
marks are aligned.
the
prepare Zero
press ZERO
Zero accepted
prepare Test
press TEST
Countdown
10:00
3. Press ZERO key.
4. Remove the vial from the sample chamber.
5. Add one AMMONIA No. 1 tablet straight from the
foil to the water sample and crush the tablet using a
clean stirring rod.
6. Add one AMMONIA No. 2 tablet straight from the
foil to the same water sample and crush the tablet
using a clean stirring rod.
7. Close the vial tightly with the cap and swirl several
times until the tablets are dissolved.
8. Place the vial in the sample chamber making sure that
marks are aligned.
the
9. Press TEST key.
Wait for a reaction period of 10 minutes.
After the reaction period is finished the measurement starts
automatically.
The result is shown in the display in mg/l Ammonium.

25
SP600 Spectrophotometer 01/2008
1.1 Methods
Notes:
1. The tablets must be added in the correct sequence.
2. The AMMONIA No. 1 tablet will only dissolve completely after the AMMONIA No. 2
tablet has been added.
3. The temperature of the sample is important for full colour development.
At a temperature below 20°C the reaction period is 15 minutes.
4. Sea water samples:
Ammonia conditioning reagent is required when testing sea water or brackish water
samples to prevent precipitations of salts.
Fill the test tube with the sample to the 10 ml mark and add one level spoonful of
Conditioning Powder. Mix to dissolve, then continue as described in the test
instructions.
5. Conversion:
mg/l NH4 = mg/l N x 1.29
mg/l NH3 = mg/l N x 1.22
6. N
NH
NH
4
3

26
SP600 Spectrophotometer 01/2008
1.1 Methods
1 2
3 4
Countdown
3:00
start:
Ammonium
6
2
with Powder Pack
0.01 – 0.8 mg/l N
Use two clean vials (24 mm Ø) and mark one as blank for
zeroing.
1. Fill a clean vial (24 mm Ø) with 10 ml of deionized
water (this is the blank).
2. Fill the other clean vial (24 mm Ø) with 10 ml of the
water sample (this is the sample).
3. Add one Vario Ammonium Salicylate F10 powder
pack straight from the foil to each vial.
4. Close the vials with the caps and shake to mix the con-
tents.
5. Press [
Wait for a reaction period of 3 minutes.
After reaction period is finished proceed as follows:
6. Add one Vario Ammonium Cyanurate F10 powder
] key.
pack straight from the foil to each sample.
Countdown
15:00
start:
prepare Zero
press ZERO
Zero accepted
prepare Test
press TEST
7. Close the vials with the caps tightly and shake to mix
the contents.
8. Press [ ] key.
Wait for a reaction period of 15 minutes.
After reaction period is finished proceed as follows:
9. Place the vial (the blank) in the sample chamber making
sure that the marks are aligned.
10. Press ZERO key.
11. Remove the vial from the sample chamber.
12. Place the vial (the sample) in the sample chamber
making sure that the marks are aligned.
13. Press TEST key.
The result is shown in the display in mg/l Ammonium.

27
SP600 Spectrophotometer 01/2008
1.1 Methods
Notes:
1. Extremely basic or acidic water samples should be adjusted with 0.5 mol/l (1 N) Sulfuric
acid solution or 1 mol/l (1 N) Sodium hydroxide solution to pH 7.
2. Interferences:
Interfering substance Interference levels and treatments
Calcium greater than 1000 mg/l CaCO
Iron Interferes at all levels. Correct as follows:
a) determine the concentration of iron present in the
sample by performing a total Iron test
b) add the same iron concentration as determined
to the deionized water (step 1).
The interference will be blanked out successfully.
Magnesium greater than 6000 mg/l CaCO
Nitrate greater than 100 mg/l NO3-N
Nitrite greater than 12 mg/l NO2-N
Phosphate greater than 100 mg/l PO4-P
Sulfate greater than 300 mg/l SO
Sulfide intensifies the colour
Glycine, Hydrazine,
Colour, Turbidity
Less common interferences such as Hydrazine and
Glycine will cause intensified colours in the prepared
sample. Turbidity and colour will give erroneous high
values. Samples with severe interferences require
distillation.
3
3
4
3.
N
NH
NH
4
3

28
SP600 Spectrophotometer 01/2008
1.1 Methods
1 2
3 4
Ø 16 mm
Ammonium LR
6
5
with Tube Test
0.02 – 2.5 mg/l N
1. Open one white capped reaction vial and add 2 ml
deionized water (this is the blank).
2. Open another white capped reaction vial and add
2 ml of water sample (this is the sample).
3. Add one Vario AMMONIA Salicylate F5 powder
pack straight from the foil into each vial.
4. Add one Vario AMMONIA Cyanurate F5 powder
pack straight from the foil into each vial.
5. Close the vials tightly and swirl several times to dissolve
the powder.
Countdown
20:00
start:
prepare Zero
press ZERO
Zero accepted
prepare Test
press TEST
6. Press [
Wait for a reaction period of 20 minutes.
After reaction period is finished proceed as follows:
7. Place the vial (the blank) in the sample chamber making
sure that the marks are
8. Press ZERO key.
9. Remove the vial from the sample chamber.
10. Place the vial (the sample) in the sample chamber
making sure that the marks are
11. Press TEST key.
The result is shown in the display in mg/l Ammonium.
] key.
aligned.
aligned.

29
SP600 Spectrophotometer 01/2008
1.1 Methods
Notes:
1. Strong alkaline or acidic water samples must be adjusted to approx. pH 7 before
analysis (use 1 mol/l Hydrochloric acid resp. 1 mol/l Sodium hydroxide).
2. If chlorine is known to be present, add one drop of 0.1 mol/l Sodium thiosulfate for
each 0.3 mg/l Cl2 in a one litre water sample.
3. Iron interferes with the test. The interferences will be eliminated as follows:
Determine the amount of total iron present in the water sample. To produce the blank
add an iron standard solution with the same iron concentration to the vial (point 1)
instead of deionized water
4. Conversion:
mg/l NH4 = mg/l N x 1.29
mg/l NH3 = mg/l N x 1.22
5. N
NH
NH
4
3

30
SP600 Spectrophotometer 01/2008
1.1 Methods
1 2
3 4
Ø 16 mm
Ammonium HR
6
6
with Tube Test
1 – 50 mg/l N
1. Open one white capped reaction vial and add 0.1 ml
deionized water (this is the blank).
2. Open another white capped reaction vial and add
0.1 ml of water sample (this is the sample).
3. Add one Vario AMMONIA Salicylate F5 powder
pack straight from the foil into each vial.
4. Add one Vario AMMONIA Cyanurate F5 powder
pack straight from the foil into each vial.
5. Close the vials tightly and swirl several times to dissolve
the powder.
Countdown
20:00
start:
prepare Zero
press ZERO
Zero accepted
prepare Test
press TEST
6. Press [
Wait for a reaction period of 20 minutes.
After reaction period is finished proceed as follows:
7. Place the vial (the blank) in the sample chamber making
sure that the marks are
8. Press ZERO key.
9. Remove the vial from the sample chamber.
10. Place the vial (the sample) in the sample chamber
making sure that the marks are
11. Press TEST key.
] key.
aligned.
aligned.
The result is shown in the display in mg/l Ammonium.

31
SP600 Spectrophotometer 01/2008
1.1 Methods
Notes:
1. Strong alkaline or acidic water samples must be adjusted to approx. pH 7 before
analysis (use 1 mol/l Hydrochloric acid resp. 1 mol/l Sodium hydroxide).
2. If chlorine is known to be present, add one drop of 0.1 mol/l Sodium thiosulfate for each
0.3 mg/l Cl2 in a one litre water sample.
3. Iron interferes with the test. The interferences will be eliminated as follows:
Determine the amount of total iron present in the water sample. Add an iron standard
solution with the same concentration to the vial (point 1) instead of deionized water to
produce the blank.
4. Conversion:
mg/l NH4 = mg/l N x 1.29
mg/l NH3 = mg/l N x 1.22
5. N
NH
NH
4
3

32
SP600 Spectrophotometer 01/2008
1.1 Methods
Arsen
6
8
ic
0.02 – 0.6 mg/l As
Reagents (note 2):
• 40%SulfuricAcid(H2SO4) p.a.
• Dissolve8.33gPotassiumIodide(KI)p.a.in50mlof
deionized water
Note: stored in a dark bottle it can be used for 1 week
•
Dissolve 4.0 g Tin(II)-chloride-Dihydrate (SnCl2•2H2O)
p.a. in 10 ml Hydrochloric Acid (HCl) 25 % p.a.
• 2.0gZinccoarsepowder
(Zn; particle size about 0.3-1.5 mm) p.a.
• Absorptionsolution:
Dissolve 0.25 g Silver diethyldithiocarbamate
(C
AgNS2) p.a.
5H10
and
0.02 g Brucine (C23H26N2O4) p.a. in
100 ml 1-Methyl-2-pyrrolidone extra pure (C
and store in a dark bottle.
If it is not possible to dissolve completely, stir for min.
1 hour and filtrate to get a clear solution.
5H9
NO)
Notes:
• useonlydryglassvessels
• storedinadarkglassbottleatmax.20°Ctheabsorp-
tion solution can be used for about 1 week
• storeSilverdiethyldithiocarbamateat4°C.
Part list for glass apparatus:
•100mlErlenmeyerask(NS29/32) Ordercode:370501
•glassstopper(NS29/32) Ordercode:370502
•absorptiontube(NS29,2/32) Ordercode:370503
Assembling of apparatus:
1
2
3
4

33
SP600 Spectrophotometer 01/2008
1.1 Methods
Sample preparation: Reaction times must
be exactly kept !
1. Prepare the dry reaction apparatus (note 4) and place
it under a fume hood (toxic fumes!).
2. Pipette 50 ml of water sample into a 100 ml Erlenmeyer flask (NS 29/32).
3. 30 ml Sulfuric Acid,
2.0 ml Potassium Iodide solution and
0.3 ml Tin(II)chloride are added to the water sample.
4. Close the flask and shake, wait for a period of 15
minutes.
5. Prepare 2.0 g Zinc.
6. Fill the absorption tube with exact 5.0 ml of absorption
solution
(see picture
7. After end of the 15 minutes reaction time add the
2 g Zinc to the Erlenmeyer flask and immediately as-
semble the apparatus with the prepared absorption
tube (see picture
8. The reaction starts (fume hood!).
Wait for 60 minutes reaction time.
and ; use pipette).
).
Performing test procedure:
9.
10
prepare Zero
press ZERO
Zero accepted
prepare Test
press TEST
11. Press ZERO key.
12. After zeroing remove the cell from the sample chamber.
13. Fill the cell with the colored absorption solution. (see
14. Place the cell in the sample chamber making sure that
15. Press TEST key.
The result is shown in the display in mg/l Arsenic
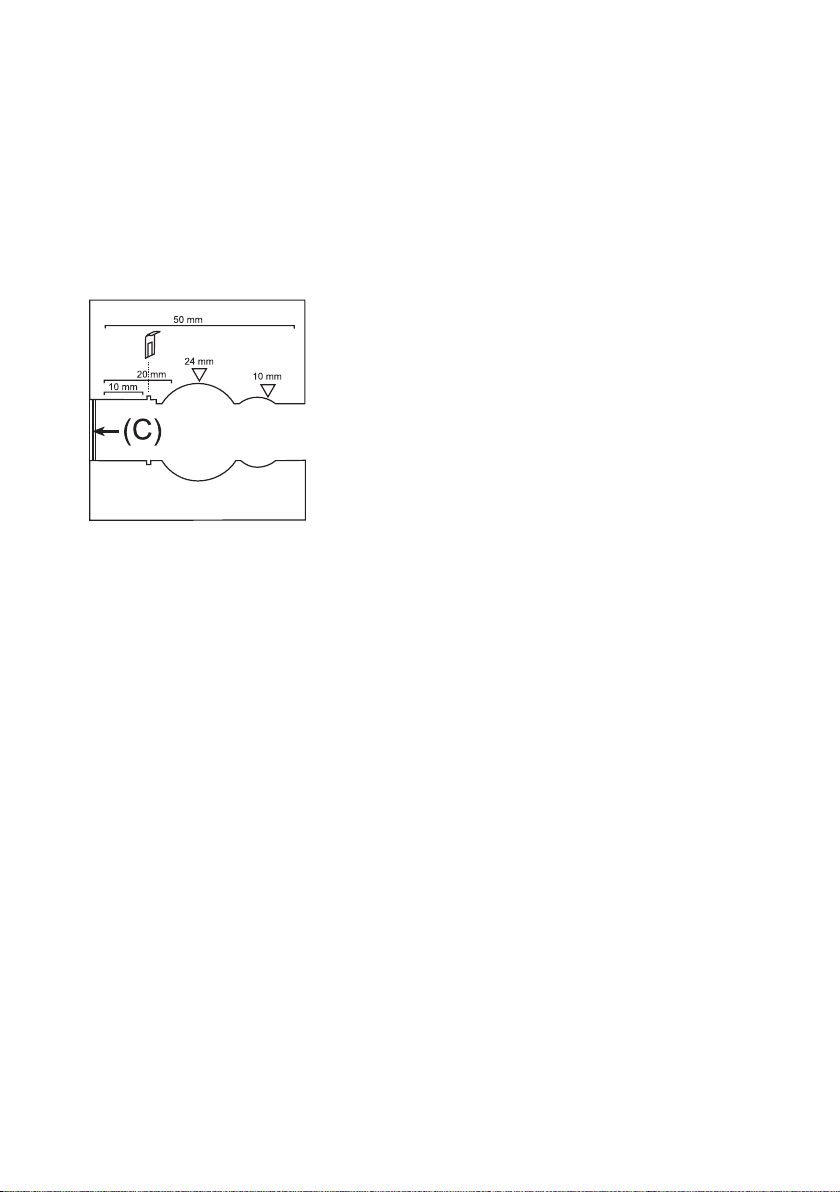
Fill a clean 20 mm cell (note 1) with deionized water.
Place the cell in the sample chamber making sure that
the positioning is correct.
Empty the cell and dry completely.
picture
the marks are aligned.
).
.
34
SP600 Spectrophotometer 01/2008
1.1 Methods
Notes:
1. Appropriate safety precautions and a good lab technique must be used during the
whole procedure.
2. Reagents are commercially and should ordered locally.
MSDS: please refer to your local reagent supplier. Ensure proper disposal of reagent
solution.
3. Use a cell with 20 mm path length. Order code: 60 10 50.
Positioning: insert cell on the left side in the sample chamber (c = clip).
4. According to literature (G. Ackermann, J. Köthe: Fresenius Z. Anal. Chem. 323 (1986), 135)
Sb, Se and Te interfere due to the same reaction; Thiosulfate interferes differently.

35
SP600 Spectrophotometer 01/2008
36
SP600 Spectrophotometer 01/2008
1.1 Methods
Boron
8
5
with Tablet
0.1 – 2 mg/l B
Fill a clean vial (24 mm Ø) with 10 ml of the water
1.
sa
mple, close thightly with the cap.
2. Place the vial in the sample chamber making sure that
marks are aligned.
the
prepare Zero
press ZERO
Zero accepted
prepare Test
press TEST
Countdown
20:00
3. Press ZERO key.
4. Remove the vial from the sample chamber.
5. Add one BORON No. 1 tablet straight from the foil
to the water sample and crush the tablet using a clean
stirring rod and dissolve the tablet.
6. Add one BORON No. 2 tablet straight from the foil
to the same water sample and crush the tablet using a
clean stirring rod.
7. Close the vial tightly with the cap and swirl several
times until the tablets are dissolved.
8. Place the vial in the sample chamber making sure that
marks are aligned.
the
9. Press TEST key.
Wait for a reaction period of 20 minutes.
After the reaction period is finished the measurement
starts automatically.
The result is shown in the display in mg/l Boron.

37
SP600 Spectrophotometer 01/2008
1.1 Methods
Notes:
1. The tablets must added in the correct sequence.
2. The sample solution should have a pH value between 6 and 7.
3. Interferences are prevented by the presence of EDTA in the tablets.
4. The rate of colour development depends on the temperature. The temperature of the
sample must be 20°C ± 1°C.
5. B
H3BO
3

38
SP600 Spectrophotometer 01/2008
1.1 Methods
Bromine
7
8
with Tablet
0.1 – 3 mg/l Br
1. Fill a clean 10 mm cell with water sample.
2. Place the cell in the sample chamber making sure that
the positioning is correct.
2
prepare Zero
press ZERO
Zero accepted
prepare Test
press TEST
3. Press ZERO key.
4. Remove the cell from the sample chamber. Empty the
cell and dry completely.
5. Rinse a beaker with the water sample and empty it,
leaving a few drops remaining in the beaker.
6. Add one DPD No. 1 tablet straight from the foil and
crush the tablet using a clean stirring rod.
7. Add 10 ml of water sample and dissolve the tablet.
8. Fill the 10 mm cell with the colored test solution.
9. Place the cell in the sample chamber making sure that
the positioning is correct.
10. Press TEST key.
The result is shown in the display in mg/l Bromine.

39
SP600 Spectrophotometer 01/2008
1.1 Methods
Notes:
1. Vial cleaning:
As many household cleaners (e.g. dishwater detergent) contain reducing substances,
the subsequent determination of Bromine may show lower results. To avoid any
measurement errors, only use glassware free of Chlorine consumption.
Preparation: Put all applicable glassware into Sodium hypochlorite solution (0.1 g/l) for
one hour, then rinse all glassware thoroughly with deionized water.
2. Preparing the sample:
When preparing the sample, the escape of Bromine gases, e.g. by pipetting or shaking,
must be avoided. The analysis must take place immediately after taking the sample.
3. The DPD colour development is carried out at a pH value of 6.3 to 6.5. The reagent
tablet therefore contains a buffer for pH adjustment. Strong alkaline or acidic water
samples must be adjusted between pH 6 and pH 7 before the reagent is added
(use 0.5 mol/l Sulfuric acid resp. 1 mol/l Sodium hydroxide).
4. Exceeding the measuring range:
Concentrations above 22 mg/l Bromine can produce results within the measuring range
up to 0 mg/l. In this event, the water must be diluted with water free of Bromine. 10 ml
of the diluted sample will be mixed with the reagent and the measurement repeated.
Oxidizing agents such as Chlorine, Ozone etc. interfere as they react like Bromine.

40
SP600 Spectrophotometer 01/2008
1.1 Methods
Bromine
7
9
with Tablet
0.05 – 1 mg/l Br
1. Fill a clean 50 mm cell with water sample.
2. Place the cell in the sample chamber making sure that
the positioning is correct.
2
prepare Zero
press ZERO
Zero accepted
prepare Test
press TEST
3. Press ZERO key.
4. Remove the cell from the sample chamber. Empty the
cell and dry completely.
5. Rinse a beaker with the water sample and empty it,
leaving a few drops remaining in the beaker.
6. Add one DPD No. 1 tablet straight from the foil and
crush the tablet using a clean stirring rod.
7. Add 10 ml of water sample and dissolve the tablet.
8. Fill the 50 mm cell with the colored test solution.
9. Place the cell in the sample chamber making sure that
the positioning is correct.
10. Press TEST key.
The result is shown in the display in mg/l Bromine.

41
SP600 Spectrophotometer 01/2008
1.1 Methods
Notes:
1. Vial cleaning:
As many household cleaners (e.g. dishwater detergent) contain reducing substances,
the subsequent determination of Bromine may show lower results. To avoid any
measurement errors, only use glassware free of Chlorine consumption.
Preparation: Put all applicable glassware into Sodium hypochlorite solution (0.1 g/l) for
one hour, then rinse all glassware thoroughly with deionized water.
2. Preparing the sample:
When preparing the sample, the escape of Bromine gases, e.g. by pipetting or shaking,
must be avoided. The analysis must take place immediately after taking the sample.
3. The DPD colour development is carried out at a pH value of 6.3 to 6.5. The reagent
tablet therefore contains a buffer for pH adjustment. Strong alkaline or acidic water
samples must be adjusted between pH 6 and pH 7 before the reagent is added
(use 0.5 mol/l Sulfuric acid resp. 1 mol/l Sodium hydroxide).
4. Exceeding the measuring range:
Concentrations above 22 mg/l Bromine can produce results within the measuring range
up to 0 mg/l. In this event, the water must be diluted with water free of Bromine. 10 ml
of the diluted sample will be mixed with the reagent and the measurement repeated.
Oxidizing agents such as Chlorine, Ozone etc. interfere as they react like Bromine.

42
SP600 Spectrophotometer 01/2008
1.1 Methods
Bromine
8
0
with Tablet
0.05 – 6.5 mg/l Br2
1. Fill a clean vial (24 mm Ø) with 10 ml of the water sample,
close tightly with the cap.
2. Place the vial in the sample chamber making sure that
marks are aligned.
the
prepare Zero
press ZERO
Zero accepted
prepare Test
press TEST
3. Press ZERO key.
4. Remove the vial from the sample chamber, empty the
vial leaving a few drops in.
5. Add one DPD No. 1 tablet straight from the foil and
crush the tablet using a clean stirring rod.
6. Add water sample to the 10 ml mark.
7. Close the vial tightly with the cap and swirl several
times until the tablet is dissolved.
8. Place the vial in the sample chamber making sure that
marks are aligned.
the
9. Press TEST key.
The result is shown in the display in mg/l Bromine.

43
SP600 Spectrophotometer 01/2008
1.1 Methods
Notes:
1. Vial cleaning:
As many household cleaners (e.g. dishwasher detergent) contain reducing
substances, the subsequent determination of Bromine may show lower results. To
avoid any measurement errors, only use glassware free of Chlorine consumption.
Preparation: Put all applicable glassware into Sodium hypochlorite solution
(0.1 g/l) for one hour, then rinse all glassware thoroughly with deionized water.
2. Preparing the sample:
When preparing the sample, the escape of Bromine gases, e.g. by pipetting or
shaking, must be avoided. The analysis must take place immediately after taking
the sample.
3. The DPD colour development is carried out at a pH value of 6.3 to 6.5. The reagent
tablet therefore contains a buffer for the pH adjustment. Strong alkaline or acidic water
samples must be adjusted between pH 6 and pH 7 before the reagent is added
(use 0.5 mol/l Sulfuric acid resp. 1 mol/l Sodium hydroxide).
4. Exceeding of the measuring range:
Concentrations above 22 mg/l Bromine can produce results within the measuring
range up to 0 mg/l. In this event, the water sample must be diluted with water free
of Bromine. 10 ml of the diluted sample will be mixed with the reagent and the
measurement repeated.
Oxidizing agents such as Chlorine, Ozone etc. interfere as they react like Bromine.

44
SP600 Spectrophotometer 01/2008
1.1 Methods
Cadmium
8
7
with MERCK Spectroquant
®
Cell Test,
Nr. 1.14834.0001
0.025 – 0.75 mg/l Cd / 25 – 750 μg/l Cd
prepare Zero
press ZERO
Zero accepted
prepare Test
press TEST
Countdown
2:00
Ø 16 mm
1. Place the supplied blank in the sample chamber making
sure that the marks are
2. Press ZERO key.
3. Remove the vial from the sample chamber.
4. Add 5 ml of water sample into one reaction tube.
5. Close the vial tightly with the cap and invert several
times to mix the contents.
6. Add 0.2 ml reagent Cd-1K.
7. Close the vial tightly with the cap and invert several
times to mix the contents.
8. Add one level microspoon of reagent Cd-2K.
9. Close the vial tightly with the cap and swirl until the
reagent is solved completely.
10. Place the vial in the sample chamber making sure that
the marks are
11. Press TEST key.
Wait for a reaction period of 2 minutes.
aligned.
aligned.
After the reaction period is finished the measurement
starts automatically.
The result is shown in the display as Cadmium.

45
SP600 Spectrophotometer 01/2008
1.1 Methods
Notes:
1. This method is adapted from MERCK.
2. Before performing the test read the original test instructions (delivered with the test) and
the MSDS (available at www.merck.com).
3. Spectroquant
4. Appropriate safety precautions and good lab technique should be used during the whole
procedure.
5. Because reaction depends on temperature, the sample temperature must be between
10 and 40°C.
6. Sample and reagent volumes should always metered by using volumetric pipettes
(class A).
7. This test determines only Cd
by digestion before colloidal, undissolved and complex-bounded cadmium can be measured.
8.
mg/l
μg/l
®
is a registered trade mark of the company MERCK KGaA.
2+
-ions. Samples must be pre-treated or decomposed

46
SP600 Spectrophotometer 01/2008
1.1 Methods
9
Chloride
0
with Tablet
0.5 – 25 mg/l Cl
1. Fill a clean vial (24 mm Ø) with 10 ml of the water sample,
close tightly with the cap.
2. Place the vial in the sample chamber making sure that
the
–
marks are aligned.
prepare Zero
press ZERO
Zero accepted
prepare Test
press TEST
Countdown
2:00
3. Press ZERO key.
4. Remove the vial from the sample chamber.
5. Add one CHLORIDE T1 tablet straight from the foil
to the water sample, crush the tablet using a clean
stirring rod and dissolve the tablet.
6. Add one CHLORIDE T2 tablet straight from the foil
to the same water sample and crush the tablet using a
clean stirring rod.
7. Close the vial tightly with the cap and swirl gently
several times until the tablet is dissolved (Note 1).
8. Place the vial in the sample chamber making sure that
marks are aligned.
the
9. Press TEST key.
Wait for a reaction period of 2 minutes.
After the reaction period is finished the measurement starts
automatically.
The result is shown in the display in mg/l Chloride.

47
SP600 Spectrophotometer 01/2008
1.1 Methods
Notes:
1. Ensure that all particles of the tablet are dissolved – Chloride causes an extremely fine
distributed turbidity with a milky appearance.
Heavy shaking leads to bigger sized particles which can cause false readings.
2. High concentrations of electrolytes and organic compounds have different effects on the
precipitation reaction.
3. Ions which also form deposits with Silver nitrate in acidic media, such as Bromides,
Iodides and Thiocyanates, interfere with the analysis.
4. Highly alkaline water should – if necessary – be neutralised using Nitric acid before
analysis.
48
SP600 Spectrophotometer 01/2008
1.1 Methods
Chloride
9
1
with Reagent Test
5 – 60 mg/l Cl
Use two clean vials (24 mm Ø) and mark one as blank for
zeroing.
1. Fill a clean vial (24 mm Ø) with 10 ml of deionized
water (this is the blank).
2. Fill the second clean vial (24 mm Ø) with 1 ml of the
water sample and 9 ml of deionized water (this is
the sample).
3. Fill each vial with the same size drops by holding the
bottle vertically and squeeze slowly:
3 drops Chloride-51
4. Close the vials with the caps tightly and invert the vials
several times to mix the contents.
5. Fill each vial with the same size drops by holding the
bottle vertically and squeeze slowly:
–
Countdown
3:00
start:
prepare Zero
press ZERO
Zero accepted
prepare Test
press TEST
3 drops Chlorid-52
6. Close the vials with the caps tightly and invert the vials
several times to mix the contents.
7. Press [
Wait for a reaction period of 3 minutes.
8. Place the vial (the blank) in the sample chamber making
9. Press ZERO key.
10. Remove the vial from the sample chamber.
11. Place the vial (the sample) in the sample chamber ma-
12. Press TEST key.
The result is shown in the display in mg/l Chloride.
] key.
sure that the
king sure that the
marks are aligned.
marks are aligned.

49
SP600 Spectrophotometer 01/2008
1.1 Methods
Notes:
1. The test sample and the reagents should have room temperature for test performance.
2. The test sample should have a pH of between 3 and 9.
3. Store the reagent bottles in a cool, dry place ideally at between 4°C and 8°C.
4. Interferences: Thiocyanate, Sulfide, Thiosulfate, Bromide and Iodide interfere because
they react like Chloride.

50
SP600 Spectrophotometer 01/2008
1.1 Methods
Chlorine with Tablet
9
8
0.1 – 6 mg/l Cl
2
Chlorine with Tablet
9
9
0.02 – 0.5 mg/l Cl
2
1
1
1
Chlorine
>> diff
free
total
>> diff
>> free
>> total
0 0
0 1
1 0
Chlorine with Tablet
0.02 – 3 mg/l Cl
2
Chlorine with Liquid Reagent
0.02 – 3 mg/l Cl
2
Chlorine with
Powder Pack
0.01 – 2 mg/l Cl
The following selection is shown in the display:
for the differentiated determination of free, combined and
total Chlorine
for the determination of free Chlorine
for the determination of total Chlorine
2
Select the desired determination with the arrow keys
] and [ ]. Confirm with [ ] key.
[

51
SP600 Spectrophotometer 01/2008
1.1 Methods
Notes:
1. Vial cleaning:
As many household cleaners (e.g. dishwasher detergent) contain reducing
substances, the subsequent determination of Chlorine may show lower results. To
avoid any measurement errors, only use glassware free of Chlorine consumption.
Preparation: Put all applicable glassware into Sodium hypochlorite solution
(0.1 g/l) for one hour, then rinse all glassware thoroughly with deionized water.
2. For individual testing of free and total Chlorine, the use of different sets of
glassware is recommend (EN ISO 7393-2, 5.3)
3. Preparing the sample:
When preparing the sample, the escape of Chlorine gases, e.g. by pipetting or
shaking, must be avoided. The analysis must take place immediately after taking
the sample.
4. The DPD colour development is carried out at a pH value of 6.3 to 6.5. The reagents
therefore contain a buffer for the pH adjustment.
Strong alkaline or acidic water samples must be adjusted between pH 6 and pH 7
before the reagent is added (use 0.5 mol/l Sulfuric acid resp. 1 mol/l Sodium hydroxide).
5. Exceeding of the measuring range:
Concentrations above
10 mg/l Chlorine using tablets
4 mg/l Chlorine using liquid reagents
2 mg/l using powder packs
can produce results within the measuring range up to 0 mg/l. In this event, the
water sample must be diluted with water free of Chlorine. 10 ml of the diluted
sample will be mixed with the reagent and the measurement repeated.
6. Turbidity (lead to errors):
The use of the DPD No. 1 tablet (method 98, 99, 100) in samples with high Calcium ion
contents* and/or high conductivity* can lead to turbidity of the sample and therefore
incorrect measurements. In this event, the reagent tablet DPD No. 1 High Calcium
should be used as an alternative. Even if the turbidity does occur after the
DPD No. 3 tablet has been added, this can be prevented by using the DPD No. 1
HIGH CALCIUM tablet.
* it is not possible to give exactly values, because the development of
turbidity depends on nature and ingredients of the sample.
7. If ??? is displayed at a differenciated test result see page 325.
Oxidizing agents such as Bromine, Ozone etc. interfere as they react like Chlorine.

52
SP600 Spectrophotometer 01/2008
1.1 Methods
9
prepare Zero
press ZERO
Zero accepted
prepare T1
press TEST
T1 accepted
prepare T2
press TEST
Countdown
2:00
*,** mg/l free Cl
*,** mg/l comb Cl
*,** mg/l tot Cl
Chlorine, differentiated determination
8
with Tablet
0.1 – 6 mg/l Cl
1. Fill a clean 10 mm cell with water sample.
2. Place the cell in the sample chamber making sure that
the positioning is correct.
3. Press ZERO key.
4. Remove the cell from the sample chamber. Empty the
cell and dry completely.
5. Rinse a beaker with the water sample and empty it,
leaving a few drops remaining in the beaker.
6. Add one DPD No. 1 tablet straight from the foil and
crush the tablet using a clean stirring rod.
7. Add 10 ml of water sample and dissolve the tablet.
8. Fill the 10 mm cell with the colored test solution.
9. Place the cell in the sample chamber making sure that
the positioning is correct.
10. Press TEST key.
11. Remove the cell from the sample chamber and return
the colored test solution completely back into the beaker.
12. Add one DPD No. 3 tablet straight from the foil to the
same water sample and crush the tablet using a clean
stirring rod. Dissolve the tablet.
13. Fill the 10 mm cell with the colored test solution.
14. Place the cell in the sample chamber making sure that
the positioning is correct.
15. Press TEST key.
Wait for a reaction period of 2 minutes.
After the reaction period is finished the measurement
starts automatically.
The result is shown in the display in:
mg/l free Chlorine
mg/l combined Chlorine
mg/l total Chlorine
2

53
SP600 Spectrophotometer 01/2008
1.1 Methods
9
Chlorine, free
8
with Tablet
0.1 – 6 mg/l Cl
1. Fill a clean 10 mm cell with water sample.
2. Place the cell in the sample chamber making sure that
the positioning is correct.
2
prepare Zero
press ZERO
Zero accepted
prepare Test
press TEST
3. Press ZERO key.
4. Remove the cell from the sample chamber. Empty the
cell and dry completely.
5. Rinse a beaker with the water sample and empty it,
leaving a few drops remaining in the beaker.
6. Add one DPD No. 1 tablet straight from the foil and
crush the tablet using a clean stirring rod.
7. Add 10 ml of water sample and dissolve the tablet.
8. Fill the 10 mm cell with the colored test solution.
9. Place the cell in the sample chamber making sure that
the positioning is correct.
10. Press TEST key.
The result is shown in the display in mg/l free Chlorine.
Notes:
see page 51

54
SP600 Spectrophotometer 01/2008
1.1 Methods
9
Chlorine, total
8
with Tablet
0.1 – 6 mg/l Cl
1. Fill a clean 10 mm cell with water sample.
2. Place the cell in the sample chamber making sure that
the positioning is correct.
2
prepare Zero
press ZERO
Zero accepted
prepare Test
press TEST
Countdown
2:00
3. Press ZERO key.
4. Remove the cell from the sample chamber. Empty the
cell and dry completely.
5. Rinse a beaker with the water sample and empty it,
leaving a few drops remaining in the beaker.
6. Add one DPD No. 1 and one DPD No. 3 tablet
straight from the foil and crush the tablet using a clean
stirring rod.
7. Add 10 ml of water sample and dissolve the tablet.
8. Fill the 10 mm cell with the colored test solution.
9. Place the cell in the sample chamber making sure that
the positioning is correct.
10. Press TEST key.
Wait for a reaction period of 2 minutes.
After the reaction period is finished the measurement
starts automatically.
The result is shown in the display in mg/l total Chlorine.
Notes:
see page 51

55
SP600 Spectrophotometer 01/2008
1.1 Methods
9
prepare Zero
press ZERO
Zero accepted
prepare T1
press TEST
T1 accepted
prepare T2
press TEST
Countdown
2:00
*,** mg/l free Cl
*,** mg/l comb Cl
*,** mg/l tot Cl
Chlorine, differentiated determination
9
with Tablet
0.02 – 0.5 mg/l Cl
1. Fill a clean 50 mm cell with water sample.
2. Place the cell in the sample chamber making sure that
the positioning is correct.
3. Press ZERO key.
4. Remove the cell from the sample chamber. Empty the
cell and dry completely.
5. Rinse a beaker with the water sample and empty it,
leaving a few drops remaining in the beaker.
6. Add one DPD No. 1 tablet straight from the foil and
crush the tablet using a clean stirring rod.
7. Add 10 ml of water sample and dissolve the tablet.
8. Fill the 50 mm cell with the colored test solution.
9. Place the cell in the sample chamber making sure that
the positioning is correct.
10. Press TEST key.
11. Remove the cell from the sample chamber and return
the colored test solution completely back into the beaker.
12. Add one DPD No. 3 tablet straight from the foil to the
same water sample and crush the tablet using a clean
stirring rod. Dissolve the tablet.
13. Fill the 50 mm cell with the colored test solution.
14. Place the cell in the sample chamber making sure that
the positioning is correct.
15. Press TEST key.
Wait for a reaction period of 2 minutes.
After the reaction period is finished the measurement
starts automatically.
The result is shown in the display in:
mg/l free Chlorine
mg/l combined Chlorine
mg/l total Chlorine
2

56
SP600 Spectrophotometer 01/2008
1.1 Methods
9
Chlorine, free
9
with Tablet
0.02 – 0.5 mg/l Cl
1. Fill a clean 50 mm cell with water sample.
2. Place the cell in the sample chamber making sure that
the positioning is correct.
2
prepare Zero
press ZERO
Zero accepted
prepare Test
press TEST
3. Press ZERO key.
4. Remove the cell from the sample chamber. Empty the
cell and dry completely.
5. Rinse a beaker with the water sample and empty it,
leaving a few drops remaining in the beaker.
6. Add one DPD No. 1 tablet straight from the foil and
crush the tablet using a clean stirring rod.
7. Add 10 ml of water sample and dissolve the tablet.
8. Fill the 50 mm cell with the colored test solution.
9. Place the cell in the sample chamber making sure that
the positioning is correct.
10. Press TEST key.
The result is shown in the display in mg/l free Chlorine.
Notes:
see page 51

57
SP600 Spectrophotometer 01/2008
1.1 Methods
Chlorine, total
9
9
with Tablet
0.02 – 0.5 mg/l Cl
1. Fill a clean 50 mm cell with water sample.
2. Place the cell in the sample chamber making sure that
the positioning is correct.
2
prepare Zero
press ZERO
Zero accepted
prepare Test
press TEST
Countdown
2:00
3. Press ZERO key.
4. Remove the cell from the sample chamber. Empty the
cell and dry completely.
5. Rinse a beaker with the water sample and empty it,
leaving a few drops remaining in the beaker.
6. Add one DPD No. 1 and one DPD No. 3 tablet
straight from the foil and crush the tablet using a clean
stirring rod.
7. Add 10 ml of water sample and dissolve the tablet.
8. Fill the 50 mm cell with the colored test solution.
9. Place the cell in the sample chamber making sure that
the positioning is correct.
10. Press TEST key.
Wait for a reaction period of 2 minutes.
After the reaction period is finished the measurement
starts automatically.
The result is shown in the display in mg/l total Chlorine
.

58
SP600 Spectrophotometer 01/2008
1.1 Methods
1
prepare Zero
press ZERO
0 0
Chlorine, differentiated determination
with Tablet
0.02 – 3 mg/l Cl2
1. Fill a clean vial (24 mm Ø) with 10 ml of the water sample,
close tightly with the cap.
2. Place the vial in the sample chamber making sure that
marks are aligned.
the
3. Press ZERO key.
4. Remove the vial from the sample chamber, empty the
vial leaving a few drops in.
5. Add one DPD No. 1 tablet straight from the foil and
crush the tablet using a clean stirring rod.
6. Add water sample to the 10 ml mark.
7. Close the vial tightly with the cap and swirl several
times until the tablet is dissolved.
Zero accepted
prepare T1
press TEST
8. Place the vial in the sample chamber making sure that
marks are aligned.
the
9. Press TEST key.
10. Remove the vial from the sample chamber.
11. Add one DPD No. 3 tablet straight from the foil to the
same water sample and crush the tablet using a clean
stirring rod.
12. Close the vial tightly with the cap and swirl several
times until the tablet is dissolved.

59
SP600 Spectrophotometer 01/2008
1.1 Methods
13. Place the vial in the sample chamber making sure that
the marks are aligned.
T1 accepted
prepare T2
press TEST
Countdown
2:00
*,** mg/l free Cl
*,** mg/l comb Cl
*,** mg/l total Cl
14. Press TEST key.
Wait for a reaction period of 2 minutes.
After the reaction period is finished the measurement
starts automatically.
The result is shown in the display in:
mg/l free Chlorine
mg/l combined Chlorine
mg/l total Chlorine
Notes:
see page 51

60
SP600 Spectrophotometer 01/2008
1.1 Methods
1
prepare Zero
press ZERO
0 0
Chlorine, free
with Tablet
0.02 – 3 mg/l Cl2
1. Fill a clean vial (24 mm Ø) with 10 ml of the water sample,
close tightly with the cap.
2. Place the vial in the sample chamber making sure that
marks are aligned.
the
3. Press ZERO key.
4. Remove the vial from the sample chamber, empty the
vial leaving a few drops in.
5. Add one DPD No. 1 tablet straight from the foil and
crush the tablet using a clean stirring rod.
6. Add water sample to the 10 ml mark.
7. Close the vial tightly with the cap and swirl several
times until the tablet is dissolved.
Zero accepted
prepare Test
press TEST
8. Place the vial in the sample chamber making sure that
marks are aligned.
the
9. Press TEST key.
The result is shown in the display in mg/l free Chlorine.
Notes:
see page 51

61
SP600 Spectrophotometer 01/2008
1.1 Methods
1
prepare Zero
press ZERO
0 0
Chlorine, total
with Tablet
0.02 – 3 mg/l Cl
1. Fill a clean vial (24 mm Ø) with 10 ml of the water sample,
close tightly with the cap.
2. Place the vial in the sample chamber making sure that
the
3. Press ZERO key.
4. Remove the vial from the sample chamber, empty the
vial leaving a few drops in.
5. Add one DPD No. 1 tablet and one DPD No. 3 tablet
straight from the foil and crush the tablets using a clean
stirring rod.
6. Add water sample to the 10 ml mark.
7. Close the vial tightly with the cap and swirl several
times until the tablets are dissolved.
2
marks are aligned.
8. Place the vial in the sample chamber making sure that
the
Zero accepted
prepare Test
press TEST
Countdown
2:00
9. Press TEST key.
Wait for a reaction period of 2 minutes.
After the reaction period is finished the measurement starts
automatically.
The result is shown in the display in mg/l total Chlorine.
Notes:
see page 51
marks are aligned.

62
SP600 Spectrophotometer 01/2008
1.1 Methods
1
prepare Zero
press ZERO
0 1
Chlorine, differentiated determination
with Liquid Reagent
0.02 – 3 mg/l Cl2
1. Fill a clean vial (24 mm Ø) with 10 ml of the water sample,
close tightly with the cap.
2. Place the vial in the sample chamber making sure that
the
marks are aligned.
3. Press ZERO key.
4. Remove the vial from the sample chamber and empty
the vial.
5. Fill the vial with the same size drops by holding the
bottle vertically and squeeze slowly:
6 drops of DPD 1 buffer solution
2 drops of DPD 1 reagent solution
6. Add water sample to the 10 ml mark.
Zero accepted
prepare T1
press TEST
7. Close the vial tightly with the cap and swirl several
times to mix the contents.
8. Place the vial in the sample chamber making sure that
the
marks are aligned.
9. Press TEST key.
10. Remove the vial from the sample chamber.
11. Add 3 drops of DPD 3 solution to the same water
sample.
12. Close the vial tightly with the cap and swirl several
times to mix the contents.

63
SP600 Spectrophotometer 01/2008
1.1 Methods
13. Place the vial in the sample chamber making sure that
the marks are aligned.
T1 accepted
prepare T2
press TEST
Countdown
2:00
*,** mg/l free Cl
*,** mg/l comb. Cl
*,** mg/l total Cl
Notes:
1. After use replace the bottle caps securely noting the colour coding.
2. Store the reagent bottles in a cool, dry place ideally between 6°C and 10°C.
3. Also see page 51.
14. Press TEST key.
Wait for a reaction period of 2 minutes.
After the reaction period is finished the measurement
starts automatically.
The result is shown in the display in:
mg/l free Chlorine
mg/l combined Chlorine
mg/l total Chlorine

64
SP600 Spectrophotometer 01/2008
1.1 Methods
1
prepare Zero
press ZERO
0 1
Chlorine, free
with Liquid Reagent
0.02 – 3 mg/l Cl
1. Fill a clean vial (24 mm Ø) with 10 ml of the water sample,
close tightly with the cap.
2. Place the vial in the sample chamber making sure that
the
3. Press ZERO key.
4. Remove the vial from the sample chamber and empty
the vial.
5. Fill the vial with the same size drops by holding the
bottle vertically and squeeze slowly:
6 drops of DPD 1 buffer solution
2 drops of DPD 1 reagent solution
6. Add water sample to the 10 ml mark.
7. Close the vial tightly with the cap and swirl several
times to mix the contents.
2
marks are aligned.
8. Place the vial in the sample chamber making sure that
the
marks are aligned.
Zero accepted
prepare Test
press TEST
Notes (free and total Chlorine):
1. After use replace the bottle caps securely noting the colour coding.
2. Store the reagent bottles in a cool, dry place ideally between 6°C and 10°C.
3. Also see page 51.
9. Press TEST key.
The result is shown in the display in mg/l free Chlorine.

65
SP600 Spectrophotometer 01/2008
1.1 Methods
1
prepare Zero
press ZERO
0 1
Chlorine, total
with Liquid Reagent
0.02 – 3 mg/l Cl
1. Fill a clean vial (24 mm Ø) with 10 ml of the water sample,
close tightly with the cap.
2. Place the vial in the sample chamber making sure that
the
3. Press ZERO key.
4. Remove the vial from the sample chamber and empty
the vial.
5. Fill the vial with the same size drops by holding the
bottle vertically and squeeze slowly:
6 drops of DPD 1 buffer solution
2 drops of DPD 1 reagent solution
3 drops of DPD 3 solution
6. Add water sample to the 10 ml mark.
2
marks are aligned.
7. Close the vial tightly with the cap and swirl several
times to mix the contents.
8. Place the vial in the sample chamber making sure
that the
Zero accepted
prepare Test
press TEST
Countdown
2:00
9. Press TEST key.
Wait for a reaction period of 2 minutes.
After the reaction period is finished the measurement starts
automatically.
total Chlorine.
marks are aligned.
The result is shown in the display in mg/l
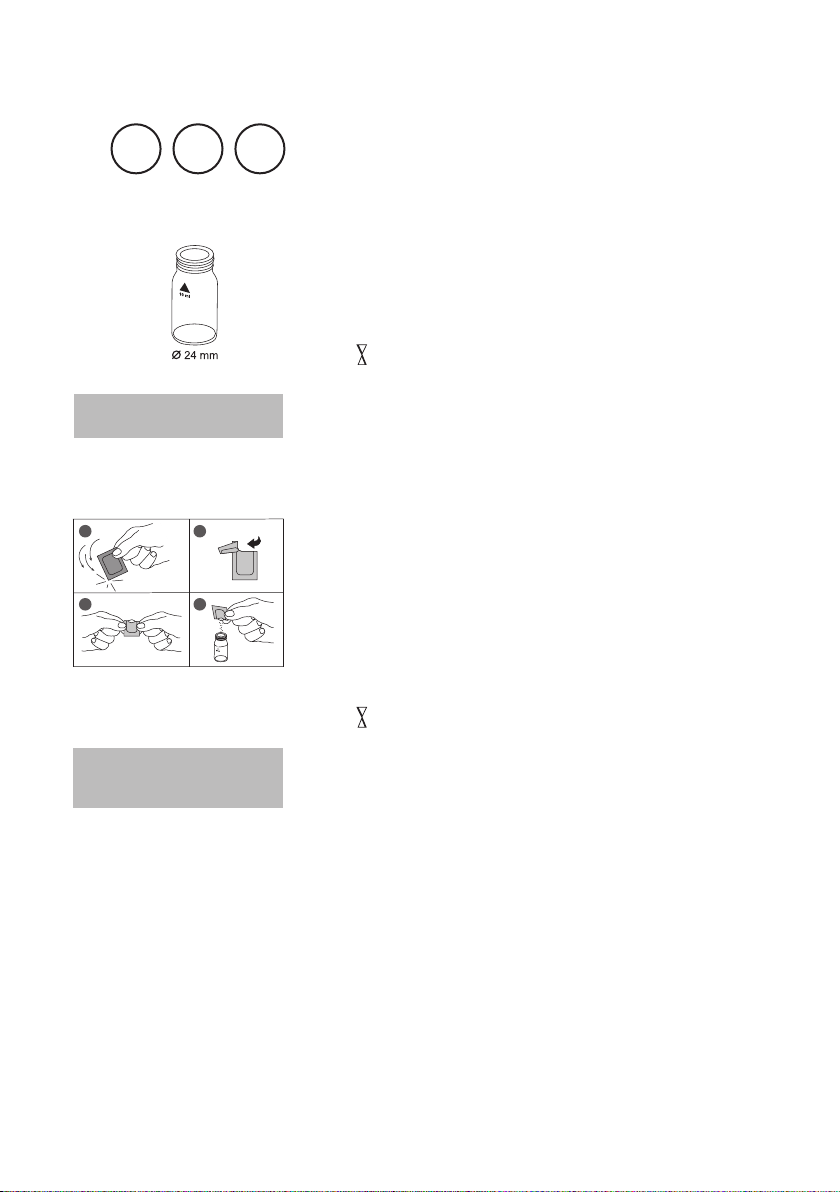
66
SP600 Spectrophotometer 01/2008
1.1 Methods
1 2
3 4
1
prepare Zero
press ZERO
1 0
Chlorine, differentiated determination
with Powder Pack
0.01 – 2 mg/l Cl
1. Fill a clean vial (24 mm Ø) with 10 ml of the water sample,
close tightly with the cap.
2. Place the vial in the sample chamber making sure that
the
3. Press ZERO key.
4. Remove the vial from the sample chamber.
5. Add one VARIO Chlorine FREE-DPD / F10 powder
pack straight from the foil to the water sample.
6. Close the vial tightly with the cap and swirl several
times to mix the contents (approx. 20 seconds).
7. Place the vial in the sample chamber making sure that
the
2
marks are aligned.
marks are aligned.
Zero accepted
prepare T1
press TEST
8. Press TEST key.
9. Remove the vial from the sample chamber. Empty the
vial, rinse vial and cap several times and then fill the vial
with 10 ml of water sample.
10. Add one VARIO Chlorine TOTAL-DPD / F10 powder
pack straight from the foil to the water sample.
11. Close the vial tightly with the cap and swirl several
times to mix the contents (approx. 20 seconds).

67
SP600 Spectrophotometer 01/2008
1.1 Methods
12. Place the vial in the sample chamber making sure that
the marks are aligned.
T1 accepted
prepare T2
press TEST
Countdown
3:00
*,** mg/l free Cl
*,** mg/l comb. Cl
*,** mg/l total Cl
13. Press TEST key.
Wait for a reaction period of 3 minutes.
After the reaction period is finished the measurement starts
automatically.
The result is shown in the display in:
mg/l free Chlorine
mg/l combined Chlorine
mg/l total Chlorine
Notes:
see page 51

68
SP600 Spectrophotometer 01/2008
1.1 Methods
1 2
3 4
1
prepare Zero
press ZERO
1 0
Chlorine, free
with Powder Pack
0.01 – 2 mg/l Cl
1. Fill a clean vial (24 mm Ø) with 10 ml of the water sample,
close tightly with the cap.
2. Place the vial in the sample chamber making sure that
the
3. Press ZERO key.
4. Remove the vial from the sample chamber.
5. Add one VARIO Chlorine FREE-DPD / F10 powder
pack straight from the foil to the water sample.
6. Close the vial tightly with the cap and swirl several
times to mix the contents (approx. 20 seconds).
7. Place the vial in the sample chamber making sure that
the
2
marks are aligned.
marks are aligned.
Zero accepted
prepare Test
press TEST
8. Press TEST key.
The result is shown in the display in mg/l free Chlorine.
Notes:
see page 51
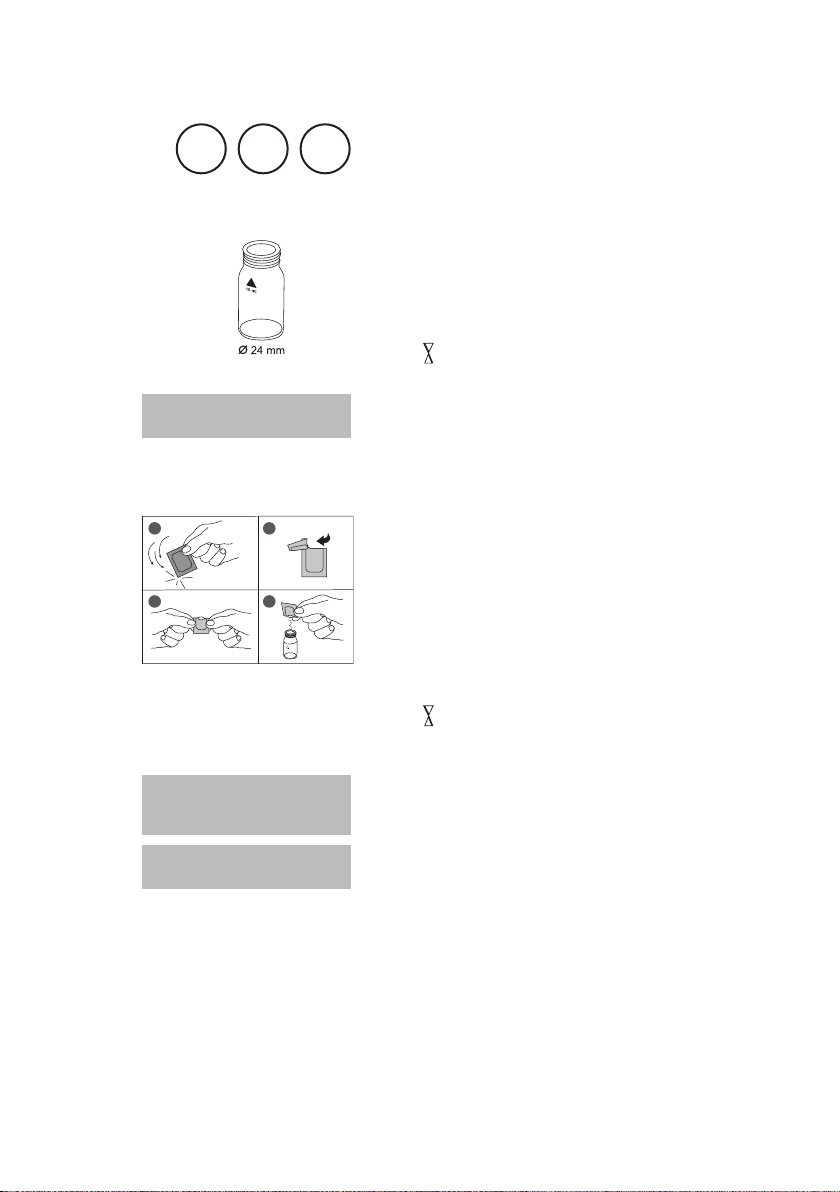
69
SP600 Spectrophotometer 01/2008
1.1 Methods
1 2
3 4
1
prepare Zero
press ZERO
1 0
Chlorine, total
with Powder Pack
0.01 – 2 mg/l Cl
1. Fill a clean vial (24 mm Ø) with 10 ml of the water sample,
close tightly with the cap.
2. Place the vial in the sample chamber making sure that
the
3. Press ZERO key.
4. Remove the vial from the sample chamber.
5. Add one VARIO Chlorine TOTAL-DPD / F10 powder
pack straight from the foil to the water sample.
6. Close the vial tightly with the cap and swirl several time
to mix the contents (approx. 20 seconds).
7. Place the vial in the sample chamber making sure that
the
2
marks are aligned.
marks are aligned.
Zero accepted
prepare Test
press TEST
Countdown
3:00
8. Press TEST key.
Wait for a reaction period of 3 minutes.
After the reaction period is finished the measurement starts
automatically.
The result is shown in the display in mg/l total Chlorine.
Notes:
see page 51
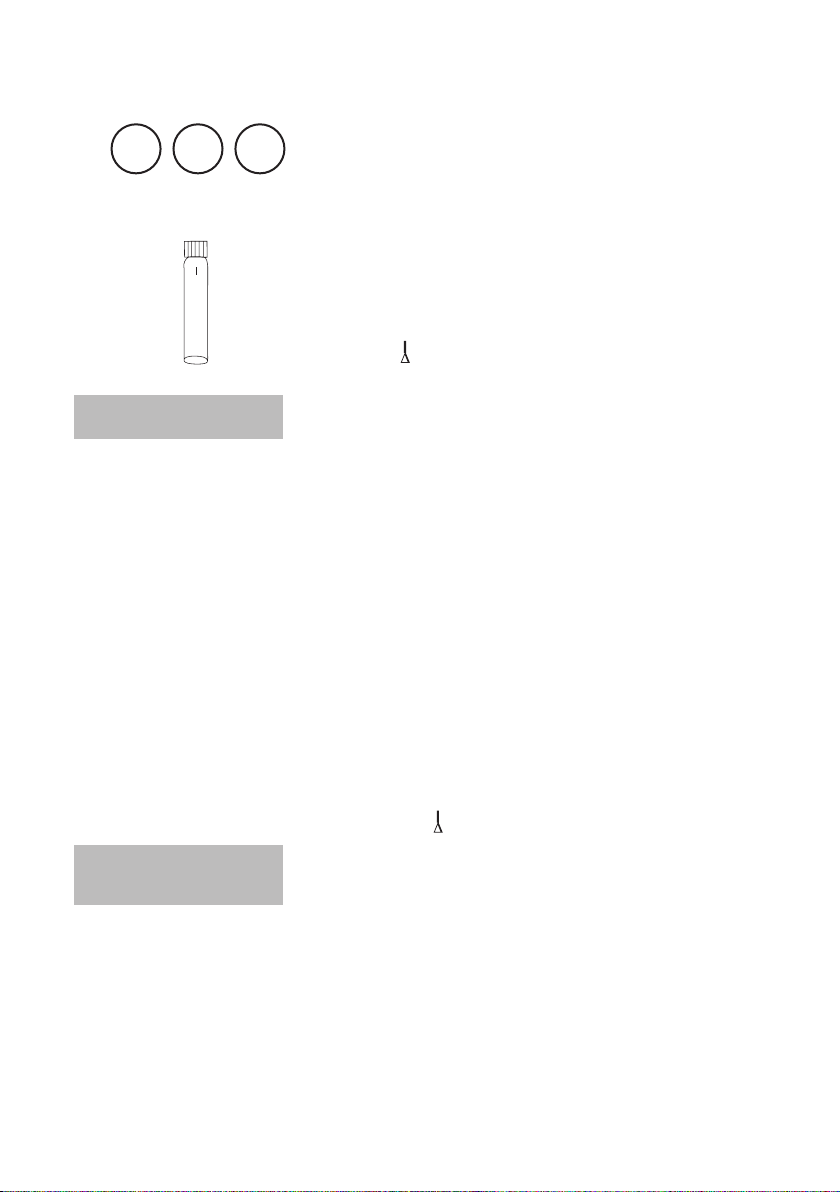
70
SP600 Spectrophotometer 01/2008
1.1 Methods
1
prepare Zero
press ZERO
0 5
Ø 16 mm
Chlorine HR (Kl)
with Tablet
5 – 200 mg/l Cl
1. Fill a clean vial (16 mm Ø) with 10 ml of the water sample,
close tightly with the cap.
2. Place the vial in the sample chamber making sure that
the marks
3. Press ZERO key.
4. Remove the vial from the sample chamber.
5. Add one CHLORINE HR (KI) tablet straight from
the foil to the water sample and crush the tablet using
a clean stirring rod.
6. Add one ACIDIFYING GP tablet straight from the
foil to the same water sample and crush the tablet using a
clean stirring rod.
2
are aligned.
Zero accepted
prepare Test
press TEST
7. Cl o se th e vial t ight ly wi th th e c ap an d swi r l
several times until the tablets are dissolved.
8. Place the vial in the sample chamber making sure
that the marks
9. Press TEST key.
The result is shown in the display in mg/l Chlorine.
are aligned.

71
SP600 Spectrophotometer 01/2008
1.1 Methods
Notes:
1. Oxidizing agents interfere as they react like Chlorine.

72
SP600 Spectrophotometer 01/2008
1.1 Methods
1
prepare Zero
press ZERO
1 9
Chlorine dioxide in absence of Chlorine
with Tablet
0.05 – 1 mg/l ClO
1. Fill a clean 50 mm cell with water sample.
2. Place the cell in the sample chamber making sure that
the positioning is correct.
3. Press ZERO key.
4. Remove the cell from the sample chamber. Empty the
cell and dry completely.
5. Rinse a beaker with the sample and empty it leaving
a few drops in.
6. Add one DPD No. 1 tablet straight from the foil and
crush the tablet using a clean stirring rod.
7. Add 10 ml of water sample and dissolve the tablet.
2
Zero accepted
prepare Test
press TEST
8. Fill the 50 mm cell with the colored test solution.
9. Place the cell in the sample chamber making sure that
the positioning is correct.
10. Press TEST key.
The result is shown in the display in mg/l
Chlorine dioxide.

73
SP600 Spectrophotometer 01/2008
1.1 Methods
Notes:
1. Vial cleaning:
As many household cleaners (e.g. dishwasher detergent) contain reducing
substances, the subsequent determination of Oxidizing agents (e.g. Chlorine,
Bromine) may show lower results. To avoid any measurement errors, only use
glassware free of Chlorine consumption.
Preparation: Put all applicable glassware into Sodium hypochlorite solution
(0.1 g/l) for one hour, then rinse all glassware thoroughly with deionized water.
2. Preparing the sample:
When preparing the sample, the escape of Chlorine dioxide gases, e.g. by
pipetting or shaking, must be avoided. The analysis must take place immediately
after taking the sample.
3. The DPD colour development is carried out at a pH value of 6.3 to 6.5. The
reagent tablet therefore contains a buffer for the pH adjustment.
Strong alkaline or acidic water samples must be adjusted between pH 6 and
pH 7 before the tablet is added (use 0.5 mol/l Sulfuric acid resp. 1 mol/l Sodium
hydroxide).
4. Turbidity (lead to errors):
The use of the DPD No. 1 tablet in samples with high Calcium ion contents* and/or high
conductivity* can lead to turbidity of the sample and therefore incorrect measurements.
In this event, the reagent tablet DPD No. 1 High Calcium should be used as an
alternative.
* it is not possible to give exactly values, because the development of
turbidity depends on nature and ingredients of the sample.
5. Exceeding of the measuring range:
Concentrations above 19 mg/l Chlorine dioxide can produce results within the
measuring range up to 0 mg/l. In this event, the water sample must be diluted with
water free of Chlorine dioxide. 10 ml of the diluted sample will be mixed with the
reagent and the measurement repeated.
6.
Oxidizing agents such as Chlorine, Ozone etc. interfere as they react like Chlorine
dioxide.

74
SP600 Spectrophotometer 01/2008
1.1 Methods
1
Chlorine dioxide
>> with Cl
without Cl
>> with Cl
>> without Cl
2 0
Chlorine dioxide
with Tablet
0.05 – 2.5 mg/l ClO
The following selection is shown in the display:
for the determination of Chlorine dioxide in the presence
of Chlorine.
for the determination of Chlorine dioxide in the absence
of Chlorine.
Select the desired determination with the arrow keys
] and [ ]. Confirm with [ ] key.
[
2

75
SP600 Spectrophotometer 01/2008
1.1 Methods
Notes:
1. Vial cleaning:
As many household cleaners (e.g. dishwasher detergent) contain reducing
substances, the subsequent determination of Chlorine dioxide may show lower
results. To avoid any measurement errors, only use glassware free of Chlorine
consumption.
Preparation: Put all applicable glassware into Sodium hypochlorite solution
(0.1 g/l) for one hour, then rinse all glassware thoroughly with deionized water.
2. Preparing the sample:
When preparing the sample, the escape of Chlorine dioxide gases, e.g. by
pipetting or shaking, must be avoided. The analysis must take place immediately
after taking the sample.
3. The DPD colour development is carried out at a pH value of 6.3 to 6.5. The
reagent tablet therefore contains a buffer for the pH adjustment.
Strong alkaline or acidic water samples must be adjusted between pH 6 and
pH 7 before the tablet is added (use 0.5 mol/l Sulfuric acid resp. 1 mol/l Sodium
hydroxide).
4. Exceeding of the measuring range:
Concentrations above 19 mg/l Chlorine dioxide can produce results within the
measuring range up to 0 mg/l. In this event, the water sample must be diluted with
water free of Chlorine dioxide. 10 ml of the diluted sample will be mixed with the
reagent and the measurement repeated.
5. If ??? is displayed at a differentiated test result see page 325.
Oxidizing agents such as Chlorine, Ozone etc. interfere as they react like Chlorine
dioxide.

76
SP600 Spectrophotometer 01/2008
1.1 Methods
1
prepare Zero
press ZERO
2 0
Chlorine dioxide
in the presence of Chlorine
with Tablet
0.05 – 2.5 mg/l ClO
1. Fill a clean vial (24 mm Ø) with 10 ml of the water sample,
close tightly with the cap.
2. Place the vial in the sample chamber making sure that
marks are aligned.
the
3. Press ZERO key.
4. Remove the vial from the sample chamber, empty the
vial leaving a few drops in.
5. Add one DPD No. 1 tablet straight from the foil and
crush the tablet using a clean stirring rod.
Fill a second clean vial with 10 ml of water sample.
6.
7. Add one GLYCINE tablet straight from the foil and
crush the tablet using a clean stirring rod.
2
Zero accepted
prepare T1
press TEST
8. Cl ose the vi al tig h tly with the ca p a nd sw i rl
several times until the tablet is dissolved.
9. Transfer the contents of the second vial into the
prepared vial.
10. C los e t he vi a l tig h tly with th e cap an d swi r l
several times until the tablet is dissolved.
11. Place the vial in the sample chamber making sure that
marks are aligned.
the
12. Press TEST key.

77
SP600 Spectrophotometer 01/2008
1.1 Methods
13. Remove the vial from the sample chamber. Empty the
vial, rinse vial and cap several times and then fill with a
2-3 drops of water sample.
14. Add one DPD No. 1 tablet straight from the foil and
crush the tablet using a clean stirring rod.
15. Add water sample to the 10 ml mark.
16. Close the vial tightly with the cap and swirl several
times until the tablet is dissolved.
T1 accepted
prepare T2
press TEST
T2 accepted
prepare T3
press TEST
Countdown
2:00
*,** mg/l ClO2 [Cl]
*,** mg/l ClO2
*,** mg/l free Cl
*,** mg/l comb. Cl
*,** mg/l total Cl
17. Place the vial in the sample chamber making sure that
the
18. Press TEST key.
19. Remove the vial from the sample chamber.
20. Add one DPD No. 3 tablet straight from the foil to the
same water sample and crush the tablet using a clean
stirring rod.
21. Close the vial tightly with the cap and swirl several
times until the tablet is dissolved.
22. Place the vial in the sample chamber making sure that
the
23. Press TEST key.
Wait for a reaction period of 2 minutes.
After the reaction period is finished the measurement starts
automatically.
The result is shown in the display in:
as Chlorine dioxide in mg/l Chlorine,
or
as Chlorine dioxide in mg/l ClO2.
mg/l free Chlorine
mg/l combined Chlorine
mg/l total Chlorine
marks are aligned.
marks are aligned.
Notes:
See next page.

78
SP600 Spectrophotometer 01/2008
1.1 Methods
Notes:
(Chlorine dioxide in the presence of Chlorine)
1. The conversion factor to convert Chlorine dioxide as Chlorine to Chlorine dioxide
as ClO2 is approximately 0.4 (more exactly 0.38).
mg/l ClO2 = mg/l ClO2 [Cl] x 0.38
ClO2[Cl]
ClO
(Chlorine dioxide displayed as Chlorine units ClO2 [Cl] has its origin out of the swimming
poolwater treatment according to DIN 19643.)
2. The total Chlorine result given includes the contribution by the Chlorine dioxide (as
Chlorine) reading. For true total Chlorine value subtract the Chlorine dioxide (as
Chlorine) reading from the quoted total Chlorine reading.
3. Also see page 75.
2

79
SP600 Spectrophotometer 01/2008
1.1 Methods
1
prepare Zero
press ZERO
2 0
Chlorine dioxide
in absence of Chlorine
with Tablet
0.05 – 2.5 mg/l ClO
1. Fill a clean vial (24 mm Ø) with 10 ml of the water sample,
close tightly with the cap.
2. Place the vial in the sample chamber making sure that
marks are aligned.
the
3. Press ZERO key.
4. Remove the vial from the sample chamber, empty the
vial leaving a few drops in.
5. Add one DPD No. 1 tablet straight from the foil and
crush the tablet using a clean stirring rod.
6. Add water sample to the 10 ml mark.
2
7. Cl ose the vi al tig h tly with the ca p a nd sw i rl
several times until the tablet is dissolved.
8. Place the vial in the sample chamber making sure that
the
Zero accepted
prepare Test
press TEST
*,** mg/l ClO2 [Cl]
*,** mg/l ClO2
9. Press TEST key.
The result is shown in the display
as Chlorine dioxide in mg/l Chlorine,
or
as Chlorine dioxide in mg/l ClO
Notes:
see page 75
marks are aligned.
.
2

80
SP600 Spectrophotometer 01/2008
1.1 Methods
1
1
Chrom
>> diff
Cr (VI)
Cr (III + VI)
>> diff
>> Cr (VI)
>> Cr (III + VI)
2 4
2 5
Chromium with Powder Pack
0.005 – 0.5 mg/l Cr / 5 – 500 μg/l Cr
Chromium with Powder Pack
0.02 – 2 mg/l Cr
The following selection is shown in the display:
for the differentiated determination of Chromium (VI),
Chromium (III) and total Chromium
for the determination of Chromium (VI)
for the determination of total Chromium (sum Cr (III) +
Cr (VI))
Select the desired determination with the arrow keys
] and [ ]. Confirm with the [ ] key.
[

81
SP600 Spectrophotometer 01/2008
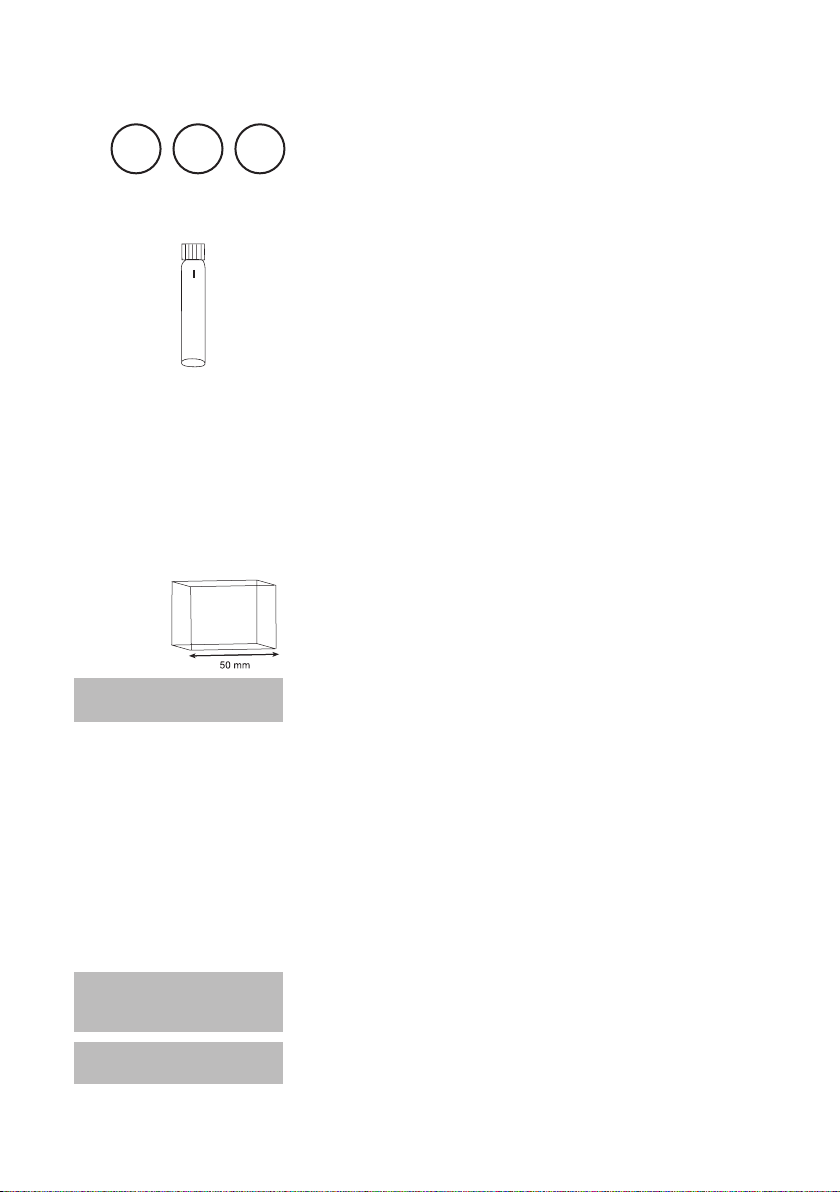
82
SP600 Spectrophotometer 01/2008
1.1 Methods
1
prepare Zero
press ZERO
2 4
Ø 16 mm
Chromium, differentiated
determination with Powder Pack
0.005 – 0.5 mg/l Cr / 5 – 500 μg/l Cr
Digestion:
Fill 10 ml of water sample into a clean vial (16 mm Ø).
1.
2. Add one PERSULF.RGT FOR CR powder pack straight
from the foil into the vial.
3. Close the vial tightly with the cap and swirl several
times to mix the contents.
4. Heat the vial for 120 minutes in a preheated thermoreactor at a temperature of 100°C.
5. Remove the vial from the thermoreactor.
(CAUTION: The vials are hot!).
Invert the vial and allow to cool to room temperature.
Performing test procedure:
6. Fill a clean 50 mm cell with deionized water.
7. Place the cell in the sample chamber making sure that
the positioning is correct.
8. Press ZERO key.
9. Remove the cell from the sample chamber. Empty the
cell and dry completely.
Zero accepted
prepare T1
press TEST
Countdown
5:00
10. Add one CHROMIUM HEXAVALENT powder pack
straight from the foil into the pre prepared vial (see
step 5).
11. Close the vial tightly with the cap and swirl several
times to mix the contents.
12. Fill the 50 mm cell with this test solution.
13. Place the cell in the sample chamber making sure that
the positioning is correct.
14. Press TEST key.
Wait for a reaction period of 5 minutes.
After the reaction period is finished the measurement
starts automatically.

83
SP600 Spectrophotometer 01/2008
1.1 Methods
15. Fill a second clean vial (16 mm Ø) with 10 ml of water
sample.
16. Add one CHROMIUM HEXAVALENT powder pack
straight from the foil to the water sample.
Ø 16 mm
T1 accepted
prepare T2
press TEST
Countdown
5:00
*,** mg/l Cr (VI)
*,** mg/l Cr (III)
*,** mg/l Cr tot.
Notes:
1. Performing steps 1–14 determines concentration of total chromium and steps 15–20
determines concentration of Chromium (VI). The concentration of Chromium (III) results
out of the difference.
2. pH value of the water sample should be between 3 and 9.
3. For information about interferences especially in waste water and chemical waste water
through metals and reductive or oxidic agents see DIN 38 405 – D 24 and Standard
Methods of Water and Wastewater, 20th Edition; 1998.
mg/l
4.
μg/l
17. Close the vial tightly with the cap and swirl several
times to mix the contents.
18. Fill the 50 mm cell with this test solution.
19. Place the cell in the sample chamber making sure that
the positioning is correct.
20. Press TEST key.
Wait for a reaction period of 5 minutes.
After the reaction period is finished the measurement
starts automatically.
The result is shown in the display in:
mg/l Cr (Vl)
mg/l Cr (lll)
mg/l Cr total chromium
84
SP600 Spectrophotometer 01/2008
1.1 Methods
1
prepare Zero
press ZERO
Zero accepted
prepare Test
press TEST
Countdown
5:00
2 4
Ø 16 mm
Chromium (Vl)
with Powder Pack
0.005 – 0.5 mg/l Cr / 5 – 500 μg/l Cr
1. Fill a clean 50 mm cell with deionized water.
2. Place the cell in the sample chamber making sure that
the positioning is correct.
3. Press ZERO key.
4. Remove the cell from the sample chamber. Empty the
cell and dry completely.
5.
Fill 10 ml of water sample into a clean vial (16 mm Ø)
6. Add one CHROMIUM HEXAVALENT powder pack
straight from the foil to the water sample.
7. Close the vial tightly with the cap and swirl several
times to mix the contents.
8. Fill the 50 mm cell with this test solution.
9. Place the cell in the sample chamber making sure that
the positioning is correct.
10. Press TEST key.
Wait for a reaction period of 5 minutes.
After the reaction period is finished the measurement
starts automatically.
.
The result is shown in the display as Chromium (Vl).
Notes:
see previous page

85
SP600 Spectrophotometer 01/2008
1.1 Methods
1
prepare Zero
press ZERO
Zero accepted
prepare Test
press TEST
Countdown
5:00
2 4
Ø 16 mm
Chromium, total (Cr(lll) + Cr(Vl))
with Powder Pack
0.005 – 0.5 mg/l Cr / 5 – 500 μg/l Cr
Digestion:
Fill a clean vial (16 mm Ø) with 10 ml of the water sam-
1.
ple.
2. Add one PERSULF.RGT FOR CR powder pack straight
from the foil into the vial.
3. Close the vial tightly with the cap and swirl several
times to mix the contents.
4. Heat the vial for 120 minutes in a preheated thermoreactor at a temperature of 100°C.
5. Remove the vial from the thermoreactor.
(CAUTION: The vials are hot!).
Invert the vial and allow to cool to room temperature.
Performing test procedure:
6. Fill a clean 50 mm cell with deionized water.
7. Place the cell in the sample chamber making sure that
the positioning is correct.
8. Press ZERO key.
9. Remove the cell from the sample chamber. Empty the
cell and dry completely.
10.
Add one CHROMIUM HEXAVALENT powder pack
straight from t he foi l to the pre-prepared water
sample.
11. Close the vial tightly with the cap and swirl several
times to mix the contents.
12. Fill the 50 mm cell with this test solution.
13. Place the cell in the sample chamber making sure that
the positioning is correct.
14. Press TEST key.
Wait for a reaction period of 5 minutes.
After the reaction period is finished the measurement
starts automatically.
The result is shown in the display as total Chromium.

86
SP600 Spectrophotometer 01/2008
1.1 Methods
1
prepare Zero
press ZERO
2 5
Ø 16 mm
Chromium, differentiated
determination with Powder Pack
0.02 – 2 mg/l Cr
Digestion:
Fill a clean vial (16 mm Ø) with 10 ml of the water sam-
1.
ple.
2. Add one PERSULF.RGT FOR CR powder pack straight
from the foil into the vial.
3. Close the vial tightly with the cap and swirl several
times to mix the contents.
4. Heat the vial for 120 minutes in a preheated thermoreactor at a temperature of 100°C.
5. Remove the vial from the thermoreactor.
(CAUTION: The vials are hot!).
Invert the vial and allow to cool to room temperature.
Performing test procedure:
6. Place the pre prepared vial in the sample chamber
making sure that the marks
7. Press ZERO key.
8. Remove the vial from the sample chamber.
are aligned.
Zero accepted
prepare T1
press TEST
Countdown
5:00
9. Add one CHROMIUM HEXAVALENT powder pack
straight from the foil into the pre prepared vial.
10. Close the vial tightly with the cap and swirl several
times to mix the contents.
11. Place the vial in the sample chamber making sure that
the marks
12. Press TEST key.
Wait for a reaction period of 5 minutes.
After the reaction period is finished the measurement
starts automatically.
are aligned.

87
SP600 Spectrophotometer 01/2008
1.1 Methods
Ø 16 mm
T1 accepted
prepare T2
press TEST
Countdown
5:00
13. Fill a second clean vial (16 mm Ø) with 10 ml of water
sample.
14. Add one CHROMIUM HEXAVALENT powder pack
straight from the foil to the water sample.
15. Close the vial tightly with the cap and swirl several
times to mix the contents.
16. Place the vial in the sample chamber making sure that
the marks
17. Press TEST key.
Wait for a reaction period of 5 minutes.
After the reaction period is finished the measurement
starts automatically.
The result is shown in the display in:
are aligned.
*,** mg/l Cr (VI)
*,** mg/l Cr (III)
*,** mg/l Cr tot.
Notes:
1. Performing steps 1–12 determines concentration of total chromium and steps 13–17
determines concentration of Chromium (VI). The concentration of Chromium (III) results
out of the difference.
2. pH value of the water sample should be between 3 and 9.
3. For information about interferences especially in waste water and chemical waste water
through metals and reductive or oxidic agents see DIN 38 405 – D 24 and Standard
Methods of Water and Wastewater, 20th Edition; 1998.
mg/l Cr (Vl)
mg/l Cr (lll)
mg/l Cr total Chromium

88
SP600 Spectrophotometer 01/2008
1.1 Methods
1
prepare Zero
press ZERO
2 5
Ø 16 mm
Chromium (Vl)
with Powder Pack
0.02 – 2 mg/l Cr
Fill a clean vial (16 mm Ø) with 10 ml of the water
1.
sample.
2. Place the vial in the sample chamber making sure that
the marks
3. Press ZERO key.
4. Remove the vial from the sample chamber.
5. Add one CHROMIUM HEXAVALENT powder pack
straight from the foil to the water sample.
6. Close the vial tightly with the cap and swirl several
times to mix the contents.
7. Place the vial in the sample chamber making sure that
the marks
are aligned.
are aligned.
Zero accepted
prepare Test
press TEST
Countdown
5:00
8. Press TEST key.
Wait for a reaction period of 5 minutes.
After the reaction period is finished the measurement
starts automatically.
The result is shown in the display in mg/l Chromium (Vl).
Notes:
see previous page

89
SP600 Spectrophotometer 01/2008
1.1 Methods
1
prepare Zero
press ZERO
2 5
Ø 16 mm
Chromium, total (Cr(lll) + Cr(Vl))
with Powder Pack
0.2 – 2 mg/l Cr
Digestion:
Fill a clean vial (16 mm Ø) with 10 ml of the water sam-
1.
ple.
2. Add one PERSULF.RGT FOR CR powder pack straight
from the foil into the vial.
3. Close the vial tightly with the cap and swirl several
times to mix the contents.
4. Heat the vial for 120 minutes in a preheated thermoreactor at a temperature of 100°C.
5. Remove the vial from the thermoreactor.
(CAUTION: The vials are hot!).
Invert the vial and allow to cool to room temperature.
Performing test procedure:
6. Place the pre prepared vial in the sample chamber making sure that the marks
7. Press ZERO key.
8. Remove the vial from the sample chamber.
are aligned.
9. Add one CHROMIUM HEXAVALENT powder pack
10. Close the vial tightly with the cap and swirl several
11. Place the vial in the sample chamber making sure that
Zero accepted
prepare Test
press TEST
Countdown
5:00
12. Press TEST key.
Wait for a reaction period of 5 minutes.
After the reaction period is finished the measurement
The resul t is shown in the display in mg/l total
straight from the foil to the water sample.
times to mix the contents.
the marks
starts automatically.
Chromium.
are aligned.

90
SP600 Spectrophotometer 01/2008
1.1 Methods
1
prepare Zero
press ZERO
3 0
Ø 16 mm
COD LR
with Tube Test
0 – 150 mg/l O
1. Open one white capped reaction vial and add 2 ml
deionized water (this is the blank (Note 1)).
2. Open another white capped reaction vial and add
2 ml of water sample (this is the sample).
3. Close the vials with the cap tightly. Invert the vial gently
several times to mix the contents.
(CAUTION: The vial will become hot during mixing!)
4. Heat the vials for 120 minutes in the preheated reactor at
a temperature of 150°C.
5. (CAUTION: The vials are hot!)
Remove the tubes from the heating block and allow them
to cool to 60°C or less. Mix the contents by carefully
inverting each tube several times while still warm.
Then allow the tubes to cool to ambient temperature
before measuring. (Note 2).
6. Place the vial (the blank (Note 3, 4)) in the sample
chamber making sure that the marks
7. Press ZERO key.
2
are aligned.
Zero accepted
prepare Test
press TEST
8. Remove the vial from the sample chamber.
9. Place the vial (the sample (Note 3, 4)) in the sample
chamber making sure that the marks
10. Press TEST key.
The result is shown in the display in mg/l COD.
are aligned.

91
SP600 Spectrophotometer 01/2008
1.1 Methods
Notes:
1. Run samples and blanks with the same batch of vials. The blank is stable when stored in
the dark and can be used for further measurements with vials of the same batch.
2. Do not place the hot vials in the sample chamber. Cool the vials to room temperature for
final measurements.
3. Suspended solids in the vial lead to incorrect measurements. For this reason it is
important to place the vials carefully in the sample chamber. The precipitate at the
bottom of the sample should be not suspended.
4. Clean the outside of the vials with a towel. Finger prints or other marks will be removed.
5. Samples can be measured when the Chloride contents does not exceed 1000 mg/l.
6. In exceptional cases, compounds contained in the water cannot be oxidized adequate,
what results in minimum findings, compared with the reference method.

92
SP600 Spectrophotometer 01/2008
1.1 Methods
1
prepare Zero
press ZERO
3 1
Ø 16 mm
COD MR
with Tube Test
0 – 1 500 mg/l O
1. Open one white capped reaction vial and add 2 ml
deionized water (this is the blank (Note 1)).
2. Open another white capped reaction vial and add
2 ml of water sample (this is the sample).
3. Close the vials with the cap tightly. Invert the vial gently
several times to mix the contents.
(CAUTION: The vial will become hot during mixing!)
4. Heat the vials for 120 minutes in the preheated reactor at
a temperature of 150°C.
5. (CAUTION: The vials are hot!)
Remove the tubes from the heating block and allow them
to cool to 60°C or less. Mix the contents by carefully
inverting each tube several times while still warm.
Then allow the tubes to cool to ambient temperature
before measuring. (Note 2).
6. Place the vial (the blank (Note 3, 4)) in the sample
chamber making sure that the marks
7. Press ZERO key.
2
are aligned.
Zero accepted
prepare Test
press TEST
8. Remove the vial from the sample chamber.
9. Place the vial (the sample (Note 3, 4)) in the sample
chamber making sure that the marks
10. Press TEST key.
The result is shown in the display in mg/l COD.
are aligned.

93
SP600 Spectrophotometer 01/2008
1.1 Methods
Notes:
1. Run samples and blanks with the same batch of vials. The blank is stable when stored in
the dark and can be used for further measurements with vials of the same batch.
2. Do not place the hot vials in the sample chamber. Cool the vials to room temperature for
final measurements.
3. Suspended solids in the vial lead to incorrect measurements. For this reason it is
important to place the vials carefully in the sample chamber. The precipitate at the
bottom of the sample should be not suspended.
4. Clean the outside of the vials with a towel. Finger prints or other marks will be removed.
5. Samples can be measured when the Chloride contents does not exceed 1000 mg/l.
6. In exceptional cases, compounds contained in the water cannot be oxidized adequate,
what results in minimum findings, compared with the reference method.
7. For samples under 100 mg/l COD it is recommendable to repeat the test with the tube
test for COD LR.
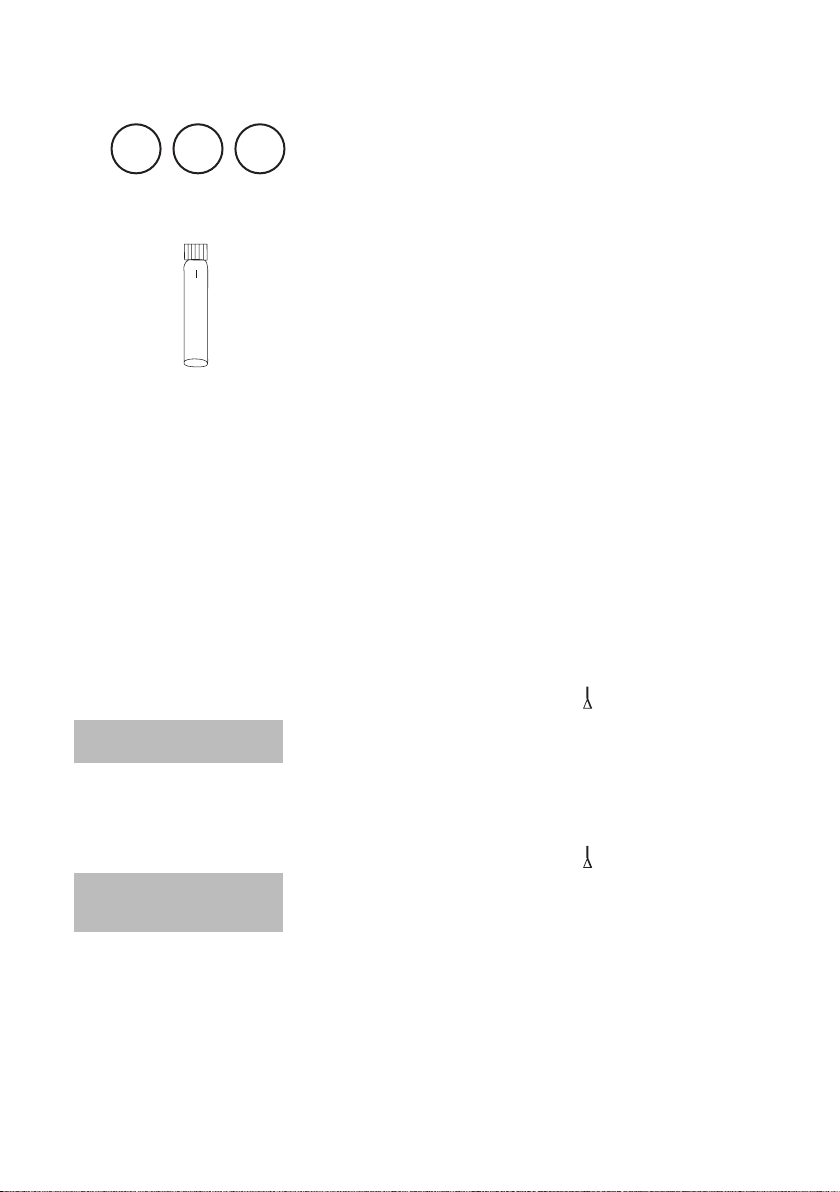
94
SP600 Spectrophotometer 01/2008
1.1 Methods
1
prepare Zero
press ZERO
3 2
Ø 16 mm
COD HR
with Tube Test
0 – 15 g/l O2 (=^ 0 – 15 000 mg/l O2)
1. Open one white capped reaction vial and add 0.2 ml
deionized water (this is the blank (Note 1)).
2. Open another white capped reaction vial and add
0.2 ml of water sample (this is the sample).
3. Close the vials with the cap tightly. Invert the vial gently
several times to mix the contents.
(CAUTION: The vial will become hot during mixing!)
4. Heat the vials for 120 minutes in the preheated reactor at
a temperature of 150°C.
5. (CAUTION: The vials are hot!)
Remove the tubes from the heating block and allow them
to cool to 60°C or less. Mix the contents by carefully
inverting each tube several times while still warm.
Then allow the tubes to cool to ambient temperature
before measuring. (Note 2).
6. Place the vial (the blank (Note 3, 4)) in the sample
chamber making sure that the marks
7. Press ZERO key.
are aligned.
Zero accepted
prepare Test
press TEST
8. Remove the vial from the sample chamber.
9. Place the vial (the sample (Note 3, 4)) in the sample
chamber making sure that the marks
10. Press TEST key.
The result is shown in the display in g/l COD.
are aligned.

95
SP600 Spectrophotometer 01/2008
1.1 Methods
Notes:
1. Run samples and blanks with the same batch of vials. The blank is stable when stored in
the dark and can be used for further measurements with vials of the same batch.
2. Do not place the hot vials in the sample chamber. Cool the vials to room temperature for
final measurements.
3. Suspended solids in the vial lead to incorrect measurements. For this reason it is
important to place the vials carefully in the sample chamber. The precipitate at the
bottom of the sample should be not suspended.
4. Clean the outside of the vials with a towel. Finger prints or other marks will be removed.
5. Samples can be measured when the Chloride contents does not exceed 1000 mg/l.
6. In exceptional cases, compounds contained in the water cannot be oxidized adequate,
what results in minimum findings, compared with the reference method.
7. For samples under 1 g/l COD it is recommendable to repeat the test with the test kit for
COD MR or for samples under 0.1 g/l COD with the tube test COD LR.

96
SP600 Spectrophotometer 01/2008
1.1 Methods
1
1
Copper
>> diff
free
total
>> diff
>> free
>> total
4 9
5 0
Copper
with Tablet
0.05 – 1 mg/l Cu
Copper
with Tablet
0.5 – 5 mg/l Cu
The following selection is shown in the display:
for the differentiated determination of free, combined and
total Copper.
for the determination of free Copper.
for the determination of total Copper.
Select the desired determination with the arrow keys
] and [ ]. Confirm with [ ] key.
[

97
SP600 Spectrophotometer 01/2008
1.1 Methods
Note:
1. If ??? is displayed at the diffentiated test result see page 325.

98
SP600 Spectrophotometer 01/2008
1.1 Methods
1
prepare Zero
press ZERO
4 9
Copper, differentiated determination
with Tablet
0.05 – 1 mg/l Cu
1. Fill a clean 50 mm cell with water sample.
2. Place the cell in the sample chamber making sure that
the positioning is correct.
3. Press ZERO key.
4. Remove the cell from the sample chamber. Empty the
cell and dry completely.
5. Fill a beaker with 10 ml of water sample.
6. Add one COPPER No. 1 tablet straight from the foil
and crush the tablet using a clean stirring rod. Dissolve
the tablet.
7. Fill the 50 mm cell with the colored test solution.
Zero accepted
prepare T1
press TEST
8. Place the cell in the sample chamber making sure that
the positioning is correct.
9. Press TEST key.
10. Remove the cell from the sample chamber and return
the colored test solution completely back into the
beaker.
12. Add one COPPER No. 2 tablet straight from the foil
to the same water sample and crush the tablet using a
clean stirring rod. Dissolve the tablet.
 Loading...