

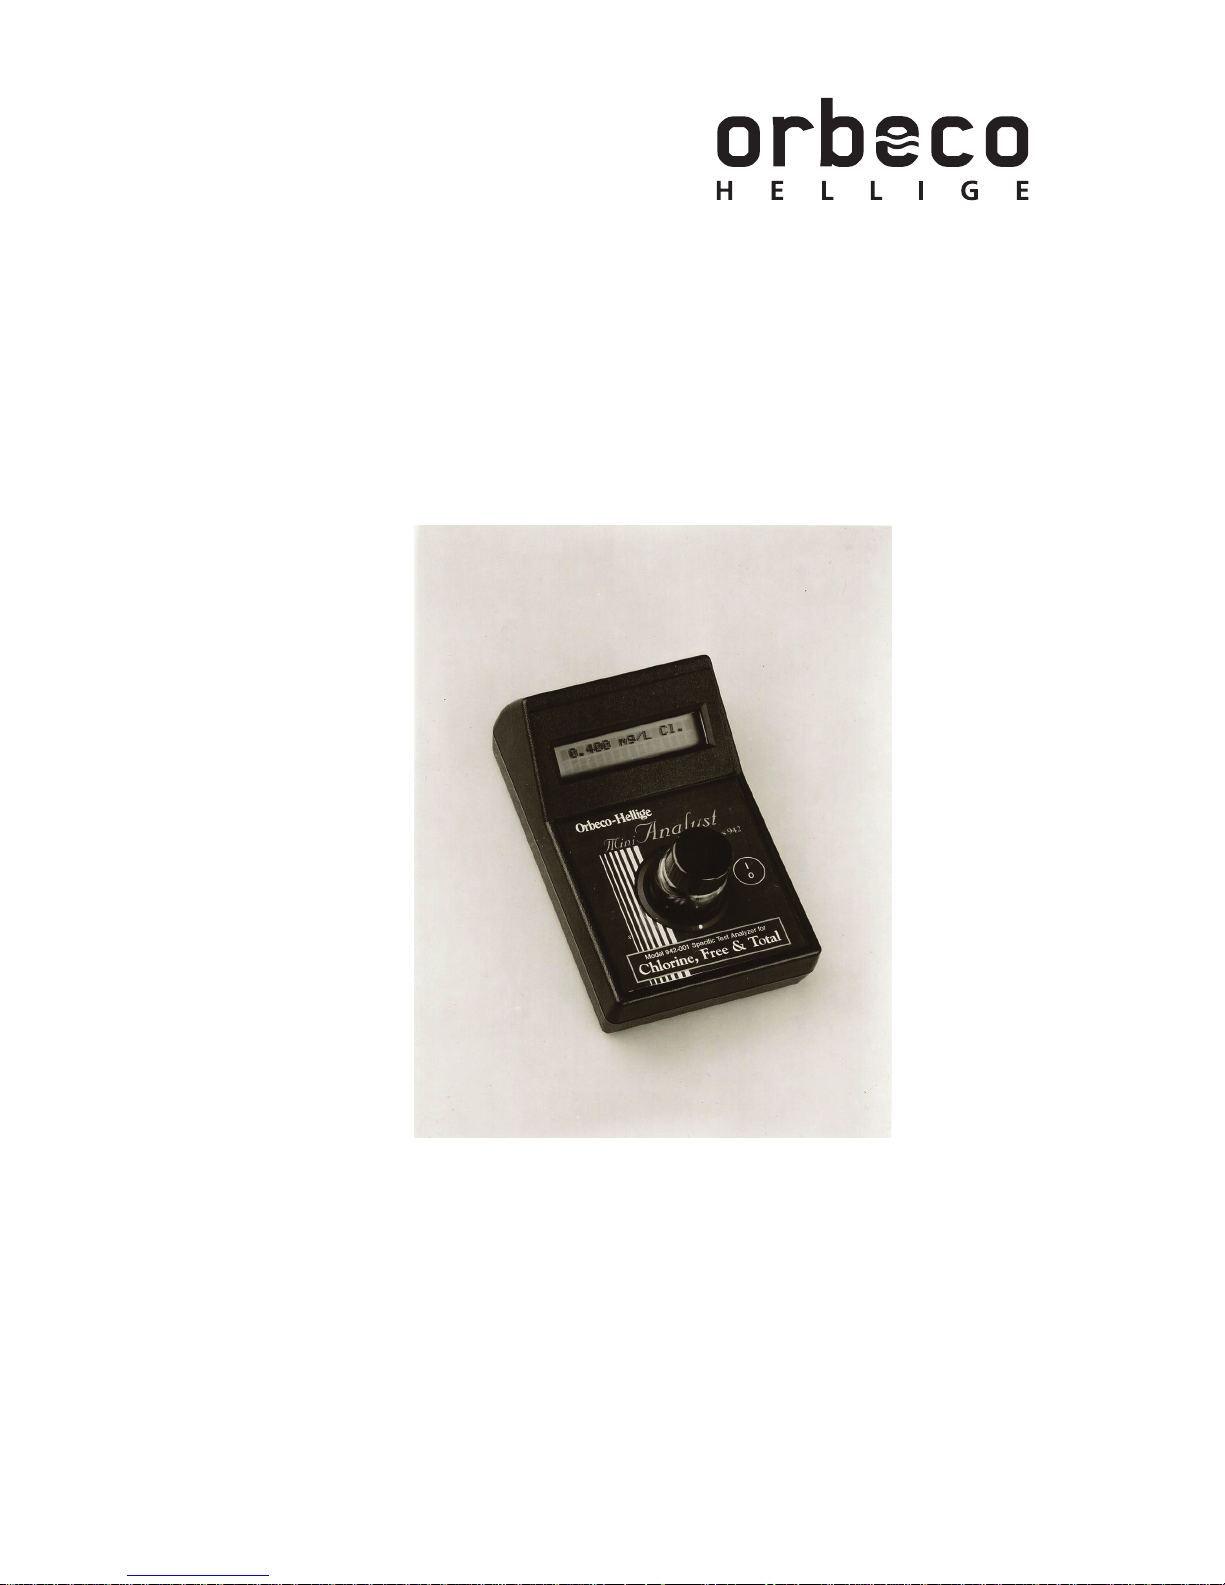
Series 942
The Mini Analyst
Instruction Manual
942-043, Ammonia Nitrogen LR

2
Safety Precautions
CAUTION
Please read this instruction manual before unpacking, setting up or using The Mini Analyst. Please read the
method description completely before performing the test. Be aware of the risks of using the required reagents
by reading the MSDS (Material Safety Data Sheets). Failure could result in serious injury to the operator or
damage to the instrument.
MSDS: www.orbeco.com
CAUTION
The accuracy of the instrument is only valid if the instrument is used in an
environment with controlled electromagnetic disturbances according to DIN 61326.
Wireless devices, e.g. wireless phones, should not be used near the instrument.

3
Table of Contents
Specications .....................................................................................................................................3
1.0 General Description and Features ..............................................................................4
2.0 Safety ........................................................................................................................................5
2.1 Preparing for Operation......................................................................................................5
2.2 General Operating Details and Techniques..................................................................5
2.3 Range Expansion - How to Cover Higher Ranges by Diltuion...............................8
2.4 Meaning of “Blank“ and “Sample“ Tubes.......................................................................8
2.5 Precautions...............................................................................................................................9
3.0 General Operating Instructions ................................................................................ 10
4.0 Important Reagent Safety and Disposal Precautions.....................................13
4.1 Reagent Handling and Disposal .................................................................................... 13
4.2 In Case of Emergency ........................................................................................................ 13
4.3 Explanation of Safety Codes ........................................................................................... 14
4.4 First Aid ................................................................................................................................... 15
4.5 Instructions for Disposal and Neutralizing Spills ....................................................15
5.0 Maintenance and Trouble-shooting ....................................................................... 17
5.1 Automatic Self-Diagnosis ................................................................................................ 17
5.2 Replacement of Batteries .................................................................................................17
5.3 Instrument Not Working?..................................................................................................17
5.4 When Test Results are in Question.................................................................................17
6.0 Warranty ............................................................................................................................... 20
7.0 Specic Test Instructions................................................................................................21

4
Specications
Microprocessor Capacity: Stores calibration for specied test.
Temperature Range, Operating: 0o to 40oC (32o to 140oF)
Temperature Range, Storage: -10
0
to 70oC (14o to 158oF)
Power: 3 AA size alkaline batteries (supplied)
Low Battery Power Indicator: Automatic, on display
Automatic Power-O: After 15 minute interval of non-use
Voltage Regulation: Automatic, by internal circuit
Light Source: Narrow band LED, selected for Specic Test
Photometric Detector: Photovoltaic Cell
Data/Message Readout: 2-line, 16 character alphanumeric LCD
Zero Set: Automatic by microprocessor
Standardization Set: Automatic by microprocessor
Housing: Rugged, corrosion and water resistant ABS plastic
Faceplate/Keypad: Sealed, splash-proof. Touch sensitive on/o switch
Microswitch: Automatically senses insertion/withdraw of tubes
Instrument Dimensions: 5.75” L x 3.6” W x 2” H / 146 L x 91.4 W x 50.8 H mm
Instrument Weight: 12 oz./341 g.
Shipping Weight: 4 lbs./1.8 Kg.
Carrying Case: Rugged, corrosion and water resistant plastic
Sample Tubes: Glass: Scratch-resistant, grad. @10mL, 26mm Diameter with screw cap. No. 975-TG,
package of 4 pieces.
Plastic: Break-resistant, grad. @ 10mL, 26 mm Diameter with screw cap. No. 975-TP,
package of 4 pieces.

5
1.0 General Description and Features
Orbeco-Hellige portable Series 942 Specic Test Mini Analyst Water Analyzers combine an advanced
microprocessor-controlled pre-calibrated photometer with all-inclusive “Quick ‘n’ Easy” Reagent Outts. You
can choose from many dierent complete testing outts. They are ideal for every type of water analysis....for
easy regulatory monitoring, accurate process control, and fast pollution and environmental testing....in the
lab, plant, classroom, or eld.
How They Work. A high intensity Light Emitting Diode (LED) transmits a narrow bandwidth light beam
through the reagent-treated water sample to a light sensitive photovoltiac cell. Ocially approved reagent
chemistries have been selected that provide a color intensity related to the concentration of the substance
under test. A pre-calibrated microprocessor converts the light absorbed directly to numerical test value,
which is shown on the LCD display.
A Permanent Calibration For Each Mini Analyst is stored in the memory of each Model 942 instrument to
save you time, work and expenses. The test procedures in Section 7 are given in step-by-step, easy-to-follow
form, with special instructions for your safety and convenience. No user adjustments are ever needed.
LED Narrow-Band Light Source assures high test sensitivity and very long light source and battery life.
Microprocessor-controlled, each Mini Analyst automatically self-checks its power, circuitry, and lamp readi-
ness at the beginning of each testing session.
The Direct-Reading LCD Display provides procedure prompts and exact, unambiguous test results. It also
indicated low battery condition.
Model 942 is Powered by 3 long-life alkaline AA batteries (supplied). Battery life is extended by automatic
shut-o after 15 minutes of non-use.
Accessories Included With the 942 include all required reagents, 4 scratch-resistant glass tubes, 3 long-life
AA batteries, and foam-lined carrying case. Please contact Customer Service for replacement “Quick ‘n’ Easy”
Reagent Kits, tubes, and other specic test Mini Analyst available.
Each Model 942 is Made in the U.S.A. and has a 3-year Warranty
For Toll-free Technical Support, contact Orbeco-Hellige, Inc at:
Phone: 941.756.6410
800.922.5242 (U.S.A. Only)
Fax: 941.727.9654
service@orbeco.com
www.orbeco.com
Specications are listed on the previous page

6
2.0 Preparations Before Operation and Testing Techniques
2.1 Preparing for Operation
Toll-free Hotline for Technical Service: If you have any questions or problems, call our Toll-free Hotline at
1.800.922.5242 Monday - Friday between 8:00 AM - 5:00 PM Eastern Standard Time, or send an E-mail to
service@orbeco.com. It will be a pleasure to help you.
Remove Red Dust Cover Plug from sample tube hole before testing. (Retain it to prevent dust penetration
during inactive storage).
Install the Supplied 3 AA Batteries: Remove cover on bottom of instrument and insert batteries (observe
correct polarity for each). If the 942 is not expected to be used for periods exceeding 3 months, remove the
batteries to avoid damage due to possible battery leakage.
Low-Battery Warning: The 942 self-checks the battery condition as each test is started. When the battery
condition has weakened to a pre-set level, the display reads “Battery Low.” Replace all 3 batteries promptly
to avoid inaccurate readings. Calibration memory will not be lost during battery replacement.
When Replacing Batteries, use only fresh 1.5v AA alkaline batteries. Install with polarities as shown in battery holder. Always replace all 3 batteries at the same time, and do not use a mixture of dierent brands.
Automatic Power-o: To conserve battery life, the Model 942 shuts itself o automatically 15 minutes after
the last key pressed.
2.2 General Operating Details and Techniques
Taking Water Samples:
For the highest accuracy, be very careful to ensure that water samples are truly representative. Water samples taken from pipes or wells should be allowed to run suciently to ush out sediments or standing water.
To get a truly representative test value from surface waters, it may be necessary to take samples at various
locations and depths, and even at dierent times of day or night.
Sample containers should be scrupulously clean. An accepted general method of cleaning containers prior
to use consists of taking the following steps. First, clean with a lab detergent. Then ush thoroughly with
tap water. Next, rinse with R-405 1:1 Hydrochloric Acid or R-1119 1:1 Nitric Acid, and rinse thoroughly with
distilled or R-3684 Deionized Water. Repeat several times.
Special instructions are given in the Specic Test Procedure (section 7) if unusual preliminary steps must be
taken.
It is best to test samples as quickly as possible after they have been collected, especially when you have
reason to believe the concentration will be low. If this is not possible, see below.

7
Preserving or Storing Water Samples
Customary methods for preserving a sample include adjusting its pH, adding chemicals, refrigeration, or
freezing. Some materials may change soon after having been sampled, and applicable instructions for these
are given in the Specic Test Procedure.
For details beyond those specically noted in Section 7, refer to Part 1060 of the current edition of Standard
Methods. This details:
A. Whether polyethylene or glass containers (or both) may be used
B. Recommends preservation including cooling, chemical addition, or pH adjustments
C. Lists the maximum storing times for water tests to be valid
Two Types of Sample Tubes are Supplied -- Plastic and Glass
Break-resistant No. 975-TP Plastic Tubes are ideal for testing swimming pools, foodstus or situations where
broken glass would be hazardous. Scratch-resistant No. 975-TG Glass Tubes are preferred for all other testing applications. The 942’s calibrations are equally accurate for either type of tube. But when making tests,
USE THE SAME TYPE OF TUBE FOR THE BLANK AND SAMPLE; DO NOT INTERMIX PLASTIC TUBES WITH GLASS
TUBES.
Importance of Cleanliness
Use only clean tubes, and hold them by their caps to prevent nger marks on the sides of the tubes. The
containers used to obtain samples and labware used with the instrument should be clean both inside and
out. To avoid inaccurate results, always wash and dry tubes and labware promptly after use. If stubborn
residues have adhered to a tube’s surfaces, soak with non-abrasive lab detergent, ush thoroughly with
deionized water and air dry. Some test procedures have special cleaning instructions. To maintain accuracy
and avoid errors, discard any Sample Tube that is scratched or permanently stained.
Proper Use of Graduated Labware
Certain tests are supplied with graduated labware. For highest test accuracy, it is important to measure
accuracy, it is important to measure liquid volumes precisely. Always hold graduated labware vertically, and
align your eye with graduation line and the BOTTOM of the curved liquid surface.
Always Accurately Fill the Sample Tube to the 10mL Graduation Mark
A lower or higher volume will cause inaccurate results. Cap the tube rmly to avoid its coming loose when
the tube is lifted.
Avoid and Eliminate Bubbles
Pour sample slowly and carefully to avoid bubbles from foaming and clinging to the inside tube walls because they may cause inaccuracies. If bubbles appear, swirl tube, strike bottom gently to dislodge them or
let tube stand with cover removed until bubbles can be knocked free by gently tapping.

8
Avoid and Eliminate Condensation
Condensation can cause inaccurate results, and may damage the instrument. Generally condensation forms
when the sample, or the instrument itself is brought from a colder location into a moist and warmer one. All
must be allowed to come to ambient temperature. Condensation on tubes must be wiped away until the
tube sides remain dry. Never allow condensate or any liquids to enter the sample tube well. If this should
happen, take immediate action -- see Maintenance, Section 5.
Always Cap Tubes Before Testing
This seals the contents from contamination, and will prevent varying overhead light from entering the tube
during measurement. Wipe sides clean; hold tubes by cap.
Place the 942 on a Horizontal Flat Surface While Testing
Holding it by hand at an angle may disturb the sample and interfere by reecting the light o the sample’s
meniscus (the curved surface of the liquid).
Orientation of Sample Tubes in the Tube Well
For reproducible test results when using a 975-TP Plastic Tube, align one of its 2 seams with the “6 o’clock”
position of the hole. No. 975-TG Glass Tubes do not have this requirement, and can be inserted without any
special orientation.
Reagent Tablets
Instructions are given whether the tablet is simply allowed to dissolve, or if it should be crushed with the
crusher/stirrer rod supplied. Always allow the tablet-treated test sample to stand for a few seconds so that
undissolved particles (if any) settle before test reading is taken.
Reagent Stability
For longest shelf life, unless otherwise specically directed, store reagents in a dry, cool, and dark place.
Never insert a soiled pipet into a reagent bottle, and make certain to cap bottles tightly. Write the date of
receipt on reagent labels, and use previously received reagents rst. Do not use liquid reagents beyond
their expiration date, if one is provided on the label. Accurate standard solutions may be used to check the
reliability of reagents of questionable age.
For Extremely Critical Work
Using a felt-tip pen, place a vertical alignment mark on the upper sides if the tubes (both blank and sample)
that you intend to use for such tests (but do not extend the lines into the photometric measuring portion of
the tubes). When inserting these tubes, rotate them so that the lines align with the white dot at the 6 o’clock
position of the tube bezel, so they will be identically and reproducibly positioned for each measurement.

9
2.3 Range Expansion - How To Cover Higher Ranges by Dilution
If “Dilute and Retest” appears on the display, the test result is higher than the normal range of the test. The
sample must be diluted, the test repeated, and the result multiplied by the applicable “Dilution Factor, “ as
follows:
1. Optional No. A138 Graduated Test Vial permits routine dilutions to be made easily and
quickly. Simply add sample to either the 10, 20, 25, or 50mL graduation, add deionized water
to the 100mL mark, cap and mix. Repeat the test using 10mL of the diluted mixture, and
multiply the reading by the Dilution Factor (10, 5, 4, or 2 respectively). For Example:
Fill Vial to Add Deionized Multiply Reading by
Graduation Water to Dilution Factor
_________________________________________________________________
50mL 100mL 2 X
25mL 100mL 4 X
20mL 100mL 5 X
10mL 100mL 10 X
2. Alternately, for highest precision, use a Class A laboratory volumetric pipette to measure the
above sample volumes, transfer to a Class A 100mL volumetric ask, add deionized water to
the graduation, stopper, and invert several times to mix. Repeat the test with a 10mL portion,
and multiply the result by the dilution factor.
3. For an approximate ranging test, measure 5mL (or smaller volume) into a sample tube and
dilute to the 10mL line with distilled or deionized water. Perform the test, and multiply
instrument reading by 10 divided by the measured volume.
2.4 Meaning of “Blank” and “Sample” Tubes
Each procedure gives instructions for their preparation. A “BLANK” tube is one which contains a sample that
is untreated (has not had a tablet or reagent added to it), or which contains none of the unknown (consists
of deionized water plus the reagent(s) used in the test). When placed in the 942, it enables the instrument
to automatically standardize itself. The “BLANK” tube compensates for any original, inherent color in the test
sample that has nothing to do with the color that the tablet or reagent will impart to the sample during the
test. If the sample is completely clear and colorless, then deionized water may be substituted for the sample
in the “BLANK” tube.
The name “SAMPLE” tube is given to the tube which contains the sample under test, to which the tablet(s)
or reagent(s) have been added in accordance with the test procedure. Once standardized with the “BLANK”
tube, the model 942 photometrically measures the color of the reagent-treated sample in the “SAMPLE”
tube, calculates, and shows the test result in the display.

10
2.5 Precautions
Before Starting the Test:
Read its entire procedure to be prepared for reagent hazard information and other special instructions
Reagent Safety:
We have all taken all measures possible to use only safe tablet reagents. However, several test procedures
require use of hazardous liquids. Because of possible dangers in handling certain chemical reagents,
become familiar with safe techniques, proper usage, and correct disposal before using any reagent. See
Section 4 for details. Material Safety Data Sheets are provided for all hazardous items. (Request copies of
any you require).
Protect Model 942 From Temperature Extremes, Humidity, and Corrosive Gases
Do not leave the unit in a vehicle, boat, or shed exposed to heat or sunlight, because of high temperatures
that may build up inside an enclosed space. Avoid using or storing above 50oC (122oF) or in high humidity. Keep away from corrosive fumes, open chemicals, or dusty areas. Store indoors in a cool, protected dry
place, and reinsert its red Dust Cover Plug in the tube hole to prevent dust penetration.
Allow Model 942 to Come to Temperature Equilibrium
When moving from one temperature extreme to another, wait at least 10 minutes before use.

11
3.0 General Operating Instructions
Before Starting to Test, Carefully Read Sections 3 Through 7
Pay attention to all notes and cautions to avoid inaccurate results or possible personal harm.
Section 7 Explains the Specic Test Procedure
Section 7 details the exact steps to follow. These include preparing a “BLANK” tube and how to use a tablet
or reagent(s) to prepare a “SAMPLE” tube for use in the General Operating Instructions described below.
The following instructions cover the general operating steps that apply to all Model 942 Mini Analyst
instruments. The sequence of steps covers how to activate the instrument, and how to go through its
automatic steps to guide you in completing each test. After you press the On/O switch, the instrument will
automatically prompt you step by step until it displays the test result.
1. To Activate the Instrument, push the On/O switch (
O
) on the faceplate.
The display will read:
WELCOME
ORBECO-HELLIGE
And will then display:
MODEL 942
(NAME OF TEST)
After the instrument automatically goes through its self-diagnostic steps, it will display:
INSERT BLANK
2. Insert the “BLANK” Tube. An internal micro-switch senses the presence of the tube, and
activates the instrument. The screen then reads:
READING BLANK
PLEASE WAIT
Then it prompts:
REMOVE BLANK

12
3. After “BLANK” Tube is removed, display prompts:
INSERT SAMPLE
4. Insert “SAMPLE” Tube. Display prompts:
READING SAMPLE
PLEASE WAIT
5. After you note the result and remove the “SAMPLE” Tube, the instrument prompts:
INSERT BLANK
6. If you have NO further sample(s) to test, press the On/O switch to shut o.
If you have ADDITIONAL sample(s) to test, insert “BLANK” and proceed as before, or use the
AUTO-BLANK function as described in Step 9 below.
7. O-Scale Indications and Instructions:
A. If display prompts: DILUTE & RETEST
REMOVE SAMPLE
Sample is beyond normal range -- see paragraph 2.3 of section 2 to dilute, and
then retest again, starting with Step 2 above.
B. If display prompts:
OFFSCALE - RETEST
REMOVE SAMPLE
Retest using fresh sample and fresh reagents, starting with Step 2.
8. Battery Strength Indication -- If display prompts BATTERY WEAK, the instrument may
continue to perform for some time, but it is wise to replace the batteries as soon as possible
to insure uninterrupted service. If the display prompts BATTERIES DEAD, (or there is no
display in spite of attempts to turn the instrument on) the batteries must be replaced.

13
9. Auto-blank permits you to speed up your testing. This unique operator-controlled feature
allows quick, multiple sample readings without your having to reinsert the blank tube
between each measurement
To access this feature, the On/O switch must be pressed promptly, once, in Step 1 above,
when the display reads:
MODEL 942
(NAME OF TEST)
The display will then read:
AUTO BLANK ON
(NAME OF TEST)
If the Auto-blank display does not appear, the On/O switch was not pressed at the correct
time, causing the instrument to be turned o. Turn it back on, and try again.
After the Auto-blank display disappears, the INSERT BLANK display will appear as in Step 1.
Follow instructions as previously given in Section 3, Steps 2 through 4. When the tube is
removed in Step 4, the instrument will prompt INSERT SAMPLE TUBE (meaning the NEXT
Sample Tube).
Insert your next Sample Tube. The instrument will now allow you to insert as many Sample
Tubes as you wish, without having to rst insert the BLANK Tube each time.
To deactivate the Auto-blank feature, turn the instrument o at any point, and activate the
instrument again without accessing the Auto-blank feature.
NOTE: While the Auto-blank feature can be a signicant time-saver in many situations, be
aware that the accuracy of the Auto-blank feature depends on a number of factors. It
assumes that the color of the blank would not change in the time Auto-blank is used, that
subsequent Sample Tubes have stable colors, that elapsed time and temperature changes
during the testing period would not eect the results, etc. If you have any reservations that
one or more of the above factors could inuence the accuracy using the Auto-blank feature,
use the standard method in Section 3 instead.

14
4.0 Important Reagent Safety and Disposal Precautions
You are about to use an instrument which can be extremely helpful to you. In our modern world, every
mature person understands that many valuable devices are potentially dangerous if misused, or if they fall
into the hands of those not qualied to use them properly. For your safety, we call your attention to the
possible dangers of misuse of testing reagents. But at the same time we want to assure you that with
intelligent use, our products can be powerful tools that can bring you great benets and convenience.
Follow the instructions carefully and intelligently, protect the equipment from harm, and it will give you
long and excellent service.
4.1 Reagent Handling and Disposal Precautions
The “Quick ‘n’ Easy” reagent test kit supplied for use with each specic Model 942 has been designed to
provide maximum convenience with accuracy and long term dependability. To maintain this top
performance and to avoid potential problems or accidents, it is in your personal interest to pay careful
attention to the following safety precautions.
4.2 In Case Of Emergency
(If your specic test kit procedure lists a reagent with a safety code), read the corresponding explanations
below. If necessary, immediately call a physician or your local Poison Control Center (ask you telephone
operator for assistance). If you cannot get local help, in the continental USA call the The Poison Help hotline
1-800-222-1222 (available 24 hours a day, 7 days per week). Be prepared to explain what happened and to
read the reagent’s label text and/or the corresponding Safety Codes comments given below.
1. While most of our 68 Mini Analysts use safe reagent tablets, it is unavoidable that a few tests
use reagents that can be potentially hazardous. It is your responsibility to understand all
safety requirements, maintain good safety practices, and take all steps to avoid harm.
2. For your safety and convenience, we have identied and listed by codes any applicable safety
information for each such reagent. These codes appear after each reagent where it is listed as
part of the “Quick ‘n’ Easy” test kit described at the beginning of the specic test procedure.
The information includes cautions on reagent handling and disposal, and antidotes in case of
accidents. Familiarize yourself thoroughly with this information before starting the test.
Always have immediate access to any specic items listed to cope with accidental spills. In
addition, Material Safety Data Sheets are available for all applicable items at no charge.
3. KEEP ALL REAGENTS LOCKED AND OUT OF THE REACH OF CHILDREN and others not
authorized for their use. Many of our test kits utilize reagents in the form of convenient,
pre-measured tablets. For storage, they are hermetically sealed in metal foil. These tablets
are not intended to be taken orally! Tear the foil open and drop the tablet into the Sample
Tube as directed in the test procedure, avoiding any contact with your ngers.
4. Always carefully read all text matter on reagent labels before opening the packages or
bottles, and read the entire test procedure before starting. If you are not certain what they
mean or what to do, always ask a qualied person for clarication or contact the
Orbeco-Hellige Service department at 941.756.6410 or by E-mail at service@orbeco.com
before proceeding.

15
5. FOLLOW PROCEDURE INSTRUCTIONS EXACTLY! Do not take short cuts. Follow the steps in
the order given. Make certain to correctly time the waiting period for proper reaction and
color development.
6. NEVER USE YOUR MOUTH TO DRAW REAGENTS INTO PIPETTES. Always use the safety bulb
provided for the purpose. In any tests involving hot asks, beakers, or labware, use heat
resistant gloves or lab tongs.
7. Dropping pipets are not tted with bottle caps are not intended to be left in reagent
containers. After use, they and regular pipets, tubes and other glassware should be washed
with water, rinsed with distilled or deionized water, and allowed to drain dry. Be careful not
to place pipets on soiled work surfaces, where they could become accidently soiled and
contaminate a reagent bottle when reintroduced to it.
8. When Handling potentially hazardous reagents, wear eye protection, protective clothing and
suitable gloves. Where so cautioned in a procedure, strictly follow “use in well ventilated
areas” instructions if a suitable fume hood is not available. It is wise to always work carefully
and neatly. Be careful not to splash, spill, or drip reagents on skin, clothing, shoes, work
surfaces, etc. If hazardous chemicals have accidently contacted skin or eyes, copiously ush
with water for 15 minutes, and if necessary call a physician. Clean up and properly dispose of
spills immediately. Wash hands thoroughly after use.
9. Do not store reagents near food or use near where food is eaten. Do not smoke near open
reagent bottles, especially irritants. Replace and tighten reagent container bottle caps
immediately after use, and take special care not to interchange bottle caps.
4.3 Explanation of Safety Codes
For your safety and convenience, any hazardous reagent in a “Quick ‘n’ Easy” Test Kit has been specially
coded. WHEN THEY ARE APPLICABLE, Safety Code letters and numbers are listed after the name of such
reagents at the beginning of the test procedures, and are explained on the following pages. (If no Safety
Code is listed, the reagent is not considered hazardous. Nevertheless, ALL reagents should be kept out of
the reach of those not authorized or trained to use them).
The rst part of the code (LETTERS FROM “A” ONWARDS) refers to specic FIRST AID instructions
detailed either directly on the label of each specic reagent bottle, or as explained below.
The second part of the code (NUMBERS FROM “1” UPWARDS) refers to specic DISPOSAL
suggestions detailed below.
IMPORTANT: To be prepared to deal with First Aid or disposal emergencies, check the codes, if any, listed
in Section 6 for the Specic Test Procedure. Have immediate access to any items listed for rst aid and/or
disposal.

16
4.4 First Aid
The below Safety Codes (if applicable) are listed after the name of any hazardous reagent(s) in the “Quick
‘n’ Easy” Test at the beginning of each test procedure.
Code ‘A’: (For Corrosive Acids and Alkalies): EXTERNAL- Flush eyes or skin with plenty of water for at least
15 minutes. Remove contaminated clothing or shoes. INTERNAL- If conscious, give plenty of milk or water
immediately. Call physician. Do NOT induce vomiting.
Code ‘B’: (For Highly Toxic Substances): EXTERNAL- Flush eyes or skin with plenty of water for at least 15
minutes. Remove contaminated clothing or shoes. INTERNAL- If conscious, give plenty of milk or water
immediately. Induce vomiting. If unconscious or convulsing, seek immediate medical attention.
Code ‘C’: (For Highly Poisonous, Cyanide-like Substances): EXTERNAL- Flush with water for at least 15
minutes. Remove contaminated clothing or shoes. INGESTED- If conscious, give plenty of water
immediately. Induce vomiting. INHALED- Remove exposed person to fresh air at once. If diculty
breathing occurs, start mouth-to-mouth resuscitation. If Amyl Nitrate is available, break a pearl in a
handkerchief and hold lightly under the nose for 15 seconds; Repeat 5 times at about 15 second intervals.
Code ‘D’: (Poisonous Substances): EXTERNAL- Flush with water for at least 15 minutes. Remove
contaminated clothing or shoes. INGESTED- If conscious, give plenty of milk or water immediately. Induce
vomiting. If unconscious or convulsing, seek immediate medical attention. INHALED- Remove exposed
person to fresh air at once. If diculty breathing occurs, start mouth-to-mouth resuscitation. Give oxygen if
available. INGESTED - If conscious, give plenty of milk or water immediately. Induce vomiting. If
unconscious or convulsing, seek immediate attention.
Codes With Letters BEYOND “D” (except “0”): These items are not categorized above. See FIRST AID
instructions on bottle or package.
Code “0”: (General Precautions): Handle with due care. Do not take internally. Do not breathe dust. If
spilled on skin or in eyes, or on clothing, ush with water for at least fteen (15) minutes.
4.5 Instructions for Disposal and Neutralizing Spills
When it becomes necessary to dispose of outdated, contaminated, or unwanted reagents, precautions
should be observed to protect the environment and personal safety. Wear safety glasses, lab gloves, and a
lab coat or apron.
The second part of the safety code (numbers from 1 upwards) refers to the following instructions for safe
disposal of reagents. Use the corresponding numbered paragraphs below. If you want additional details,
refer to the Laboratory Waste Disposal Manual, published by the Manufacturing Chemists Association,
Washington, D.C. 20009 or call us toll free at 1.800.922.5242.
Before disposing of empty bottles, ush the insides with plenty of water and replace the caps. Make certain
that all wastes are stored in a secured area away from children and not qualied for their use.

17
Code 1: (Acids): Small volumes may be ushed down the drain with plenty of water. Larger volumes or
concentrated solutions should be neutralized rst by pouring slowly into a large volume of an agitated
solution of Soda Ash and Slaked Lime or Sodium Bicarbonate before ushing down the drain. Spills should
be covered with Sodium Bicarbonate. Add water to form a slurry. Scoop up, wash down into drain with
plenty of excess water.
Code 2: (Bases): Small volumes may be ushed down the drain with plenty of water. Larger volumes or
strong solutions should be poured slowly into a large container of water and neutralized with 1:1
Hydrochloric Acid (use No. 1073 Litmus Paper to check if neutral). Spills should be ushed with plenty of
water, mopped up, and neutralized with 6 Molar Hydrochloric Acid before ushing down the drain with
plenty of water.
Code 3: (Chloroform): Do NOT ush down drain. Store large volumes for disposal by authorized salvager.
Absorb small volumes or spills in vermiculite. Add Soda Ash and Slaked Lime. When saturated, burn in a
safe area as solid waste.
Code 4: (Compounds Containing MERCURY SALTS): Do NOT ush down drain. Store for disposal by authorized salvager. Mop up spills completely using plenty of water. May be converted to the soluble nitrate.
Adjust acidity and precipitate as mercuric sulde. Wash and dry the precipitate. Ship back to supplier.
Code 5: (All other Reagents): Small volumes may be ushed down the drain with plenty of water in accordance with local regulations. Spill should be ushed with plenty of water, mopped up and ushed down the
drain.

18
5.0 Maintenance and Trouble-Shooting
Each Series 942 Mini Analyst has been designed and constructed to give many years of trouble-free service
in the lab, plant, classroom, or eld. They are housed in a tough ABS enclosure which is particularly resistant
to rough handling and chemical attack. Their key pads are completely sealed against accidental spills. Treat
your Mini Analyst as you would any valuable possession. Do not allow dust, uids, or condensation to enter
the tube well, but if this happens, do not open the instrument, instead hold it upside down and gently wipe
the tube well from below with tissue. Cover the tube well or the entire instrument when it is not in use to
prevent debris from entering the well.
5.1 Automatic Self-Diagnosis
Your model 942 automatically performs self-diagnostic steps each time it is turned on and during each
test -- checking its batteries, analog function, LED Lamp, and Photocell. Aside from its batteries, it contains
no user-servicable parts. If a problem should arise that is not covered by the information below, contact
Customer Service by phone at 941.756.6410 or 800.922.5242, by fax at 941.727.9654, or by E-mail at
service@orbeco.com.
5.2 Replacement of Batteries
The Model 942 will display two warning messages. The rst: BATTERIES LOW, is a warning that the
batteries are getting weak. You may still be able to perform several tests by inserting the blank and
continuing as before. BATTERIES LOW will continue to appear at the end of each subsequent test until
either fresh batteries are installed, or the batteries continue to weaken to the point that the message
BATTERIES DEAD appears (or the screen remains blank). In this event no further testing can be performed
unless the batteries are replaced.
To replace the batteries, turn instrument over, place thumb on mark on battery compartment cover, press
down and slide the cover o. Replace all 3 batteries, following polarity markings shown in battery
compartment. IMPORTANT: Rechargeable batteries may be used but cannot be recharged in the instrument.
Do not use a mixture of dierent battery brands. Do not mix regular batteries with rechargeable ones.
5.3 Instrument Not Working?
If your Model 942 is not operating at all, or not operating correctly, rst review the below points. (If it
functions correctly, but the results appear wrong, see section 5.4 below).
Check (with a battery checker, not a voltmeter) that each battery has a 1.3v output and that they
have been installed with the correct polarity as shown in the battery compartment. Has BLANK
tube and SAMPLE tube been lled all the way to the 10mL mark? Are tubes free of obstructions
such as bubbles or identifying labels? Outside surfaces of tubes must be unobstructed.
5.4 When Test Results are in Question
If the instrument itself seems to be functioning correctly, but the test results seem to be wrong, rst
thoroughly review the contents of these directions, and the following:

19
A. Has the sample been taken correctly? Has it changed in value due to settling over time,
exposure to heat or cold, or was it kept in a container that may have contaminated it?
B. Were sample tubes clean and dry before use? Free of nger marks? Are sample tubes
scratched or stained? Are bubbles clinging to insides of tubes? Is condensation on outside?
Retest paying attention to these factors.
C. Have blank and sample tubes been lled to the 10mL mark? Are they positioned all the way
down in the tube well?
D. Is the reagent fresh or still valid? If questionable, retest with fresh reagent.
E. Reviewed any notes in the directions about possible interferences?
F. What are results being compared to that appear to signify questionable results? Are those
readings necessarily valid? Have you tested a sample of known value? Ask about our
selection of precise standard solutions.
When communicating with us about results, give complete details of all aspects of your observations, age
and condition of reagents used, type and description of samples being measured. Did you previously get
successful results?

20
6.0 Warranty
The manufacturer warrants to the original purchaser of this instrument that it will be free of defects in material
and workmanship, in normal use and service, for a period of three years from date of shipment to the original
purchaser. The manufacturer’s obligation under this warranty is limited to replacing, at its factory, the instrument
or any part thereof. Parts, which by their nature are normally required to be replaced periodically, consistent
with normal maintenance, specically lamps including uorescent backlight, reagent, sensors, electrodes and
fuses are excluded. Also excluded are accessories and supply type items.
Original purchaser is responsible for return of the instruments, or parts thereof, to the manufacturer’s factory.
This includes all freight charges incurred in shipping to and from the manufacturer’s factory.
The manufacturer is not responsible for damage to the instrument, or parts thereof, resulting from misuse,
negligence or accident, or defects resulting from repairs, alterations or installation made by any person or
company not authorized by the manufacturer.
The manufacturer assumes no liability for consequential damage of any kind, and the original purchaser, by
placement of any order for the instrument, or parts thereof, shall be deemed liable for any and all damages
incurred by the use or misuse of the instruments, or parts thereof, by the purchaser, its employees, or others,
following receipt thereof.
Carefully inspect this product for shipping damage, if damaged, immediately notify the shipping company and
arrange an on-site inspection. The manufacturer cannot be responsible for damage in shipment and cannot
assist with claims without an on-site inspection of the damage.
This warranty is given expressly and in lieu of all other warranties, expressed or implied. Purchaser agrees
that there is no warranty on merchantability and that there are no other warranties, expressed or implied. No
agent is authorized to assume for the manufacturer any liability except as set forth above. Opening the main
instrument enclosure (excluding the battery compartment) may void the warranty.

21
7.0 Specic Test Instructions
Specic Test Procedure for Mini Analyst Model 942-043
Ammonia Nitrogen, Low Range
Ranges: 0-1.0 mg/L, and higher by dilution
Method: Indophenol
“Quick ‘n’ Easy” Test Kit No. 975-43 contains:
• RT-109,AmmoniaNo.1Tablets,(SafetyCodeD,1)*
• RT-110,AmmoniaNo.2Tablets,(SafetyCodeB,2)*
• 432-SRP,Tabletcrusher
*ForSafetyCodeexplanations,seeSection4.
Before Starting:
Read Sections 1 through 5, and all Notes below. Do not inter-mix glass and plastic Tubes.
Procedure:
1. Prepare a Blank Tube by lling a clean, dry tube to the 10 mL mark with sample. Cap the tube, and set it
aside for use in Step 4.
2. Fill another clean, dry tube to the 10 mL mark with sample. This will become the “sample tube.”
3. Add one of the Ammonia No. 1 Tablets and one of the Ammonia No. 2 Tablets to the sample tube. Crush
tablets; cap the tube and mix to dissolve completely. Note the time.
4. Wait 10 minutes to allow for full color development. If the sample temperature is below 20°C (68°F), wait
15 minutes.
5. Follow Operating Instructions in Section 3 to obtain test results in terms of mg/L (p.p.m.) Nitrogen from
Ammonia (NH3-N).
Notes:
Note 1: If display reads “O scale Retest – Remove Sample,” retest using fresh sample and fresh reagents.
Note 2: Ammonia concentrations can be expressed as NH4 and NH3 as well as N.
• ToconvertfromNtoNH4multiplytheresultby1.3.
• ToconvertfromNtoNH3multiplytheresultby1.2.
Note 3: If display reads “Dilute and Retest” dilute a fresh sample with distilled or deionized water, retest, and
multiply reading by the dilution factor as explained in section 2.3.
Note 4: Testing sea water or brackish water requires No. RT-111, Ammonia Conditioning Reagent to prevent
precipitation of salts. It is supplied in a convenient “spoon pack” to aid measuring out the powder. To use, in
Step 2 above, rst add 1 level spoonful and mix to dissolve, before adding Ammonia Tablets Nos. 1 and 2.
Accuracy Conrmation:
Use R-2434, Ammonia Standard, 1000 mg/L with careful lab technique and clean, dry Grade A labware. With
a volumetric pipette measure 10 mL of R-2434 (shelf life 1 ½ years) and dilute with distilled water to 1000 mL
in a volumetric ask, then dilute 3 mL of this to 100 mL. Both dilutions are stable for 48 hours. Test within 1
hour. Value should be 0.3 mg/L (p.p.m.) ± 0.03 mg/L Ammonia as N.

22

23

Technical changes without notice
Printed in USA 08/08 Rev. 1
Orbeco-Hellige® is a registered
trademark of Orbeco-Hellige, Inc
Orbeco-Hellige, Inc.
6456 Parkland Drive
Sarasota, Fl 34243
Phone: 941.756.6410
800.922.5242
Fax: 941.727.9654
service@orbeco.com
www.orbeco.com
 Loading...