

Page 1

Operators Manual
USB 2.0 / FireWire PCI Card
For Macintosh and PC
Revision date: January 9, 2003
1
Page 2

About this manual
The information in this manual is subject to change without notice. We welcome your comments on any area of Orange
Micro products or services. Please send your comments to:
Product Manager
Orange Micro, Inc.
1400 N. Lakeview Ave.
Anaheim, California 92807
marketing@orangemicro.com
Orange Micro may use or distribute any of the information you supply in any way it deems appropriate without incurring any
obligations whatsoever.
Warning
This manual and the software described herein are protected by United States Copyright law (Title 17 United States Code).
Unauthorized reproduction and/or sales may result in imprisonment for up to one year and fines of up to $10,000 (17 USC
506). Copyright violators may also be subject to civil liability.
Copyright Information
OrangeLink is a trademark of Orange Micro, Inc. iLink is a trademark of Sony Corporation. Apple, Macintosh, FireWire and
Final Cut Pro are trademarks and registered trademarks of Apple Computer, Inc. All brand names are registered trademarks
of their respective companies.
Copyright © Orange Micro, Inc. 2003. All rights reserved.
No part of this manual may be reproduced in any form except by written permission from Orange Micro, Inc.
2
Page 3

Table of Contents
About this manual.............................................................................................................................................................................2
Table of Contents.............................................................................................................................................................................. 3
Package Contents.............................................................................................................................................................................4
Software Included ............................................................................................................................................................................. 4
System Requirements ......................................................................................................................................................................5
Chapter 1 ............................................................................................................................................................................................6
Introduction.......................................................................................................................................................................................6
Chapter 2 ............................................................................................................................................................................................7
How to install an OrangeLink in your Macintosh ............................................................................................................................7
Step 1 – Installing your OrangeLink hardware ............................................................................................................................7
Step 2 – Installing OrangeLink Drivers in the Mac OS................................................................................................................7
Installing FireWire Drivers .........................................................................................................................................................8
Installing USB Drivers................................................................................................................................................................9
Step 3 – Installing BTV Pro on your Macintosh.........................................................................................................................11
Chapter 3 ..........................................................................................................................................................................................12
How to install an OrangeLink in your PC ......................................................................................................................................12
Step 1 – Installing OrangeLink Drivers in Windows ..................................................................................................................12
Step 2 – Installing your OrangeLink hardware ..........................................................................................................................13
Installing the OrangeLink USB 2.0/ FireWire PCI Card .........................................................................................................13
Installing USB 2.0 Drivers for the first time in Windows XP...................................................................................................13
Installing USB 2.0 Drivers for the first time in Windows 2000. ..............................................................................................15
Installing USB 2.0 Drivers for the first time in Windows Me...................................................................................................16
Installing USB 2.0 Drivers for the first time in Windows 98 SE..............................................................................................17
Step 3 – Verifying hardware settings .........................................................................................................................................19
Step 4 – Installing Ulead VideoStudio DV SE on your PC........................................................................................................21
Chapter 4 ..........................................................................................................................................................................................22
Guidelines for Connecting FireWire Devices................................................................................................................................22
Chapter 5 ..........................................................................................................................................................................................23
Guidelines for Connecting USB 2.0 Hi-Speed Devices................................................................................................................23
Appendix A ......................................................................................................................................................................................24
Optional Hardware .........................................................................................................................................................................24
Appendix B ......................................................................................................................................................................................25
Using BTV Pro on the Macintosh ..................................................................................................................................................25
BTV Pro – QuickStart .................................................................................................................................................................25
Additional FireWire Workflow Recommendations and Known Issues:.....................................................................................27
Appendix C ......................................................................................................................................................................................28
Using Ulead VideoStudio on Windows .........................................................................................................................................28
Ulead VideoStudio – QuickStart.................................................................................................................................................28
Additional FireWire Workflow Recommendations and Known Issues:.....................................................................................29
Appendix D ......................................................................................................................................................................................30
Macintosh Troubleshooting ...........................................................................................................................................................30
PC Troubleshooting .......................................................................................................................................................................32
Appendix E.......................................................................................................................................................................................34
Specifications .................................................................................................................................................................................34
Appendix F.......................................................................................................................................................................................35
Warranty Information .....................................................................................................................................................................35
FCC Class B Information...............................................................................................................................................................36
Index .................................................................................................................................................................................................37
3
Page 4

Package Contents
The OrangeLink OrangeLink+ USB 2.0 / FireWire PCI card package contains the
following items:
• FireWire/USB2 PCI card
• Manual and Software CD-ROM
• One 6 foot (1.82 meter) 4-pin to 6-pin FireWire cable to connect the OrangeLink
card to a digital camcorder or other FireWire/IEEE 1394 devices that do not
require power from the FireWire bus.
• Quickstart card
Software Included
• Apple QuickTime for Macintosh
• BTV Pro for the Macintosh
• Apple QuickTime for Windows
• Ulead VideoStudio for Windows
4
Page 5

System Requirements
Hardware
• Any desktop computer with an available 7" or 12" PCI slot
• 64 MB System RAM
• 200 MB free hard drive space
• CD-ROM drive (for software installation)
Operating System
• Windows 98 SE, Me, 2000 or XP come with all drivers necessary to support USB2/FireWire PCI card for FireWire
and USB 1.1. The USB 2.0 Hi-Speed drivers are provided by Orange Micro.
• Mac OS X: Mac OS 10.1 or newer is required to work properly with the USB2/FireWire PCI card. Mac OS 10.1
comes with all drivers necessary to support the USB2/FireWire PCI card for FireWire and USB 1.1. The USB 2.0
Hi-Speed drivers are provided by Orange Micro.
• Mac OS 8.6: The USB2/FireWire PCI card will operate as a fully compliant 1394 OHCI host controller under Mac
OS 8.6 after installing Apple FireWire Software v2.3.3. The USB2/FireWire PCI card will operate as a fully
compliant USB 1.1 host controller under Mac OS 8.6 and Mac OS 9.0.x after installing Apple USB Adapter Card
Support.
• Mac OS 9.0.x: The USB2/FireWire PCI card will operate as a fully compliant 1394 OHCI host controller under Mac
OS 9.0.x after installing Apple FireWire Software v2.5 or newer. The USB2/FireWire PCI card will operate as a fully
compliant USB 1.1 host controller under Mac OS 8.6 and Mac OS 9.0.x after installing Apple USB Adapter Card
Support.
• Mac OS 9.x: Mac OS 9.1 or newer pre-install all drivers necessary to the support USB2/FireWire PCI card for
FireWire and USB 1.1 support.
Power Consumption
• Depending upon the number of devices connected, the USB2/FireWire PCI card can consume up to 9 watts of
power from the internal power supply
Minimum System Requirements for DV editing (Mac)
• Power Macintosh G3 233 MHz or faster
• Hard drive with sustained write speed of 7.5 MB/s
• Total System RAM of 80MB or more
• Mac OS 9.04 or later
• QuickTime 4.1.2 or later
• Apple FireWire 2.4 or later
Minimum System Requirements for DV editing (PC)
• Intel Pentium III or compatible 500Mhz or faster
• Dedicated large capacity 7200 RPM UDMA 66 IDE or SCSI hard disk or disk array
• 128MB or more of system RAM
• Microsoft DirectX compatible video display adapter
• Sound card capable of 16-bit stereo or higher
5
Page 6

Chapter 1
Introduction
What is OrangeLink?
The OrangeLink FireWire® host adapters add FireWire support to PCI or CardBus-based Mac’s or PC’s. It is ideal for older
Power Macintosh desktop computers or PowerBook G3 Series as well as PCs that need the advanced technology offered
by FireWire® (also known as IEEE-1394 or iLink).
What is FireWire?
FireWire supports the IEEE-1394 High Performance Serial Bus standard. FireWire high-speed serial I/O technology is
particularly great for use with multimedia peripherals such as digital video (DV) camcorders and tape decks. The
OrangeLink supports other FireWire peripherals such as disk drives, ultra high-resolution scanners, printers and digital still
cameras.
OrangeLink Features
The OrangeLink products function at the maximum IEEE-1394 rated speed of 400 megabits/second (50 megabytes/sec).
The OrangeLink allows up to 63 devices to be connected in a chain through its standard 6 pin ports. The OrangeLink can
be used with third party video editing software to capture and export full size, full motion DV video at 720 by 480 pixels at 30
frames per second.
The Benefits of OrangeLink FireWire
The major benefit for OrangeLink FireWire technology is its ease of use. Imagine automatic configuration, no device IDs or
terminators, simple to use cables, and of course, “hot plug” connectivity. Consider a FireWire disk drive for example. You
can disconnect it from one computer and connect it to another; no need to power down or restart. You can move whole
databases around your workgroup “live”! Or, when the office day is done, pop it into your shirt pocket and hot plug it to your
home computer.
The fastest growing use for FireWire consists of digital video (DV) camcorders. The digital format of these devices provides
precise audio and video capabilities in an original digital format that is more directly compatible with a computer than the
current analog video cameras. This means that the OrangeLink is ideal for computer based home video editing as well as
for more professional applications, e.g. Adobe®
Premiere® and Apple Final Cut Pro™.
What is USB 2.0 Hi-Speed?
USB 2.0 Hi-Speed host adapters add USB 2.0 Hi-Speed support to PCI or CardBus-based G3 Mac’s or PC’s. They
are ideal for desktop computers or laptops that need the advanced technology offered by USB 2.0 Hi-Speed. USB stands for
“Universal Serial Bus.” It allows you to attach multiple USB peripheral devices simultaneously with automatic device
detection and installation. USB 2.0 Hi-Speed has a higher bandwidth and is ideal for high-speed devices such as the next
generation scanners, printers and fast storage devices.
USB 2.0 Hi-Speed Features
USB 2.0 Hi-Speed has a dramatic performance increase over the standard USB. OrangeUSB 2.0 Hi-Speed products
function at a rated speed of 480 megabits/second. That’s 40 times faster than older USB 1.1 standards. The OrangeUSB
2.0 Hi-Speed allows up to 127 devices to be connected. USB 2.0 Hi-Speed is also “backward compatible” which means the
user can plug in their USB 1.1 and USB 2.0 Hi-Speed devices simultaneously! High transmission speed is negotiated on a
device-by-device basis. If the higher speed is not supported by a peripheral, the link operates at a lower speed of 12Mb/s or
1.5Mb/s as determined by the peripheral.
USB 2.0 Hi-Speed Ready
The OrangeLink+ FireWire/USB 2.0 Hi-Speed card will operate out of the box as a fully compliant USB 1.1 host controller
under Mac OS 8.6- 9.x, Mac OS X, Windows 98 Second Edition, Windows Me , Windows 2000 and Windows XP. Once
OrangeUSB 2.0 drivers are installed, users can connect USB 1.1 and USB 2.0 Hi-Speed peripherals to a USB 2.0 Hi-Speed
port and get a data transfer rate of up to 480 Mbits/s (Hi-Speed). Current USB 1.1 peripherals will continue to have a data
transfer rate of 12Mb/s (Full-Speed) and 1.5Mb/s (Low-Speed).
6
Page 7
Chapter 2
How to install an OrangeLink in your Macintosh
In order to ensure proper operation of your OrangeLink product, please follow the instructions below in the order they
appear. These instructions document the installation process for all Orange Micro OrangeLink products inside PCI-based
Power Macintosh systems.
Step 1 – Installing your OrangeLink hardware
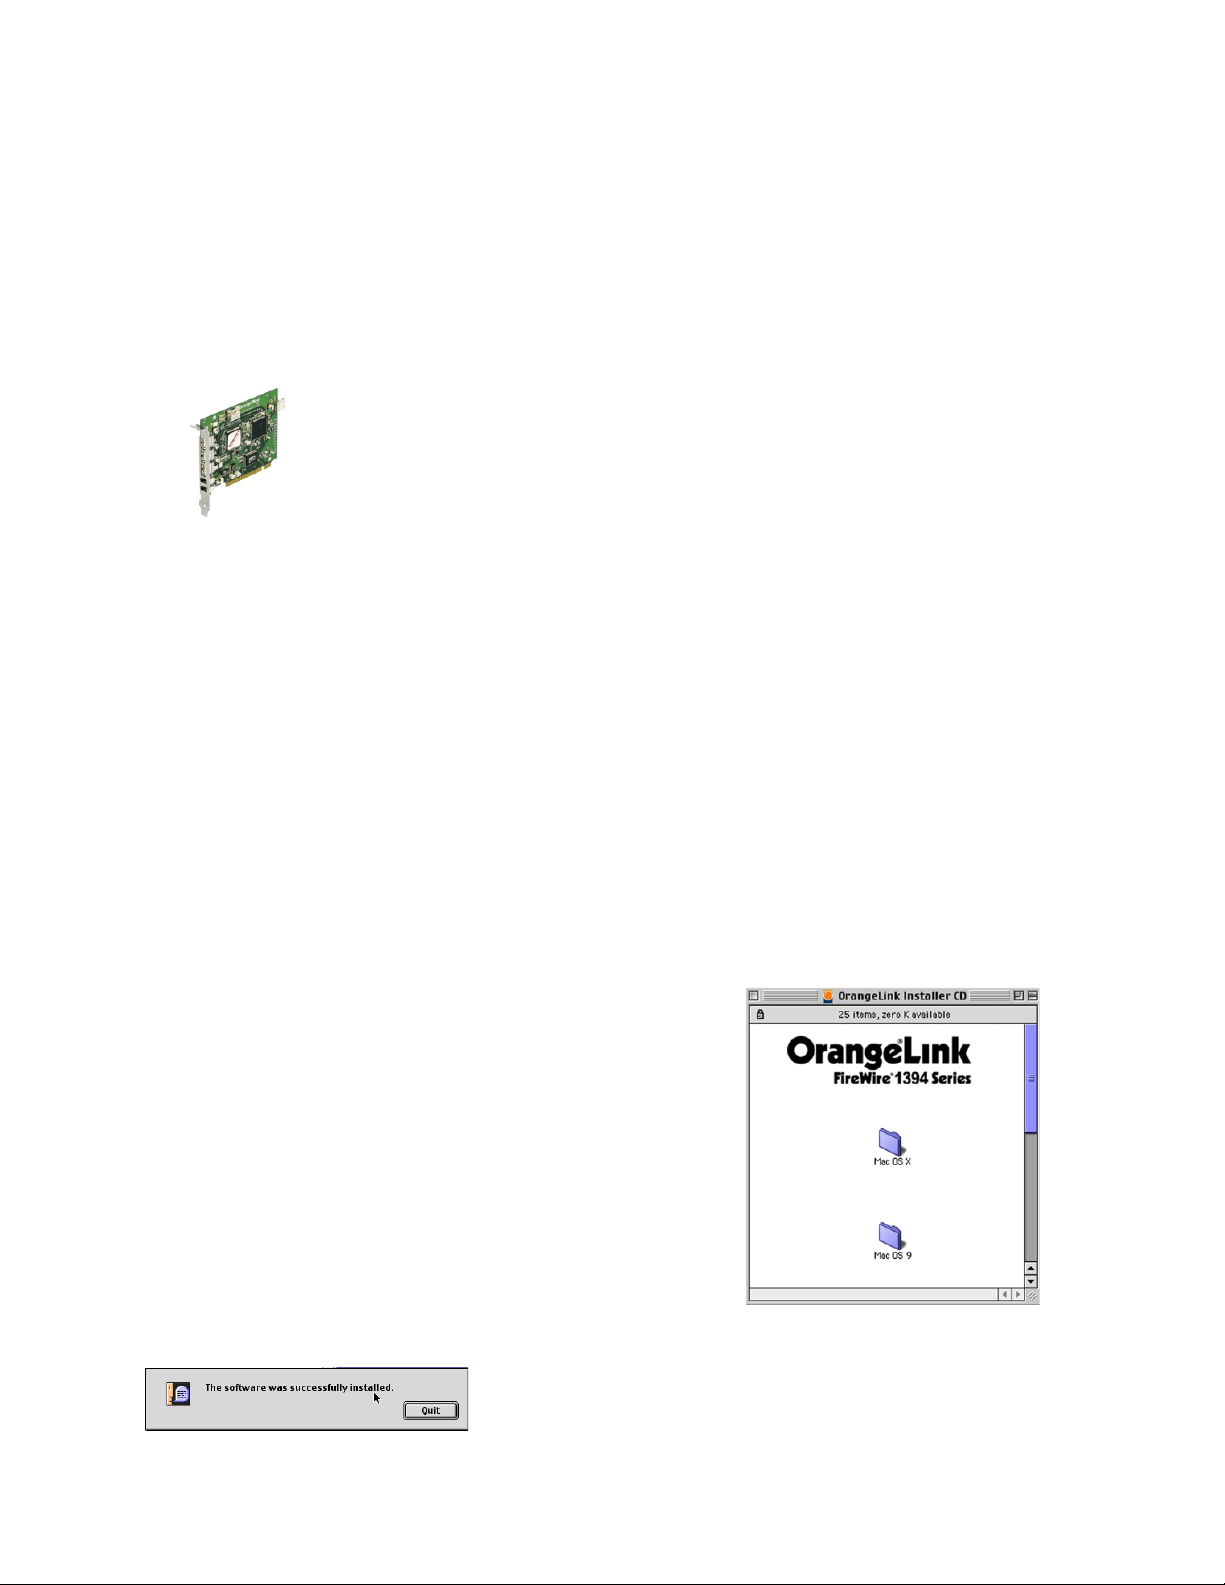
USB 2.0/FireWire PCI Card
NOTES: Refer to your computer’s manual for instructions on how to open your computer and install
a PCI card.
The USB2/FireWire PCI card gets the power it supplies to the FireWire bus from the PCI slot.
IMPORTANT: Before Handling the PCI card or touching anything in the computer, ground yourself by touching the
power supply for a couple of seconds. Failure to do this may damage the card and/or your
computer.
• With your computer off, open your computer case.
• Locate an open PCI slot. If there is a faceplate covering the opening to the back panel, remove it.
• Locate the USB2/FireWire PCI card and insert it into the free slot. Once inserted, screw the card in securely.
• Connect your internal devices as needed.
• Close computer.
Step 2 – Installing OrangeLink Drivers in the Mac OS
• Insert the OrangeLink FireWire Manual and
Software CD. The window pictured on the right
should pop up on your Macintosh desktop.
• No OrangeLink drivers are required for Mac OS X. If
you have Mac OS 9, double-click on the OrangeLink
Installer icon located in the Mac OS 9 folder.
• Once the OrangeLink Installer has opened, click
“Install.” The OrangeLink Installer copies all
necessary Orange Micro drivers to the Mac OS 9
extensions folder. Additional utilities and shortcuts
to important Apple software download web sites are
copied to a folder named “Orange Micro Updates”
on your Macintosh startup drive.
• Click on “Quit” after the OrangeLink Installer has
successfully completed the install.
Figure 1. The Installation Window
7
Page 8
Installing FireWire Drivers
Once you have finished installing the OrangeLink software, you need to download the most current release of FireWire
support from Apple Computer. To download FireWire support, follow these instructions:
NOTE: Mac OS 9.1 and Mac OS X come with FireWire support preinstalled and it is not necessary to
download and install FireWire drivers. Mac OS 8.6 users should download Apple FireWire 2.3.3.
• Connect to the Internet in the manner recommended by your Internet Service Provider. A connection to the Internet
is vital to the installation of your OrangeLink card, because Apple requires that FireWire support be downloaded
directly from its web site (www.apple.com/support).
• Locate the “Download Apple FireWire” AppleScript. This script can be found in the “Orange Micro Updates” folder
that was created on your Macintosh startup drive by the OrangeLink Installer.
• Double-click “Download Apple FireWire.” If you are connected to the Internet, click “Continue” to connect to Apple’s
FireWire download section on their web site. If you are not connected to the Internet, you may select “Later” to
download Apple FireWire support at a later time.
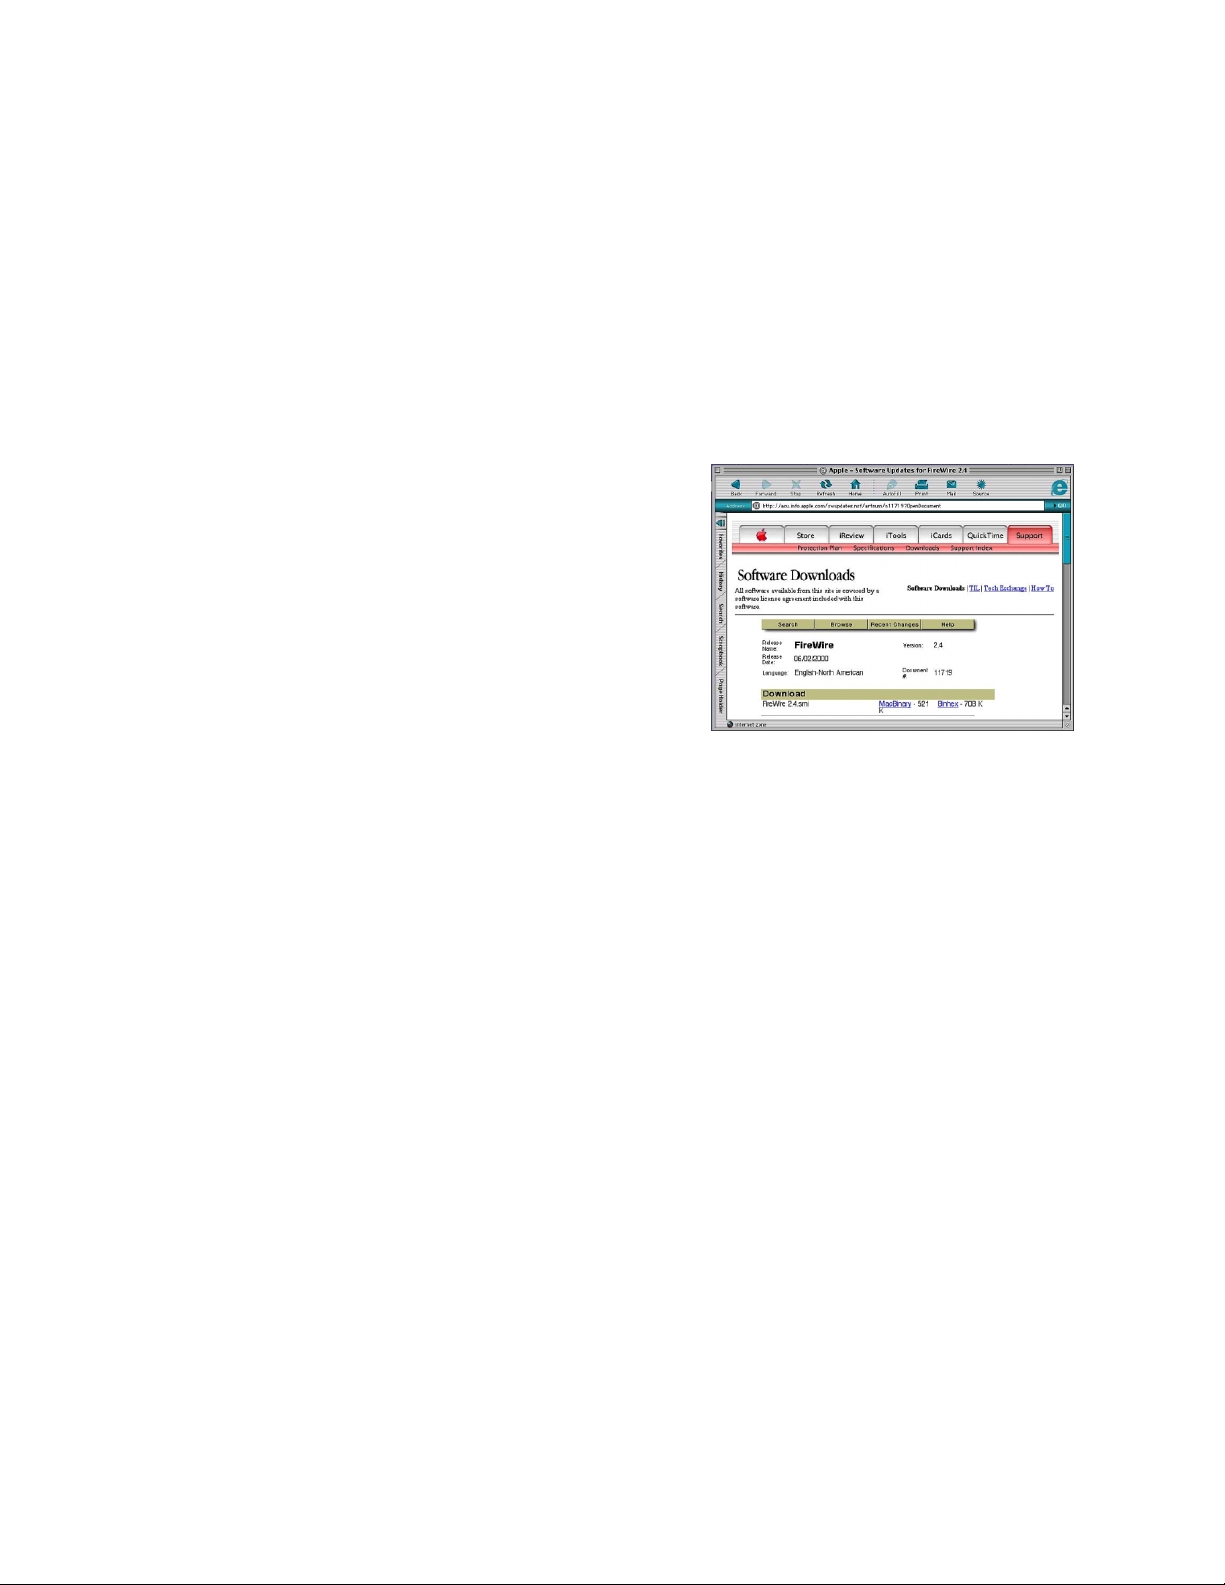
• Once you have selected “Continue” your web
browser will automatically start and download
Apple’s FireWire Support from their web site.
• Follow the instructions on Apple’s web site to
download the FireWire Support installer to your
Macintosh hard drive.
• Run the Apple FireWire Support installer, following
all on-screen instructions. When FireWire support
has been installed, you will be prompted to restart
your Macintosh. Click “Restart.”
Congratulations! You have set up your FireWire support on your Macintosh. If you are installing an OrangeLink USB2/
FireWire PCI card, you may continue on to Step 3 - Installing BTV Pro on your Macintosh.
NOTE: A file called FireWire Support may be in a folder titled FireWire in the Apple Extras folder on your
Macintosh. Do not move this older extension to your Extensions folder; it may interfere with the
operation of the new Apple FireWire software
It is recommended that you follow the instructions for downloading USB Drivers below before running the Apple FireWire
Installer. Doing so will decrease installation time, since you will not have to re-connect to the Internet to download Apple
USB Adapter Card Support.
.
8
Page 9
Installing USB Drivers
NOTE: USB 2.0 Hi-Speed support is available on MAC OS X. When running on the OS X system, USB 2.0
Hi-Speed will have a data transfer rate of 480 Mbits/s. When running on the OS 8.6 and OS 9 USB
will have data transfer rate of up to 12 Mbits/s.
Users can connect USB and USB 2.0 Hi-Speed peripherals to a USB 2.0 Hi-Speed port. The current
USB peripherals will continue to have a data transfer rate of 12 Mbits/s while USB 2.0 Hi-Speed
peripherals will have a data transfer rate of 480 Mbits/s if Mac OS X is currently running.
To download USB Support follow these instructions:
NOTE: Mac OS 9.1 and Mac OS X come with USB 1.1 support preinstalled. It is not necessary to download
and install Apple USB drivers.
Mac OS 8.6 and 9.0.x users
• Connect to the Internet in the manner recommended by your Internet Service Provider. A connection to the Internet
is vital to the installation of your OrangeLink+ USB 2.0/FireWire PCI card.
• Locate the “Check for OrangeUSB Updates” AppleScript. This script can be found on the OrangeLink FireWire
Manual and Software CD or in the “Orange Micro Updates” folder that was created on your Macintosh startup drive
by the OrangeLink Installer.
• Double-click “Check for OrangeUSB Updates”. If you are connected to the Internet, click “Continue” to connect to
Software Updates OrangeUSB Mac Product page of the Orange Micro web site. If you are not connected to the
Internet, you may select “Later” to download USB support at a later time.
• Follow the instructions on the Software Updates OrangeUSB Mac Product page of the Orange Micro web site to
download the appropriate USB Support software.
Mac OS X users
After the OrangeLink+ USB 2.0/FireWire PCI card is installed, log into Mac OS X with a username and password
that has administrative access.
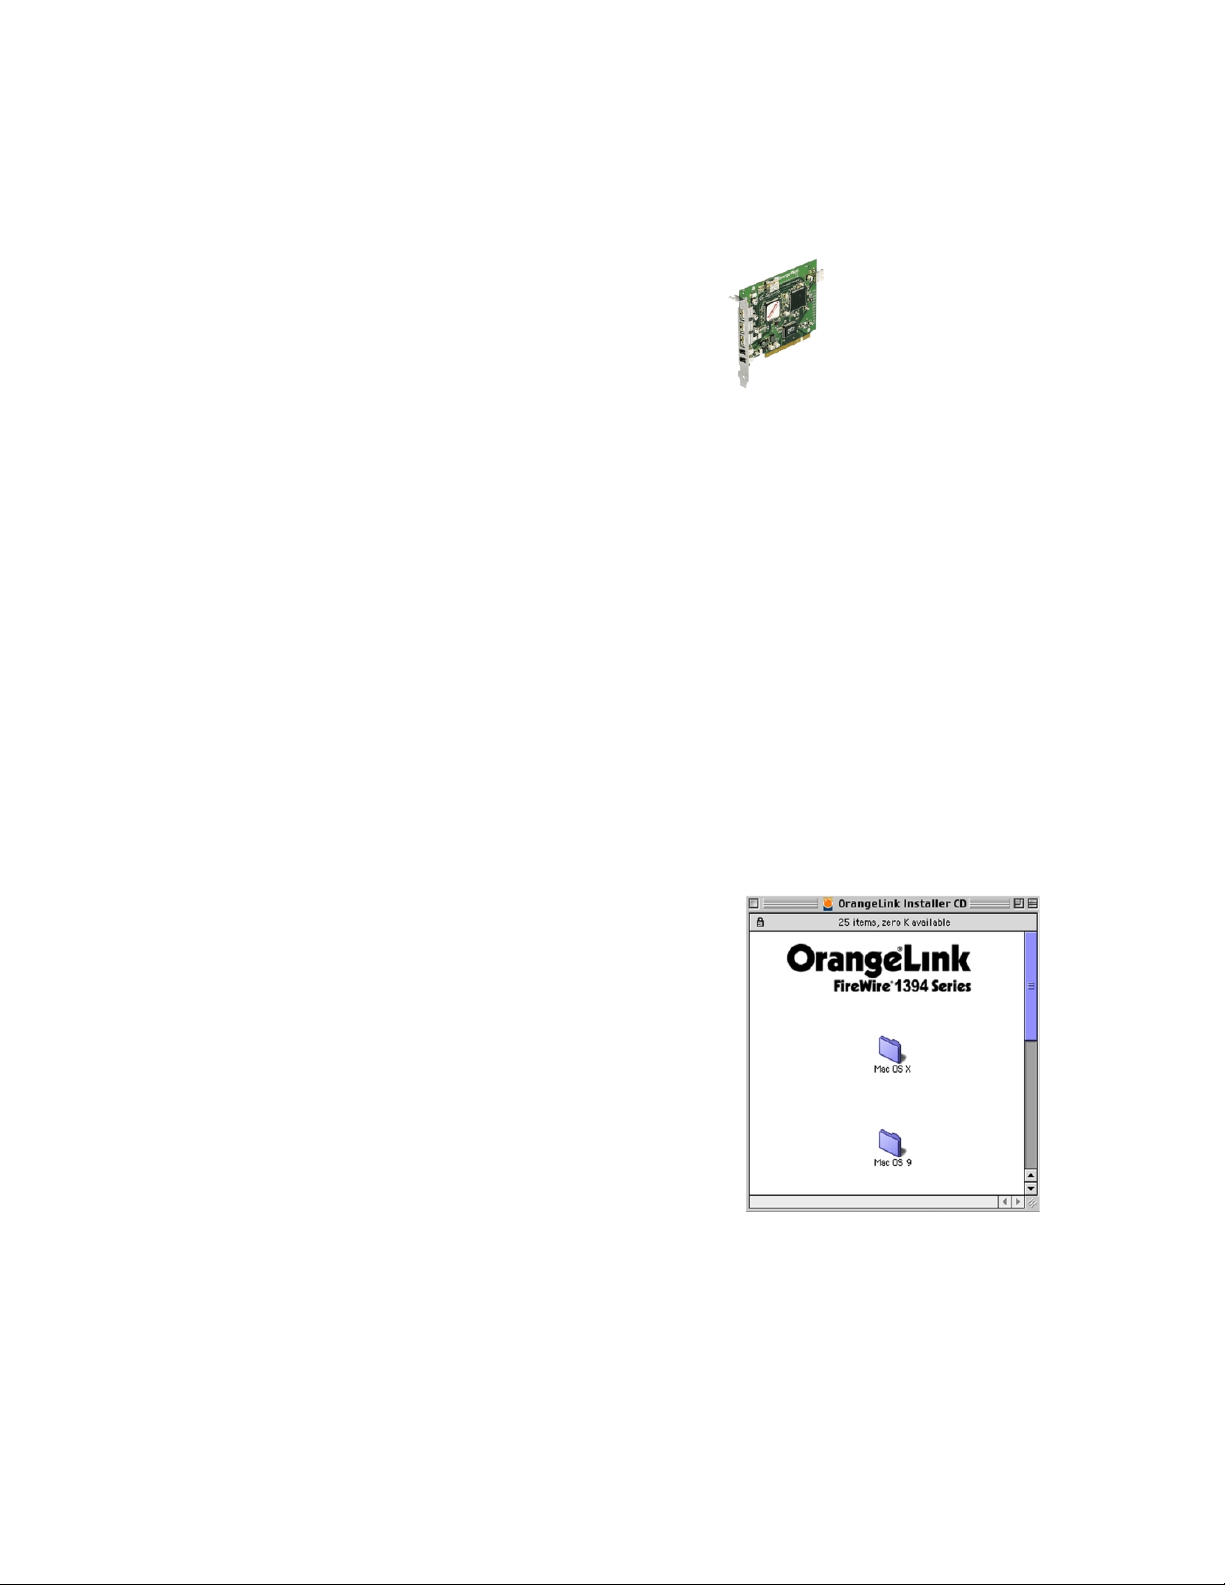
• Insert the OrangeLink FireWire Manual and
Software CD. The window pictured on the right
should pop up on your Macintosh desktop.
• The OrangeLink FireWire Manual and Software CD
contains an installer for Mac OS 10.1.x and 10.2.x
(Jaguar) inside the OrangeUSB Mac OS X Support
folder. Open the folder that represents your version
of Mac OS X (Fig. 1).
• Double click on OrangeUSB.pkg icon
• If the installer displays the message “Administrative
access is required to continue”, click on the Lock
icon.
• You will then be prompted to enter the administrator
password. If the account you are using does not
have administrative access, you must enter the
username and password for an account that does or
you will NOT be able to install OrangeUSB EHCI
support!
Figure 1. The Installation Window
9
Page 10
• If you have administrative access, the “Welcome to
the OrangeUSB Drivers Installer” window will
appear. Click on the Continue button.
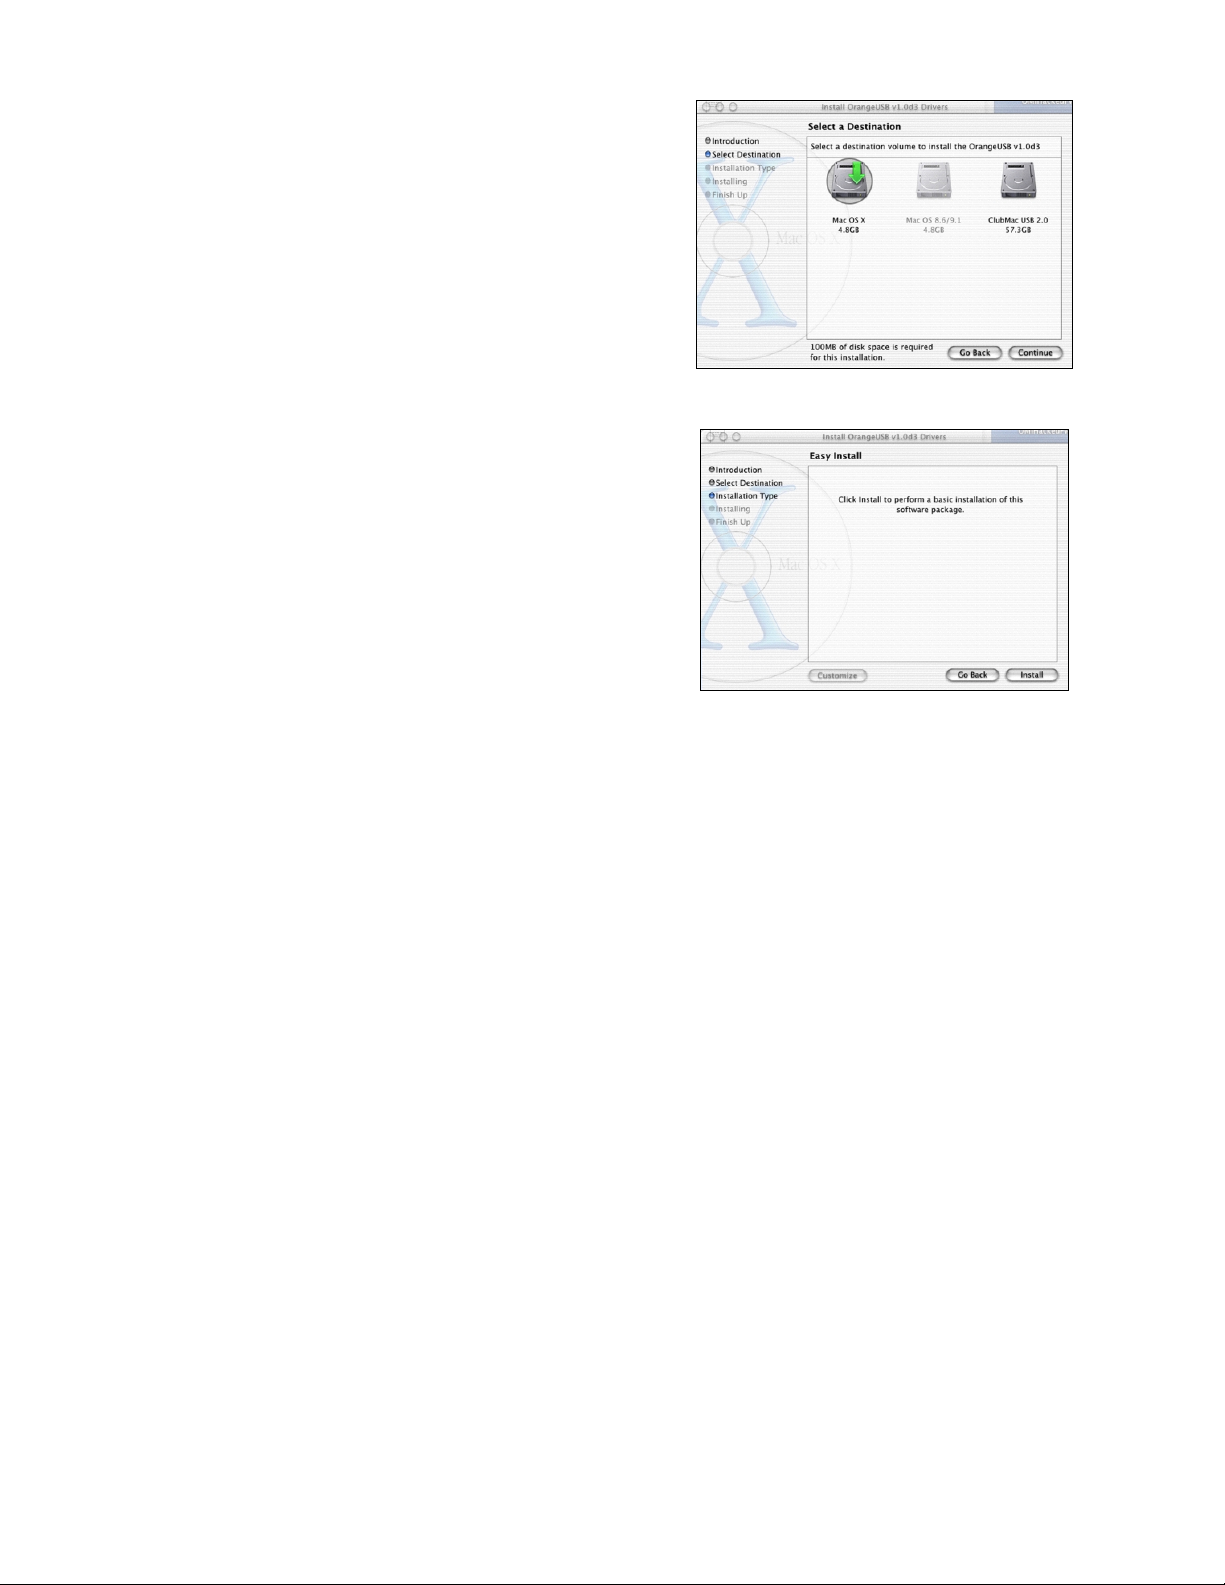
• The “Select a Destination” dialog (Fig. 2) will
appear. Select the active Mac OS X system drive,
then click “Continue”.
• The “Easy Install” dialog will appear. Click on the
“Install” button to install OrangeUSB Drivers.
• Click on the ”Restart” button to finish the
installation, when prompted.
Figure 2
Figure 3
USB 2.0 Hi-Speed products that use an NEC chipset have 3 USB host controller engines on board. Two of the host
controller engines handle USB 1.1 transactions. One of the host controllers engines handle, USB 2.0 transactions.
USB data traffic is automatically routed to the proper host controller engine depending on the speed of the device that is
plugged into the USB port. This essentially creates 3 concurrent USB buses. These USB buses allow devices to run in a
less congested traffic environment. This helps devices such as color printers, scanners, video cameras and mass storage
devices, which require a high bandwidth, to work well together.
The NEC PCI to USB Enhanced Host Controller driver handles USB 2.0 Hi-Speed (480 Mbits/s) traffic. The two NEC PCI to
USB Open Host Controllers handle Full-Speed (12 Mb/s) and Low-Speed (1.5 Mb/s) traffic.
Confirm proper installation of USB 2.0 Hi-Speed driver:
Verify the “OMI_EHCI.kext” Extension is located in the Mac OS X /System/Library/Extensions/ directory.
Verify the USB 2.0 Host Controller is detected:
Open the Apple System Profiler located in the Mac OS X /Applications/Utilities folder. Then click on the “Devices and
Volumes” tab.
This information looks different in every version of Mac OS X. In the example below PCI slot J10 contains two “USB” entries
and one “pci12ee, 7001” entry. The “USB” entries represent the two NEC PCI to USB Open Host Controllers and the
“pci12ee, 7001” represents the one NEC PCI to USB Enhanced Host Controller.
If all three appear, the USB 2.0 Host Controller has been detected.
10
Page 11

Mac OS 10.2.3 (Jaguar)
Troubleshooting
Problem:
I plug in a USB device and the Mac OS X system freezes.
Solution:
On beige G3 Macintosh computers, Mac OS X may attempt to load the built-in USB OHCI drivers for the EHCI controller.
Orange Micro has worked out a patch to solve this problem. It is located on the OrangeUSB Installer CD in the G3 USB 2.0
Patch folder.
Congratulations! Your Macintosh is now ready to use your FireWire and USB devices. To install a specific FireWire or USB
device, please consult your device manufacturer’s documentation.
Step 3 – Installing BTV Pro on your Macintosh
BTV Pro is an application for the Macintosh that allows you to view, capture and edit video, create stop-motion
animations, and also has advanced capture features such as frame averaging, time lapse and motion detection.
IMPORTANT: INSTALL THE FOLLOWING SOFTWARE IN THE ORDER LISTED!
Install QuickTime™
To install QuickTime, double-click on the “QuickTime Installer” icon located in the “Manual and Software” CD-ROM.
Inside the QuickTime installer choose the “Full” option as your installation type. Make sure you are not working with a
beta version of QuickTime.
Install BTV Pro on your Macintosh
Double-click the “Install BTV Pro” icon on the “Manual and Software” CD-ROM in the folder of your operating system of
choice. A folder named “BTV Pro 5.x folder” will be created on your Macintosh hard drive.
Adobe Acrobat® Reader
You can install the Adobe Acrobat Reader software by double-clicking the “Reader Installer” icon on the “Manual and
Software” CD-ROM in the Acrobat Reader folder. Much of the documentation included on this CD-ROM is provided in
the Adobe Acrobat portable document format (PDF). You may view and print these PDF files with the Adobe Acrobat
Reader.
The “BTV Pro 5 manual.pdf” is in Acrobat PDF format. It is installed in the “BTV Pro 5.x folder” on your Macintosh hard
drive.
11
Page 12

Chapter 3
How to install an OrangeLink in your PC
In order to ensure proper operation of your OrangeLink product, please follow the instructions below in the order they
appear. These instructions document the installation process for all Orange Micro OrangeLink products inside your
Windows PC.
Step 1 – Installing OrangeLink Drivers in Windows
NOTE: Do not install OrangeLink+ USB 2.0/FireWire PCI card before installing OrangeLink and OrangeUSB
drivers in Windows.
Orange Micro OrangeLink FireWire products may be used on any Intel Pentium or compatible system running
Microsoft Windows 98 Second Edition, Windows Me, Windows 2000 or Windows XP. OrangeLink products are not
compatible with any previous versions of Windows. Once the OrangeLink PCI card is installed the FireWire drivers
provided by Microsoft will automatically be installed. Windows 98SE will require the Microsoft Windows 98 SE CDROM.
NOTE: Microsoft refers to FireWire as IEEE-1394; the two are synonymous.
• Insert the OrangeLink Installer CD. Once inserted,
the OrangeLink Installer will automatically start and
display the menu to the right.
• Click on "Install OrangeLink Drivers"
• The OrangeLink drivers will be copied to:
C:\windows\drivers\OrngLink\
or
C:\winnt\drivers\OrngLink\
Depending on the version of Windows.
• If you have an OrangeLink+ USB 2.0/FireWire PCI
card, Click on "Install OrangeUSB Drivers".
• The OrangeUSB 2.0 drivers will be copied to:
C:\windows\drivers\ousb2\
or
C:\winnt\drivers\ousb2\
Depending on the version of Windows.
• Follow the onscreen instructions.
• When prompted, shutdown your computer.
NOTE: Microsoft Windows 98SE, Me, 2000, XP have USB 1.1 support built-in. You can connect USB 1.1
and USB 2.0 Hi-Speed peripherals to a USB 2.0 Hi-Speed port. USB 1.1 peripherals will continue to
have a data transfer rate of 12 Mbits/s while USB 2.0 Hi-Speed peripherals will have a data transfer
rate of 480 Mbits/s once OrangeUSB 2.0 Hi-Speed drivers are installed.
12
Page 13

Step 2 – Installing your OrangeLink hardware
Installing the OrangeLink USB 2.0/ FireWire PCI Card
USB 2.0 /FireWire PCI Card
NOTES: Refer to your computer’s manual for instructions on how to open your computer and install a
PCI card. The USB2/FireWire PCI card gets the power it supplies to the FireWire bus from the
PCI slot.
IMPORTANT: Before Handling the PCI card or touching anything in the computer ground yourself by
touching the power supply for a couple of seconds. Failure to do this may damage the card
and/or your computer.
• With your computer off, open your computer case.
• Locate an open PCI slot. If there is a faceplate covering the opening to the back panel, remove it.
• Locate the USB2/FireWire PCI card and insert it into the free slot. Once securely inserted, screw the card in.
• Connect your internal devices as needed.
• Close computer.
• Turn the computer power on.
• Insert the appropriate Microsoft Windows operating system CD-ROM
• As Windows boots the “Found New Hardware Wizard” dialog will appear
Follow the on-screen instructions
Installing USB 2.0 Drivers for the first time in Windows XP.
Once the card is installed and the computer is restarted, Windows will detect the card and attempt to load the
drivers for it.
Note: If your computer has properly installed drivers for built-in USB ports you may not see some of the below dialogs.
Once the OrangeUSB card is installed and the computer is
restarted,
1. Windows will detect “Universal Serial Bus
(USB) Controller”.
2. Select “Install from a list or specific location”
3. Click Next to continue.
• The Windows “choose you search and
installation options” dialog will appear.
• Select “Don’t search, I will choose the driver
to install”.
• Click Next to continue.
13
Page 14

• The Windows “Select the device driver you
want to install” dialog will appear.
• Select “OrangeUSB USB 2.0 Host
Controller.
• Click Next to continue
• The Windows “wizard has finished installing
the software” dialog will appear.
• Click “Finish” to continue
• Windows will detect “USB 2.0 Root Hub
Device”.
• Select “Install the software automatically”
• Click “Next” to continue
• The Windows “wizard has finished installing
the software” dialog appears.
• Click “Finish” to continue
Proceed to Step 3 – Verifying hardware settings.
14
Page 15

Installing USB 2.0 Drivers for the first time in Windows 2000.
Once the card is installed and the computer is restarted, Windows will detect the card and attempt to load the
drivers for it.
Note: If your computer has properly installed drivers for built-in USB ports you may not see some of the below dialogs.
• The “Welcome to the Found New
Hardware Wizard” dialog will appear.
• Click “Next.”
Figure 1
• The “Install New Hardware Device
Drivers” dialog will appear. Click the
“Search for suitable driver for my
device” button. Then, click “Next.”
• The Locate Driver Files dialog will
appear. Click the “Specify Location”
button.
• Type in the following path under
“Specify a Location”:
“x:\winnt\drivers\ousb2\”
(x = the drive letter for your boot hard
drive
• The next dialog will let you know the
driver has completed loading. Click
“Finish” to finalize the installation.
• The “System Settings Change” dialog
may appear, suggesting you “restart
your computer now.”
Figure 2
Proceed to Step 3 – Verifying hardware settings.
Figure 3
15
Page 16

Installing USB 2.0 Drivers for the first time in Windows Me.
Once the card is installed and the computer is restarted, Windows will detect the card and attempt to load the drivers for it.
Note: If your computer has properly installed drivers for built-in USB ports you may not see some of the below dialogs.
• Windows will find a “PCI Universal
Serial Bus”. Select “Specify the
location of the driver”. Click “Next.”
• You should now see a window that
resembles Figure 1. Put a check
mark in the box next to “Specify
Location.”
• Type in the following path under
“Specify a Location”:
“x:\Windows\drivers\ousb2\”
(x = the drive letter for your boot hard
drive drive
• The driver will be “OrangeUSB 2.0
Host Controller” When you see the
screen in Figure 2, click “Next.”
Figure 1
• The next dialog will let you know the
driver has finished installing. Click
“Finish” to finalize the installation.
• The “System Settings Change” dialog
may appear, suggesting you “restart
your computer now.”
Proceed to Step 3 – Verifying hardware settings.
Figure 2
Figure 3
16
Page 17

Installing USB 2.0 Drivers for the first time in Windows 98 SE.
Once the OrangeUSB USB 2.0 card is installed and the computer is started, Windows will detect the card and attempt to
load the drivers for it.
Note: If your computer has properly installed drivers for built-in USB ports you may not see some of the below dialogs.
• Windows will detect a “NEC USB
Open Host Controller”. (Make sure the
Win98 CD-ROM is in the CD-ROM
bay.) Click “Next.”
• Select “Search for the best driver for
your device.” Click “Next.”
• Uncheck all boxes in Figure 1. Click
“Next.”
• Windows will find an updated driver
for this device. Click “Next.” Then
Click “Next” again.
• The “Window has finished installing
the software that your new hardware
device requires” dialog appears as in
Figure 2. Click “Finish.”
• Repeat the above process for the
second NEC USB Open Host
Controller.
Figure 1
• After you have installed the two NEC
USB Open Host Controllers, Windows
will find a “PCI Universal Serial Bus”
device as in Figure 3. Click “Next.” To
continue.
• Another dialog will appear. Select
“Search”. Click “Next.”
• Check “Specify a Location”.
• Type in the following path under
“Specify a Location”:
“x:\Windows\drivers\ousb2\”
(x = the drive letter for your boot hard
drive
• A dialog will appear with “OrangeUSB
2.0 Host Controller” as in Figure 4,
click “Next” to continue.
Figure 2
Figure 3
Figure 4
17
Page 18

• The “Windows driver file search for
the device” dialog will appear with the
location of the driver. Click “Next” to
continue.
• The “Add New Hardware Wizard”
dialog will appear. Click “Finish.”
• Restart Windows.
Proceed to Step 3 – Verifying hardware settings.
Figure 5
18
Page 19

Step 3 – Verifying hardware settings
Verifying USB 2.0 Hi-Speed hardware settings
USB 2.0 Hi-Speed products that use an NEC chipset have 3 USB host controller engines on card. Two of the host controller
engines handle USB 1.1 transactions. One of the host controllers engines handle USB 2.0 transactions.
USB data traffic is automatically routed to the proper host controller engine depending on the speed of the device that is
plugged into the USB 2.0 port. This essentially creates 3 concurrent USB buses. These USB buses allow devices to run in a
less congested traffic environment. This helps devices such as color printers, scanners, video cameras and mass storage
devices, which require a high bandwidth, to work well together.
The OrangeUSB 2.0 Host Controller driver handles USB 2.0 Hi-Speed (480 Mbits/s) traffic. The two NEC PCI to USB Open
Host Controllers handle Full-Speed (12 Mb/s) and Low-Speed (1.5 Mb/s) traffic.
Check your Windows System/Device Manager to confirm proper installation of USB 2.0 Hi-Speed drivers:
Right click on the “My Computer” icon. Select Properties from the pop up menu, click on the “Hardware” tab then click on
the Device Manager button. Scroll down to the “Universal Serial Bus controllers” category and click on the plus sign next to
it. There may be additional devices in the list being displayed, but all of the below devices should appear.
Note: Under Windows XP, the “My Computer” icon may appear on the Windows XP Start menu
An X through a device’s icon means the device as been disabled. A circled exclamation point through the device’s icon
means the device has a problem. The type of problem will appear in the Properties dialog box for the device. To view the
Properties dialog box for a device, double click on it.
If the Windows 2000 or Windows XP Device Manager “Universal Serial Bus controllers” category does not look the same as
the Orange Micro supplied USB 2.0 drivers below, Windows 2000 or XP may have installed the Microsoft supplied USB 2.0
drivers “NEC PCI to USB Enhanced Host Controller” instead of the “OrangeUSB USB 2.0 Host Controller”.
Orange Micro supplied USB 2.0 drivers Microsoft supplied USB 2.0 drivers
If you prefer to use the Orange Micro supplied USB 2.0 drivers instead of the Microsoft supplied USB 2.0 drivers under
Windows 2000 or Windows XP, double click on the “NEC PCI to USB Enhanced Host Controller” driver in the Windows
Device Manager. Click on the Driver tab, then the Update Driver button. Go back to the above section “Installing USB 2.0
Drivers for the first time in ...” ( for Windows 2000 or Windows XP) and follow the instructions.
19
Page 20

Verifying FireWire hardware settings
Check your Windows System/Device Manager to confirm proper installation of FireWire drivers:
IEEE 1394 Bus host controllers
-Orange Micro OrangeLink OHCI IEEE 1394 Host Controller
Windows 2000/ Windows XP
Your hardware is ready for use, and you may continue on to Step 4 – Installing Ulead VideoStudio on your PC
Windows 98 SE/ Windows Me
20
Page 21

Step 4 – Installing Ulead VideoStudio DV SE on your PC
To install Ulead Video Studio, insert the OrangeLink “Manual and Software” CD-ROM into your CD-ROM drive.
When the OrangeLink Installer loads the OrangeLink Setup Menu, select “Install Ulead VideoStudio 4.0.”
The Ulead VideoStudio software installation instructions are on the OrangeLink “Manual and Software” CD in the Adobe
Acrobat portable document format (PDF). Click on the box next to ”Browse This CD" and double click on vstudio.pdf. If
Adobe Acrobat Reader is installed on your system, Acrobat Reader should automatically open vstudio.pdf.
Once the file is open, scroll down to the contents page (3). There you will see 7: Installation. Click on 7 and you will see the
installation instructions for VideoStudio DV SE. Follow these instructions to install the Ulead software.
21
Page 22

Chapter 4
Guidelines for Connecting FireWire Devices
FireWire devices can be connected in any combination of branching and chaining, as long as no loops are formed. A
FireWire bus can support up to 16 consecutive cable hops of 4.5 meters (14.76 feet) each. There are no SCSI-style ID
numbers to set and no termination requirements.
The OrangeLink+ FireWire PCI products are designed to keep the FireWire network operating even if the computer is shut
down. Loss of power to the computer will not affect the operation of a FireWire card as long as it can draw power from other
devices on the FireWire bus. The OrangeLink FireWire PCI card draws its power from the PCI bus.
To connect a DV camera, plug the 6-pin connector on the supplied FireWire cable to the OrangeLink PCI FireWire card and
the 4-pin connector to the camera’s IEEE 1394 (DV IN/OUT, iLink) port. Both connectors snap into place when properly
engaged. If you wish to connect two computers together (or if your device has a 6-pin FireWire port), you can obtain a 6-pin
to 6-pin cable through an AV equipment retailer, electronics store or directly from Orange Micro.
The OrangeLink USB2/FireWire PCI card has three FireWire ports, two external ports and one internal port.
USB 2.0/FireWire PCI
• Do not connect more than 63 (including the computers) devices at one time
• Do not connect devices in such a way that any two devices have more than 16 cables directly connected between them.
• Unused FireWire connections should be left empty. There are no terminators for FireWire connections.
• Connect devices that require power from FireWire directly to the computer.
• Do not unplug a FireWire device while it is being used. For example, do not unplug a FireWire disk while copying files
onto it.
• If you have problems with digital video transfers make certain that no other FireWire devices are being used at the same
time.
22
Page 23

Chapter 5
Guidelines for Connecting USB 2.0 Hi-Speed Devices
The OrangeLink+ USB 2.0 /FireWire PCI card also provides four easy-to-use USB 2.0 Hi-Speed ports. New USB 2.0 HiSpeed devices are available including hard drives, removable media and scanners. Just plug them in when you need them.
It’s that simple. No configuration is necessary.
The OrangeLink USB 2.0 Hi-Speed supports up to 127 devices simultaneously. USB 2.0 Hi-Speed technology is
“backward compatible” meaning users can plug in their older USB 1.1 peripherals and their USB 2.0 Hi-Speed peripherals
simultaneously! Peripheral connections may be up to five meters in length.
Built-in +5-volt power distribution eliminates the need for AC power supplies for low/bus-powered devices. Much like
FireWire, there are no SCSI-style ID numbers to set, and no termination requirements make installation quick and easy.
The OrangeLink USB 2.0 Hi-Speed performance operates at up to 480 Megabits per second–that’s 40 times faster than
USB 1.1.Simply “hot-plug” or “hot-unplug” any USB 1.1 or 2.0 Hi-Speed peripheral or any other USB 1.1 or 2.0 Hi-Speed
compliant device and it is ready to use.
The OrangeLink+ USB 2.0/FireWire PCI card has three external and
one internal USB 2.0 Hi-Speed ports, as shown in the photo on the
right.
The maximum length for USB 2.0 Hi-Speed is five meters. Cables
with shielding and two twisted-pair connectors are considered “fully
rated” to transfer data at the maximum 480 megabits per second.
Non-shielded cables with non-twisted conductors are allowed, but are
used when they are soldered to a device that will transmit only at the
lower 1.5-megabit-per-second transfer rate. Low-speed cables can be
a maximum of 3 meters in length.
USB 2.0 Hi-Speed cables are called “A to B” cables, because they have two standard USB 2.0 Hi-Speed connectors,
known as Type A and Type B. The Type A connectors are small and rectangular, and are used to plug into the back of your
computer. Type B connectors are square, and are used to attach a USB 2.0 Hi-Speed cable to a USB 1.1 or 2.0 Hi-Speed
device (printer, modem, hub, etc.). Having two dissimilar connector types prevents wrong connections.
The USB 2.0 Hi-Speed specification requires that power be provided on the bus for use by low-power devices. Hubs can
use this power for operation, and are thus referred to as “bus-powered” hubs (allowed under the USB 1.1 specification).
Hubs may also include an AC adapter that provides external power to the hub. Such hubs are referred to as “self-powered”
hubs. USB 2.0 Hi-Speed hubs by specification require “self-powered” hubs. OrangeLink USB 2.0 Hi-Speed support gives
you access to many easy-to-use plug and play devices designed to make your computing experience as simple as possible.
USB
Type A
Ports
23
Page 24

Appendix A
Optional Hardware
The following optional OrangeLink hardware accessories are available from Orange Micro:
IBOT2 USB 2.0 Web Cam Part# 70USB90050
Without USB 2.0 PCI Card
IBOT2 USB 2.0 Web Cam Part# 70USB90051
With USB 2.0 PCI Card
IBOTpro FireWire Web Cam Part# 70HTL00100
BTV Pro for Macintosh, ArcSoft Video Impression, ArcSoft Photo Impression, iSpQ VideoChat and head set microphone.
IBOT FireWire Web Cam Part# 70HTL00101
BTV pro for Macintosh Trial, iVisit video conferencing
FireWire cable Part# 70CAB13942
4.5 meter (15 feet) 6-pin to 6-pin
FireWire cable Part# 70CAB13943
4.5 meter (15 feet) 6-pin to 4-pin
FireWire cable Part# 70CAB13945
4.5 meter (15 feet) 4-pin to 4-pin
FireWire cable Part# 70CAB13946
0.6 meter (6 feet) 4-pin to 6-pin
FireWire cable Part# 70CAB13947
0.6 meter (6 feet) 4-pin to 4-pin
FireWire cable Part# 70CAB13948
0.6 meter (6 feet) 6-pin to 6-pin
USB 2.0 Certified cable Part# 70CAB90032
0.6 meter (6 feet)
USB 2.0 Certified cable Part# 70CAB90033
4.5 meter (15 feet)
FireWire Repeater Part# 70HTL00020
Allows an additional 4.5 meter extension for FireWire devices. Includes a 4.5 meter (15 foot) 6-pin to 6-pin cable.
FireWire Hub Part# 70HTL00030
Connects up to 8 devices. Also provides an additional 4.5 meter extension, and an enhanced 12 volts of power for FireWire
peripherals.
USB 2.0 Hub Part# 70USB90030
Connects up to 4 devices. Also provides an additional 4.5 meter extension.
FireWire PCI Board Part# 70HTL13943
Add 3 FireWire ports to your PCI based Mac or PC.
USB 2.0 Hi-Speed PCI Board Part# 70USB90010
Add 5 USB 2.0 Hi-Speed ports to your PCI based Mac or PC.
FireWire PC Card Part# 70HTL00040
Add 2 FireWire ports to your Mac or PC Laptop.
USB 2.0 Hi-Speed PC Card Part# 70USB90020
Add 4 USB 2.0 Hi-Speed ports to your Mac or PC Laptop.
USB 2.0 FireWire PCI Board Part# 70HTL00110
Add 3 FireWire and 4 USB 2.0 Hi-Speed port to your PCI based Mac or PC.
FireWire/Ethernet PCI Board Part# 70HTL00090
Add 2 FireWire ports and Ethernet support to your PCI based PC Only.
Optional OrangeLink FireWire PC Card Power Supply
Avoid buying a FireWire Hub for the purpose of supplying power to the FireWire Bus. Available from:
http://www.1394firestation.com/
Information about the IEEE 1394 Trade Association and many other FireWire products can be found at these addresses:
http://www.1394ta.org http://www.1394showcase.com
24
http://www.apple.com/firewire/firewireproducts.html
Page 25

Appendix B
Using BTV Pro on the Macintosh
BTV Pro – QuickStart
What Extensions and Control Panels are needed for working with DV in BTV Pro?
When working with DV and BTV Pro, it is recommended that you set up a custom extension set. The following sample
extension set includes the required BTV Pro and System files. Extension versions and their existence in your system may
vary depending on which OS you use and what you have installed. Pay special attention to the underlined extensions.
Make sure they are enabled before moving on to the next step.
ATI 3D Accelerator 4.9.7 (Note 1)
ATI Driver Update 1.5.3 (Note 1)
ATI Graphics Accelerator 4.9.4 (Note 1)
ATI MPP Manager 1.1.2f1 (Note 1)
ATI Rage 128 3D Accelerator 5.8.1 (Note 1)
ATI Resource Manager 2.4.8 (Note 1)
ATI Video Accelerator 4.2.2 (Note 1)
ATI Video Accelerator Update 1.0.2 (Note 1)
FireWire Enabler (2.4 or newer)
FireWire OrangeLink PC Card 1.1.4 (PC Card Only)
FireWire Support (2.4 or newer)
Open TransportLib 2.0.3
OpenTptInternetLib 2.0.3
OpenTptAppleTalkLib 2.0.3
Open Transport Library 2.0.3
Open Tpt Internet Library 2.0.3
Open Tpt AppleTalk Library 2.0.3
QuickTime Extensions folder
QuickTime Authoring 4.1.1
QuickTime Capture 4.1.2
QuickTime Effects 4.1.1
QuickTime Image 4.1.1
QuickTime Internet Extras 4.1.1
QuickTime Music 4.1.1
QuickTime Player Extras 4.1.1
QuickTime Streaming 4.1.1
QuickTime Streaming Authoring 4.1.1
QuickTime Streaming Extras 4.1.1
QuickTime Web Helper 4.1.2
QuickTime FireWire DV Enabler (2.2 or newer)
QuickTime FireWire DV Support (2.2 or newer)
QuickTime™ 4.1.2
QuickTime™ MPEG Extension 1.1.2
QuickTime™ Musical Instruments 4.1.1
QuickTime™ PowerPlug 4.1.2
QuickTime™ VR 2.3
Shared Library Manager PPC 2.0.2
Shared Library Manager 2.0.2
Sound Manager 3.6.5
Note 1- G3 models with an ATI RAGE 128 graphic accelerator card or ATI RAGE Pro graphic accelerator
chip.
Note 2- Remove any other DV or FireWire files except those underlined above.
25
Page 26

Capturing Video
At this point you should have already installed the OrangeLink software and BTV Pro software. The FireWire drivers will not
recognize most camcorders if the camcorder, Macintosh, and BTV Pro software are not started in the right order.
Performing the following procedures in order will quickly get you started capturing DV video.
• Be sure that the Macintosh is OFF, the camcorder power is OFF and the FireWire cable is connected securely to
the camcorder DV port and the OrangeLink FireWire port.
• Start your Macintosh.
Note: For optimal performance; Set the Monitor Control Panel to “Thousands” of colors. Set the Memory
Control Panel to Virtual Memory OFF and Disk Cache to 128k.
• When the Macintosh has completely started, configure the camcorder to Camera mode (some camcorder
manufacturers refer to this as Recording mode) and turn ON the power to the camcorder.
• Listen to your Macintosh hard disk. When the camcorder is detected, the FireWire software will load and you will
hear a burst of disk access while the FireWire drivers load.
• Set the capture scratch disk and folder: Pull down the Settings
“Preferences…” menu. Click on the “Frame Capture” tab. Click on the
“Capture destinations…” button to set which hard drive is your capture
drive. Drives that are too slow, fragmented or full will not work well.
Note: Set BTV Pro capture scratch disk and folder to an AV/DV
rated drive (DV requires a sustained transfer rate of 3.6
MB/second) with ample amounts of free space.
• Pull down the Apple / Control Panels/ AppleTalk menu. Under the
Options button select Make AppleTalk Inactive. Capturing DV works
best when AppleTalk is inactive.
• Pull down the BTV Pro Windows menu and select “Capture Controls”.
Now, when you wish to capture video click on the “Start Capturing
Movie” button. The same button will represent the “Stop Capturing
Movie” button.
Output Video to FireWire
To output your edited movie from BTV Pro back to your DV Camera or Deck you will need to perform the following steps.
• Make sure your DV Camcorder is in VTR/VCR mode on standby. BTV Pro will take control of the camera and switch
it to record mode as it exports.
Note: DV cameras have two kinds of record buttons (one for VTR/VCR and one for live camera mode).
• Open the movie you wish to export.
• Pull down the BTV Pro Movie menu and select “Output to FireWire”.
• Click on the BTV Pro Play button to send your movie to the DV camcorder.
• Once BTV Pro is done exporting video, it will stop the camera and place it back into standby mode. At this point you
can go to your camera and playback the exported video.
If your audio plays clipped during a Output to FireWire, you may not have a fast enough hard drive for DV output or you may
be running out of disk space. Set BTV Pro capture scratch disk and folder to an AV/DV rated drive (DV requires a sustained
transfer rate of 3.6 MB/second) with ample amounts of free space. You will get better performance if your movies are on a
separate drive from your Mac System drive. G3’s with SCSI drives should be capable of handling DV. Macs with IDE drives
may require a faster drive to output to DV. You can check what kind of hard drive you have by using the Apple System
Profiler under the Apple Menu. You should use disk-defragmenting utilities like Norton Utilities’ Speed Disk to optimize
AV/DV rated drives for best performance.
For additional Mac troubleshooting tips refer to Appendix D.
26
Page 27

Additional FireWire Workflow Recommendations and Known Issues:
• Editing DV is a CPU and hard drive intensive task. You may need to minimize your extension sets (via the Extensions
Manager and optimize your hard drives (using a Mac disk defragmentation utility like Norton Speed Disk) to get the best
possible performance out of your computer.
• Do not expect full screen overlay of video to play well on the computer monitor since the CPU is handling it. Use BTV
Pro to assemble your video, then export it back to your DV camcorder, which is capable of playing the movie back to the
TV monitor at full screen.
• There is a QuickDraw 3D compatibility problem, which causes ATI overlay problems. You may experience your markers
being overdrawn by the clip overlay. To avoid this, you may disable QuickDraw 3D by creating a custom extension set.
• It is recommended that no other operations be attempted while Capturing or Outputting Video to FireWire.
• The current Apple FireWire 2.4 extensions allow for multiple devices, but they share the same FireWire channel for
sending/receiving DV data. This might lead to difficulties selecting between multiple device. It is recommended that you
only work with one device at a time and turn off the other devices when not in use.
• Since DV transfers video and audio across a single stream, it is not recommended to attempt audio- or video-only
captures.
• With the current ATI Video Software Update 1.0, you will experience a frame redraw artifact during Play Edit in Trim
Mode.
For more detailed information regarding the operation of BTV Pro refer to the BTV Pro OM manual.pdf located in the “BTV
Pro OM Folder” on your hard drive.
27
Page 28

Appendix C
Using Ulead VideoStudio on Windows
Ulead VideoStudio – QuickStart
Capturing Video
At this point you should have already installed the OrangeLink software and VideoStudio DV SE software. The FireWire
drivers will not recognize most camcorders if the camcorder, the PC, and the VideoStudio software are not started in the
right order. Performing the following procedures in order will quickly get you started capturing DV video.
• Be sure that the PC is OFF, the camcorder power is OFF and the FireWire cable is connected securely to the
camcorder DV port and the OrangeLink FireWire port.
• Start your PC.
• When the PC has completely booted, configure the camcorder to
Camera mode (Some camcorder manufacturers refer to this as
Recording mode.) and turn ON the power to the camcorder.
Listen to your PC hard disk. When the camcorder is detected the
FireWire Software will load and you will hear a burst of disk
access while the FireWire drivers load. If you are presented with
the following “Version Conflict” dialog, click yes.
• Check the Windows System/Device Manager for the following
devices:
1394 Bus Controller:
-Orange Micro OrangeLink OHCI IEEE 1394 Host
Controller
Imaging Device:
-Microsoft DV Camera and VCR
Note: The Imaging Device will only appear if Windows
detects the camera. If the above devices do not
appear as shown, highlight the device that
appears under 1394 Bus Controller and click on
the Remove button at the bottom of the Device
Manager Window. Then insert the “OrangeLink
Manual and Software CD” and select the “Install
OrangeLink Drivers” option. Restart Windows
then compare the above devices to ensure they
appear as shown.
• Double-click the Ulead VideoStudio icon on your desktop. Follow the onscreen instructions to begin capturing video.
For any help on capturing video with VideoStudio, insert the “OrangeLink Manual and Software CD”. It should Auto
Start. Click on the box next to ”Browse This CD” double click on vstudio.pdf. You are now ready to start capturing video!
28
Page 29

• Verify VideoStudio settings. Point and click on the
and Commands icon). The Settings and Commands menu to the
right will appear:
Verify the following Settings:
Select Device Control… = MS 1394 Device Control
Change Capture Plug-in… = Ulead DirectShow Capture plug-in
(Settings
Additional FireWire Workflow Recommendations and Known Issues:
Optimize your System
If you do not optimize your system you may get dropped audio or video frames. This can cause choppy sound or video that
does not appear smooth.
Run Disk Defragmenter on your hard disk. With all applications closed, click on the Windows Start menu and select Start /
Programs / Accessories / Systems Tools / Disk Defragmenter.
Enable DMA for IDE hard disks. In the Windows System/Device Manager double click on Disk Drives. Then double click on
the icon labeled Generic IDE Disk. Select the Settings tab and click on the DMA box. Close all windows and restart the
Windows operating system. Not all hard drives support DMA. If any problems result due to this procedure, restart Windows
in safe mode and remove the check on the DMA box.
Interrupt Conflicts
Interrupt sharing conflicts can cause dropped frames;
device not found errors and general protection faults (GPF).
To resolve these interrupt sharing conflicts, view your
system resources by right clicking on My Computer on your
Windows desktop and selecting "properties." Double-click
on the Computer icon at the top of the System/Device
Manager. This will bring up a window listing your device
IRQ's.
The OrangeLink PCI FireWire card works best when
occupying an IRQ value of 9, 10, 11, 12, 14, or 15 by itself
or with no additional devices (IRQ holder for PCI Steering
and other ACPI items refer to resource designations and
may be ignored).
To isolate the USB2/FireWire PCI card on an IRQ by itself, it may be necessary to move the OrangeLink PCI to different
PCI slots. While performing this operation, remove all non-essential PCI cards. Once you can capture video properly
reinstall non-essential PCI cards in your system.
Note: Some systems are particular about which slots contain active PCI cards. Put the OrangeLink PCI
card in the slot closest to the power supply. Try putting SCSI, Ethernet, Sound or VDD cards in
slots below the OrangeLink PCI card. If you have enough open slots, leave slots empty between the
OrangeLink PCI card and other PCI cards.
For additional troubleshooting tips go to our web site.
http://www.orangemicro.com/faqolwin.html
29
Page 30

Appendix D
Macintosh Troubleshooting
Problem – Can I boot from a FireWire hard drive?
Suggestion:
Yes. Booting from FireWire devices is enabled on certain newer model Macintosh computers. Refer to the following URL:
http://til.info.apple.com/techinfo.nsf/artnum/n58606
I have a Macintosh 6500, 5500, or Twentieth Anniversary Macintosh and my OrangeLink+ FireWire/USB card does
not work.
Suggestion:
The OrangeLink+ USB 2.0/FireWire PCI card is not compatible with these systems due to a bug in the firmware of
these systems.
Problem – What are the minimum system requirements to use the OrangeLink?
Suggestion:
The PCI based card can be used on any PCI based Macintosh except the Power Macintosh 6500, 5500, or Twentieth
Anniversary Macintosh. The devices that can be used are FireWire hard drives, CD-R's, printers, cameras etc.... DV editing
has more stringent requirements and may not be possible on some older systems.
Problem – Apple FireWire will not install in my MacOS 8.6 system. What should I do?
Suggestion:
Apple recommends FireWire software version 2.3.3 for systems with MacOS 8.6 installed.
http://download.info.apple.com/Apple_Support_Area/Apple_Software_Updates/
Problem – My OrangeLink appears to be dead
Suggestion:
• Ensure the OrangeLink is secure in its slot.
• Go to the Mac System/Extensions Folder and trash all FireWire extensions.
• Reinstall OrangeLink Software. Refer to Chapter 2.
Problem – I have installed the card and the OrangeLink Software and now my Mac will not boot.
Suggestion:
• Try moving the card to a different PCI Slot. If you have other PCI cards as well, try switching the order the cards are
installed in the computer. The Macintosh can be particular about PCI hierarchy. Move the OrangeLink card into the first
PCI slot if possible.
Problem – I can capture video, but when I export I get blocky video back to the camera.
Suggestion:
If you have a processor upgrade card installed, confirm that the G3 upgrade card has the proper bus speed settings to
match your system. If you have a 50 MHz bus on your system and your upgrade card is running at 48.5, the timing
difference will cause the kind of problem you currently have. If your system has a 50mhz-bus speed, and your upgrade card
has your system running at 345hz, then your card will need to be adjusted.
30
Page 31

Other recommendations:
1. You should optimize your hard drive by defragmenting it. Install all the most current software updates from our web site,
Apple's web site, and Adobe's web site.
2. Run your system with an extremely bare extension set. Save an extension set specifically for FireWire editing. Your
video editing software and camera will be the only things you are using, so you can disable many extensions to speed
up the system.
3. Disable "FireWire OrangeLink CardBus Enabler” if not using PC Card.
4. Disable QuickTime VR, and QuickTime Musical Instruments.
5. Disable the Desktop picture (Appearance Control Panel).
6. Disable all USB extensions, SerialShimLib, and HID Library.
7. Disable any extensions from current software programs such as MS OFFICE.
8. Disable Printer extensions, and other device extensions not FireWire.
9. Remove all old extensions from software and printers no longer being used.
10. When running your camera, run it from the AC Adapter. Run no other devices or programs. These steps should greatly
reduce or eliminate the problems you are having with video editing.
For additional troubleshooting tips go to our web site.
http://www.orangemicro.com/faqolmac.html
31
Page 32

PC Troubleshooting
Problem – I run Windows 98SE and after plugging in my DV camcorder it shows up in the Windows Device Manager
under the "Sound, video and game controllers" section instead of under the "Imaging Device" section.
Suggestion:
• Open then Windows Device Manager, expand the "Sound, video and game controller" section then remove the device
driver for your camcorder. After closing the Device Manager, Windows will prompt you to restart. Select "No".
• From the Start menu button select Find\Files or Folders. The Find dialog will now appear. Enter "dvcam.*" under the
"Named" section and click the "Find Now" button. Windows should find three files which match the aforementioned
criteria. Delete all three of these files.
• Insert your Windows 98 Second Edition CD into your CD-ROM drive then restart Windows. As Windows restarts, the
camcorder will be detected. When prompted point the Hardware Installation Wizard to the Win98 folder on the Windows
98SE CD to install the appropriate drivers for your camcorder.
Problem – I have installed the OrangeLink drivers and OrangeLink card, but when I turn on my camera, Windows
asks me to load the camera driver.
Suggestion:
If your system is asking for camera drivers, then you will need to upgrade your Windows to Windows 98 Second Edition. If
you right click on the My Computer icon, and choose properties, your system properties box will open. This box will display
the version of windows you currently have. If the date for Windows is 4/10/1998 and does not say Second Edition, you will
need to purchase the updated version of the operating system
Problem – I cannot get disk media to work properly in Windows 98 Second Edition What can I do?
Suggestion:
An update to Windows 98SE is available that corrects problems with mass storage devices. Use the link below to go to the
Microsoft web page and download the update.
http://www.microsoft.com/Windows98/downloads/contents/WURecommended/S_WUFeatured/1394/Default.asp
Problem – Are there any recommended updates for DV editing?
Suggestion:
Microsoft recommends users of Digital Video equipment install DV Updater for DirectX 8.0
http://www.microsoft.com/downloads/release.asp?ReleaseID=28377
Problem – How to prepare a FireWire disk for use under Windows 98SE or Windows Me?
Suggestion:
• Boot up your computer with the FireWire hard drive turned on and connected.
• From the Start\Programs menu select "MS DOS Prompt". The MS DOS Windows will now appear. From command
prompt type "fdisk" and hit the enter key.
• When asked to enable Large Disk support press "Y".
• The Microsoft Fixed Disk Utility will open. Choose option 5 "Change current fixed disk drive" then hit the Enter key.
• Now select your FireWire drive from the list. Your main internal hard drive will be Disk 1. If you have only one hard drive
in your computer then drive 2 will be your FireWire drive. If you are not sure which drive is your FireWire drive you
should contact the manufacture of the drive for further instructions. After selecting your FireWire drive from the list hit the
enter key to proceed.
• WARNING: FAILING TO SELECT THE CORRECT DRIVE MAY CAUSE PERMANENT LOSS OF DATA!
• You will now be presented the original menu of 5 items. Select option 1 "Create DOS partition or Logical DOS drive" and
hit Enter.
• You will now be presented 3 menu items. Choose number 1 "Create Primary DOS Partition" then hit the Enter key.
• You will now see the question "Do you wish to use the maximum available size for the Primary DOS partition"? Answer
yes.
• The partitioning is complete hit the Esc button twice. You will see a message that you must restart your computer. Hit
the Esc button once more to exit the fdisk program. From the MS DOS command prompt type "exit" to close the MS
DOS Prompt window.
• Disconnect the drive from the FireWire bus, wait about ten seconds, then reconnect the drive. After plugging the drive
back in double click the "My Computer" icon to open the My Computer window. You should have a new drive icon for
the FireWire drive. Right click on the drive icon for the FireWire drive. From the pop-up menu that appears select
"Format". From the format dialog select "Full" under "Format Type, then click the Start. You will see a warning that all
files will be destroyed. Click OK to proceed. This process may take several minutes. Once complete, click the Close
buttons and you are done.
32
Page 33

Problem – How do I prepare my FireWire Disk for use under Windows 2000?
Suggestion:
• Plug the FireWire drive into any available FireWire port.
• The system should detect the drive and install a device driver for it. To verify the drive is properly detected right click on
the "My Computer" icon. From the popup menu that appears click Properties. The System Properties dialog will
appear. Click the Hardware tab then click on the Device Manager button. The Device Manager dialog will appear. Scroll
down through the list of devices until you see the Disk Drives section. Expand this section. Under the Disk Drive
section your FireWire drive should be listed. For information on how your drive will show up in the Device Manager
please contact he manufacturer of your drive.
• After you have verified that your FireWire drive has been detected by Windows 2000 you will need to partition and
format the drive before it will be usable. Open the Disk Management utility. To get there: Click on the
Start/Settings/Control Panel menu. Double-click on Administrative Tools, and then double-click on the Computer
Management icon. In the Storage sub-section, click Disk Management.
• The Write Signature and Upgrade Disk Wizard will start. Click Next to start the Wizard. Select your FireWire drive from
the list using the checkbox. Click Next to continue. Click Finish to write the signature to the drive.
• The FireWire drive will be listed without a drive letter, and show as "unallocated".
• To create a partition, right click on the unallocated area of the drive. Then from the popup menu that will appear select
Create Partition.
• The Create Partition Wizard will start. Click next to start the Wizard. Choose Primary partition then click next. Enter the
amount of disk space to be used and then click next. Assign a drive letter or path, and then click next. Select a file
system to use to format the disk, then click next. Verify all settings, and then click Finish to begin formatting the drive.
Note: The formatting process could take several hours.
• When the formatting process has finished, your FireWire drive should then be available for use.
Problem – I followed the instructions, loaded the Driver software, but no 1394 Bus controller is listed in the Device
Manager.
Suggestion:
• Before the Orange Micro OrangeLink 1394 Host Controller will appear in the Device Manager, you must install the
OrangeLink card in your computer. After installing the card and re-booting, Windows will prompt you to insert the
Windows CD to finish installation. The "Orange Micro OrangeLink OHCI IEEE 1394 Host Controller" will now appear in
the Device Manager.
Problem – I installed the software. I installed the card but when I look in my device manager there is a yellow
exclamation point on “Orange Micro OrangeLink OHCI IEEE 1394 Host Controller.”
Suggestion:
This exclamation point usually means there is a resource conflict between the OrangeLink card and another card in your
system.
• Shutdown your computer and move the OrangeLink to another open slot.
• If you do not have open slots, swap slots with another card in your system.
• Restart your computer. Windows will then re-configure itself and re-assign resources. Check your Device Manager
again. If the exclamation point is still there then repeat the process until it no longer appears.
Problem – I get choppy sound or video that does not appear smooth.
Suggestion:
• Check the amount of RAM in your system. The recommended amount is 128MB or higher, preferably 256MB or more.
• Check your hard drive for available space. Editing DV takes up large amounts of disk space. As your hard drive fills up
the slower it performs.
• Try to free up space on your hard drive by deleting unneeded programs and files.
• Optimize your system.
Problem – Windows 98SE does not detect my camcorder.
Suggestion:
• Some camcorders have problems being detected when they are not plugged into their power supply.
For additional troubleshooting tips go to our web site. http://www.orangemicro.com/faqolwin.html
33
Page 34

Appendix E
Specifications
Hardware Features
• PCI 2.1 Compliant
FireWire Ports
• IEEE-1394 OHCI compliant; 100 (12.5 MB/sec) Mbits/s; 200 Mbit/s (25 MB/sec); 400 Mbit/s (50 MB/sec)
• Connect up to 63 devices, internal or external
• All FireWire ports provide up to 12 V of power
• Supports Plug-and-Play Specification
• Hot Plug
• Complies with Standard for a IEEE-1394 High Performance Serial Bus/ iLink
• Up to 16 consecutive cable hops of 4.5 meters
• Support for digital video in full size, full motion video of 720 by 480 pixels at 30 frames per second
• Isochronous and Asynchronous data transfer
• Function Control Protocol (FCP)
• Connection Management Protocol (CMP)
USB 2.0 Hi-Speed Ports (USB 2.0/FireWire PCI card only)
• NEC single chip
• Fully compatible with USB UHCI, OHCI and EHCI specifications
• Data transfer rate up to 480 Mbits/second
• 1.5 Mbits/second option (UHCI) supports low-end devices such as keyboard and mouse
• Provides +5 volts for devices
• Supports Plug-and-Play Specification
• Hot Plug
Connectors
• Two external 6-pin FireWire ports
• One internal 6-pin FireWire port
• Three external Type A USB 2.0 Hi-Speed ports
• One internal Type A USB 2.0 Hi-Speed port
34
Page 35

Appendix F
Warranty Information
LIMITED WARRANTY
Every Orange Micro product is fully tested and checked for quality prior to shipment. It is warranted to be free from defects
in materials and workmanship for a period of one (1) year from date of purchase. During that time period, Orange Micro Inc.
will, at no charge to the purchaser of record, repair or replace the defective unit returned to the Customer Service
Department in accordance with the following instructions:
NOTE: DO NOT return the Orange Micro product to Orange Micro Inc. until you have received a Return
Material Authorization (RMA) Number. Customers outside the United States should contact the
Orange Micro distributor in that country and request service.
1. Phone the Orange Micro Customer Service Department at 714 779-2772. Customer Service hours of operation are
between 8AM and 4PM PST. Customer Service lines are closed from 12PM to 1PM PST for lunch. Obtain a Return
Material Authorization (RMA) number.
2. Provide Orange Micro, Inc. with Model, Serial Number, Proof of Purchase, Return Address, and preferred return
shipping method. Enclose a clear description of the problem experienced and any sample printouts showing the
problem, if possible.
3. Ship in the original carton or securely packed in a cardboard carton with at least two inches of cushioned packing
material on all sides. Mark the package “FRAGILE” and ship via UPS, Parcel Post, or Air Freight, insured and prepaid.
NOTE: DO NOT SEND COLLECT - collect shipments will be refused and returned to sender.
Orange Micro, Inc. disclaims any liability to users of the Orange Micro product for consequential damages of any kind arising
from or connected with the use of the Orange Micro product.
This warranty is void in cases of misuse, abuse, abnormal conditions of operations or attempts to alter or modify the function
of a part or assembly.
This limited warranty is in lieu of all other warranties expressed or implied, and no representative or other person is
authorized to represent or assume for Orange Micro, Inc. any warranty liability beyond that set forth herein.
This warranty gives you specific legal rights, and you may also have additional rights, which vary, from state to state. The
warranty expressed herein applies to the Orange Micro product sold and used in the United States of America.
35
Page 36

FCC Class B Information
This equipment has been tested and found to comply with the limits of a Class B digital device, pursuant to Part 15 of the
FCC Rules. These limits are designed to provide reasonable protection against harmful interference in a residential
installation. This equipment generates, uses and can radiate radio frequency energy and, if not installed and used in
accordance with the instructions, may cause harmful interference to radio or television reception, which can be determined
by turning the equipment off and on, the user is encouraged to try to correct the interference by one or more of the following
measures:
• Reorient or relocate the receiving antenna.
• Increase the separation between the equipment and receiver.
• Connect the equipment into an outlet on a circuit different from that to which the receiver is connected
• Consult the dealer or an experienced radio/TV technician for help.
Any changes or modifications not expressly approved by the manufacturer could void the user’s authority to operate the
equipment.
The user may find the following booklet prepared by the Federal Communications Commission helpful: “How to Identify and
Resolve Radio/TV Interference Problems. This booklet is available from the US Government Printing Office, Washington,
DC 20402. Stock No. 004-000-00345-4
36
Page 37

Index
Adobe Acrobat Reader, 11, 21
Apple QuickTime, 4
blocky video, 30
Booting from FireWire devices, 30
BTV, 8, 11
BTV Pro, 4, 11, 25, 26, 27
camera driver, 32
capture video, 29, 30
Capturing Video, 26
choppy sound, 29, 33
Customer Service, 35
Customer Service hours of operation, 35
Device Manager, 20, 29, 32, 33
Ethernet, 24, 29
Extensions and Control Panels, 25
fdisk, 32
FireWire, 6
FireWire cable, 24
FireWire disk, 6, 22, 32
FireWire PC Card, 24
FireWire PCI, 13, 24
FireWire/Ethernet, 24
Hi-Speed Ready, 6
How to install an OrangeLink in your Macintosh, 7
Install an OrangeLink in your PC, 12
Installing FireWire Drivers, 8
Installing OrangeLink Drivers in the Mac OS, 7
Installing OrangeLink Drivers in Windows, 12
Installing USB Drivers, 9
Mac OS X, 6, 8, 9
Mac will not boot, 30
Macintosh 6500, 5500, 30
Macintosh Troubleshooting, 30
MacOS 8.6, 30
mass storage, 32
Optional Hardware, 24
OrangeLink Hardware Accessories, 24
FireWire cable, 24
FireWire Hub, 24
FireWire Repeater, 24
Orange Converter, 24
Output to FireWire, 26
Output Video to FireWire, 26
Package Contents, 4
PC Troubleshooting, 32
PowerBook, 6
QuickTime, 5, 11, 25, 31
recommended updates, 32
Software included, 4
Sound, video and game controllers, 32
System Requirements, 5
Twentieth Anniversary Macintosh, 30
Ulead VideoStudio, 20, 21, 28
USB 2.0, 8, 23, 24
USB 2.0 /FireWire, 7
USB 2.0 Certified cable, 24
USB 2.0 Hi-Speed, 9, 23, 24, 34
USB 2.0/FireWire, 34
USB 2.0/FireWire/, 22
VideoStudio, 21, 28, 29
Warranty Information, 35
37
 Loading...