

ORANGE 8028, 8029, 8038, 8039, 8068 User Manual
User manual
8028/8029/8038/8039/8068
e-diatonis CE/S/M/L
R100
8AL90894ZUABed01

2
Recommendations on the management of password (or personal code) of your
phone
When connected to an external public network your e-diatonis IPBX can be subject to
malicious attacks. A simple way of protecting against attack is to change your passwords
regularly as you do for your PCs. Here are a few tips on choosing your password, called
"personal code" (6 digits on your phone) :
Do not use a too easy password (ex. 123456, 302010 ...)
Take a different password for each application
Your password is personal and should remain confidential, not disclose it to anyone else
Never write down your password. The first thing an attacker will do is rummage through your
belongings – check your diary, look under your monitor and keyboard, sift through your
garbage, etc.
Your phone is now correctly secure and the fraud risks are minimized.

3
Introduction
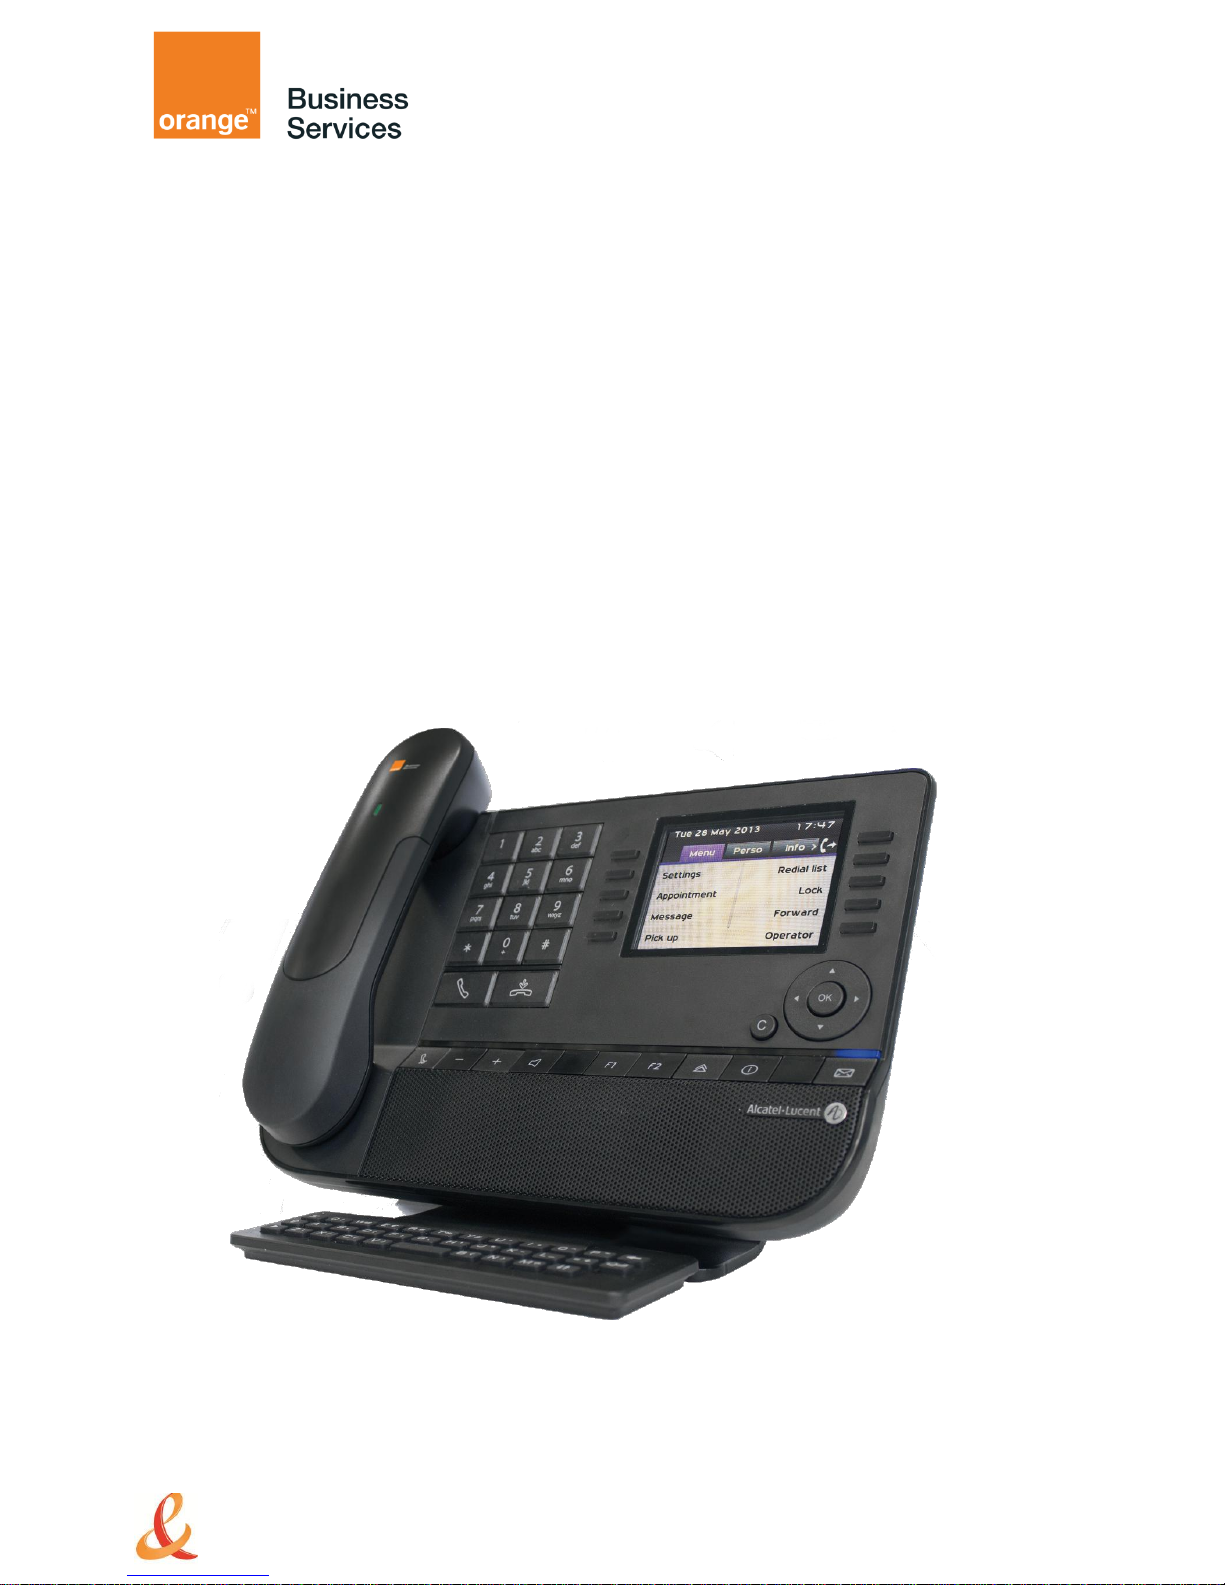
Thank you for choosing an Orange Business Services phone.
This model offers enhanced ergonomical features for more effective communication.
This document describes the services offered by the following sets:
8068
8039
8038
8029
8028
The label and icons displayed on the phone depends on the type of the set.
Some features are depended on the type of the set.
8068 BT
8068
8039
8038
8029
8028
IP Phone
Digital Phone
Colorscreen
Monochrome screen
Bluetooth® handset
Bluetooth® Headset
Two-port Gigabit Ethernet switch with Power Over
Ethernet support
Add-on 10/40 keys-8000 modules
Audio services (hands-free, handset and headset)
LCD 14 keys-8000 moduletouches-8000
Adjusting the contrast of the display
Agent set / Supervisor station
The labels and icons presented in this document are not contractually binding and may be modified
without prior warning.

4
1 GETTING TO KNOW YOUR TELEPHONE 8
1.1 8068 BLUETOOTH® / 8068 8
1.2 8038/8039 8
1.3 8028/8029 9
1.4 CONNECTIVITIES 9
1.5 WELCOME SCREENS 10
1.6 NAVIGATION 11
1.7 STATUS ICONS / CALL ICONS 11
1.8 PERMANENT FEATURES KEYS 11
1.9 ALPHABETIC KEYBOARD 12
1.10 ADD-ON MODULE 13
1.11 CALL MANAGEMENT SCREEN 14
1.12 BLUETOOTH® WIRELESS HANDSET 15
2 USING YOUR TELEPHONE 16
2.1 MESSAGING PORTAL 16
2.2 MAKING A CALL 17
2.3 RECEIVING A CALL 18
2.4 USING THE TELEPHONE IN “HANDS FREE“ MODE 18
2.5 ACTIVATING THE LOUDSPEAKER DURING A CONVERSATION (RECEIVER LIFTED) -LOUDSPEAKER. 18
2.6 CALLING A CONTACT USING THE SEARCH BY NAME FEATURE 18
2.7 MAKE CALLS VIA YOUR PROGRAMMED CALL KEYS 19
2.8 FILTERING CALLS USING THE VOICE MAILBOX 19
2.9 REDIALING 20
2.10 CONSULTING THE CALL LOG 20
2.11 REQUESTING AUTOMATIC CALLBACK IF INTERNAL NUMBER IS BUSY 22
2.12 CANCELLING AN AUTOMATIC CALLBACK 22
2.13 RECEIVING INTERCOM CALLS 22
2.14 SENDING DTMF SIGNALS 23
2.15 MUTE, SO THAT YOUR CALLER CANNOT HEAR YOU 23
2.16 SENDING AN INSTANT MESSAGE TO A CONTACT 23
2.17 ANSWERING WITH AN INSTANT MESSAGE 24
2.18 CONSULTING INSTANT MESSAGES 25

5
3 DURING A CONVERSATION 27
3.1 MAKING A SECOND CALL DURING A CONVERSATION 27
3.2 ANSWERING A SECOND CALL DURING A CONVERSATION 28
3.3 SWITCHING BETWEEN CALLS (BROKER CALL) 28
3.4 TRANSFERRING A CALL 28
3.5 TRANSFER A CALL TO A VOICE MAIL 29
3.6 THREE-WAY CONFERENCE WITH INTERNAL AND/OR EXTERNAL CALLERS (CONFERENCE) 29
3.7 PLACING A CALL ON HOLD (HOLD) 29
3.8 PLACING AN OUTSIDE CALL ON HOLD (PARKING) 30
3.9 INTRUSION INTO AN INTERNAL CONVERSATION 30
3.10 STORE A NUMBER 30
3.11 ADJUST AUDIO VOLUME 30
4 “MEET ME “ CONFERENCE 31
4.1 INITIATE A “MEET ME “ CONFERENCE 31
4.2 JOIN A “MEET ME “ CONFERENCE 31
5 SHARING 32
5.1 RECEIVING SUPERVISED CALL RINGING 32
5.2 ANSWERING THE GENERAL BELL 32
5.3 MANAGER/ASSISTANT FILTERING 32
5.4 CALL PICK-UP 32
5.5 OUTSIDE CALLS TO THE OPERATOR WILL RING ON YOUR TELEPHONE AND YOU CAN ANSWER THE CALL: 33
5.6 HUNTING GROUPS 33
5.7 CALLING AN INTERNAL CALLER ON HIS/HER PAGER 33
5.8 ANSWERING A CALL ON YOUR PAGER 33
5.9 CALLING A CALLER ON HIS/HER LOUDSPEAKER 34
5.10 SEND A VOICE MESSAGE COPY 34
5.11 SENDING A RECORDED MESSAGE TO A NUMBER OR A DISTRIBUTION LIST 34
5.12 BROADCASTING A MESSAGE ON THE LOUDSPEAKERS OF A STATION GROUP 35
6 KEEP IN TOUCH 36
6.1 SELECTING CALLS TO BE FORWARDED 36
6.2 FORWARDING CALLS TO ANOTHER NUMBER (IMMEDIATE FORWARD) 36
6.3 FORWARDING YOUR CALLS TO YOUR VOICE MESSAGE SERVICE 36
6.4 WHEN YOU RETURN, CONSULT RECORDED MESSAGES 36
6.5 ACTIVATEDISABLE THE PERSONAL ASSISTANT 37
6.6 PERSONAL ASSISTANT: REACHING YOU WITH ONE NUMBER ONLY 37
6.7 FORWARDING CALLS TO YOUR PAGER 37
6.8 FORWARDING YOUR CALLS FROM THE RECEIVING TERMINAL (“FOLLOW ME“) 38
6.9 DIVERTING ALL GROUP CALLS 38
6.10 CANCELLING ALL FORWARDS 38

6
6.11 CANCELLING A SPECIFIC FORWARD 38
6.12 FORWARDING CALLS WHEN YOUR LINE IS BUSY (FORWARD IF BUSY) 38
6.13 DO NOT DISTURB 39
6.14 LEAVING A RECORDED MESSAGE FOR INTERNAL CALLERS 39
6.15 CONSULTING WRITTEN MESSAGES 40
6.16 MESSAGE NOTIFICATION 40
7 MANAGING YOUR CHARGES 41
7.1 CHARGING YOUR CALLS DIRECTLY TO BUSINESS ACCOUNTS 41
7.2 FINDING OUT THE COST OF AN OUTSIDE CALL MADE FOR AN INTERNAL USER FROM YOUR TERMINAL 41
8 PROGRAMMING YOUR TELEPHONE 42
8.1 INITIALIZING YOUR VOICE MAILBOX 42
8.2 CUSTOMIZING YOUR VOICE GREETING 42
8.3 MODIFYING YOUR PERSONAL CODE 42
8.4 ADJUSTING THE AUDIO FUNCTIONS 43
8.5 ADJUSTING THE CONTRAST OF THE DISPLAY (8028/8029/8038/8039 PREMIUM DESKPHONE) 44
8.6 SELECTING THE WELCOME PAGE 44
8.7 SELECTING LANGUAGE 44
8.8 PROGRAMMING DIRECT CALL KEYS (PERSO PAGE) 44
8.9 DELETING DIRECT CALL KEYS (PERSO PAGE) 45
8.10 PROGRAMMING DIRECT CALL KEYS (F1 AND F2 KEYS) 45
8.11 DELETING DIRECT CALL KEYS (F1 AND F2 KEYS) 45
8.12 PROGRAMMING DIRECT CALL KEYS (8028/8029 PREMIUM DESKPHONE) 45
8.13 DELETING DIRECT CALL KEYS (8028/8029 PREMIUM DESKPHONE) 46
8.14 PROGRAMMING AN APPOINTMENT REMINDER 46
8.15 IDENTIFY THE TERMINAL YOU ARE ON 46
8.16 LOCK / UNLOCK YOUR TELEPHONE 46
8.17 CONFIGURING THE AUDIO JACK OF YOUR TELEPHONE 47
8.18 ACTIVATING/DEACTIVATING “FORCED HEADSET“ MODE 47
8.19 INSTALLING A BLUETOOTH® WIRELESS TECHNOLOGY HANDSET (MATCHING) 47
8.20 USE OF THE BLUETOOTH® HANDSET 48
8.21 INSTALLING A BLUETOOTH® WIRELESS TECHNOLOGY HEADSET (MATCHING) 48
8.22 USING A BLUETOOTH® WIRELESS TECHNOLOGY HEADSET 49
8.23 DELETING AN ACCESSORY (HEADSET, HANDSET, ETC.): BLUETOOTH® WIRELESS TECHNOLOGY 49
8.24 CONTACTING YOUR ADMINISTRATOR 49

7
9 ACD: AGENT SET / SUPERVISOR STATION 50
9.1 AGENT SET 50
9.2 OPEN AN AGENT SESSION (LOGIN) – AGENT SET 50
9.3 ACD APPLICATION WELCOME SCREEN – AGENT SET 50
9.4 THE FOUR OPERATING STATUSES OF THE AGENT SET 51
9.5 CHANGING THE OPERATING STATUS OF THE SET – AGENT SET 51
9.6 MODIFYING YOUR PERSONAL CODE – AGENT SET 51
9.7 INTEGRATING ANOTHER GROUP/LEAVING A GROUP – AGENT SET 51
9.8 CLOSE THE AGENT SESSION (LOGOUT) – AGENT SET 51
9.9 SUPERVISOR STATION 52
9.10 SUPERVISING GROUP MAILBOXES – SUPERVISOR STATION 52
10 GUARANTEE AND CLAUSES 53
10.1 SAFETY INSTRUCTIONS 53
10.2 "EC" DECLARATION OF COMPLIANCE 54
8
1 Getting to know your telephone
1.1 8068 Bluetooth® / 8068
1.2 8038/8039
A Bluetooth®
handset for
optimized
communication. A
wired handset is
also available and
can replace the
Bluetooth® handset
3.5 mmheadset
jack
Alphabetic
keyboard
Loudspeaker
Colorscreen
10 dedicatedfunctions keys
Permanent feature keys: quick access
to the phone’s main features
Navigation
LED
Flashing blue: incoming call Arrival of a new call
Flashing orange: alarm
Handset
3.5 mmheadset
jack
Alphabetic
keyboard
Loudspeaker
Monochrome screen
10 dedicatedfunctions keys
Permanent feature keys: quick access
to the phone’s main features
Navigation
LED
Flashing blue: incoming call Arrival of a new call
Flashing orange: alarm
An adjustable and stable foot
An adjustable and stable foot
9
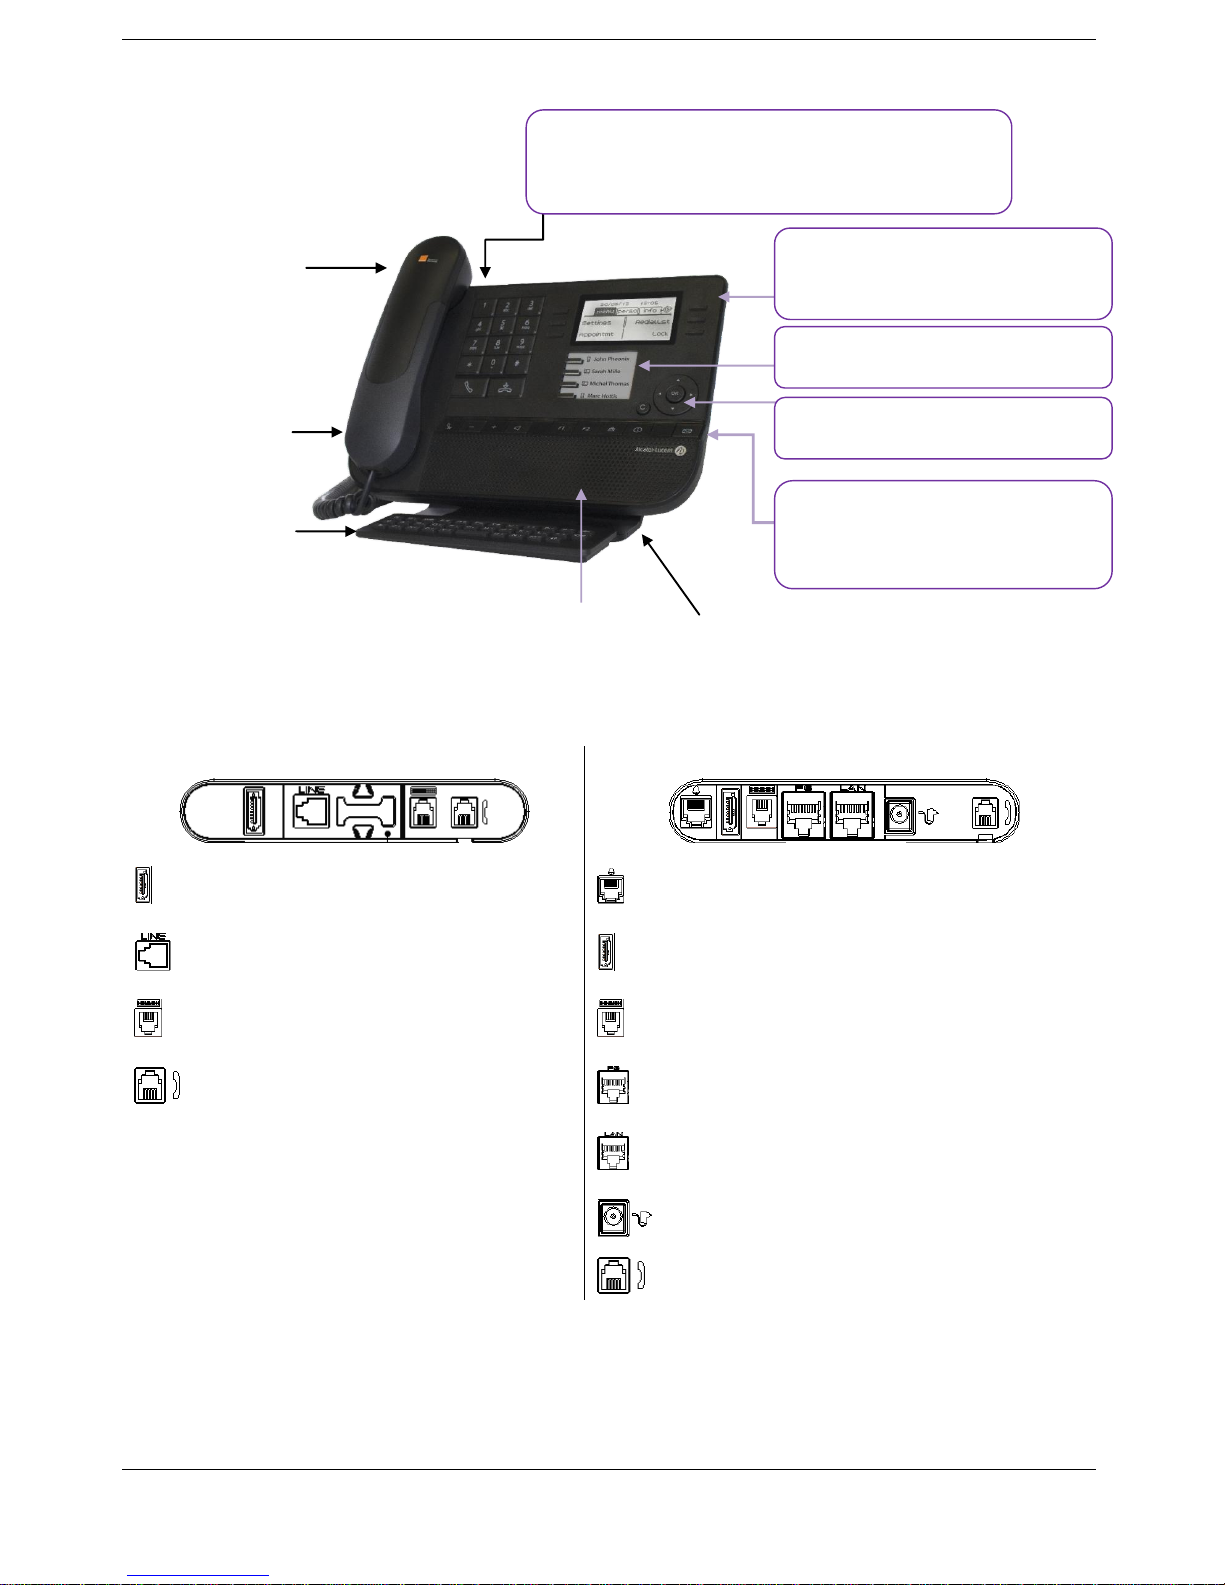
1.3 8028/8029
1.4 Connectivities
Description of the connectors
8029 / 8039
8068 / 8038 / 8028
Add-on module connector (SATA type).
1 RJ 11 connector for external ringer and
audio active envelop indicator
1 RJ 11 connector for external ringer
and audio active envelop indicator
Add-on module connector (SATA type).
1 RJ 9 connector for alphanumerical
keyboard
1 RJ 9 connector for alphanumerical
keyboard
1 RJ9 connector for a corded handset
One 10/100/1000 Gigabit Ethernet
connector (PC)
One 10/100/1000 Gigabit Ethernet
connector (LAN)
One DC power jack for an external power
adaptor
1 RJ9 connector for a corded handset
Handset
3.5 mmheadset
jack
Alphabetic
keyboard
Loudspeaker
Monochrome screen
6 dedicated functions keys
functions keys
Navigation
LED
Flashing blue: incoming call Arrival of a new call
Flashing orange: alarm
4 programmable keys with Led and
paper label
Permanent feature keys: quick
access to the phone’s main features
An adjustable and stable foot
10
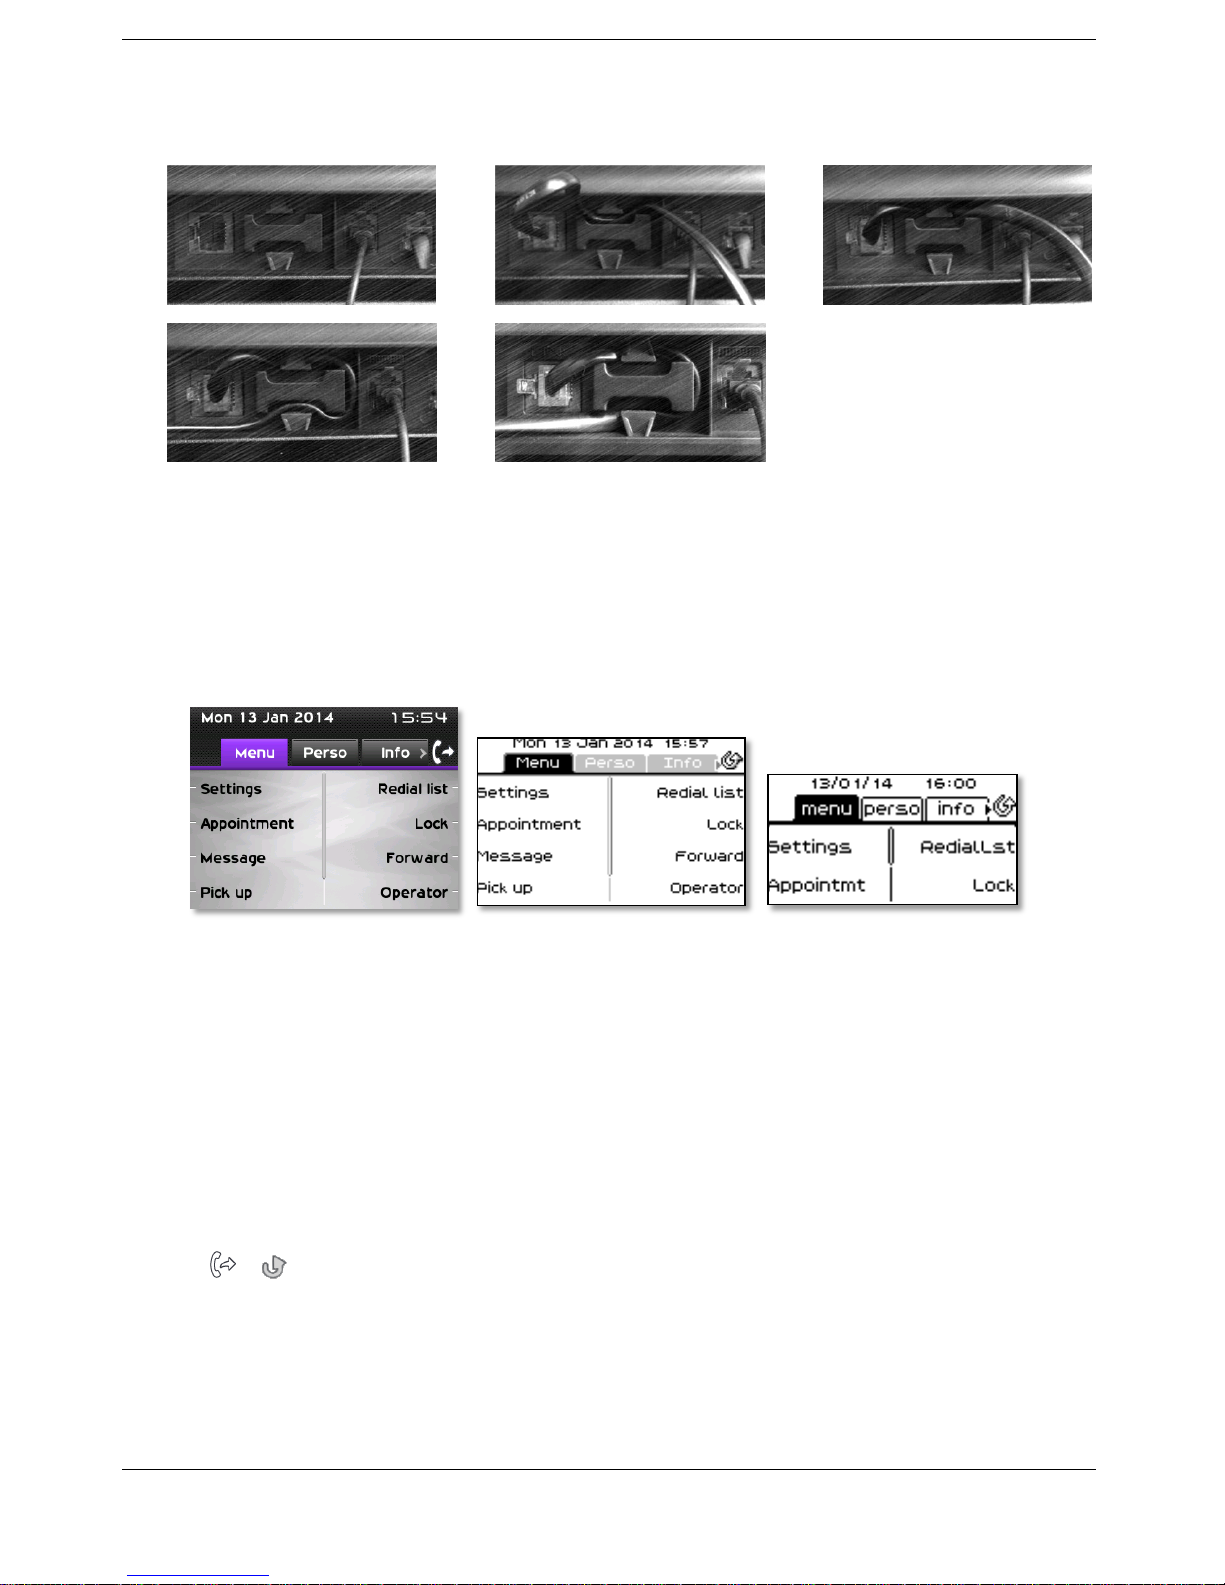
Cable path for line connection (8029/8039 Premium Deskphone)
Make sure you position the cable correctly in the compartment intended for that purpose:
1 2 3
4 5
1.5 Welcome screens
You can access all of your phone's features from these screens. The default display has three pages
that you can access by pressing the page tabs at the top of the screen. The selected page is
highlighted.
o Menu
o Perso
o Info
Menu page:
Contains all features and applications accessible by pressing the label of the desired feature or
application From this page, it is possible to adjust the ringer volume, program the time of an
appointment, lock the terminal, define the default page displayed, configure voice mail, and
access telephone functions such as calling back one of the last numbers or intercepting calls.
Perso page:
Contains call line keys (allowing supervision of calls) and programmable call keys.
Info page:
Contains information on the telephone and the status of its functions: name, telephone
number, number of messages (including call log events, instant messages and voice messages),
activation of transfer function, appointment reminder, etc.
/ Transfer icon: Pressing the key next to this icon allows you to program or change the
transfer function
8068
8038/8039
8028/8029
11
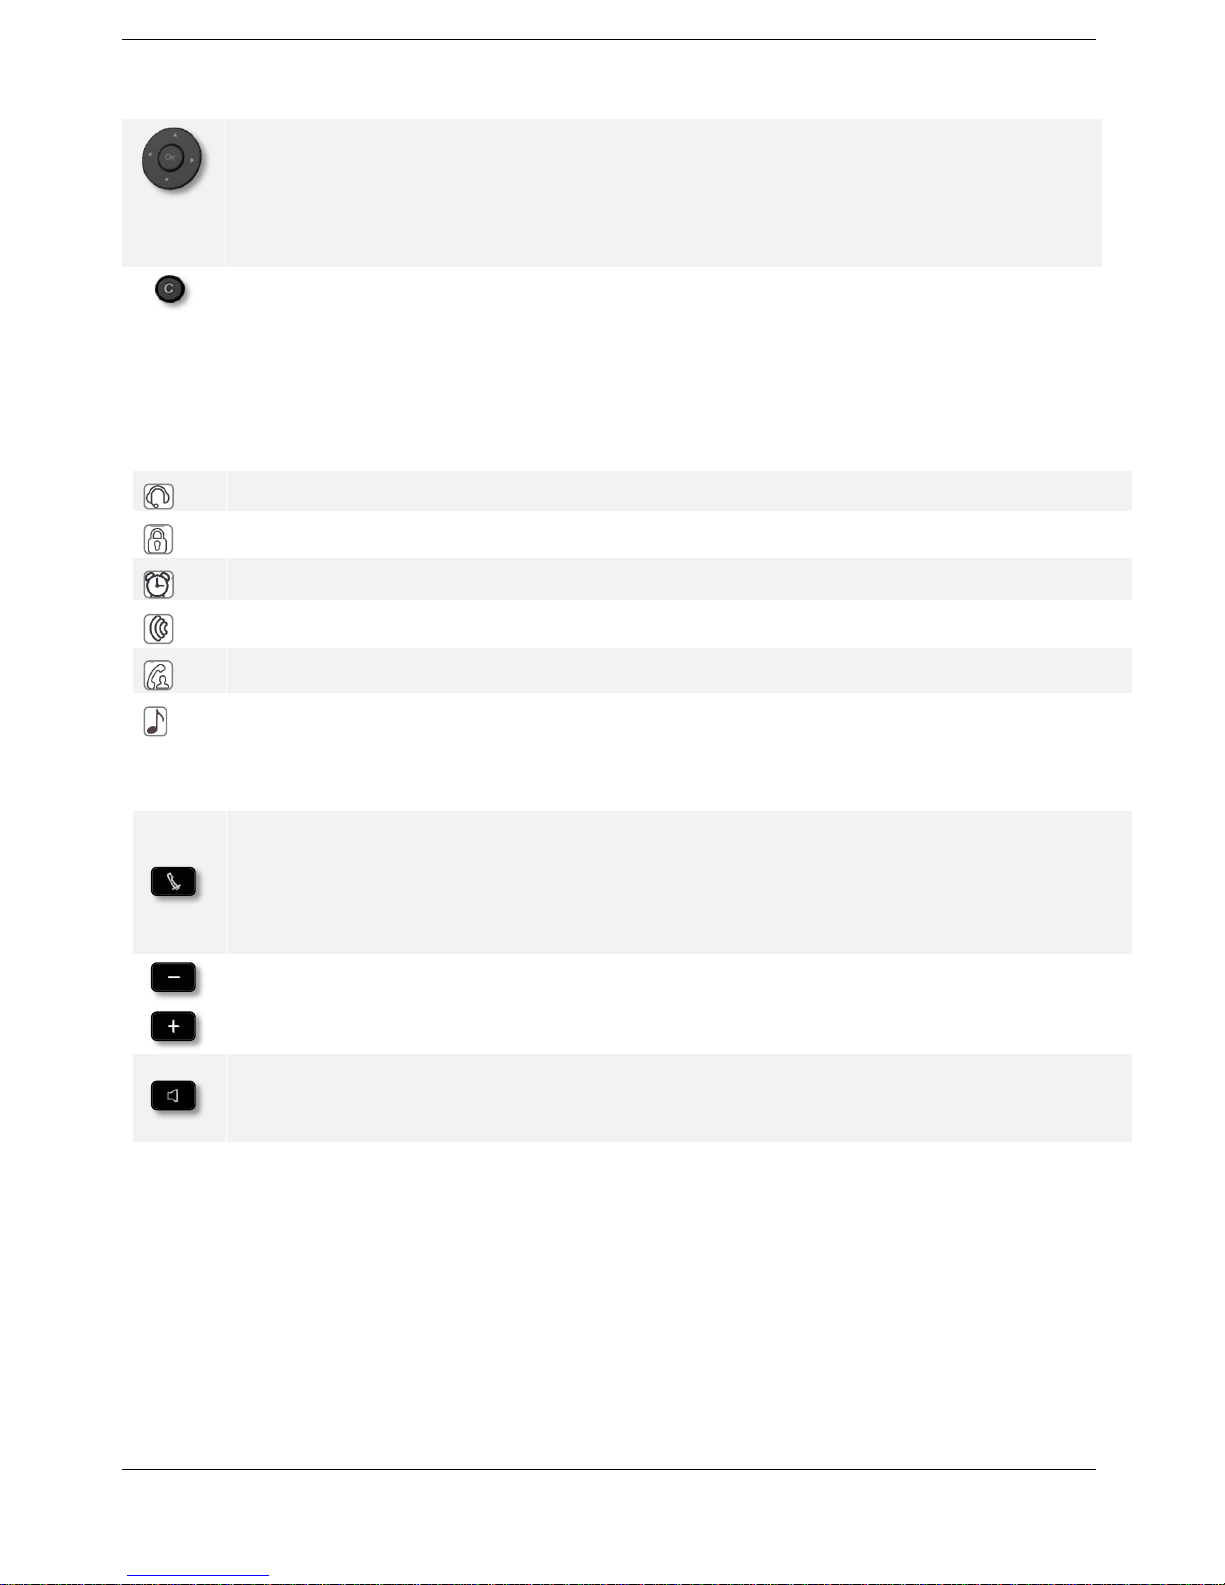
1.6 Navigation
OK key: Used to validate your choices and options while programming or configuring
Left-right navigator: Used to move from one page to another and display information
about current calls (call in progress, calls on hold, incoming call).
Up-down navigator: Used to scroll through the content of a page.
Back/Exit key Use this key to go back to the previous step. Use this key to go back to the
homepage (long press)
1.7 Status icons / Call icons
Icons giving information about some specific configurations of the phone or about call status are
displayed in the top bar of the screen.
Headset connected
Telephone locked
Appointment programmed
Incoming call icon
Call in progress icon
Call holding icon
1.8 Permanent features keys
They are located just above the loudspeaker
Mute and intercom key.
During a call, press this key to stop your contact from hearing you. When idle, press
this key to switch the phone to intercom mode. When you receive a call, the phone
hooks off automatically and you go straight into handsfree mode. When activated, this
is key blue
Turn down the volume Lower the contrast
Turn up the volume Increase the contrast
Pressing this key answers an incoming call in handsfree mode (the key is blue). When a
call is in progress, pressing this key switches from handsfree mode to headset or
handset mode.
12
Programmable keys (F1 and F2 keys).Lit when the function associated with the key is
activated. A service or a direct call can be associated to these keys.
Redial key: to access the 'Redial' feature.
Last number redial (short press)
Call back on the last 10 number dialed (long press)
Guide key: Used to obtain information on functions of the “menu“ page and to program
key of the “perso“ page
Messaging key to access the messaging portal (call log, voice messages and instant
messages).
This key flashes blue when there is a new event such as a new voice message, a new
instant message or a new event in the call log.
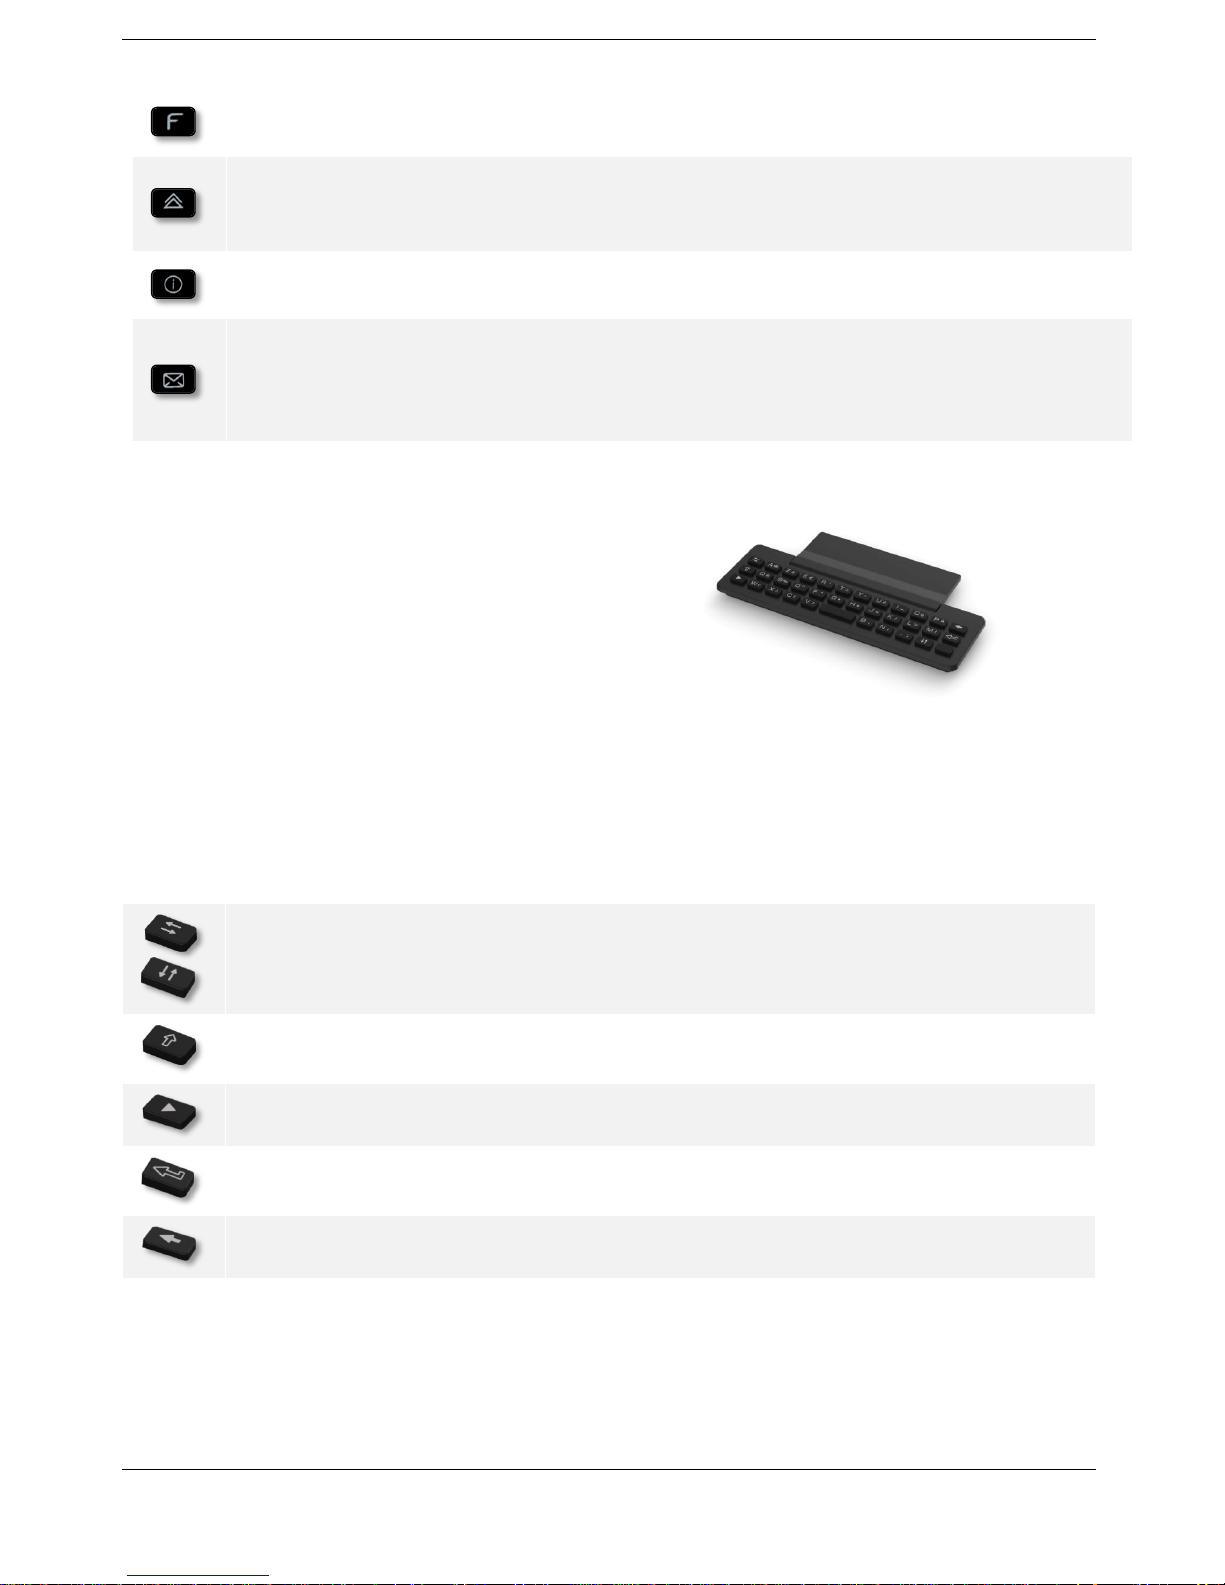
1.9 Alphabetic keyboard
Your set is provided with an alphabetic keyboard
depending on you country and language:
Country variants:
o AZERTY
o QWERTZ
o QWERTY (international)
o QWERTY (nordic)
Use the keyboard to enter names while configuring the phone. Directly access the dial by name
feature by entering the name of your caller on the keyboard.
Below is a list of the function keys that allow you to access all the symbols
Cursor moving keys (left, right, up and down). Allows you to navigate edit boxes. Press the
Alt key to access the left and up directions
Caps lock: to write text in capital letters.
Alt key. To access specific and punctuation characters.
Enter key: to validate edited text.
Backspace key: to delete one character in an edit box.
13
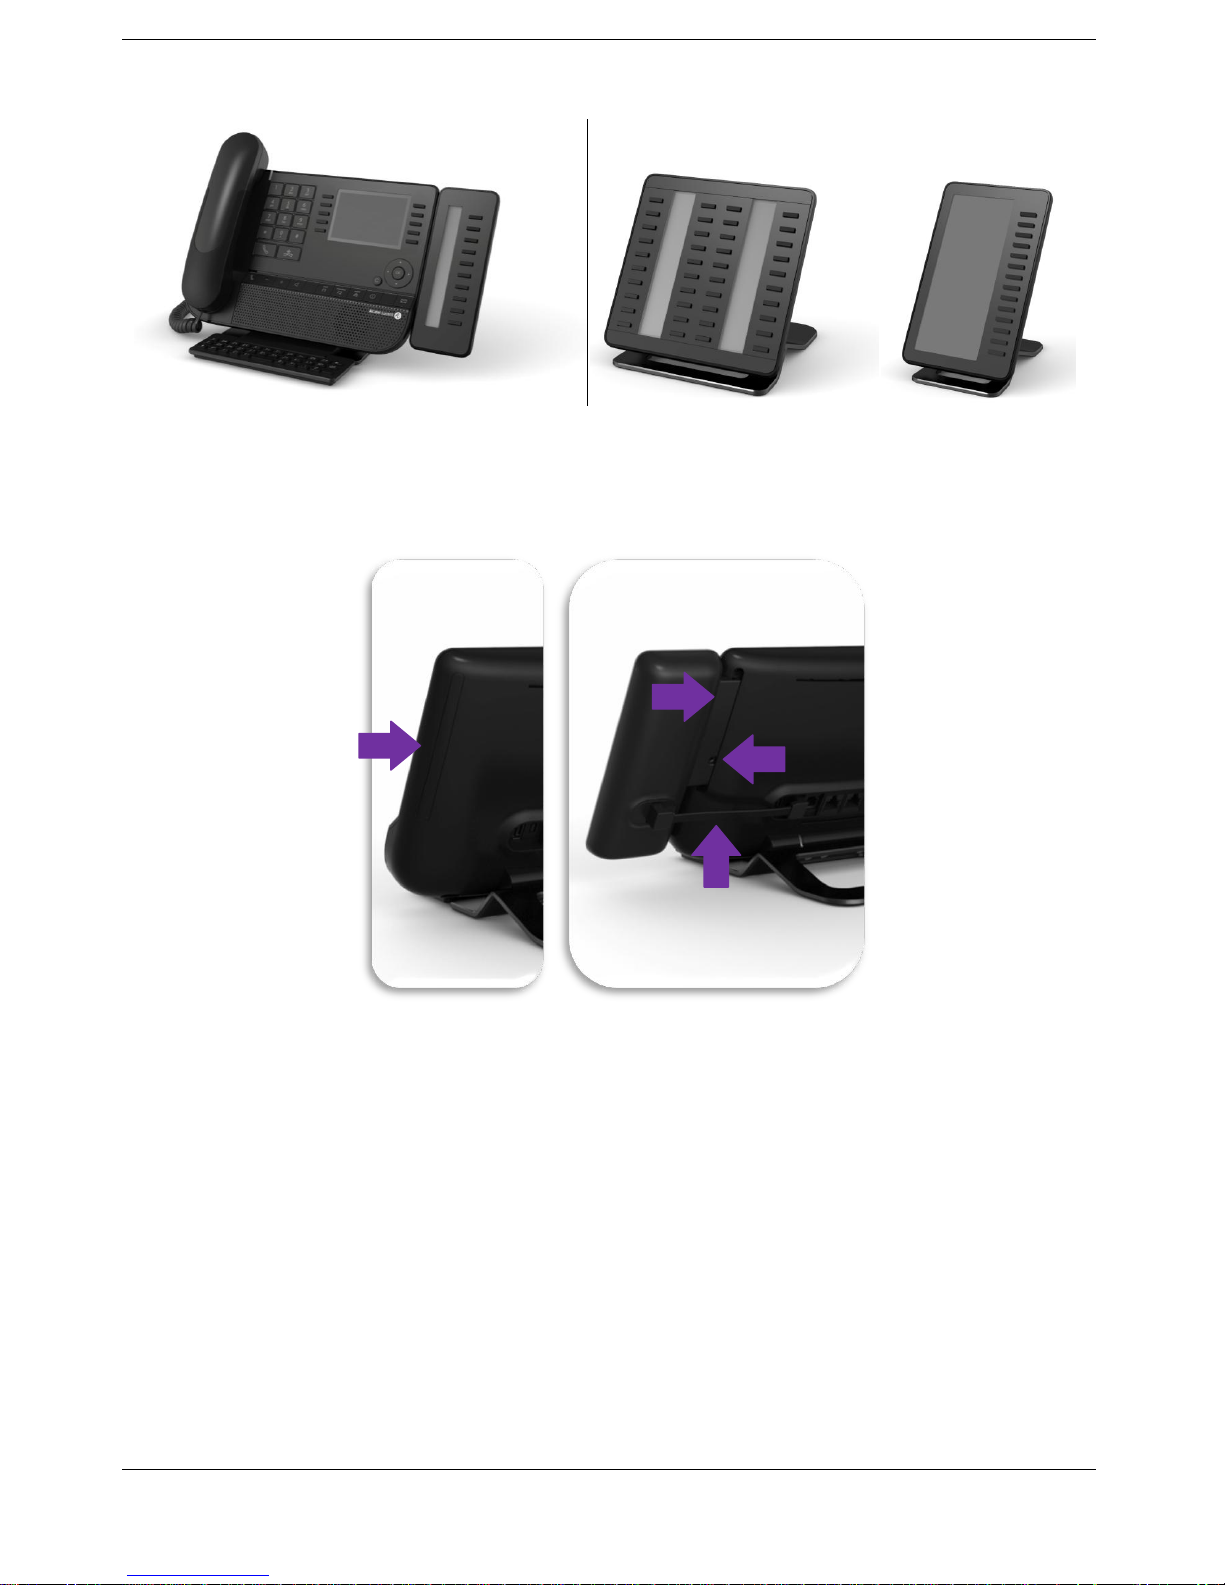
1.10 Add-on module
Flashing blue: incoming call
Installation
Premium Add-on 10 keys modules
1. Remove the protection of the dedicated compartment behind the set
2. Insert the add-on correctly in the compartment
3. Plug the provided cord into the dedicated socket behind your set
4. Fix the add-on with the provided screw
Premium Add-on 40 keys / Premium Smart Display 14 keys:
1. Plug the provided cord into the dedicated socket behind your phone
2. If desired, fix the foots (set and add-on) with the provided clip
1
2
3
4
14
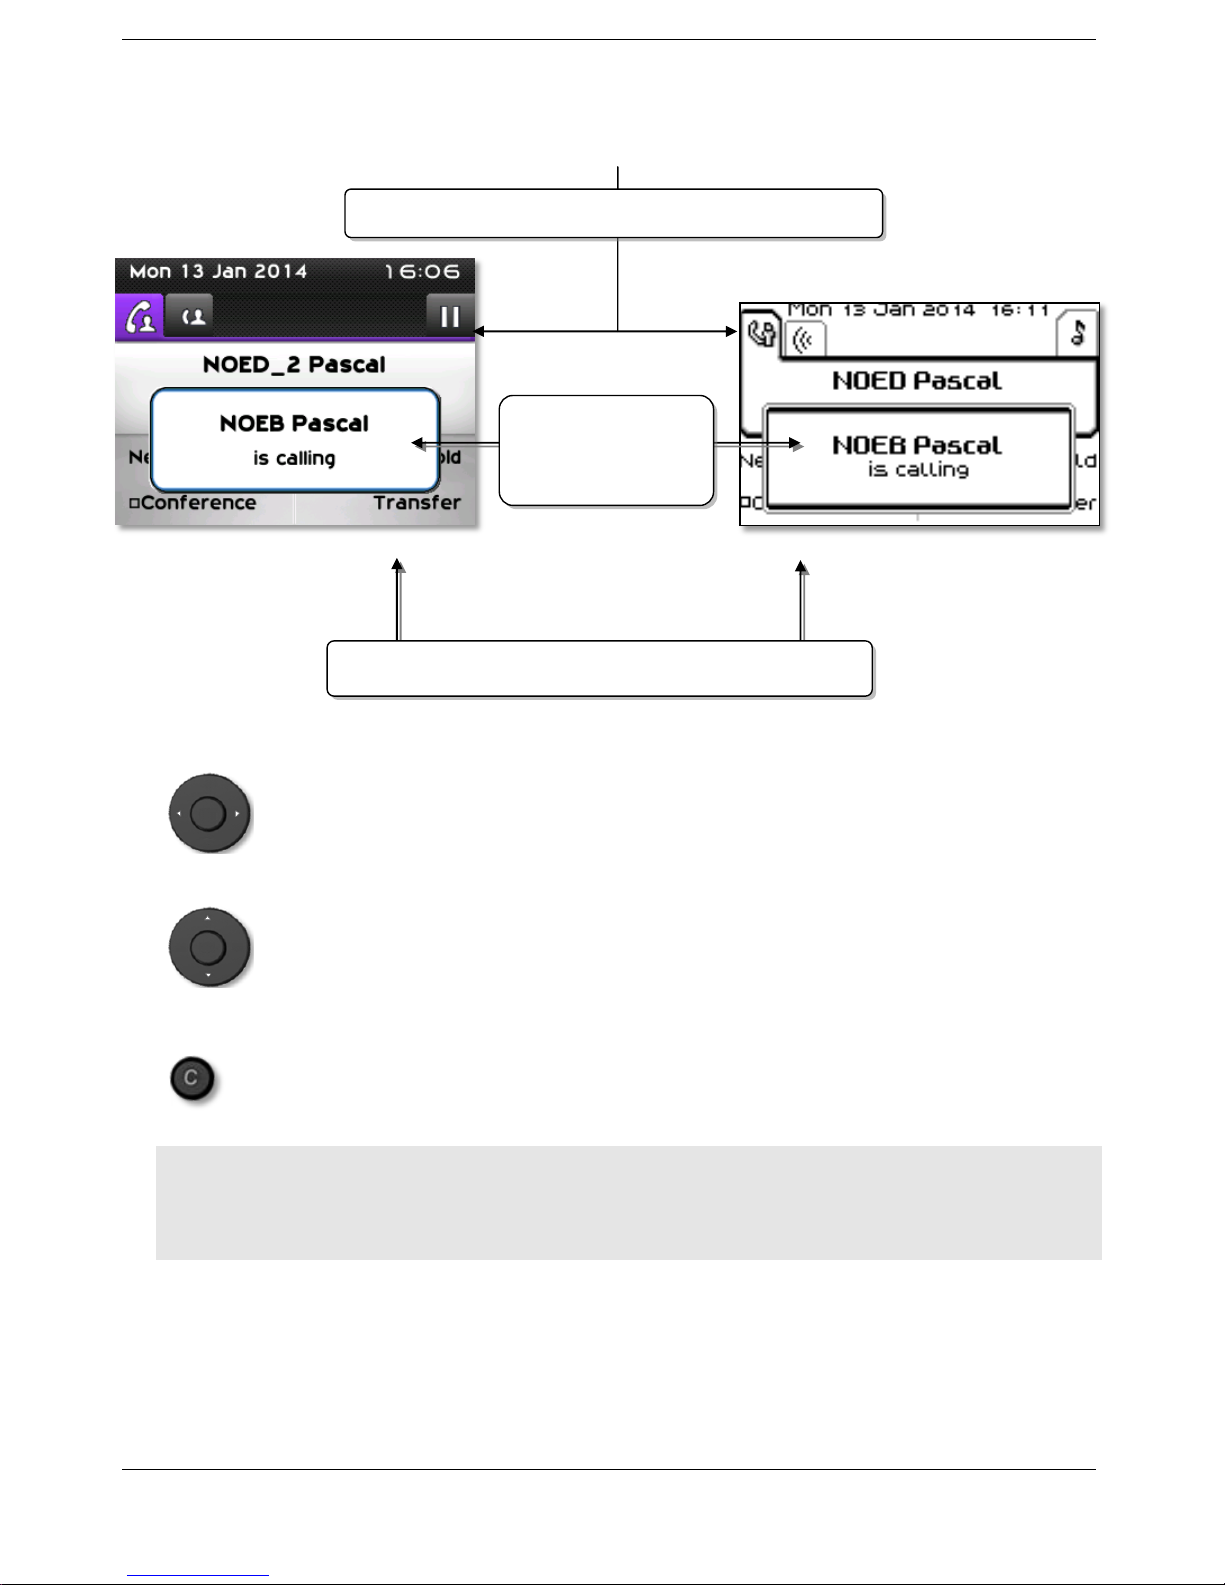
1.11 Call management screen
Each tab corresponds to a call, the status of which is symbolized by its icon
(in progress, held, arrival of new call). When a call is in progress, use the
left-right navigator to look at held or incoming calls.
All features are accessible while the call is displayed on the screen. Use the
Up and Down arrows to move up or down a page. These functions (transfer,
conference, etc.) are directly related to the status of the call consulted.
For example, the transfer function will not be available between a call in
progress or a held call and an incoming call.
Used to switch from a telephone screen to an application screen. For
example, it can be used while a call is in progress to search a number,
program an appointment reminder, etc
Calls can also be managed from the Perso page.
While the call is in progress, press the Back/Exit key and display the Perso page. Calls in progress
or waiting calls are displayed on the different line keys. It is then possible to converse with the
caller of your choice by pressing the key associated to the caller.
Incoming call icon Call in progress ,Call on hold , …
Incoming call and
conversation
presentation screen
Soft keys: actions available depending on the call status
8068
8038
15
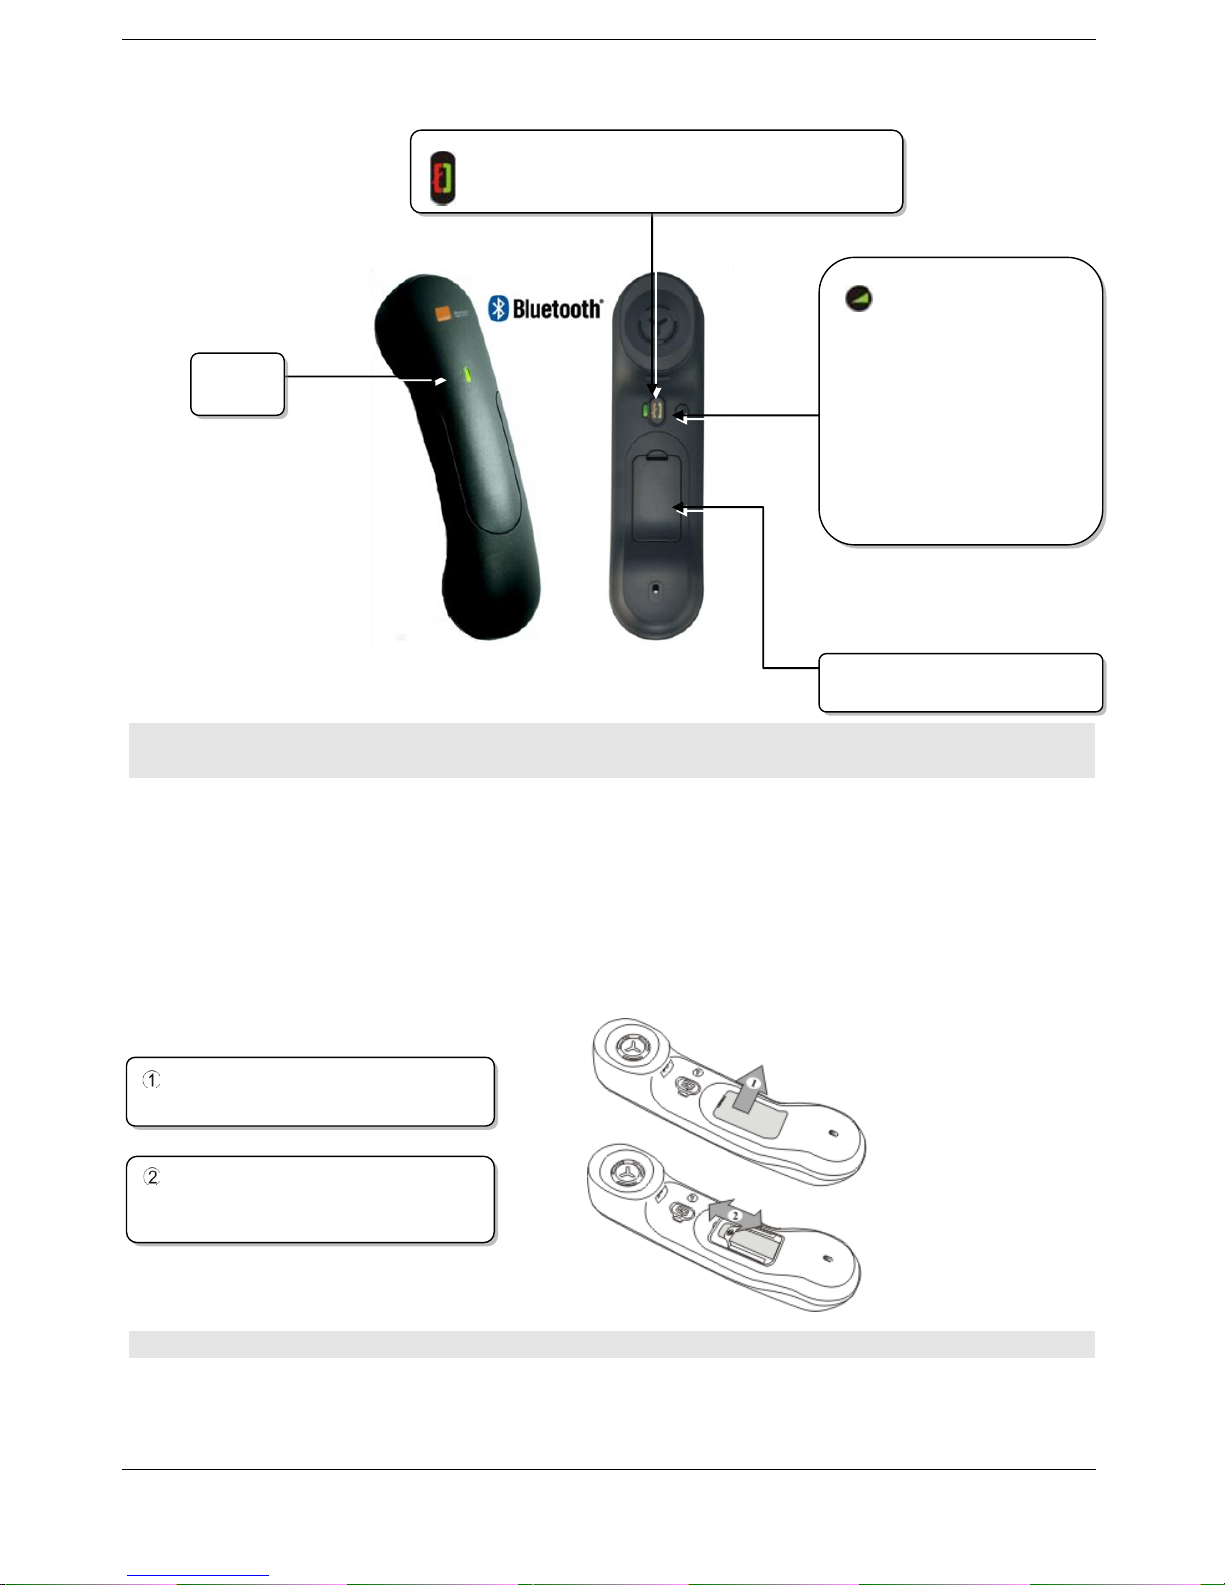
1.12 Bluetooth® Wireless handset
If the Bluetooth® handset is on its base, you do not need to press the Off-hook/On-hook key to take or
terminate the call. Just off-hook/on-hook the Bluetooth® handset.
LED
Off: operating normally
Blinking green: in communication
Green steady: handset charging
Orange flashing: battery charge low or handset outside coverage zone
Orange steady: malfunction
Installing or replacing the Bluetooth® handset battery
The battery recharges when the Bluetooth® handset is on its base.
LED
Off-hook/On-hook: press this key to take or
terminate a call
Volume/Mute:
Short successive
presses to change the
handset volume level
(3 levels)
Long press to activate
or deactivate mute
mode
Location of the battery
Lift up the battery cover
Slide out the battery holding
part
16
2 Using your telephone
2.1 Messaging portal
The messaging portal allows you to access and manage features such as the call log, instant messaging
and voice messages. When there is a new event (new log, new instant message or new voice message)
the message key blinks blue.
Accessing the messaging portal
Press the message key to access the messaging portal.
Accessing the features of the messaging portal
To access the available features (call log, instant messages, voice messages, sending an instant
message), press the associated softkey.
Acknowledging
When you consult a new event (call log, instant message or voice message), the event is automatically
acknowledged. However, you can choose to acknowledge all events without consulting them.
Access the messaging portal
Press the associated softkey.
Press the softkey associated with the type of event you want to acknowledge. If you press
the key associated with the “all” option, all new events are acknowledged. You can also
acknowledge all events if you press the softkey associated with the check icon in the top right
corner of the screen.
Press to confirm.
Deleting
When consulting an event (call log, instant message or voice message), you can delete the event once
you have consulted it. However, you can choose to delete all events in one go.
Access the messaging portal
Press the associated softkey.
Press the softkey associated with the type of event you want to delete.
Press to confirm.

17
Configure access to the messaging portal
The system default setting requires you to enter a password to access the messaging portal features.
You can change the setting so that you don't have to enter a password each time you want to access
the messaging portal features.
Access the messaging portal
Configure
Authentification
Enter your personal password
Set authentication to on or off.
On: password is always required.
Off: password is never required.
Press to confirm.
2.2 Making a call
Use one of the following:
Dial directly the number for your call
Lift the receiver Enter the destination number
Press the on-hook/off-hook key of the Bluetooth® device (Bluetooth® Wireless handset)
Dial the destination number
Hands free Dial the destination number
Programmed line key
Dial by name (enter the first letters of the contact's name on the alphapad and press OK to
start the search)
From call log after accessing the messaging portal.
Redial last number
To make an external call, dial the outside line access code before dialing your contact number
The duration of your external call may be limited in time by the administrator. In this case, a beep
sounds and/or a message will be displayed on the screen 20 seconds before the end of the
communication
If the internal or outside number does not reply:
Use one of the following:
Interphony:Broadcast a message on the loudspeaker of the free terminal
¤Callback:Request callback to a busy terminal
Text:Send a written message
 Loading...