

Oracom ORC-350 User Manual
www.oracom.co.kr
Features........................................................................................................ 3
Package content............................................................................................ 3
Product overview........................................................................................... 4
LCD Panel..................................................................................................... 4
Button function table...................................................................................... 5
Installing the battery...................................................................................... 7
Listening to music quick start steps............................................................... 8
Turning the power On/Off.............................................................................. 9
Digital music player modes..........................................................................10
Playing digital music tracks or voice files.....................................................10
Setting menu................................................................................................ 11
Playing an FM radio station..........................................................................11
Setting a favorite FM radio station............................................................... 12
Adjusting the volume................................................................................... 12
FM radio recording.......................................................................................13
Navigating music tracks or voice files......................................................... 13
Setting the section repeat play function.......................................................13
Recording voice........................................................................................... 14
Line-in encoding...........................................................................................15
Menu table.................................................................................................. 17
Using the Menu mode................................................................................ 19
Setting the repeat mode..............................................................................19
Setting the equalizer (EQ) function............................................................ 20
Managing files............................................................................................ 21
Setting the logo options.............................................................................. 23
Setting the display options......................................................................... 24
Displaying file information.......................................................................... 25
Selecting the display language.................................................................. 25
Installing software....................................................................................... 26
Connecting to your computer..................................................................... 31
Managing files.............................................................................................32
Using the Logo Editor program...................................................................34
Using the Voice Converter program............................................................37
Specifications............................................................................................. 39
21
Contents
Using
Menu Setting
Connecting
Using Program
Support and Product information
3
• Compact, slim design
• 2-Button, 1-Navi stick, 1-Slide switch
• Plug and play USB flash drive
(USB driver is required for Windows 98SE only)
• MP3 and WMA music file playback
• FM tuner • 15 Programmable preset stations
• FM recording • Line-in encoding
• 5 band equalizer • Menu selection system
• Multi language support • Custom logos
• Blue backlight • Voice recording
• Folder directory • High-speed USB communication
• OS support for Windows, Mac, and Linux
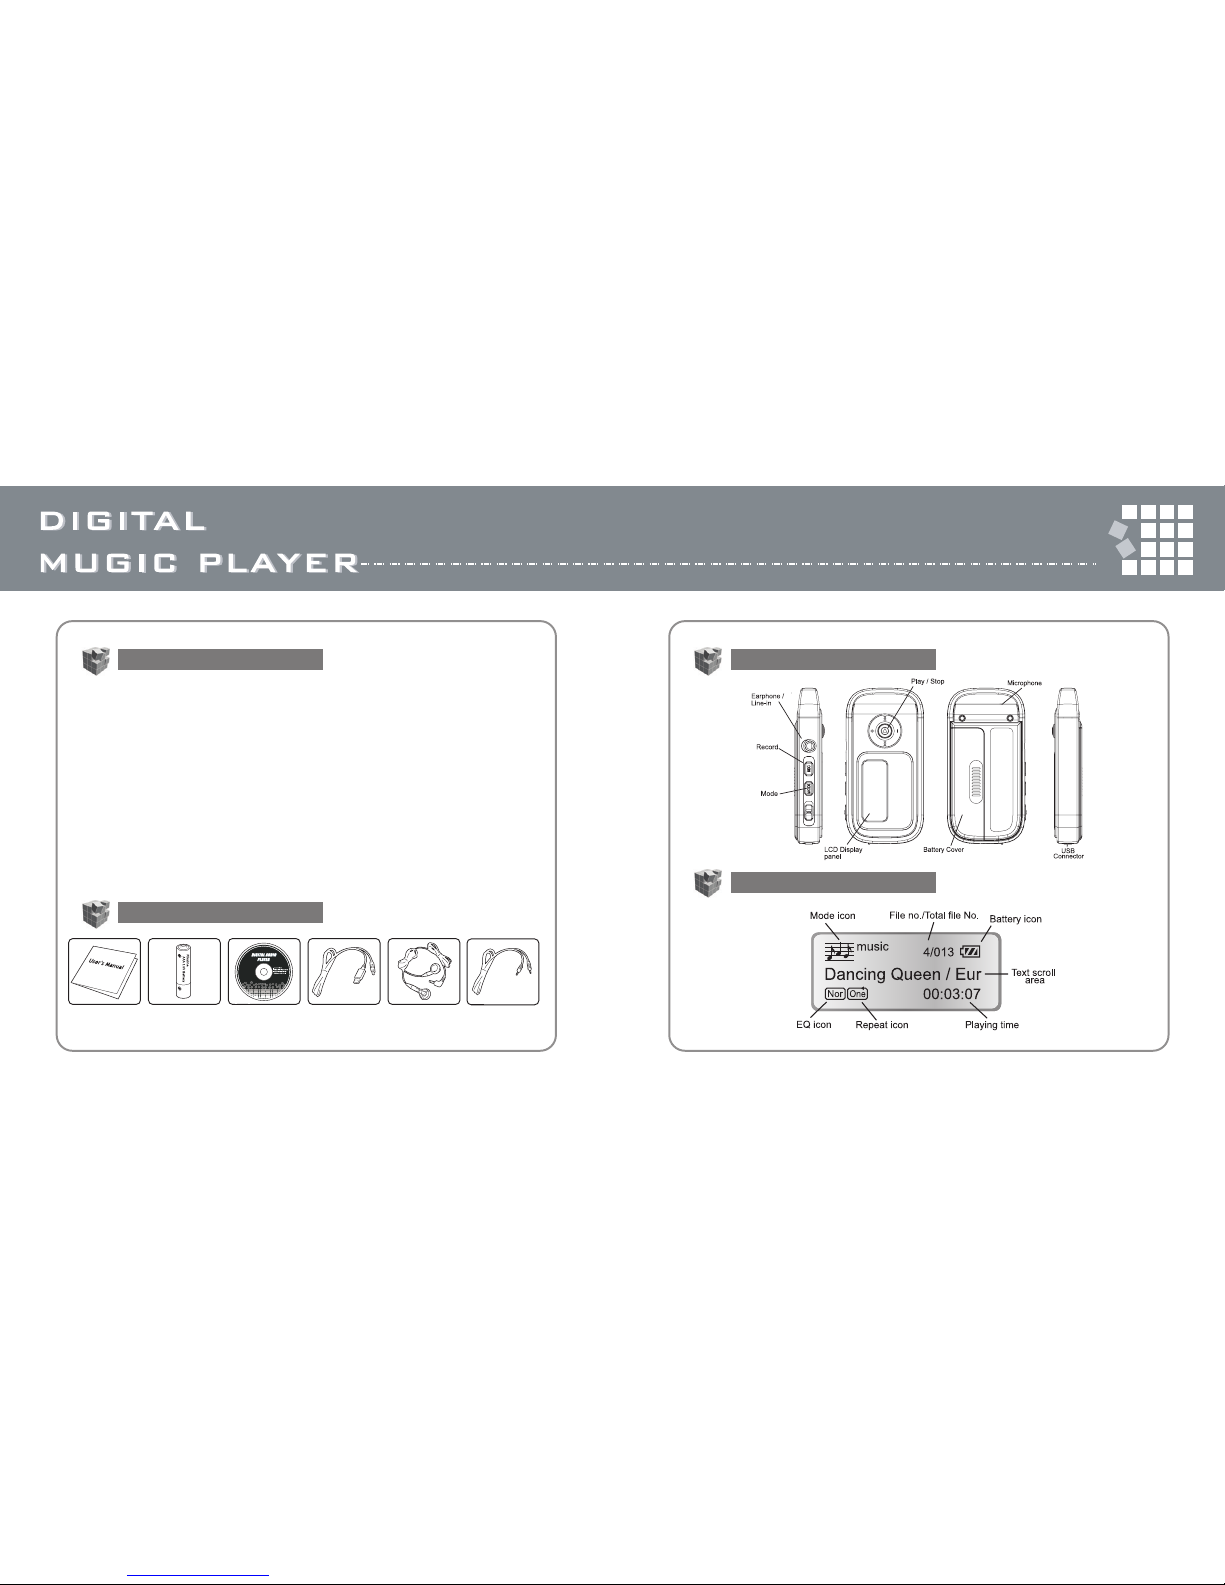
User manual
One AAA size
battery
Stereo
earphone
Installation
CD
USB Cable
Features
Package Content
4
Product Overiew
LCD Panel
Line-in
cable
65
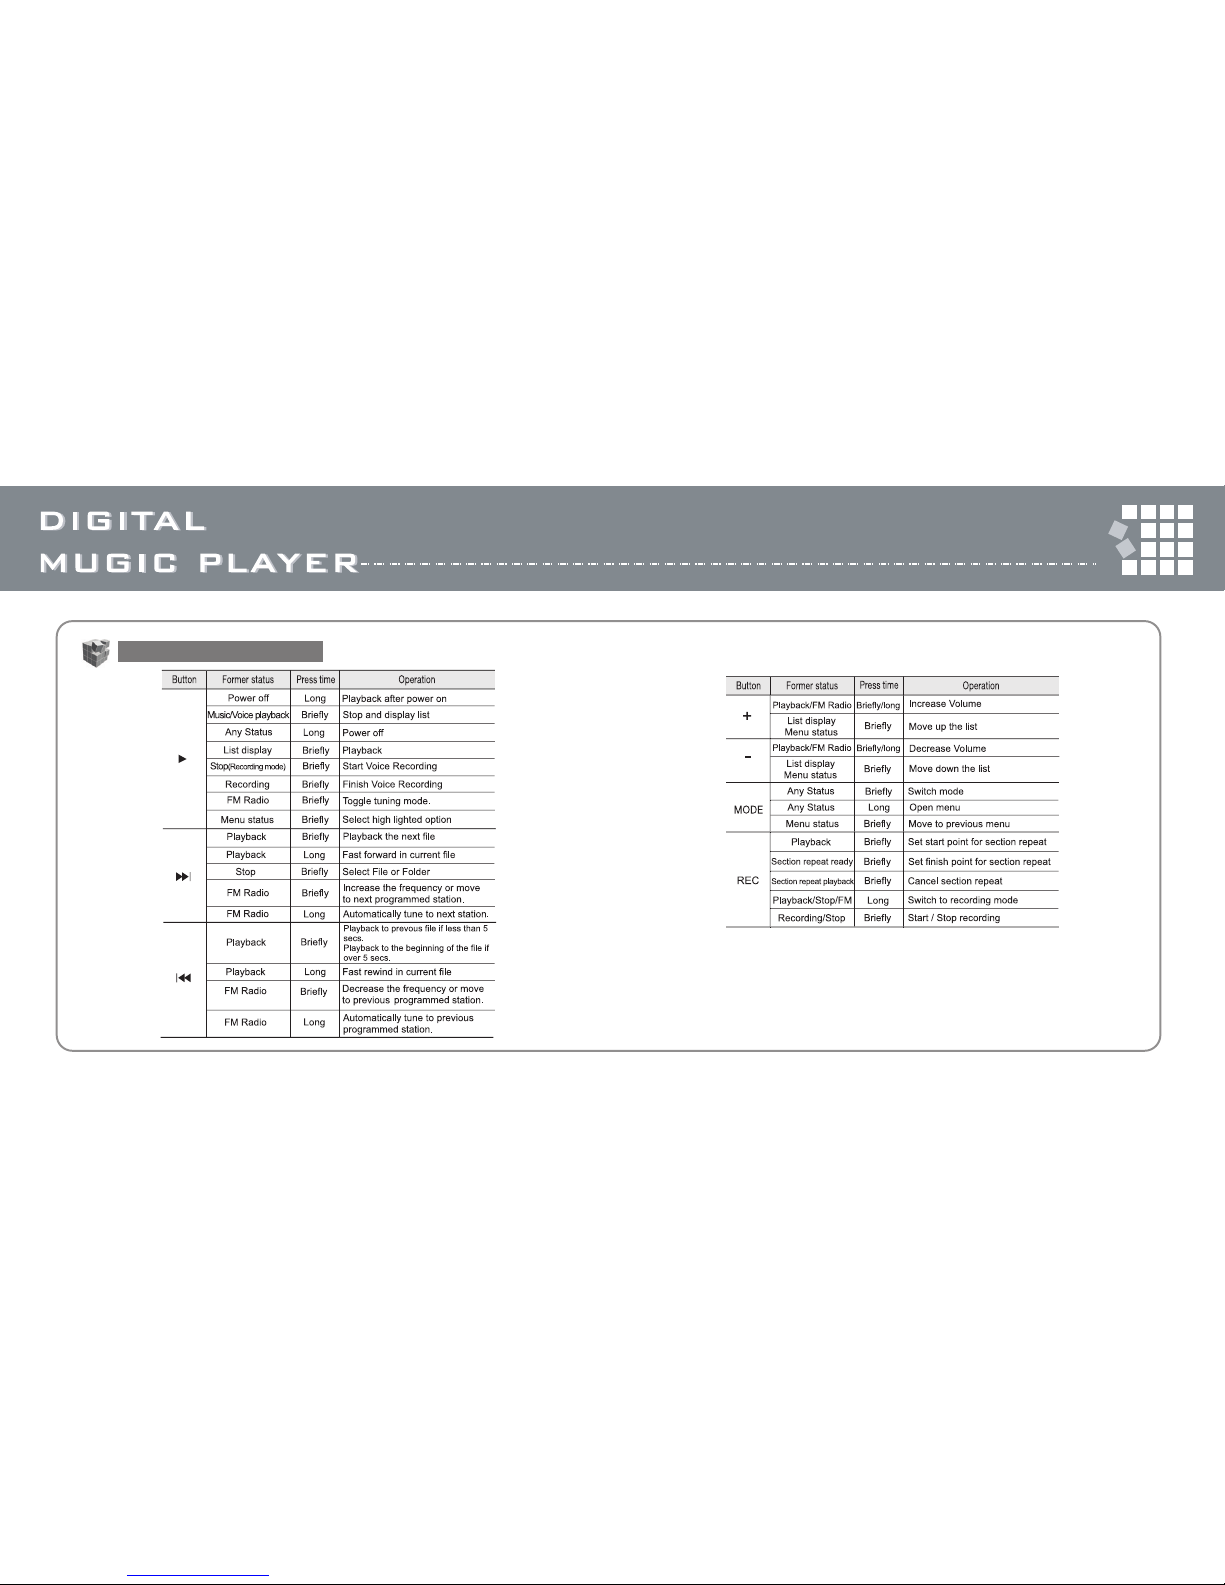
Button function table
87
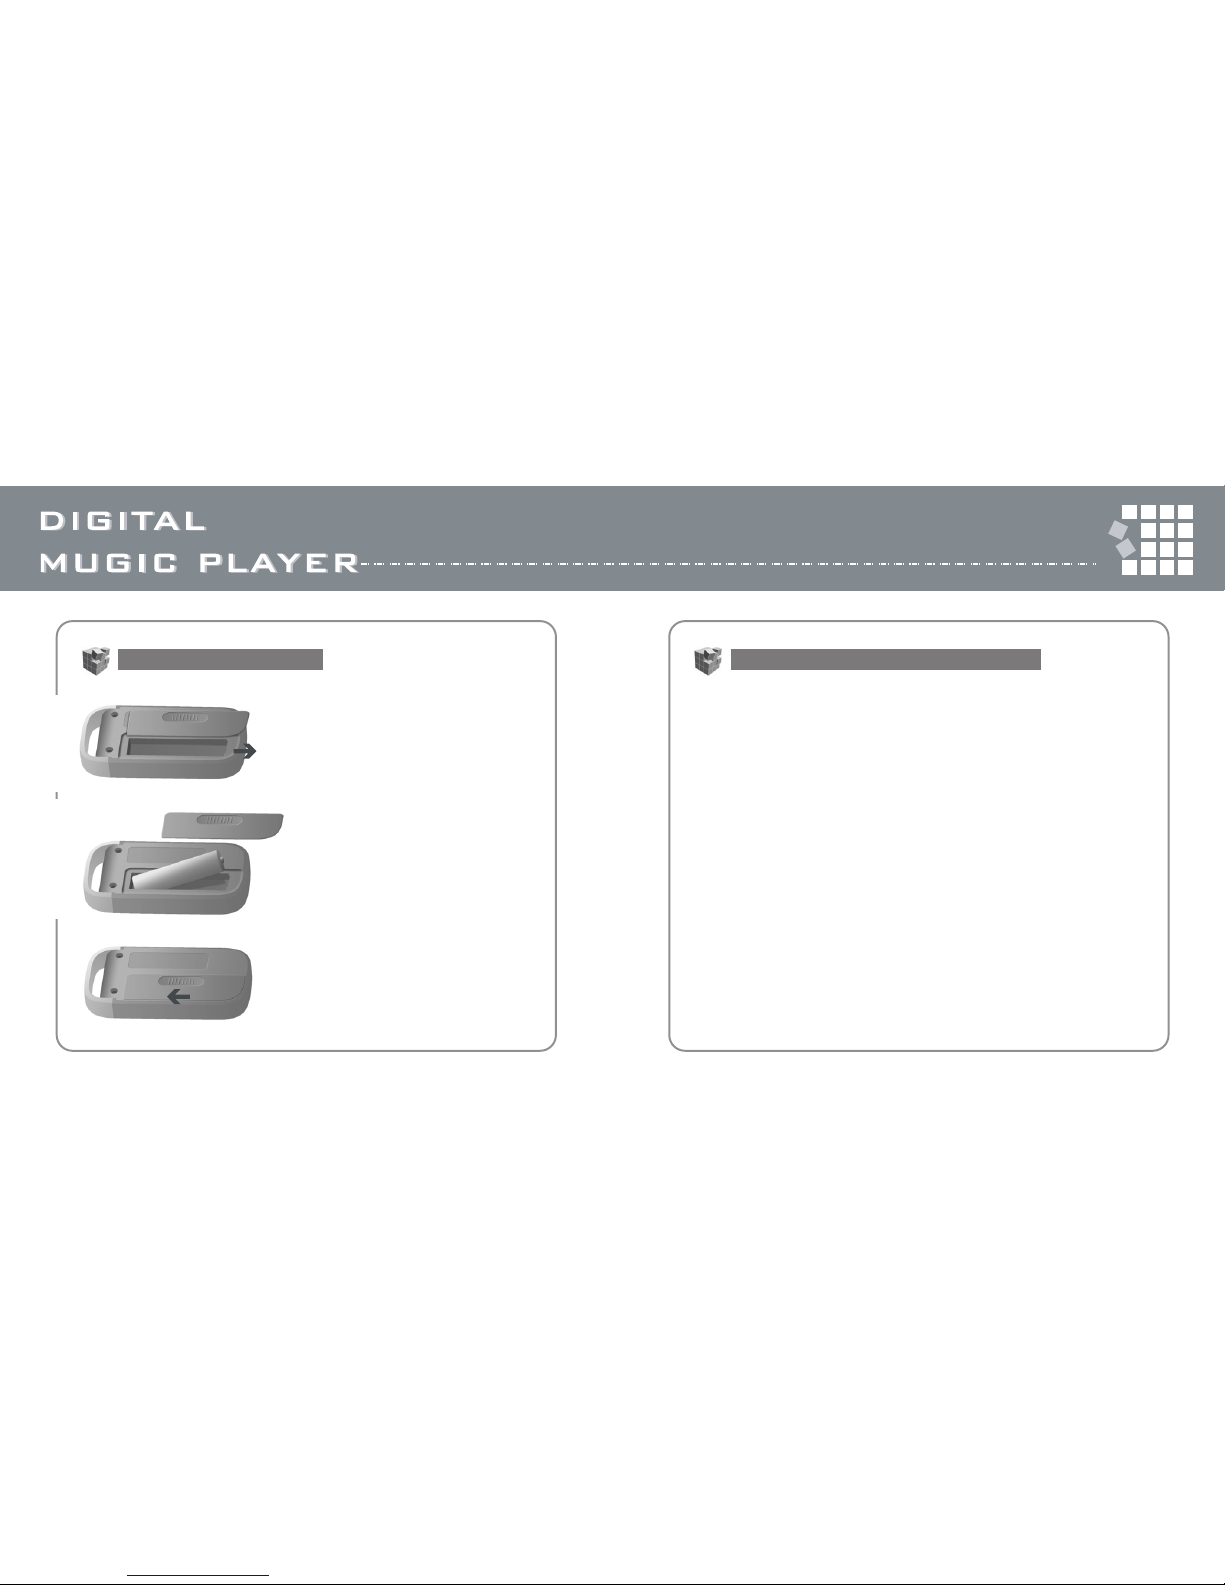
1. Insert one AAA battery into the
player.
• If you are using Windows XP, Windows Me, or Windows 2000
1. Connect the player into your computer's USB port via USB cable.
2. Copy .MP3 or .WMA files to the removable disk.
3. Remove the player from your computer by clicking "the green arrow on
the system tray"
4. Press and hold the ▶ button to turn on the player.
5. Press the ▶ button to play music.
Note : When Hold switch is on, the buttons on the player will not function.
• If you are using Windows 98SE, see "Installing Software" on page 25.
Installing the Battery
Listening to music quick start steps
2. Match the and symbols on the
batteries with the and symbols
inside the battery compartment.
3. Push the battery cover to arrow
direction.
109
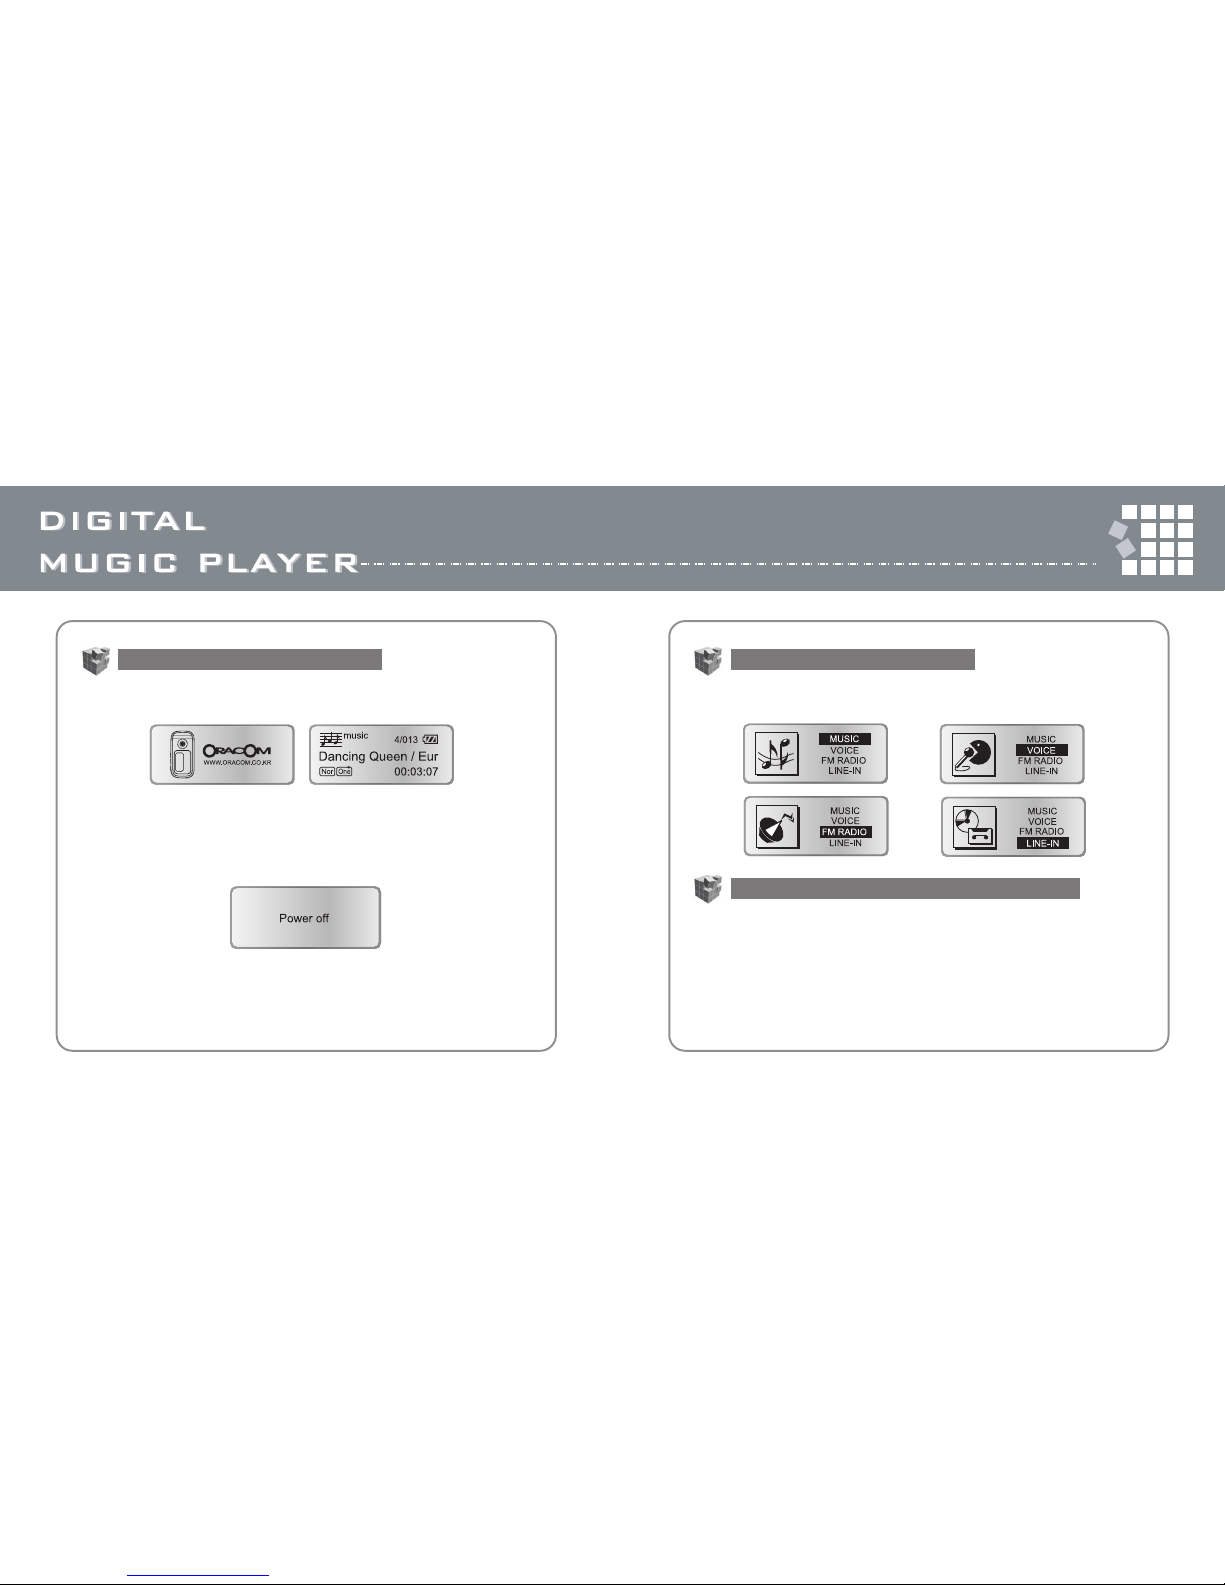
• Press and hold the ▶ button to turn on the player. The player turns on.
• Press the ▶ button for more than one second to turn off the player.
If the player is not operated for longer than one minute in the file list display
and for longer than two minutes in Line-in/Record, the player automatically
turns off.
• Press the mode button briefly and push the navi stick toward or and
press the ▶ button to select one of the modes.
• To play music tracks or voice files
: Push the ▶ button toward or to select file in the file list and press
the ▶ button. The music track or recorded file plays in voice mode.
• To show file list
: Press the ▶ button. The music track or voice file stops playing and
shows file list.
• If file is not changed, the player restarts from the position it stopped.
Turning the power On and Off
Digital music player modes
Playing digital music tracks or voice files
1211
• Press the mode button for more than one second in music mode or
voice mode. The play menu appears.
• Repeat, EQ, File, Language, Logo, Display etc. are in the play mode.
• See page.19 "Using the menu mode" for details of setting menu.
• Tune to the station you want to program. (SCAN mode)
• Press REC button briefly.
• Select a preset number (from 1 to 15) by pushing the navi stick toward
◀◀ / ▶▶.
• Press REC button to program current station.
• To adjust the volume
: The volume range can be adjusted from 0 to 40.
: Push the navi stick toward to turn the volume level up.
: Push the navi stick toward to turn the volume level down.
• Press the mode button briefly and select FM radio mode by pushing the
navi stick toward or . Then, SCN(SCAN) or MEM(MEMORY) will be
shown on the right of the LCD display.
(SCN(SCAN) mode is for selecting frequency, MEM(MEMORY) mode is for
selecting programmed frequency)
• While in FM radio mode, press the ▶ button briefly to switch
SCAN ⇔ MEMORY
• In SCAN mode, push the navi stick toward
◀◀ / ▶▶
to increase or decrease
the frequency. (0.1MHz)
• FM station automatic tuning(SCAN mode) : Push the navi stick toward
◀◀ / ▶▶
for more than one second.
• To listen to a programmed station (MEMORY mode)
: Select a preset station number by pushing the navi stick toward
◀◀ / ▶▶.
Setting menu
Playing an FM radio station
Setting a favorite FM radio station
Adjusting the volume
 Loading...