

Page 1
ORACLE AUDIO
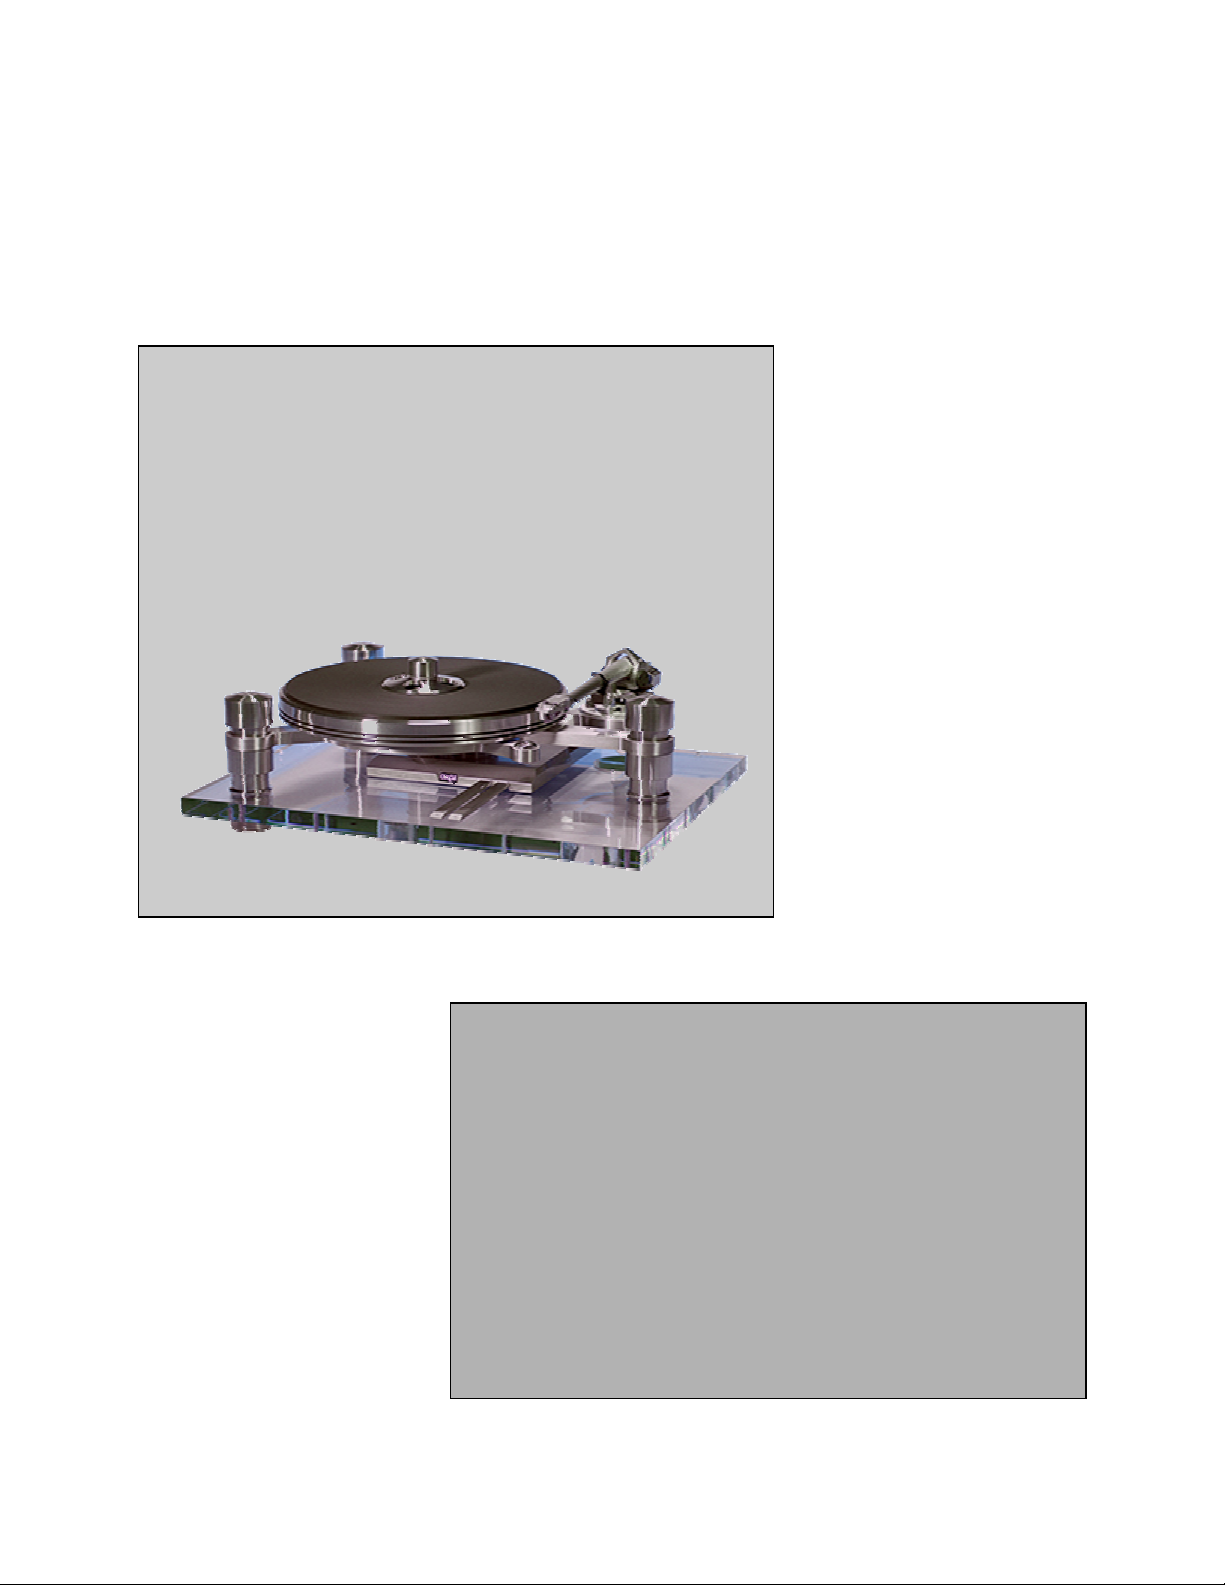
DELPHI MARK V
turntable
OWNER’S MANUAL
by Oracle Audio Technologies inc.
1
Page 2

T
ABLE OF CONTENTS
Foreword .................................................................................................... 1
How to ...
... pack and unpack your Delphi ................................................................. 2
... assemble the sub chassis ...................................................................... 3
... adjust the plinth assembly ...................................................................... 3
... install the tone arm and phono cartridge ................................................ 3 - 4
... precisely align the phono cartridge ......................................................... 4
... calibrate the suspension ......................................................................... 5 - 6 - 7
... dress the phono lead .............................................................................. 8
... install the drive belt ................................................................................. 8
... remove the platter with the drive belt installed ........................................ 9
... connect the power supply ....................................................................... 9
... adjust the 33 / 45 speed ......................................................................... 9
... attach the ground lead ............................................................................ 10
... install and calibrate the hinges ............................................................... 10
... operate the record clamp ........................................................................ 10
... level your Delphi ...................................................................................... 10
What to do ...
... if .............................................................................................................. 11
... for maintenance ...................................................................................... 12
oreword
F
are self explanatory, we strongly suggest you read this booklet to better understand the
importance of the different key adjustments.
Your Delphi is a precision instrument and its performance will be effected by the different
adjustments. It is important to set up your Delphi with the utmost care so it can effectively
convert record groove modulations into outstanding musical performance and enjoyment !
Total accuracy of your source system can only be achieved through minute details of
turntable suspension calibration, tone arm installation and cartridge alignment.
This is your Delphi MKV owner’s manual. The following pages will describe as
succinctly as possible the assembly of your new Delphi. Although some operations
2
Page 3

ow to ...
H
... pack and unpack your Delphi
- Remove the inner box by lifting it straight up and out. Open the flaps on both ends
and slide out the styrofoam packaging.
- Lift the styrofoam cover straight up so as to protect the corner reinforcement.
Note 1: All the accessories are positionned strategically in the packaging to prevent
them from coming loose and possibly damaging the turntable during shipping.
IMPORTANT ! When shipping the turntable position each item in its allocated
section.
- The following items are located in the upper section of packaging.
- Dust cover ( optional item ordered separately )
- Calibrator disc
- Main bearing lubricating oil
- D.C. Power supply
- Accessories bag
- Drive belt
- Linth free cloth
- Suspension adjustment gauge
- Tools pouch
( screw driver, allen keys, 9/64"-3/32"-5/64" )
Note 2: Lift the acrylic base straight up so as not to damage the platter’s spindle
protruding through.
- The following items are located in the bottom section of packaging.
- Plinth assembly
- Platter
- Record clamp
- Brillance cleaner
Note 3: Your ORACLE’s packaging has been designed to protect it from the abusive
handling normally encountered during shipping. Such packing materials are
expensive and we recommend you save it for future shipping.
... assemble the sub chassis
- Hinges ( supplied with the dust cover option )
- Strain relief clip
- Main bearing assembly
- One extra suspension spring
- Three suspension caps
It is mandatory
to use the original packaging for any return to the factory.
3
Page 4

- Locate the bearing assembly in the lower section of the packaging. Remove the 3
mounting screws.
- Locate the tool kit in the lower section and select the appropriate allen key...
9/64th
- Lift the subchassis straight up and mount the bearing assembly from underneath
(ground lug side). The bearing assembly can only be mounted in one position
Note: Important, the main bearing mounting flange is marked with a red dot. When
installed this red dot must be on the axis of the motor pulley and the platter
spindle. Any other positionning will impair the operation of your Delphi.
- Set the subchassis aside.
... adjust the plinth assembly
- Remove the styrofoam support blocks from around the suspension posts.
- Remove the suspension modules ( ie. the suspension housing, the spring and all
related parts ) Remember that each module has or could have a different color
coded spring. The modules have to go back on the same stem they came from.
- Remove the protective film from around the acrylic base.
- Level the plinth by turning the adjustable feet below.
Note: If you do not have a small carpenter's level to do this job, use the styrofoam
blocks as they were originally installed around the three suspension posts.
Seat the subchassis evenly on the 3 blocks and use the spirit level on the
subchassis to level the plinth.The suspension modules are not required for
this operation.
... install the tone arm and phono cartridge
Note 1: The tonearm installation and calibration will be easier and safer with the
sub-chassis resting on the foam shipping blocks as described earlier.
Note 2: The drive belt should not be used for this operation
Note 3: Do not pour the oil in the bearing well for this operation.
Note 4: Handle the platter installation carefully to prevent any damages to the
bearing assembly.
- Install the platter without the drive belt.
- Place the tone arm mounting board loosely in the sub chassis mounting ring and
determine the correct way to mount the arm to the arm board.
- Mount the tone arm to the pre-cut tone arm board.
- Install the tone arm following the manufacturer’s recommendations.
- Properly secure the tone arm mounting hardware.
... install the tone arm and phono cartridge ...
4
Page 5

Important ! If you are planning to cut your own mounting board, remember that the cutting
of the arm board can sometimes be troublesome as well as being a potential hazard. The
use of an adequate tooling is important to both accuracy and safety.
- Use stainless steel or aluminum screws to mount the cartridge for maximum rigidity.
- In preparation for the final alignment, tighten the screws so the cartridge can be
moved in the headshell.
... precisely align the phone cartridge
Note 1: The adequate use of the Oracle calibrator disc will insure an accurate
cartridge alignment.
Note 2: Important ! Do not use tape to keep the platter from turning, doing so would
damage the paint finish of the sub chassis or the platter.
- Place the calibrator disc on the platter, over the mat.
- Prevent the platter from turning for this operation.
- Aim the alignment line ( Located over the " O " of Oracle ) with the pivot center of the
tone arm.
- Adjust the stylus pressure to approximately 1 gram.
- Move the tone arm over the alignment grid and cue it down.
Note 3: Important ! Any movement of the platter with the stylus cued down could
result in irrevocable damage to the stylus or the cantilever.
- Chek for the horizontality of the arm tube with the surface of the calibrator disc or
use the tone arm manufacturer's supplied tool, adjust the height accordingly.
- Bring the tone arm over the center of the grid again and lower it. The stylus tip
must fit in the pin hole in the center of the grid. If not, position the cartridge so it
does.
- Precisely align the body of the cartridge with the lines of the grid. An other way
would be to visualize the cantilever as an extention of the center line of the grid
- Secure the cartridge screws and repeat the previous operation.
- Check the azimuth ( lateral view of the cantilever ) by lowering the stylus over the
black portion on the calibrator disc. The mirror reflection will help determine if the
cartridge is off its vertical axis...
- Check the stylus pressure and adjust it to the manufacturer's specifications.
- Install the stylus guard to complete the assembly of your Delphi. Whenever
possible, do not install the phono lead at this time.
... calibrate the suspension
Note 1: The spring tension of the suspension system can be adjusted two ways. First
by using a different color coded spring. They are coded as follow from the
weakest to the strongest, white ( rarely needed... not supplied ), yellow, red,
green, blue and black ( rarely needed... not supplied ) The second is by
5
Page 6

changing the position of the spring in its holder. The color coding is visible
from the inside at the wider end of the spring.
Note 2: The reference to clockwise or counter-clockwise is determined by viewing
the spring from above, unless otherwise mentionned.
Note 3: By hand the spring can only be rotated counterclockwise in its holder but,
using needle nose pliers, it can be held near the tip at the wider end. It is
then possible to move it clockwise. If this cannot be done, rotate the
spring counterclockwise until it comes out and reinsert it from under the
holder leaving more of the spring out.
Note 4: Before installing the spring back into the suspension housing, hold it with
one hand and pull on it at the wider end, this stretching will insure a
positive seating in the threads of the holder.
Step one Pre-loading the spring.
- Ajust the spring so three coils are showing below the holder.
Step two Preparing a spring module.
- Position the upper spring damper over the suspension stem.
- Install the sorbothane damper over the spring holder and seat it well
around the lip.
- Insert the spring assembly into the suspension housing.
- Install the suspension housing over the spring assembly.
Note 5: The factory standard settings
ALUMINIUM TOWERS: GOLD TOWERS:
Yellow, front left module Red, front left module
Red, rear left module Green, rear left module
Green, right module Blue, right module
The blue spring is supplied as extra. The yellow spring is supplied as extra.
Note 6: The standard spring combination will accommodate most tonearms.
Step three Calibrating the suspension.
... calibrate the suspension...
Note 7: Before beginning this step the record clamp and an old record must be in
place over the platter. This will give a more accurate operational mass of the
sub chassis.
Note 8: Do not install the drive belt nor the phono lead so as to prevent any bias in
the interpretation of the calibration.
6
Page 7
- Place the subchassis over the suspension modules.
- Install the platter without the drive belt.
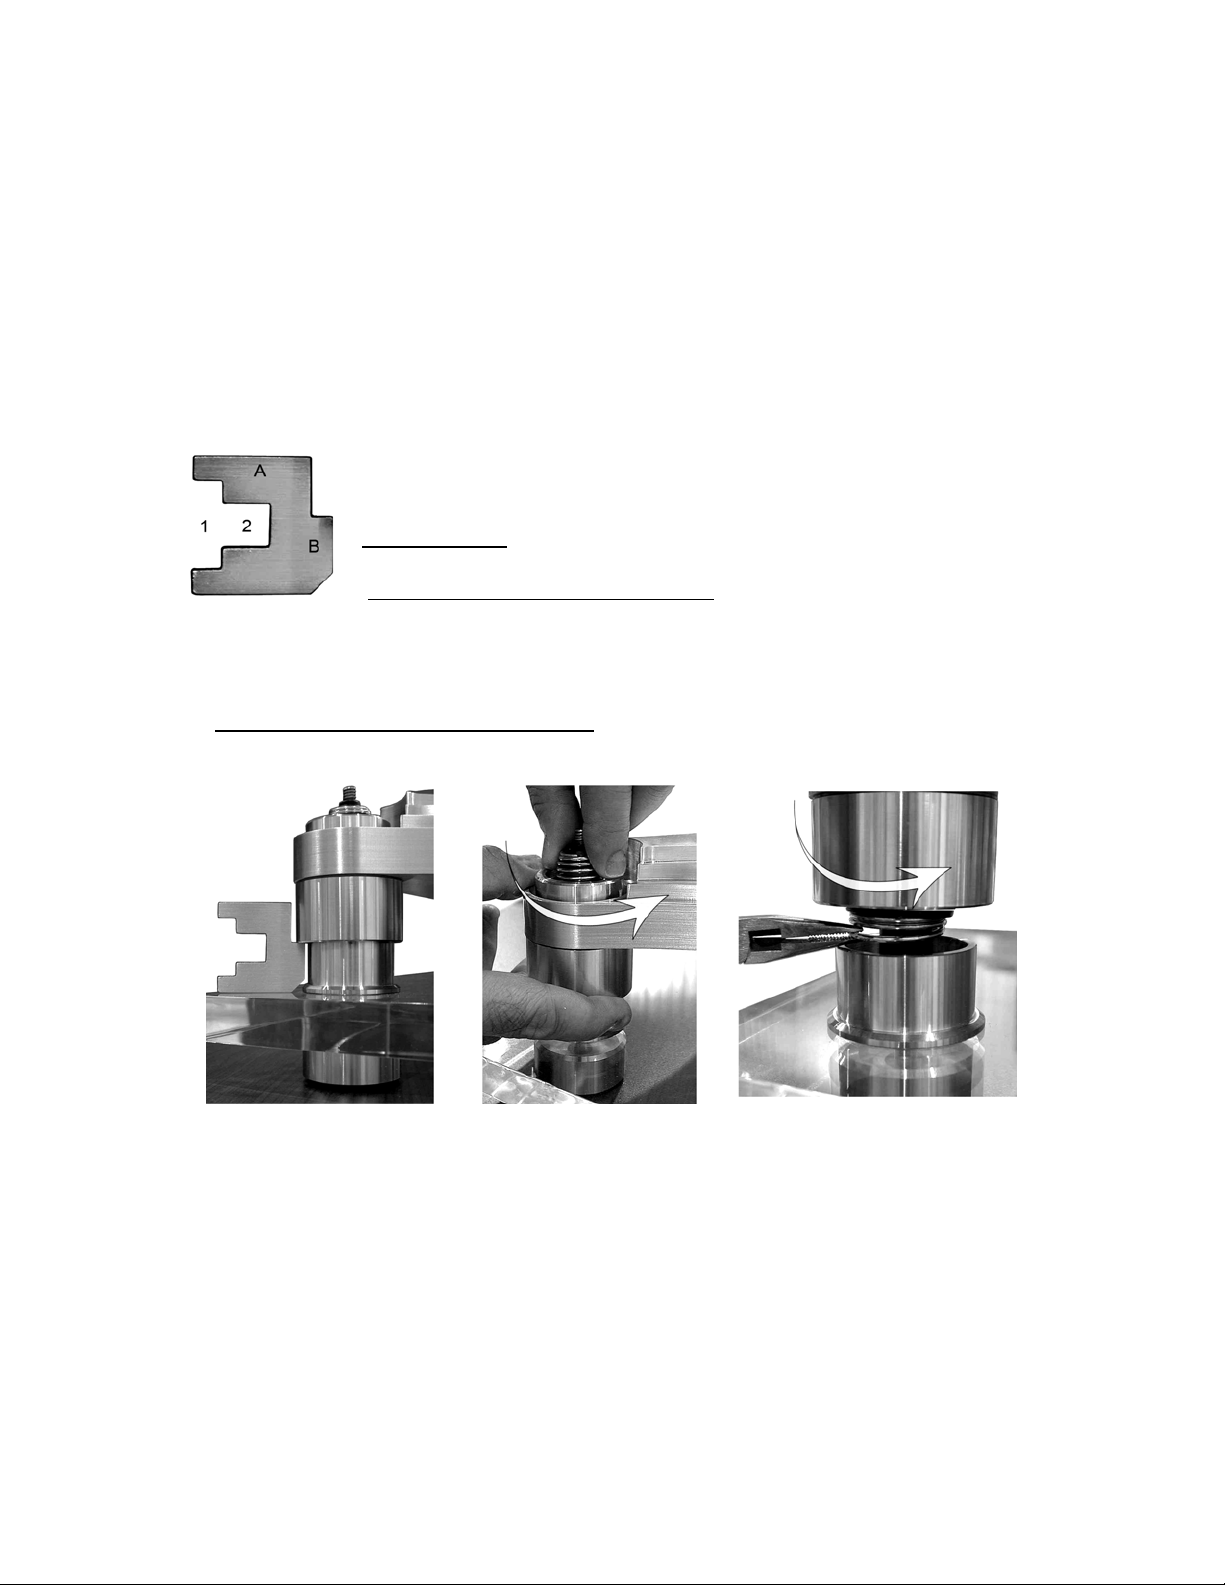
- Locate the suspension gauge in the documentation envelope.
- Punch the suspension gauge out of the card. Do not consider "A", nor 1 & 2, they
were used on the earlier models.
- Place the gauge on the acrylic base with the "B" side against the lock feet.
- For the first round bring all three suspension housings at 3 mm (1/8" inch) above
the "B" step on all three modules.
- For the second round, reduce the increments to 1/8 of a turn or less until the
suspension housing touches the step on the gauge very lightly.
Note 9: With the spring adjusted as per step one, the bottom of
the suspension housing should be well above the "B"
step of the gauge.
If it falls below... this is an indication that the spring used is too
weak for this tonearm application.
If a small adjustment is necessary to move the suspension
housing above the ‘B’ line, remove the
subchassis and move the weak
spring counter clockwise in its holder ( looking at it from the
wide side ). Start step three again.
If the adjustment needed is important, identify the color code and use the next stiffer
spring. With a new spring start the procedure again from step one.
Note 10: Aways start the calibration with the module near the tone arm then move to
the rear left and finally to the front module.
Note 11: If the distance between the bottom of the suspension housing and the
gauge is small, rotate the spring counter-clockwise by increments of ¼ of a
turn, if the distance is large start by making full turns of the spring. Always
apply a downward pressure on the record clamp to stretch the spring prior
to taking a new reading.
Note 12: In the event that the suspension housing goes below the "B" step, start the
precedure step one again.
Note 13: Once the proper adjustment is achieved, it is important as a final check to
verify the relative position of the bottom of the spring with its holder. This can
7
Page 8

be done by simply lifting the suspension housing just enough so you can see
the spring. If you can see the spring anywhere from almost flush to up to 3
coils out of the spring holder, the spring is in a safe range. If the spring can
not be seen showing below the holder a carefull inspection should be
performed on this spring to make sure it is still at less than ½ turn
inside the holder.
... calibrate the suspension...
Note 13: This is an indication that the spring is approaching its limits ( too soft
for the application ). The use of a softer spring should be considered. Failing
to do so could eventually cause the spring to slip out of its holder thus
causing potential damage to your record and your phono cartridge!
... dress the phono lead ( does not apply to the Delphi with a granit base edition )
- The phono lead can now be connected to the base of your tone arm.
- Secure the lead to the strain relief clip form above or below the plinth.
Note 1: The lead must create a loop from the base of the tone arm to the strain
relief clip. This is done to prevent any interference of the lead with the
suspension system.
Note 2: In some applications, the phono lead might be too stiff and it is then
recommended to split the molded wire from the plug to the strain relief.
Note 3: If the loop is too long, the lead could come in contact with the table below
the turntable. If it is too short, it will keep the suspension system from
moving freely. In both cases, this would be detrimental to the sound.
... install the drive belt
Note 1: To reduce contamination problems, wash your hands prior to handling the
drive belt.
- Remove the platter.
- Pour some of the oil vial (3 cc) in the bearing and verify the level using the depth
gage supplied with your turntable.
- Locate the drive belt in the upper section of the packaging.
- With the platter upside down, place the belt around the hub.
- Bring the platter over the bearing and
lower it straight down with one finger holding
the belt stretched.
- Guide the drive belt around the motor pulley when the spindle is 2/3 inside the
main bearing.
- Rotate the platter by hand a few turns to allow the belt to position itself around the
hub and the motor pulley.
Note 2: The special lubricating oil supplied with your Delphi is designed to protect
and preserve the mating parts for many years.Unless contaminated with dirt
or alcohol, this lubrication will last for many years
8
Page 9

Note 3: In the event that the drive belt becomes contaminated, clean it with
denatured alcohol. Clean the motor pulley and the drive hub at the same
time.
... remove the platter with the drive belt installed
Note: The following is not an operation related to the assembly of your Delphi but
a procedure to prevent overstretching the drive belt.
- Place one hand at the rear of the platter, over the motor, one hand at the front, lift
the platter about 2.5 cm (one inch) and with one finger pull the belt off the motor
pulley, then lift the platter straight up. Lifting the platter without looking after the
drive belt could possibly damage it.
... connect the power supply
- Plug the power supply output to the turntable input receptacle located to the rear of
the turntable.
- Plug the input cord to an AC outlet.
Note: Keep the power supply away from signal carrying leads.
... adjust the 33 and 45 speed
Note 1: The 33 speed must always be calibrated first.
Note 2: The individual speed potentiometers are accessible from the rear of the drive
module. When viewing the module from the rear, a clockwise rotation of the
potentiometer will result in an increase of the selected speed.
Note 3: The inner circles of strobe marks on the calibrator disc are to be used with a
supply of 50 Hz. The circle near the center is for 33 RPM, the other one is for
45 RPM. The outer circles are to be used with a supply of 60 Hz. The
outermost circle is for 45 RPM, the one next to it is for 33 RPM.
Note 4: The use of incandescent or preferably, fluorescent lighting is required to
accuratly read the calibrator disc.
Note 5: When the right speed is reached the appropriate set of strobe marks will be
standing still ( with no movement forewards or backwards )
- Place the calibrator disc over the spindle, on the platter.
- Select the 33 speed and check for accuracy.
- Select the 45 speed and check for accuracy.
- If both speeds need to be corrected, select the 33 speed again and, using the small
screw driver supplied with the tool kit, rotate the 33 speed potentiometer ( to the left,
when viewing the module from the rear ) until the strobe marks on the calibrator disc
come to a standstill position.
- Check the 45 speed again, if a small correction is still required, rotate the 45 speed
potentiometer.
9
Page 10

... attach the ground lead
- Loosen the thumb nut from under the sub-chassis near the tonearm and insert one
end of the lead.
- Attach the other end of the lead to the ground post of your pre-amplifier.
... install and calibrate the hinges
( Supplied when purchasing the optional dust cover )
- Locate the hinges in the lower section of the packaging and the appropriate allen
key ( 3/32" ) from the tool kit.
- Mount the hinges to the plinth and do not tighten the screws completely. Make sure
the dust cover slots line up correctly with each other before the final tightening.
- Install the dust cover by sliding it in the hinges slot.
Note: If the dustcover can not be lifted totally
open in its playing area, it is possible to change the
spring tension of the hinges. The tension have been
pre-adjusted on both hinges at the factory to its best
performance.
... operate the record clamp
- Tighten the clamp so the record is pushed flat
against the mat.
Note : Damages may occur to your albums when
overtightening the record clamp.
... level your Delphi
Your turntable is now ready to be moved to its final location.
- Level the acrylic base by turning the leveling feet. Use the subchassis spirit level to
complete this final adjustment since the relative level has already been established
between the subchassis and the acrylic base.
What to do ...
... if the turntable does not start and the speed indicating light does not go on
Check: - AC connection to the wall outlet.
- power supply output plug to the input receptacle of the turntable.
- power supply output, if not output, replace the fuse inside.
Use 0.25 amp / 250vac for 100 and 120 volts line input.
Use 0.1 amp / 250vac for 200 and 220 volts line input.
... if the turntable does not start and the speed indication light goes on
10
Page 11

Check: - drive belt
- motor connection plug for a broken wire
- drive module for a broken wire
- defective drive module
... if the platter is not parallel with the plinth
Check: - suspension calibration using the suspension gauge
Note: If a relatively important change occured in one particular suspension module,
it could be the sign of an improperly seated spring of sorbothane ring. Check
the installation carrefully prior to calibrating again.
Read: - section How to ... calibrate the suspension
... if an even up or down motion cannot be obtained when gently pressing on the
record clamp
Check: - leveling of the base
- for phono lead interference with the movement of the suspension. If
uncertain, unplug the lead.
Read: - previous topic: ... if the platter is not parallel with the plinth.
... if 33 and 45 speed becomes erratic`
Check: - drive belt to make sure it rides in the center of the motor pulley.
- motor pulley height (should be 71 mm (2.800 in.) from the top of the
pulley to the acrylic base).
- lubrication in main bearing.
- drive belt for oil contamination
- drive belt for excessive wear
- for damaged of defective main bearing
- motor connection plug for a broken wire
- drive module for a broken wire
- defective motor
- defective drive module.
... for maintenance
- The blue cloth supplied can be used to clean all the metal, acrylic parts and the mat.
Always use the cloth dampened with water to dust the acrylic parts. Do not use this
cloth to pick up oil spills, keep it for the delicate work.
- Unless contaminated, there will be no need to dismantle the main bearing. If
required it is simple to disassemble it from the subchassis. Keep the bearing ass’y
vertical since it contains oil. If the oil is contaminated it must be disposed of
ecologically. Remove the 3 socket head capscrews holding the bottom cover.
Clean the thrust pad and the inside of the bearing well with denatured alcohol using
a cotton swab. Allow a few minutes for the parts to dry. Reassemble, making sure
11
Page 12

to firmly secure the screws. Do not forget to add the content of one oil vial (about 3
cc) before installing the platter.
- As a precaution to preserve the furniture your Delphi sits on, it is advisable to use a
folded paper towel under the main bearing for a few weeks in the case of a bearing
spillage.
- The drive belt should be replaced yearly for optimal performance.
We are confident your new Oracle product will give you many years of satisfaction.
You are now ready for the real and only purpose of all this... to sit down and relax, to
just listen and enjoy beautiful music.
The people at Oracle Audio Technologies inc.
6136 boulevard Bertrand Fabi, suite 101
Rock Forest. Quebec. Canada
J1N 2P3
phone: 1-819-864-0480 fax: 1-819-864-9641
e-mail : info@oracle.audio.com
www.oracle-audio.com
12
 Loading...