

Page 1
USB Server Gigabit – Quick Start Guide
System-LED (green/ orange)
State-LEDs (green/ red)
GREEN ON
Power supply and system OK
GREEN ON
USB port in use
GREEN flashing
System start
RED ON
The USB Server has been disconnected the power
disconnecting of the USB device
ORANGE flashing
Current firmware update or reset to factory
settings
ORANGE ON
Reset to factory settings finished; Restart
required
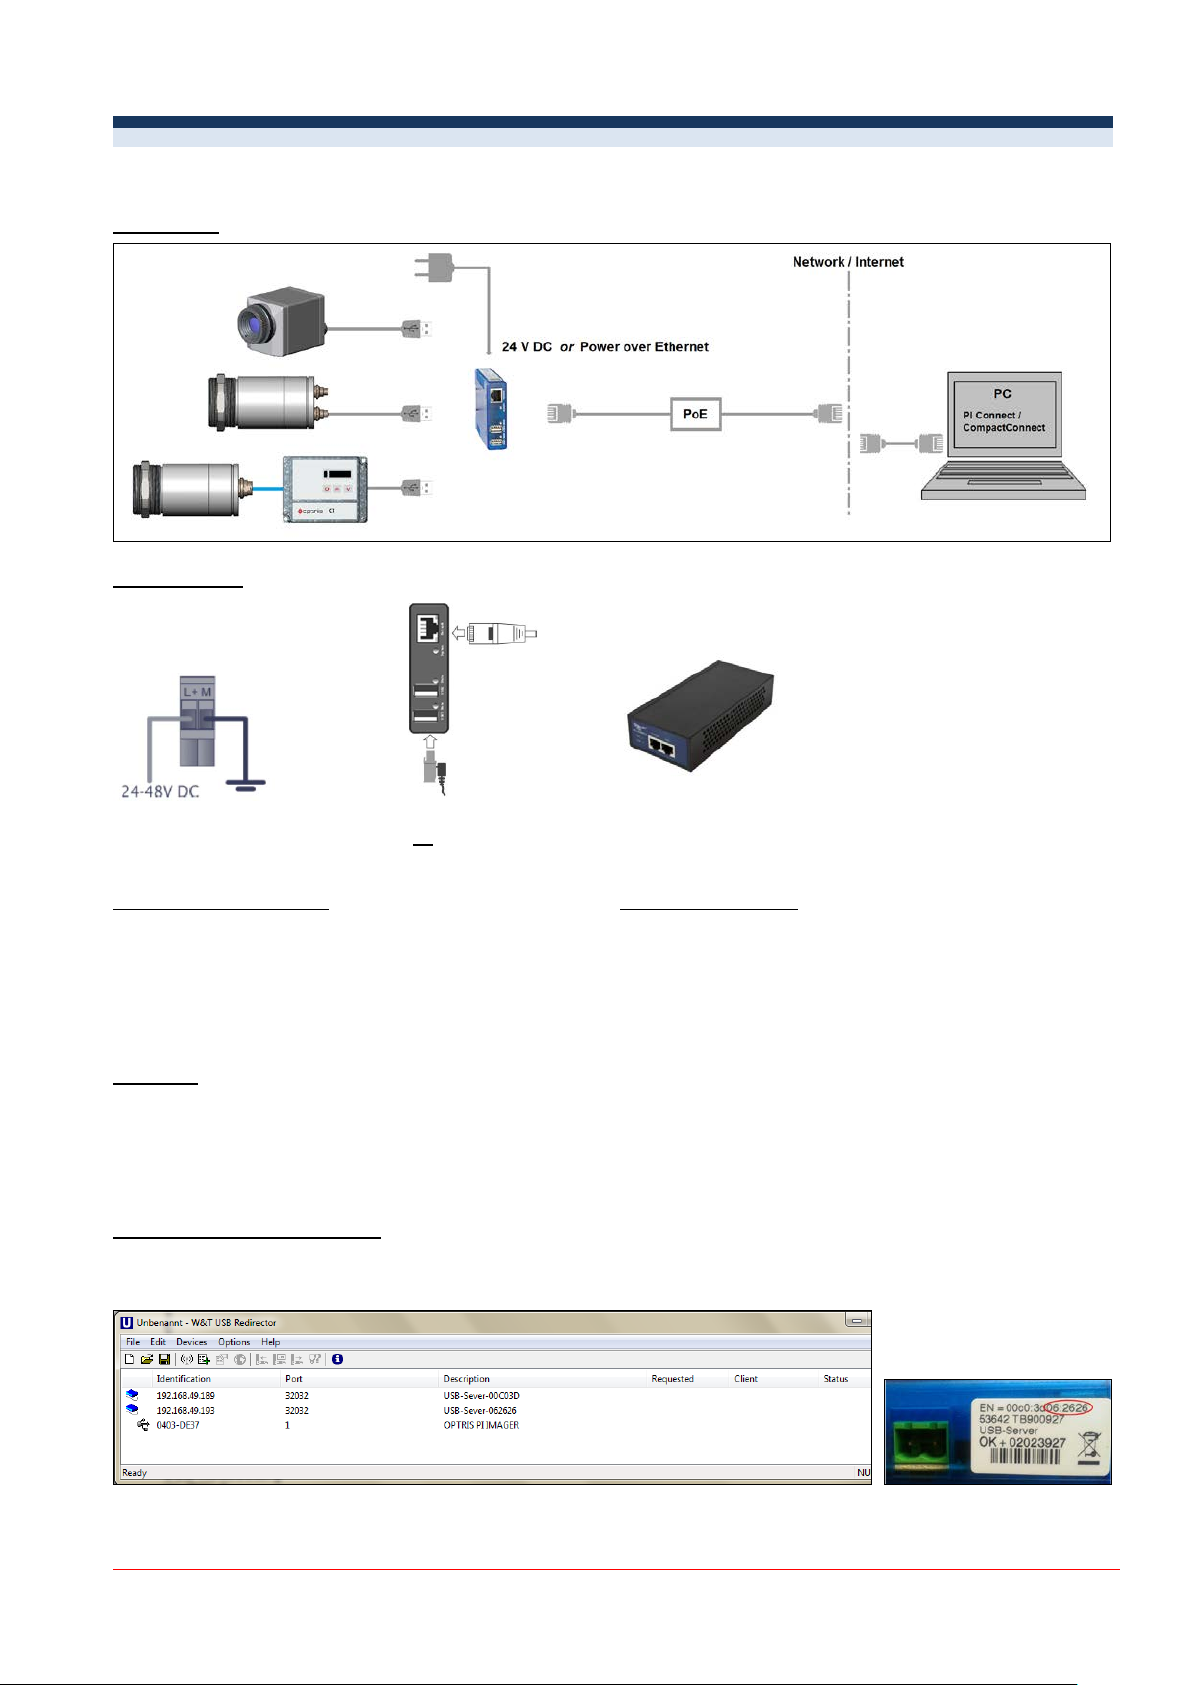
1. Connection USB Server Gigabit [ACPIUSBSGB] via Network
Installation
Power supply
24V power supply or Power over Ethernet [part#: ACPIPOE]
supply of the port e.g. due to overload or temporary
Software
Install the software programs from the Software-CD (folder: USB-Server):
• USB Redirector
• WuTility
Starting the USB redirection
Start the USB Redirector. The local network will be automatically scanned for available USB-Servers
(if not, refresh the current view with File/ New).
If several USB-Servers are in your network you can identify your own by the number you find in the overview of
Redirector (under Description) as well as on the serial number label of your device(e.g.: USB-Server-062626).
ACPIUSBSGB-QSG-E2015-04-A
1/5
Page 2
USB Server Gigabit – Quick Start Guide
You see in the Redirector the connected USB device. Mark it and press the Claim button.
The status is changing now to Connected. You can see the IP address of your local PC under Client:
The device (IR camera PI, CTvideo or CSvideo) can now be used in the sam e way as it would be connected
directly to a local USB port of your PC.
The program Redirector can be minimized – the redirection will be determined if you close the window.
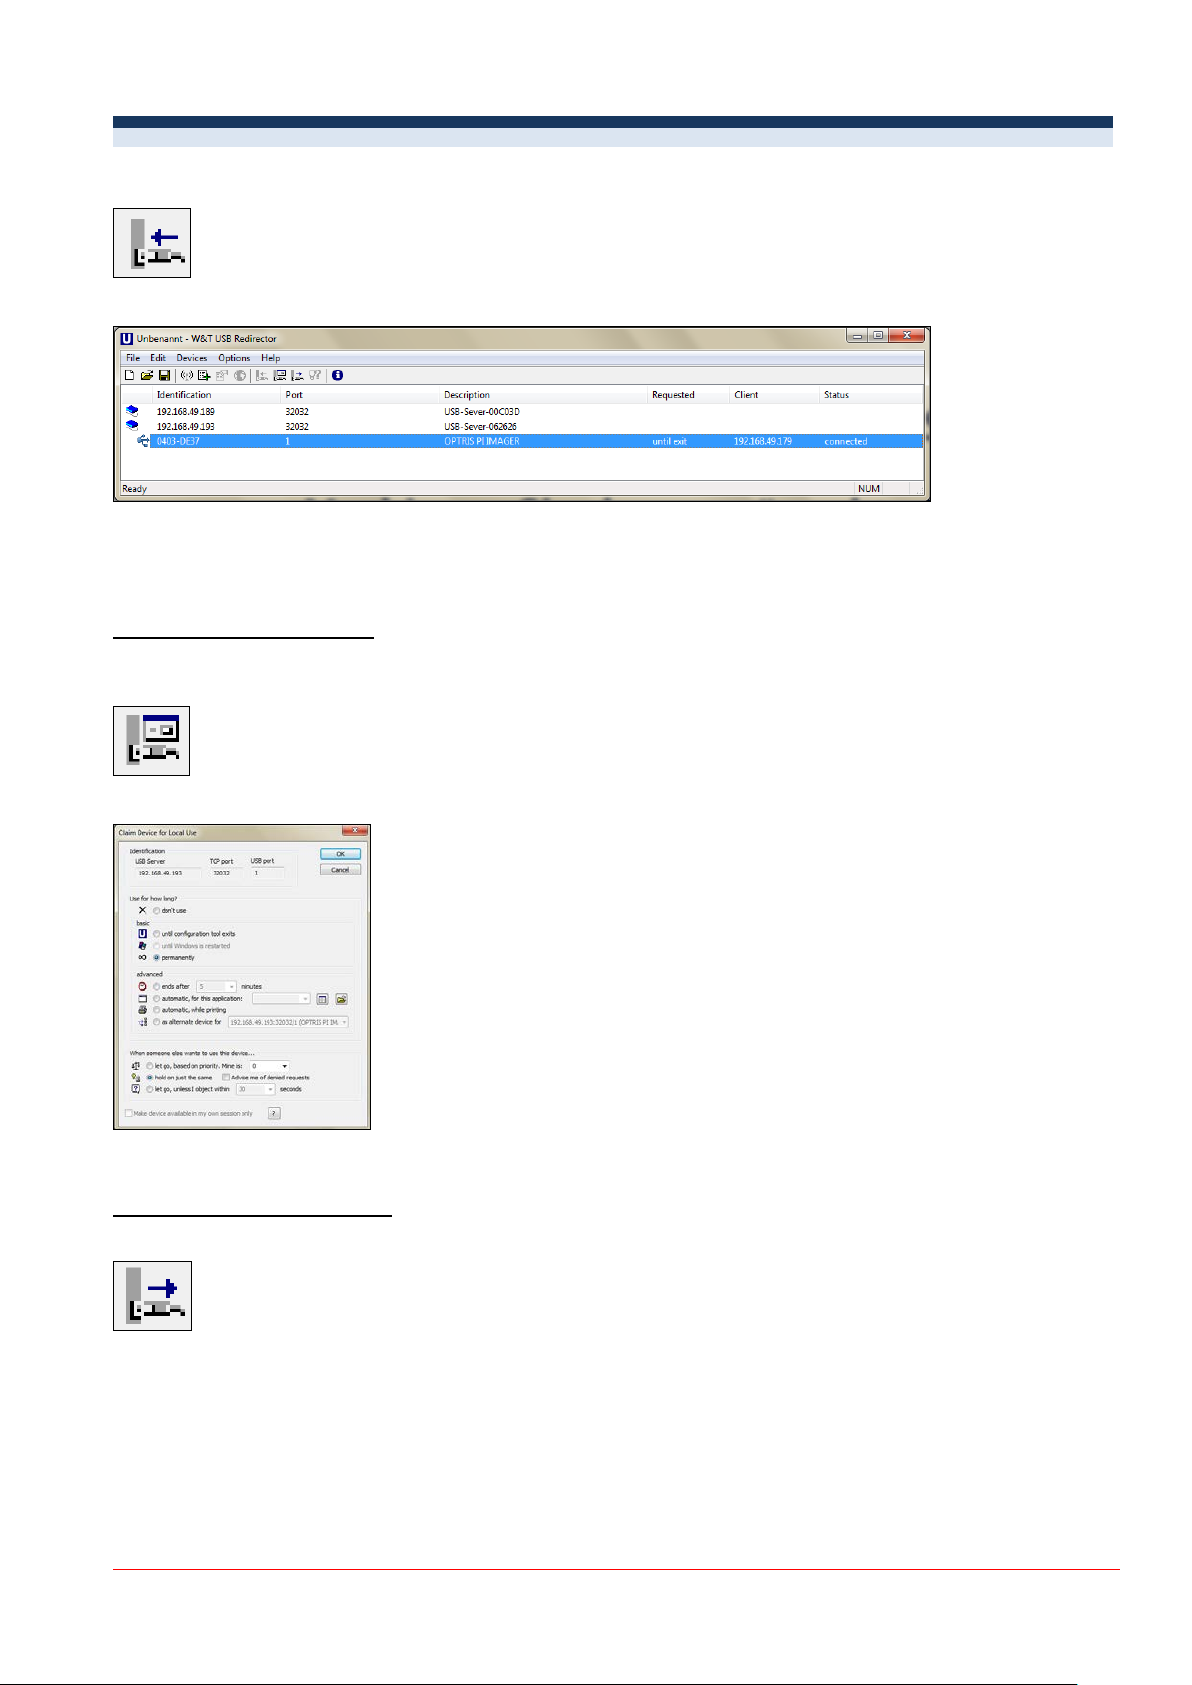
Automated USB redirection
Open the Redirector and mark the connected device.
Then press Claim, Advanced:
Select permanently:
The USB redirection is now kept also if the program Redirector will be closed. If the PC and/ or the USB-Server
are restarted, the redirection will be recovered automatically.
Stopping the USB redirection
To stop the permanent USB redirection, star t the Redirector and press the Release button:
ACPIUSBSGB-QSG-E2015-04-A
2/5
Page 3

USB Server Gigabit – Quick Start Guide
2. Direct Connection (Point-to-Point-Network)
Installation
On a direct connection to a PC both, the USB-Server as well as the PC must use a fixed IP address. No DHCP
server is available here. Accomplish the following settings on your PC once (depending on the operating system
the procedure can differ from the here shown – the following description refers to a Windows 7 system).
1. Go to System controls; open Network and Sharing Center.
2. Enter Local Area Connection – status screen [1] is shown and subsequently Properties.
3. Mark Internet protocol Version 4 (TCP/IPv4) [2] and go to Properties again.
[1] [2] [3]
4. Open register Alternate Configuration in window [3] and enable the checkbox User configured.
5. Now enter a user defined IP address for your PC, for example 192.168.0.1.
ACPIUSBSGB-QSG-E2015-04-A
3/5
Page 4

USB Server Gigabit – Quick Start Guide
If there is any problem in the WuTility software with the detection of connected USB
6. To change the network settings of the USB-Server start the WuTility program:
Server, check the following setting:
1. Go to Options/Inventorying method and choose Global broadcast.
Independent on the current network settings of the USB-Server the device is dis played now.
Mark the USB-Server and then press IP Address:
7. The standard setting of the USB-Server is DHCP. On a direct connection to a PC set a static IP address to the
device. Take care that the network part of the address is identical to the network part of the IP address of the
connected PC (therefore: 192.168.0):
ACPIUSBSGB-QSG-E2015-04-A
4/5
Page 5

USB Server Gigabit – Quick Start Guide
8. Now press Next and then Finish. The network connecti on bet w een PC and USB-Server will be established
and you can perform the USB redirection as described previously. Close the WuTility software.
Scope of Supply
USB Server Gigabit
24 V power supply
Ethernet cable, 1m
Quick Start Guide
ACPIUSBSGB-QSG-E2015-04-A
5/5
 Loading...