

Page 1
MOUNTING INSTRUCTIONS FOR
SHORT THROW PROJECTOR MOUNT
X307UST / X307USTi / W307UST / W307USTi
To fit Optoma:
MODEL No. OWM1000
Max Weight Loading 15Kgs
OWM1000
FN.
read these instructions carefully before installing your equipment.
Ÿ
install the mount in a suitable location using fixings which are appropriate for the wall material and structure. Consult a
Ÿ
qualified builder if you are in any doubt as to the structural integrity of the wall.
use all available fixing points.
Ÿ
do not attempt to alter or modify any part of the wall mount or it's attachments.
Ÿ
do not use if any parts are broken or appear to be damaged.
Ÿ
tighten all bolts and fixings securely. Only use fixings provided with this bracket.
Ÿ
do not mount your projector near to sources of heat or moisture.
Ÿ
always have a minimum of two persons to install the projector and the mount.
Ÿ
Mount Assembly Kit
Cable protection grommet
Projector Fixing Kit
A - M3 x 10mm
B - M4 x 10mm
C - M5 x 10mm
D - M6 x 10mm
I - M3 Washer
J - M4 Washer
M - M5 x 15mm
N - M6 x 15mm
O - Extension Arm
P - M5 x 10mm
Also Required
E - M3 x 25mm
F - M4 x 25mm
G - M5 x 25mm
H - M6 x 25mm
K - M5 Washer
L - M6 Washer
x2
x4
x4
x4
x4
x4
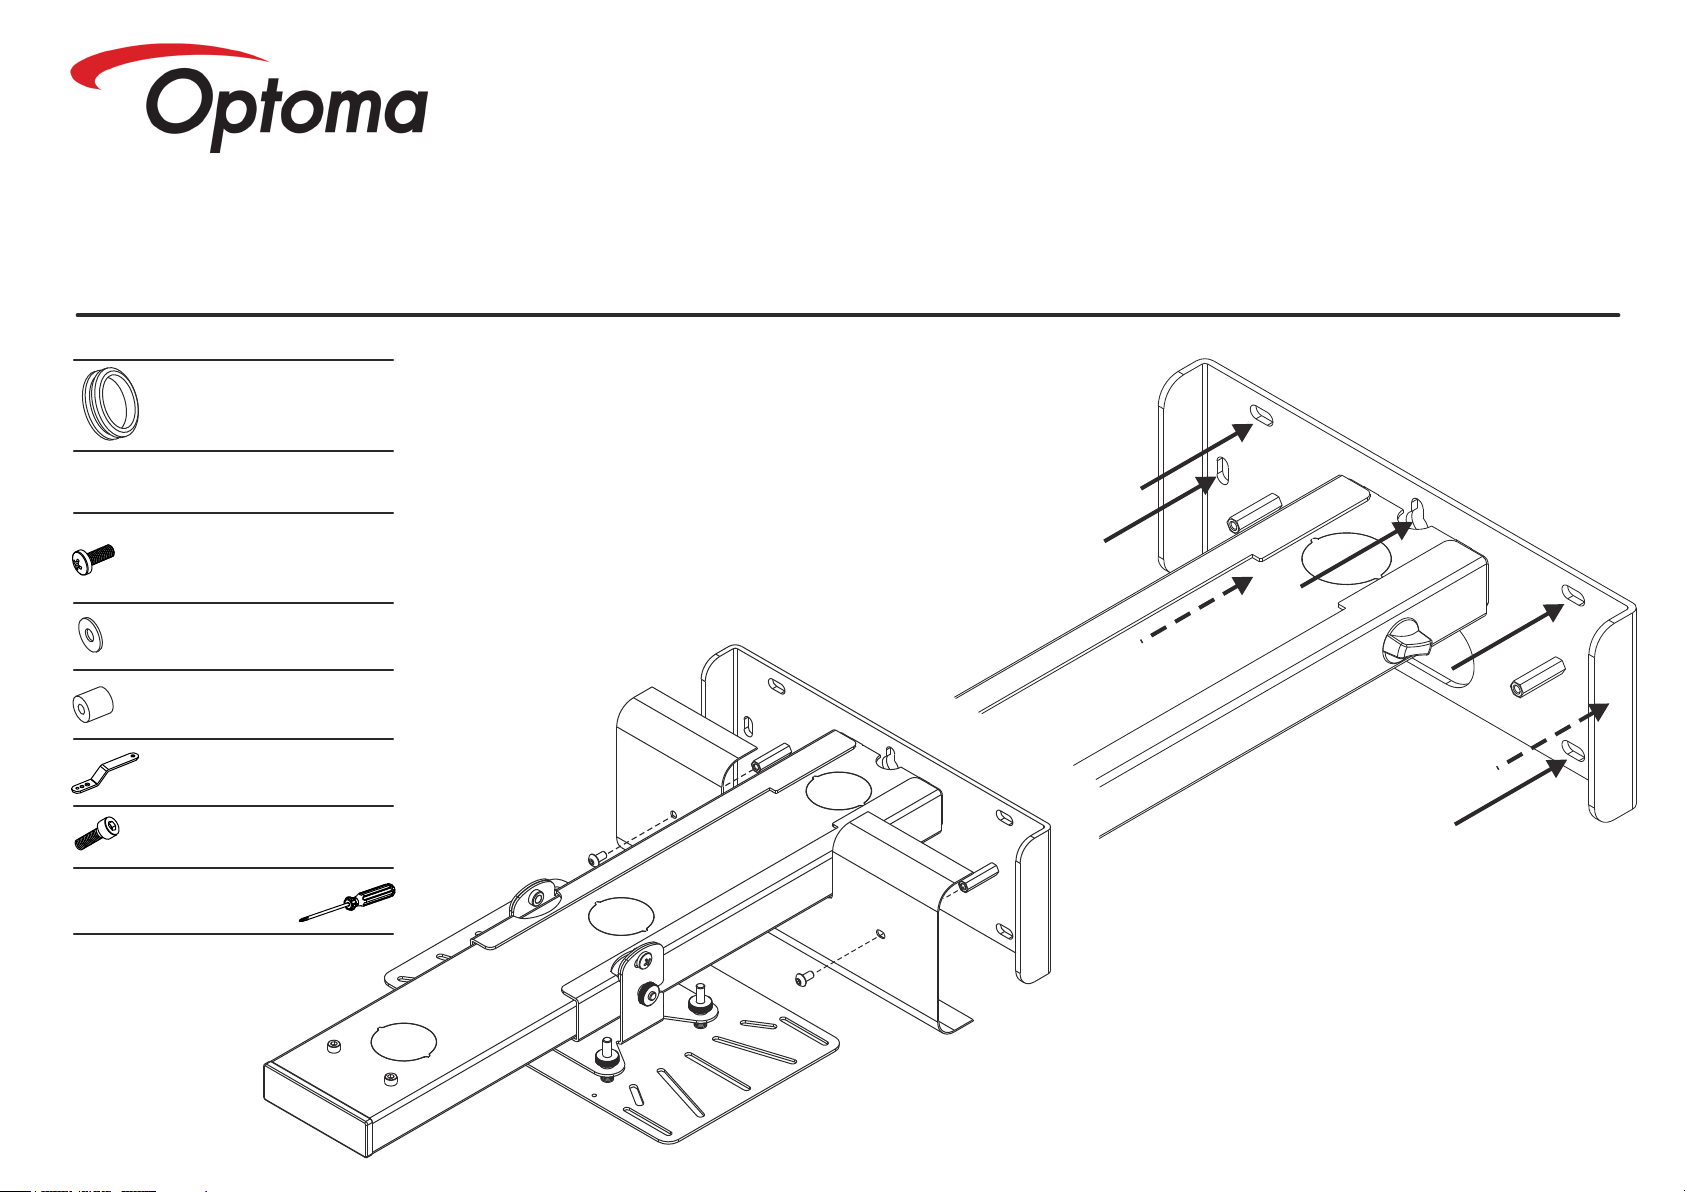
1
Attach Wall Plate To Wall
Ÿ For ease of installation mount bracket on wall using position 1
and mark other positions using a spirit level. Then remove
fixing from position 1, remove bracket and drill other positions
Ÿ Use Fixings suitable for your type of wall construction.
Ÿ Use All available fixing points.
Ÿ If in any doubt of the suitability of the wall, it's construction or what
type of fixings to use, consult a qualified builder or installer.
NOTE:
Ÿ For mounting OPTOMA XGA and WXGA Ultra Short Throw
Projectors locate the wall plate centrally to the screen centre.
a
b
1
Remove wall plate trim before attaching to wall
NOTE: Retain fixings for re-attaching trim later.
Page 2
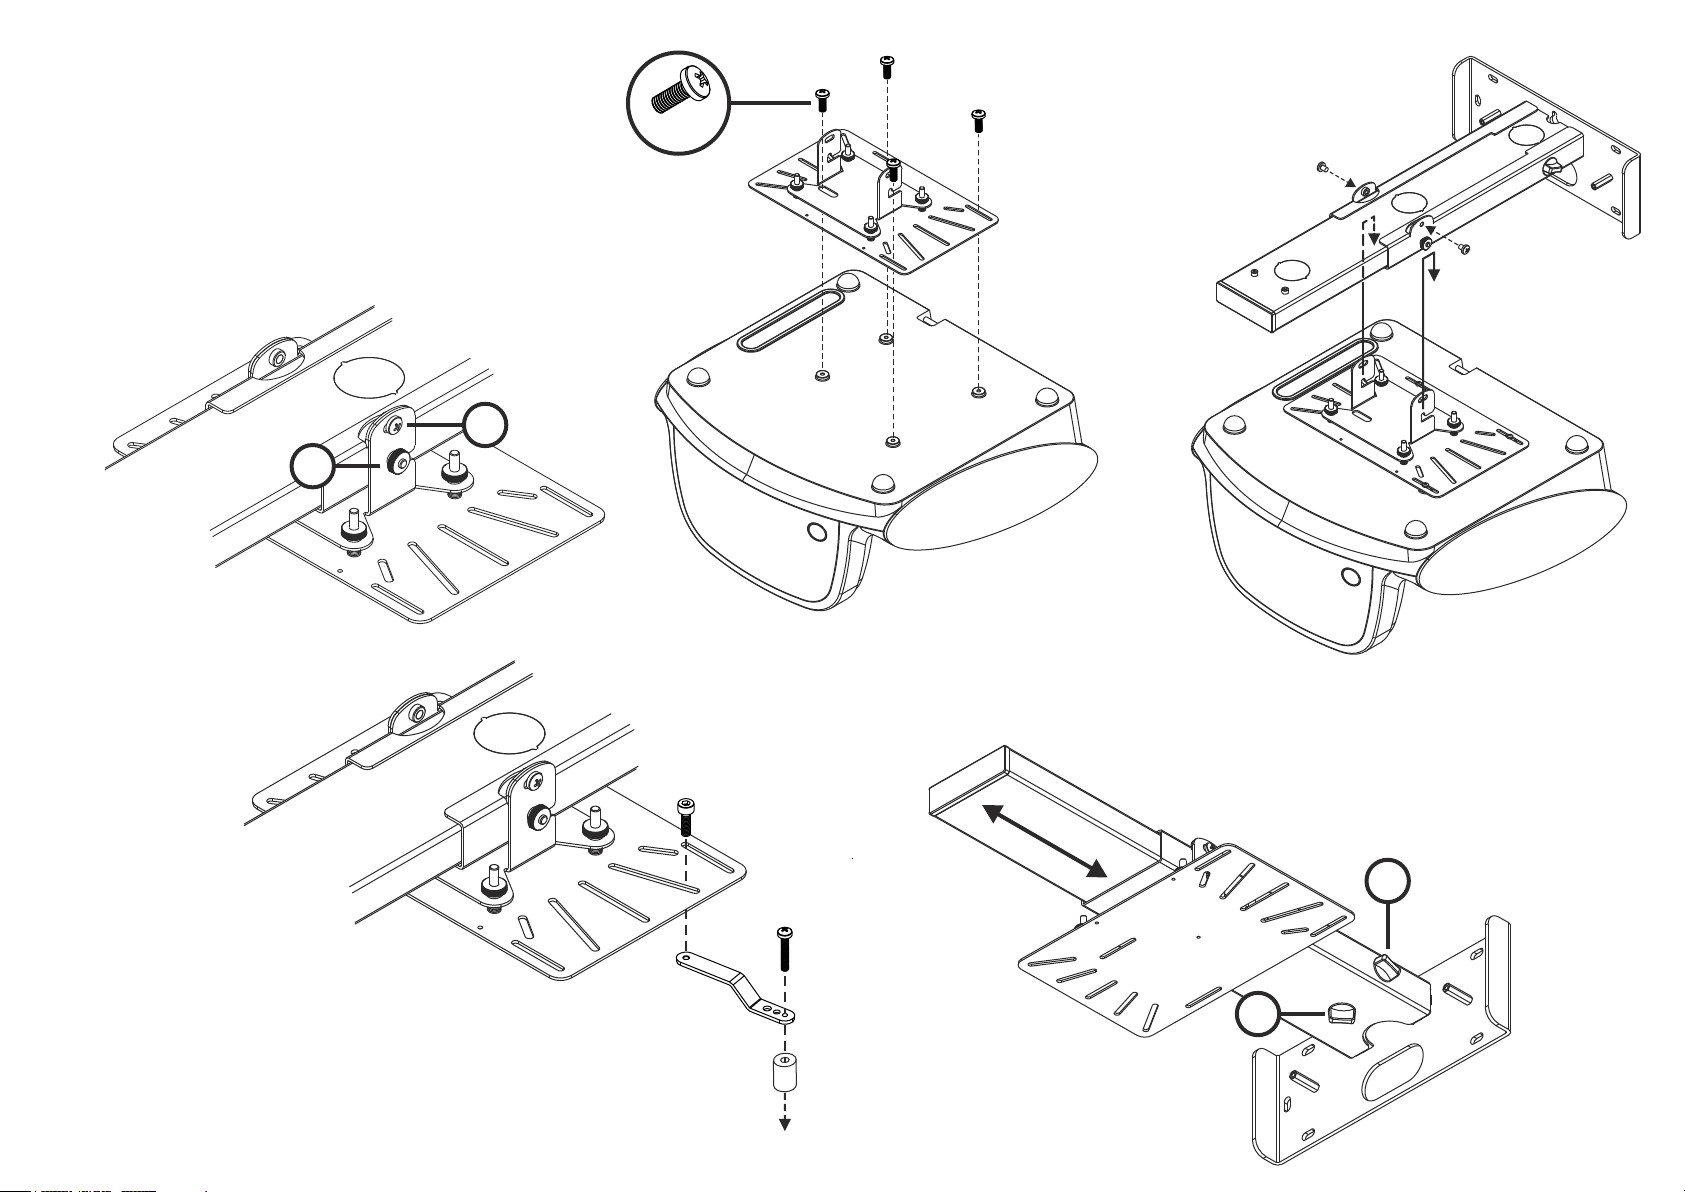
2
Attach Optoma Ultra Short Throw Projector
Bx4
Re-attach interface plate by hooking on to
c
support. To secure plate, follow reverse
of stage 3a.
a b
Remove interface plate by removing screws 'b' (x2)
and loosening thumbwheels 'a' (x2). Then you can
un-hook the plate.
NOTE: Retain screws 'b' for use later.
b
a
Attaching Third Party
Projectors
3 4
Adjust length
Projector removed in this view for clarity
Loosen hand wheels 'a' (x2). Slide projector to desired position
and re-tighten hand wheels.
NOTE:
Use universal fixing kit as demonstrated right using bolts, extension arms
and/or spacers to attach to third party projector models. Use relevant fixings
in all available fixing points on projector. Any slots or holes in the interface
plate can be used depending on required position of extension arms.
P
O
To Projector
a
A~H
a
M~N
Page 3

Cable Routing
Projector removed in this view for clarity
5
Cable exit from mount to projector
c
Remove knock-out nearest to desired exit point
depending on position of projector. To remove
knock-out follow Stage '6b'. Route cable out of
support and through cable protection grommet.
Secure cable protection grommet into knock-out
hole before adjusting cables.
Entry option through wall plate or through wall trim Entry option bypassing wall plate and in to support
a b
6
i. Remove knock-out to reveal access hole i. Insert Cable Protection Grommet and feed
Cables in to support.
Fine Adjustment
Tilt - Loosen bolt 'a' (x2). Adjust projector to required angle. Re-tighten bolt 'a' (x2).
Fine level - Adjust thumbwheels 'b' independently to achieve desired level.
Lateral Positioning - Loosen Projector fixing screws slightly and slide the projector until image is
centralised to screen.
NOTE: Do not fully remove any of the adjustment wheels or fixings described above
b
a
c
Page 4

7
Re-attach Wall Plate Trim
Projector removed in this view for clarity
SHORT THROW PROJECTOR MOUNT
MODEL No.
FN.
OWM1000
OWM1000
Max Weight Loading 15Kgs
Specifications;
Throw distance - OPTOMA XGA & WXGA Ultra Short Throw Projectors
Adjustment - 425mm Throw Adjustment
350mm to 775mm (From wall to lens)
UNIVERSAL (Approx dependent on fixing positions)
0mm to 850mm
+/- 5° Tilt Adjustment
4-point vernier adjustment tilt and yaw
20mm left/right lateral adjustmentl
read these instructions carefully before installing your equipment.
Ÿ
install the mount in a suitable location using fixings which are appropriate for the wall material and structure. Consult a
Ÿ
qualified builder if you are in any doubt as to the structural integrity of the wall.
use all available fixing points.
Ÿ
do not attempt to alter or modify any part of the wall mount or it's attachments.
Ÿ
do not use if any parts are broken or appear to be damaged.
Ÿ
tighten all bolts and fixings securely. Only use fixings provided with this bracket.
Ÿ
do not mount your projector near to sources of heat or moisture.
Ÿ
always have a minimum of two persons to install the projector and the mount.
Ÿ
Compatibility - Optoma
OPTOMA XGA & WXGA Ultra Short Throw Projectors
OPTOMA XGA & WXGA Short Throw Projectors*
Hitachi
ED-D10N, ED-D11N, CP-D10
ED-A100*, ED-A101*, ED-A111*, CP-A100*, ED-A220
NEC
M2XXXX, M3XXXX
U2XX, U3XX
Compatibility information provided as a guide. Please check with the
manufacturer to ensure 100% compatibility.
*Screen size limited
 Loading...