

Page 1
INSTALLATION INSTRUCTION
A16 UST lens
Page 2

1
Content
Projector system requirement ...................................................................... 2
Required accessories and tools ................................................................... 2
Entering UST mode for installation setup ................................................... 4
Removing the non-UST lens ......................................................................... 4
Boresight pre-adjustment ............................................................................. 4
Installing UST lens boresight module .......................................................... 6
Installing the lens supporter ......................................................................... 7
Installing ceiling mount with lens supporter ............................................... 9
Installing the UST lens ................................................................................ 11
Turning the projector on.............................................................................. 12
Image adjustment ........................................................................................ 12
Lens focus adjustment ......................................................................... 12
Boresight adjustment ........................................................................... 13
Attaching the lens supporter to the UST lens ........................................... 14
Removing the UST lens ............................................................................... 14
Change back to the non-UST lens after using the UST lens .................... 15
Releasing the UST lens boresight module ................................................ 15
Page 3
2
A16 UST LENS INSTALLATION
INSTRUCTION
This user manual is designed to assist with the installation of the BX-CTA16 UST lens
in your Optoma projector. Before attempting to fit the UST lens, please read through
this document in full order to ensure installation steps are made correctly.
Projector system requirement
Firmware version xxxx or higher is mandatory for correct UST lens installation or
operation.
To check the firmware version in the projector menu, select: OPTION > Information.
ZU660: requires firmware version V04.10 or higher
ZU850: requires firmware version V03.77 or higher
ZU1050: requires firmware version V00.29 or higher
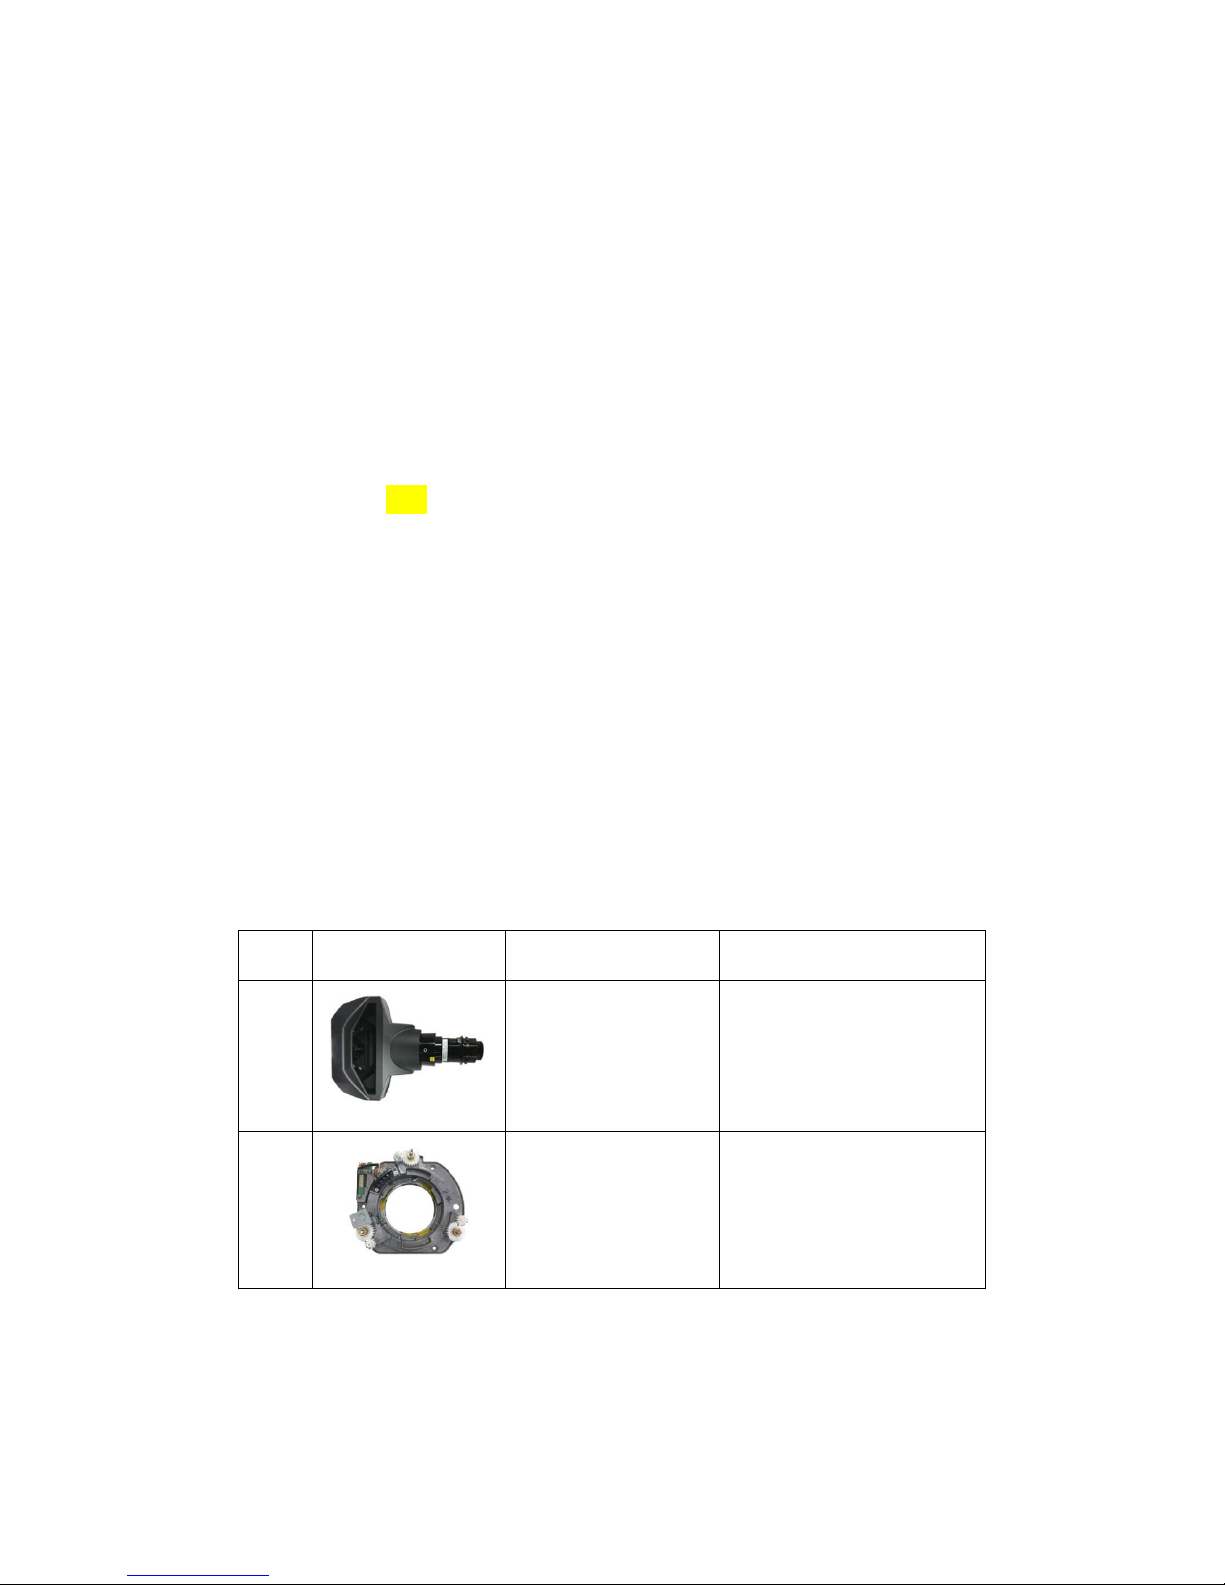
Required accessories and tools
Check that the following items (A-L) are included in the package. Prepare the required
tools (I, II, III) for installing each item.
Item
Image
Name of item
Quantity included
A UST lens
1
B
UST lens boresight
module
1
Page 4
3
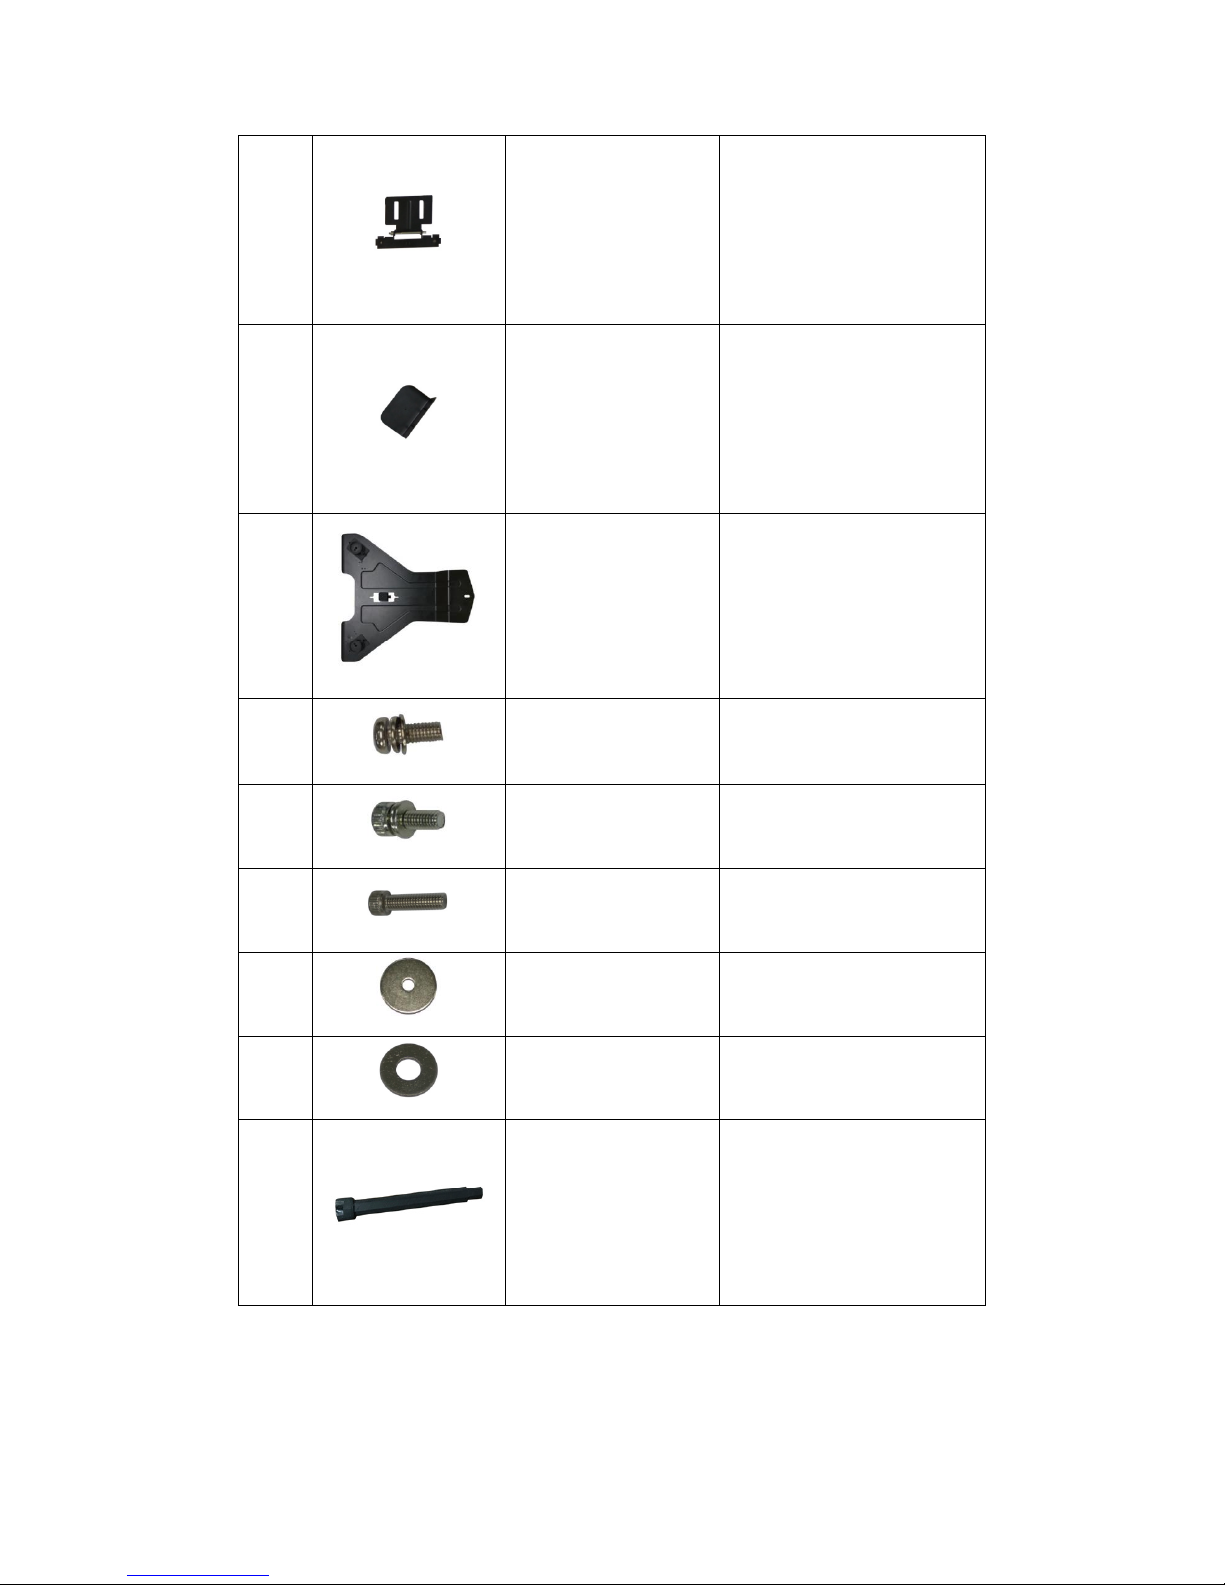
C Lens mount bracket
1
D Bracket
1
E Lens supporter
1
F M3 X L8 screws
2
G M3 X L8 hex screws
3
H
M6 X L22 hex
screws
2
I
M3-3.7 x 0.8 x 18
washer
3
J
M6-6.7 x 1 x 16
washer
2
K Boresight extender
3
Page 5

4
Entering UST mode for installation setup
To complete the UST lens setup, follow the steps below.
1. Power on the projector with a non-UST lens.
2. In the projector menu, follow these steps: Option > Service > UST Lens Install
> Start.
To enter service menu, enter the password “Left, Down, Right, Up” or “1, 5,
9, 0”.
3. Press Exit to turn off the projector.
4. Disconnect the AC cable.
Note: If an additional non-UST lens is not available, RS232 command, “~XX361 1”, or
hot key “Exit, Input, Left, Right” can be used to do UST lens calibration. After UST
lens calibration, the projector would automatically power off.
Removing the non-UST lens
To remove the non-UST lens, follow the steps below.
1. Make sure projector is turned off before removing the non-UST lens.
2. Rotate the non-UST lens counter-clockwise by a quarter to release the lens.
3. Remove the non-UST lens from the front aperture of the projector.
Boresight pre-adjustment
The UST lens boresight module needs to be adjusted before fitting to the projector.
1. Make sure the boresight gears are in the initial state.
If not, turn the small boresight gears counter-clockwise to the end position,
where 2 marks are roughly aligned.
L L shape tool
1
Page 6

5
2. Turn the boresight gears clockwise according to the desired projector
orientation.
Note: The ZU850 has a different orientation table from ZU660 and ZU1050.
A
C
B
Page 7
6
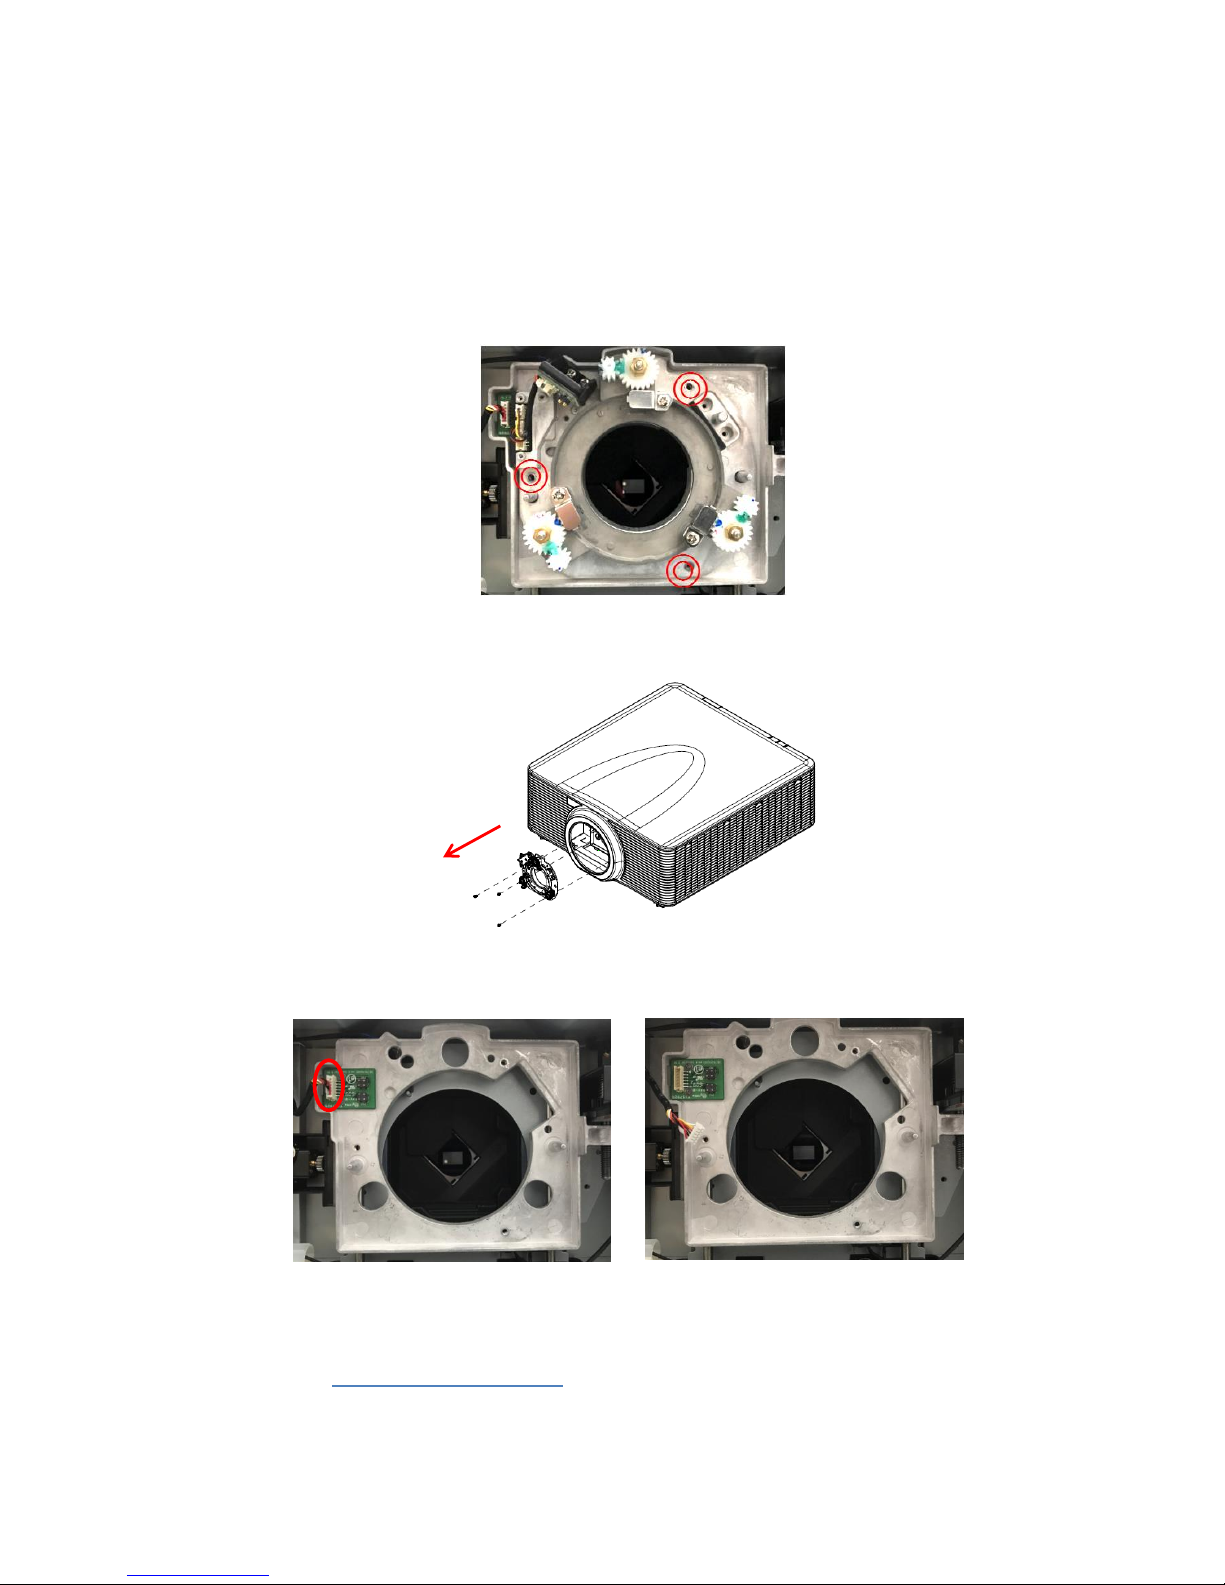
Installing UST lens boresight module
To install UST lens boresight module, complete the following steps.
1. Remove 3 screws with a Philips #2 screwdriver from the non-UST lens
boresight module.
2. Release the non-UST lens boresight module from projector.
1. Release the lens cable from the original holder on the plate.
2. Install the UST lens boresight module into the projector.
The boresight module needs to be adjusted before fitting to the unit.
See Boresight pre-adjustment.
Page 8

7
3. After installing UST lens boresight module, fasten using 3 screws with a
Philips #2 screwdriver.
4. Insert the cable back into the UST lens boresight module.
Note: Ensure the cable is not wrapped or pinched when fastening the UST
lens boresight module.
Installing the lens supporter
An additional lens supporter is required for this lens. Complete the following steps to
install the lens supporter.
1. Place the lens and projector upside-down on the cushioned surface.
2. Use a Philips #2 screwdriver to fasten the lens mount bracket on to the UST
Page 9

8
lens with 2 M3 X L8 screws.
Note: Ensure the arrow on lens mount bracket is facing out from the lens
mount.
3. To avoid the lens supporter touching the surface, turn the projector feet at
least 5 counter-clockwise turns.
4. To pre-lock the bracket on to the lens supporter use a 2.5 mm allen key with 1
M3 x L8 hex screw and M3-3.7 X 0.8 X 18 washer.
Note: Do not fully tighten the screws until the lens has been installed.
Lens supporter
M6-6.7 x 1 x 16 washers
M6 X L22 hex screws
M3 X L8 screws
Lens mount bracket
UST lens
Lens mount
Page 10

9
5. Attach the lens supporter to the bottom of the projector.
6. To fasten the lens supporter on to the mounting holes use 5 mm allen key
with 2 M6 x L22 hex screws and 2 M6-6.7 x 1 x 16 washers.
Installing ceiling mount with lens supporter
To install this lens in ceiling mount, complete the following steps.
Note: Due to thermal requirement, user needs to keep at least 30mm between the
ceiling mount plate and bottom intake. Furthermore, user would need to prepare
adapter A, adapter B, M6 ceiling mount screws and ceiling mount plate that are not
included in the package list.
Lens supporter
M6-6.7 x 1 x 16 washers
M6 X L22 hex screws
bracket
M3-3.7 x 0.8 x 18 washer
M3 X L8 hex screw
Page 11

10
1. Remove 2 M6 x L22 hex screws and 2 M6-6.7 x 1 x 16 washers from the
mounting holes.
2. Insert adapter B between lens supporter and ceiling mount plate, and insert
adapter A between projector and ceiling mount plate.
3. Fasten the ceiling mount plate onto the lens supporter by the M6 ceiling mount
screws.
Note:
1. Adapter A should be at least 40.1mm long.
2. Adapter B should be the length of adapter A minus the length between lens
supporter and projector. The length between the lens supporter and projector
is 15.15mm.
3. Determine the thickness of the ceiling mount plate in order to have the length
of the M6 screws for ceiling mount. M6 screws for ceiling mount should be the
Page 12

11
length of adapter A plus thickness of ceiling mount plate plus 10mm.
Installing the UST lens
Follow the steps below to install the UST lens.
1. To fine-tune the boresight, insert the boresight extenders before installing UST
lens.
2. Insert the UST lens.
Note: Align the TOP mark with the top of projector when inserting the UST
lens.
3. Rotate the lens clockwise to lock UST lens.
Page 13

12
Turning the projector on
To turn on the projector after UST lens has been installed, follow the steps below.
1. Connect the AC cable and ensure the power is switched on.
2. Ensure the lens correctly installed in the projector.
3. Ensure no personnel or no object is in the beam path before projector turning
on.
4. Turn on the projector by pressing on the remote controller or on the
projectors built-in keypad.
Image adjustment
Please note the items below when completing the initial image adjustment.
1. Limited lens shift is allowed.
2. Source input is not available.
3. If Lens Focus Adjustment does not make the image clear, follow the steps in
Boresight Adjustment for boresight fine-tuning.
4. Press “Pattern” to switch test patterns.
5. Press “Exit” to exit this adjustment process.
Lens focus adjustment
To make up the tolerance between lens and DMD chips, user would need to adjust
back focus to make the screen distinct. “ZOOM” button on remote control is for back
focus length adjustment and “FOCUS” button is for floating focus adjustment.
Page 14

13
1. Adjust back focus length to make the area of point 5 clear and sharp.
2. Adjust focus to make screen corners (point 1, 3, 7, and 9) clear and sharp.
3. Repeat step 1 and step 2 on full screen to balance center and corner
resolution.
Boresight adjustment
Note: If further tuning is required, follow the steps below. Otherwise, move to the next
section.
To complete fine tuning of the image, adjust the boresight gears using the L shape tool.
Make sure that the boresight extenders are installed.
1. Adjust boresight gear B using the L shape tool to focus screen point 4 and 7.
2. Adjust boresight gear C using the L shape tool to focus screen point 6 and 9.
3. Adjust Zoom/Focus to make screen point 1 to 3 clear.
4. Adjust boresight gear A using the L shape tool to make screen point 8 visible.
2 1 4
5 76
3
8
9
Page 15

14
5. Repeat steps 1 - 4 to balance center and corner resolution.
Attaching the lens supporter to the UST lens
After image adjustment is completed, attach the lens supporter to the UST lens.
Follow the steps below to complete the processes.
1. Attach lens mount bracket to the bracket.
2. Fasten the two M3 X L8 hex screws using the 2.5 mm allen key without
putting excessive force on the UST lens, bracket and lens supporter.
3. Fasten the M3 X L8 hex screws fully using the 2.5 mm allen key to connect
the bracket and lens supporter in to the final position.
Note: To avoid affecting the projected image, do not use any force whilst
fastening the screws.
Removing the UST lens
Follow the steps below to remove the UST lens.
1. Press the lens release button.
2. Rotate the lens counter-clockwise by a quarter and release the UST lens.
A
C
B
2 1 4
5 76
3
8
9
Page 16

15
Change back to the non-UST lens after using the UST
lens
To install non-UST lens, follow the steps below.
1. In the proejctor menu, follow these steps to switch back to non-UST mode:
Option > Service > UST Lens Install > None.
To enter service menu, enter password “Left, Down, Right, Up” or “1, 5,
9, 0”.
2. Turn off the projector.
3. Disconnect from AC power.
4. Remove the UST lens.
See Removing the UST lens.
5. Replace the UST lens boresight module with the non-UST boresight module.
See Releasing UST lens Boresight module.
6. Change back to the non-UST lens.
7. Power on the projector with AC power on.
8. Complete the lens calibration process by pressing “Lens, Enter” on keypad or
“Lens H or Lens V, Enter” on remote control.
Releasing the UST lens boresight module
To uninstall the UST lens boresight module, follow the steps below.
Page 17

16
1. Release the lens cable from the UST lens boresight module.
2. Remove 3 screws using a Philips #2 screwdriver on the UST lens boresight
module.
3. Release the UST lens boresight module from the projector.
4. Insert the cable back into the lens shift plate.
Page 18

17
5. Insert non-UST lens boresight module back into the projector.
6. Fasten the module using 3 screws with a Philips #2 screwdriver.
Page 19

18
Optoma global offices
For service or support, please contact your local office.
Page 20

Page 21

 Loading...