

Page 1
Page 2

1. After unpacking the DVR, set it up on a sturdy shelf free from vibrations, dust, high humidity and
moisture.
2. Connect the following at the back of the computer:
a. PC USB mouse and keyboard – plug in the USB mouse at the USB ports
located at the back of the PC shown here below
b. PC power cable – plug it in at the back of the PC as shown here.
c. PC monitor – plug your PC monitor cable at the “VGA Out” as shown above.
3. Connect the Video cables from your cameras to the video pigtail connectors of the DVR system located at
the back panel of the DVR computer. Note that every pigtails are color coded, red colors are used for video
input and white (or white stripes) are for audio input. Every DVR pigtail cables are labeled as VID or AID
followed by a number, for example, VID1 or AID1 etc…. See the illustration below.
I. Get to know your connectors and back panel
Pigtail
label is
indicated
here
Video and
Audio 1-4
Video and
Audio 5-8
8 channel DVR
16 channel DVR
24/36 channel DVR 48/64 channel DVR
Video and
Audio 1-8
Video and
Audio 9-16
Page 3
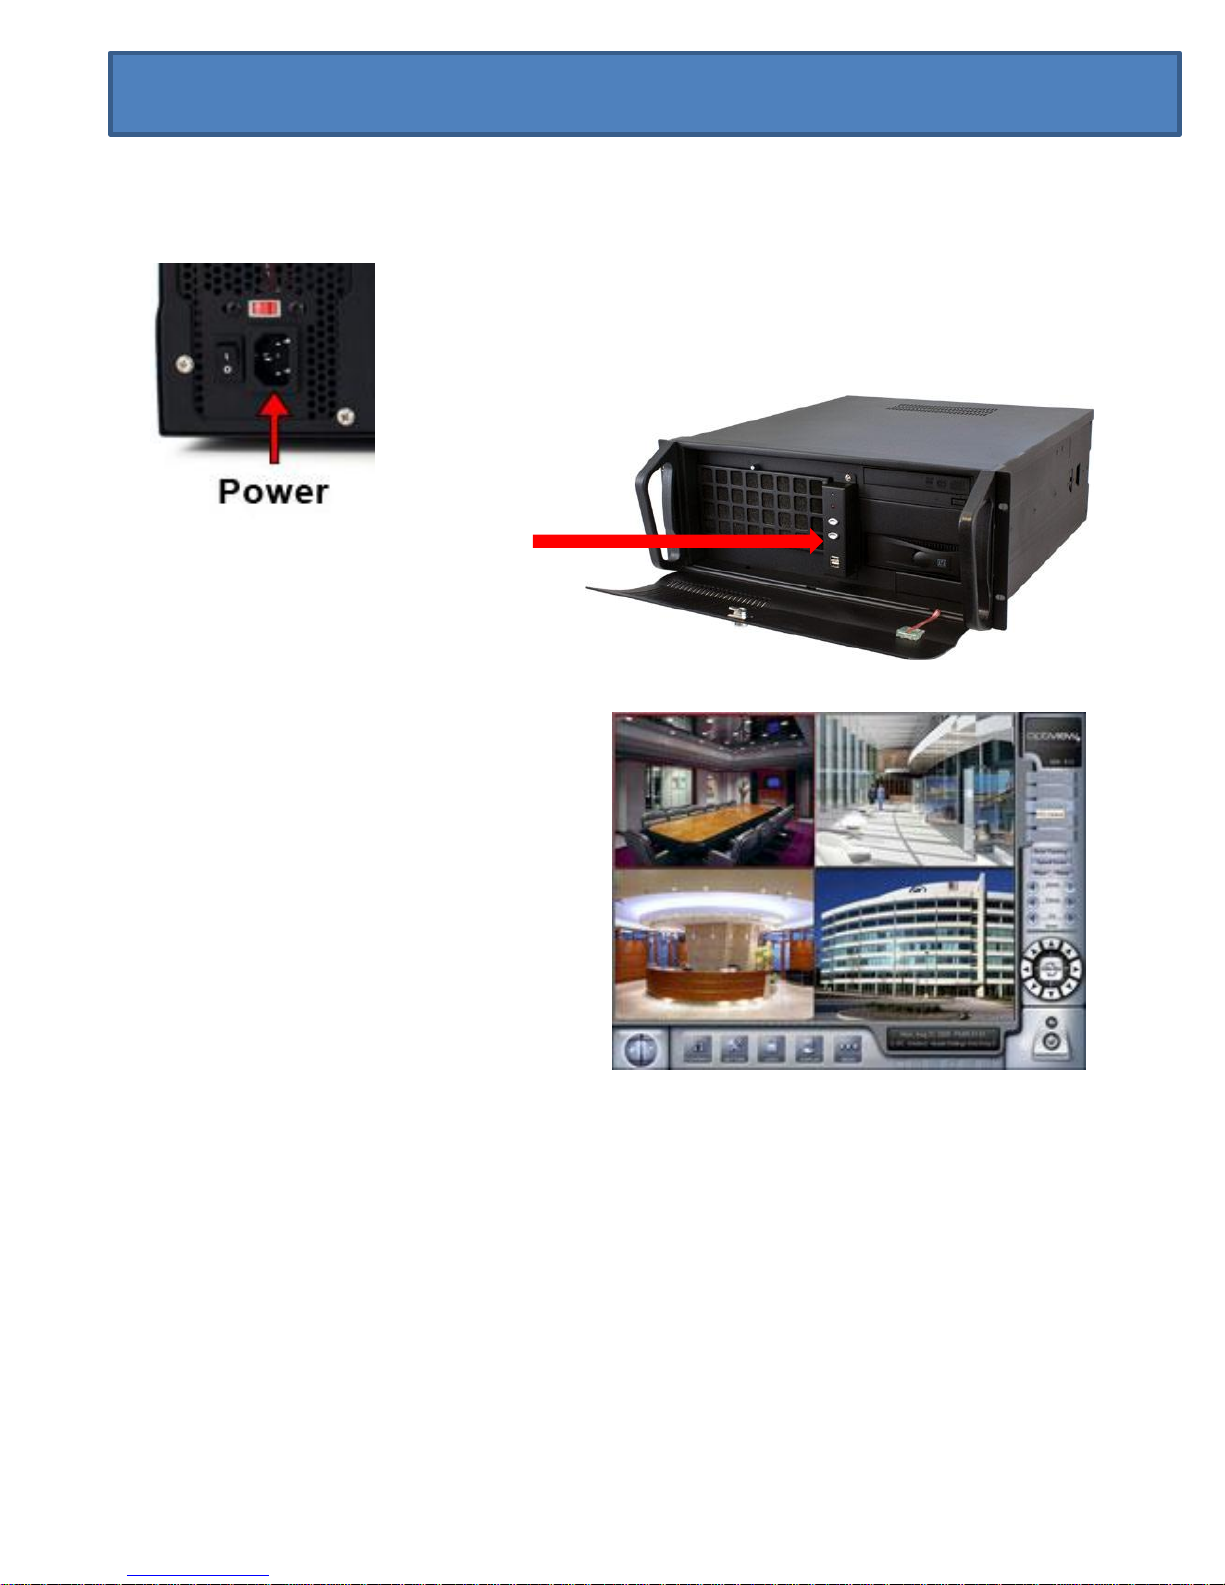
II. Starting your DVR System
1. After power cable, USB mouse, keyboard, monitor and all your camera cables have
been connected to the DVR system, you are now ready to turn ON your DVR
system.
Turn ON the main black color power
switch at the back of the computer,
the DVR will start to load the
software in a few moments.
2. The DVR settings was all preconfigured
at our facility to meet the optimum level
of performance. It is already set to
automatically record security video as
soon as the software finished loading on
your screen. It will record based on
motion detection to allow the system to
store more days of recorded video on
your hard drive at optimum level.
Top: Front power switch
Bottom: Reset power switch
3. Things you might want to customize or change on your DVR system:
a. setup up personalized username and password
b. setup the DVR on your private network
c. change the date/time of the DVR clock, including time zone.
Note: The DVR Serial number is located at the top right corner of the software or at the back
panel of the DVR box. You need to have this ready before you call for technical support at
904-855-1121. Your DVR CD copy will contain DVR manuals, software and training video to
learn more about your DVR.
Page 4
III. Customize your DVR System: Create DVR User Accounts
A. Setup Personalized Username and Password
This task involves two way process.
First, we need to activate the DVR lock options, secondly, we will create the user
account with their username, password and assign user access rights which will limit
what they can do at the DVR system.
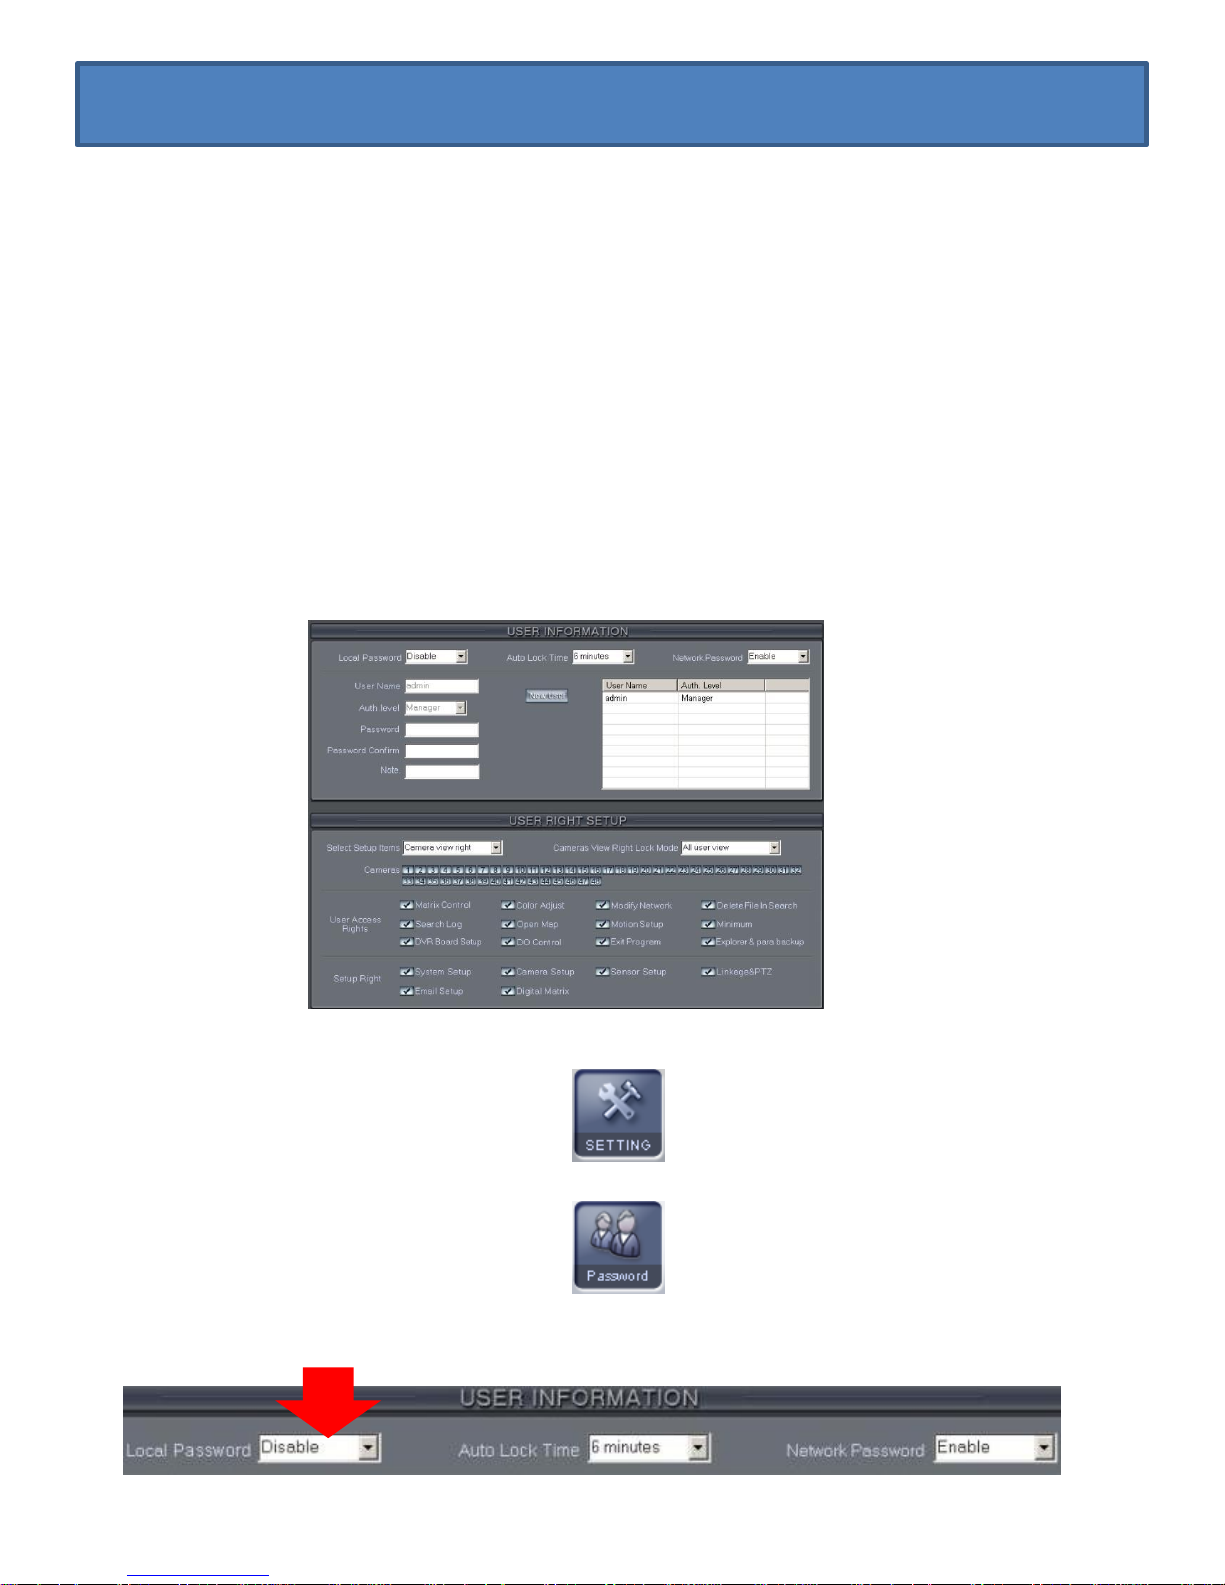
1. Activate the DVR Software Lock. Starting from the LIVE menu screen:
a. Click “Settings” button
b. Click “Password” button
c. Enable the DVR lock options as shown below:
Three most common things customized on a VR Enterprise DVR system:
A. setup up personalized username and password
B. setup the DVR on your private network
C. Change date and time clock of the DVR system
Page 5

III. Customize your DVR System: Create DVR User Accounts
2. Create DVR User Account – below is the user graphics menu to add a DVR user account.
b. Enter the username, authority level and password for your new account as shown
below:
c. Assign your own preferred specific User Right and Setup rights for the new user
account.
User rights includes operational access right s usually granted to change specific
settings of the DVR systems
Setup Rights are access right to main menu before a user can get into the details
of the operations’ user access rights.
d. Press exit button to save the parameters, when prompted, “Save “ the settings
Note: password should
only be 8 characters
long. Do not use special
characters such as
)(*&^%$#@!
a. Click “New User”
button
Page 6

B. Setup DVR on your private network
Note: This portion of information is provided by Optiview as a courtesy only. Optiview Inc. does not provide
detailed technical support in configuring private network devices like routers, similar network devices and/or problems in
configuring your local area network. If you encounter problems, please contact your network device manufacturer, Internet
Service Provider or Microsoft for technical support. If you need to have a detailed technical support in configuring your
private network, Optiview does offer a Networking Technical Support at the rate of $65.00 per hour (subject to change
without prior notice). This support requires the customer to have Internet subscription from your Internet Service provider
and a software will be installed on your computer to remotely configure your network devices (routers, modem etc…)
There are several process involved on this task which includes but not limited to:
* Connecting network cable of your DVR to you private
network device (routers or switch)
* Adding the DVR system to your local private network.
- Set a static IP address to you DVR system.
* Configure Network firewall for Port Forwarding
Here is a typical diagram how your network devices are interconnected:
1. Connecting network cables of DVR to your router/switch
a. Connect a CAT5 cable to your router or switch
b. Connect the opposite end of the CAT5 cable to your DVR computer through the network
port located at the back panel of the DVR computer.
IV. Customize your DVR System: Configure Network Setup
Page 7

2. Setup a Static IP address to your DVR system
What is an IP address?
IP addresses also known as network address are four sets of numbers separated by periods
that allow computers to identify each other. Every computer has at least one IP address,
and two computers should never have the same IP address. If they do, neither of them will
be able to connect to the local network or Internet.
Dynamic vs. Static IPs Most routers assign dynamic IP addresses by default. They do this
because dynamic IP address networks require no configuration. The end user can simply
plug their computer in, and their network will work. When IP addresses are assigned
dynamically, the router is the one that assigns them. Every time a computer reboots it asks
the router for an IP address. The router then hands it an IP address that has not already
been handed out to another computer. This is important to note. When you set your
computer to a static IP address, the router does not know that a computer is using that IP
address. So the very same IP address may be handed to another computer later, and that
will prevent both computers from connecting to the internet. So when you assign a static IP
addresses, it's important to assign an IP address that will not be handed out to other
computers by the dynamic IP address server. The dynamic IP address server is generally
referred to as the DHCP server.
Step 1: Click on Windows Logo button on your lower left corner, on your “search programs” or
RUN box (for XP) box type in CMD
Step 2: At the command prompt, type in “ipconfig /all” as shown below
IV. Customize your DVR System – Configure Network Setup
Page 8

Step 3: The command prompt may look different on your screen, but it display a line “Ethernet
adapter Local Area Connection”. Type ipconfig /all in that window, and then press the
enter key. This will display a lot of network information. If it scrolls off the top you may
need to enlarge the window or use the scroll bar to scroll down and look for “Ethernet
adapter Local Area Connection”.
Step 4: You need to write down some of the information in this window. Take down the IP
address, Subnet Mask, Default Gateway, and DNS Servers. Type exit in this window, then
press the enter key to close it.
Step 5: Assign a network address to DVR.
5.1 On your DVR desktop screen as shown below, click on LAN Setup icon.
IV. Customize your DVR System – Configure Network Setup
LAN Setup
Page 9

5.2 Double click on the Local Area connection icon
5.3 Click Properties >>>>> highlight Internet Protocol version 4 (TCP/IP), click OK.
5.4 Enter the local network address to be use for the DVR system. Every network is using a
different set of network address range, check with your modem or router as to what range
of network address to use. Usually, Linksys routers have a network address range starting
at 192.168.1.2 >>>> up to 253. If you have Linksys, you may use 192.168.1.200 for your
DVR. Make sure you check with your router, as this is just an assumption. Refer to your
notes from Step 4 to give you an idea what is the range of network address used by your
router.
Use the following IP address
IP address: 192.168.1.200
Subnet Mask: 255.255.255.0
Default Gateway: 192.168.1.1
Use the following DNS server:
Preferred DNS Server: 192.168.1.1
Page 10

Page 11

Step 1: From your DVR desktop screen, using your mouse, double click the time clock at the
lower right corner of your desktop screen. To simply change the date and time, click your
mouse on “Change date and time settings….”
Step 2: Click “Change Date and Time….” to change date and time. Click your mouse on the date,
then click your mouse on the hour or minutes to change the time. Use the arrow
up/down on the right side of the time as shown here to change the time. Click “Change
Time Zone” if you need to change your time zone and select the correct zone for your
state, then click OK when finished.
V. Customize DVR System Time Clock
 Loading...