

Page 1
quick start guide
* Technical Notes
© 2012 NaturalPoint, Inc. All rights reserved.
All other company and or product names are the trademarks of their respective owners.
Friendly Customer Service
If you have any difficulties after reviewing the
documentation, visit our website or call
1.541.753.6645 between 9AM-5PM PT.
Visit www.OptiTrack.com for the latest software
support, sample code, and product news.
Important: Flex 13 cameras must be directly connected to an
OptiTrack OptiHub 2 in order to power their IR LEDs.
Windows XP, Vista, and 7 users must have administrative privileges to
install the USB drivers.
P-OT-112.1202
Page 2
SMPTE
Time Coder
(optional)
External
Trigger
(optional)
Acquisition
System
(optional)
OptiHub 2
(Master Hub)
OptiHub
OptiHub
6 x Cameras
6 v100 R2
6 v100 R2
Hi Speed
USB 5m
Hi-Speed
USB 5m
OptiSync Mode
(No RCA Cables
Required)
Hub to Hub
Sync
Up to 2 Active
USB Extensions
5m
(optional)
1
2
3
4
5
6
7
8
9
10
11
13
14
15
16
12
* Synchronizing Multiple Cameras
1. Install Software
2. Plug In Hardware
Download the latest software installer from the website.
Run the installer and follow its prompts.
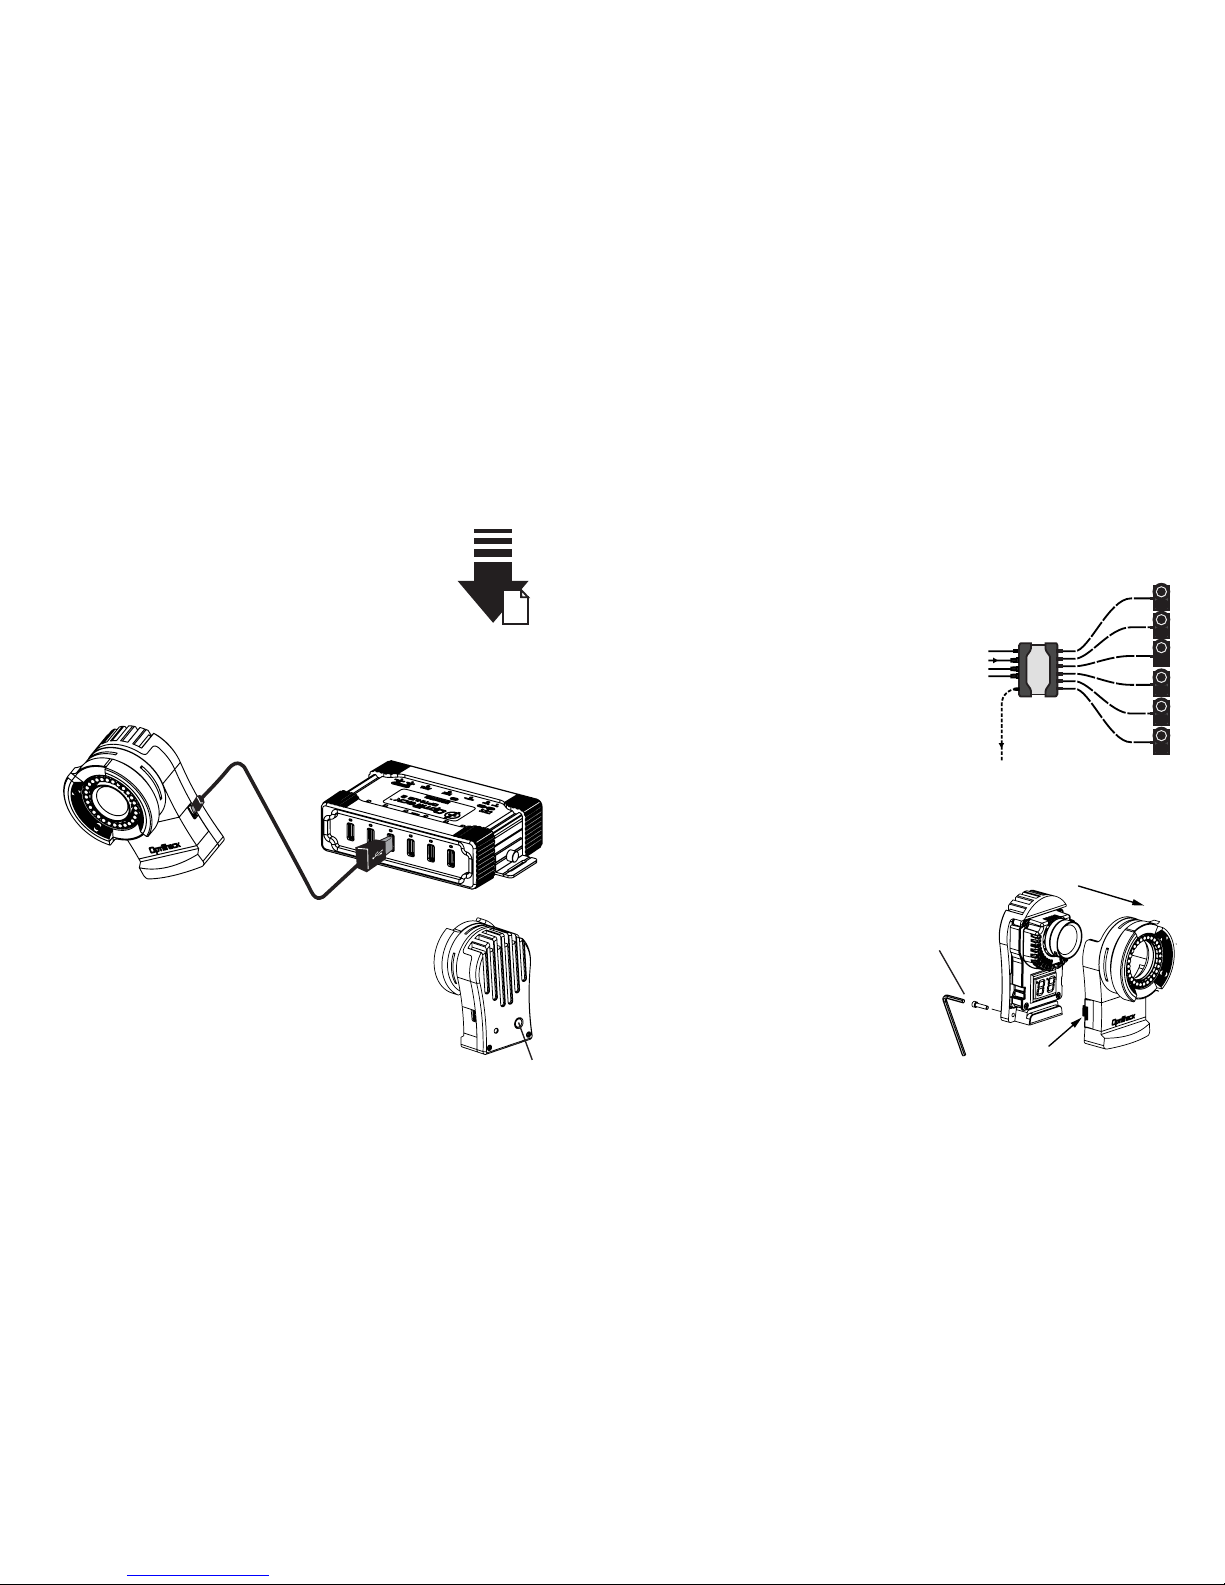
Connect the Flex 13's cord to a USB port of an OptiHub 2.
Multiple OptiTrack cameras may be synchronized for greater
precision via OptiSync (sync over USB cable).
OptiSync requires cameras connected to OptiHubs.
Flex 13 cameras require an OptiHub 2 and may not
be mixed with V100:R2 cameras in the same system.
See the hub setup schematics included with your
OptiHub 2, or download the diagrams from the
OptiHub 2 product page at OptiTrack.com.
Initiate camera synchronization via software.
* Customizable Camera Button
The Flex 13 camera features a customizable button on
the back, in the bottom right corner. This button can be
used to zoom in on the camera's 2D view for aiming and
inspection in the software.
* Case Release Button
The front of the Flex 13 case can be easily removed to facilitate
lens focus. Firmly press the case release
button then gently pull the front
of the case off the camera.
The case front can be locked
in place more securely if
desired by using the screws
and hex key included with
the camera.
optional hex key
and screws
press case
release button
customizable button
 Loading...