

Page 1

To begin using the CloudGate, follow the steps in this
guide:
1. Register your CloudGate on the Option provisioning
server
Go to the Option Provisioning server
www.cloudgateuniverse.com
In case you have no account yet you will be
asked to make one. Afterwards you have to
follow the instructions to activate your device.
Or
In case you have already an account you just
have to Sign in.
Click on the “Devices” tab on the top of the
screen.
Click on “activate new device”
2. Attach the appropriate antennas to the SMA connectors on the front of the device. Please take care to hold the
antenna and only rotate the nut to fix the antenna. Do not rotate the antenna itself.
3. Make sure you have a valid SIM card available.
OPTION NV - Gaston Geenslaan 14 - 3001 Leuven Belgium
T +32 16 317 411 - F +32 16 207 164 - www.option.com
This product complies with the essential
requirements
of R&TTE directive 1999/5/EC.
The Declaration of Conformity can be found in
the CloudGate documentation.
(www.cloudgateuniverse.com)
Page 2
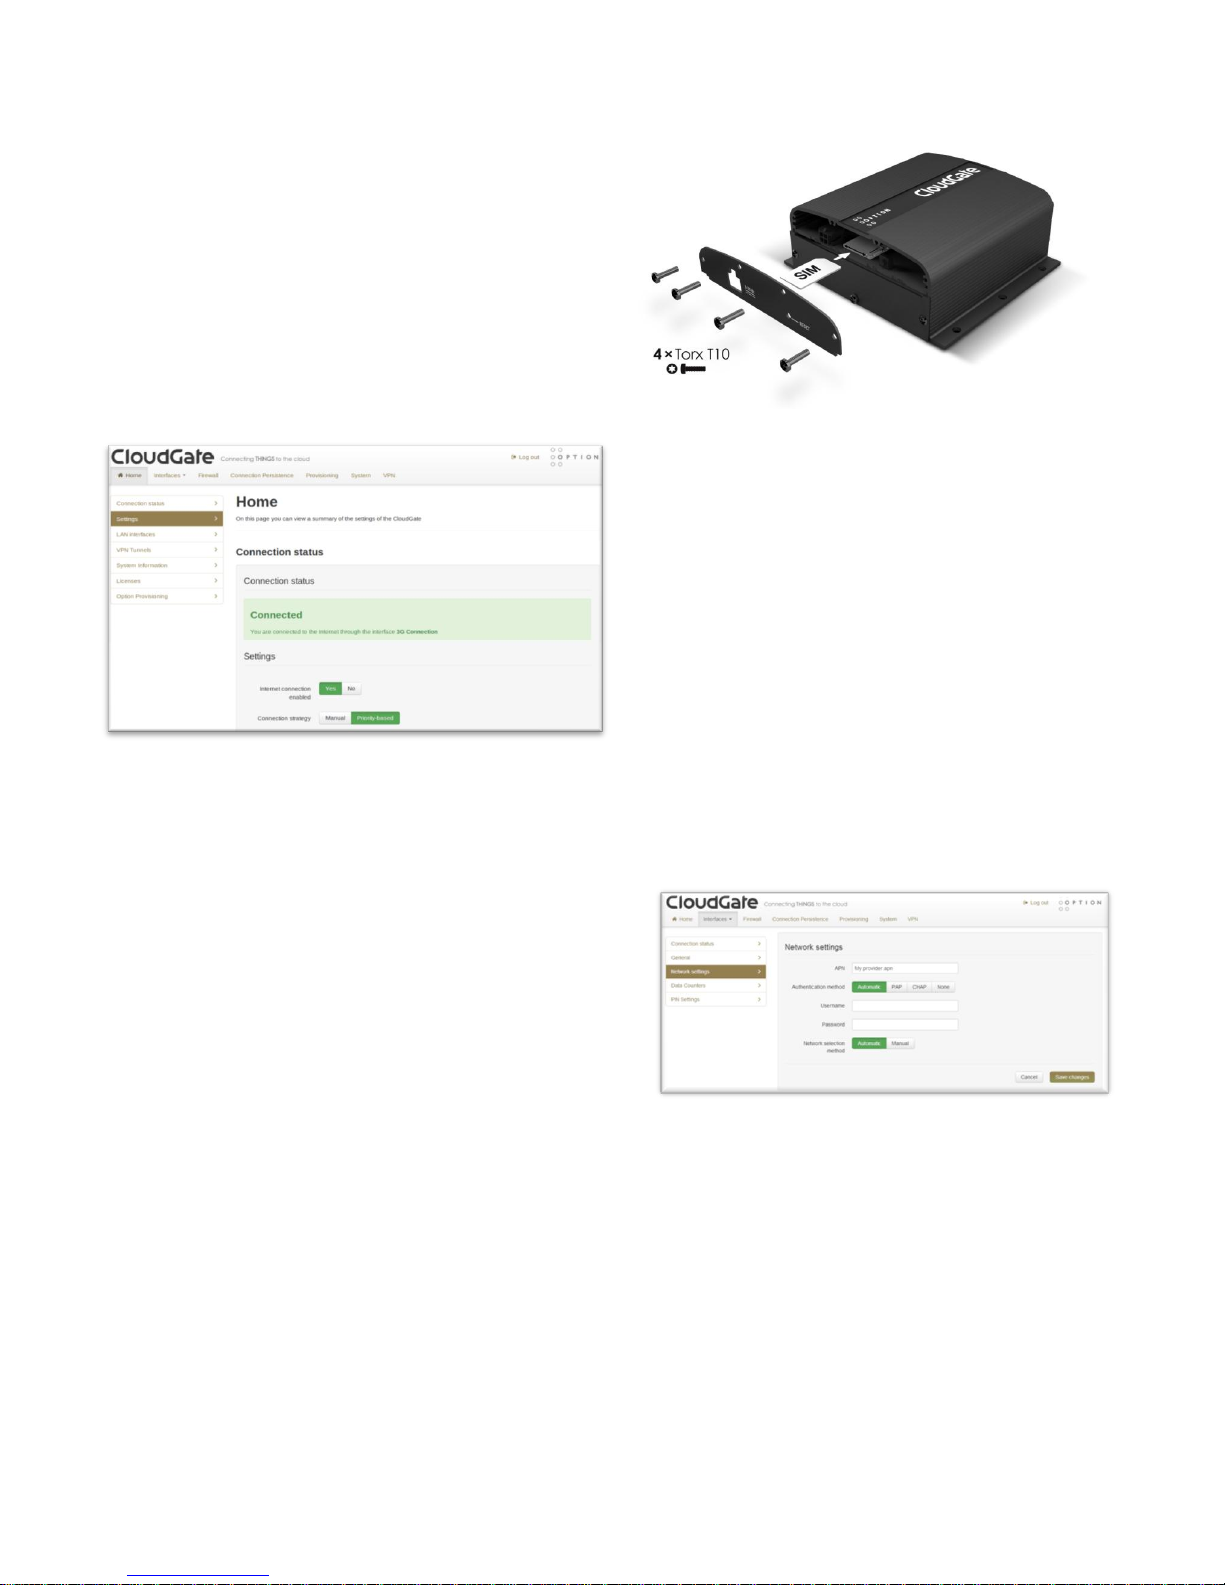
4. To install the SIM card:
Remove the four Torx T10 screws from the top
cover plate on the back of the unit and remove
the plate.
Insert the SIM into the SIM slot as shown in the
picture on the right.
Replace the top cover plate and its four Torx
T10 screws.
5. Power up the CloudGate by plugging in
the appropriate power supply cable (933VDC) into the connector on the back
of the device.
6. Connect an Ethernet cable to the
CloudGate’s Ethernet port on one end
and a computer on the other end.
7. Open a web browser on the computer
and enter the address 192.168.1.1 into the
address bar. Enter the default username
(admin) and password (admin). The
window as seen on the left should
appear.
8. Click on the “Interfaces” tab on the top menu bar
and select “3G Connection”.
9. The network settings will populate automatically for
many SIM cards. Check the settings of the APN,
Username, and Password. Update if appropriate.
10. Click “Save changes”.
11. Connection to the network will be setup automatically.
For more information, please visit:
www.cloudgateuniverse.com
 Loading...