

GlobeSurfer
®
i CON 7.2 / 7.2 S
User Guide

2
TABLE OF CONTENTS
1. Welcome to the Globesurfer ® i CON 7.2 / 7.2 S 3
2. Features 4
3. System Requirements 5
4. Globesurfer ® i CON 7.2 / 7.2 S Package Content 5
5. Installing and setting up Globesurfer ® i CON 7.2 / 7.2 S 5
6. Using your Globesurfer ® i CON 7.2 / 7.2 S 6
7. LED Status Information 8
8. Troubleshooting 9
9. Detailed Technical Specifications 11
10. Technical Support 12
Appendix A: Limited Warranty 12
Appendix B: Safety and Health tips 14
Appendix C: Qualcomm Licensing information 15
IMPORTANT NOTICE
Please check with your network provider for advice on network coverage to ensure
satisfactory performance of this device. Other characteristics such as network cell
hand-over, dead coverage spots, geographic or structural obstructions, etc. may also
affect the performance of the data transmission.
Before you proceed, be sure to read the Safety and Health Tips in Appendix B.

3
GlobeSurfer ® i CON 7.2 / 7.2 S USER GUIDE
1. WELCOME TO GLOBESURFER® I CON 7.2 FAMILY
The Globesurfer ® i CON 7.2 / 7.2 S products are offering the simplest Internet
access method ever: Insert your SIM card, plug it into any PC or laptop through
its USB connector and you are ready to surf at DSL-speed using the latest
HSDPA wireless network technology.
The Globesurfer ® i CON 7.2 / 7.2 S products combine the convenience of high
speed wireless connectivity with extreme ease of use. There is no need for
installing software, for connecting DSL wires and filters or for setting parameters.
Just plug in the Globesurfer ® i CON 7.2 / 7.2 S, and let the installer do its work
(driver and connection software installation). You are then one click away to
access the Internet: e-mail, Instant messaging, browsing, on-line gaming,
downloading, streaming, ...
Your Globesurfer ® i CON 7.2 / 7.2 S is a truly versatile device for easy Internet
access.
Connect anytime, anywhere!
4
2. FEATURES
• Easy installation thanks to Zero CD™ Plug ‘n’ Play
• Easy connection, directly to the PC or by using a provided extension cable
• Download and upload speeds:
GlobeSurfer ® i CON 7.2 / 7.2 S: High speed with HSDPA and UMTS data
(up to 7.2 Mbps downlink and 384 Kbps uplink) and backward
compatible with EDGE / GPRS / GSM data connectivity (up to 247 Kbps)
• Connectivity:
• GlobeSurfer ® i CON 7.2: Global connectivity with triple-band
HSDPA / UMTS (850 / 1900 / 2100 Mhz) and quad-band
EDGE / GPRS / GSM (850 / 900 / 1800 / 1900 Mhz)
• GlobeSurfer ® i CON 7.2 S: European connectivity with single-band
HSDPA/UMTS (2100 Mhz) and quad-band EDGE / GPRS / GSM
(850 / 900 / 1800 / 1900 Mhz)
• Always gets the best out of the network, even on the borders of coverage,
thanks to its Advanced Receiver Technology, incorporating Receiver
Diversity and Equalisation. Only for GlobeSurfer ® i CON 7.2.
• Visual feedback on connection status with the LED and the easy connection
software, including signal strength indication
• Compatible with nearly all modern Desktop and laptop PC’s equipped with
Microsoft ® OS (2000, XP, XP Pro and Vista) and MAC OS X

5
GlobeSurfer ® i CON 7.2 / 7.2 S USER GUIDE
3. SYSTEM REQUIREMENTS
• Windows® 2000, XP, XP Pro, Vista or MAC OS X
• Free USB (Type A) port
• 5Mb of free hard disk space
4. I CON 7.2 / 7.2 S PACKAGE CONTENT
• Globesurfer ® i CON 7.2 / 7.2 S
• USB Extension Cable
• Quick Start Guide
In some cases the package may contain a SIM card supplied by your
Mobile Operator.
5. INSTALLING AND SETTING UP GLOBESURFER ® I CON 7.2 / 7.2 S
Please use the Quick Start Guide to prepare your Globesurfer ® i CON 7.2 / 7.2 S
for first use.
6
6. USING YOUR GLOBESURFER ® I CON 7.2 / 7.2 (S
)
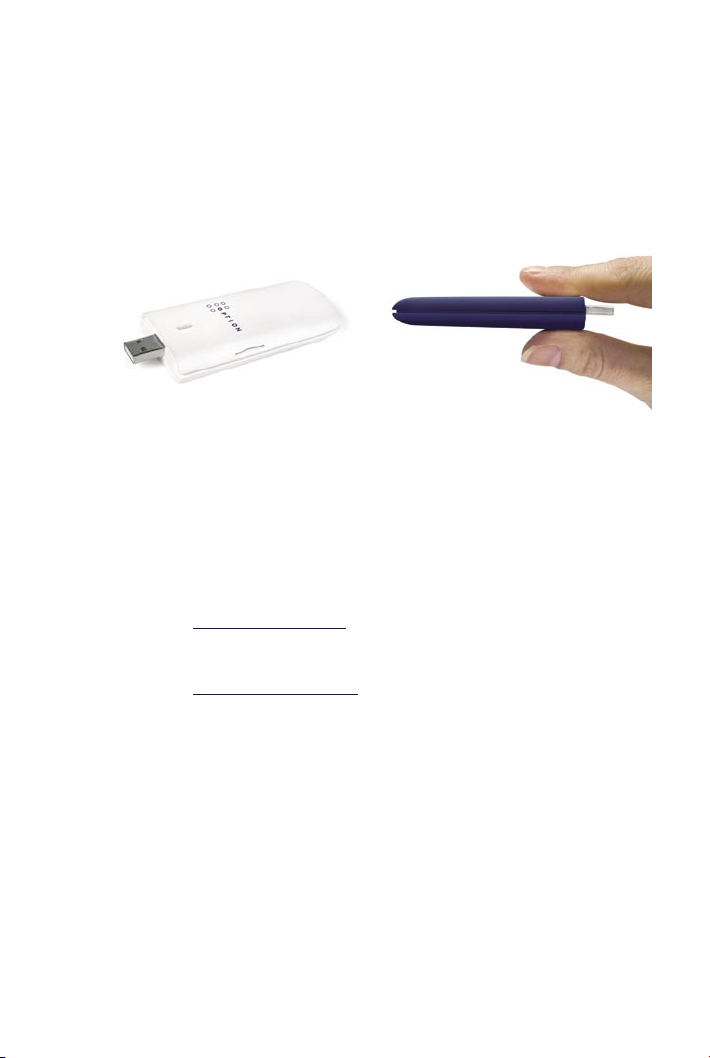
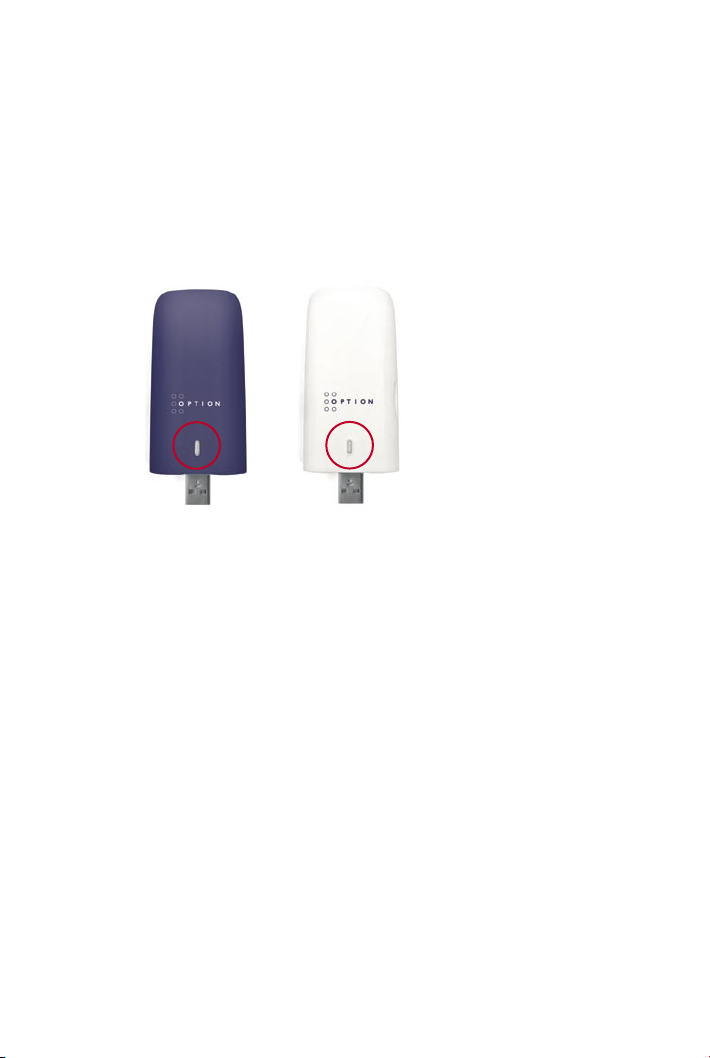
Step 1 – Start up your computer. Insert the USB connector of the
GlobeSurfer ® i CON 7.2 / 7.2 S in a free USB slot or use an
extension cable.
Same procedure for GlobeSurfer ® i CON 7.2 (blue)
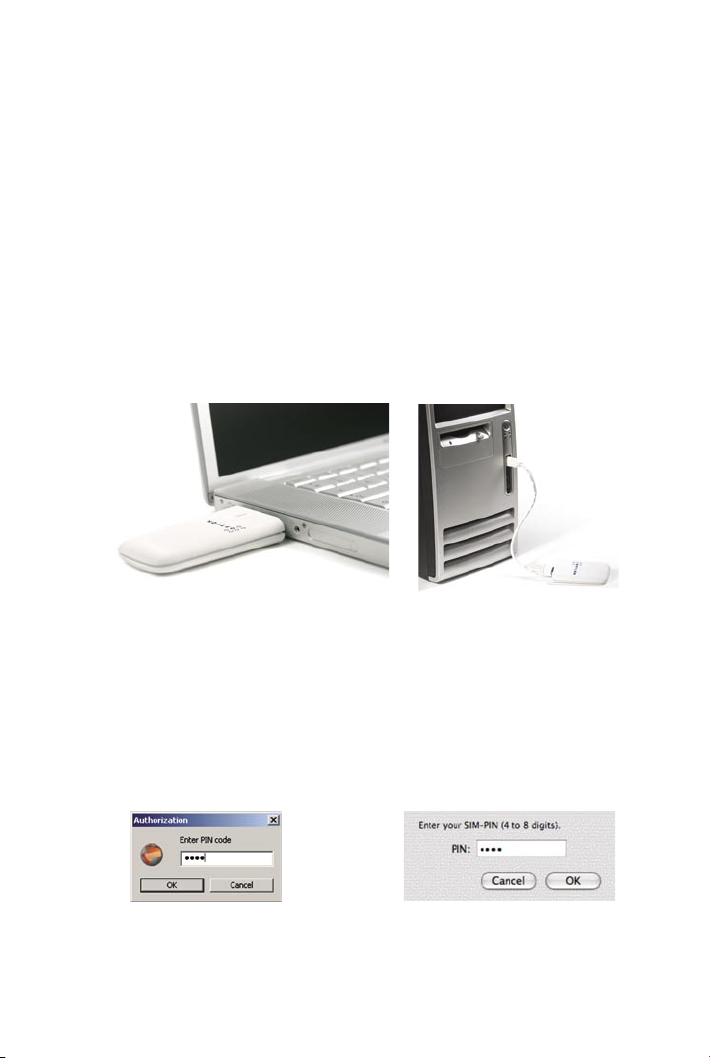
Step 2 – Enter your SIM pin code
(conditional, if you didn’t disable the pin code on your SIM)
Windows OS Mac OS
7
GlobeSurfer ® i CON 7.2 / 7.2 S USER GUIDE
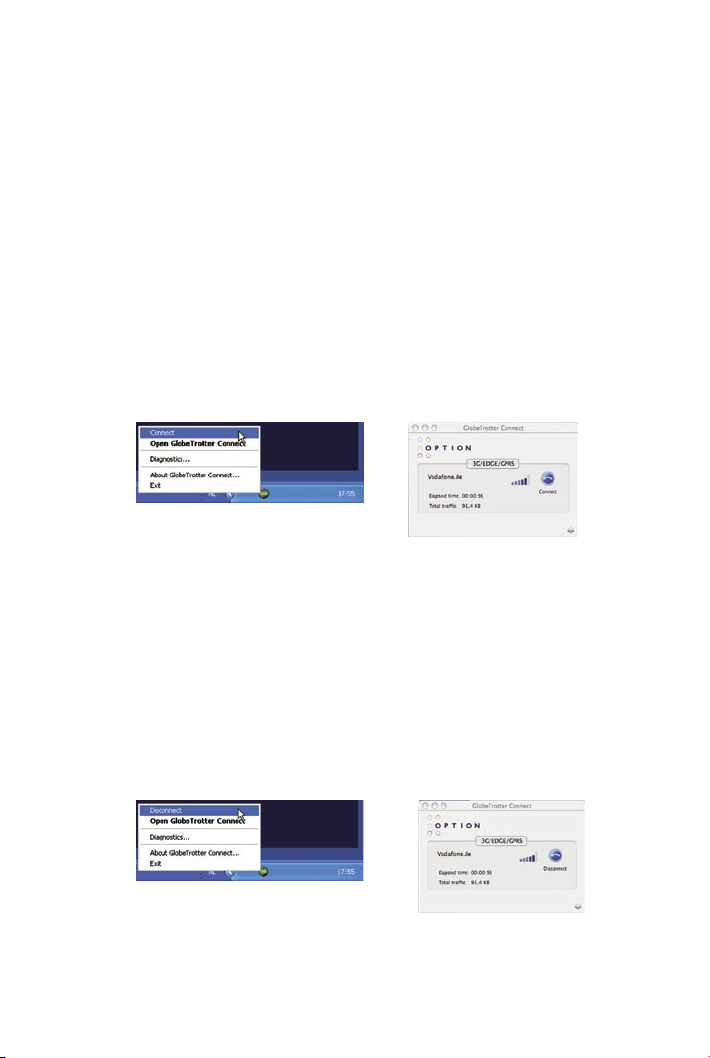
Step 3 – Connecting
Windows OS
You can now connect to the Internet using
the GlobeTrotter Connect application found
in the system tooltray: right click on it and
click “connect”.
Mac OS
Open the ‘Application’ folder and run
‘GlobeTrotter Connect’. In this tool,
click the connect button.
Disconnecting can be done in the same way:
Windows OS
Right click on the GlobeTrotter Connect
application found in the system tooltray and
click “disconnect”.
Mac OS
Open the ‘Application’ folder and run
‘GlobeTrotter Connect’. In this tool,
click the disconnect button.
8
7. LED STATUS INFORMATION
LED status
• Off:
• Fast blinking:
• Slow blinking:
• Permanently on:
• Very fast blinking:
Meaning of LED Status
GlobeSurfer ® i CON 7.2 / 7.2 S not powered
Searching for network
Ready to connect (attached on network)
GlobeSurfer ® i CON 7.2 / 7.2 S connected
(to the Internet)
A problem occurred. Check problem causes in the user manual
or disconnect and reconnect the GlobeSurfer ® i CON 7.2 / 7.2 S
to the computer.
Advanced use info: single blinking means that the GlobeSurfer ® i CON 7.2 / 7.2 S
is registered to the network (GSM or UMTS); double blinking means that it is as
well attached to the data network.

9
GlobeSurfer ® i CON 7.2 / 7.2 S USER GUIDE
8. TROUBLESHOOTING
SYMPTOM POSSIBLE CAUSE POSSIBLE SOLUTION
No LEDS burning
on GlobeSurfer ®
i CON 7.2 / 7.2 S
GlobeSurfer ®
i CON 7.2 / 7.2 S is
not connected to a
working USB port
Check if the GlobeSurfer ® i CON
7.2 / 7.2 S is well plugged in into a USB
port or check the connection of the
cable if you are using this. If still not
working, try to use another USB port.
LED does not start
blinking (GlobeSurfer ®
i CON 7.2 / 7.2 S
does not attach to
GPRS or UMTS)
No SIM inserted
Disconnect the GlobeSurfer ® i CON
7.2 / 7.2 S. Insert the SIM and reconnect
the GlobeSurfer ® i CON 7.2 / 7.2 S
Insufficient signal
strength
Move GlobeSurfer ® i CON 7.2 / 7.2 S
to location with better coverage (e.g.
window). The extension cable can be of
help for this. Use the signal strength tool
to see the signal strength.
SIM card was not
present when powering
(connecting to USB
port) the GlobeSurfer ®
i CON 7.2 / 7.2 S
Disconnect the GlobeSurfer ® i CON
7.2 / 7.2 S. Insert the SIM and reconnect
the GlobeSurfer ® i CON 7.2 / 7.2 S.
Drivers are not properly
loaded (GlobeSurfer ®
iCON 7.2 / 7.2 S shows
yellow exclamation
marks in Device
Manager)
Close all ports before disconnecting
GlobeSurfer ® iCON 7.2 / 7.2 S (cable) from
your computer. (Close communication
software that might be accessing
GlobeSurfer ® i CON 7.2 / 7.2 S)

10
SYMPTOM POSSIBLE CAUSE POSSIBLE SOLUTION
LED does blink, but
the GlobeSurfer ®
i CON 7.2 / 7.2 S
doesn’t connect
The APN is not correct
Check the settings with the ones that
you’ve obtained from your network
operator
You are roaming and
the network you are
using there does not
allow data links with
your home operator
Manually select another network (that
supports data links with your home
operator)
No or weak UMTS /
HSDPA network where
you are
Check in the communication software
tool which settings are used (“UMTS
preferred is recommended”). Check also
in the signal strength tool which network
is used (UMTS / HSDPA or GPRS / EDGE)
Your connection
software doesn’t
detect the
GlobeSurfer ®
i CON 7.2 / 7.2 S
Faulty driver
installation
Remove previously installed connection
software. Also remove any other drivers
of similar devices. Re-install then the
GlobeSurfer ® i CON 7.2 / 7.2 S software.
Conflict with other
programs
Disable or remove any other
communication program that might
connect with the GlobeSurfer ®
i CON 7.2 / 7.2 S
Slow speed
No or weak UMTS /
HSDPA network where
you are
Check in the communication software
tool which settings are used (“UMTS
preferred is recommended”). Check also
in the signal strength tool which network
is used (UMTS / HSDPA or GPRS / EDGE).

11
GlobeSurfer ® i CON 7.2 / 7.2 S USER GUIDE
9. DETAILED TECHNICAL SPECIFICATIONS
• HSDPA / UMTS Air Interface:
• Triple-band WCDMA 850 / 1900 / 2100 MHz for i CON 7.2,
single-band WCDMA 2100 Mhz for i CON 7.2 S
• UMTS: 384 Kbps operation in downlink, 384 Kbps in uplink
• HSDPA: 7.2 Mbps in downlink & 384 Kbps in uplink
• Dual antenna receiver diversity (on 2100 Mhz): only for i CON 7.2
• 3GPP FDD compliant, up to 7.2 Mbps peak rate
• UE Power Class 3
• Receiver equalisation
• EDGE / GSM Air Interface:
• Quad-band: 850 / 900 / 1800 / 1900 MHz (US-Cellular, EGSM, DCS and
US-PCS bands)
• EDGE Power Class E2, GSM Power Class 1 at 1800 / 1900 Mhz and
Power Class 4 at 850 / 900 Mhz
• GPRS / EDGE coding scheme support: CS1-4 and MCS1-9
• Multislot GPRS / EDGE Class 12
• Powering is done through the USB interface
• USB 2.0 Full Speed interface (USB 1.1)
• Status LED, indicating the connection status
• SIM card interface compliant with 3GPP 31.101 and 31.102 supporting 1.8
and 3V UICCs
• Environmental Operating temperature: 0 to +40º C
• RoHS compliant

12
10. TECHNICAL SUPPORT
Questions and answers regarding GlobeTrotter Connect can be found on
our Support website:
http://support.option.com/support/faq.php
Technical questions can be posted after registering through our online
Support Web on: http://support.option.com/support/newticket.php
For registering please go to: http://support.option.com/support/register.php
APPENDIX A: LIMITED WARRANTY
• HARDWARE: Option warrants its products to be free from defects in workmanship
and materials, under normal use and service, for one year. If a product does not
operate as warranted during the applicable warranty period, Option shall, at its
option and expense, repair the defective product or part, deliver to Customer an
equivalent product or part to replace the defective item. All products replaced will
become property of Option. Replacement products may be new or reconditioned.
Option shall not be responsible for any software, firmware, information or memory
data of Customer contained in, stored on, or integrated with any products returned
to Option pursuant to any warranty.
• SOFTWARE: Option warrants that the software programs licensed from it will perform
in substantial conformance to the program specifications therefore for a period of
ninety (90) days from the date of purchase from Option or its Authorized Reseller.
Option warrants the magnetic media containing software against failure during the
warranty period. No updates are provided. Option’s sole responsibility hereunder
shall be (at Option’s discretion) to replace any defective media with software, which
substantially conforms to Option’s applicable published specifications. Customer
assumes responsibility for the selection of the appropriate applications program
and associated reference materials. Option makes no warranty that its products
will work in combination with any hardware or applications software products

13
GlobeSurfer ® i CON 7.2 / 7.2 S USER GUIDE
provided by third parties, that the operation of the software products will be
uninterrupted or error-free, or that all defects in the products will be corrected.
For any third-party products listed in the Option software product documentation or
specifications as being compatible, Option will make reasonable efforts to provide
compatibility, except where the non-compatibility is caused by a “bug” or defect in
the third party’s product.
• STANDARD WARRANTY SERVICE: Standard warranty service for hardware
products may be obtained by delivering the defective product, accompanied by a
copy of the dated proof a purchase, to Option’s Corporate Service Center or to an
Authorized Option Reseller during the applicable warranty period. Standard warranty
service for software products may be obtained by calling Option’s Corporate Service
Center or an Authorized Reseller, within the warranty period. Products returned to
Option’ Corporate Service Center must be pre-authorized by Option with a Return
Material Authorization (RMA) number marked on the outside of the package, and
sent prepared, insured, and packaged appropriately for safe shipment. The repaired
or replaced item will be shipped to Customer, at his own expense, not later that thirty
(30) days after receipt by Option.
• WARRANTIES EXCLUSIVE: if an Option product does not operate as warranted
above, customer’s sole remedy shall be repair or replacement, at Option’s option.
The foregoing warranties and remedies are exclusive and are in lieu of all other
warranties, express or implied, either in fact or by operation of law, statutory or
otherwise, including warranties of merchantability and fitness for a particular
purpose, Option neither assumes nor authorizes any person to assume for it any
other liability in connection with the sale, installation, maintenance or use of its
products. Option shall not be liable under this warranty if its testing and examination
disclose that the alleged defect in the product does not exist or was caused by
Customer’s or any third person’s misuse, neglect, improper installation or testing,
unauthorized attempts to repair, or any other cause beyond the range of intended
use, or by accident, fire or other hazard.

14
• LIMITATION OF LIABILITY: In no event, whether based in contract or tort
(including negligence) shall Option be liable for incidental, consequential,
indirect, special or punitive damages of any kind, or for loss of revenue, loss
of business, or other financial loss arising out of or in connection with the sale,
installation, maintenance, use, performance, failure, or interruption of its products,
even if Option or its Authorized Reseller has been advised of the possibility of
such damages.
APPENDIX B: SAFETY AND HEALTH TIPS
• Do not expose GlobeSurfer ® i CON 7.2 / 7.2 S to extreme temperatures such as
found near a hot radiator or stove or in a car parked in the sun.
• Do not expose GlobeSurfer ® i CON 7.2 / 7.2 S to extreme cold temperature such as
a car parked outdoors in winter.
• Do not expose GlobeSurfer ® i CON 7.2 / 7.2 S to water and moisture.
• To prevent possible interference with aircraft systems, safety regulations require
you to have permission from a crewmember to use GlobeSurfer ® i CON 7.2 / 7.2 S
while the plane is on the ground. You must not use GlobeSurfer ® i CON 7.2 / 7.2 S
while the plane is in the air.
• GlobeSurfer ® i CON 7.2 / 7.2 S may cause interference some implanted cardiac
pacemakers, equipment for people with hearing impairments and all other
implanted medical equipment.
• Do not use your GlobeSurfer ® i CON 7.2 / 7.2 S in a potentially explosive
atmosphere.
• Do not attempt to disassemble GlobeSurfer ® i CON 7.2 / 7.2 S.
Doing so will void warranty.
• Service should only be performed by Authorized Service Centers.

15
GlobeSurfer ® i CON 7.2 / 7.2 S USER GUIDE
APPENDIX C: QUALCOMM LICENSING INFORMATION
Licensed by QUALCOMM Incorporated under one or more of the following United
States Patents and/or their counterparts in other nations: 4,901,307; 5,490,165;
5,056,109; 5,504,773; 5,101,501; 5,506,865; 5,109,390; 5,511,073; 5,228,054;
5,535,239; 5,267,261; 5,544,196; 5,267,262; 5,568,483; 5,337,338; 5,600,754;
5,414,796; 5,657,420; 5,416,797; 5,659,569; 5,710,784; 5,778,338
Copyright Option nv © 2007 all rights reserved. No parts may be reproduced without written permission.
The Apple logo, Mac and Mac OS are trademarks of Apple Computer, Inc.
Option nv, Gaston Geenslaan 14, 3001 Leuven, Belgium.
www.option.com

GlobeTrotter Connect
User Guide
Connect anytime, anywhere

2
TABLE OF CONTENTS
1. SYSTEM REQUIREMENTS 3
2. PRODUCT FEATURES 3
3. SHORT DESCRIPTION AND INTENDED USE 3
3.1. Basic Use 3
4. INSTALLING AND SETTING UP GLOBETROTTER CONNECT 4
4.1. Installation 4
4.2. Installation process 6
4.3. Running GlobeTrotter Connect 7
4.4. Entering your PIN code 7
4.5. Checking Status 7
4.6. Exit GlobeTrotter Connect 8
5. SETTING UP A CONNECTION TO THE INTERNET 9
5.1. Connecting to the Internet 9
5.2. Disconnecting 10
5.3. Changing the program options 10
5.3.1. APN 11
5.3.2. Enable / Disable the Pin Code 11
5.3.3. Technology Selection 11
6. PRODUCT SUPPORT AND ADDITIONAL HELP 12
7. PRODUCT SUPPORT AND ADDITIONAL HELP 14
7.1. Technical Support 14
APPENDIX A: LIMITED WARRANTY 15

3
GlobeTrotter Connect USER GUIDE
1. SYSTEM REQUIREMENTS
Windows® 2000, XP, Vista
5Mb free hard disk space
2. PRODUCT FEATURES
•
Easy installation
•
Simple intuitive user interface
•
Compatible with most modern desktop and laptop PC’s equipped with
Microsoft Windows® 2000, XP, Vista
3. SHORT DESCRIPTION AND INTENDED USE
The GlobeTrotter Connect application is a small, easy to use tool to manage your
connection to the Internet over 2G and 3G mobile networks. It is designed for use
with all of Option’s data products.
3.1. Basic Use
The focus is on simplicity and most users will use it only in basic mode,
where it displays a window with network information and a Connect button.
The main purpose is therefore simply to Connect/Disconnect to and from
the Internet.
• Figure 1: GlobeTrotter Connect For Basic View
NOTE: Some versions of GT Connect contain an SMS module. In this case
the Close button says ‘SMS Centre’.

4
4. INSTALLING AND SETTING UP GLOBETROTTER CONNECT
4.1. Installation
GlobeTrotter Connect can be installed in several ways:
1. You can install it from a CD if provided.
Browse on the CD-ROM and look for setup.exe.
Double click it to start the installation. The following screen appears.
• Figure 2: GlobeTrotter Connect Installation Wizard
Click “Next” to continue the installation and use the Browse button to
specify the folder where you want to have the software installed.
• Figure 3: Specify installation folder

5
GlobeTrotter Connect USER GUIDE
The GlobeTrotter Connect application is now ready for installation.
Click “Next” and the actual installation will start.
• Figure 4: GlobeTrotter Connect ready to Install
After GlobeTrotter Connect is installed, the following screen will be
shown. Click “Finish” to close the installation wizard.
• Figure 5: Successfully installed GlobeTrotter Connect
2. Download it free from http://www.option.com/support/login.shtml and
run the installation file. Follow the same procedure as described in 1.
3. If your Option data product is equipped with Zero-CDTM technology the
application is installed as soon as you connect the product for the first
time. For a short time the ZeroCD icon will be visible in Explorer.
• Figure 6: ZeroCD drive

6
4.2. Installation process
The installation process is straightforward.
You will see the following screen appear.
• Figure 7: GlobeTrotter Connect Installation Screen
Wait until the process is completed. You will see the following screen to
indicate that the software has been installed.
• Figure 8: GlobeTrotter Connect Installation Completed
In the mean time, you will see various balloons appear indicating the
installation process of your Option device. Wait until the following balloon to
indicate that the process has finished.
• Figure 9: Found New Hardware Balloon

7
GlobeTrotter Connect USER GUIDE
4.3. Running GlobeTrotter Connect
As soon as you plug in a compatible communications device (Card, USB
device…). GlobeTrotter Connect shows up in the Systray.
• Figure 10: GlobeTrotter Connect icon
GlobeTrotter Connect is now ready to make a connection. Don’t forget that
apart from the software the Option communications device also needs to be
ready. E.g. you can’t use the device while it isn’t registered to the network
or if the PIN code hasn’t been entered yet.
4.4. Entering your PIN code
If you have enabled the PIN code on your SIM card you will automatically be
asked to type it in. If enabled you won’t be able to use your data device until
you have typed in the PIN code. This will happen every time you power up
the device.
• Figure 11: Pin Code Dialog
4.5. Checking Status
Once the PIN code is entered (or immediately if you have disabled the PIN
code) the device will look for the network. You can check the status by
moving your mouse pointer over the GlobeTrotter Connect icon to get a quick
status report showing the network name, technology being used and the
signal quality:

8
• Figure 12: Network Information Balloon
If GlobeTrotter Connect is opened, you can see the signal strength
immediately in the lower right corner. If you need to know the signal strength
more accurately (e.g. in fringe areas you may want to determine the location
where you have the best reception) double-click on the signal strength
indicator to see an enlarged view of the signal strength indicator.
• Figure 13: Signal Strength Indicator
The indicator next to the signal strenght shows 3G if you have a 3G
coverage. Once you have a connection the indicator shows HS if an HSDPA
(HS) connection was established.
• Figure 14: Enlarged Signal Strength Indicator
4.6. Exit GlobeTrotter Connect
When you click
or this doesn’t kill the application.
It just retreats to the Systray (see Figure 10: GlobeTrotter Connect icon).
This behaviour is equivalent to other Windows applications such as MSN
messenger. To terminate the application you must ‘Right Click’ on the Title
Bar and choose Exit.

9
GlobeTrotter Connect USER GUIDE
• Figure 15: Exit GlobeTrotter Connect
5. SETTING UP A CONNECTION TO THE INTERNET
When you want to connect to the Internet you need to specify how you want to
connect. You can do this in the settings screen (see the “Changing the program
options” section of this manual).
As your mobile operator often preconfigures GlobeTrotter Connect for you the
settings may already be in there.
5.1. Connecting to the Internet
To connect to the Internet simply click on the ‘GlobeTrotter Connect’ icon
in the Systray (see screenshot) to display its menu. Click “Connect” to start
the Internet connection.
• Figure 16: Connect
If software has not been configured, connecting to the Internet will fail.
In this case refer to the “Changing the program options” section of
this manual.

10
5.2. Disconnecting
To disconnect, click on the Systray icon to show the menu and select
the “Disconnect” option.
• Figure 17: Disconnect
5.3. Changing the program options
Although GlobeTrotter Connect is a simple and straightforward software
it has a number of items that need to be configured at least once (either
preconfigured by the operator or manually by the user).
To change the settings, launch the Globetrotter Connect main window.
You can do this by double clicking on the Systray icon or by selecting
“Open GlobeTrotter Connect” from the Systray Icon menu.
• Figure 18: Basic View

11
GlobeTrotter Connect USER GUIDE
Click on “Show settings” to make the configuration options visible.
• Figure 19: Advanced View
5.3.1. APN
The Access Point Name (APN) defines your route to the Internet.
Your mobile operator can supply the APN (some operators may also
specify a user name and password if required).
Most users will never have to change this setting. If you have
entered the APN manually a button saying Automatic will appear
next to the Save button. If you press this button the software will try
to ‘guess’ the APN needed based on your SIM.
5.3.2. Enable / Disable the Pin Code
By clicking on ‘Enabled’ or ‘Disabled’ you can enable or disable the
PIN code on your SIM. For security reasons you will have to provide
the PIN code before you can disable the PIN code. If you enable the
PIN code you’ll have to enter a new code.
5.3.3. Technology Selection
Most of the time you should allow your data product to decide what
technology to use. Sometimes local conditions will make connecting

12
to the Internet difficult and the default setting “UMTS Preferred”
may not give optimum performance.
In these circumstances you can experiment by forcing the data
connection on to “UMTS Only” or “GPRS Only”. Remember to switch
back the setting to “UMTS Preferred” when conditions change.
6. ACTIVATING THE SMS CENTRE
(not all versions of GT Connect contain the SMS module)
To activate the SMS click the SMS button. On the left side you see the different folders
•
Inbox
•
Sent
•
Unsent (contains the draft SMSses)
• Figure 20 SMS Centre
Click on any of these folders to see the messages it contains. To read a message
click on it in the Sender or Date column. The text of a selected message is shown
in the grey box on the right.

13
GlobeTrotter Connect USER GUIDE
To Reply or Forward a message select it as above and press the appropriate
button. A new message window opens containing the Reply number respectively
the ‘to be forwarded’ text.
NEW MESSAGES
To create a new message press the New button. The New SMS Message window
opens and you can start typing your message (max. 160 characters). To send the
message fill in the recipients phone number and click Send. If you prefer to send
your message at a later time click the Save button which automatically stores your
message in the Unsent folder for later use.
• Figure 21 New Message
DELETE MESSAGES
To delete a message select it as explained above and press the Delete button.

14
7. PRODUCT SUPPORT AND ADDITIONAL HELP
The GlobeTrotter Connect updates will be made available from time to time at:
http://www.option.com/support/login.shtml
Additional support can be found at:
http://support.option.com/support
7.1. Technical Support
Questions and answers regarding GlobeTrotter Connect can be found on
our Support website: http://support.option.com/support/faq.php
Technical questions can be posted after registering through our online
Support Web on:
http://support.option.com/support/newticket.php
For registering please go to:
http://support.option.com/support/register.php

15
GlobeTrotter Connect USER GUIDE
Copyright Option nv © 2007. All rights reserved. No parts may be reproduced without written permission.
Option nv, Gaston Geenslaan 14, 3001 Leuven, Belgium.
www.option.com
APPENDIX A: LIMITED WARRANTY
Customer accepts unconditionally, without any warranties, the License on
the Software AS IS and without any further claims, demands or requests.
OPTION SHALL NOT BE LIABLE TO THE CUSTOMER FOR ANY INDIRECT,
INCIDENTAL, CONSEQUENTIAL, PUNITIVE, RELIANCE OR SPECIAL DAMAGES.

Gaston Geenslaan 14 - 3001 Leuven Belgium - T +32 16 317 411 - F +32 16 207 164
www.option.com

Safety Manual
Option GI0201 USB Modems
version 2.0
04 / 05 / 2007
Connect anytime, anywhere

Table of contents
1. Introduction 3
1.1 Your USB Modem is like a Mobile Phone 3
2. Safety Measures 3
2.1. General recommendations for use 3
2.2. Traveling 4
2.3. Ambient Temperature 4
2.4. Explosive Atmospheres 4
2.5. Blasting Areas - Construction Sites 4
2.6. Do not use on aircraft 4
2.7. Do not use in hospitals 5
2.8. Interference from Radio Signals 5
2.9. Immunity to Interference 5
2.10. Cardiac Pacemakers, Implanted Defibrillators &
Other medical implant devices 6
2.11. Hearing Devices 6
2.12. Children 6
2.13. Driving 7
2.14. SIM cards 7
2.15. Accessories 7
2.16. Safe Distance 7

3
Option GI0201 USB Modems SAFETY MANUAL
1. Introduction
This document contains very important information about the safe
operation of your Option USB Modem. We recommend you to read this
entire document before using the card. Ignoring these guidelines may
be dangerous or illegal.
1.1. Your USB Modem is like a Mobile Phone
Your USB Modem uses the same technology as a mobile phone. It is
important that you always obey all safety regulations related to mobile
phone use. If you have any doubt about the safe operation of your USB
Modem, you should remove the USB Modem from the PC and seek
advice from authorized personnel.
2. Safety Measures
Please read the following guidelines carefully. Not following these
guidelines can cause harm to the card, yourself or other persons.
2.1 General recommendations for use
•
Always treat your product with care and keep in a clean and dust-
free place. Do not expose your product to open flames or lit tobacco
products.
•
Do not expose to liquid, moisture or humidity. Do not expose the
USB Modem to rain, or other liquids.
•
Do not drop, throw or try to bend your product.
•
Do not paint your product.
•
Do not attempt to disassemble your product. Doing so may be
dangerous and it will void the warranty.
•
Do not touch the antenna unnecessarily.

4
2.2. Traveling
Handle the modem with care while traveling. It is recommended to
remove the modem from the laptop.
2.3 Ambient Temperature
Do not expose the modem or the antenna to ambient temperatures
beyond the range of -25 to + 50 degrees Celsius.
2.4 Explosive atmospheres
Turn off your PC in any area with a potentially explosive atmosphere.
It is rare, but your PC could generate sparks, which could cause an
explosion or fire. Areas with a potentially explosive atmosphere are not
always, clearly marked. They include fuelling areas ( petrol filling
stations ), below deck on boats, fuel or chemical transfer or storage
facilities, and areas where the air contains chemicals or particles, such
as grain, dust, or metal powders. Do not transport or store your PC and
accessories in the compartment of a vehicle, which contains flammable
gas, liquid or explosives.
2.5 Blasting areas – Construction sites
Turn off your PC when in a blasting area in order to avoid interfering
with two - way radios used in blasting operations.
2.6 Do not use on aircraft
Using wireless devices on aircraft can cause interference and is illegal.
Remove your USB Modem if you intend to use your PC whilst in an
aircraft. Do not use it when the plane is on the ground without
permission from the aircraft crew.

5
Option GI0201 USB Modems SAFETY MANUAL
2.7 Do not use in hospitals
Please ensure you follow any local regulations or rules. People are
often asked to switch off all electronic devices in some areas of a
hospital; this is a recommendation that Option fully supports. Using a
USB Modem close to sensitive electronic devices could possibly result
in interference. If you intend to use your PC in such areas, you must
remove the USB Modem.
2.8 Interference from Radio Signals
Option relies on advice from health authorities an relevant expert bodies
about potential undesired responses to radio emissions from USB
Modems.
2.9 Immunity to Interference
Electromagnetic interference is the disturbance of the normal operation
of a device due to its undesired response to radio signals from an
external source. Occasionally in some situations, you may hear short
sounds coming from audio equipment such as radio or multimedia PC.
However, these audible signals do not interfere with the operation of the
equipment.
The 1989 Directive from the European Commission ( 89 / 336 / ECC ) 13
governing all forms of electronic equipment concerns interference that
such equipment produces and its immunity to interference from
outside. Any equipment compliant with that directive is unlikely to suffer
interference. All wireless devices may get interference, which could
affect performance.

6
2.10 Cardiac Pacemakers, Implanted Defibrillators & Other medical
implant devices
It is possible that some USB Modems may interfere with some types of
pacemakers or implanted defibrillators when operated close to the
implanted device. You should seek advice from your doctor that is
specific to the implant before using the USB Modem. Health authorities
in many countries have set up advisory services for medical devices
and implants including providing advice about maintaining separation
distance between USB Modems or other radio frequency equipment
and the implant. Option operating companies reflect the advice given by
their relevant health authority or national advisory service and / or as a
minimum indicate a separation distance of at least 15 cm between USB
Modems or other radio frequency equipment and the implant.
2.11 Hearing devices
People with hearing aids or other cochlear implants may experience
interfering noises when using mobile devices or when one is nearby.
The level of interference will depend on the type of USB Modem, the
type of hearing device and the distance between the two. Increasing
the distance between the USB Modem and hearing device may reduce
interference.
2.12 Children
Do not allow children to play with your USB Modem. They could hurt
themselves or others, or could accidentally damage the USB Modem.
Your USB Modem also contains small parts with sharp edges that may
cause an injury or which could become detached and create a choking
hazard.

7
Option GI0201 USB Modems SAFETY MANUAL
2.13 Driving
Do not use USB Modem while driving; park the vehicle first.
2.14 SIM cards
To protect against damage from electronic discharge (ESD) do not
touch the SIM card connectors. As a precaution, always make sure
that the USB Modem is already in your hand before you insert or
remove the SIM card.
2.15 Accessories
Only use Option approved accessories. Do not connect with
incompatible products. When used with accessories such as external
antennas, Option can only guarantee safe and correct operation of our
products if the accessories are tested and approved by us.
To comply with international safety requirements; when using an Option
approved external antenna, you must ensure that it is kept from the
body at a distance greater than 20 cm.
2.16 Safe Distance
We advise the end-user to keep a minimum distance of 20 cm between
him and the device.
The USB Modem has been thoroughly tested to better SAR
requirements. These tests simulate the absorption by the human body
of radiation from the USB Modem.
The SAR tests were performed with the antenna at a distance of 15 mm
from a phantom as suggested by the Vodafone Test Specification.

8
The power maximums measured for a mass of 10 g ( European bands )
and a mass of 1 g ( American bands ) are :
BAND AVERAGED MASS SAR MEASURED
GSM850
1 g 0,523 W/ kg
GSM900
10 g 0,556 W/ kg
GSM1800
10 g 0,468 W/ kg
GSM1900
1 g 1,130 W/ kg
FDD 1
10 g 0,575 W/ kg
FDD 2
1 g 1,240 W/ kg
FDD 5
1 g 0,319 W/ kg
The SAR limit as defined by the European Council Recommendation is
2,0 W/ kg for a mass of 10g (R&TTE Directive 1999 519 EC). The FCC
guidelines (OET 65) define a limit of 1,6 W/ kg averaged over a mass of
1g. We can therefore reasonably assert that the Option USB Modem
complies with SAR requirements.
For day-to-day use, we would advise the user to keep a minimum
distance from the antenna of 20 cm. When using an external antenna, it
is advised to use the same safety distance of 20 cm from the external
antenna.
Copyright Option nv © 2007. All rights reserved. No parts may be reproduced without written permission.
Option nv, Gaston Geenslaan 14, 3001 Leuven, Belgium.
www.option.com
 Loading...