

13-129 3.fm Page 1 Wednesday, Ju ly 14, 1999 6: 49 PM
Owner’s Manual
Please read before using this equipment.
Cat. No. 13-1293
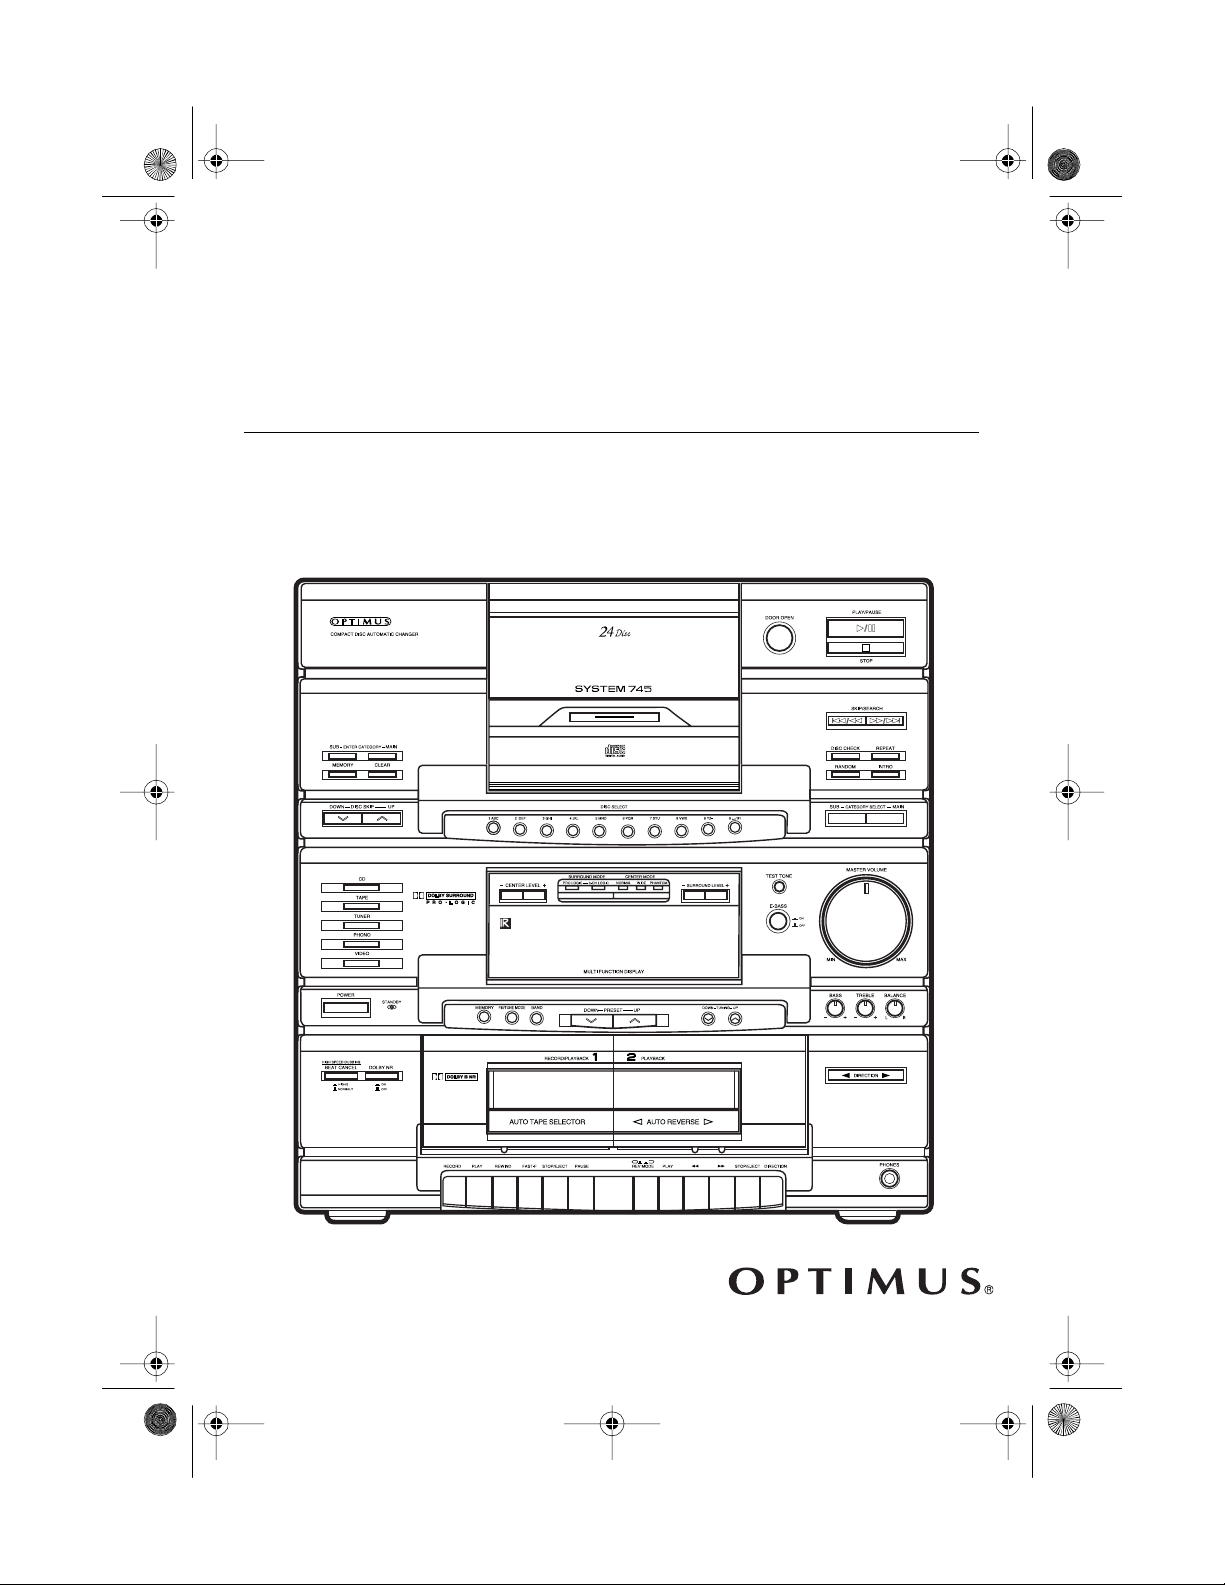
System 745
Stereo Rack System
yrig
g
13-129 3.fm Page 2 Wednesday, Ju ly 14, 1999 6: 49 PM
.
Warning
ard, do not expose this system to rain or
moisture.
CAUTION
ELECTRIC SHOCK, DO NOT REMOVE
COVER OR BACK. NO USER-SERVICEABLE PARTS INSIDE. REFER SERVICING
TO QUALIFIED PERSONNEL.
: To prevent fire or shock haz-
CAUTION
RISK OF ELECTRIC SHOCK.
DO NOT OPEN.
: TO REDUCE THE RISK OF
This sym bol is in te nd ed to a le rt yo u
to the pr e s en ce of uninsu lated da ngerous voltage within the system’s
enclos u re t h at m ig ht b e of s ufficient
magnitude to constitute a risk of
electric shock. Do not open the system’s case.
This symbol is intended to inform
!
you that important operating and
maintenance instructions are included in th e l itera ture a ccomp an ying this sy s tem .
!
Impor t an t :
• Remove the protective cardboard
sheet before you use t he system
(see “Unpacking the System” on
Page 8).
• Remove all CDs from the CD
changer before you move the system.
Cop
ht Notice:
Most material on
compact discs and prerecorded tapes
is copyrighted. The unauthorized recording or duplication of copyrighted
material is a violation of the copy right
laws of most countries and such duplication may result in fines and/or imprisonment. Note, however, that in the
United States, it is not a violation of
U.S. copyright laws for a consumer to
use an audio recording device to duplicate musical recordings for noncommercial (pers onal) use.
The System 745 is made and tested to
meet exacting safety standards. It
meets UL and F CC requirements and
complies with safety performance
standards of the U.S. Department of
Health and Human Services.
Warnin
s:
• This system uses a laser light
beam on the CD changer. Only a
qualified service person should
remove the cover or attempt to
service this device, due to possible eye injury.
• The use of controls, adjust ments,
or procedures other than those
specified herein might result in
hazardous radiation exposure.
© 1997 Tandy Corporation. All Rights Reserved.
Optimus is a registered trademark used by Tandy Corporation.
Dolby Noise Reduction and Pro Logic are manufactured under license from Dolby Laboratories.
Dolby, the double-D symbol ( ), and Pro Logic are trademarks of Dolby Laboratories.
RadioShack is a trademark used by Tandy Corporation.
2

g
g
gory
g
y
g
g
y
y
13-129 3.fm Page 3 Wednesday, Ju ly 14, 1999 6: 49 PM
FEATURES
Your Optimus System 745 Stereo
Rack System is a versatile sound system combining a 100 watt-per-channel
amplifier with Dolby Pro Logic Surround Sound, precision AM/FM stereo
receiver, dual-dubbing cassette deck,
24-disc automatic CD changer, and
front, center, and rear speakers.
The 100-watt, thr ee-way front speakers combine 10-inch woofers, 4-inch
midranges, and 3-inch tweeters to
give you exc ell ent respo ns e in al l fr equency ranges. The efficient bassreflex design provides a cleaner
sound than acoustic suspension
speakers.
The 15-Watt, full range center and
surround speakers’ simulated black
wood-grain veneer cabinets finish
make the speakers attractive, and the
cabinet design enhances the bass response.
Preset Tunin
store 24 FM and 12 AM stations for
quick tuning.
Memories
— let you
CD CHANGER
Rotating CD Storage Compartment
— provides a virtually dust-free CD
compartment with a storage tray that
safely protects up to 24 of your CDs,
and quickly accesses an y CD by rot ating the tray in either direction.
Cate
sign any one of seven preset music
categories (or a category or subcategory of your own) to each loaded CD,
then play only the CDs assigned to a
selected category or subcategory.
Fluorescent Scrollin
scrolls messages to help you easily
operate the CD changer.
Playback
— lets you as-
Displa
—
The CD changer can hold up to 24
5-inch CDs and organizes them
much like a jukebox would, so you
can play them easily without having
to continually rem ove and load CDs.
You need two AA batteries (not
Note:
supplied) to power the remote control.
STEREO TUNER
Digital Synthesized Tunin
nates tuning drift by locking the tuner
on the selected frequency.
— elimi-
Sequence Track Pro
lets you program up to 48 selections
(tracks or entire CDs) to play in any
order you choose.
Intro Scan
first 10 seconds of each track so you
can easily find the one you want.
Random Pla
and plays all tracks on one CD at a
time, or all tracks on all loaded CDs.
Repeat Pla
a single track, all tracks on a single
CD, all tracks on all loaded CDs, or a
programmed sequence.
— scans and plays the
— randomly selects
— automatically repeats
rammin
—
3

13-129 3.fm Page 4 Wednesday, Ju ly 14, 1999 6: 49 PM
Audible Search — lets you rapidly
play a CD in either direction to locate
a particular section of a track.
Direct Selection Play — lets you
quickly select any track from any loaded CD.
DUAL CASSETTE DECK
Consecutive Play — automatically
plays both sides of one tape, then one
side of another tape.
Auto-Reverse (Deck 2 only) — you
can set Deck 2 to continuously play
both sides of a tape.
Dolby B Noise Reduction System —
reduces tape hiss to enhance dynamic
range and sound quality.
Synchro Tape Dubbing — lets you
easily dub (copy) tapes.
OTHER FEATURES
Front, Ce nte r, and Surround Speakers — provides everything you need
for home theater sound.
Motorized Volume Control — auto-
matically rotates the main volume control when you use the remote control
to adjust the system’s volume.
Automatic Volume Reset — automatically reduces the volume when
you turn on the system the first time,
to protect connected speak ers, headphones, and your hearing.
Extended-Bass — lets you emphasize low bass soun ds during low-volume listening.
Headphone Jack — le ts you connec t
headphones (not supplied) for private
listening.
Two Dubbi ng Spee ds — le t you dub
(copy) a cassette tape at high or n ormal speed.
SPEAKERS
Superior Speaker Elements — meet
our rigid requirements for excellence.
Decorative Cloth Grilles — hides the
speaker drivers without obstructing
the sound.
4
We recommend you rec ord the serial
number of the System 7 45 here. The
number is on the system’s back panel.
Serial Number: __________________

13-129 3.fm Page 5 Wednesday, Ju ly 14, 1999 6: 49 PM
THE FCC WANTS YOU
TO KNOW
This equipment complies with the limits for a Class B digital device as specified in Part 15 of
limits provide reasonable protection
against radio and TV interference in a
residential area. However, your equipment might cause TV or radio interference even when it is operating
properly.
To eliminate interference, you can try
one or more of these corrective measures.
• Reorient or relocate the receiving
antenna.
FCC Rules
. These
• Increase the distance between the
equipment and the radio or TV.
• Use outlets on different electrical
circuits for the equipment and the
radio or TV.
Consult your local RadioShack store if
the problem still exists.
You must use shielded interface cables with this equipment.
5

g
g
13-129 3.fm Page 6 Wednesday, Ju ly 14, 1999 6: 49 PM
CONTENTS
Preparation ........................................................................................................... 8
Unpacking the System ..................................................................................... 8
Placing the Speakers ....................................................................................... 8
Connecting the Speakers ................................................................................ 9
Front Speakers ....................................................................................... 10
Center Speaker ....................................................................................... 10
Surround Speakers ................................................................................. 10
Connecting the Antennas .............................................................................. 11
Connecting an FM Antenna .................................................................... 11
Connecting the AM Loop Antenna .......................................................... 12
Connecting Other Audio Sources .................................................................. 12
Connecting a Turntable . .......................................................................... 12
Connecting Video Equipment .................................................................. 12
Putting Batteries in the Remote Control ........................................................ 13
Connecting Headphones ............................................................................... 13
Listening Safely ....................................................................................... 14
Connecting Power ......................................................................................... 14
Resetting the System .................................................................................... 14
Operation ............................................................................................................ 15
Basic Operation ............................................................................................. 15
Using the Remote Control ............................................................................. 16
Dolby Pro Logic Surround ...................................................... ....... ....... ....... .. 17
Dolby Surround Encoded Material .......................................................... 17
Selecting the Dolby Surround Mode ....................................................... 17
Adjusting the Sound ...................................................................................... 19
the Tuner .................................................................................................. 20
Usin
Manual Tuning ............................................................................................... 20
Seek Tuning .................................................................................................. 20
Memory Tuning .............................................................................................. 21
Automatically Storing Stations ................................................................ 21
Manually Storing Stations ....................................................................... 22
Selecting Preset Stations ........................................................................ 22
Changing the Tuning Increment . ................................................................... 23
the CD Changer ....................................................................................... 24
Usin
Loading CDs .................................................................................................. 24
Selecting a CD ............................................................................................... 26
Removing CDs .............................................................................................. 26
Playing CDs ................................................................................................... 27
Skipping Tracks ............................................................................................. 28
6

13-129 3.fm Page 7 Wednesday, Ju ly 14, 1999 6: 49 PM
Audible Search .............................................................................................. 28
Repeat Play .................................................................................................. 29
Random Play ................................................................................................ 29
Intro Scan ...................................................................................................... 30
Assigning Category and Subcategory Names to Loaded CDs ..................... 31
Assigning Preset Category Names . ........................................................ 31
Creating and Assigning New Category Names ...................................... 32
Creating and Assigning Subcategory Names ......................................... 33
Changing/Erasing Category and Subcategory Names . . ......................... 34
Category/Subcategory Play .................................................................... 35
Programmed Play ......................................................................................... 36
Programming and Playing a Sequence .................................................. 36
Reviewing the Programmed Sequence .................................................. 37
Adding Selections to the Programmed Sequence .................................. 37
Changing a Programmed Sequence ...................................................... 37
Clearing the Programmed Sequence .................................................. ... 38
CD Care Tips ................................................................................................ 38
Using the Cassette Deck ................................................................................... 39
Loading a Cassette Tape ............................................................................. . 39
Playing a Cassette Tape ............................................................................... 40
Using Consecutive Play (Deck 2 to Deck 1) ................................................. 41
Using Dolby Noise Reduction ....................................................................... 41
Recording ...................................................................................................... 42
Dubbing (Copying) Cassette Tapes .............................................. .. ....... . 42
Dubbing (Copying) CDs ......................................................................... . 43
Recording from the Tuner or an Audio Source ....................................... 44
Tape Tips ....................................................................................................... 45
Storing Cassettes ................................................................................... 45
Preventing Accidental Erasure ............................................................... 45
Erasing a Cassette Tape ........................................................................ 45
Restoring Tape Tension and Sound Quality ........................................... 45
Troubleshooting ................................................................................................ 46
Care and Maintenance ...................................................................................... 48
Cleaning the Tape-Handling Parts ....................... ....... ....... ..... ....... ....... ....... . 49
Specifications .................................................................................................... 50
7

13-129 3.fm Page 8 Wednesday, Ju ly 14, 1999 6: 49 PM
PREPARATION
Cautions:
• Do not connect the system to AC
power until you complete all other
connections.
• Be sure to follow all the instructions in the enclosed “Safety
Instructions” sheet.
UNPACKING THE
SYSTEM
The protective cardboard sheet in the
system’s CD com partment helps protect the system from damage during
shipment or while moving it. To remove the cardboard sheet, first remove all packing material from around
the system, then press
When the CD changer’s door opens,
remove the cardboard sheet, then
close the door.
Note:
case you ever want to move the system to another area. Before y ou mo ve
the system, be sure there are no CDs
in the CD changer, then re-insert the
cardboard sheet into the CD changer’s center slot.
The system speakers’ features and
specifications are packed with the
speakers.
Save the cardboard sheet in
DOOR OPEN
PLACING THE
SPEAKERS
The System 745 includes one center,
two front, and two rear (surround)
speakers. Before you connect them,
follow these steps t o place the speakers.
Front
Speaker
.
1. Place the center speaker directly
in front of the listening area,
above or below the TV.
Note:
netically shielded to prevent vid eo
distortion. However, if the TV picture has interference, increase the
distance between the TV and t he
speaker, but keep the speaker in
line with the TV.
Center Speaker
Rear Speakers
The center speaker is mag-
Front
Speaker
8

13-129 3.fm Page 9 Wednesday, Ju ly 14, 1999 6: 49 PM
2. For the best stereo effect, place
the front speakers on each s ide of
the center speaker so:
• the distance between each
speaker and the center speaker
is the same
• the distance between the
speakers is the same as the
distance between the listening
area and the center speaker
Notes:
• To improve the stereo effect if
the distance between the
speakers is greater than the
distance between the listening
area and the center speaker,
angle the speakers in toward
you.
• To increase the bass effect,
place the front speakers in the
corners of the room, against the
wall, or directly on the floor.
• To decrease the bass effect,
move the front speakers slightly
away from the corners or raise
them 6 to 8 inches off the floor.
Your local RadioShack store
carries speaker stands.
3. Place the surround speakers to
the rear and sides of the listening
area.
CONNECTING THE
SPEAKERS
For the best results, connect the two
front speakers to the
ERS
terminals, the center speaker to
CENTER SPEAKER
the
the two rear speakers to the
ROUND SPEAKERS
back of the system.
Important:
• If you are using speakers other
than the ones supplied, remember
that each speaker connected to
the system’s speaker terminals
must have an impedance of at
least 8 ohms. Your local RadioShack store has a large selection of speakers.
• For maximum bass response and
best overall performance, connect your speakers so their pol arities match (+ to +, and – to –).
FRONT SPEAK-
terminals, and
SUR-
terminals on the
Caution: Do not let the bare speaker
wires touch each other. This might
damage the system or the speakers.
9

13-129 3.fm Page 10 Wednesday, J uly 14, 1999 6: 49 PM
Front Speakers
1. Press the left front speaker’s posi-
(+)
tive
stripped end of the supplied red
speaker wire into the terminal,
then release the tab.
2. Press the left front speaker ’s negative
one stripped end of the supplied
black speaker wire into the terminal, then release the tab.
3. Press the system’s
SPEAKERS L (+)
minal tab, insert the stripped end
of the left front speaker ’s red conductor into the terminal, then
release the tab.
red terminal tab, insert one
(–)
black terminal tab, insert
FRONT
red speaker ter-
Center Speaker
1. Press the
red speaker terminal tab, insert
the stripped end of the center
speaker’s brown conductor with
white stripe into the terminal, then
rel ease the ta b.
2. Press the
black speaker terminal tab, insert
the stripped end of the center
speaker’s brown conductor into
the terminal, then release the tab.
CENTER SPEAKER (+
CENTER SPEAKER (–)
Surround Speakers
)
4. Press the system’s
SPEAKERS L (–)
black speaker
FRONT
terminal tab, insert the stripped
end of the left front speaker’s
black conductor into t he terminal,
then release the tab.
5. Repeat Steps 1–4 t o connect the
right front speaker to the system’s
FRONT SPEAKERS R
terminals.
10
1. Press the
L (+)
SURROUND SPEAKERS
red speaker terminal tab,
insert the stripped end of the left
rear speaker’s brown conductor
with white stripe into the terminal,
then release the tab.
2. Press the
L (–)
SURROUND SPEAKERS
black speaker terminal tab,
insert the stripped end of the left
rear speaker’s brown conductor
into the terminal, then releas e the
tab.

g
13-129 3.fm Page 11 Wednesday, J uly 14, 1999 6: 49 PM
3. Repeat Steps 1 and 2 to connect
the right rear speaker to the
ROUND SPEAKERS R (+)
terminals.
SUR-
and
(–)
CONNECTING THE
ANTENNAS
You can use the supplied indoor AM
loop antenna and FM dipo le antenna
for adequate reception in most areas.
Connecting an FM Antenna
The supplied FM antenna is usually
adequate for FM reception in metropolitan areas. If FM reception is weak,
we recommend you use an outdoor
antenna for improved rece ption. Your
local RadioShack store sells outdoor
antennas and accessories.
To connect an FM antenna, hold down
both
EXTERNAL ANTENNA FM 300Ω
terminal tabs, insert the stripped ends
of the FM a ntenna’s wires into the terminal’s holes, then release the tabs.
Fully extend and position the FM antenna for the best reception.
Note:
na, follow all the ins t ru ct ions in the enclosed “Safety Instructions” sheet and
the warnings included with the a ntenna. Use 300-ohm twin lead wire for
this connection.
Warnin
you install or remove an outdoor antenna. If the antenna starts to fall, let it
go! It could contact overhead power
lines. If the antenna touches the power line, contact with the antenna,
mast, cable, or guy wires can cause
electrocution and death. Call the power company to remove the antenna.
DO NOT attempt to r emove it yourself.
If you install an outdoor a nten-
Use extreme caution when
:
11

13-129 3.fm Page 12 Wednesday, J uly 14, 1999 6: 49 PM
Connecting the AM Loop
Antenna
1. Unwind the supplied AM loop
antenna wires about two turns.
2. Hold down both
ANTENNA AM LOOP
insert the stripped ends of the
antenna’s wires into the holes,
then release the tabs.
3. Position the AM loop antenna for
the best reception.
EXTERNAL
terminal tabs,
1. Plug the turntable’s cables into the
PHONO L
on the back of the system.
2. If the turntable has a ground wire,
use a Phi llips screwdriv er to connect it to the
the back of the system.
(white) and R (red) jacks
GND
terminal on
Connecting Video Equipment
CONNECTING OTHER
AUDIO SOURCES
Connecting a Turntable
Caution:
top of th e system or on any oth e r co mponent that gets hot.
Notes:
• The turntable’s cables m ust have
• Be sure to match the left and right
12
Do not pl ace a turntable on
phono-type plugs.
plugs on the cables with the
PHONO L
tem.
and R jacks on the sys-
If you have a VCR or other equipment,
such as a video disc player or a TV
that has line-level audio outputs, you
can play the sound through the System 745.
Use a stereo cable (such as C at. No.
42-2352, not supplied) to connect the
source’s left and right audio output
jacks to the
(red) jacks on the back of the system.
VIDEO L
(white) and
R

13-129 3.fm Page 13 Wednesday, J uly 14, 1999 6: 49 PM
PUTTING BATTERIES IN
THE REMOTE CONTROL
The system’s remote control requires
two AA batteries (not s up plied) for operation. For the longest life and best
performance, we recomme nd alkaline
batteries, such as RadioShack Cat.
No. 23-557.
1. Remove the battery compartment
cover by pressing down the top of
the cover while sliding it away
from the remote control.
2. Insert two fresh AA batteries in the
compartment as indicated by the
polarity symbols (+ and –) ma rked
inside the compartment.
Cautions:
• Dispose of batteries promptly and
properly; do not bury or burn
them.
• Never leave dead or weak batteries in the rem ot e control.
CONNECTING
HEADPHONES
You can connect a pair of headphones to t he System 7 45 to l isten in
private. Your local RadioShack store
has a wide selection of headphones.
To connect headphones to the system, put the hea dphones’
into the
PHONES
jack on the system.
1
/4-inch plug
Cautions:
• Use only fresh batteries of the
required size and type.
• Do not mix old and new batteries, different types of batteries
(standard, alkaline, or rechargeable), or rechargeable
batteries of different capacities.
3. Replace the cover.
If the remote control does not work or
has poor range, replace both batteries.
Note:
automatically disconnects the external
speakers. If you are using the surround mode, however, connecting t he
headphones does not disconnect the
center and rear speakers.
Connecting the headphones
13

13-129 3.fm Page 14 Wednesday, J uly 14, 1999 6: 49 PM
Listening Safely
To protect your hearing, follow these
guidelines when you use headphones.
• Set the volume to the lowes t setting before you begin listening.
After you begin listening, adjust
the volume to a comfortable level.
• Do not listen at extremely high
volume levels. Extended highvolume l istening can l ead to permanent hearing loss.
• Once you set the volume, do not
increase it. Over time, your ears
adapt to the volume level, so a
volume level that d oes not cause
discomfort might still damage your
hearing.
CONNECTING POWER
After you make all other connections,
plug the system’s power cord into a
standard AC outlet. The red STA NDBY indicator lights when the system i s
connected to AC power but the system is turned off.
RESETTING THE
SYSTEM
M-ERROR
If
play, or the system does not work
properly when CD is selected, make
sure the protective cardboard sheet
has been removed. After removing the
cardboard, if the system still does not
work properly, you might need to reset
it.
Note:
quence of tracks to play (see “Programmed Play” on Page 36 ), resetting
the System 745 clears that sequence
from memory.
Follow these steps to reset the system.
1. Unplug the power cord from the
AC outlet.
2. Use the straightened end of a
paper clip to hold down
the back of the system for about
20 seconds.
scrolls across the dis-
If you have programmed a s e-
RESET
on
Note:
stations and category and subcategory names even when you unplug it
from the AC outlet.
14
The system saves all stored
3. Plug the power cord back into the
AC outlet.
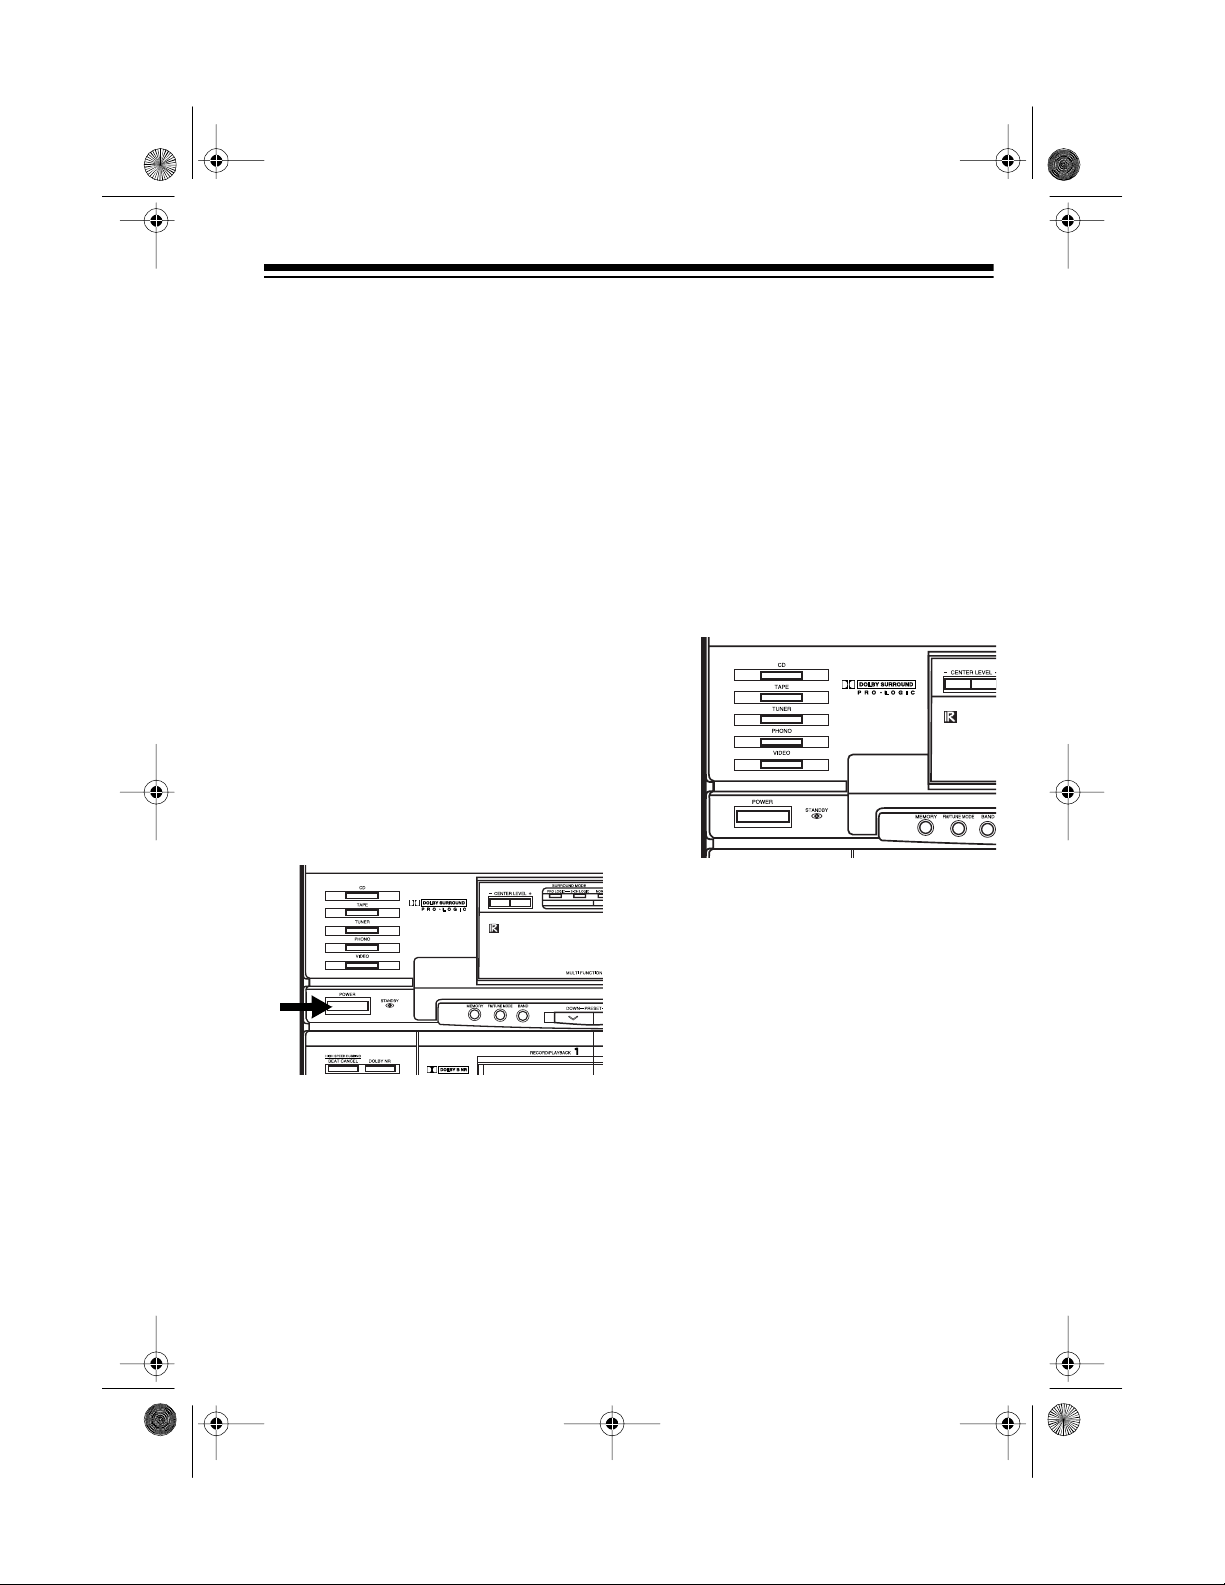
4. Press
POWER
tem. The STANDBY indicator
turns off.
to turn on the sys-
POWER ON
13-129 3.fm Page 15 Wednesday, J uly 14, 1999 6: 49 PM
OPERATION
BASIC OPERATION
Cautions:
• The system automatically reduces
the volume the first time you turn it
on after you install it. To protect
your hearing after that, set the volume to its lowest level before you
turn it on.
• Do not set the system’s volume
too high while playing soft or quiet
portions of a music program. Due
to the system’s wide dynamic
range, the speakers might be
damaged if the music program
produces a sudden loud passage.
scrolls across the display , the STANDBY indicator turns
off, and the
PHONO
tons light.
Note:
the system was last turned off
lights red; all others light green.
2. Press
or
the desired audio source. The
selected source’s indicator lights
red.
, and
The function selected when
CD, TAPE, TUNER, PHONO
VIDEO
CD, TAPE, TUNER
VIDEO
function but-
on the system to select
,
Follow these steps to operate your
system.
tem.
POWER
to turn on the sys-
1. Press
3. If the source to be played is
encoded with Dolby Surround
Sound, select the desired Dolby
Surround Mode (see “Selecting
the Dolby Surround Mode” on
Page 17).
4. Start the source or tune to the
desired station.
15
13-129 3.fm Page 16 Wednesday, J uly 14, 1999 6: 49 PM
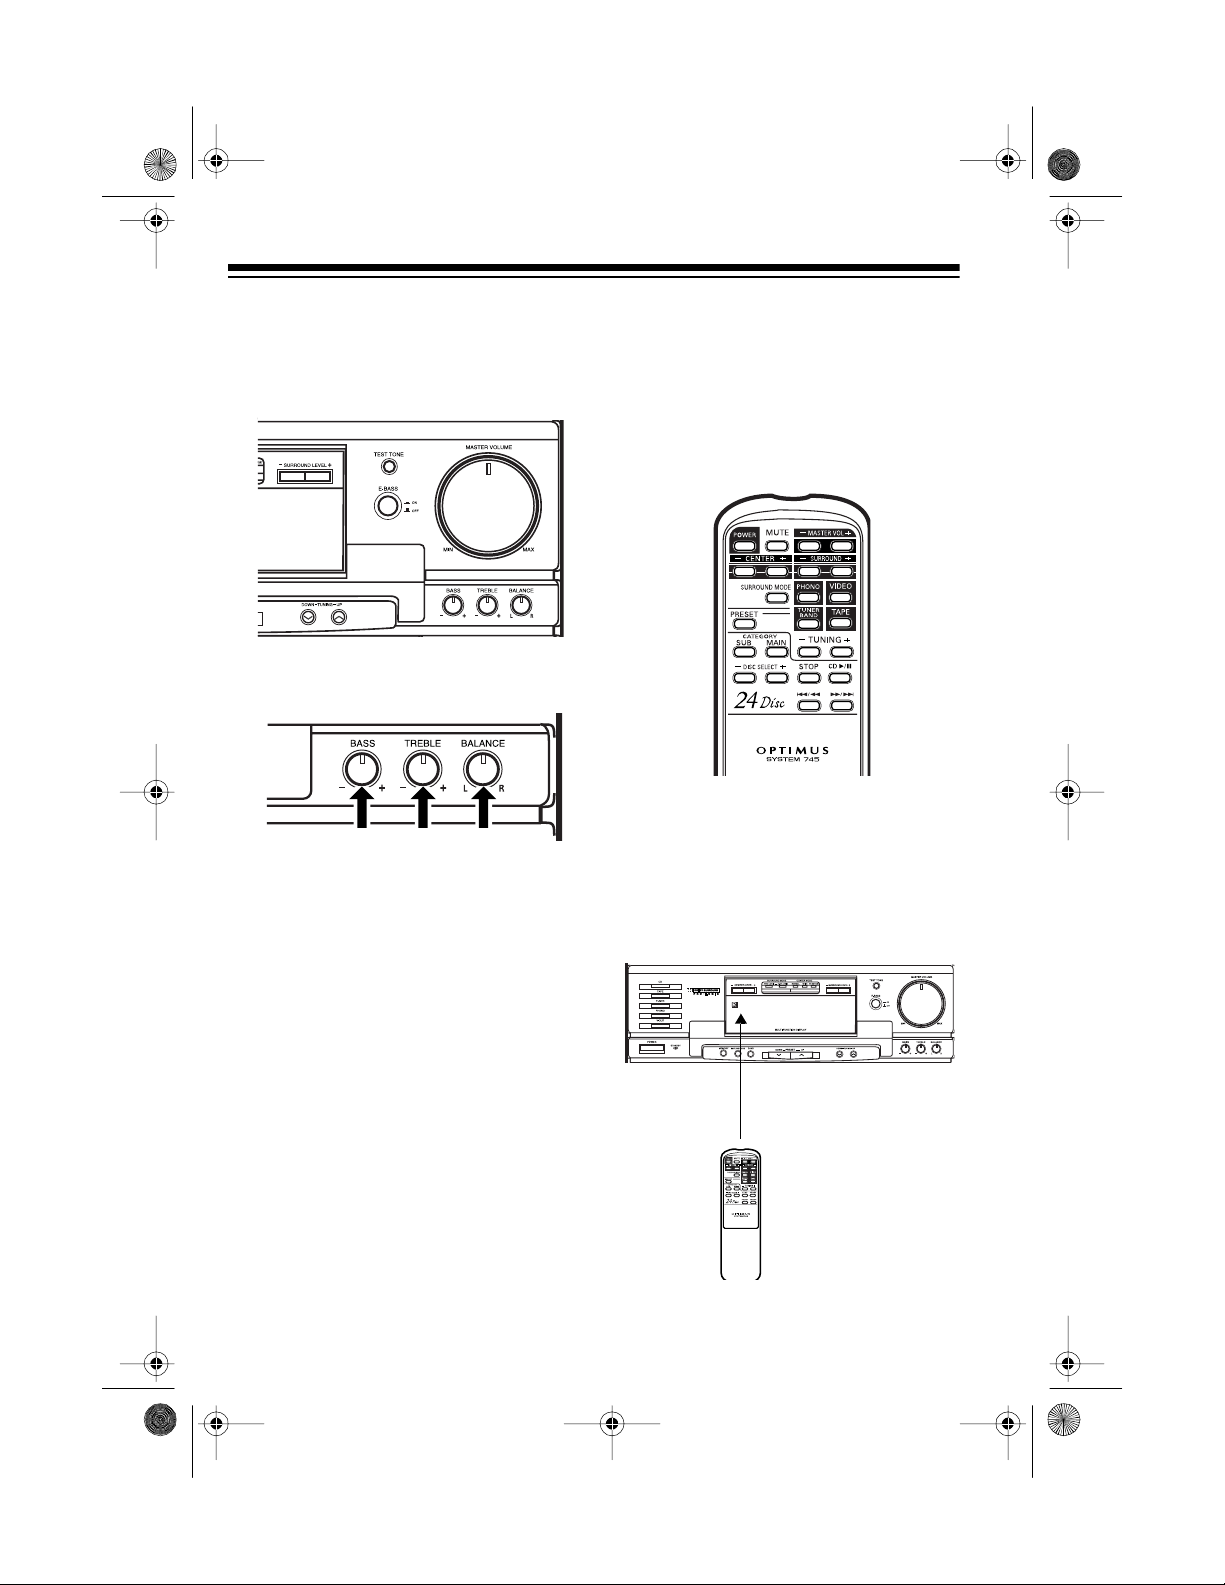
5. Adjust
system (or press
MASTER VOLUME
MASTER VOL –
on the
or + on the remote control) to a
comfortable listening level.
6. Adjust
ANCE
BASS, TREBLE,
for the desired stereo effect.
and
BAL-
7. To turn off the system, press
POWER
again.
GOOD-B YE
scrol ls
across the display, the STANDBY
indicator lights, and the system
turn s o ff.
USING THE REMOTE
CONTROL
The buttons on the remote control perform the same functions as similarly
marked buttons on the system’s front
panel.
To use the rem ote control, point it directly at the infrared s en so r on the left
side of the system’s display, then firmly press the desired button. The remote control works up to about 20 feet
away.
16
Infrared
Sensor

13-129 3.fm Page 17 Wednesday, J uly 14, 1999 6: 49 PM
DOLBY PRO LOGIC
SURROUND
Dolby Surround is a process that
makes movies more exciting by c reating a more realistic audio experien ce
to accompany the action on the
screen. Rather than all the sound
coming from the front of the theater (or
your living room), the sound seems to
surround you, making you feel like you
are closer to the action.
The Pro Logic technology makes
home theater sounds more realistic.
The Pro Logic decoder separates the
audio according to the apparent location of the source. You hear dialogue
from the center speaker, normal stereo background sound from the left
and right front speakers, and enhanced surround sound from the rear
speakers.
In addition, many television stations
broadcast regular programs with Dolby Surround. Also, most satellite programs, especially movies, are
broadcast with Dolby Surround.
The System 745 gives you the best
sound performance from music sources that have the
logo.
Selecting the Dolby S urround
Mode
When playing a program source encoded with Dolby Surround Sound,
follow these steps t o sel ect the proper
surround mode.
1. Repeatedly press
MODE
until the desired Dolby Pro
Logic Surround mode (PRO
LOGIC or 3-CH L OGIC) indicator
lights.
SURROUND
Dolby Surround Encoded
Material
Program sources such as laser discs,
video tapes, and cable broadcast s are
usually direct copies of the original
motion picture’s sound track. All these
sources have surround sound audio if
the original soun d track had it. Many
video tapes and laser discs are
marked with the
logo. However, many that are not
marked also have su rround sound audio.
• Select PRO LOGIC when using
front, center, and rear speakers.
• Select 3-CH LOGIC when using
only front and center spea kers.
The sound that w ould normally
come from the surround (rear)
speakers is routed to a nd combined with the sound that
comes from the left and right
front speakers.
17
13-129 3.fm Page 18 Wednesday, J uly 14, 1999 6: 49 PM
• Select OFF (so neither indicator
lights) when using stereo headphones, playing a monaural
program, or receiving a weak
FM broadcast (the soun d quality might improve).
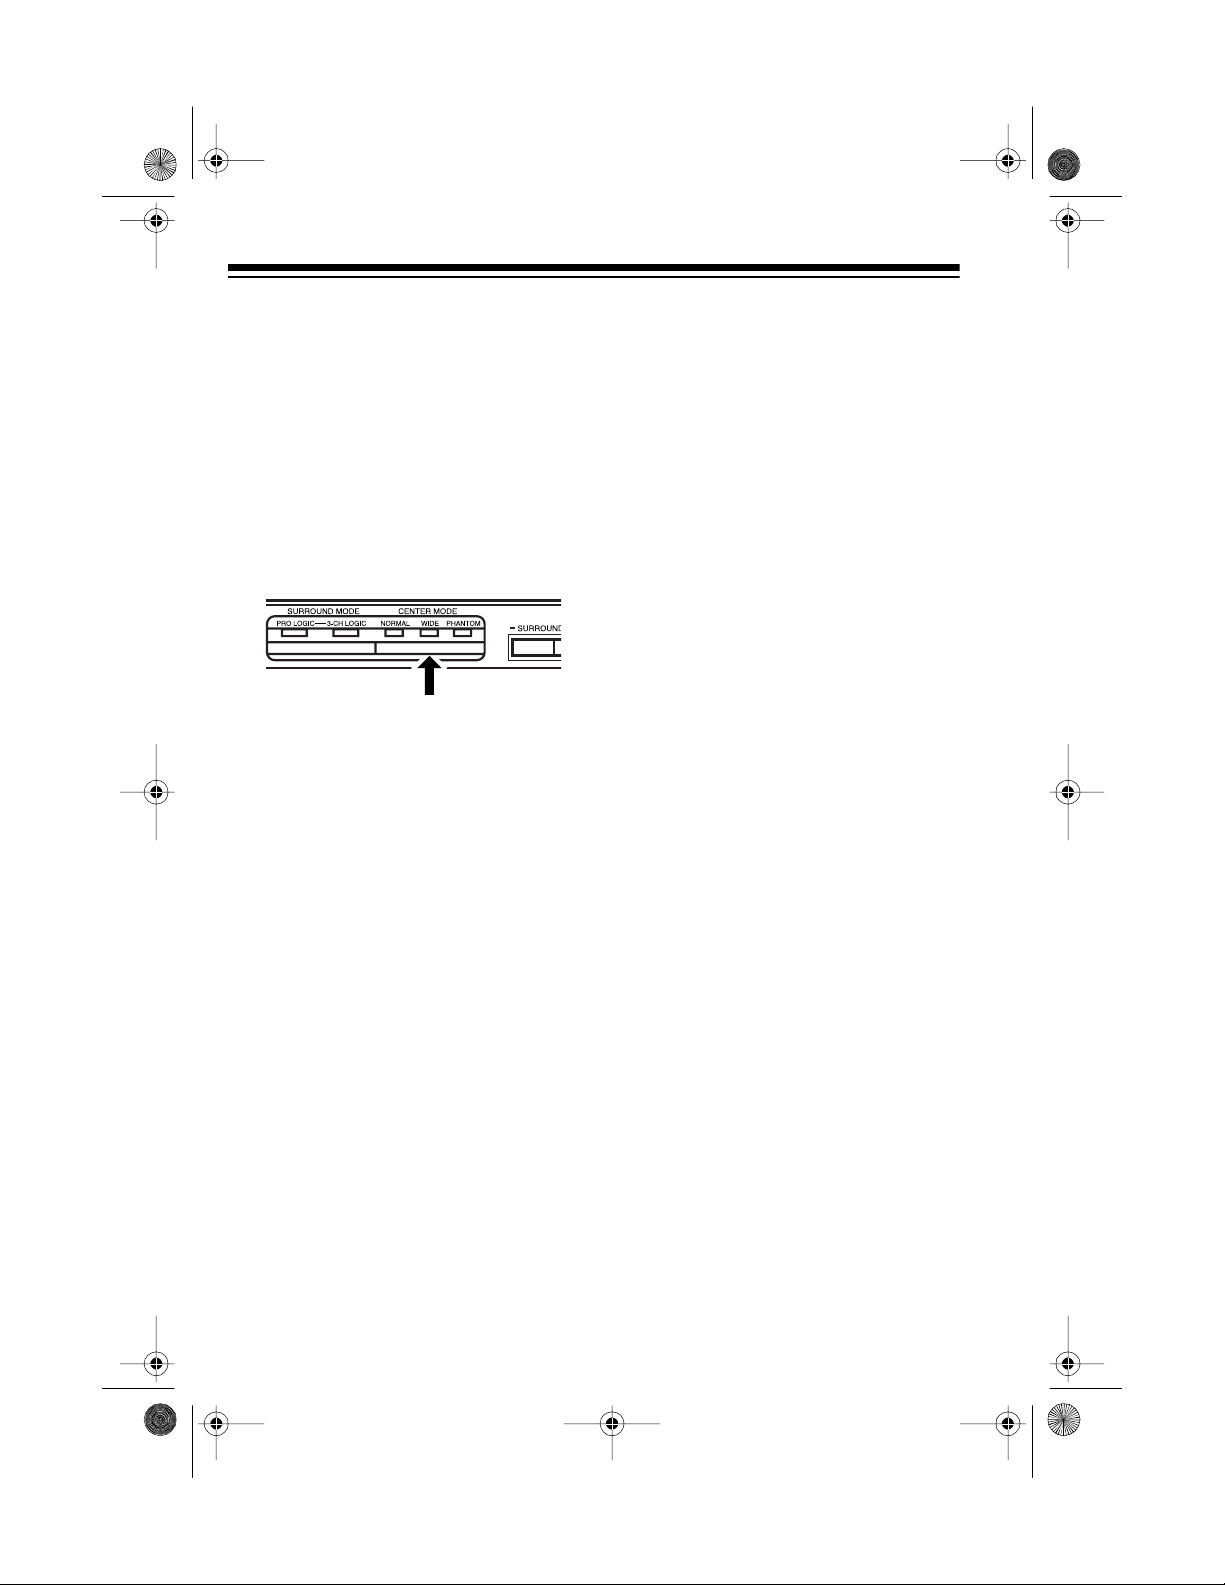
2. If you selected PRO LOGIC and
you connected the supplied front,
center, and rear speakers, then
repeatedly press
CENTER MODE
until the WIDE indicator lights.
If you selected PRO LOGIC and
you connected speakers other
than the ones supplied, repeatedly press
CENTER MODE
to
select one of the following operating modes:
NORMAL
Select this mode when
:
using a center speaker with limited low-frequency response . The
low-frequency sounds present at
the center of the screen are
routed equally to the front left and
right speakers. This creates the
illusion that the sound is coming
from the center.
WIDE
Select this mode when
:
using a full-range center speaker
that has good low-frequency
response. The low-frequency
sounds present at the center of
the screen are routed to the center speaker.
PHANTOM
Select this mode when
:
not using a center speaker. The
sound present at the center of the
screen is routed equally to the left
and right front speakers. This creates the illusion that th e sound is
coming from the center.
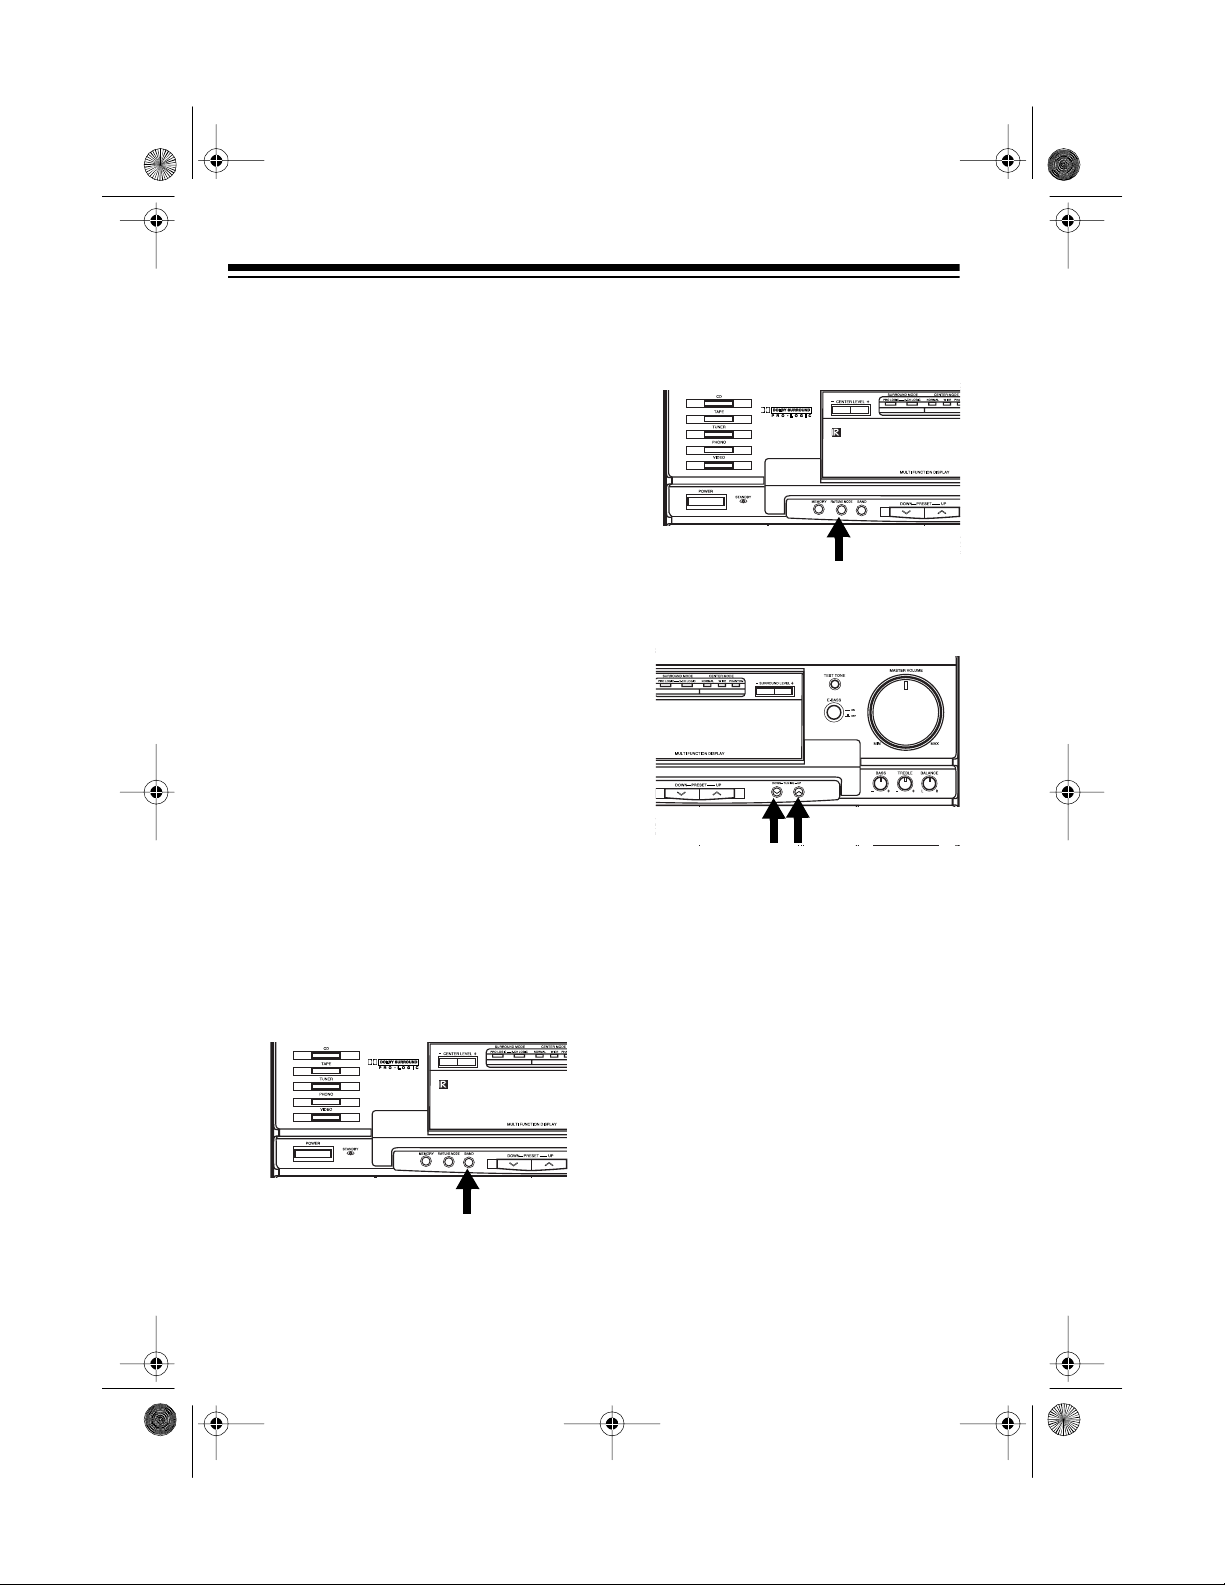
3. Press
TEST TONE
. The test tone
sounds from each speaker for
about 2 seconds. (If connected,
both surround speakers sound the
tone at the same time.)
4. Slowly turn
the system (or hold down
VOL –
MASTER VOLUME
on
MASTER
or + on the rem ote control)
until the test tone sounds at a
comfortable level.
5. Press
CENTER LEVEL –
the system (o r
CENTER –
or + on
or + on
the remote control) until the volume level for the center speaker is
the same as the front speakers.
6. Press
on the system (or
+
SURROUND LEVEL
SURROUND
– or
– or
on the remote control) until the
volume level for the rear s peakers
is the same as the front speakers.
7. Press
TEST TONE
to turn off the
test tone.
When Dolby Pro Logic is not on,
Note:
MASTER VOLUME
MASTER VOL
on the system (or
– or + on the remote
control) affects only the sound level
from the front speakers. When using
stereo headphones, turn off Dolby
Surround.
+
18

13-129 3.fm Page 19 Wednesday, J uly 14, 1999 6: 49 PM
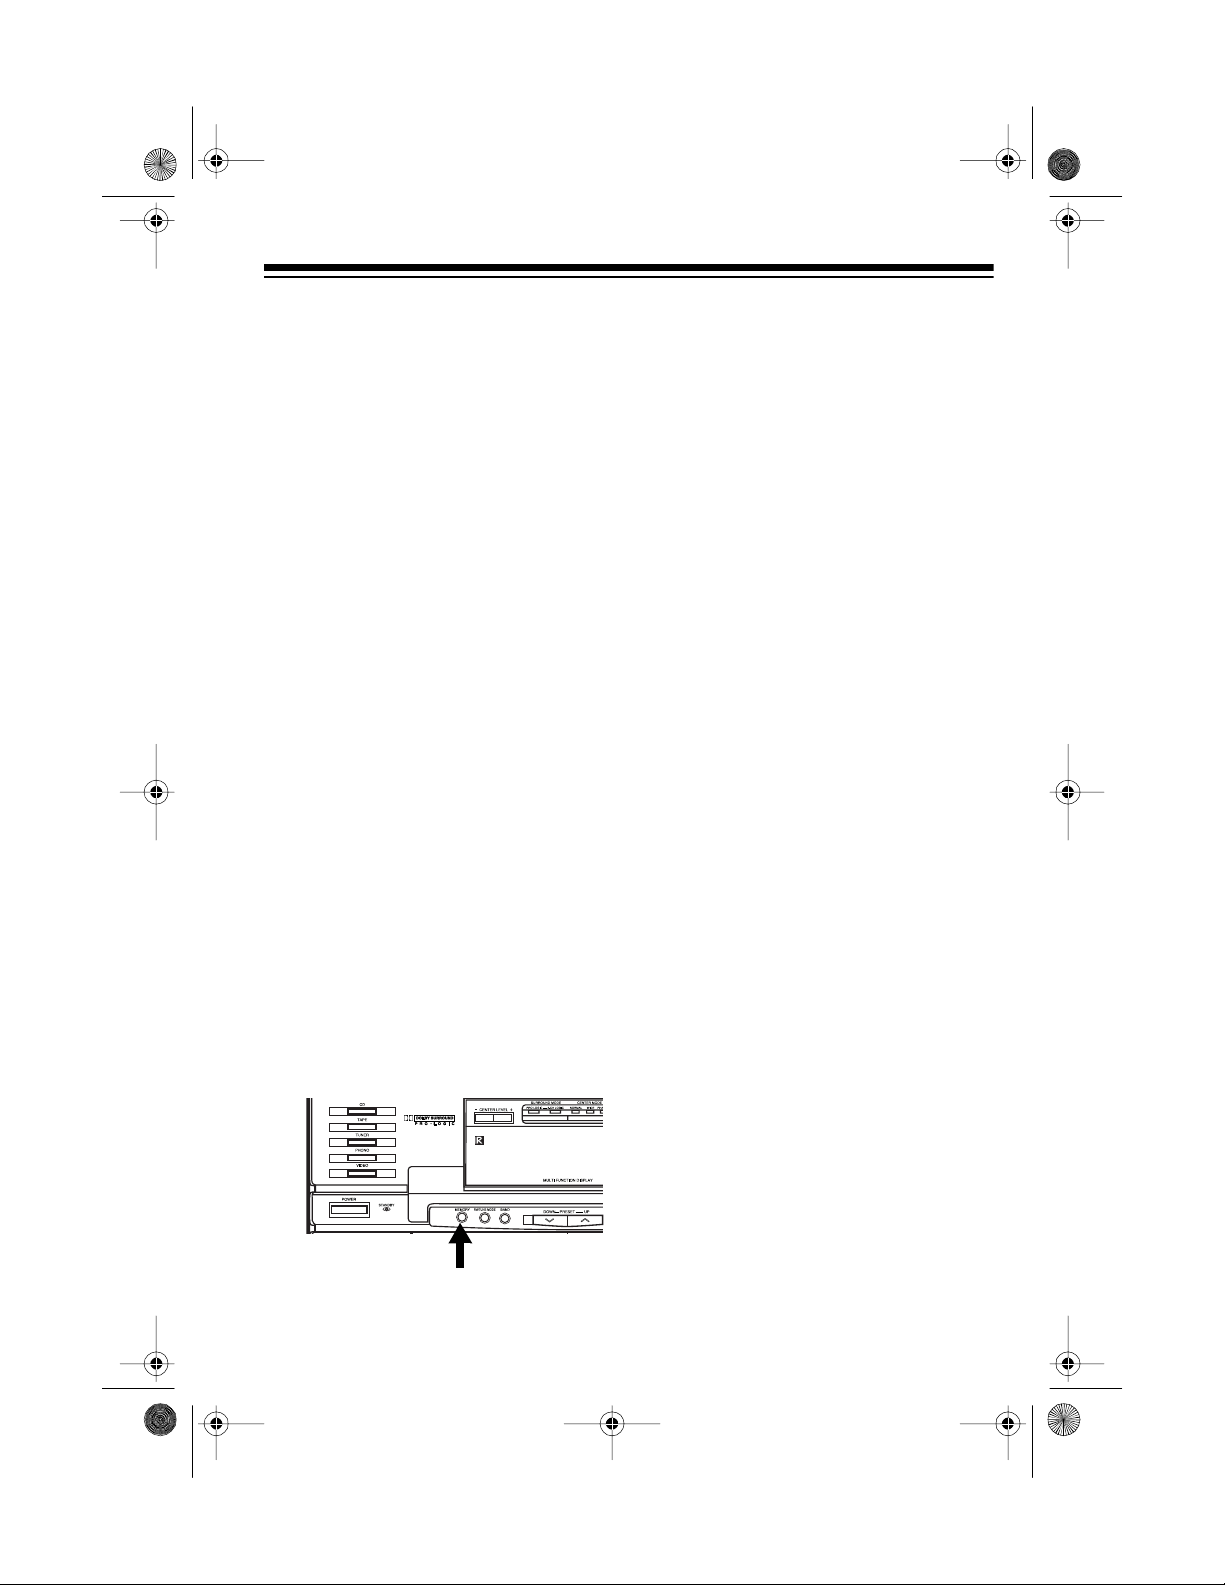
ADJUSTING THE SOUND
Press
to emphasize bass sounds. T o cancel
extended bass, press
E-BASS
(extended bass) to
E-BASS
again.
ON
BALANCE
Use
to adjust the output
level (balance) between the left and
right channel of the front speakers or
headphones.
MUTE
Press
silence the sound.
on the remote control to
MUTE
blinks on the
display. To return to the previous volume level, press
MUTE
again.
Adjust
the low frequencies. Adjust
BASS
to increase or decrease
TREBLE
to
increase or decrease the high frequencies.
19
13-129 3.fm Page 20 Wednesday, J uly 14, 1999 6: 49 PM
USING THE TUNER
TUNER
Press
ER/BAND
tuner automatically tunes to the station that was playing when you last
turned it off. The station’s frequency
and band (
display.
When you receive an FM station in
stereo,
play.
If FM stereo reception is noisy, press
FM/TUNE MODE
MONO
appears on the display and
AUTO
disappears. The sound is no
longer in stereo, but the reception
should improve.
You can tune to other AM or FM radio
stations using manual, seek, or memory tuning.
on t he syst em (or
on the remote control). The
AM
or FM) appears on the
STEREO
appears on the dis-
on the system until
TUN-
2. Repeatedly press
on the system until
pears from the display.
3. Repeatedly press (or hold down)
TUNING DOWN
or up the selected band.
FM/TUNE MODE
AUTO
disap-
or UP to tune down
MANUAL TUNING
1. Press
TUNER/BAND
trol) until
display.
20
BAND
on the system (or
on th e remote con-
AM
or FM appears on the
SEEK TUNING
Follow these steps to tune to the next
higher or lower station with a strong
signal.
BAND
1. Repeatedly press
system (or
remote control) until
appears on the display.
2. Repeatedly press
on the system until
on the display.
3. Press
system automatically tunes to the
next strong station.
TUNER/BAND
FM/TUNE MODE
TUNING DOWN
on the
on the
AM
or
AUTO
appears
or UP. The
FM
13-129 3.fm Page 21 Wednesday, J uly 14, 1999 6: 49 PM
MEMORY TUNING
You can automatically or manually
store up to 36 stations (AM o r FM) in
the system’s memory.
Note:
The tuner keeps the st ored stations even when you turn off the system or unplug it from the AC outlet.
Automatically Storing
Stations
You can set up the system so it automatically stores FM and AM stations.
During auto store, the system first
scans the FM band and automatically
stores the first 24 strong FM stations it
finds into memory locations 1–24.
Then the system scans the AM band
and stores the first 12 strong AM stations it finds into memory locations
25–36.
Follow these steps to set up the system so it automatically stores FM and
AM stations.
1. Hold down
TUNE MODE
CH
and -- appear and
MEMORY
) for about 3 seconds.
flashes on the display .
(next to
FM/
MEMORY
Note:
Use only the
ton next to
FM/TUNE MODE
MEMORY
on the
but-
tuner to automatically store stations. (The
CLEAR
to
MEMORY
button next
on the CD changer per-
forms another function.)
2. When both
MEMORY
flash on the display, release
ORY
.
and
AUTO
MEM-
After the system stores all FM and AM
stations into memory, it tunes to the
first stored FM station (memory location 1) and begins to play.
Notes:
• If the system cannot find enough
FM stations to fill the first 24 memory locations, it switches to the
AM band and searches for AM
stations, storing any it can find in
the remaining memory locations.
• If the system cannot find enough
AM stations to fill all the rema ining
available memory locations, the
remaining memory locations will
be left blank.
• To stop automatically storing stations before the system stores al l
stations, press
FM/TUNE MODE
MEMORY
(next to
) on the system.
21

13-129 3.fm Page 22 Wednesday, J uly 14, 1999 6: 49 PM
Manually Storing Stations
1. Tune to the station you want to
store.
2. Briefly press
TUNE MODE
MEMORY
) on the system.
and CH appear, and
flashes on the display for about 10
seconds.
Notes:
• Do not hold down
This causes the system to automatically store stations into all
of its me mory loc ations.
• Use only the
next to
FM/TUNE MODE
tuner to automatically store stations. (The
next to
CLEAR
changer performs another f unction.)
3. Within 10 seconds, repeatedly
press
PRESET DOWN
select the memory location where
you want to store the station.
(next to
MEMORY
MEMORY
MEMORY
MEMORY
on the CD
button
on the
button
or UP to
FM/
--
4. When the memory location you
want to use ap pears, press
ORY
within 10 seconds.
disappears, and the display
shows the selected memory location next to
CH
.
Selecting Preset Stations
To select a preset sta tion, repeatedly
PRESET DOWN
press
.
SET
on the remote control).
or UP (or
MEM-
MEMORY
PRE-
If you do not press
Note:
SET DOW N
onds,
or UP within 10 sec-
– –, CH
, and
disappear from the display. Simply begin again at Step 2.
22
PRE-
MEMORY

13-129 3.fm Page 23 Wednesday, J uly 14, 1999 6: 49 PM
CHANGING THE TUNING
INCREMENT
The System 745’s tuner is preset to
tune frequencies that are broadcast in
increments of 10 kHz f or AM and 200
kHz for FM, which is standard in the
United States.
If you use the S ystem 745 in Europe
or other parts of the world where f requencies are broadcast in increm ents
of 9 kHz for AM and 50 kHz for FM,
you can change the system’s tuning
increment.
Important:
the stations stored in memory when
you change the tuning increment.
Follow these steps to change the tuning increment.
1. Select AM or FM (wherever you
want to change the tuning increment).
2. Press
tem.
3. While you hold down
POWER
changes to the other setting.
4. To verify that the tuning increment
for the selected band has
changed, press
UP
The System 745 clears all
POWER
to tune down or up the band.
to turn off the sys-
BAND
, press
. The tuning increment
TUNING DOWN
or
23

g
13-129 3.fm Page 24 Wednesday, J uly 14, 1999 6: 49 PM
USING THE CD CHANGER
Press CD on the system to select the
CD changer function.
• If CDs are loaded, the display’s
upper line shows the current CD’s
information (
number,
number of tracks, and the total
playing time).
• If no CDs are loaded, the display
shows
last-selected disc number.
Warnin
and damage to the CD changer and
CD, do not put your fingers or the CD
inside the CD changer any further
than necessary to load and unload it.
:
DISC
and the CD’s
TRACK
DISC
To avoid personal injury
and the total
CHANGE
, , and the
LOADING CDS
Important:
protective cardboard sheet from the
CD compartment before you load and
play CDs (see “Unpacking the System” on Page 8).
1. Press
changer’s door opens.
Cautions:
• Do not apply excessive force t o
• To prevent dust from entering
2. If you do not see on the
display, press
inside the CD changer’s door.
Make sure you re move th e
DOOR OPEN
the CD changer’s door when it
is open. This could damage t he
CD changer.
the system, always keep the
CD changer’s door closed
except when loading or unloading CDs.
. The CD
CHANGE
LOAD/UNLOAD
24

13-129 3.fm Page 25 Wednesday, J uly 14, 1999 6: 49 PM
3. Repeatedly press
DOWN
or UP on the CD changer
DISC SELECT –
(or
remote control) until
DISC SKIP
or + on the
DISC
the disc number you want to
select appear on the display’s
upper line, and the disc number
flashes on the display’s lower line.
The platform inside the CD
changer rotates the slot for that
disc number to the front.
Cautions
: To prevent damage to
the CD changer:
• Do not manually rotate or s top
the platform while it is rotating.
• Do not load or unload a CD
while the platform is rotating.
and
Cautions:
To prevent damage to
the CD:
• Load only
CDs that are
marked with:
• Do not load a ny thing o ther than
5-inch CDs into the CD
changer. Do not load single 3inch CDs with any type of
adapter device.
• Do not load more than one CD
into the same slot.
• Do not force a CD into the loading slot. (While loading a CD,
always gently insert the CD into
the loading slot, then release it.)
5. Repeat Steps 3–4 to load up to 24
CDs.
6. Push the CD changer’s door up
until it clicks to close it.
7. Press
DISCS
DISC CHECK
scrolls once and flashes
CHECKING
.
three times on the display.
4. To load a CD, hold it vertically by
the edges with the label side to
the right, then gently insert it i nto
the slot in the center of the CD
changer.
The CD changer selects each slot
on the platform and checks only
for the presence of a CD in each
slot on the platform, not if the CD
is defective or loaded incorrectly.
25

13-129 3.fm Page 26 Wednesday, J uly 14, 1999 6: 49 PM
After the CD changer checks all
disc trays, the display shows each
loaded CD’s disc number at the
bottom of the display surrounded
by a graphic.
To assign a category or subcategory
to a CD (see “Assigning Category and
Subcategory Names to Loaded CDs”
on Page 31).
SELECTING A CD
With play stopped, selec t the CD you
want to play or eject one of two ways.
• Repeatedly press
DOWN
or UP on the CD changer
DISC SELECT
(or
remote control) until the disc number appears.
DISC SKIP
– or + on the
Note:
If you select a num ber that
does not have a CD assigned to it,
NO DISC
appears on the display.
REMOVING CDS
1. With play stopped, select the CD
you want to eject.
2. Press
DOOR OPEN
changer’s door opens.
3. Press
LOAD/UNLOAD
CD changer’s door.
appears on the display, the platform moves the selected CD to
the slot and the graphic around
the selected CD’s number disappears.
4. After the platform stops, gently
remove the CD from the CD slot.
5. To remove more CDs, select the
CD then repeat Steps 3–4.
. The CD
inside the
CHANGE
• Press the appropriate
SELECT
key(s) on the CD changer
until the disc number appears.
For example, to select disc number 23, press
2/DEF
, then
(Precede single-digit numbers
with a
disc number 3, press
GHI
0
. For example, to select
.)
0-/*
26
DISC
3/GHI
, then
6. Close the door.
.
3/
13-129 3.fm Page 27 Wednesday, J uly 14, 1999 6: 49 PM
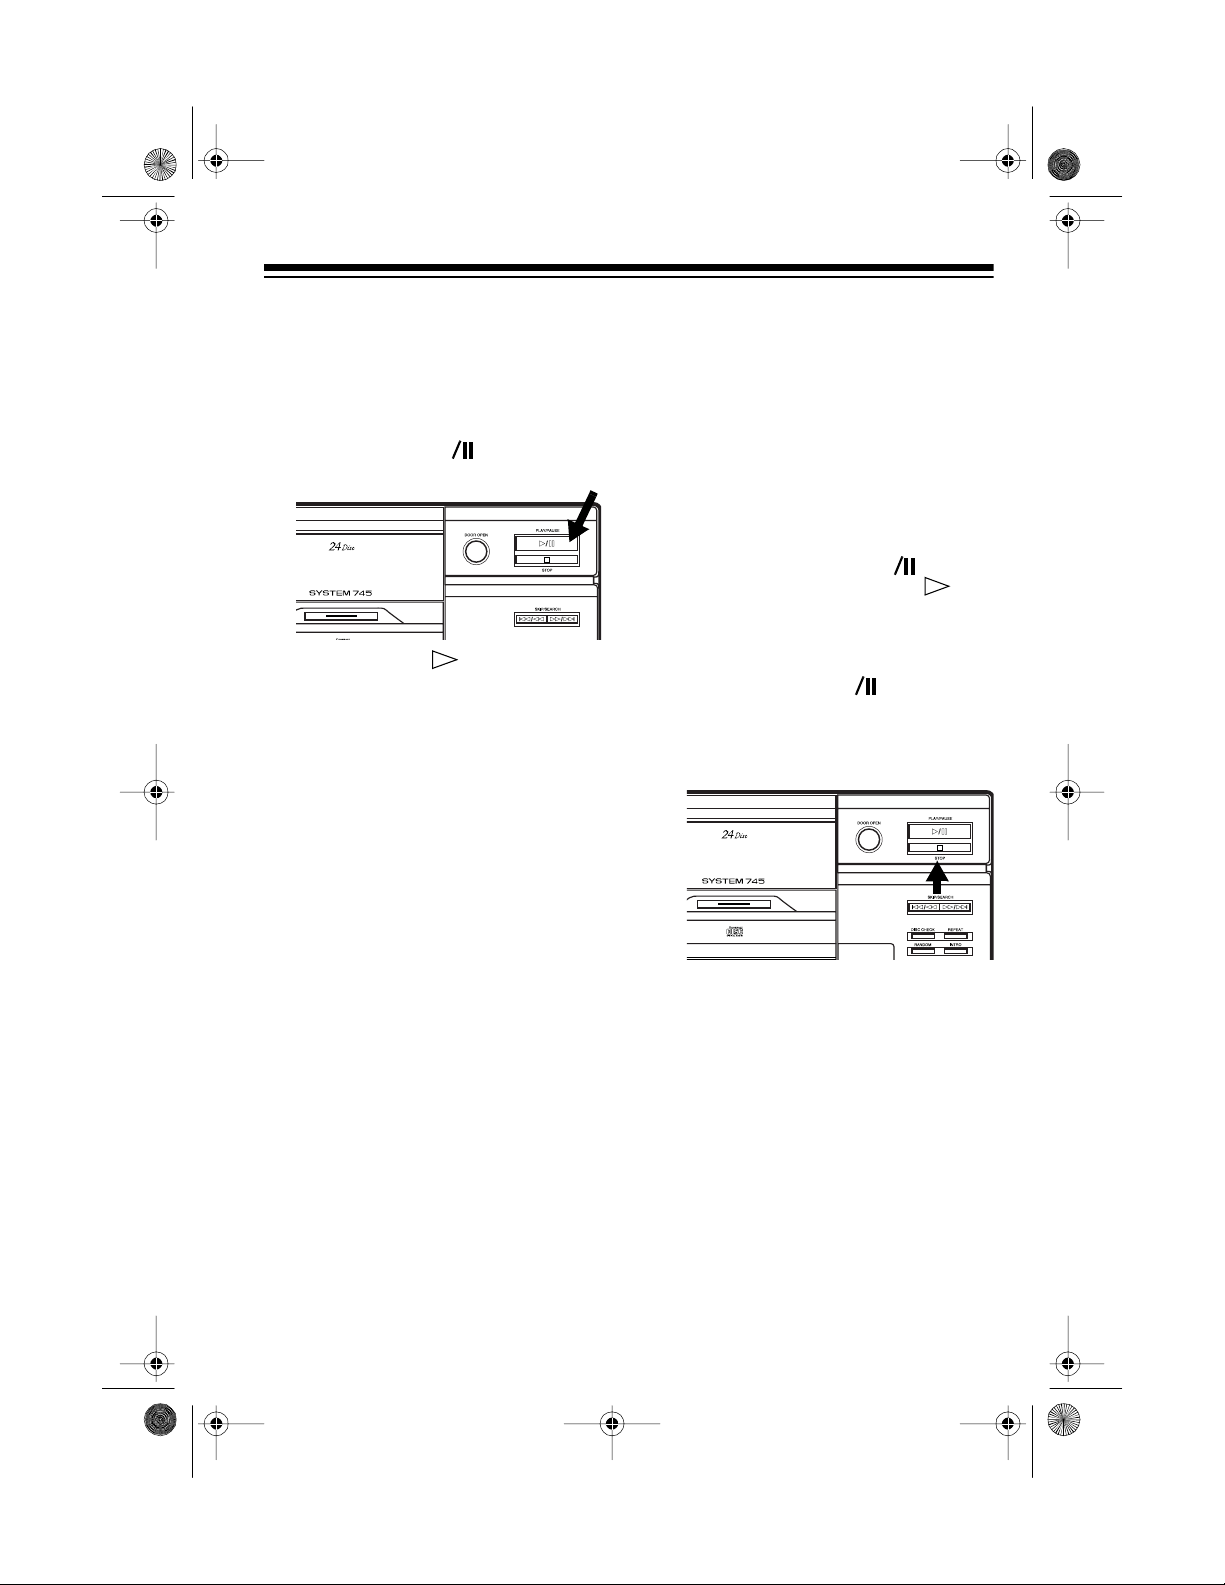
PLAYING CDS
1. With play stopped, select the CD
you want to play.
2. Press
changer (or
PLAY/PAUSE
CD
control).
PLAY
and appear, and
SEARCHING DISC
number scroll across the display.
After a few seconds, the selected
CD begins to play from Track 1.
While a CD plays, the CD changer
displays the current disc number
(blinking inside the graphic), the
current disc number and track
number, the current index number
(if the CD has index numbers —
numbers that mark sections within
a track) or
have index numbers, and the
elapsed time for the current track
(in minutes and seconds).
1
on the CD
on the remote
t
and the CD’s
if the CD does not
• A sudden shock o r jolt while a
CD is playing might suddenly
change the CD’s rotation spe ed
or make the CD changer skip
the current track. This might
momentarily mute o r distort the
sound. This is not a malfunction.
• To temporarily stop play, press
PLAY/PAUSE
changer (or
remote control).
on the CD
CD
on the
t
PLAY
, , and
the disc number surrounded by
a graphic flash on the display.
To resume play, press
PAUSE
3. To stop play, press
(or CD ) again.
t
STOP
. The CD
changer displays the selected
CD’s total play time.
PLAY/
Notes:
DISC ERROR
•If
scrolls across
the display or if the graphic
around the current disc n umber
blinks, the CD might be loaded
incorrectly or scratched.
27

13-129 3.fm Page 28 Wednesday, J uly 14, 1999 6: 49 PM
SKIPPING TRACKS
To skip backward or forward to a nother track (while a CD is playing,
paused, or stopped), repeatedly press
SKIP/SEARCH
until the desired track number appears. The CD changer skips to the
selected track, then plays i t.
To skip to a track on another CD, repeatedly press
on the CD changer (or
or + on the remote control) until the
disc number for the desired CD appears, then repeatedly press
SEARCH
the desired track number appears.
Notes:
• If you use skip play wh ile a CD is
paused, the CD remains paused
when the CD changer skips to the
selected track.
• If you start skip play during random play, th e CD changer cancels
random play (see “Random Play”
on Page 29).
or
DISC SKIP DOWN
DISC SELECT
or
SKIP/
UP
or until
AUDIBLE SEARCH
To search for a particular section of a
track (while a CD is playing), hold
down
plays the CD either backward or forward (like reviewing or cueing a cassette tape) and automatically reduc es
the CD’s volume if the CD was playing. When you reach t he desired section, release
–
or to resume normal play.
Notes:
SKIP/SEARCH
or
. The CD changer rapidly
SKIP/SEARCH
• If you use audibl e search while a
CD is paused, you do not hear
any sound and the CD remains
paused when you release
SEARCH
or .
SKIP/
• If the current CD reaches the e nd
while you hold down
SEARCH
, the CD
SKIP/
changer pauses at the beginning
of Track 1 on the next CD, u nless
you selected
REPEAT ALL
(see
“Repeat Play” on Page 29).
• If the current CD reaches the
beginning while you hold down
SKIP/SEARCH
, the CD
changer pauses at the beginning
of Track 1 on the current CD.
28
• If you use audible search during
random play, the CD changer cancels random play (see “Random
Play” on Page 29).

13-129 3.fm Page 29 Wednesday, J uly 14, 1999 6: 49 PM
REPEAT PLAY
You can repeat a single track on any
loaded CD, all tracks on a selected
CD, all tracks on all loaded CDs, or a
programmed sequence (see “Programmed Play” on Page 36).
• To repeat a single track, repeatedly press
ONE
appears on the display.
• To repeat all tracks on a CD or in a
programmed sequence, repeatedly press
ALL
appears on the display.
• To repeat all loaded CDs and
tracks, press
REPEAT
REPEAT
REPEAT CONTINUE
the display.
• To repeat a category (see “Category/Subcategory Play” on Page
35), press
MAIN
so
the display. Then repeatedly press
REPEAT
TINUE
To cancel repeat play at any time, repeatedly press
ONE
REPEAT ALL
,
CONTINUE
play.
CATEGORY SELECT
CATEGORY
until
appears on the display.
disappear from the dis-
REPEAT CON-
REPEAT
, and
REPEAT
until
REPEAT
until
REPEAT
appears on
appears on
REPEAT
until
REPEAT
until
RANDOM PLAY
During random play, the CD chan ger
randomly selects and plays tracks until you stop it.
Note:
You cannot use skip play or au-
dible search during random play.
Follow these steps to play random
tracks.
1. With play stopped, press
DOM
once to select
twice to select
RANDOM 1
•
track and plays it, then sele cts
another CD and track.
RANDOM 2
•
randomly plays all the track s on
that CD once, then selects
another CD.
2. Press
changer (or
control) to start random play.
Note:
selects the same track twice in a
row from a single CD. However, it
might select the same track more
than once.
PLAY/PAUSE
CD
The CD changer never
RANDOM 1
RANDOM 2
selects a CD and a
selects a CD, then
on the CD
on the remote
t
RAN-
, or
.
29

13-129 3.fm Page 30 Wednesday, J uly 14, 1999 6: 49 PM
3. To make another random selection during play, press
•In the
RANDOM 1
RANDOM
.
mode, the CD
changer randomly selects
another CD and track.
•In the
RANDOM 2
mode, the CD
changer randomly selects
another track from the same
CD. If all the tracks have been
played, the CD chang er selects
another CD and track.
4. To stop random play, press
STOP
To play random selection s from a category or subcategory, first select a
category or subcategory (see “Category/Subcategory Play” on Page 35),
then follow the steps above.
INTRO SCAN
INTRO
Press
onds of each t rack , begi nning with the
current CD.
display. Press
to normal play.
.
Notes:
• If you press
play , intro scan starts with the next
track on the CD.
• You can skip to another track during intro scan (see “Skipping
Tracks” on Page 28).
to play the first 10 sec-
INTRO
appears on the
INTRO
again to return
INTRO
during normal
30
13-129 3.fm Page 31 Wednesday, J uly 14, 1999 6: 49 PM
ASSIGNING CATEGOR Y
AND SUBCATEGORY
NAMES TO LOADED CDS
You can assign a category name to
each loaded CD, and then use category names to select and play only
those CDs that contain the type of music you want to hear.
In addition to assigning category
names, you can further define music
styles within the same category by assigning your own subcategory name
to the CD.
For example, if you load two jazz CDs
and assign a JAZZ category name,
you can assign subcategory names
such as DIXIE or FUSION. You must
assign a category to a loaded CD b efore you can assign a subcategory to
it.
Notes:
Assigning Preset Category
Names
1. With play stopped, select the
desired CD.
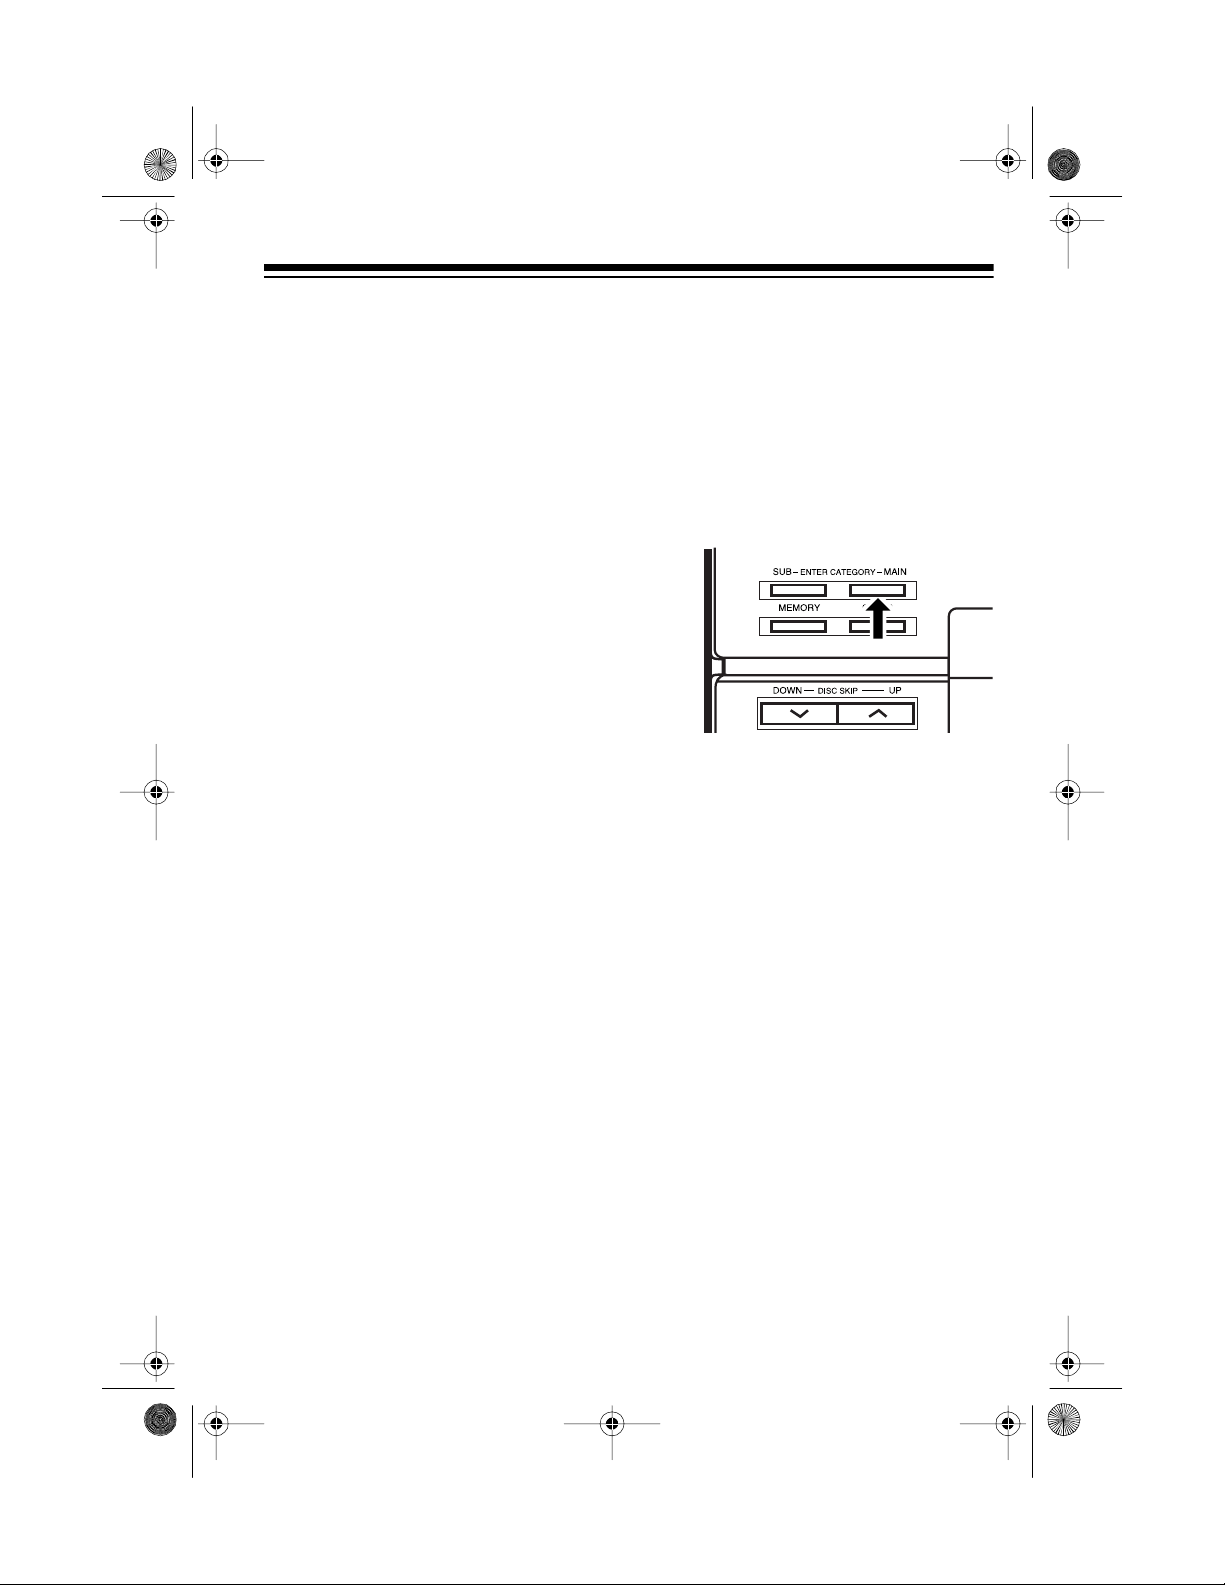
2. Repeatedly press
GORY MAIN
CATEGORY
until
name flash.
Each time you press
EGORY MAIN
plays these preset category
names:
ROCK
•
C/W
•
on the CD changer
, the CD changer dis-
(Rock)
(Country and western)
ENTER CATE-
and the category
ENTER CAT-
• The CD changer saves category
and subcategory names even
when you turn off the CD changer
or unplug it from the AC outlet.
• When you assign a category or
subcategory name to a loaded
CD, the CD changer stores the
selected name by disc position
number. If you remove a CD then
load another CD as that same
disc number, the same category
and subcategory names apply to
the new CD until you change
them.
R/B
•
•
•
•
•
• _ _ _ _ _ _ _ _ (These blank
(Rhythm and blues)
JAZZ
(Jazz)
EASY
(Easy listening)
SHOW
(Show tunes)
CLAS
(Classical)
lines appear so you can create
a new category name — see
“Creating and Assigning New
Category Names” on Page 32.)
31
13-129 3.fm Page 32 Wednesday, J uly 14, 1999 6: 49 PM
Note: If new category names
have been created (see “Creating
and Assigning New Category
Names”), they appear after
CLAS
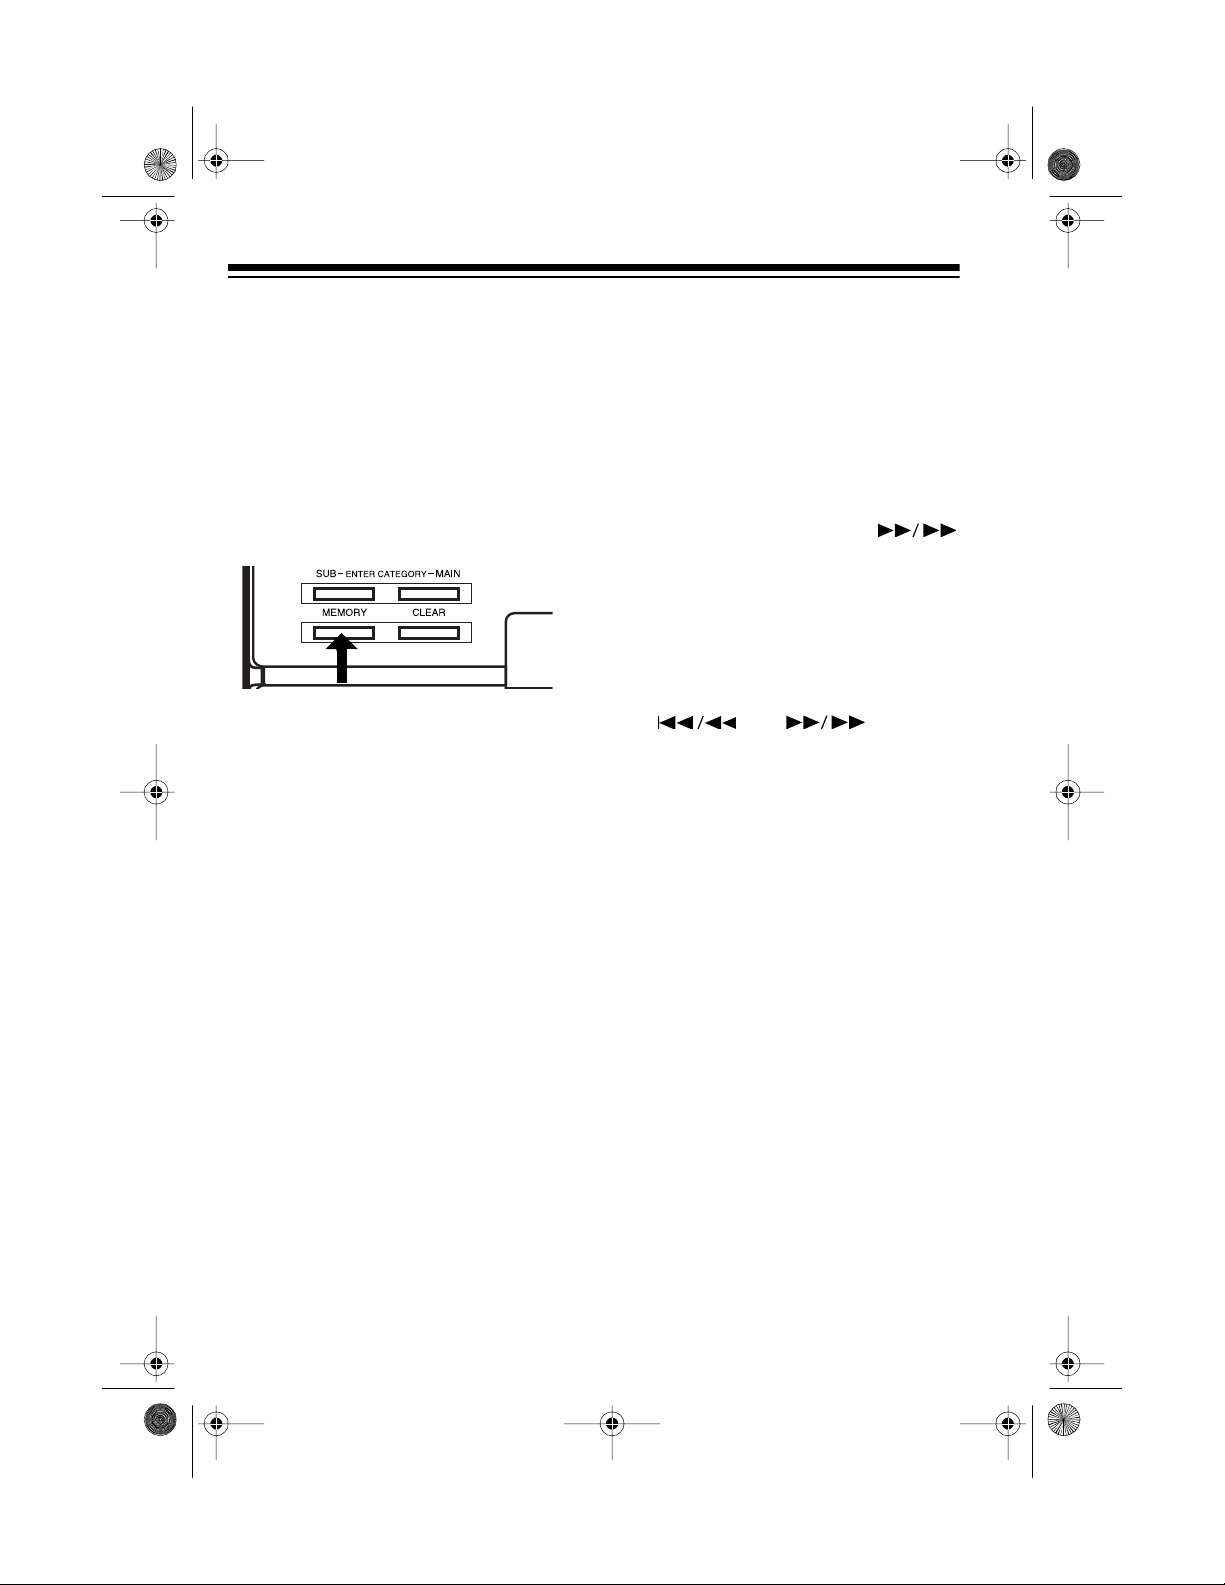
3. When you see the category name
you want, press
CLEAR
) on the CD changer. The
MEMORY
selected category name and
MEMORIZED
scrolls across the
(nex t to
IS
display.
Note: Use only the
ton next to
CLEAR
MEMORY
but-
on the CD
changer to assign a preset category name. (The
next to
FM/TUNE MODE
MEMORY
below the
button
display performs a different function.)
3. Repeatedly press the appropriate
DISC SELECT
key on the CD
changer until the desired charac-
.
ter replaces the flashing _ on the
display.
For example, to select
JKL
four times (until L flashes on
L
, press
4/
the display).
4. Press
SKIP/SEARCH
once. The next _ in _ _ _ _ _ _ _ _
flashes.
5. Repeat Steps 3–4 until the display
shows the new category name.
Note: If you make a mistake,
repeatedly press
SKIP/SEARCH
or until the
incorrect character flashes, then
enter the correct character.
6. After you enter the n ew category
name, press
CLEAR
) on the CD changer to
MEMORY
(next to
store it.
Creating and Assigning New
Category Names
You can create up to 24 new category
names that contains up to 8 characters (including letters, numbers, and
special characters). When you create
a new category name, it is automatically assigned to the selected CD.
1. With play stopped, select the
desired CD.
2. Repeatedly press
GORY MAIN
on the C D changer
un til _ _ _ _ _ _ _ _ appears on
the display.
32
ENTER CATE-
The new category name and
MEMORIZED
play (for example,
RIZED
Note: Use only the
next to
scrolls across the dis-
RAP IS MEMO-
).
MEMORY
CLEAR
on the CD changer t o
IS
button
store a new subcategory name. (The
MEMORY
MODE
button next to
below the display performs an-
FM/TUNE
other function.)
13-129 3.fm Page 33 Wednesday, J uly 14, 1999 6: 49 PM
Creating and Assigning
Subcategory Names
You can create up to 24 subcategory
names that contains up to 8 characters (including letters, numbers, and
special characters). When you create
a new subcategory name, it is automatically assig ned to the selec ted CD.
Do not assign the same subcat -
Note:
egory name to CDs under different
categories. Otherwise, when you select and play the CDs under th at subcategory name, you might hear CDs
under an unexpected category.
1. With play stopped, select the
desired CD.
2. Press
ENTER CATEGORY MAIN
on
the CD changer. The category you
previously assigned to the CD and
CATEGORY
flash on the display.
Note:
repeatedly press
If you make a mistake,
SKIP/SEARCH
or until the
incorrect character flashes, then
enter the correct character.
7. To store the new subcategory
name, press
CLEAR
on the CD changer).
MEMORY
(next to
The stored category name, subcategory name, and
RIZED
scrolls across the display
(for example,
IS
MEMORIZED
Use only the
Note:
ton next to
CLEAR
IS MEMO-
ROCK BEATLES
).
MEMORY
on the CD
but-
changer to store a new subcategory name. (The
next to
FM/TUNE MODE
MEMORY
below the
button
display performs another function.)
3. Repeatedly press
GORY SUB
until _ _ _ _ _ _ _ _
appears on the display.
EGORY
and the first _ flashes.
ENTER CATE-
SUB CAT-
4. Repeatedly press the appropriate
DISC SELECT
key on the CD
changer until the desired character replaces the flashing _ on the
display. For example, to select L,
press
4/JKL
four times (until
flashes on the display).
5. Press
SKIP/SEARCH
once. The next _ flashes.
6. Repeat Steps 4–5 until the display
shows the complete new subcategory name.
L
33

13-129 3.fm Page 34 Wednesday, J uly 14, 1999 6: 49 PM
Changing/Erasing Category
and Subcategory Names
When you change or erase a CD’s
category name, the CD changer automatically erases the previously assigned subcategory name. When you
erase a subcategory name, the CD
changer also automatically e rases the
category name.
Follow these steps to change a CD’s
category or subcategory name.
1. With play stopped, select the
desired CD.
2. Press
ENTER CATEGORY MAIN
the CD changer. If you want to
change only the subcategory
name, press
SUB
on the CD changer. The current category and/or subcategory
name and
CATEGORY
ENTER CATEGORY
CATEGORY
flash.
or
on
SUB
Follow these steps to erase a CD’s
category and subcategory name.
1. With play stopped, select the
desired CD.
2. Press
3. Press
ENTER CATEGORY MAIN
the CD changer. The category
CLEAR
CATEGORY
on the CD changer.
flash on
name and
the display.
on
PRESS CLEAR KEY AGAIN TO
ERASE
twice.
4. Press
again.
Note:
name and it is not stored in any of the
other CDs, that category nam e is removed from the system’s memory and
is no longer a preset option.
scrolls across the display
CLEAR
ERASED
If you clear a main category
on the CD changer
briefly appears.
3. Press
once. The first letter of the category or subcategory name
flashes.
4. Follow Steps 3–6 under “Creating
and Assigning New Category
Names” on Page 32 or Steps 4–7
under “Creating and Assigning
Subcategory Names” on Page 33
to change the d isplayed category
or subcategory name.
34
SKIP/SEARCH
13-129 3.fm Page 35 Wednesday, J uly 14, 1999 6: 49 PM
Category/Sub cate go ry Play
Note:
on CDs by category or subcategory
(see “Random Play” on Page 29).
Follow these steps to play only those
CDs assigned to a specific category or
subcategory.
You can randomly play tracks
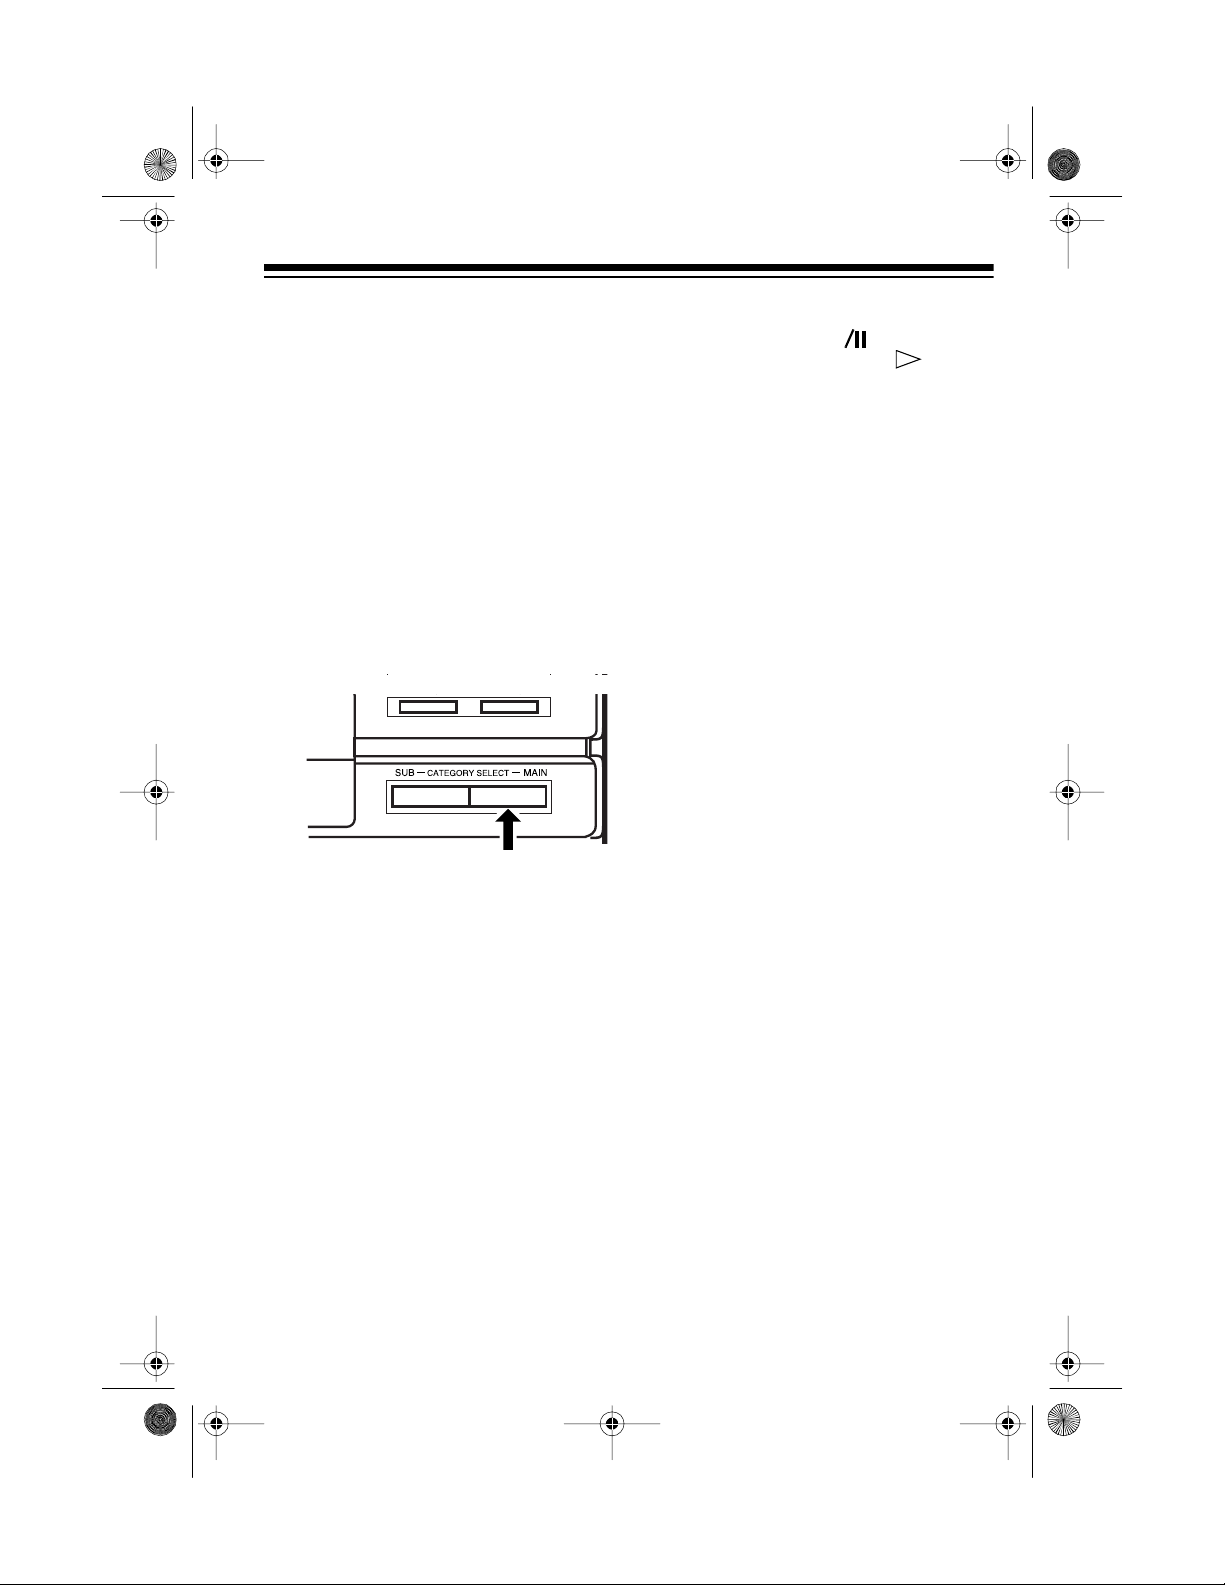
1. With play stopped, repeatedly
press
on the CD changer (or
MAIN
CATEGORY
CATEGORY SELECT MAIN
CA TEGORY
on the remote control) until
and the category
name appears.
As each category name appears,
the display shows only the disc
numbers assigned to that category.
3. Press
changer (or
control).
and
PLAY/PAUSE
CD
PLAY and
SEARCH ING DISC
on the CD
on the remote
t
appear,
and the
CD’s disc number scroll across
the display. After a few seconds,
the first CD in the category or subcategory plays.
After playing all the CDs with the
same category or subcat egory name,
the CD changer automatically stops
but the category or subcategory stays
selected.
To stop play before the CD changer
automatically stops, press
STOP
any
time.
To clear the category or subcategory
selection, with play stopped, press
STOP
or turn the CD changer off.
2. If desired, repeatedly press
GORY SELECT SUB
changer (or
CATEGORY SUB
on the CD
the remote control) until the subcategory name appears. As each
subcategory name appears, the
display shows only the dis c numbers assigned to that subcategory.
If you have not assigned a
Note:
subcategory name to a disc num-
SUB CATEGORY NOT USED
ber,
scrolls across the display.
CATE-
on
35

13-129 3.fm Page 36 Wednesday, J uly 14, 1999 6: 49 PM
PROGRAMMED PLAY
You can program up t o 48 selections
from all loaded CDs to play in an y order you choose. A selection can be a
single track or all tracks on a CD.
Notes:
• You can store a selection more
than once in a programmed
sequence.
• You cannot display the remaining
time for the entire CD during programmed play.
Progra mming and Play ing a
Sequence
1. With play stopped, press
(next to
changer.
The current CD’s number and
(all tracks on the current CD)
appear on the display, and
flashes.
2. Select the desired CD.
Note:
selected CD (as a single selection), skip Step 3.
3. Repeatedly press
display shows the track you want
to program.
36
CLEAR
To store all tracks on the
or until the
) on the CD
MEMORY
AL
PROG
SKIP/SEARCH
4. Press
on the CD changer.
flashing, the CD changer programs your selection, and the
number under
play indicates how many selections you have made.
5. Repeat Steps 2–4 to program
more selections.
Note:
than 48 selections,
appears.
6. To play the programmed sequen ce, press
CD changer (or
remote control).
After the CD changer plays the last
track in the programmed sequence, it
stops.
Notes:
• The programm ed sequence stays
in memory after playback is over
(see “Clearing the Programmed
Sequence” on Page 38 for how t o
clear the programmed sequence).
1
.
• You can skip to other programmed
tracks during programmed play.
• You can use audible search during programmed p lay by pressing
and holding down
CD changer reaches the end of a
track during audible search, it
pauses at the beginning of the
next programmed track. When t he
CD changer reaches the beginning of the current track, it paus es
there.
MEMORY
(next to
STEP
If you try to program more
PLA Y/PAUSE
CD
or . When the
CLEAR
PROG
. stops
on the dis-
FULL
on the
on the
t
SKIP/SEARCH
)

13-129 3.fm Page 37 Wednesday, J uly 14, 1999 6: 49 PM
Reviewing the Programmed
Sequence
With play stopped, repeatedly press
MEMORY
changer. The display shows the following programming information for
each selection in the sequence.
•
•
•
(next to
DISC
and the selected CD’s disc
number
TRACK
AL
STEP
This number shows the sequence
order in which the selection plays.
and the track number or
(all)
and the selection number.
CLEAR
) on the CD
Adding Selections to the
Programmed Sequence
Note:
selections in a programmed sequence, you cannot add more to it.
If you have already stored 48
1. With play stopped, repeatedly
MEMORY
press
on the CD changer until -------appears on the display.
(next to
CLEAR
4. Press
on the CD changer to store the
selection.
5. Repeat Steps 2–4 as necessary
to add selections to the programmed sequence.
MEMORY
(next to
CLEAR
)
Changing a Programmed
Sequence
1. With play stopped, repeatedly
MEMORY
press
on the CD changer until the selection you want to cha nge appears
on the display.
2. Select the CD you want to change
to.
To change the displayed track
number, repeatedly press
SEARCH
until the new track number
appears.
3. Press
)
on the CD changer to store the
change.
or
MEMORY
(next to
(next to
CLEAR
SKIP/
CLEAR
)
)
2. Select the desired CD.
To store all the tracks on the
Note:
selected CD (as a single selection), skip Step 3.
3. Repeatedly press
or until the
display shows the track you want
to program.
SKIP/SEARCH
37

13-129 3.fm Page 38 Wednesday, J uly 14, 1999 6: 49 PM
Clearing the Programmed
Sequence
The CD changer saves a programmed
sequence as long as power is supplied to the CD changer. To clear a
programmed sequence, press
CLEAR
or
and CD is the selected function.
when a CD is not playing
STOP
CD CARE TIPS
Even though a CD is very durable, you
should handle it with care.
• Keep the CD inside the CD
changer or in its protective case or
sleeve when you are not playing
it.
• Handle a CD by its edges to avoid
fingerprints which can prevent the
CD changer’s laser beam from
accurately reading the CD. Your
local RadioShack store sells a
suitable CD cleaner kit.
• Do not write on either s ide of the
CD, particularly the non-label
side. (Signals are read from the
non-label side.)
• Keep the CD dry. A water drop
can act as a lens and affect the
laser beam’s focus.
• If a CD skips or the CD changer
displays
try to play it, the CD might be
scratched. Your local RadioShack
store sells a Scratch ’n Fix kit
(Cat. No. 42-127) that might help
remove the scratch and stop the
skip (see “Troubleshooting” on
Page 46).
DISC ERROR
when you
38
• Never use chemicals such as
record cleaning sprays, anti-static
sprays or fluids, be nzene, or thinner to clean CDs. These chemicals will permanently damage the
CD’s plastic surface.
13-129 3.fm Page 39 Wednesday, J uly 14, 1999 6: 49 PM
USING THE CASSETTE DECK
Press
the cassette deck function.
Note:
one deck, use only the controls on that
deck.
TAPE
on the system to select
While playing or recording on
LOADING A CASSETTE
TAPE
Cautions:
• Before you load a cassette, take
up any tape slack by turning the
tape hub with a pencil or your finger. Loose t ape can easily get tangled in your cassette deck’s
mechanism.
• Use only Type-1 (normal-bias) or
Type-2 (CrO
RadioShack store sells a complete selection of blank tapes.
• Do not use C-120 tapes because
they are very thin and can e asily
get tangled in your cassette
deck’s mechanism.
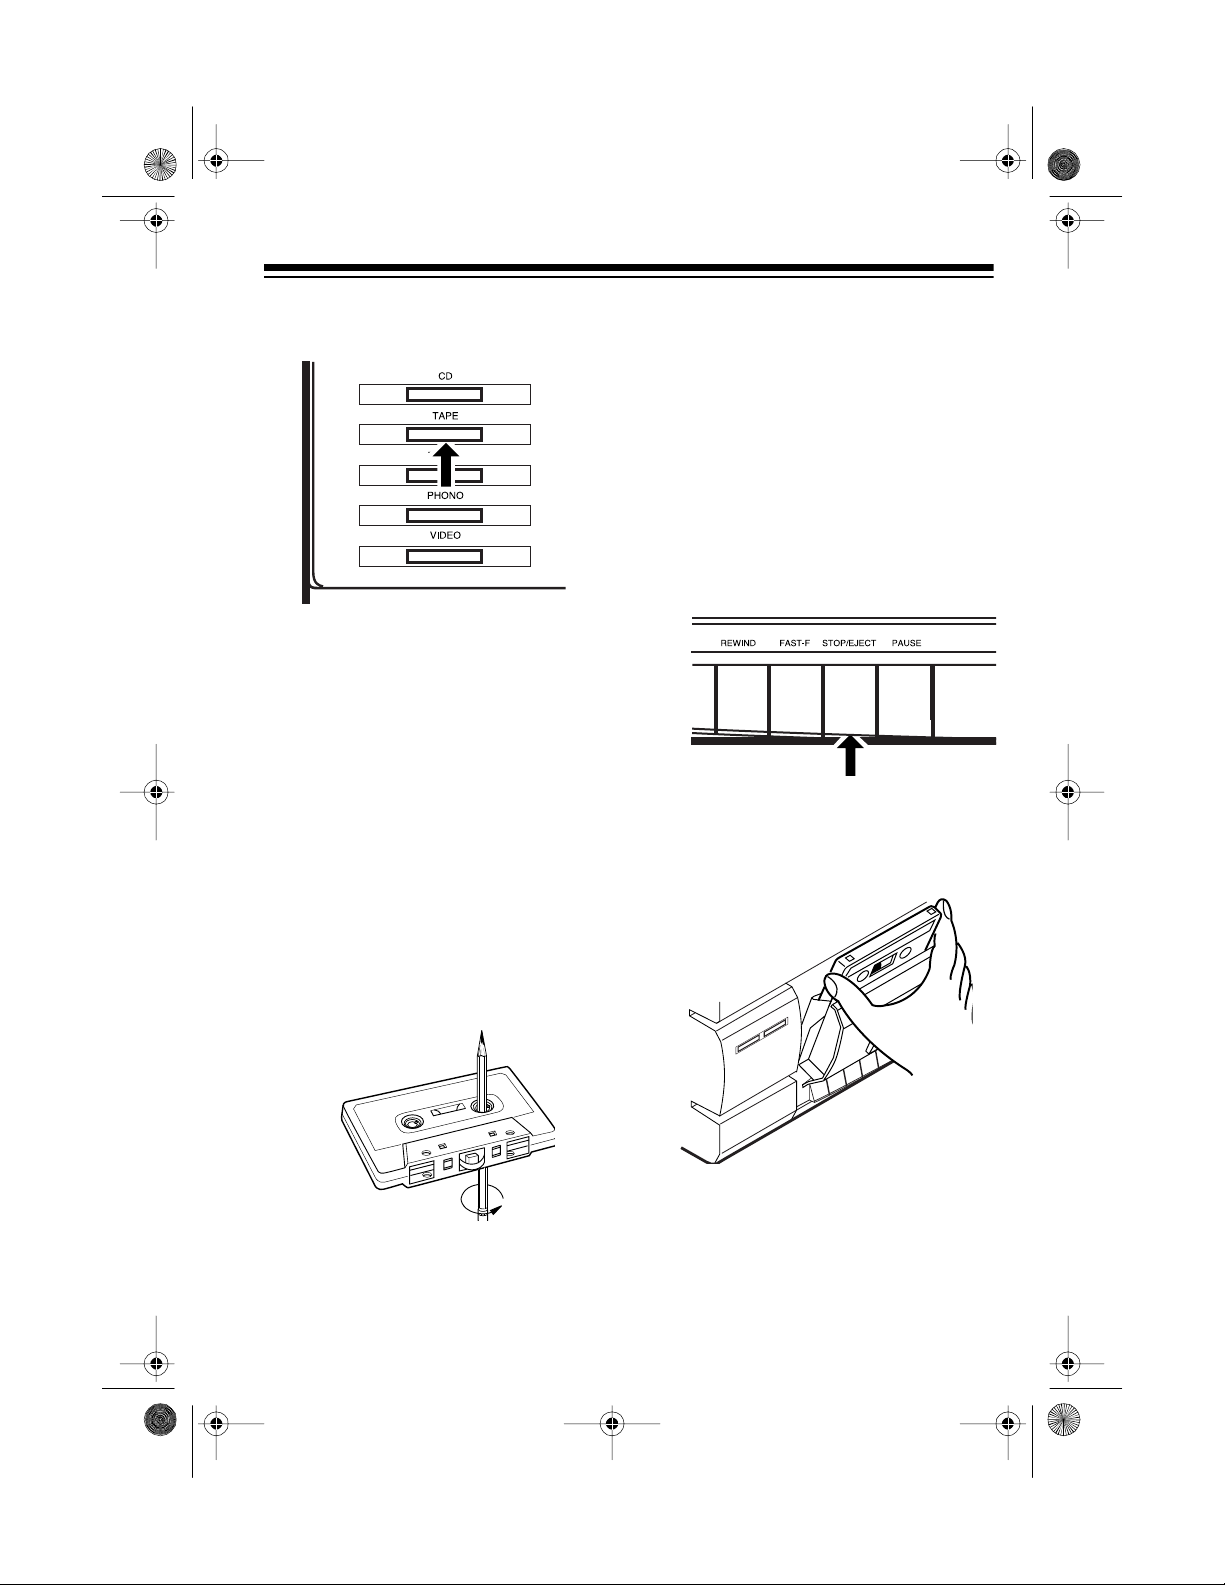
1. Press
2. Load the cassette with its open
STOP/EJECT
1 or Deck 2 to open the cassette
compartment door.
edge facing down, its full reel to
the left, and the side you want t o
play facing you.
) tapes. Your local
2
on either Deck
3. Gently close the compartment
door.
39
13-129 3.fm Page 40 Wednesday, J uly 14, 1999 6: 49 PM
PLAYING A CASSETTE
TAPE
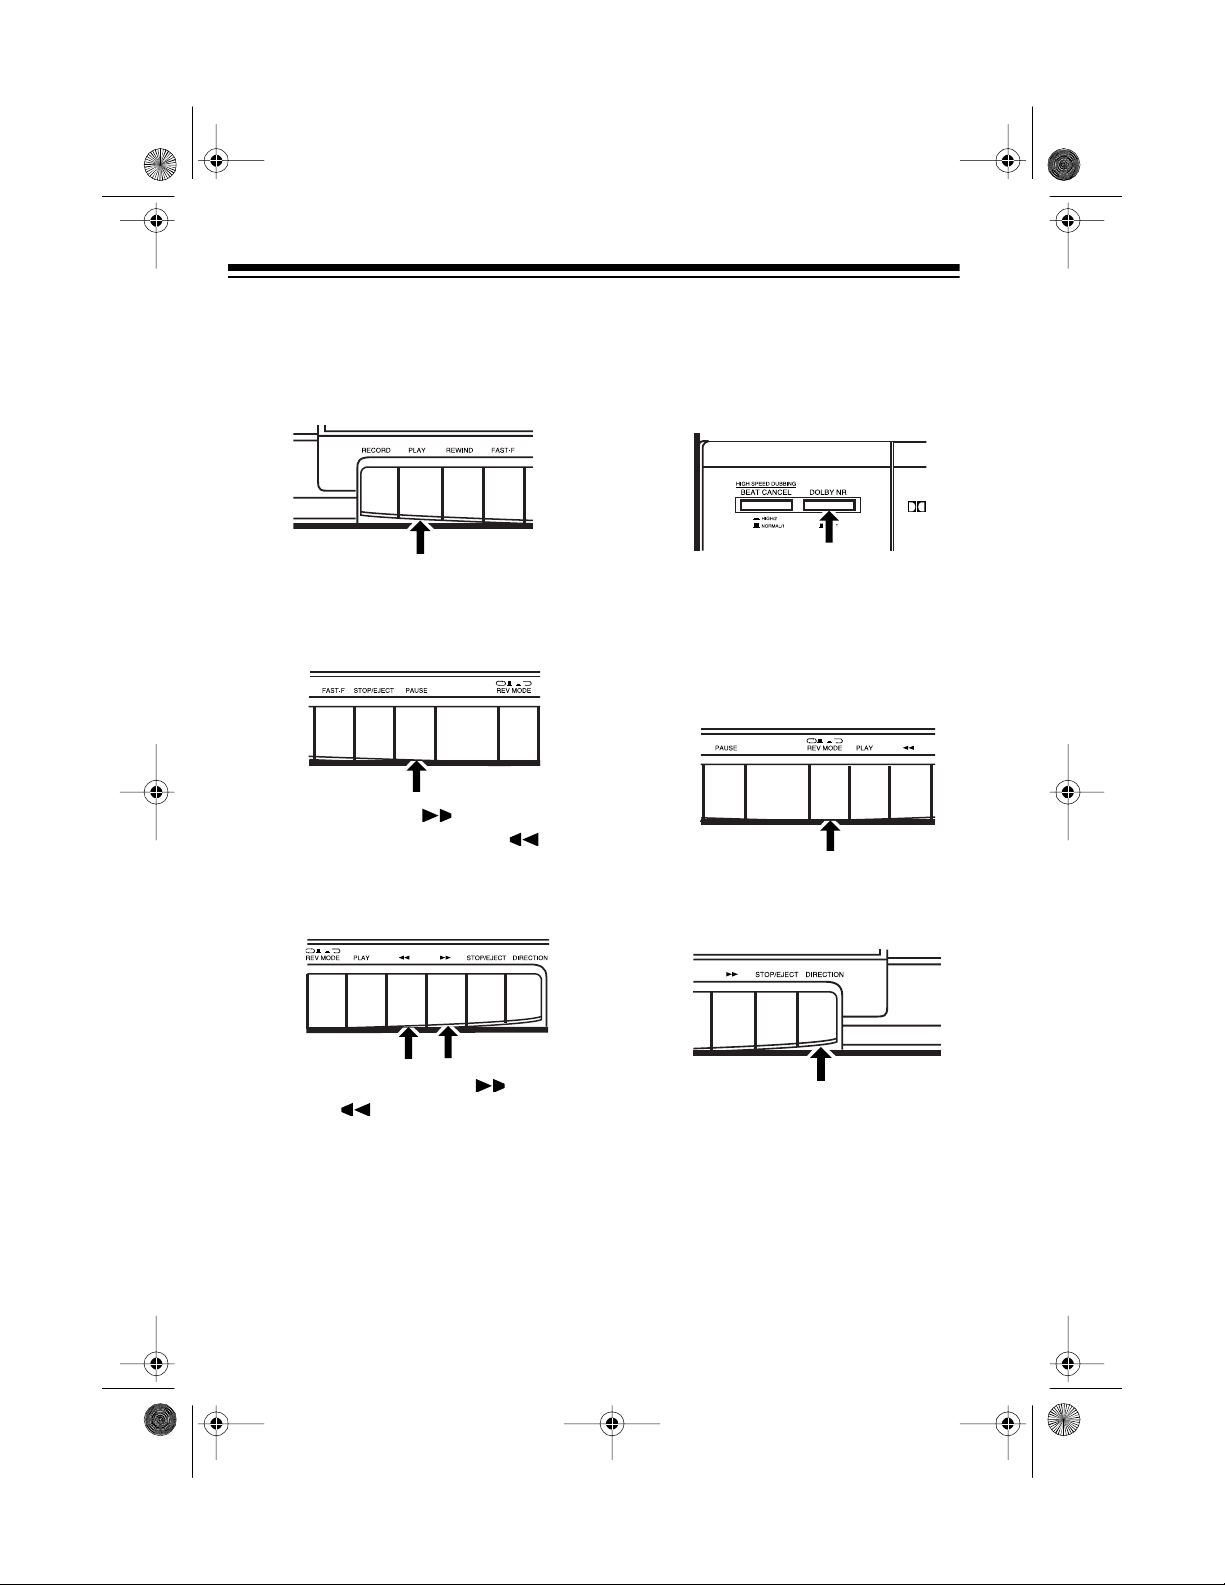
1. Press
PLAY
to start play.
•Press
PAUSE
on Deck 1 to temporarily stop playback. To
resume playback, press
again.
•Press
ward, or press
FAST-F
/ to fast-for-
REWIND
/ to
rewind the tape. When the tape
reaches the desired location,
STOP/EJECT
press
.
PAUSE
2. If the tape is m arked DOLBY NR,
DOLBY NR
set
DOLBY NR
set
to ON. Otherwise,
OFF
to
(see “Using
Dolby Noise Reduction” on Page
41).
3. If you use Deck 2:
• Press in to play both
REV MODE
sides of the tape one time, or
press out to continu-
REV MODE
ously play both sides of the
tape.
•Press
DIRECTION
to immediately play the other side of the
cassette tape.
Do not press
WIND
/ on the other deck, or
FAST-F
the sound quality might deteriorate.
40
/ or
RE-
13-129 3.fm Page 41 Wednesday, J uly 14, 1999 6: 49 PM
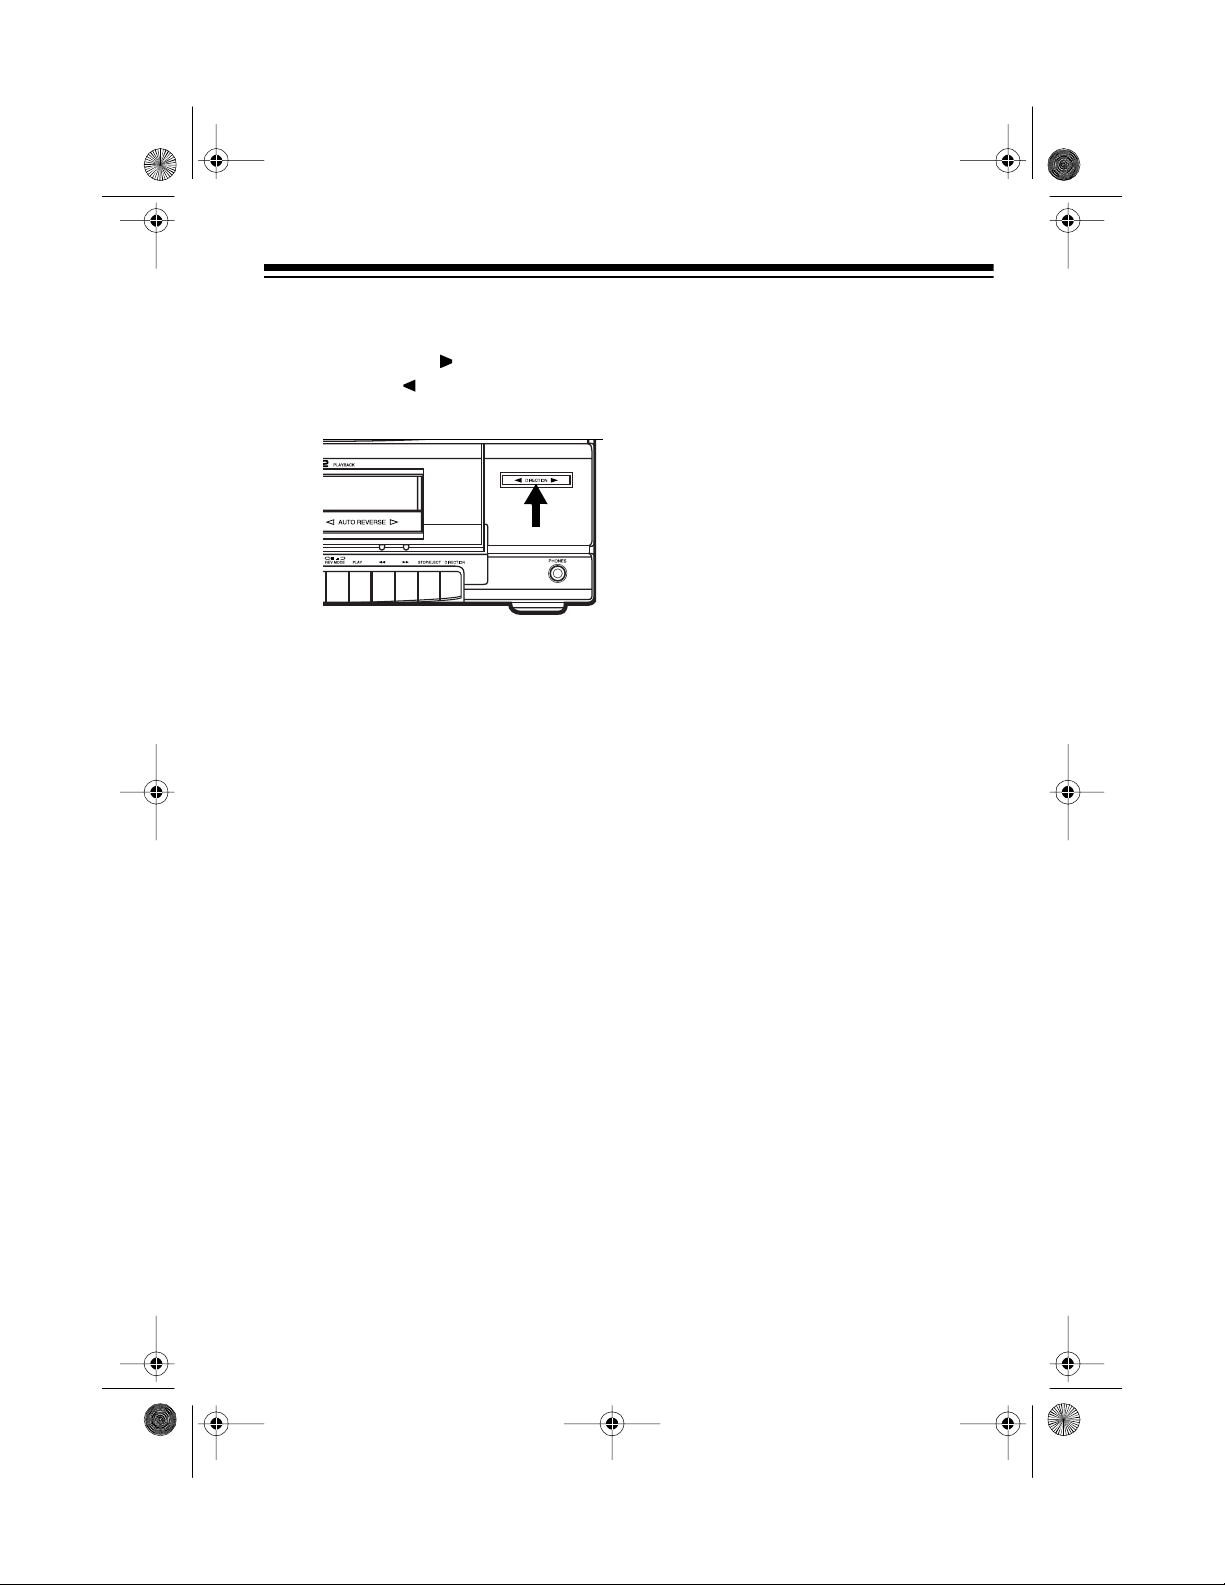
DIRECTION
The
the playback tape direction —
DIRECTION
back) or
playback).
indicator shows
(normal play-
DIRECTION
(reverse
USING CONSECUTIVE
PLAY (DECK 2 TO
DECK 1)
You can set the tape player to play
both sides of the tape in Deck 2, then
automatically play one side of the tape
in Deck 1.
Caution:
2 reaches the end during fastforward or rewind, press
EJECT
nism.
Note:
auto stop system to protect the
tape and prevent pinch roller damage. When the tape reaches the
end during playback, recording,
fast-forward, or rewind, the tape
mechanism in Deck 1 automatically releases.
4. Press
back at any time.
When the tape in Deck
to release the mecha-
Deck 1 has a full-release
STOP/EJECT
to stop play-
STOP/
1. Press in on Deck 2.
2. Press
sette in Deck 2 plays.
3. While the cassette in Deck 2 is
playing, press
on Deck 1.
When the cassette in Deck 2 finishes
playing both sides, the cassette tape
in Deck 1 automatically begins playback.
REV MODE
PLAY
on Deck 2. The cas-
PA US E
then
PLAY
USING DOLBY NOISE
REDUCTION
The System 745’s cassette Deck uses
the Dolby-B NR (noise reduction) system which lowers the level of background noise or “tape hiss” to one
third of the original level.
When listening to a recording, set
DOLBY NR ON/OFF
when it was recorded.
to the setting used
41

13-129 3.fm Page 42 Wednesday, J uly 14, 1999 6: 49 PM
RECORDING
You can use the System 745 to record
onto a cassette tape from the following sources:
• Another cassette tape
• CD changer
• Tuner
• Audio source
Notes:
• Before you record on a cassette
tape, make sure the cassette’s
erase-protection tabs are in place
(see “Preventing Accidental Erasure” on Page 45).
• The recording level is preset.
Pressing
MASTER VOLUME
VOL –
E-BASS
MASTER VOL
or
remote control) does not affect the
recording level or quality.
Dubbing (Copying) Cassette
Tapes
or adjusting
MASTER
(or
+
on the
3. Set the dubbing speed.
• To record in half the normal
recording time, press
SPEED DUBBING/BEAT CANCEL
so it clicks and stays in.
• To record at normal speed for
better quality sound, press
HIGH SPEED DUBBING/BEAT
CANCEL
so it clicks and stays
out.
Caution:
Do not change the dubbing speed while dubbing. Doing
so might ca use a dis tor t ed recording or damage the tape.
4. On Deck 1, press
RECORD. RECORD
PAUSE
and
PLAY
Deck 1 automatically lock down.
HIGH
then
on
You can use the cassette de ck’s synchro dubbing feature to easily copy a
tape from Deck 2 to Deck 1. You can
choose between normal and highspeed dubbing, and you can monitor
the tape as you dub it.
1. Load the cassette you want to
copy from into Deck 2.
2. Load a blank cassette, or one you
want to record over, into Deck 1.
42
Caution:
RECORD
Do not force down
. This can damage the
recording mechanism.
PLAY
PAUSE
5. On Deck 2, press
.
on Deck 1 releases, and the system copies the tape in Deck 2
onto the tape in Deck 1.

13-129 3.fm Page 43 Wednesday, J uly 14, 1999 6: 49 PM
Note: To monitor the tape while it
is copying, adjust
UME
TER VOL
MASTER VOL
(or
+ on the remote control)
MASTER VOL-
– or
to a comfortable listening level.
6. To stop copying, press
EJECT
on both decks.
Notes:
• If the cassette tape in Deck 1
stops before the tape in Deck 2,
the cassette tape in De ck 2 continues to play at normal speed.
• If the cassette tape in Deck 2
stops before the tape in Deck 1,
Deck 1 records silence. Press
STOP/EJECT
on Deck 1 when
Deck 2 stops.
• If the original tape was recorded
using Dolby NR, the copy also has
Dolby NR, regardless of the position of the
DOLBY NR
switch. If the
tape you copy does not have
Dolby NR, you cannot add it to the
tape you r ecord.
MAS-
STOP/
PLAY
4. Press
on Deck 1, wait for
the blank tape to play past the
tape leader (about 8 seconds),
then press
STOP/EJECT
on Deck
1.
5. Select the CD you want to record
from, then press
the CD changer (or
PLAY/PAUSE
CD
on the
on
t
remote control) twice to pause the
CD.
PAUSE
6. On Deck 1, press
RECORD. RECORD
and
then
PLAY
on
Deck 1 automatically lock down.
Caution: Do not force down
RECORD
. This can damage the
recording mechanism.
PAUSE
7. Simultaneously press
Deck 1 and
CD changer (or
PLAY/PAUSE
CD
on the
on
on the
t
remote control). The CD starts
playing from Track 1 or at the
beginning of a programmed
sequence, and the cassette
records until it reaches the end of
the side.
Dubbing (Copying) CDs
1. Press CD.
2. If you want to record a p rogram of
CD selections, follow the steps in
“Programming and Playing a
Sequence” on Page 36 to program the CD playback.
3. Load a blank cassette tape, or
one you want to record over, into
Deck 1.
8. When you finish recording, press
STOP
on the CD changer, then
press
STOP/EJECT
on the tape
deck.
Press
STOP/EJECT
again to op en
the cassette compartment and
remove the cassette tape.
43

13-129 3.fm Page 44 Wednesday, J uly 14, 1999 6: 49 PM
Recording from the Tuner or
an Audio Source
You can record from the tuner or from
an external audio source connected to
the System 745, such as a turntable, a
VCR, or video equipment.
1. Load a blank cassette tape, or
one you want to record over, into
Deck 1.
PLAY
2. Press
the blank tape to play past the
tape leader (about 8 seconds),
then press
1.
3. Press
to select the audio source you
want to record from.
4. On Deck 1, press
RECORD. RECORD
Deck 1 automatically lock down.
Caution:
RECORD
recording mechanism.
on Deck 1, wait for
STOP/EJECT
TUNER, PHONO
, or
PAUSE
and
on Deck
VIDEO
then
PLAY
Do not force down
. This can damage the
on
6. To completely stop recording
before it automatically stops, stop
the selected audio source (if necessary), then press
on Deck 1. Press
STOP/EJECT
STOP/EJECT
again to open the cassette compartment and remove the cassette
tape.
When you play back a cassette
Note:
tape on which you recorded an AM radio program, you might hear a highpitched tone or whistling sound. This
is called a beat. To reduce the beat
while playing a tape, set
DUBBING/BEAT CANCEL
deck to
NORMAL/1
HIGH SPEED
on the tape
HIGH/2
or
and
leave the switch on the setting that
gives the best recording quality.
5. Simultaneously press
PAUSE
Deck 1 and start the selected
audio source (if necessary). The
cassette records until it reaches
the end of the side, then it automatically stop s.
Note:
PAUSE
recording, press
To pause recording, press
on Deck 1. To resume
P AUSE
again.
44
on

13-129 3.fm Page 45 Wednesday, J uly 14, 1999 6: 49 PM
TAPE TIPS
Storing Cassettes
Do not store cassette t apes in places
with high temperature or high humidity
or where large amou nts of dust or dirt
exist.
Preventing Accidental
Erasure
Cassettes have two erase-protection
tabs, one for each recording side.
To protect a recording from bein g accidentally recorded over or erased,
use a screwdriver to remove one or
both tabs.
Side A Tab
Caution:
tion tab does not prevent a bulk tape
eraser from erasing a cassette.
Removing the erase-protec-
Erasing a Cassette Tape
To erase a cassette tape, select an
audio source with no audio playing,
then simply record as usual. The cassette deck records silence over the
previous recording.
You can quickly erase both sides of a
cassette tape using a bulk tape eraser
such as Cat. No. 44-232, available at
your local RadioShack store.
Resto r ing Tape Tension and
Sound Quality
After you play a cassette tape several
times, the tape might become tightly
wound on the reels. This can cause
playback sound quality to deteriorate.
If you want to record on a cassette
that has had its tab removed, put a
piece of heavy plastic tape over the
recording tab hole.
Be sure you cover only the hol e originally covered by the erase-protection
tab.
To restore the sound quality, fastforward the tape from the beginning
to the end of one side, then completely rewind it. Then loosen the
tape reels by gently tapping each
side of the cassette’s outer shell on
a flat surface.
Caution:
the cassette when tapping it. Do not
touch the exposed tape or allow any
sharp objects near the cassette.
Be careful not to damage
45

13-129 3.fm Page 46 Wednesday, J uly 14, 1999 6: 49 PM
TROUBLESHOOTING
If your system is not wo rking as i t should, these s uggestion s might help you eliminate the problem. If the syst em still doe s not operate properl y, take it to your lo cal
RadioShack store for assistance.
Symptom Possible Cause Suggestion
No power when
POWER
is press ed on system.
No sound.
Sound from one speaker
only.
CD changer does not
work.
M-ERROR
scrolls across
the display.
Power problem. Check the power cord
and AC outlet.
MASTER VOLUME
MASTER VOLUME MIN/
set to
MIN
.
MAX
Wrong function is
selected
Speakers connected
incorrectly.
Speakers connected
incorrectly.
BALANCE
is set incor-
Adjust
MIN/MAX
.
Select the correct function.
Check speaker connections.
Check speaker connections.
Adjust
BALANCE
rectly.
CD
CD not selected.
Press
CD
or
on the system
on the remote
t
control.
CD loaded incorrect ly. Remove the CD and re-
load it.
System memory must be
reset.
Reset the system (see
“Resetting the System”
on Page 14).
.
DISC ERROR
across the display, or
scrolls
CD loaded incorrect ly. Remove the CD and re-
load it.
the graphic around the
disc number blinks on
the display.
Sound from CD skips. CD is dirty or damaged. Clean the CD and reload
it, or try a new one.
46

13-129 3.fm Page 47 Wednesday, J uly 14, 1999 6: 49 PM
Symptom Possible Cause Suggestion
Abnormal CD or display
operation.
Poor sound quality during cassette tape playback.
System memory must be
reset.
Cassette tape heads,
capstans, tape guides,
or pinch rollers are dirty.
Cannot record. Erase-protection tabs
are removed from the
cassette tape.
Output sound is not stereo.
FM/TUNE MODE
MONO
.
set to
The station you are listening to is an AM station, or an FM station
that you are not receiving in stereo.
Poor sound quality when
playing back a recording of an AM radio pro-
HIGH SPEED DUBBING/
BEA T CANCEL
must be
set.
gram.
Reset the system (see
“Resetting the System”
on Page 14).
Clean the cassette tape
decks (see “Cleaning the
Tape-Handling Parts” on
Page 49).
Put tape over the eraseprotection tab holes (see
“Tape Tips” on Page
45).
until
FM/
AUTO
Repeatedly press
TUNE MODE
STEREO
appears on
the display.
Tune to an FM stereo
station.
HIGH SPEED DUB-
Press
BING/BEAT CANCEL
to
whichever position,
HIGH/2
(in) or
NORMAL/1
(out) that gives the best
recording quality.
Flickering
STEREO
indi-
cator.
Remote control does not
work.
Weak signal. Reorient the FM antenna
or install an outdoor FM
antenna.
Batteries in the remote
control are weak.
Replace the batteries
with fresh ones (see
“Putting Batteries in the
Remote Control” on
Page 13).
47
13-129 3.fm Page 48 Wednesday, J uly 14, 1999 6: 49 PM
CARE AND MAINTENANCE
Your Optimus System 745 Stereo Rack System is an example of superior design
and craftsmanship. The following sugges tions will help you care for the system s o
you can enjoy it for years.
Keep the system dry. If it gets wet, wipe it dry imm ediately. Liquids
can contain minerals that can corrode the electronic circuits.
Use and store the system only in normal temperature environments.
Temperature extremes can shorten the life of electronic devices,
damage batteries in the remote c ontrol, and distort or melt plastic
parts.
Keep the system away from dust and dirt, which can cause premature wear of parts.
Handle the system gently and carefully. Dropping it can dam age circuit boards and cases, and can cause the system to work improperly.
Use only fresh batteries of the required size and type in the remote
control. Always remove o ld o r weak batteries. They can lea k c hem icals that destroy electronic circuits.
Wipe the system with a damp cloth occasionally to keep it looking
new. Do not use harsh chemicals, cleaning solvents, or strong detergents to clean the system.
Caution:
cleaner. The vacuum action can permanently damage speaker elements.
Modifying or tampering with the system’s internal parts can caus e a malfunction
and might invalidate your system’s warranty and void your FCC authorization to operate it. If your system is not working as it should, take it to your local RadioShack
store for assistance.
48
Gently clean the speakers with a feather dus ter. Do not use a vacuum

13-129 3.fm Page 49 Wednesday, J uly 14, 1999 6: 49 PM
CLEANING THE TAPEHANDLING PARTS
Dirt, dust or particles of the tape’s
coating can accumulate on the tape
heads and other parts that the tape
touches. This can greatly reduce the
cassette player’s performance. To
prevent noise and poor high-frequency response, clean the cassette player’s tape-handling parts after every 20
hours of use. Your local RadioShack
store sells a complete line of cassette
deck cleaning supplies.
Follow these steps to clean the tapehandling parts on your system’s cassette decks.
1. Turn off the system, then unplug
its power cord.
Note:
745 clears the CD changer ’s programmed sequence memory but
does not clear stations in mem ory
or category/subcategory names.
2. Press
sette decks. Both cassette compartment doors open.
3. Press
decks to expose the tape-handling
parts.
Unplugging the SYSTEM
STOP/EJECT
PLAY
on both cas-
on both cassette
4. Use a cotton swab dipped in
denatured alcohol or tape head
cleaning solution to gently clean
the record/play heads, pinch rollers, capstans, tape guides, and
erase head.
Deck 1
Record/Playback
Head
Erase Head
Tape
Guides
Pinch Roller
Capstan
Deck 2
Pinch
Roller
Tape
Guides
Playback Head
Capstans
Pinch
Roller
5. When you finish cleaning, press
STOP/EJECT
on both cassette
decks to release the play mechanisms, then close both cassette
compartment doors and reconnect
power.
49

13-129 3.fm Page 50 Wednesday, J uly 14, 1999 6: 49 PM
SPECIFICATIONS
GENERAL
Power Requirements ........................................................ 120V AC (±10%), 60 Hz
Power Consumption ................................................................................. 230 Watts
Main Console Dimensions (HWD) ................................ 16
Weight .............................................................................................................. 36 lb
AMPLIFIER
Main Amplifier
Continuous minimum sine wav e RM S power output per channel at 8 ohm s, 4 0 Hz20 kHz with no more than 0.9% total harmonic distortion (with Center/Surround
amplifier off) ...............................................................................................100 Watts
Center Amplifier
1
/
2
(420
×
161/
×
181/8 Inches
2
×
420
×
460 mm)
(16.3 kg)
Continuou s minimum si ne wave RM S powe r output at 1 kH z into 8 oh ms with
no more than 0.9% tot al h arm o ni c di st orti on (with Ma in /Su rro und amplifie r o ff)
15 Watts
Surround Amplifier
Continuous minimum sine wave RMS power output per channel at 1 kHz into 8
ohms with no more than 0.9% total harmonic distortion (with Main/Center amplifier
off)................................................................................................................15 Watts
Bass Control ................................................................................. ±10 dB (100 Hz)
Treble Control ................................................................................ ±10 dB (10 kHz)
E-BASS Contro l ...................... ....................... ................. .............. +10 dB (100 Hz)
Input Sensitivity/Impedance:
PHONO ................................................................................. 3.0 mV/47 kOhm
Nominal Output Impedance:
Speaker Terminals .............................................................................. 8 Ohms
PHONES Jack . .............................................................................. 8–32 Ohms
TUNER (FM) Frequency Range: In 200 kHz Steps ................ 87.9–107.9 MHz
In 50 kHz Steps .................. 87.5–108.0 MHz
Usable Sensitivity (Mono) .................................................... 19.2 dBf
50

13-129 3.fm Page 51 Wednesday, J uly 14, 1999 6: 49 PM
TUNER (AM) Frequency Range: In 10 kHz Steps ...................... 520–1710 kHz
In 9 kHz Steps ........................ 522–1710 kHz
Sensitivity (with supplied AM Loop antenna): .................... 900 µV/M
CD CHANGER
CD Transport Type ..................................................... 24–Disc Bidirectional Radial
Frequency Response ........................................................................ 20 Hz–20 kHz
Signal-to-Noise Ratio ...................................................................................... 73 dB
Wow & Flutter .................................................................................. ... Undetectable
CD Used .................................... .. ..... .. ..... ..... .. ..... .. ..... .. ..... ..... ..... . 5–inch (120 mm)
Sampling Frequency .................................................................................. 44.1 kHz
Optical Source .......................................................... 3-Beam Semiconductor Laser
Number of Channels ................................................................. ..... ....... ..... 2, Stereo
DUAL CASSETTE DECK
Frequency Response ............................... 63 Hz–10 kHz (Normal Ta pe, Playback )
60 Hz–14 kHz (CrO2 Tape, Playback)
Track Format ......................................................................... 4 Tracks, 2 Channels
Signal-to-Noise Ratio (with Dolby NR ON) ..................................................... 50 dB
Wow & Flutter ................................................................................. 0.18% (WRMS)
Fast-Forward/Rewind Time: Deck 1 .............. About 115 seconds (with C-60 tape)
Deck 2 .............. Abo ut 160 seconds (with C-60 tape)
INFRARED REMOTE CONTROL
Controls ...... ................. ....................... ........................ ................. ............... 24 keys
Power Requirements ...................................................... 3VDC (Two AA batteries)
Specifications are typical; individual units m ight vary. Specifications are subj ect to
change and improvement without notice.
51
g
g
g
g
g
g
g
g
g
g
g
13-129 3.fm Page 52 Wednesday, J uly 14, 1999 6: 49 PM
Limited One-Year Warranty
This product is warrant ed by RadioShac k against manufacturing defects in materia l and workmanship under normal use for one (1) year from the date of purchase from RadioShack company-owned
stores and authorized RadioShack franchisees and dealers. EXCEPT AS PROVIDED HEREIN, RadioShack MAKES NO EXPRESS WARRANTIES AND ANY IMPLIED WARRANTIES, INCLUDING
THOSE OF MERCHANTABILITY AND FITNESS FOR A PARTICULAR PURPOSE, ARE LIMITED
IN DURATION TO THE DURATION OF THE WRITTEN LIMITED WARRANTIES CONTAINED
HEREIN. EXCEPT AS PROVI DED HEREIN, Rad ioShack SH ALL HAVE NO LIABILIT Y OR RESPONSIBILITY TO CUSTOMER OR ANY OTHER PERSON OR ENTITY WITH RESPECT TO ANY
LIABILITY, LOSS OR DAMAGE CAUSED DIRECTLY OR INDIRECTLY BY USE OR PERFORMANCE OF THE PRODUCT OR ARI SING OUT OF ANY BREACH OF THIS WARRANTY, INCLUDING, BUT NOT LIMITED TO, ANY DAMAGES RESULTING FROM INCONVENIENCE, LOSS
OF TIME, DATA, PROPERTY, REVENUE, OR P ROFIT OR ANY INDIRECT, SPECIAL, INCIDENTAL, OR CONSEQUENTIAL DAMAGES, EVEN IF RadioShack HAS BEEN ADVISED OF THE
POSSIBILITY OF SUCH DAMAGES.
Some states do not allow the limitations on how lon
cidental or consequential dama
In the event of a product defect durin
sales receipt as proof of pur cha se date to any RadioS hack s tore. Radi oSha ck wil l, at its option, unless otherwise provided by law: (a) correct the defect by product repair without char
labor; (b) replace the produc t with one of the same or similar desi
price. All replaced parts and pr oducts, and pro ducts on which a refund is made, become the property of RadioShack. New or rec onditioned parts and products may be used in the performance of
warranty service. Repa ired or replaced parts and produ cts are warranted for the remainder of the
ori
inal warranty period. You will be charged for repair or replacement of the product made after the
expiration of the warranty period.
This warranty does not cover: (a) dama
accident, misuse, impr oper or abnormal usa
maintenance, al teration, li
other than those provi ded by a RadioShack Autho rized Service Facility; ( c) consumables such as
fuses or batteries; (d) cos meti c dama
of product removal, installation, set-up service adjustment or reinstallation.
This warranty
state to state.
RadioShack Customer Relations, Dept. W, 100 Throckmorton St., Suite 600, Fort Worth, TX 76102
ives you specific legal rights, and you may also have other rights which vary from
es, so the above limitations or exclusions may not apply to you.
the warran ty perio d, take the produ ct and the Rad ioShack
htning or other incidence of excess voltage or current; (b) any repair s
e; (e) transportatio n, shippi ng or insurance costs; or ( f) costs
We Service What We Sell
an implied warranty lasts or the exclusion of in-
n; or (c) refund the p urchase
e or failure caused by or attributable to acts of God, abuse,
e, failure to follow instruct ions, improper instal lation or
e for parts and
3/97
RadioShack
A Division of Tandy Corporation
Fort Worth, Texas 76102
1AD6P1P0532––A
3A7 Printed in Malaysia
 Loading...