

Page 1

13-129 4.fm Page 1 Wednesday, Ju ly 14, 1999 7: 01 PM
Micro Stereo Component System
Cat. No. 13-1294
OWNER’S MANUAL
Please read before using this equipment.
System 746
Page 2

g
g
y
y
g
y
g
13-129 4.fm Page 2 Wednesday, Ju ly 14, 1999 7: 01 PM
FEATURES
Your Optimus System 746 Micro
Stereo Component System of fers all
the versatile features you need for
excellent audio entertainment, all in
one compact package.
The system includes a top-loading
CD player with a 32-track programmable memory, an AM/FM stereo
tuner, a cassette deck with autostop, two 2-wa y speakers with 4- inch
woofers and piezo tweeters, a remote control, and a variety of special
features.
System Featur es
Memory Tunin
and easily select up t o 30 of your f avorite AM and FM radio stations.
Remote C ontrol
most of the system’s function s from
a distance.
Di
ital C lock
time display even when the system
is turned off.
— lets you store
—
lets you control
—
gives you a digital
CD Player
—
Automatic Search
quickly locate and play any track on
the loaded CD.
—
Intro Scan
10 seconds of each track on a CD.
Audible Search
locate a particular section of a track
while it is pla y ing.
Repeat Pla
track or a programmed sequence of
tracks.
Random Pla
in random order.
Pro
rammable Pla
program up to 32 tracks to play in
any order you choose.
5- or 3-Inch CD Compatible
you play either type of CD
lets you play the first
æ
— repeats a single
— plays all the tracks
lets you
lets you quickly
— lets you
æ lets
.
Cassette Player
—
Wake-Up Timer
system to automat ically turn itsel f on
at a set time and play a radio station,
CD, or cassette tape you select.
Sleep Timer
tem to automatically turn itself off.
Optimus and RadioShack are registered trademarks used by Tandy Corporation.
2
—
lets you se t the
lets you set the sys-
© 1997 Tandy Corporation.
All Rights Reserved.
Multiple Source Recordin
you record onto a cassette tape from
either the CD player or the radio.
Automatic Level Control
matically adjusts the recording level.
— lets
—
auto-
Page 3
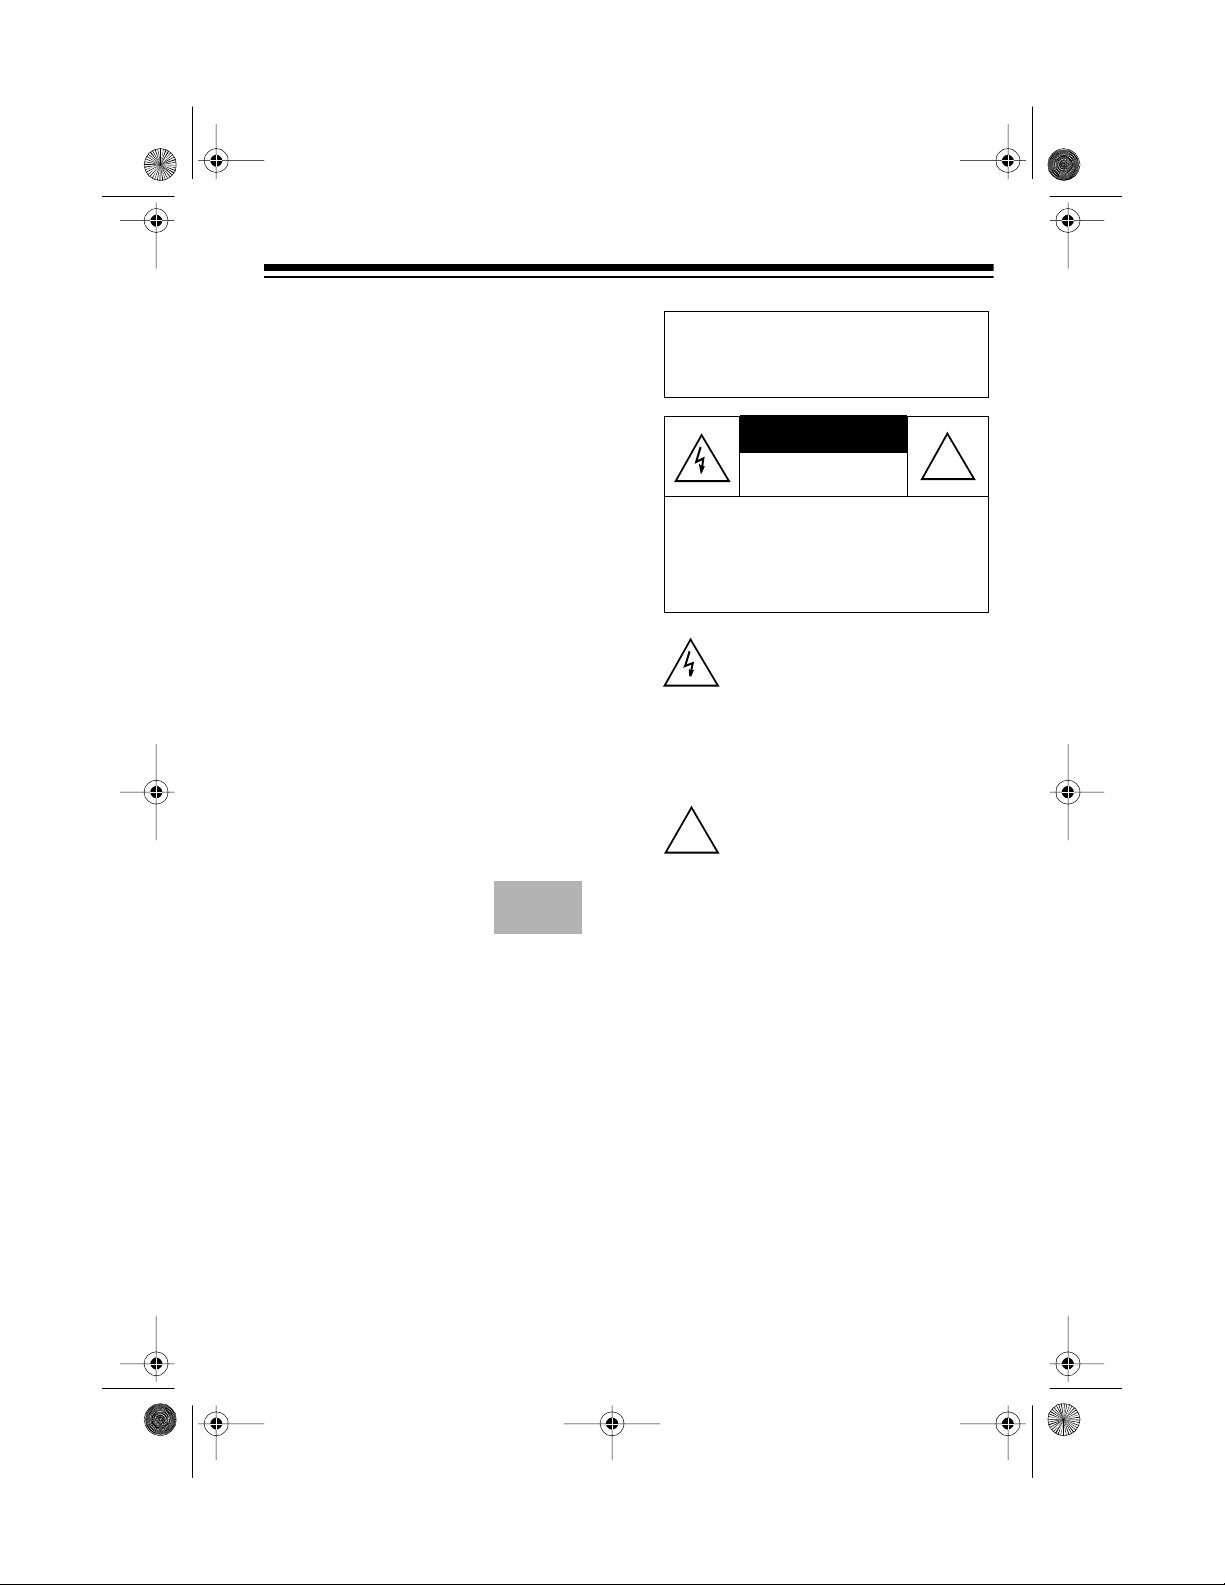
CAUTION
13-129 4.fm Page 3 Wednesday, Ju ly 14, 1999 7: 01 PM
Auto-Stop —
protects the tape and
tape-handling parts by automatically
stopping the tape when it finishes
playing, rewinding, or fast-forwarding.
Note: The System 746 requires two
AAA batteries (not supplied) for the remote control and two AA batteries (not
supplied) for memory backup.
Important: Most material on compact
discs and prerecorded tapes is copyrighted. Unauthorized duplication of
copyrighted material is a violation of
the copyright laws of most countries
and such duplication may result in
fines and/or imprisonment. Note, however, that in the United States, it is not
a violation of U.S. copyright laws for a
consumer to use an audio recording
device to duplicate musical recordings
for noncommercial (personal) use.
Compact discs that you
can play on your system’s CD player have
this mark on them:
We recommend you record your system’s serial number here. The number
is on the back panel.
Warning: To prevent f ire or shoc k
hazard, do not expose this product to rain or moisture.
RISK OF ELECTRIC SHOCK.
DO NOT OPEN.
CAUTION: TO REDUCE THE RISK OF
ELECTRIC SHOCK, DO NOT REMOVE
COVER OR BACK. NO USER-SERVICEABLE PARTS INSIDE. REFER SERVICING TO QUALIFIED PERSONNEL.
This symbol is inten ded to alert yo u
to the p r es en c e o f un in su lated d an gerous voltage within the product’s
enclosure that mi ght be of suff icient
magnitude to constitute a risk of
electric shock. Do not open the
product’s case.
This symbol is intended to inform
you that important operating and
!
maintenance instructions are included in the literature accompanying this product.
!
Warnings:
• This system uses a laser light
beam. Only a qualified service
person should remove the cover
or attempt to service this device,
due to possible eye injury.
Serial Number: ________________
• The use of controls, adjustm ents,
or procedures other than those
specified herein may result in hazardous radiation exposure.
The graphical symbols with supplemental markings are located on the
back of the system.
3
Page 4

13-129 4.fm Page 4 Wednesday, Ju ly 14, 1999 7: 01 PM
FCC INFORMATION
This system complies with the limits
for a Class B digital device as specified in Part 15 of
limits provide reasonable protection
against TV or radio interference in a
residential area. However, your system might cause TV or radio interf erence even when it is operating
properly.
To eliminate interference, you can try
one or more of the following corrective
measures.
• Reorient or relocate the TV or radio’s receiving antenna.
FCC Rules
. These
• Increase the distance between the
system and the TV or radio.
• Use outlets on different electrical
circuits for the system and the TV
or radio.
Consult your local RadioShack store if
the problem still exists.
4
Page 5

y
13-129 4.fm Page 5 Wednesday, Ju ly 14, 1999 7: 01 PM
CONTENTS
Preparation ........................................................................................................... 7
Connecting the Speakers . ............................................................................... 7
Connecting the AM Loop Antenna .................................................................. 7
Connecting the FM Antenna ........................................................................... 7
Connecting to Power ....................................................................................... 8
Installing Batteries ........................................................................................... 8
In the System ............................................................................................ 8
In the Remote Control .............................................................................. 8
Using Headphones ......................................................................................... 9
Listening Safely ........................................................................................ 9
Basic Operation ................................................................................................. 10
Using the Remote Control ............................................................................. 11
Timer Operation ................................................................................................. 12
Setting the Clock ........................................................................................... 12
Setting a Wake-Up Time ............................................................................... 12
Setting the Sleep Timer ................................................................................. 13
Tuner Operation ................................................................................................. 15
Automatic Tuning .......................................................................................... 16
Memory Tuning ............................................................................................. 16
Storing Stations in Memory Manually ..................................................... 16
Storing Stations in Memory Automatically .............................................. 16
Selecting Stations Stored in Memory ..................................................... 16
CD Pla
er Operation .......................................................................................... 17
Loading a CD ................................................................................................ 17
Playing a CD ................................................................................................. 17
Automatic Skip .............................................................................................. 18
Audible Search .............................................................................................. 18
Random Play ................................................................................................ 18
Repeat Play .................................................................................................. 19
Intro Play ....................................................................................................... 20
Programmed Play ......................................................................................... 20
Programming and Playing a Sequence of Tracks .................................. 20
Reviewing the Programmed Sequence .................................................. 21
Erasing the Programmed Sequence ...................................................... 21
CD Care Tips ................................................................................................ 21
Cassette Deck Operation .................................................................................. 22
Loading a Cassette Tape .............................................................................. 22
Playing a Cassette Tape ............................................................................... 22
Recording on a Cassette Ta pe ...................................................................... 23
5
Page 6

13-129 4.fm Page 6 Wednesday, Ju ly 14, 1999 7: 01 PM
Recording from the Tuner ....................................................................... 23
Recording from a CD .............................................................................. 24
Timer Recording ...................................................................................... 25
Tape Care Tips . ............................................................................................. 25
Erasing a Cassette Tape ......................................................................... 25
Preventing Accidental Erasure ................................................................ 25
Restoring Tape Tension and Sound Quality .................................................. 26
Care and Maintenance ....................................................................................... 27
Cleaning the Tape-Handling Parts ................................................. .. .......... .... 28
Resetting the System .................................................................................... 28
Specifications ..................................................................................................... 29
6
Page 7
13-129 4.fm Page 7 Wednesday, Ju ly 14, 1999 7: 01 PM
PREPARATION
Complete all other connections
Note:
before connecting the system to AC
power and turning it on.
CONNECTING THE
SPEAKERS
CONNECTING THE AM
LOOP ANTENNA
Attach the supplied AM loop antenna
AM ANT.
to the
the system.
terminal on the back of
-
+
(R)
and left
(L
L
1. Lift open the red and black
tabs for the right
speaker terminals on the b ack of
the system.
illustration
2. Put the stripped end of the right
speaker’s striped wire into the
+
red terminal, then press the tab
until it clicks back into place.
3. Put the other right speaker’s wire
R
into the
press the tab until it clicks back
into place.
4. Repeat Steps 2 and 3 to connect
the left speaker ’s wi res to the
and
black terminal, then
terminals.
-
-
)
Attach the antenna stand and set the
antenna on a flat surface.
R
illustration
illustration
CONNECTING THE FM
ANTENNA
Press the
put the stripped end of the supplied
FM antenna wires into the antenna
+
terminals on the back of the system,
then release the tabs.
FM ANTENNA
terminal tabs,
illustration
7
Page 8

13-129 4.fm Page 8 Wednesday, Ju ly 14, 1999 7: 01 PM
CONNECTING TO
POWER
After you complete all connections,
plug the system’s power cord into a
standard AC outlet. STANDBY
lights and
display.
Warning:
the power cord plug’s blades are polarized and fit a polarized AC outlet
only one way. If you have difficulty inserting the plug, do not force it. Turn it
over and reinsert it.
AM 12:00
To prevent electric shock,
appears on the
INSTALLING BATTERIES
In the System
Cautions:
• Always use fresh batteries of the
required size and recommended
type.
• Never leave dead or we ak batteries in the system or remote control. Batteries can leak chemicals
that can corrode the control.
1. Press in on the battery compartment cover and push in the direction of the arrow, and lift off the
cover.
illustration
2. Put two AA batteries in the compartment as indicated by the polarity symbols (+ and –) marked
inside.
3. Replace the cover.
In the Remote Control
The remote control requires two AA A
batteries (not supplied) for power. We
recommend alkaline batteries, such
as RadioShack Cat. No. 23-555 for
the best performance and longest life.
1. Press the tab in the direction of
the arrow and lift off the battery
compartment cover.
• Do not mix old and new batteries,
different types of batteries (standard, alkaline, or rechargeable),
or rechargeable batteries of different capacities.
To retain any preset radio stations
during an AC power loss, install two
alkaline AA batteries (such as Cat.
No. 23-557) into the system’s battery
compartment.
8
illustration
Page 9

13-129 4.fm Page 9 Wednesday, Ju ly 14, 1999 7: 01 PM
2. Install the batteries as indicated
by the polarity symbols (
and -)
+
marked inside the compartment.
illustration
3. Replace the cover.
Caution: If you are n ot going t o use
the remote control for a month or
more, remove its batteries. Batteries
can leak damaging chemicals.
You can use the remote control up to
a distance of a bout 20 feet from the
System 746. If the remote control
operates erratically or does not
work, replace both batteries.
USING HEADPHONES
You can use headpho nes (not supplied) to listen in privacy. Insert the
headphones’
ack.
j
1
/8-inch plug into the
• Connecting headphones automatically disconnects the speakers.
• Your local RadioShack store
sells a wide selection of headphones.
Listening Safely
To protect your hearing, follow these
guidelines when you use headphones.
• Do not listen at extremely high
volume levels. Extended highvolume listening can lead to permanent hearing loss.
• Set the vol ume to the lowest setting before you begin listening.
After you begin listening, adjust
the volume to a comfortable
level.
• Once you set the volume, do not
increase it. Over time, your ears
adapt to the volume level, so a
volume level that does not
cause discomfort might still
damage your hearing.
Notes:
illustration
9
Page 10

13-129 4.fm Page 10 Wednesday, J uly 14, 1999 7: 01 PM
BASIC OPERATION
Warning:
adjust
To protect your hearing,
VOLUME
to the lowest level
before you turn on the system.
Follow these steps to operate your
system.
POWER
POWER / STANDBY
on the remote control).
1. Press
(
STANDBY turns off, the display lights, and the last selected
system settings appear.
2. Slide
ER
, or CD.
FUNCTION
illustration
TA PE, TUN-
to
4. Adjust
VOLUME DOWN/UP
to a comfortable listening level.
illustration
5. Slide
E-BASS
to
ON
to emphasize bass sounds. To return to
normal bass sounds, slide it to
OFF
.
3. If you selected
TAPE
or
the selected audio source (see
“Cassette Deck Operation” on
Page 22 or “CD Player Operation” on Page 17).
If you selected
TUNER
the desired station (see “Tuner
Operation” on Page 15).
10
CD
, start
, select
illustration
6. To turn off the system, press
POWER/ STANDBY (POWER
on
the remote control) again.
STANDBY lights.
Page 11

13-129 4.fm Page 11 Wednesday, J uly 14, 1999 7: 01 PM
USING THE REMOTE
CONTROL
illustration
The remote control’s buttons have
the same functions as the corresponding buttons on the main system.
Notes:
• Make su re yo u have a cle ar path
between the remote control a nd
the sensor.
• Weak batteries or direct sunlight
on the remote sensor might reduce the remote control’s operating range.
To use the remote control, point it toward the remote sensor on the right
of the system’s display and press
the desired buttons.
illustration
11
Page 12

13-129 4.fm Page 12 Wednesday, J uly 14, 1999 7: 01 PM
TIMER OPERA TI O N
SETTING THE CLOCK
1. With power turned on, press
CLOCK
digits appear.
2. Press
minute digits flash.
3. Within 10 seconds, press
HOUR
mote control) to set the desired
hour.
until the hour and minute
illustration
MEMORY
(or
The hour and
.
illustration
TUNING
on the re-
setting the time, start again
from Step 1.
• To rapidly increase or decrease the hour or minute setting, hold down
HOUR
(or
MIN
and
TUNING
and
on the remote control).
5. Press
MEMORY
again or wait un-
til the display stops flashing.
The system always displays the ti me
while power is turned off. To display
the time at any time while power is
turned on, press
CLOCK
.
SETTING A WAKE-UP
TIME
You can set your system to automatically turn itself on (like an alarm
clock) and play the last selected radio station, a CD, or a cassette tape.
illustration
4. Press
MIN
TUNING
(or
the remote control) to set the desired minute.
illustration
Notes:
• If the hour and minute digits
stop flashing before y ou finish
12
on
To quickly set the wake-up
Note:
timer using the last selected system
setting s (radio statio n, volume le vel,
and so on; except if the cassette
deck is selected), you can leave the
power turned off and skip Steps 5–7
and 9.
1. Press
CLOCK
until
TIMER ON
and the last set wake-up time
appear. Then press
2. Press
TUNING
(or
MIN
MEMORY.
and
HOUR
and on the remote control) to set the wake-up
time.
Page 13

13-129 4.fm Page 13 Wednesday, J uly 14, 1999 7: 01 PM
Note: If
TIME ON
disappears
before you finish setting the hour
and minute, start again from
Step 1.
3. Press
CLOCK
until
TIMER OFF
and the last set end time appear.
4. Press
TUNING
(or
MIN
and
and on the re-
HOUR
mote control) to set the end
time.
Note: If
TIMER OFF
disappears
before you finish setting the hour
and minute, start again from
Step 3.
5. Slide
TAPE
or
FUNCTION
to CD,
to select the desired au-
TUNER
dio source.
6. Select the desired radio station,
or load the C D or cassette tape
you want the System 746 to play
when it turns itself on.
Note: If you selected a cassette
PLAY
tape, be sure to press
PAUSE
on the deck.
7. Adjust the volume and set
BASS
for the desired sound.
TIMER
8. Press
TIMER
to turn on the timer.
appears.
and
E-
Notes:
• If you selected a cassette
tape, be sure to release
PAUSE
on the deck after you
turn off the system.
• To cancel the wake-up timer,
press
TIMER
again so
TIMER
disappears.
SETTING THE SLEEP
TIMER
You can set the system to pl ay up t o
,
90 minutes, then automatically turn
off.
Note: You cannot use the wake-up
timer while using the sleep timer.
1. With power turned on slide
FUNCTION
TAPE
to CD,
to select the desired audio
TUNER
, or
source.
2. Tune to the desired AM or FM
radio station, or start the CD or
tape.
3. To turn on the sleep timer, press
SLEEP
and release
on the re-
mote control. You see:
illustration
9. Press
POWER/ STANDBY
turn off the system. The current
time appears dimly.
illustration
to
13
Page 14

13-129 4.fm Page 14 Wednesday, J uly 14, 1999 7: 01 PM
4. To set the sleep timer, repeatedly press
SLEEP
until the
desired sleep time appears.
Each time you press
SLEEP
, the
displayed sleep time decreases
in 10-minute steps.
The system turns off after the
amount of time you set. To turn off
the sleep timer sooner, repeatedly
press
SLEEP
until
SLEEP
disap-
pears.
14
Page 15

13-129 4.fm Page 15 Wednesday, J uly 14, 1999 7: 01 PM
TUNER OPERATION
1. Slide
FUNCTION
to
TUNER
system automatically tunes to
the station that was playing
when the system was turned off
or when it was last set to
2. Repeatedly press
TUNER
BAND
lect the AM or FM band. The last
selected station in that band appears.
illustration
Notes:
• For the best AM reception, rotate the loop antenna.
• For the best FM reception,
fully extend the FM antenna.
. The
to se-
You can also use autom atic tuning (see “Automatic Tuning” on
Page 16) or mem ory t uning (see
“Storing Stations in Memory
.
Manually” on Page 16).
Notes:
STEREO
•
appears when the
tuner receives a broadcast in
stereo.
• To improve reception for weak
FM stereo stations, set
MONO
on the back of the sys-
tem to
MONO
so
STEREO
ST./
disappears. The sound is no
longer in stereo, but rece ption
should improve.
illustration
3. Press
TUNING
TUNING
or (or
and on the remote
control) to tune to the next highest or lowest station. The frequency changes on the display.
illustration
4. Adjust the volume and set
BASS
for the desired sound.
E-
15
Page 16

13-129 4.fm Page 16 Wednesday, J uly 14, 1999 7: 01 PM
AUTOMATIC TUNING
You can use automatic tuning to
quickly move up or down to t he next
available station in your area.
Hold down
TUNING
trol) for about 1 second. The tuner
automatically moves up or down the
band and stops when it finds the
next active station.
TUNING
and on the remote con-
or (or
MEMORY TUNING
You can store up to 30 radio stations
in memory .
Note:
You can assign one frequency
to each memory location. When you
assign another frequency to the
same memory location, the new f requency replaces the old one.
Storing Stations in Memory
Manually
1. After tuning to the station you
want to store, press
MEMORY
GRAM
appears and
flashes.
MEMORY
PRO-
3. Press
the station in the memory location.
Note:
fore you store the station, start
again from Step 1.
MEMORY
MEMORY
If
disappears be-
Storing Stations in Memory
Automatically
To have the system automatically
store the first 30 active FM and AM
frequencies it finds, hold down
ORY
for about 3 seconds.
and each memory location number
flash. The system tunes FM frequencies first, then AM. When storing is
comple te, all display indica tors stop
flashing and the system automatically tunes to the frequency stored in
memory l ocation 01.
Selecting Stations Stored in
Memory
To recall a preset station, press
PRESET DOWN
desired frequency appears.
.
or
again to store
MEM-
MEMORY
UP
until the
2. While
16
PROGRAM
PRESET DOWN
lect a memory location number.
flashes, press
or
illustration
UP
to se-
Page 17

illustr a ti on
y
13-129 4.fm Page 17 Wednesday, J uly 14, 1999 7: 01 PM
CD PLAYER OPERATION
LOADING A CD
1. Slide
2. Press
3. Carefully place a CD over the cen-
FUNCTION
pears.
OPEN
partment.
ter hub, label side up.
OPEN
to CD. CD ap-
to open the C D com-
appears.
illustration
illust ra ti o n
PLAYING A CD
To play a CD, simply press
PAUSE
begins to play from Track 1.
then the elapsed play time appears.
Notes:
• To temporarily stop play, press
PLAY/PAUSE
the elapsed timer stops counting.
To resume play, press
PAUSE
• During playback, if the changer is
subjected to a sudden shock or
jolt, the speed of rotation might
change, or some noise might be
produced. This is not a malfunction.
after you load it. The CD
. app ears and
again.
PLAY/
PLAY/
01
4. After you load the CD, press the
right corner of the door do wn until
it clicks shut. The system displays
the number of tracks and the CD’s
total playing time.
The system automatically stops play
at the end of the CD’s last track.
To stop the CD player at any time during play, press
number of tracks and playin g time appear.
STOP
. The CD’s total
illust ra ti o n
17
Page 18

13-129 4.fm Page 18 Wednesday, J uly 14, 1999 7: 01 PM
AUTOMATIC SKIP
The automatic skip feature lets you
quickly locate the beginning of any
track on a CD, including the track
currently playing. You can use automatic skip when a CD is playing or
stopped.
illustration
If a CD is playing:
•Press
SKIP
back to the beginning of the current track.
• Repeatedly press
skip backward to the beginning
of the desired track.
• Repeatedly press
skip forward to the beginning of
the desired track.
If the CD is stopped or paused, repeatedly press
SKIP
the system displays the number of
the track you want to play, then
press
PLAY/PAUSE
player starts playing the selected
track.
once to skip
SKIP
SKIP
to
to
or until
. The CD
AUDIBLE SEARCH
Hold down
SKIP
CD player to search forward or backward during play. The CD plays rapidly, and you hear i t at a h igh speed
and low volume.
or
on the
RANDOM PLAY
This feature randomly selects and
plays all the tracks from the loaded
CD.
STOP
1. Press
function.
2. Press
pears.
The first randomly selected track
number appears, then the track
begins to play and its elapsed
play time appears.
The system plays all tracks in
random order, then stops automatically.
Notes:
to cancel any CD
RANDOM
illustration
RANDOM
.
ap-
18
To replay the curr ent track
•
SKIP
press
.
• To play the next random track,
SKIP
press
.
,
Page 19

y
13-129 4.fm Page 19 Wednesday, J uly 14, 1999 7: 01 PM
• To repeat the current track,
REPEAT
press
desired track is playing.
PEAT
appears, and the CD
once while the
RE-
player continuously replays the
track.
• To repea t ra nd om pl a y, before
RE-
ap-
the last track ends, press
PEAT
until
REPEAT ALL
pears.
• To briefly stop random play,
press
PLAY/PAUSE
. appears. To resume play, press it
again.
3. To stop the CD player at any time
during random play, press
RANDOM
disappears and the CD’s
STOP
total number of tracks and playing
time appear.
To cancel random play and resume normal play without stopping play, simply press
RANDOM
disappears and the CD
RANDOM
player resumes normal play.
REPEAT PLAY
You can repeat a single track, all
tracks on a CD, or an entire programmed sequence (see “Programmed Play” on Page 20).
illustration
To repeat a single track, press
PEAT
once while the desired track is
playing.
REPEAT
appears, and the
CD player continuously replays the
track.
.
To repeat all tracks on the CD, press
REPEA T
until
REPEAT ALL
steadily on the display.
To continuously repeat a programmed sequence, first program
.
the tracks you want to play, then press
REPEA T
along with
until
PROGRAM
REPEAT ALL
.
RE-
appears
appears
To cancel repeat play duri ng or after play, press
REPEAT
until
REPEAT
disappears. If repeat is cancelled during play, the CD player resum es normal play.
19
Page 20

y
13-129 4.fm Page 20 Wednesday, J uly 14, 1999 7: 01 PM
INTRO PLAY
The INTRO function lets you play
the first 10 seconds of eac h track so
you can quickly find the one you
want.
To use INTRO, press
INTRO
on the
remote control. The CD player begins playing.
illustration
You can use random play, repeat
play, and skip during intro play.
To cancel intro play during or after
play, press
INTRO
. If intro is cancelled during play, the CD player begins normal play.
PROGRAMMED PLAY
You can program up to 32 tracks in
any order you choose.
Progra mming and Playing a
Sequence of Tracks
1. Press
displays the total number of
tracks and the total playing time.
STOP
until the system
2. Press
PROG
3. Press
PROGRAM/MEMORY
on the remote control).
illustration
SKIP
or to select
(or
the desired track.
4. Press
PROG
store the selected track.
appears
PROGRAM/MEMORY
(or
on the remote con trol) to
P-02
.
5. Repeat Steps 3 and 4 to program additional tracks.
Note:
You cannot store more
than 32 tracks. If you try to store
any track after the 32nd t rack, it
replaces the first track and
FULL
appears.
6. Press
PLAY/PAUSE
to play
the programmed tracks.
Notes:
• You cannot use random play
while a programmed sequence is stored.
• You can repeat (all), skip over,
or search through programmed tracks.
• To briefly stop programmed
play, press
PLAY/PAUSE
appears. To resume play,
press it again.
7. Adjust the volume
BASS
for the desired sound.
and set
E-
.
20
Page 21

13-129 4.fm Page 21 Wednesday, J uly 14, 1999 7: 01 PM
8. Programmed play automatically
stops at the end of the last programmed track. To stop the CD
player at any time during programmed play, press
CD’s total number of tracks and
playing time appear.
To replace a programmed track,
Note:
press
on the remote control) until the position number of the track you want to
replace appears. Then repeat Steps 3
and 4 to select and store the new
track.
PROGRAM/MEMORY
STOP
(or
. The
PROG
Reviewing the Programmed
Sequence
While play is stopped, repeatedly
PROGRAM/MEMORY
press
on the remote control) to review the
programmed sequence.
(or
PROG
Erasing the Programmed
Sequence
You can do either of the following to
erase a programmed sequence:
•Press
PROG
STOP
grammed play.
PROGRAM/MEMORY
on the remote control) then
before or after pro-
(or
CD CARE TIPS
Even though a compact disc is very
durable, treat the CD surface with
care. We recommend the following
precautions:
• Do not place anything but a CD in
the disc tray. This can damage the
drive mechanism.
• Do not write on either side of the
CD, particularly the non-label side
(signals are read from the non-label side).
• Do not store CDs in hightemperature, high-humidity locations. The CDs might warp.
• Keep CDs dry. A water drop can
act as a lens and affect the laser
beam’s focus.
• Always handle a CD by the edges
to avoid fingerprints and always
keep it in its protective case or
sleeve when not in use. Fingerprints and scratches on the CD’s
surface can prevent the laser
beam from correctly reading the
digital information. To clean the
CD surface, use a CD cleaner kit
(such as Cat. No. 42-225). If the
CD gets scratched, use Scratch ’n
Fix (RadioShack Cat. No. 42-
127).
•Press
grammed play.
OPEN
before or after pro-
21
Page 22

13-129 4.fm Page 22 Wednesday, J uly 14, 1999 7: 01 PM
CASSETTE DECK OPERATION
The system has one cassette deck
for cassette tape playback and recording. The deck has a full-release
auto-stop system to protect tapes
and prevent pinch roller damage.
When a tape reaches the end of a
side, the tape m echanism automatically stops and releases the tape.
LOADING A CASSETTE
TAPE
1. Take up any slack in the tape by
turning the cassette’s hub with a
pencil. If you do not remove excess slack, the tape might become tangled in the record/
playback mechanism. Avoid
touching the tape.
illustration
3. Insert the cassette tape into t he
tape guides in the compartment
door, with its exposed tape edge
facing down, the side you want
play facing you, and its full reel
to the left.
4. Close the compartment door.
PLAYING A CASSETTE
TAPE
After loading a cassette tape, follow
these steps to play it.
1. Slide
2. Press (Play). The tape plays
FUNCTION
appears.
until it reaches the end of the
side, then it automatically stops.
illustration
to
TA PE
TAPE
.
2. Press (Stop/Eject) to open
the cassette compartment door.
illustration
22
Notes:
• To temporarily stop playback,
press (Pause). Press
again to continue playback.
illustration
Page 23

13-129 4.fm Page 23 Wednesday, J uly 14, 1999 7: 01 PM
• To rewind or fast-forward the
tape, press then press
(Rewind) or (Fast For-
ward).
illustration
• To stop fast-forward or rewind, press .
illustration
3. Adjust the volume
BASS
for the desired sound.
and set
E-
4. To stop play before the tape side
reaches the end, press .
Press while the cassette
player is stopped to open the
cassette compartment and remove the tape.
RECORDING ON A
CASSETTE TAPE
You can record from the CD player
or radio to a cassette tape.
Notes:
• Be sure the cassette’s eraseprotection tabs are in place (see
“Preventing Accidental Erasure”
on Page 25).
• Before you load a cassette tape
for recording, turn the cassette’s
hub with your finger or a pencil
to move the tape past its leader.
• The recording level is preset.
and
VOLUME
have no ef-
BASS
fect on the recording level or
quality.
• Tape quality greatly affects the
quality of the recording. We recommend regular length (60- or
90-minute) cassette tapes. For
low-noise, wide-range recordings, use normal-bias tape.
Recording from the Tuner
1. Load a blank cassette tape, or
one you want to record over, into
the cassette deck with the full
reel to the left and the side you
want to record on facing you.
2. Press then (Rec ord). , ,
and lock down.
E-
Caution:
If you use a cassette tape
with the erase-protection tabs removed, do not force down . This
can damage the recording mechanism. See “Preventing Accidental
Erasure” on Page 25.
3. Slide
illustration
FUNCTION
to
TUNER
.
23
Page 24

13-129 4.fm Page 24 Wednesday, J uly 14, 1999 7: 01 PM
4. Select the desired band and station, then press to release it and
start recording. The cassette
records until it reaches the end of
the side, then the cassette deck
automatically stops.
Notes:
• To temporarily stop recording,
press . Press again to resume recording.
• If you record broadcasts from
AM radio, you might hear a lowvolume hum when you play
back the recording. If this occurs, set
BEAT
on the back of
the system to the other position
and try again.
illustration
Beat switch
location
Recording from a CD
1. Load a blank cassette tape, or
one you want to record over.
2. Press then (Record). , ,
and lock down.
3. Slide
FUNCTION
4. Load the desired CD in the CD
player.
5. Select the desired CD track or
program a sequence (if you do not
want to record the entire CD in order).
Note: To copy a CD’s tracks in
random sequence, press
DOM
so
RANDOM
6. Press both on the deck and
PLAY/PAUSE
player.
Notes:
• To briefly stop the tape while re-
cording, press . To resume recording, press
to CD.
appears.
y
on the CD
again.
RAN-
5. To stop recording before it automatically stops, press on the
deck.
24
• To listen to the CD during recording, adjust the volume and
E-BASS
for the desired sound
.
7. Recording stops automatically
when the tape reaches its end. To
stop the tape at any time during
recording, press .
Note: To stop the CD at any time
during recording, press
STOP
. The
CD’s number of tracks and total
play time appear.
Page 25

g
13-129 4.fm Page 25 Wednesday, J uly 14, 1999 7: 01 PM
Timer Recording
You can set the system to automatically turn on, record from a selected
audio source onto a cassette tape,
then turn off at the time you set.
1. Follow Steps 1–5 in “Setting a
Wake-Up Time” on Page 12 to s et
the start and end times and select
the source you want to record
from.
2. Load a blank cassette tape, or
one you want to record over.
3. Press then (Record).
TIMER
4. Press
5. Release . At the preset start
time, the system turns on and
records onto the cassette until the
end time.
to turn on the timer.
illustration
TAPE CARE TIPS
Erasing a Cassette Tape
To erase a previously recorded section of a tape, simply record over it. To
erase the entire cassette tape, let t he
tape record to the end with no source
playing.
You can quickly erase both sides of a
cassette tape using a bulk tape eraser
(such as Cat. No. 44-232, not supplied).
Preventing Accidental
Erasure
Cassette tapes have two erase-protection tabs — one for each side. To
protect a recording from being accidentally recorded over or erased, use
a screwdriver to remove one or both of
the cassette tape’s erase-protection
tabs.
Caution:
length is longer than the timer recording period, and stay
locked down when the timer turns
off. To prevent accidental tape
tangling, press as soon as
possible after the timer turns off.
To turn off the timer before it au tomatically turns off, press
TIMER
disappears.
If the cassette tape’s
TIMER
until
(Needs an illus - show
an erase protection tab
bein
removed with a
screwdriver.
25
Page 26

13-129 4.fm Page 26 Wednesday, J uly 14, 1999 7: 01 PM
If you want to record on a tape side after you have removed the eraseprotection tab, place a piece of strong
plastic tape over that side’s eraseprotection hole. Be sure you cover
only the hole originally covered by the
erase-protection tab.
illustration
Note: Removing the erase-protection
tabs does not prevent a bulk eraser
from erasing a cassette tape.
RESTORING TAPE
TENSION AND SOUND
QUALITY
After you play a cassette tape several
times, the tape might become tightly
wound on the reels. This can cause
playback sound quality to deteriorate.
To restore the sound quality, fastforward the tape from the beginning to
the end of one side, then completely
rewind it. Then loosen the t ape reels
by gently tapping each side of the cassette’s outer shell on a flat surface.
Caution: Be careful not to damage
the cassette when tapping it. Do not
touch the exposed tape or allow any
sharp objects near the cassette.
26
Page 27

13-129 4.fm Page 27 Wednesday, J uly 14, 1999 7: 01 PM
CARE AND MAINTENANCE
Your Optimus System 746 M icro Stereo Component System is an example of superior design and craftsmanship. The follow ing suggestions will help you care for
the system so you can enjoy it for years.
Keep the system dry. If it gets wet, wipe it dry imm ediately. Liquids
might contain minerals that can corrode the electronic circuits.
Handle the system gently and carefully. Dropping it can dam age circuit boards and cases and can cause the system t o work i mproperly.
Use only fresh batteries of the required size and type. Batteries can
leak chemicals tha t damage yo ur system’s electronic part s.
Use and store the system only in normal temperature environments.
Temperature extremes can shorten the life of electronic devices,
damage batteries, and distort or melt plastic parts.
Keep the system away from dust and dirt, which can cause premature wear of parts.
Wipe the system with a damp cloth occasionally to keep it looking
new. Do not use harsh chemicals, cleaning solvents, or strong detergents to clean the system.
Modifying or tampering with the system’s internal component s can cause a malfunction and might invalidate your system’s warranty and void your FCC authorization to operate it. If your s ystem is not performing as it should, ta ke it to your lo cal
RadioShack store for assistance.
27
Page 28

13-129 4.fm Page 28 Wednesday, J uly 14, 1999 7: 01 PM
CLEANING THE TAPEHANDLING PARTS
Dirt, dust or particles of the tape’s
coating can accumulate on the tape
heads and other parts that the tape
touches. This can greatly reduce the
cassette player’s performance. To
prevent noise and poor highfrequency response, clean the cassette player’s tape-handling parts after
every 20 hours of use. Your local RadioShack store sells a wide sele ction
of cassette deck cleaning supplies.
1. Turn off the system, then unplug
its power cord.
2. Press . The cassette compartment door opens.
3. Press on the deck to expose
the tape-handling parts.
4. Use a cotton swab dipped in denatured alcohol or tape head
cleaning solution to gently clean
the record/playback head, pinch
roller, capstan, tape guides, and
erase head.
5. When you finish cleaning, press
to release the play mecha-
nism, then close the cassette
compartment door and reconnect
power.
RESETTING THE
SYSTEM
If the System 746 is not working properly, res et it to d elete a ll prog ramm ed
play sequences, memory tuning settings, timer sequences, and the time.
To reset the system, insert a pointed
object (such as a straightened paper
clip) into the
of the system.
RESET
hole on the back
illustration
Record/Playback
Head
Erase Head
Tape
Guides
28
Pinch Roller
Capstan
Page 29

y
13-129 4.fm Page 29 Wednesday, J uly 14, 1999 7: 01 PM
SPECIFICATIONS
Cassette
Tape Speed . ................................................................................................. 1
Wow and Flutter ................................................................................ 0.35% WRMS
Frequency Response ......................................................... 125 Hz–6.3 kHz ± 6 dB
Recording System ...................................................................................... AC Bias
Erase System ............................................................................................ Magnetic
7
/8 ips
CD Pla
er
Number of Tracks to be Programmed ..................................................... 32 Tracks
Frequency Response (at –3 dB) ...................................................... 100 Hz–20 kHz
Dynamic Range .............................................................................................. 80 dB
Signal-to-Noise ................................................................................... (JIS-A) 60 dB
Harmonic Distortion (at 1 kHz)......................................................................... 0.5%
Separation (at 1 kHz) ...................................................................................... 40 dB
Sampling Frequency .................................................................................. 44.1 kHz
Quantiza tion Number .......... ........................ ................ ........................ .............. 8-Bit
Oversampling ........................................................................................... 16 Times
Pick-Up System ........................................................................................... 3 Beam
Optical Source ....................................................................... Semiconductor Laser
Wavelength .................................................................................................. 790 nm
General
Power Output .......................................................................... 5 Watts per Channel
Power Supply ............................................................................................ 120V AC
Tuning Range ............................................................................ AM: 530–1710 kHz
FM: 88–108 MHz
Speaker Dimensions (HWD) ............................................ 9
7
×
/
51/8 × 613/16 Inches
16
×
(240
130 × 173 mm)
Speaker Size ................................................................ ................... ........... 4 Inches
Speaker Impedance .................................................................................... 4 Ohms
System Dimensions (HWD) ............................................ 9
7
/16 × 511/16 × 91/16 Inches
×
(240
145 × 230 mm)
Weight ............................................................................................................. 13 lb
(5.9 kg)
Specifications are typical; individual units m ight vary. Specifications are subj ect to
change and improvement without notice.
29
Page 30

13-129 4.fm Page 30 Wednesday, J uly 14, 1999 7: 01 PM
NOTES
30
Page 31

13-129 4.fm Page 31 Wednesday, J uly 14, 1999 7: 01 PM
31
Page 32

13-129 4.fm Page 32 Wednesday, J uly 14, 1999 7: 01 PM
Limited Ninety-Day Warranty
This product is warrant ed by RadioShac k against man ufacturing d efects in materia l and workmanship under normal use for ninety (90) day s from the date of purc hase from Rad ioShack comp anyowned stores and authorized RadioShack franchisees and dealers. EXCEPT AS PROVIDED
HEREIN, RadioShack MAKES NO EXPRE SS WARRANTIES AND ANY IMPLIED WARRANTIES,
INCLUDING THOSE OF MERCHANTABILITY AND FITNESS FOR A PARTICULAR PURPOSE,
ARE LIMITED IN DURATION TO THE DURATION OF THE WRITTEN LIMITED WARRANTIES
CONTAINED HEREIN. EXCEPT AS PROVIDED HEREIN, RadioShack SHALL H AVE NO LIABILITY OR RESPONSIBILITY TO CUSTOMER OR ANY OTHER PERSON OR ENTITY WITH RESPECT TO ANY LIABILITY, LOSS OR DAMAGE CAUSED DIRECTLY OR INDIRECTLY BY USE
OR PERFORMANCE OF THE PRODUCT OR ARISING OUT OF ANY BREACH OF THIS WARRANTY, INCLUDING, BUT NOT LIMITED TO, ANY DAMAGES RESULTING FROM INCONVENIENCE, LOSS OF TIME, DATA, PROPERTY, REVENUE, OR PROFIT OR ANY INDIRECT,
SPECIAL, INCIDENTAL, OR CONSEQUENTIAL DAMAGES, EVEN IF RadioShack HAS BEEN ADVISED OF THE POSSIBILITY OF SUCH DAMAGES.
Some states do not allow the limitations on how long an implied warranty lasts or the exclusion of incidental or consequential damages, so the above limitations or exclusions may not apply to you.
In the event of a product defect during the warran ty period, take the product and the RadioShack
sales receipt as proof of pur cha se date to any RadioS hack s tore. Radi oSha ck wil l, at its option, unless otherwise provided by l aw: (a) correct the defect by product repai r without c harge for parts and
labor; (b) replace the produc t with one of the same or similar design; or (c) refund the purchase
price. All replaced parts and pr oducts, and pro ducts on which a refund is made, become the property of RadioShack. New or rec onditioned parts and products may be used in the performance of
warranty service. Repa ired or replaced parts and produ cts are warranted for the remainder of the
original warranty period. You will be charged for repair or replacement of the product made after the
expiration of the warranty period.
This warranty does not cover: (a) damage or failure caused by or attributable to acts of God, abuse,
accident, misuse, impr oper or abnormal usa ge, failure to fol low i nstruct ions, improper instal lation or
maintenance, alterati on, lightning or other incidence of exc ess voltage or current; (b) any repairs
other than those provi ded by a RadioShack Autho rized Service Facility; ( c) consumables such as
fuses or batteries; (d ) cosmeti c dam age; (e) transp ortatio n, sh ipping or insuranc e c osts; or (f) cos ts
of product removal, installation, set-up service adjustment or reinstallation.
This warranty gives you specifi c legal rights, and you may also have oth er rights which vary from
state to state.
RadioShack Customer Relations, Dept. W, 100 Throckmorton St., Suite 600, Fort Worth, TX 76102
We Service What We Sell
3/97
RadioShack
A Division of Tandy Corporation
Fort Worth, Texas 76102
7A7 Printed in Hong Kong
 Loading...