

Page 1

32-1168.fm Page 1 Thursday, January 20, 2000 11:32 AM
Karaoke with Voice Canceller
Cat. No. 32-1168
OWNER’S MANUAL
Please read before using this equipment.
Page 2
32-1168.fm Page 2 Thursday, January 20, 2000 11:32 AM
FEATURES
Your Optimus Karaoke lets you be the
star as you sing along with your favorite
recordings. To hear your voice along
with the music through a speaker, simply connect the karaoke between an external music source (such as a CD
player) and your amplifier/receiver.
The karaoke works with stereo recordings so there are no special karaoke
tapes to buy.
Your karaoke system’s features include:
Voice Canceller
— lets you reduce the
volume of the prerecorded singer’s
voice as you sing with the music.
Supplied Microphone
— lets you im-
mediately sing along with the music.
Dual Microphone Jacks
— let you use
the supplied microphone and an optional microphone simultaneously to sing
duets or for lead and background vocals.
Separate Microphone Volume Con-
— let you adjust the volume of
trols
your duet partner or backgr ound singer
separately.
Dual Power Sources
— let you power
your system from internal batteries or
AC power (with an optional adapter).
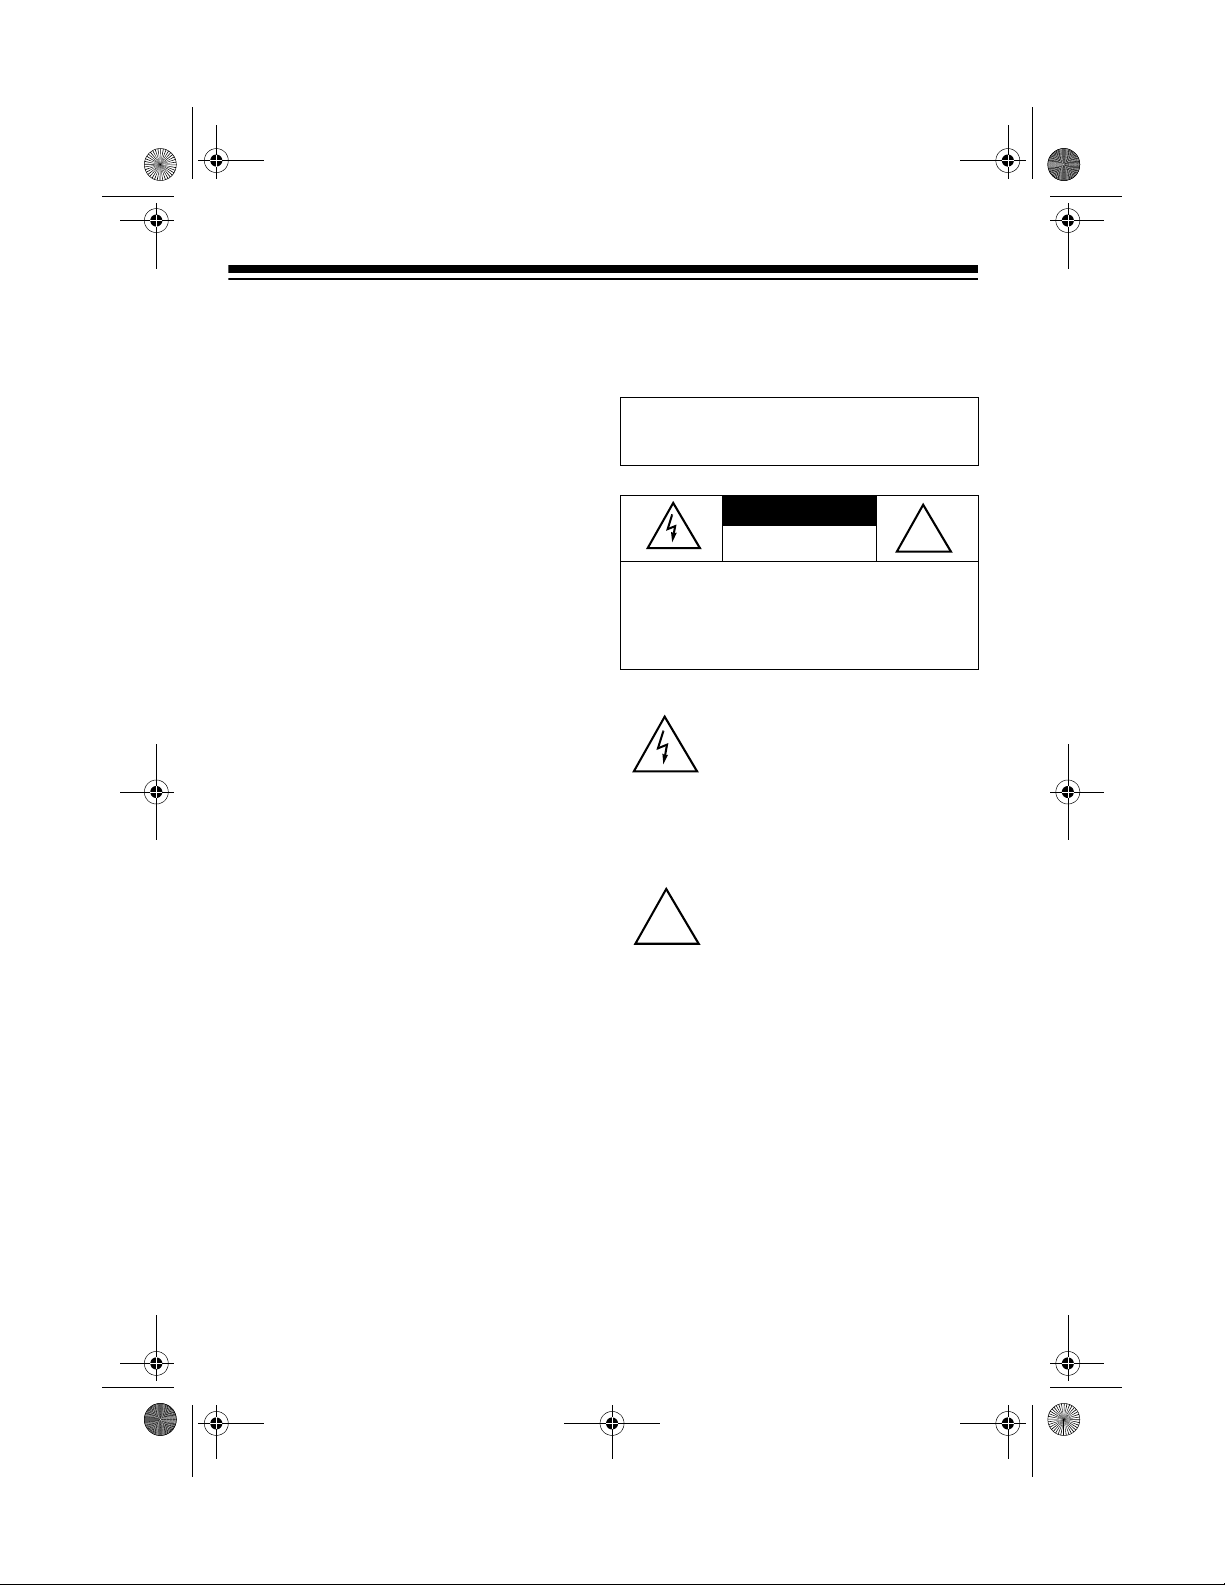
WARNING:
shock hazard, do not expose this product to rain
or moisture.
CAUTION:
ELECTRIC SHOCK, DO NOT REMOVE
COVER OR BACK. NO USER-SERVICEABLE PARTS INSIDE. REFER SERVICING
TO QUALIFIED PERSONNEL.
!
To reduce the risk of fire or
CAUTION
RISK OF ELECTRIC SHOCK.
DO NOT OPEN.
TO REDUCE THE RISK OF
This symbol is intended to alert
you to the presence of uninsulated dangerous voltage within
the product’s enclosure that might
be of sufficient magnitude to constitute a risk of electric shock. Do
not open the product’s case.
This symbol is intended to inform
you that important operating and
maintenance instructions are
included in the literature accompanying this product.
!
Dual Source Inputs
— let you connect
dual external music sources such as a
CD player and cassette player.
Echo Control
— lets you add an echo
to the sound for a concert hall effect.
2000 T andy Corporation.
©
Optimus, RadioShack, and Adaptaplug are registered trademarks used by Tandy Corporation.
All Rights Reserved.
2
Page 3

32-1168.fm Page 3 Thursday, January 20, 2000 11:32 AM
CONTENTS
Connections ............................... ............................................................................. 4
Connecting Microphones ....... ... .... ... .......................................... ......................... 4
Connecting to an Audio Source .......................................................................... 4
Connecting to an Audio Output Component ....................................................... 5
Connecting Power .................................................. ... ... ... ................................... 5
Installing Batteries ....................................................................................... 5
Using AC Power .......................................................................................... 6
Singing Along ......................................................................................................... 7
Controls ........................... ............................................................. ...................... 7
Operation ......................... ... ... ... .... ... ... ... .... ... ...................................................... 7
Care and Maintenance ............................................................................................ 9
The FCC Wants You to Know ........................................................................... 10
Specifications ....................................................................................................... 11
3
Page 4
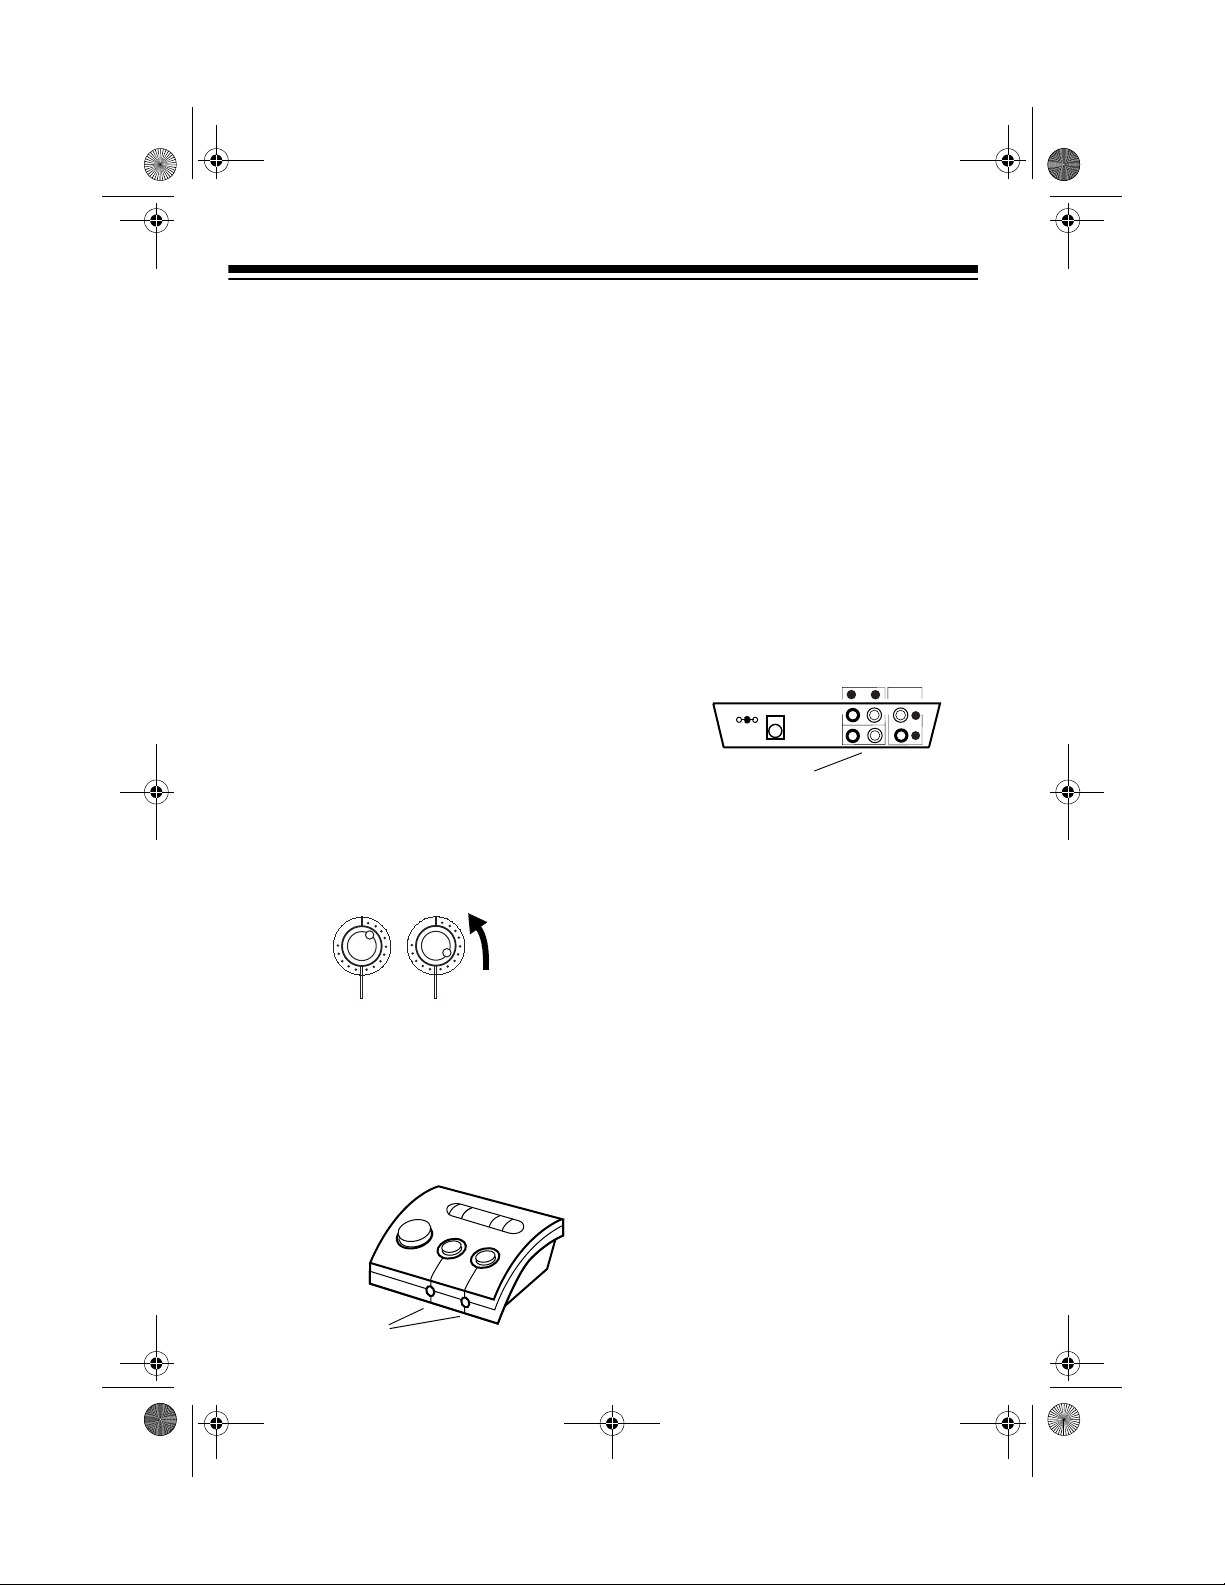
TAPE
CD
IN
R
L
L
R
•
DC 6V
MAX. 50mA
OUT
32-1168.fm Page 4 Thursday, January 20, 2000 11:32 AM
CONNECTIONS
Caution:
To avoid electrical shock, do
not connect the system to AC power until all other connections are complete.
CONNECTING
MICROPHONES
The system has two microphone jacks
so you can use the supplied microphone
to sing along to your favorite recordings,
and connect an additional microphone
for duets or lead and background vocals.
The additional microphone must have a
1
-inch plug and an ON/OFF switch . To
/
4
help prevent feedback, we recommend a
unidirectional microphone. (
carries a wide variety of microphones
To connect either one or two microphones, first rotate the
volume controls counterclockwise to
.
MIN
MIN
MAX
MAX
MIC 1
MIN
RadioShack
.)
and
MIC 2
CONNECTING TO AN
AUDIO SOURCE
You must connect an audio source
(such as a CD player or stereo system)
to the karaoke system, so you can sing
along with the music.
Connect the audio source’s stereo output jacks to the karaoke system’s
TAPE IN R
and L jacks, according to the
type of audio source, using the supplied
cable. Use the white plug for the left
connection and the red plug for the right
connection.
B
.
Audio Source Jacks
You can connect the karaoke to
Note:
both a CD and a tape audio source at
the same time. However, the karaoke
only plays one source at a time. (See
“Controls” on Page 7.)
CD
or
If the audio source does not have AUX
MIC 1
MIC 2
OUT jacks, but has a headphone output
jack (such as is often found on a porta-
If you connect only one microphone,
plug it into the jack
volume control.
MIC 1
ond microphone, plug it
rectly in front of the
directly in front of the
If you add a sec-
into the jack di-
MIC 2
volume
control.
ble tape player or CD player), use a
shielded Y-adapter to connect it to the
karaoke. (RadioShack carries a wide variety of Y-adapters.) Connect the Yadapter’s single-plug end to the audio
source’s headphone jack, and connect
the Y-adapter’s two phono plugs to the
karaoke’s
M
IC
1
M
IC
2
If you connect a second audio source,
you need an additional audio patch ca-
CD or TAPE IN R
and L jacks.
ble. (RadioShack carries a wide variety
Microphone Jacks
of audio cables.)
4
Page 5

32-1168.fm Page 5 Thursday, January 20, 2000 11:32 AM
CONNECTING TO AN
AUDIO OUTPUT
COMPONENT
To hear the music along with your voice,
connect your stereo amplifier/receiver to
the karaoke’s
OUT L
and R jacks using
the supplied cable. Use the white plug
for the left connection and the red plug
for the right connection at both ends of
the cable.
R
OUT
IN
L
B
.
DC 6V
MAX. 50mA
Audio Output Jacks
Note:
If you turn off the karaoke, the
CD
•
TAPE
L
R
sound from the audio source still passes
through the karaoke to the audio output
component unaffected until you turn off
the source and/or the output components.
Caution:
If you connect the karaoke’s
input and output to the same audio component (like a tape deck monitor circuit
in a receiver), the karaoke cannot isolate
the ground to the input jacks. This causes the right channel to short to ground
and feed the left channel to both the left
and right outputs.
CONNECTING POWER
Installing Batteries
You can power the karaoke system with
four AA batteries (not supplied). For the
longest life and best performance, we
recommend RadioShack alkaline batteries.
Cautions:
• Use only fresh batteries of the
required size and recommended
type.
• Do not mix old and new batteries,
different types of batteries (standard, alkaline, or rechargeable), or
rechargeable batteries of different
capacities.
Follow these steps to install the batteries.
.
ECHO
POWER
counterclockwise to-
until it clicks to turn it
POWER
ECHO
1. Rotate
ward
off
2. Press on the battery compartment
cover on the bottom of the karaoke
and slide it in the direction of the
arrow to remove it.
You can power your karaoke system using one of the following power sources.
• four AA batteries
• AC power
5
Page 6

TAPE
CD
IN
R
L
L
R
•
DC 6V
MAX. 50mA
OUT
32-1168.fm Page 6 Thursday, January 20, 2000 11:32 AM
3. Install the batteries as indicated by
the polarity symbols (+ and –)
marked inside the compartment.
+
++
+
4. Replace the battery compartment
cover.
If the
ON/OFF indicator dims, replace the
batteries.
Warning:
Dispose of old batteries
promptly and properly. Do not burn or
bury them.
Cautions:
• Always remove old or weak batteries. Batteries can leak chemicals
that can destroy electronic parts.
• If you do not plan to use the karaoke
system with batteries for several
days, or if you plan to use only AC
power, remove the batteries.
karaoke’s
DC 6V jack. Using an
adapter that does not meet these
specifications could damage the
karaoke or the adapter.
• Always connect the AC adapter to
the karaoke before you connect it to
AC power. When you finish, disconnect the adapter from AC power before you disconnect it from the
karaoke.
Note:
Connecting an AC adapter dis-
connects internal batteries.
1. Rotate
ward
off
ECHO counterclockwise to-
POWER until it clicks to turn it
.
POWER
ECHO
2. Insert the size M Adaptaplug
adapter into the AC adapter’s cord
so it reads TIP+ (positive).
3. Insert the adapter’s barrel plug into
the karaoke’s
DC 6V jack.
Using AC Power
B
.
You can power your karaoke using a 6V
AC adapter and a size M Adaptaplug
adapter (neither supplied). Both are
available at your local RadioShack store.
®
DC 6V Jack
4. Plug the AC adapter into a standard
AC outlet.
Cautions:
You must use a Class 2
power source that supplies
!
6V DC and delivers at least
50 mA. Its center tip must be set to
positive and its plug must fit the
6
Page 7

32-1168.fm Page 7 Thursday, January 20, 2000 11:32 AM
SINGING ALONG
CONTROLS
Now get ready for some fun! Use the CD
or tape button to select the audio
source. Then set the voice canceller button and adjust the echo control to get
the sound just right.
VOICE REDUCTION
Voice Canceller
Button
CD or Tape Button
Voice Canceller Button
voice canceller button to reduce th e volume of the prerecorded singer’s voice
as you play music from your audio
source. The VOICE REDUCTION indicator lights.
Note:
The voice cancelling feature reduces the level of signals that are recorded at the same level on both the left
and right channels. Its effectiveness varies, depending on the music source. For
example, it does not work well with monaural recordings or broadcasts, recordings or broadcasts with strong echoes,
stereo recordings with material originally
recorded in monaural, or vocals recorded off center. Also, if a musical instrument was recorded in the mid-frequency
range, its sound level might decrease
along with the vocals.
CD or Tape Button
— To sing along
with a CD, press the CD or tape button
until the CD
indicator lights. To sing
along with a tape, press the button again
until the TAPE indicator lights.
TAPE
CD
— Press the
Echo Control
— To set the amount of
echo in your voice as you sing along,
adjust
ECHO
between its minimum and
maximum settings.
POWER
Maximum
Setting
ECHO
Minimum
Setting
OPERATION
Warning:
the audio output component’s volume to
its minimum position before you turn it
on.
Follow these steps to sing along with the
audio input source.
1. To turn on the karaoke, turn
clockwise until it clicks and the
POWER indicator lights.
2. Turn on the audio source and the
audio output component. You hear
the audio source’s sound through
the audio output component. Set the
audio output component’s volume
control to a comfortable listening
level.
3. Press the CD or TAPE button
according to the audio source you
want to sing along with.
4. Set each connected
microphone’s
switch to ON. Sing
directly into the microphone along with the
music.
To protect your hearing, set
ECHO
ON/OFF
N
O
OFF
7
Page 8

32-1168.fm Page 8 Thursday, January 20, 2000 11:32 AM
5. Use MIC 1 and/or MIC 2 to adjust the
volume of each microphone.
Note:
To avoid feedback, keep the
microphone away from the speakers
and the other microphone.
6. Press the voice canceller button to
reduce the prerecorded voice’s
sound.
7. Rotate
ECHO
beration
8. When you finish, rotate
for the desired rever-
.
ECHO coun-
terclockwise until it clicks to turn off
the karaoke.
9. Turn off the audio source and the
audio output components.
Notes:
• The voice canceller button works
with the karaoke’s power on or off.
However, if the power is off, the
VOICE REDUCTION indicator does
not light.
•For
MIC 1, MIC 2, and ECHO to oper-
ate, the karaoke’s power must be
on.
8
Page 9

32-1168.fm Page 9 Thursday, January 20, 2000 11:32 AM
CARE AND MAINTENANCE
Your Optimus Karaoke is an example of superior de sign and craftsmanship . The following suggestions will help you care for your karaoke so you can enjoy it for years.
Keep the karaoke dry. If it gets wet, wipe it dry immediately. Liquids
might contain minerals that can corrode the electronic circuits.
Use and store the karaoke only in normal temperature environments.
Temperature extremes can s horten the life of electronic device s, damage batteries, and distort or melt plastic parts.
Keep the karaoke away from dust and dirt, which can caus e premature
wear of parts.
Handle the karaoke gently and carefully. Dropping it can damage circuit
boards and cases and can cause the karaoke to work improperly.
Use only fresh batteries of the r equired size and recommended type.
Batteries can leak chemicals that damage your karaoke’s electronic
parts.
Wipe the karaoke with a damp cloth occasionally to keep it looking new.
Do not use harsh chemicals, cleaning solvents, or strong detergents to
clean the karaoke.
Modifying or tampering with the karaoke’s internal components can cause a malfunction and might invalidate its warranty and void your FCC authorization to operate it. If your karaoke is not performing as it should, take it to your local RadioShack
store for assistance.
9
Page 10

32-1168.fm Page 10 Thursday, January 20, 2000 11:32 AM
THE FCC WANTS YOU TO
KNOW
Your karaoke might cause TV or radio
interference even when it is operating
properly. To determine whether your
karaoke is causing the interference, turn
off the karaoke. If the interference goes
away, your karaoke is causing the interference. Try to eliminate the interference
by:
• Moving your karaoke away from the
receiver
• Using outlets on different electrical
circuits for the karaoke and the TV
or radio
• Contacting your local RadioShack
store for help
If you cannot eliminate the interference,
the FCC requires that you stop using
your karaoke.
10
Page 11

32-1168.fm Page 11 Thursday, January 20, 2000 11:32 AM
SPECIFICATIONS
Power Supply .................................................................... 6 Volts DC: 4 AA Batteries
6 Volts DC Optional AC Adapter (Delivers 50 mA Minimum)
AUX Input Impedance ................................................................... 22 kohm (Nominal)
MIC 1/MIC 2 Maximum Volume Hum ............................................. 0.8 mV (Nominal)
Total Harmonic Distortion .................................................................................... 1.2%
Dimensions (HWD) .............................................................. 2
Specifications are typical; individual units might vary. Specifications are subject to
change and improvement without notice.
9
/16 × 611/16 × 51/8 Inches
(65 × 170 × 130 mm)
11
Page 12

32-1168.fm Page 12 Thursday, January 20, 2000 11:32 AM
Limited Ninety-Day Warranty
This product is warranted by RadioShack against manufacturing defects in material and workmanship under normal use for ninety (90) days from the date of purchase from RadioShack companyowned stores and authorized RadioShack franchisees and dealers. EXCEPT AS PROVIDED
HEREIN, RadioShack MAKES NO EXPRESS WARRANTIES AND ANY IMPLIED WARRANTIES,
INCLUDING THOSE OF MERCHANTABILITY AND FITNESS FOR A PARTICULAR PURPOSE,
ARE LIMITED IN DURATION TO THE DURATION OF THE WRITTEN LIMITED WARRANTIES
CONTAINED HEREIN. EXCEPT AS PROVIDED HEREIN, RadioShack SHALL HAVE NO LIABILITY OR RESPONSIBILITY TO CUSTOMER OR ANY OTHER PERSON OR ENTITY WITH RESPECT TO ANY LIABILITY, LOSS OR DAMAGE CAUSED DIRECTLY OR INDIRECTLY BY USE
OR PERFORMANCE OF THE PRODUCT OR ARISING OUT OF ANY BREACH OF THIS WARRANTY, INCLUDING, BUT NOT LIMITED TO, ANY DAMAGES RESULTING FROM INCONVENIENCE, LOSS OF TIME, DATA, PROPERTY, REVENUE, OR PROFIT OR ANY INDIRECT,
SPECIAL, INCIDENT AL, OR CONSEQ UENTIAL DAMAGES, EVEN IF RadioShac k HAS BEEN ADVISED OF THE POSSIBILITY OF SUCH DAMAGES.
Some states do not allow limitations on how long an implied warranty lasts or the exclusion or limit ation of incidental or consequential damages, so the above limitations or exclusions may not apply to
you.
In the event of a product defect during the warranty period, take the product and the RadioShack
sales receipt as proof of purchase date to any RadioShack store. RadioShack will, at its option, unless otherwise provided by law: (a) correct the defect by product repair without charge for parts and
labor; (b) replace the product with one of the same or similar design; or (c) refund the purchase
price. All replaced parts and products, and products on which a refund is made, become the property of RadioShack. New or reconditioned parts and products may be used in the performance of
warranty service. Repaired or replaced parts and products are warranted for the remainder of the
original warranty period. You will be charged for repair or replacement of the product made after the
expiration of the warranty period.
This warranty does not cover: (a) damage or failure caused by or attributable to acts of God, abuse,
accident, misuse, improper or abnormal usage, failure to follow instructions, improper installation or
maintenance, alteration, lightning or other incidence of excess voltage or current; (b) any repairs
other than those provided by a RadioShack Authorized Service Facility; (c) consumables such as
fuses or batteries; (d) cosmetic damage; (e) transportation, shipping or insurance costs; or (f) costs
of product removal, installation, set-up service adjustment or reinstallat i on.
This warranty gives you specific legal rights, and you may also have other rights which vary from
state to state.
RadioShack Customer Relations, 200 Taylor Street, 6th Floor, Fort Worth, TX 76102
We Service What We Sell
12/99
RadioShack
A Division of Tandy Corporation
Fort Worth, Texas 76102
01A00 Printed in Hong Kong
 Loading...