

Page 1

16-132 .fm Page 1 Tuesda y, July 20, 1999 8:46 AM
5-Inch Black and White
Cat. No. 16-132
OWNER’S MANUAL
Please read before using this equipment.
Television
with AM/FM Stereo and
Cassette Recorder
with AM/FM Radio
Page 2

g
g
y
16-132 .fm Page 2 Tuesda y, July 20, 1999 8:46 AM
FEATURES
Your Optimus 5-Inch Black and Wh ite
Television lets you watch TV just
about anywhere. It al so l ets you make
live audio recordings or record from
the radio or TV audio, or simply enjoy
the radio or cassette player’s highquality sound.
Your TV/radio/cassette ha s these feature s:
Three Power Sources —
you can
power your TV from internal batteries
(not supplied), standard AC power
(using the supplied AC adapter), or
your vehicle’s battery power (using the
supplied DC power cord).
Earphone Jack
— lets you connect
an earphone or headphones, so you
can listen without disturbing others.
Telescopin
Antenna
— swivels for
the best TV and FM radio reception.
External Antenna Jack
— lets you
connect a standard TV antenna for improved reception.
Tone —
you can customize the
sound.
Three TV Bands
— you can view
VHF low (channels 2 to 6), VHF high
(channels 7 to 13), or UHF TV b roadcasts (channels 14 to 69).
Two Radio Bands
— you can listen
to AM, FM mon o, or F M stereo broadcasts.
Beat Cut Switch
— lets you choose a
setting which eliminates the hum or
whistling sound sometimes heard in
AM broadcast recordings.
Full-Release Auto-Stop S
stem
—
protects tapes and prevents pinch roller damage by automatically stopping
and releasing the tape at the end of a
side.
Automatic Level Control
— auto-
matically sets the recording level.
We recommend you record your TV’s
serial number here. The number is on
the back of the TV.
Serial Number _______________
Bri
htness
— you can adjust the pic-
ture when it is too dark or too bright.
Contrast
— you can i ncrease or de-
crease the picture contrast.
©
1998 Tandy Corporation.
Optimus and RadioShack are registered trademarks used by Tandy Corporation.
All Rights Reserved.
2
Page 3
16-132 .fm Page 3 Tuesda y, July 20, 1999 8:46 AM
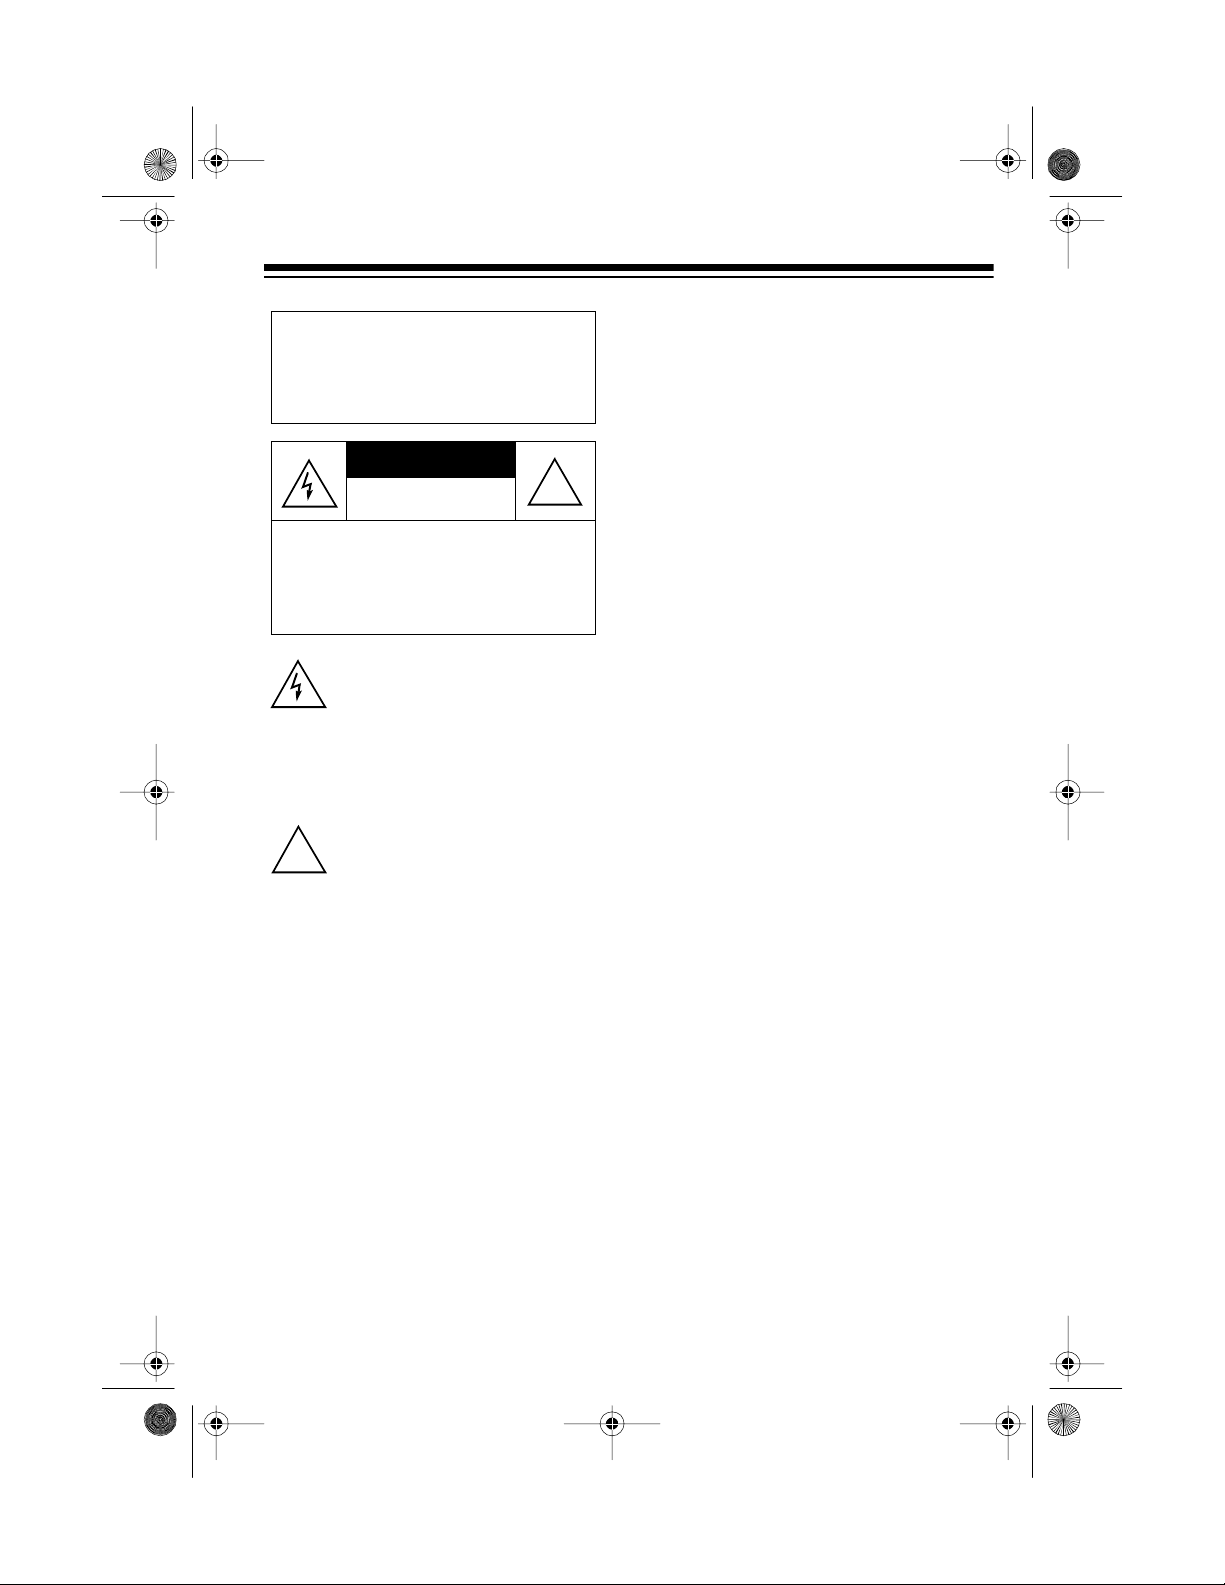
WARNING
: To reduce the risk of
fire or shock hazard, do not expose this product to rain or moisture.
CAUTION
RISK OF ELECTRIC SHOCK.
DO NOT OPEN.
CAUTION
ELECTRIC SHOCK, DO NOT REMOVE
COVER OR BACK. NO US ER-SERVICEABLE PARTS INSIDE. REFER SERVICING TO QUALIFIED PERSONNEL.
: TO REDUCE THE RISK OF
This sym bol is in te nd ed to a le rt yo u
to the pr e s en ce of uninsulated da ngerous voltage within the product’s
enclos u re t h at m ig ht b e of s ufficie nt
magnitude to constitute a risk of
electric shock. Do not open the
product’s case.
!
This symbol is intended to inform
you that important operating and
!
maintenance instructions are included in th e l itera ture a ccomp an ying this product.
3
Page 4

g
g
g
16-132 .fm Page 4 Tuesda y, July 20, 1999 8:46 AM
CONTENTS
Power Source s ............ ........................ ....................... ........................ ..................... 5
Using Internal Battery Power .............................................................................. 5
Using AC Power ................................................................................................. 6
Using Veh icle Battery Power .............................................................................. 6
Preparation ...... ........................ ........................ ....................... ........................ ......... 8
Connecting Antennas ......................................................................................... 8
Built-In Antenna ........................................................................................... 8
Outdoor Antenna . . ........................................................................................ 8
Connecting Earphones ....................................................................................... 9
Listening Safely ............................................................................................ 9
Traffic Safety ................................................................................................ 9
the TV .......................................................................................................... 10
Usin
TV Reception Tips ............................................................................................ 11
the Radio ..................................................................................................... 12
Usin
Radio Reception Tips ....................................................................................... 12
the Cassette Recorder ............................................................................... 13
Usin
Loading a Cassette Tape .................................................................................. 13
Playing a Cassette Tape ................................................................................... 13
Recording a Cassette Tape .............................................................................. 14
Recording from the Radio/TV .................................................................... 14
Making Live Recordings ............................................................................. 15
Tape Care Tips ................................................................................................. 15
Erasing a Cassette Tape ............................................................................ 15
Preventing Accidental Erasure ................................................................... 15
Restoring Tape Tension and Sound Quality ............................................... 16
Cleaning the Tape-Handling Parts ............................................................. 16
Care and Maintenance .......................................................................................... 17
Changing the Fuse ........................................................................................... 18
The FCC Wants You to Know ........................................................................... 18
Specifications ........................................................................................................ 19
4
Page 5

16-132 .fm Page 5 Tuesda y, July 20, 1999 8:46 AM
POWER SOURCES
You can power your TV/radio/cassette
from three power sources:
• internal battery power (using ten D
batteries, not included)
• standard AC po wer (using the supplied AC adapter)
• vehicle battery power (using the
supplied DC power cord)
USING INTERNAL
BATTERY POWER
You can power the TV from ten D batteries. We recommend alkaline batteries
(such as Cat. No. 23 -650) for the longest life.
Cautions
• Use only fresh batteries of the
:
required size and recommended
type.
2. Install ten D batteries in the battery
compartment as indicated by the
polarity symbols (+ and –) marked
inside.
illus of battery placement
with polarity symbols
Caution:
incorrect polarity can damage your
TV.
3. Replace the cover.
Notes:
• When the TV picture shrinks or the
cassette player’s playback slows,
replace the batteries.
• Battery life can vary greatly,
depending on how you use your TV/
radio/cassette.
Installing the batteries with
• Do not mix old and new batteries or
different types of batteries.
Follow these steps to install batteries.
1. Carefully turn the TV upside-down
and gently push the battery compartment cover in the direction of
the arrow marked on the cover.
Then lift off the cover.
illus of battery cover
removal
Cautions:
• Always remove old or weak b atteries. Batteries can leak chemicals
that can destroy electronic parts.
• Dispose of old batteries promptly
and properly.
• If you do not plan to use your TV/
radio/cassette for a mont h or more,
or if you plan to use only AC or DC
power, remove the batteries.
5
Page 6

16-132 .fm Page 6 Tuesda y, July 20, 1999 8:46 AM
USING AC POWER
To use AC power, connect the supplied
AC adapter to the
the back of TV/radio/cassette. Then plug
the other end into a standard AC outlet.
When you conn ect the AC a dapter, the
batteries automatically disconnect.
illus of DC 12- 15V location
and connection to
AC outlet
Cautions:
• The supplied AC adapter supplies
12 volts DC, delivers 1300 milliamps, and has a center positive
plug which properly fits the TV/radio/
cassette’s
an adapter that does not meet these
specifications could damage the TV/
radio/cassette or the adapter.
DC: 12~15V
DC: 12~15V
jack on
jack. Using
USING VEHICLE BA TTER Y
POWER
Follow these steps to power the TV/radio/cassette from your vehicle’s cigarette-lighter socket using the supplied
DC power cord.
1. Make sure the supplied DC power
cord’s knurled ring is screwed firmly
onto its plug.
illus of DC power cord
plug w/knurled ring
2. Plug the small end of the supplied
DC power cord into the
jack on the back of the TV/radio/
cassette.
illus of DC 12-15V location
DC 12-15V
• Always unplug the AC adapte r from
the AC outlet before you unplug it
from the TV/radio/cassette.
6
Cautions:
• The supplied DC power cord supplies 12 volts DC, delivers 1300
milliamps, and has a center positive plug that properly fits the TV/
radio/cassette’s
Using a power cord that does not
meet these specifications could
damage the TV/radio/cassette or
the power cord.
DC 12-15V
jack.
Page 7

16-132 .fm Page 7 Tuesda y, July 20, 1999 8:46 AM
• Always unplug the DC power cord
from the cigarette-lighter socket
before you unplug it from the TV/
radio/cassette.
3. Plug the large end of the DC pow er
cord into the cigarette lighter socket.
When you connect the DC power
cord , the b a t terie s automati c a l ly di s connect.
illus of
connection to cigarette
lighter socket
Note: If the TV/radio/cassette stops
working, check the fuse in the DC power
cord (see “Changing the Fuse” o n Page
18).
7
Page 8

y
16-132 .fm Page 8 Tuesda y, July 20, 1999 8:46 AM
PREPARATION
CONNECTING ANTENNAS
Built-in Antenna
The built-in telescoping a ntenna usually
provides good reception of FM, VHF,
and UHF broadcast signals.
Extend the antenna vertically to its full
length for channels 2 to 6 (VHF-LOW)
and 14 to 69 (UHF).
Extend the antenna to a shorter length
for the best reception of channels 7 to
13 (VHF-HIGH).
Outdoor Antenna
For improved reception, you can connect an optional outdoor VHF/UHF antenna to the
the TV/radio/cassette using these guidelines.
illus of ANT IN location
ANT IN
jack on the back of
• If the outdoor antenna wi re or CATV
cable is 75-ohm coaxia l cable, connect the cable to the TV/radio/cassette’s
inch miniplug adapter (such as Cat.
No. 278-257, not supplied).
Note to CATV S
reminder is provided to call the CATV
system installer’s attention to Section
820-40 of the NEC, which provides
guidelines for proper grounding and, in
particular, specifies that the cable
ground shall be connected to the
grounding system of the building, as
close to the point of c able entry as p ra ctical.
Notes:
• Your local RadioShack store has a
wide selection of antennas and
adapters to choose from.
• For better TV signal reception in
your vehicle, you can connect a
mobile TV antenna (such as Cat.
No. 15-1614, not included.)
ANT IN
jack using an F -to-1/8-
stem Installer:
This
• If the outdoor antenna wire is 300ohm double lead-in wire, connect
the wire to the TV/radio/cassette’s
ANT IN
to
Cat. No. 15-1148, not supplied).
8
jack using a screw terminal
1
/8-inch plug adapter (such as
Page 9

16-132 .fm Page 9 Tuesda y, July 20, 1999 8:46 AM
CONNECTING
EARPHONES
For private listening, plug a pair of optional earphones with a
mini-plug into the
side of the TV/radio/cassette.
illus of PHONES location
Listening Safely
To protect your hearing, follow these
guidelines when you use earphones.
• Set the volume t o the lowest setting
before you begin listen ing. After you
begin listening, adjust the volume to
a comfortable level.
1
/8-inch (3.5 mm)
PHONES
jack on the
Traffic Safety
Do not wear earphones whil e operating
a motor vehicle or riding a bicycle. This
can create a traffic hazard and could be
illegal in so me a re as .
Even though some earphones let you
hear some outside sounds when listening at normal volume levels, they still
can present a traffic hazard.
• Do not listen at extremely high vol-
ume levels. Extended high-volume
listening can lead to permanent
hearing loss.
• Once you set the volume, do not
increase it. Over time, your ears
adapt to the volume level, so a volume level that does not cause discomfort might still damage your
hearing.
9
Page 10

16-132.fm Page 10 Tuesday, July 20, 1999 8:46 AM
USING THE TV
1. Slide
2. Set
T APE/RADIO/TV
illus of TAPE/RADIO/TV
location
LO VHF HI/UHF
to TV.
to the desired
band.
illus of LO VHF HI/UHF
location
LO
— to select the VHF low chan-
nels (2 to 6)
HI
— to select the VHF high chan-
nels (7 to 13)
UHF
— to select the UHF channels
(14 to 69)
5. Turn
V-HOLD, BRIGHT
TRAST
on the back of the TV/radio/
, and
cassette to adjust the picture as
necessary.
illus of V-HOLD/BRIGHT/
CONTRAST location
V-HOLD
— adjust when the picture
rolls up or down.
BRIGHT
— adjust when the picture
is too dark or too bright.
CONTRAST
— adjust to increase or
decrease picture contrast.
TONE
6. Adjust
illus of TONE
location
for the best sound.
CON-
3. Turn
TUNING
illus of TUNING location
to the desired station.
4. Adjust the telescoping antenna for
the best picture and sound.
illus of antenna adjustment
10
7. Turn
VOLUME
to adjust the volume
to a comfortable level.
illus of VOLUME
location
8. To turn off the TV, set
TAPE
TV
to
.
TAPE/RADIO/
Page 11

16-132.fm Page 11 Tuesday, July 20, 1999 8:46 AM
TV RECEPTION TIPS
If the image is blurry, unstable, or
snowy, the signal reception might be
weak. This can be c aused by your location or the telescoping antenna’s position and length. Buildings with steel
construction can also cause reception
problems. Try changing the antenna’s
position and length. If this does not help,
use an outdoor antenna.
If the image does not fill the screen
when you are using battery power, the
batteries are weak. Replace the batteries.
11
Page 12

16-132.fm Page 12 Tuesday, July 20, 1999 8:46 AM
USING THE RADIO
1. Slide
2. Set
T APE/RADIO/TV
AM/FM/FM STEREO
RADIO
to
to the band
you want to hear. For FM stereo
reception, set it to
illus of AM/FM/FM STEREO
location
Notes:
FM STEREO
• For the best FM reception, adju st
the telescoping antenna.
• To improve reception of a weak
FM stereo station, set
STEREO
to FM. The output is
AM/FM/FM
mono, but the sound might
improve.
3. Turn
illus of TUNING location
4. Turn
TUNING
VOLUME
to the desired station.
to adjust the volume
to a comfortable level.
TONE
5. Adjust
for the best sound.
6. To turn off the radio, set
RADIO/TV
to
TAPE
.
.
.
TAPE/
RADIO RECEPTION TIPS
For improved reception, connect an optional outdoor VHF /UHF antenna to the
ANT IN
cassette using these guidelines.
Note:
a wide selection of antennas and adapters to choose from.
Weak AM reception might be caused by
the distance from t he station or by operating the TV/radio/cas sette in a building
with steel construction. Turn the TV /radio/cassette in different directions for the
best reception.
jack on the back of the TV/radio/
illus of ANT IN location
• If the outdoor antenn a wire is 300ohm double lead-in wire, connect
the wire to the TV/radio/cassette’s
ANT IN
jack using an e xternal 300-
ohm antenna adapter (not supplied).
• If the outdoor antenna wi re or CATV
cable is 75-ohm coaxia l cable, connect the cable to the TV/radio/cassette’s
ANT IN
jack using an F -to-1/8inch miniplug adapter (such as Cat.
No. 278-257, not supplied).
Your local RadioShack store has
12
Page 13

16-132.fm Page 13 Tuesday, July 20, 1999 8:46 AM
USING THE CASSETTE RECORDER
The cassette recorder has a full-release
auto-stop system to protect tapes and
prevent pinch roller damage. When a
tape reaches the end of a side, the tape
mechanism automatic ally stops and releases the tape.
LOADING A CASSETTE
TAPE
1. Take up any slack in the cassette
tape by turning th e hub with a pencil. This helps prevent the tape f rom
tangling in the record/playback
mechanism. Avoid touching the tape
with your fingers.
2. Press
STOP/EJECT
to open the cas-
sette compartment door.
illus of STOP/EJECT location
PLAYING A CASSETTE
TAPE
1. Load a tape.
2. Set
3. Press
TAPE/RADIO/TV
PLAY
. The button locks down
and the tape begins to play.
illus of PLAY location
Notes:
• To temporarily stop playback,
PAUSE
press
. Press
to continue playback.
illus of PAUSE location
to
TAPE
PAUSE
.
again
3. Insert the tape into the guides on the
door with the exposed tape edge
facing out, the s ide you want to play
facing up, and the full reel to the left.
illus of cassette insertion
4. Close the compartment door.
• To fast-forward or rewind the
tape, press
FAST-F
press
illus of REWIND, FAST-F, and
REWIND loc ati ons
STOP/EJECT
REWIND
or
.
To stop fast-forward or rewind,
press
4. Adjust
STOP/EJECT
VOLUME
and
again.
TONE
for the
desired sound.
, then
13
Page 14

16-132.fm Page 14 Tuesday, July 20, 1999 8:46 AM
5. The tape plays until it reaches the
end of the side, then it aut om atic ally
stops. To stop play before it automatically stops, press
6. Press
STOP/EJECT
STOP/EJECT
while the cassette player is stopped to open the
cassette compartment and turn the
tape over or remove it.
RECORDING A CASSETTE
TAPE
You can record from the radio or TV, or
use the built-in microphone to make a
live recording.
For the best performance, use onl y regular length (60- or 90-minute) cassette
tapes. We do not recomm end lo ng-playing cassette tapes, such as C-120s, because they are extremely thin and can
easily tangle in the playback mechanism.
Caution:
the erase-protection tabs removed, do
not force down
age the recording mechanism. See
“Preventing Accidental Erasure” on
Page 15.
Notes:
If you use a cassette tape with
RECORD
. This can dam-
• Tape quality greatly affects the quality of the recording. For low-noise,
wide-range recordings, use normal-
.
bias tape.
Recording from the Radio/TV
1. Load a blank cassette tape or one
you want to record over.
2. Press
3. Set
PAUSE
RECORD
, and
TAPE/RADIO/TV
as desired.
4. Select the desired TV or radio station, then press
the button and start recording.
Notes:
• To temporarily stop recording,
PAUSE
press
to resume recording.
• When you record broadcasts from
AM radio, you might hear a low
hum or whistling sound that can
be recorded on the tape. If you
do, set
BEAT CUT
position and record again.
illus of BEAT CUT location
RECORD. PAUSE
then
PLAY
lock down.
to
PAUSE
. Press
RADIO
or
TV
to release
PAUSE
again
to the other
,
• The automatic level control feature
automatically sets the recording
level.
TONE
and
VOLUME
have no
effect on the recording.
14
5. The system records on the cassette
until it reaches the end of the side,
then it automatically stops. To stop it
sooner, press
STOP/EJECT
.
Page 15

16-132.fm Page 15 Tuesday, July 20, 1999 8:46 AM
Making Live Recordings
Foll ow the se st eps t o mak e live reco rdings using the built-in microphone.
1. Set
T APE/RADI O/TV
to
TAPE
.
2. Load a blank cassette tape, or one
you want to record over.
3. Place the TV/radio/cassette 2 to 3
feet from the recording source.
4. Press
Both
RECORD
PLAY
to begin recording.
RECORD
and
lock down.
5. The tape stops automatically when it
reaches the end of the side. To stop
it sooner, press
STOP/EJECT
.
TAPE CARE TIPS
Erasing a Cassette Tape
To erase a previously recorded section
of a tape, simply record over it. To erase
the entire cassette tape, let the tape
record to the end without the radio, TV,
or another source playing.
Preventing Accidental Erasure
Cassette tapes have two erase-protection tabs — one for each side. To protect
a recording from being accidentally recorded over or erased, use a screwdriver to carefully break off one or both of
the cassette tape’s erase-protection
tabs.
illus of cassette with eraseprotection tabs labeled
If you want to record on a tape side after
you have removed the erase-prot ection
tab, place a piece of strong plastic tape
over that side’s tab hole.
Notes:
illus of cassette with eraseprotection tab removed and
piece of tape being
applied
You can quickly erase both sides of a
cassette tape using a bulk tape eraser,
available at your local RadioShack
store.
• Be sure you cover only the hole
originally covered by the erase-protection tab.
• Removing the erase-protection tabs
does not prevent a bu lk eraser from
erasing a cassette tape.
15
Page 16

illus of tape
handling part
16-132.fm Page 16 Tuesday, July 20, 1999 8:46 AM
Restoring Tape Tension and
Sound Quality
After you play a cassette tape several
times, the tape might become tightly
wound on the reels. This can cause
playback sound quality to deteriorate.
To restore the sound quality, fast-forward the tape from the be ginning to the
end of one side, then completely rewi nd
it. Then loosen the tape reels by gently
tapping each side of the cassette’s outer
shell on a flat surface.
Caution:
cassette when t apping it. D o not touch
the exposed tape or allow any sharp objects near the cassette.
Be careful not to damage the
Cleaning the Tape-Handling
Parts
Dirt, dust, or particles of the tape’s coating can accumulate on the tape heads
and other parts that the tape touches.
This can greatly reduce the cassette
player’s performance.
To prevent noise and poor high-frequency response, clean the cassette player’s
tape handling parts after every 20 hours
of use. Your local RadioShack store
sells a complete line of cassette cleaning supplies. You can use a cassette
tape cleaning kit (such as Cat. No. 44-
1162), or follow these steps.
1. Set
2. Remove the batteries or disconnect
3. Open the cassette compartment
4. Hold down the erase-protection tab
5. Use a cotton swab dipped in tape
6. Press
TAPE/RADIO/TV
the AC or DC power source.
cover.
sensor, then press
expose the record/playback and
erase heads.
illus of tab sensor
head cleaning solution or denatured
alcohol to gently clean the capstans,
pinch rollers, tape g uides, and tape
heads.
STOP/EJECT
cassette compartment cover. Then
reconnect power.
TAPE
to
and close the
.
RECORD
to
16
Page 17

16-132.fm Page 17 Tuesday, July 20, 1999 8:46 AM
CARE AND MAINTENANCE
Your Optimus 5-I nch Black and White Television is an example of superior design
and craftsmanship. The following suggestions will help you care for your TV/radio/
cassette so you can enjoy it for years.
Keep the TV/radio/casse tte dry. If it gets wet, wipe it dry immediately.
Liquids might contain minerals that can corrode the electronic circuits.
Handle the TV/radio/cassette gently and carefully. Dropping it can damage circuit boards and cases and can cause the TV/radio/cassette to
work improperly.
Use and store the TV/radio/cassette only in normal temperature environments. Temperature extrem es ca n shorten the life of elect ronic devices and distort or melt plastic parts.
Keep the T V/radi o/casset te away from dus t and dirt, whi ch can cause
premature wear of parts.
Wipe the TV/rad io/cassette with a damp cloth occ asionally to keep it
looking new. Do not use harsh chem icals, cleaning solvents, or stro ng
detergents to clean the TV/radio/cassette.
Modifying or tampering with the TV/radio/cassette’s internal components can cause a
malfunction and might invalidate your TV/radio/cassette’s warranty and void your
FCC authorization to operate it. If your TV/radio/cassette is not performing as it
should, take it to your local RadioShack store for assistance.
17
Page 18

16-132.fm Page 18 Tuesday, July 20, 1999 8:46 AM
CHANGING THE FUSE
If the TV/radio/cassette stops working
properly while using vehicle battery
power, follow these steps to check the
DC power cord’s 2 amp fuse. If the fuse
needs replacing, use only a fast-acting
2-amp fuse, such as RadioShack Cat.
No. 270-1007.
Caution:
ent rating.
1. Unscrew the knurled ring and check
2. If the fuse is bad, replace it.
3. Replace the knurled ring and tighten
Do not use a fuse with a differ-
the fuse in the DC power cord.
illus of disassembled fuse
holder with knurled ring,
fuse visible
it securely.
THE FCC WANTS YOU TO
KNOW
This TV/radio/cassette complies with the
limits for a Class B digital device as
specified in Part 15 of
These limits provide reas onable protection against radio and TV interference in
a residential area. However, your TV
might cause TV or radio interference
even when it is operating properly. To
eliminate interference, you can try one
or more of the following corrective measures:
• Reorient or relocate the receiving
antenna.
• Move your TV/radio/cassette away
from the TV or radio receiving the
interference.
• Connect your TV/radio/cassette to
an outlet on a different electrical circuit than the TV or radio receiving
the interference.
FCC Rules
.
18
• Consult your local RadioShack store
for assistance.
If you can not eliminate the interfe rence,
the FCC requires that you stop using
your TV/radio/cassette.
Page 19

16-132.fm Page 19 Tuesday, July 20, 1999 8:46 AM
SPECIFICATIONS
System .......................................................................................................... NTSC-M
Horizontal Resolution ................................................................................... 260 Lines
Receiving Channels ................................................................. Broadc ast VHF: 2∠13
Broadcast UHF: 14∠69
Intermediate Frequency ....................... .. .... Picture IF Carrier Frequency: 45.75 MHz
Sound IF Carrier Frequency: 41.25 MHz
Maximum Sensitivity ....................... VHF: 45 dB µV max; UHF/CATV: 48 dB µV max
Radio Frequency ............................................ AM: 530–1 710 kHz; FM : 88–10 8 MHz
Antenna .................................................................... VHF /U HF 75-Ohm Unbala nced
Power Source ..................................................................................... AC 120V, 60Hz
Power Consumption .......................................................................... 15 W Maximum
Output Power ........................................................................................................ 1 W
Load Impedance ............................................................................................. 8 Ohms
Frequency Response ................................................ . 80 Hz–7 kHz (3 dB Bandwidth)
Total Harmonic Distortion ....................................................................................... 2%
7
Dimensions (HWD) ....................... ... 11
/16 x 71/2 x 87/8 Inches (290 × 190 × 225 mm)
Weight ................................................................................................. 4 lb 7 oz (2 kg)
Specifications are typical; individual units might vary. Specifications are subject to
change and improvement without notice.
19
Page 20

16-132.fm Page 20 Tuesday, July 20, 1999 8:46 AM
Limited Ninety-Day Warranty
This product is warrant ed by RadioShac k against man ufacturing d efects in materia l and workmanship under normal use for ninety (90) day s from the date of purc hase from Rad ioShack comp anyowned stores and authorized RadioShack franchisees and dealers. EXCEPT AS PROVIDED
HEREIN, RadioShack MAKES NO EXPRE SS WARRANTIES AND ANY IMPLIED WARRANTIES,
INCLUDING THOSE OF MERCHANTABILITY AND FITNESS FOR A PARTICULAR PURPOSE,
ARE LIMITED IN DURATION TO THE DURATION OF THE WRITTEN LIMITED WARRANTIES
CONTAINED HEREIN. EXCEPT AS PROVIDED HEREIN, RadioShack SHALL H AVE NO LIABILITY OR RESPONSIBILITY TO CUSTOMER OR ANY OTHER PERSON OR ENTITY WITH RESPECT TO ANY LIABILITY, LOSS OR DAMAGE CAUSED DIRECTLY OR INDIRECTLY BY USE
OR PERFORMANCE OF THE PRODUCT OR ARISING OUT OF ANY BREACH OF THIS WARRANTY, INCLUDING, BUT NOT LIMITED TO, ANY DAMAGES RESULTING FROM INCONVENIENCE, LOSS OF TIME, DATA, PROPERTY, REVENUE, OR PROFIT OR ANY INDIRECT,
SPECIAL, INCIDENTAL, OR CONSEQUENTIAL DAMAGES, EVEN IF RadioShack HAS BEEN ADVISED OF THE POSSIBILITY OF SUCH DAMAGES.
Some states do not allow the limitations on how long an implied warranty lasts or the exclusion of incidental or consequential damages, so the above limitations or exclusions may not apply to you.
In the event of a product defect during the warran ty period, take the product and the RadioShack
sales receipt as proof of pur cha se date to any RadioS hack s tore. Radi oSha ck wil l, at its option, unless otherwise provided by l aw: (a) c orre ct the defect by product repai r without c har ge for parts and
labor; (b) replace the produc t with one of the same or similar design; or (c) refund the purchase
price. All replaced parts and pr oducts, and pro ducts on which a refund is made, become the property of RadioShack. New or rec onditioned parts and products may be used in the performance of
warranty service. Repa ired or replaced parts and produ cts are warranted for the remainder of the
original warranty period. You will be charged for repair or replacement of the product made after the
expiration of the warranty period.
This warranty does not cover: (a) damage or failure caused by or attributable to acts of God, abuse,
accident, misuse, impr oper or abnormal usa ge, failure to fol low i nstruct ions, improper instal lation or
maintenance, alterati on, lightning or other incidence of exc ess voltage or current; (b) any repairs
other than those provi ded by a RadioShack Autho rized Service Facility; ( c) consumables such as
fuses or batteries; (d ) cosmeti c dam age; (e) transp ortatio n, sh ipping or insuranc e c osts; or (f) cos ts
of product removal, installation, set-up service adjustment or reinstallation.
This warranty gives you specifi c legal rights, and you may also have oth er rights which vary from
state to state.
RadioShack Customer Relations, Dept. W, 100 Throckmorton St., Suite 600, Fort Worth, TX 76102
We Service What We Sell
3/97
RadioShack
A Division of Tandy Corporation
Fort Worth, Texas 76102
8A8N Prin te d in Chin a
 Loading...