


Optimist Remote Control Sailing Model
Kit Manual
Optimist Remote Control Sailing Model
(IODA) International Optimist Dinghy Association Approved
1 / 4 Scale Size to Original Optimist
Made in the U.S.A.
www.optimist-rc.com
C/o Optimist RC Mfg., LLC
141 Dawson Drive
Elgin, IL 60120
Phone 1-516-524-0420
Fax 1-224-535-8570

Optimist Model Kit Components
HULL
23 ½ X 12 3 ½
MOLDED PLASTIC
DECK
23 ½ X 12 X 1
MOLDED PLASTIC
MAST SUPPORT
Molded Plastic
CENTERSTAND
SUPPORT
Molded Plastic
REAR FLOATATION
Molded Plastic
FRONT FLOTATION (4)
Molded Plastic
CENTERBOARD
Plastic
RUDDER
Plastic
RUDDER PINS (2)
Metal
RUDDER SUPPORT
Metal
RUDDER SUPPORT
PLATE
Plastic
MAST
½ x 23 “
Wood
BOOM
5/16” x 21”
Wood
SPRIT
5//16” x 23”
Wood
MAST BASE
Molded Plastic
RUDDER ARM
(R/CONTROL)
Plastic
BOOM END
Molded Plastic
PULLEYS ( 3)
CLEATS
1 LONG – MAST
1 SHORT– BOOM
Metal
EYELET
Metal
(2) Slotted Machine Screws 2 x ½ “ ---(rudder arm to rudder)
(2) Slotted Self Tapping Screws 2 x ½-(rudder plate to hull and support plate)
(1) Brass Pin-------------------------------(front bottum hole, mast)
3 ft. sail string
CENTERBOARD
TOP
Molded Plastic
CENTERBOARD
STAND(2 PARTS)
Molded Plastic
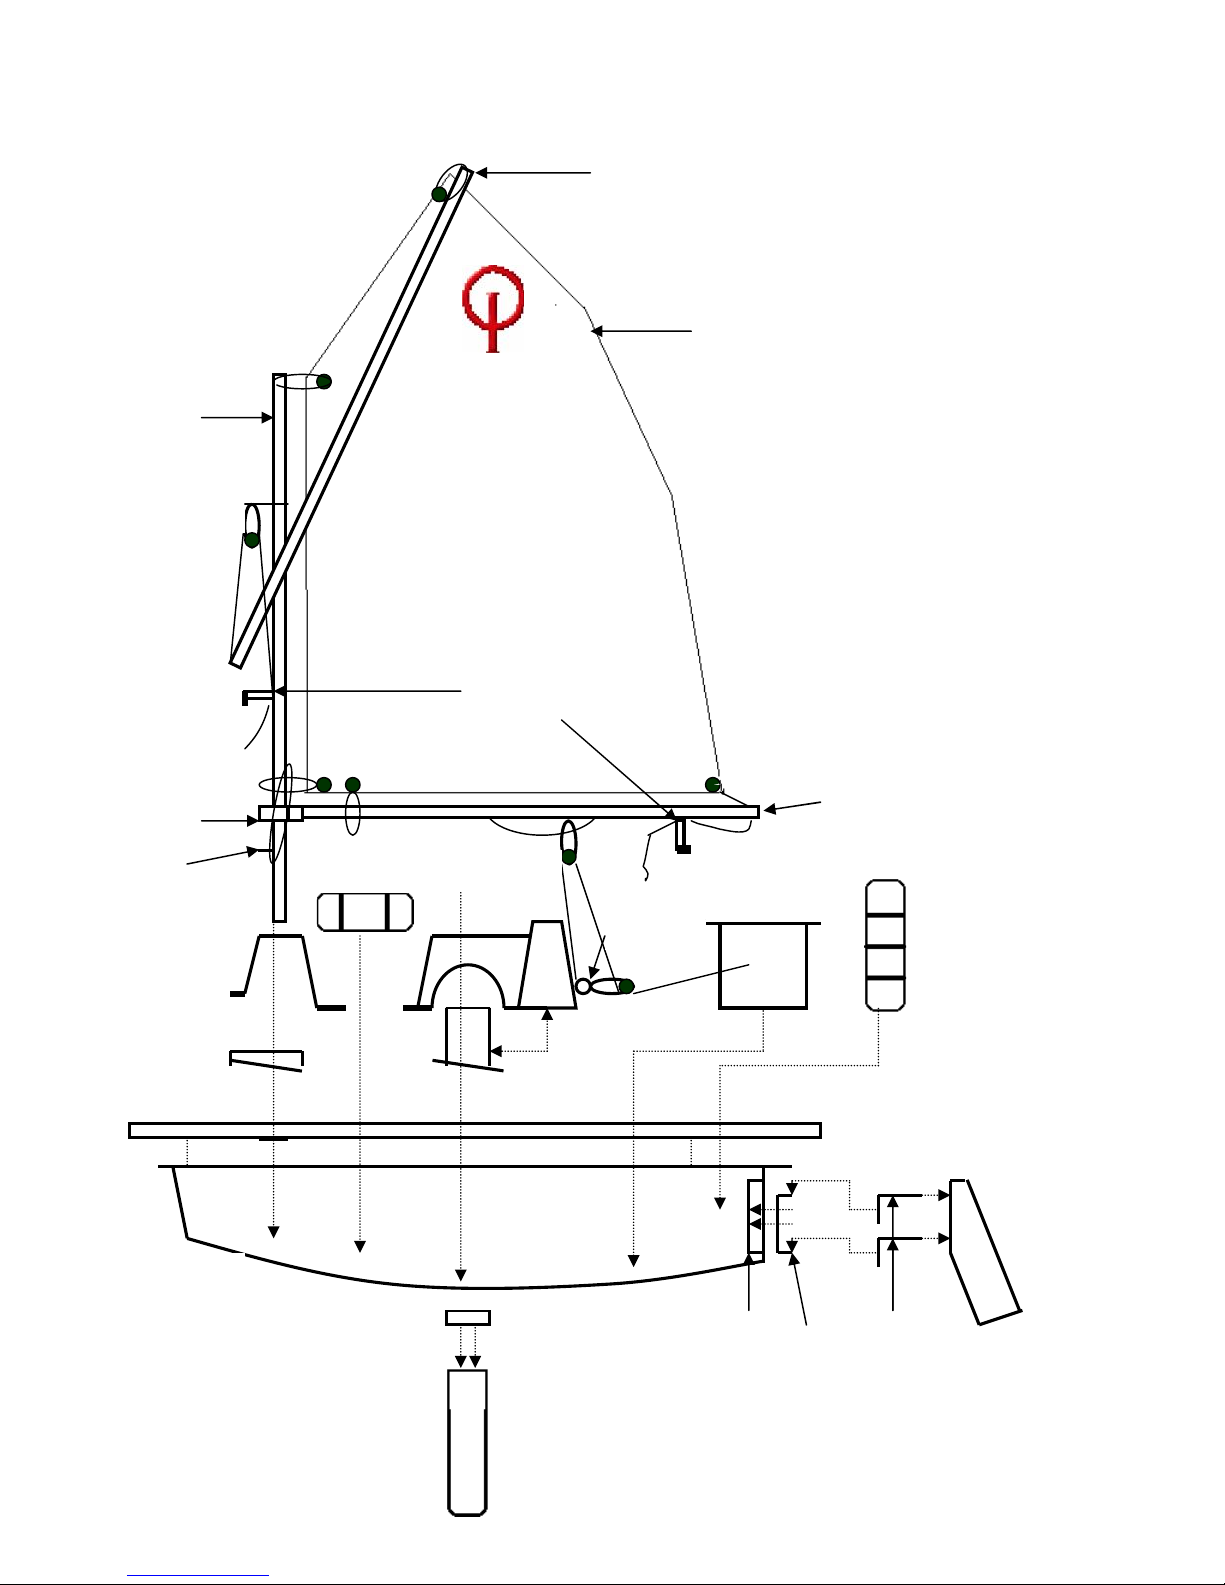
Optimist Exploded Side View
Centerboard top
Sprit
HULL
DECK
Rudder
Support
Plate
Rudder
Support
Rudder
Pins
Rudder
Mast Base
Center
Stand &
Support
Mast Thwart
R/Control Box
Front Flotation
Rear Flotation
Pulley
Cleats (2)
Long-Mast
Short-Boom
Pulley
Pulley
Boom
Boom End Support
Mast
Sail
Eyelet Screw
Centerboard
Dear Customer,
Thank You for your purchase of this Optimist Remote Control Sailing Model.
The enjoyment and Satisfaction that evolves from this pastime will be very rewarding
The following are instructions and suggestions for completing this kit.
Depending on your own model making experience, this kit will assemble easy.
Please read over instructions before you begin.
Optimist Model Kit Instructions
Materials and Tools Needed for Assembly
Sandpaper: 120, 220, 320 grit (1 sheet of each)
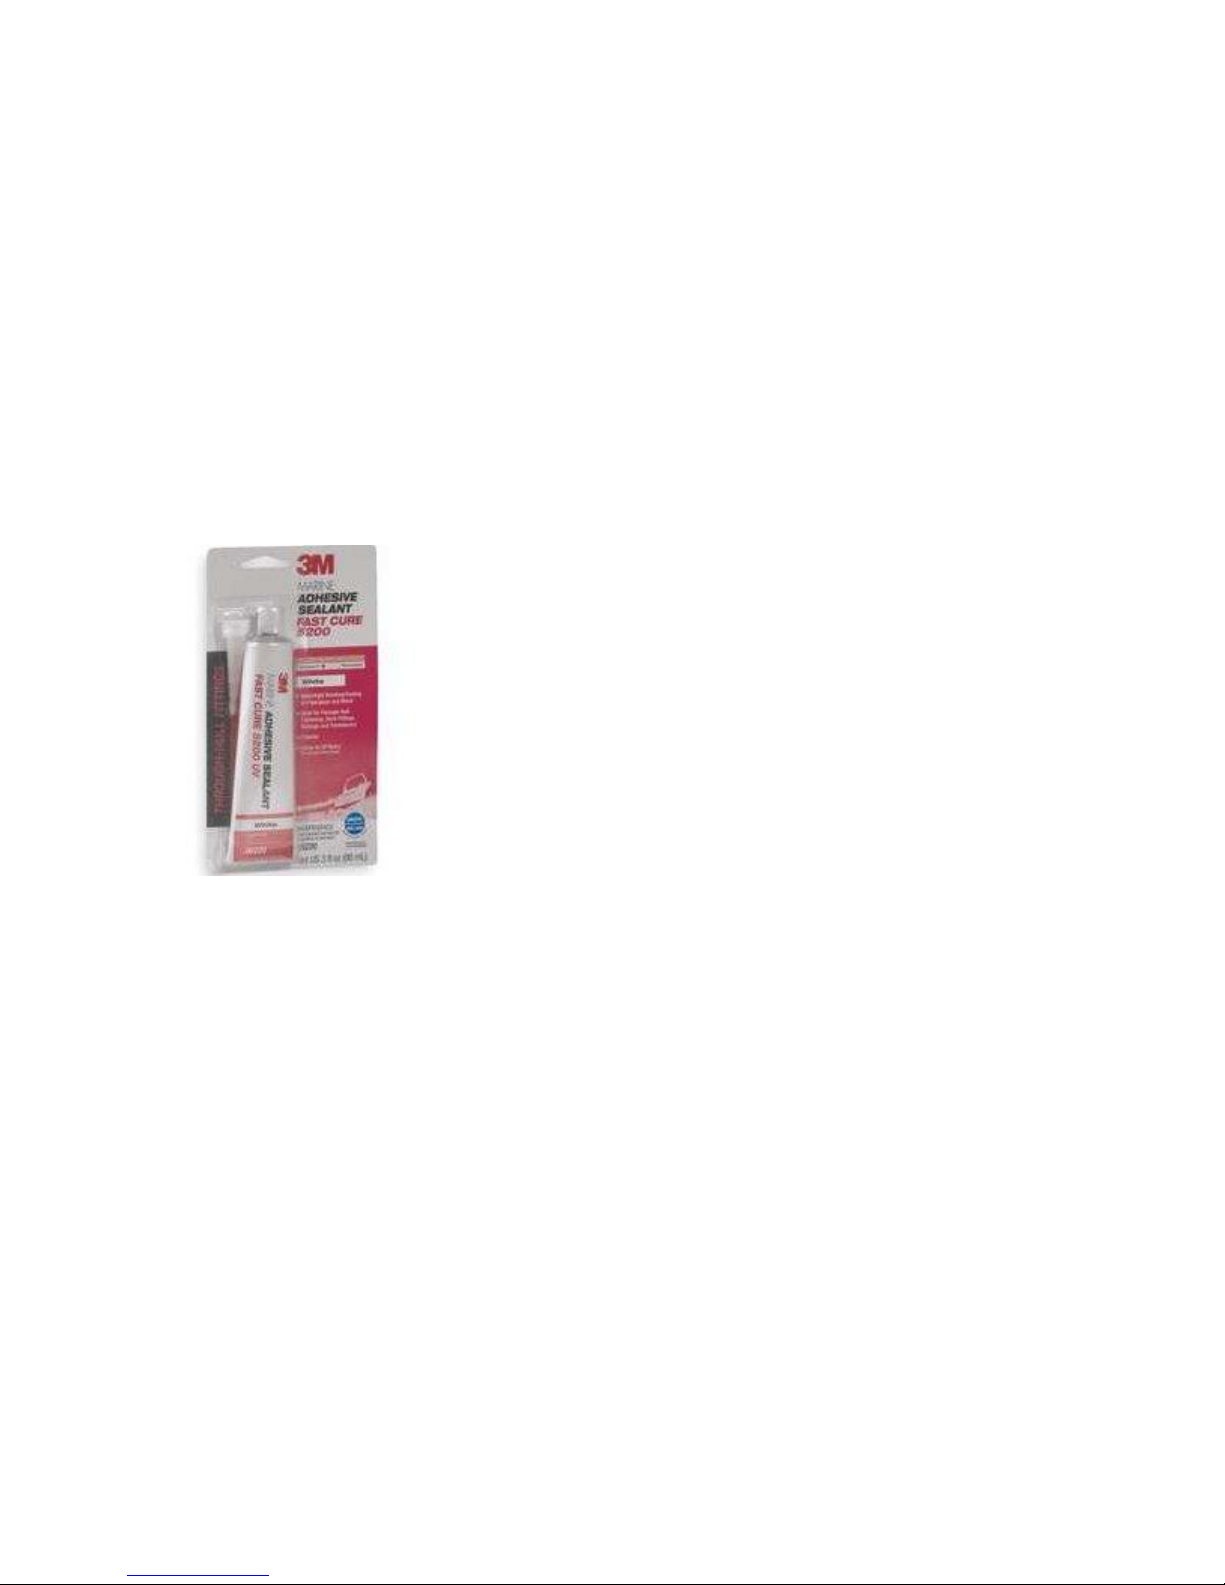
Glue:
Use 3M Marine Adhesive sealant or similar like this (3M 5200 mastic, or SIKA 591 polyurethane mastic (for
boats)) Epoxy is NOT suitable to build the Optimist. Our hulls and decks are molded
from a plastic known as ABS. ABS is a polystyrene based resin which cannot be bonded with epoxy. The epoxy is
simply too rigid and will peel away from the plastic substrates and the bond will fail.
Lighter or Solder Gun: for sealing string ends on sail
Small Regular Screwdriver (used to attach Rudder support to Hull and Rudder support Plate, and
Rudder Control Arm to Rudder)
Ruler
Paint: An Enamel Aerosol (Krylon works well),
Polyurethane Clear: This is optional for the Mast, Boom, and Sprit. These components should be
protected with either the clear or paint
Small Tabs of Velcro (Used for attaching Front Flotation, and R/Control Box to Hull)
Optimist Painting
Deck (optional)
Hull (optional)
Rudder and Centerboard (optional)
Front and Rear Flotations (matching)
* Front Flotations Should be Glued Together Before Painting for Best Appearance.*
Mast, Boom, and Sprit MUST be Painted or Clear Coated

All Plastic Parts, Can Be Painted, Color and Items to be painted is left to the
Assemblers Discretion and Imagination
All Parts to be painted should be Fitted before Painting, and Assembled after Painting.
Lightly Sand Parts to be painted with 320 grit sandpaper
Adult supervision is recommended during any assembly, painting, and gluing
Please read and follow all instructions on all other materials used during assembly of this kit .
Optimist RC Mfg., LLC is not liable or responsible for any injury, or otherwise which may result while assembling, and or
using the Optimist Model Remote Control Sailing Model.
Thank You

Optimist Model Assembly Instructions
Always Remember Tip: Measure Twice, Trim Once.
You can’t replace material you have removed
View Optimist Exploded Side View for Reference When Assembling
Old Type Front Flotations: 2 (4 halves)
Sand edges flat until 2 pieces fit together flat (lay sandpaper on flat surface, running Flotation half across
sandpaper).
Glue Flotation halves together, filling small holes if any with glue making watertight.
When the Glue dries you can lightly sand the glued edge, and paint.
New Front Flotation devices are actual Airbags : They only need to be inflated and attached with Velcro
Centerstand: 1 (2 halves)
Sand edges flat, until the Centerboard fits snug into Centerstand
Glue Centerboard Stand halves together, set aside.
Deck to Hull: Trim excess material from outer lip on Hull until Deck lays flat on Hull
DO NOT glue on at this time, There May be slight trimming that is required in next step.
Glue after all inside parts is assembled and the Deck is painted.
Rudder Support & Support Plate: Center Support Plate (plastic ½ x 1) inside rear Hull, over pre-drilled
holes and glue into this position. Using 2 slotted self taping screws (2 x ½ ), attach Rudder Support (long end
down) to Outside of Hull, through pre-drilled holes in Hull and into Rudder Support Plate.(see Exploded Side
View).
Rudder Pins & Rudder: Insert Rudder Pins, long end into pre-drilled holes into Rudder
DO not glue. Set Deck on Hull, Check clearance between Deck edge and rudder Pins.
Sand any excess on Deck so the Deck is just above the Pins. This will keep Rudder from coming off during
operation and make the Rudder removable for transport or storage.
No more trimming of Deck is required now it can be painted.
Old type Rear Flotation: 1 Position the Rear Flotation inside rear of Hull. Side with small flat surface
is the top. Top surface rests flat against rear of Hull and may rest on previous installed Rudder Support Plate.
Bottom of Rear Flotation is located about 2 ½ inches from the rear Hull wall (Rear flotation is mounted at an
angle).
Sand side edges of Rear Flotation until it fits snug into rear of Hull. Make sure there is clearance between Deck
and Rear Flotation, when Deck is set on Hull (Adjust rear Flotation accordingly). After trimmed to fit, this part
can be painted.
Glue Rear Flotation in position once fitted and painted.
New Rear Flotation device is an are actual Airbag: This only needs to be inflated and attached with
Velcro
Mast Thwart: 1 Position Mast Thwart 2 ½ to 3 inches in Hull, from front inside lip of Hull
to front edge top of Mast Thwart
Sand side edges and Bottom edges, where needed, until Thwart sets in Hull, fitting snug on sides and rests flat
on bottom of Hull. Making sure it does not interfere with Deck when installed.
Glue Mast Thwart to Hull using glue on the side and bottom surfaces of the Mast Thwart.
Mast Base: 1 Position Mast Base in Hull under Mast Thwart, using Mast ,position Base so the Mast is straight
from front to back , and side to side.
Glue Mast Base to Hull in this position. (Do Not Glue Mast to Mast Base)
Hull Edge
Deck

Optimist Model Assembly Instructions
View Optimist Model Exploded Side View for Reference When Assembling
Center Stand: There are 2 optional ways to install (with both options, taller end is to the rear)
*Please read both options before continuing*
Option A: Trim off excess material on bottom of Centerstand until flat, Locate Slot in Bottom of Hull . Position
Center Stand over slot, making sure the Centerstand is straight.
Glue in this position (added glue may be used to fill any gaps as this area must be watertight)
Option B; Locate slot in Bottom of Hull.
Using Assembled Centerstand, widen opening of slot in Hull, equally on both sides, so Centerstand bottom fits snug into
Hull opening, is flat on bottom of Hull, and is standing straight.
Mark and trim off excess material of Centerstand.
Glue in this position (added glue may be used to fill any gaps as this area must be watertight)
Put Hull in water after glue dries to make sure it is watertight. Fill any area’s that may need it, with glue and repeat.
Centerboard Support: 1 Once Centerboard stand is secure, position Support over Centerstand.
Sand excess material on side edges and bottom surface so Support fits snug against Hull sides and is flat on Hull
bottom.(you may use Centerboard to align Support in this position) Centerboard must be straight up and down.
Glue Centerboard Support in this position.
Glue Deck to Hull
Glue Centerboard Top to Centerboard
Attach Front Flotations: Velcro tabs are recommended 2 on each Flotation.
Front Flotations are mounted directly forward and to the sides of the Centerstand Support. They can a lso be glued in place
Attach 1 Pulley to Eyelet: Depending on location of Remote Control location,
Screw eyelet, with pulley attached, into back of Centerstand Support so string from Sail winch servo to Pulley is straight
and can operate smoothly.
Optional Remote Control Box: Attach R/Control Box to Hull centered directly behind Centerstand Support, leaving
room for pulley, and operation of sail winch.
R/Control Box can also be Mounted using 4 Velcro Tabs.
It also can be glued in position once operation is fine tuned.
Another optional method is to mount Remote Control Unit inside of Rear Flotation.
Rudder Arm to Rudder: Install Rudder to Rudder Support,
Make sure length of Pins do not interfere with operation of Rudder, adjust accordingly and glue pins to rudder.
Using R/C Box, linkage should move freely from Box to Rudder, over Rear Flotation and Deck. Attach Rudder Arm to
Rudder so the linkage and Rudder move freely without interference.
Use 2 - # 2 x ½ slotted machine screws.
Optimist Model Sail Assembly Instructions

View Optimist Exploded Side View Sheet for Assembly Reference
Assembly Tip: To assemble sail you may either use your Assembled Optimist Model itself or a
block of wood drilled to accept the Mast set on a bench..
All ends of tied string should be melted using clean solder gun or lighter under adult supervision
ONLY.
You can also use electrical shrink tape for a very neat appearance.
Mast, Boom, and Sprit: Should be either Painted or Clear Coated before assembly.
We are doing this from the factory for you now final coat of gloss color of your choosing only needs to be
applied!
You can lightly sand with 320 grit sandpaper before applying coating.
Mast: Insert Mast through hole in Mast Thwart and into Mast Base.
Align holes facing towards the front of Model (top hole does not face towards the front)
Attach string through top hole in Mast, through hole in sail, making a loop
Attach string through bottom hole in sail and around Mast.
Fasten string to a pulley, thread string through 2nd from top hole in Mast, tie knot in string on back side of Mast.
Insert Longer Cleat into 3rd hole from top (not drilled through) of Mast. This needs to fit tight.
Insert Brass pin into bottom hole in Mast
Sprit:
Insert String through top hole in sail and make a loop.
Make a loop on one end of another piece of string,
Thread string through cleat in Mast, around pulley that is attached to mast, and attach loop to end of Sprit.
Pull tight on end that passes through Cleat , this should lift sail.
Cut off string below Cleat leaving some excess for sailing adjustments.
Boom: Insert Short cleat into hole, 2
nd
from end. Cleat faces down.
Fasten string to outer hole in sail, making a small loop.
Thread the other end through end hole in Boom, and through Cleat.
*Boom may be cut shorter, on Mast End, for closer fit to Sail with Boom End Support installed*
Glue Boom end to Boom making sure holes and Cleat in Boom are facing down
Pull string tight through Boom Cleat
Remove excess String leaving some amount for sailing adjustments.
Attach another piece of string through other hole in Sail (bottom, mast end)and around Boom .
Tie knot in one end of another piece of string, Thread string down through one of remaining holes in Boom,
through a pulley and up through the last hole in Boom.
*A clasp of some type can be used to attach the Pulley to the string for easy Mast Removal when
transporting and Storing Your Optimist Model.
Tie knot in remaining end leaving excess loop hanging below boom with pulley attached.
Loop another piece of string around mast, below Brass Pin, and over the top of the string that attaches the
bottom of the sail to the Mast (This holds sail down during operation ) this should be snug but not to tight to stop
normal operation of sail.
Once Remote Control is mounted, Tie String to eyelet, thread up to pulley on Boom, then down to Pulley on
eyelet, to Sail Winch.
Optional: Other holes can be added to Sail
Luff (Mast side) 8 total (6 more) 2.5 inches apart
Foot (Boom side) 8 total (5 more) 2.7 inches apart
These dimensions are to Optimist scale
END OF INSTRUCTIONS
 Loading...