

Page 1

Electronic
Cash Register
OP-680
MANUAL
Page 2

Page 3

1
INDEX
Overview of Steps Required to Use This Cash Register ......................................................................... 5
1. Getting to Know the Cash Register ..................................................................................................... 6
1.1 General Specifications ................................................................................................................... 6
1.2 Precautions .................................................................................................................................... 6
1.3 Part Names and Functions ............................................................................................................ 6
1.4 Control Lock and Functions ........................................................................................................... 8
1.5 Kitchen Printer General Specifications .......................................................................................... 8
1.5.1 Description .............................................................................................................................. 8
1.5.2 Installing the Paper Rolls ........................................................................................................ 8
1.5.3 To code instructions ................................................................................................................ 8
1.5.4 Link kitchen printer method ..................................................................................................... 9
2. Setting up .......................................................................................................................................... 10
2.1 System Reset (Ram Clear) .......................................................................................................... 10
2.2 Half System Reset (Half Reset) ................................................................................................... 10
2.3 Installing the Paper Rolls .............................................................................................................. 11
2.4 Installing the Batteries .................................................................................................................. 11
3. Programming Layout (Turn the Control Lock to ‘P’ Position) ............................................................ 12
3.1 Basic Data Programming ............................................................................................................. 13
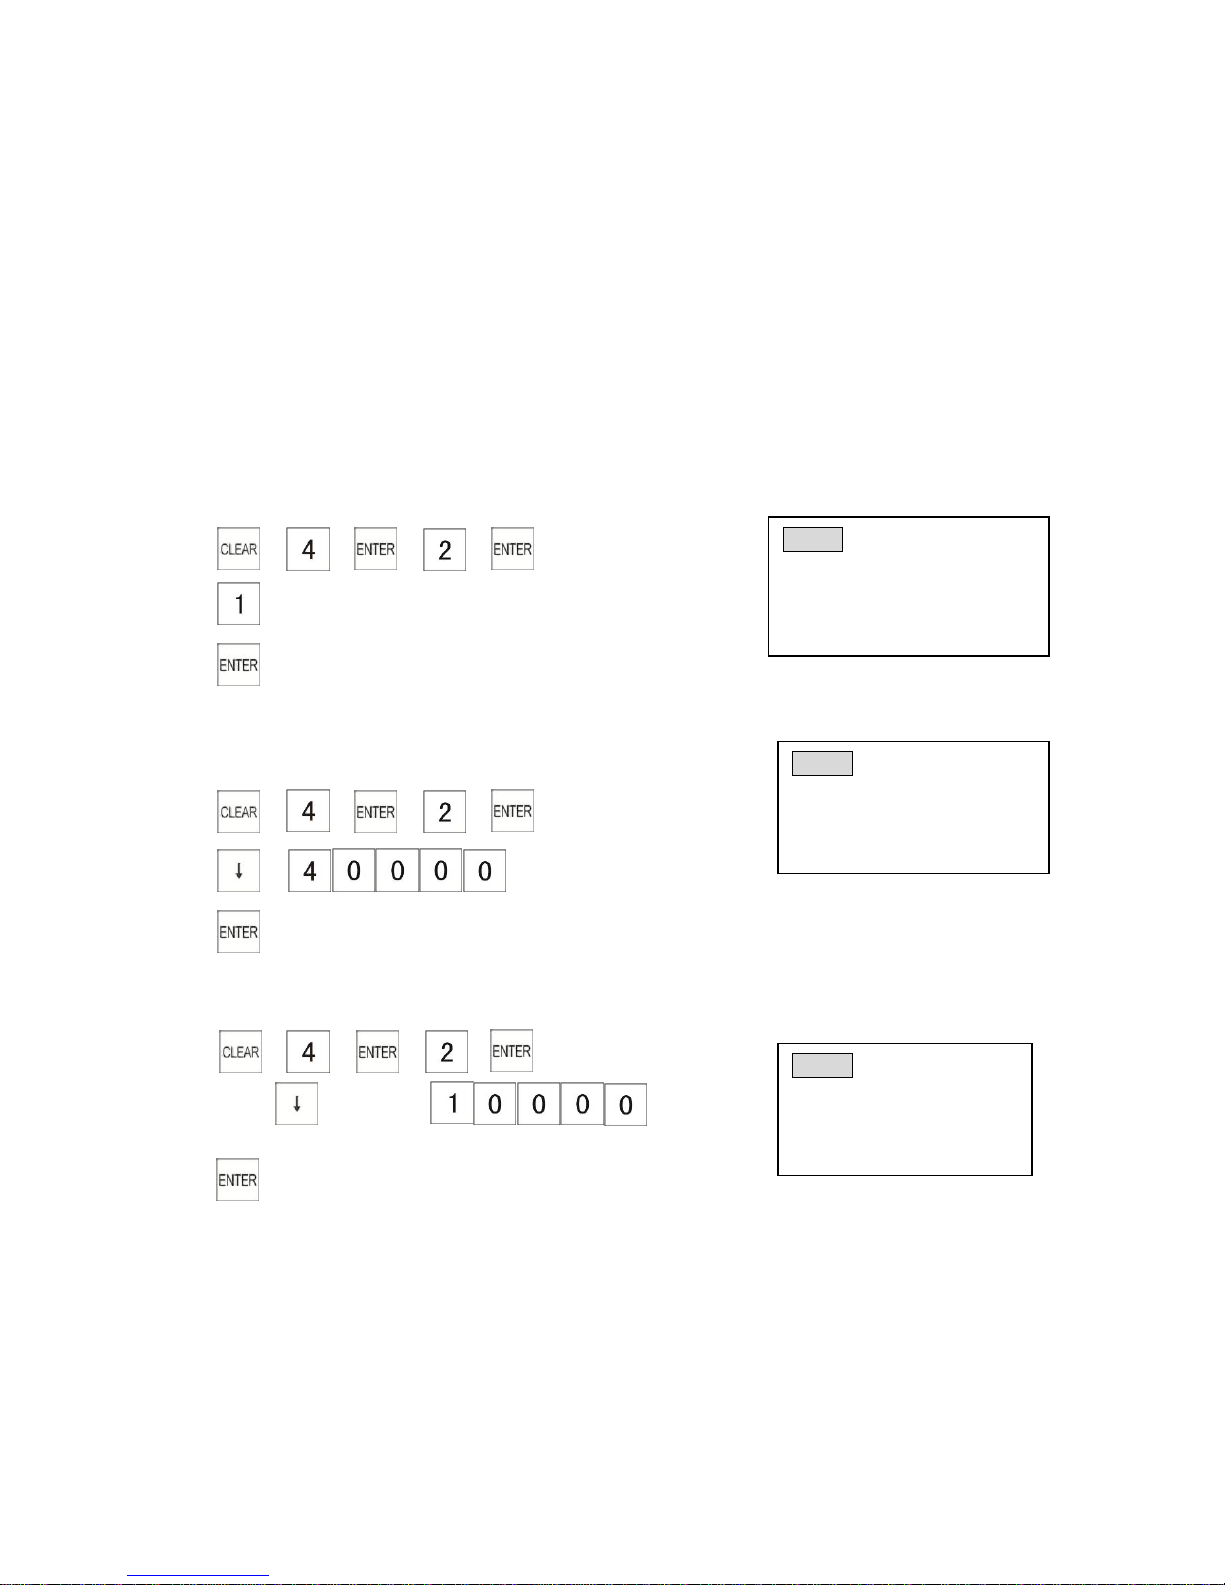
3.1.1 Programming the Date .......................................................................................................... 13
3.1.2 Programming the Time.......................................................................................................... 14
3.1.3 Programming the Transaction Number ................................................................................. 14
3.1.4 Programming the Machine Number ...................................................................................... 14
3.1.5 Programming the X 1 Report Number .................................................................................. 14
3.1.6 Programming the X 2 Report Number .................................................................................. 15
3.1.7 Programming the Z 1 Report Number .................................................................................. 15
3.1.8 Programming the Z 2 Report Number .................................................................................. 15
3.2 Department Programming ........................................................................................................... 15
3.2.1 Programming a Department Name ....................................................................................... 15
3.2.2 Programming a Department Unit Price ................................................................................. 16
3.2.3 Programming Department Flags ........................................................................................... 16
3.2.4 Programming a Department Group ...................................................................................... 17
3.2.5 Programming a HALO........................................................................................................... 17
3.3 PLU Programming ....................................................................................................................... 18
3.3.1 Programming a PLU Barcode ............................................................................................... 18
3.3.2 Programming a PLU Name ................................................................................................... 18
3.3.3 Programming a PLU Unit Price ............................................................................................. 19
3.3.4 Programming a PLU Linked Department .............................................................................. 19
3.3.5 Barcode Learning .................................................................................................................. 19
3.3.6 Searching the Barcode of a PLU .......................................................................................... 19
3.4 Tax Programming ......................................................................................................................... 20
3.4.1 Programming a Tax Type ...................................................................................................... 20
Page 4

2
3.4.2 Programming a Tax Rate ...................................................................................................... 20
3.4.3 Programming a Tax-Free Amount ......................................................................................... 20
3.5 Programming the [-] Key, the [+%] Key, and the [-%] Key ........................................................... 21
3.5.1 Programming the [+%] Key Rate .......................................................................................... 21
3.5.2 Programming the [+%] Key Flags ......................................................................................... 21
3.5.3 Programming the [-%] Key Rate ........................................................................................... 21
3.5.4 Programming the [-%] Key Flags .......................................................................................... 21
3.5.5 Programming the [-] Key ....................................................................................................... 22
3.6.6 Programming the [-] Key Flags ............................................................................................. 22
3.5.7 Programming the [-] Key Limit .............................................................................................. 22
3.6 System Flag Programming (Configuration Options) .................................................................... 23
3.7 Function Key Programming ......................................................................................................... 30
3.7.1 Basic Key Operation Sequence ............................................................................................ 30
3.7.2 Function Code Table ............................................................................................................. 31
3.8 Changing Transaction Name ....................................................................................................... 32
3.8.1 Changing Transaction Words................................................................................................ 32
3.8.2 Print Transaction Words Table .............................................................................................. 32
3.9 LOGO Message Programming .................................................................................................... 33
3.9.1 Programming the Number of Lines for Logo Message ......................................................... 33
3.9.2 Programming Logo Message Content .................................................................................. 33
3.10 Commercial Message Programming ......................................................................................... 34
3.10.1 Programming the Number of Lines for Commercial Message............................................ 34
3.10.2 Programming Commercial Message Content ..................................................................... 34
3.11 Foreign Currency Programming ................................................................................................ 34
3.11.1 Programming Foreign Currency Rate ................................................................................. 35
3.11.2 Programming Foreign Currency Name ............................................................................... 35
3.12 Clerk Programming .................................................................................................................... 35
3.13 Password Programming ............................................................................................................ 36
3.13.1 Programming the X Report Password ................................................................................ 36
3.13.2 Programming the Z Report Password ................................................................................ 36
3.13.3 Programming the Training Password .................................................................................. 36
3.13.4 Programming the Manager Password ................................................................................ 37
3.14 Kitchen Printer Programming .................................................................................................... 37
3.14.1 Programming Kitchen Printer Flags .................................................................................... 37
3.14.2 Programming Print Count ................................................................................................... 38
3.14.3 Programming Feed Line Number ....................................................................................... 38
3.15 Guest Programming................................................................................................................... 39
3.16 Check and Print Programming Data .......................................................................................... 39
3.17 Character Input Method ............................................................................................................. 39
3.17.1 Input Method ....................................................................................................................... 39
3.17.2 Character Input - Double Width .......................................................................................... 40
3.17.3 Switch Cursor Position ........................................................................................................ 40
3.18 Using Special Function Keys ..................................................................................................... 41
3.18.1 How to Use the [→] Key and the [←] Key during Setting Flag ........................................... 41
Page 5

3
3.18.2 How to Use the [→] Key and the [←] Key during Inputting the Symbol ............................. 41
3.18.3 Using the [↑] Key and the [↓] Key .................................................................................... 42
3.18.4 Using [ESC] Key ................................................................................................................. 42
3.18.5 Using [PGUP] and [PGDN] Key .......................................................................................... 42
3.18.6 Using [BKSP] Key ............................................................................................................... 42
3.18.7 Using [DEL] Key .................................................................................................................. 43
4.Cash Register Operation (“R” mode) ................................................................................................. 43
4.1 Basic Operation ........................................................................................................................... 46
4.1.1 Single-item Cash Sale .......................................................................................................... 46
4.1.2 Multiple-item Entries ............................................................................................................. 46
4.1.3 Quantity Sales ....................................................................................................................... 47
4.1.4 Duplicate Entries ................................................................................................................... 47
4.1.5 Barcode Entries .................................................................................................................... 47
4.1.6 Check, Credit and Charge Sales .......................................................................................... 48
4.1.7 Split Payment ........................................................................................................................ 49
4.1.8 Change Calculation............................................................................................................... 49
4.1.9 Subtract with the [-] Key ........................................................................................................ 50
4.1.10 Using the Discount [-%] Key and Surcharge [+%] Key ....................................................... 51
4.1.11 Void ..................................................................................................................................... 52
4.1.12 Error Correction Operation ................................................................................................. 53
4.1.13 Cancel ................................................................................................................................. 53
4.1.14 Return Product .................................................................................................................... 53
4.1.15 Received on Account and Paid Out .................................................................................... 54
4.1.16 Opening Drawer Manually .................................................................................................. 54
4.1.17 Using [CLEAR] Key............................................................................................................. 54
4.1.18 Receipt ON/OFF ................................................................................................................. 55
4.1.19 Printing a Duplicate Receipt ............................................................................................... 55
4.1.20 Changing the Unit Price at the “R” Position ........................................................................ 56
4.1.21 PLU Price Check at the “R” Position ................................................................................... 56
4.1.22 Item Tickets Function .......................................................................................................... 57
5. Other Operations ............................................................................................................................... 57
5.1 Time or Date Display ................................................................................................................ 57
5.2 Clerk Login and Change Clerk during a Transaction ............................................................... 57
5.3 Clerk Log Out ........................................................................................................................... 58
5.4 Plu Shift .................................................................................................................................... 58
5.5 Using [DPT#] Key .................................................................................................................... 58
5.6 Calculator Mode ....................................................................................................................... 58
5.7 Training Mode .......................................................................................................................... 59
5.8 Foreign Currency ..................................................................................................................... 60
5.9 $100 Sale ................................................................................................................................. 61
6. PBAL NBAL Operation (“R”mode) ..................................................................................................... 61
6.1 PBAL and NBAL Operation ...................................................................................................... 61
Page 6

4
6.2 Additional Operation................................................................................................................. 62
6.3 CKPD Operation ...................................................................................................................... 62
6.4 Change Guest Operation ......................................................................................................... 63
6.5 GLNK Operation ...................................................................................................................... 63
6.6 Cancel GLNK Operation .......................................................................................................... 64
6.7 Read Guest Sales Amount Operation ...................................................................................... 64
7. Using Kitchen Printer ......................................................................................................................... 65
7.1 Using Kitchen Printer ............................................................................................................... 65
8. Read and Reset Reports ................................................................................................................... 66
8.1 Read Report (“X” position) ........................................................................................................... 66
8.1.1 Printing Daily Reports ........................................................................................................... 66
8.1.2 Printing Periodical Reports ................................................................................................... 66
8.1.3 Search the Particular Report (Display-only) ......................................................................... 67
8.1.4 Serial Report Print ................................................................................................................. 67
8.1.5 Journal List ............................................................................................................................ 67
8.2 Reset Report (“Z” position) .......................................................................................................... 68
8.2.1 Reset Periodical Full Sales Report ....................................................................................... 68
8.2.2 Using USB Memory for Uploading and Downloading Data .................................................. 69
APPENDIX ............................................................................................................................................ 72
Appendix 1: PC communication mode .............................................................................................. 72
Appendix 2: Error codes and Messages ............................................................................................ 72
Appendix 3: Sample reports .............................................................................................................. 73
Page 7

5
Overview of Steps Required to Use This Cash Register
1. Understanding the Cash Register
Before using your cash register check the specifications and part names, and read the
precautions for using it.
See Chapter 1
2. Installing the Cash Register
Place the cash register in a location near a wall outlet and plug the power cord into the
outlet.
3. Initializing the Cash Register
Initialize the cash register’s memory, before programming.
See section 2.1
4. Installing the Batteries
Change the battery
See section 2.4
5. Installing the Paper Rolls
Install paper roll for the receipt correctly.
See section 2.3
6. Programming the Cash Register
Program items into the memory.
See Chapter 3
7. Operating the Cash Register
Perform sales transactions.
See Chapter 4
8. Review and Reset the Sales Information
Review and reset the daily sales information. You can also check the information for a
period of time.
See Chapter 8
NOTICE
The information and specifications in this manual are subject to change without prior notice.
While every precaution has been taken to make this manual accurate, the manufacturer shall not
be liable for any errors or omissions, nor for any damages resulting from the use of the information
herein.
This manual may not be copied or transmitted by any means, in whole or in part, without prior
written consent from the manufacturer.
Page 8
6
1. Getting to Know the Cash Register
1.1 General Specifications
Name Description
Power source AC 240V±10%
Power consumption Max. 70 W
Operating environment temperature 0℃ to 40℃ (32°F to 104°F)
Storage method C-MOS RAM
Type of printer 1 station thermal printer
Printing speed Approx. 7 lines per sec
Paper roll size Width 56.5-57.5mm (2.22-2.26 inches)
Max. diameter 70mm(2.76 inches)
External dimension 400mm (Width) x 330mm (Fathom) x 230mm (Height)
15.7”(W) x13”(F) x9.4”(H))
Weight (With NP33 cash drawer) 5.4kg (22 1b)
1.2 Precautions
Please note the following before using the cash register.
●Avoid using the cash register in the following conditions:
Exposed to direct sunlight or water
Hot or humid environments
Near equipment that generates strong electromagnetic fields
Anywhere there may be sudden changes in temperature
●Do not touch the cash register if your hands are wet.
●If the register malfunctions, do not attempt to repair the cash register.
●Plug your cash register into a standard wall outlet.
Other electrical devices on the same circuit may damage the cash register.
●The outlet must be located near the equipment and easily accessible.
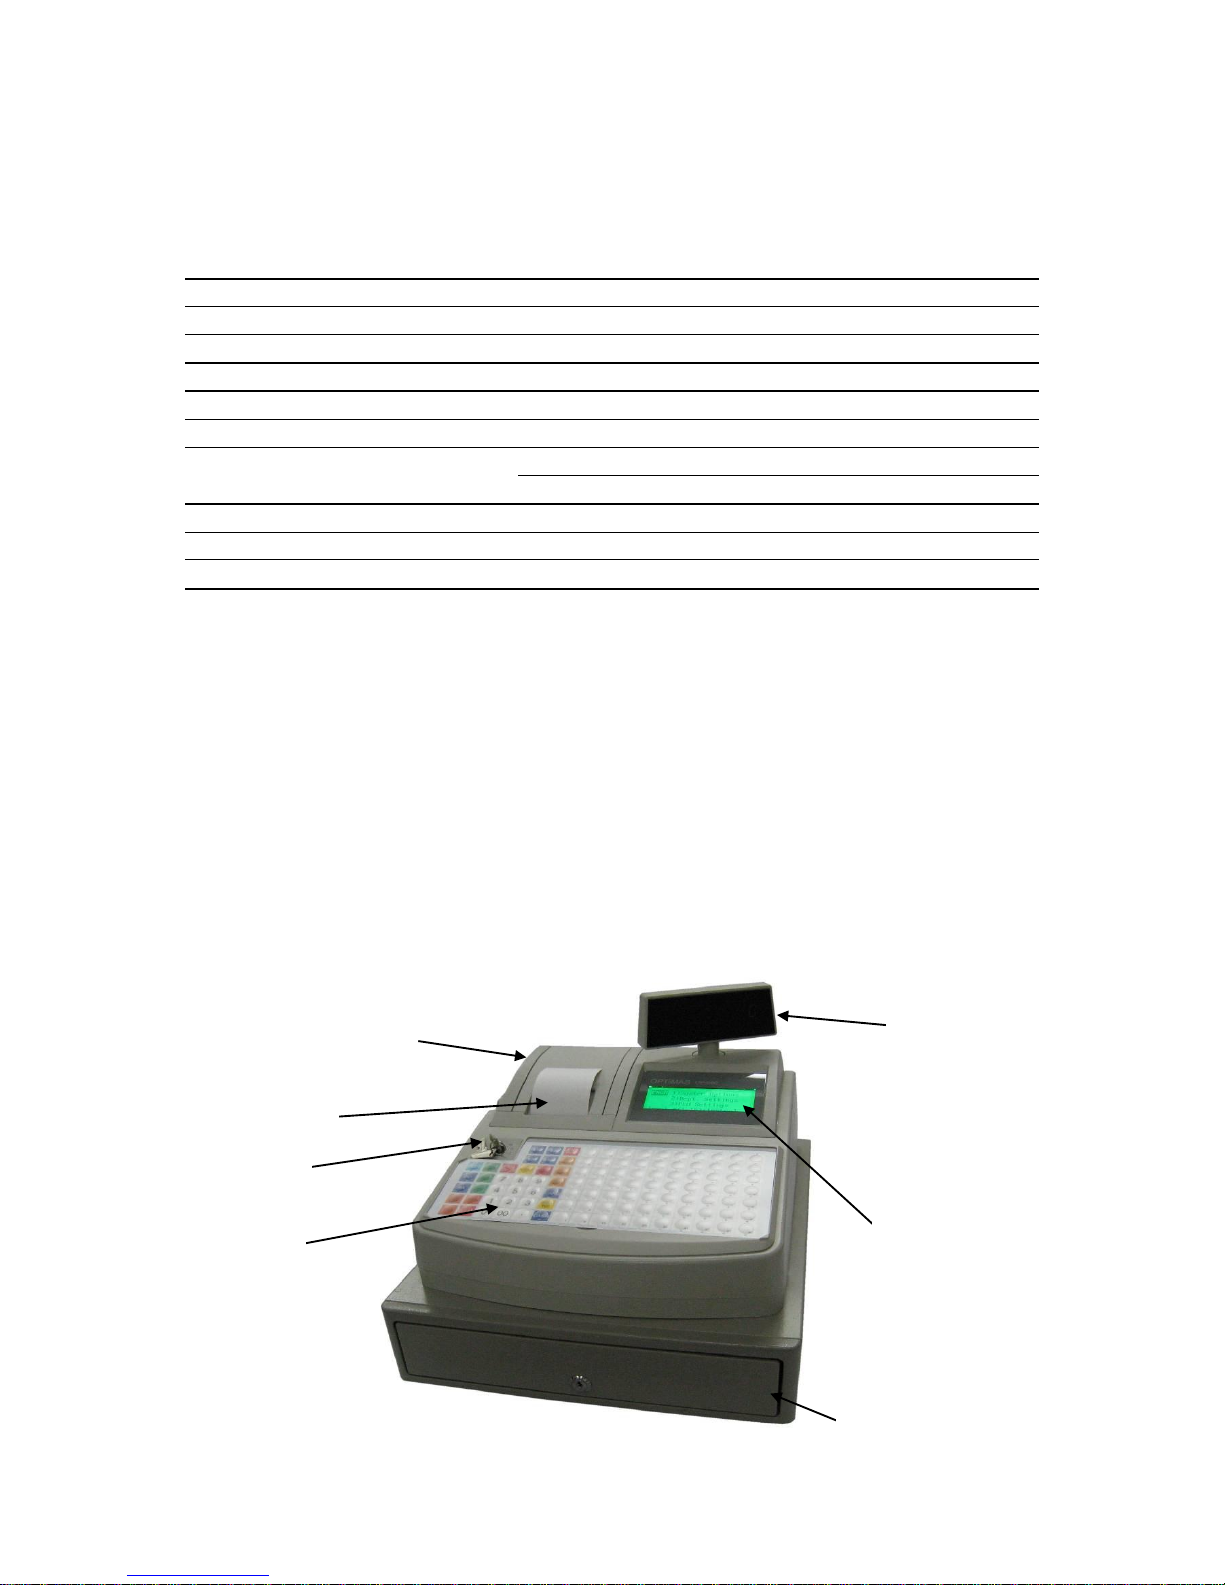
1.3 Part Names and Functions
7
5
3
4 6 1
2
Page 9

7
1. Printer cover
Protecting the printer
2. Receipt dispenser
This is where the receipt comes out
3. Customer display
Shows the customer the price, total, change
due, department and PLU codes
4. Operator display
The LCD display shows the operator the price,
total, change due, department and PLU codes
5. Control lock
Allows you to change the register mode
6. Cash drawer
Stores cash, cheques etc.
7. Keyboard
Used to input sales information etc.
Communication port of machines
The two standard RJ9 communication port of machines, Max. link four Kitchen Printer.
USB communication port of machines for USB Memory communication and PC communication and
link Barcode scanner.
1.Before PC communication turn the control lock to the “L” position. If the control lock in the other
position, the communication fails.
2.USB communication ( Please refer to chapter 8.2.2 “Using USB Memory for Uploading and
Downloading Data” for instructions.)
3. Link barcode scanner of machine. (use in the "P" or "R" position)
keyboard layout
communication port
Page 10

8
1.4 Control Lock and Functions
The control lock allows you to change the cash register mode.
Your register is equipped with five modes.
The cash register is always in one of these five modes. To change
the mode, use the manager's key (marked with “MA”) and the
operator's key (marked with “OP”).
Insert the manager's key or the operator's key into the control lock
and turn it to a required position. The manager’s key can select
any mode. The operator’s key can select the “L” and ”R” positions.
P
Program
Used for programming
L
Lock
Used to lock the register
R
Register
Used to process sales
X
Read
Used to print reports
Z
Reset
Used to print and reset sales information
1.5 Kitchen Printer General Specifications
1.5.1 Description
Name Description
Power source DC 12V , 1.0A (Please using a dedicated power adapter)
Operating environment temperature 0℃ to 40℃ (32°F to 104°F)
Type of printer 1 station thermal printer
Printing speed Approx. 7 lines per sec
Paper roll size Width 56.5-57.5mm (2.22-2.26 inches)
Max. diameter 60mm(2.36 inches)
1.5.2 Installing the Paper Rolls
Please refer to chapter 2.3 “Installing the Paper Rolls” for instructions.
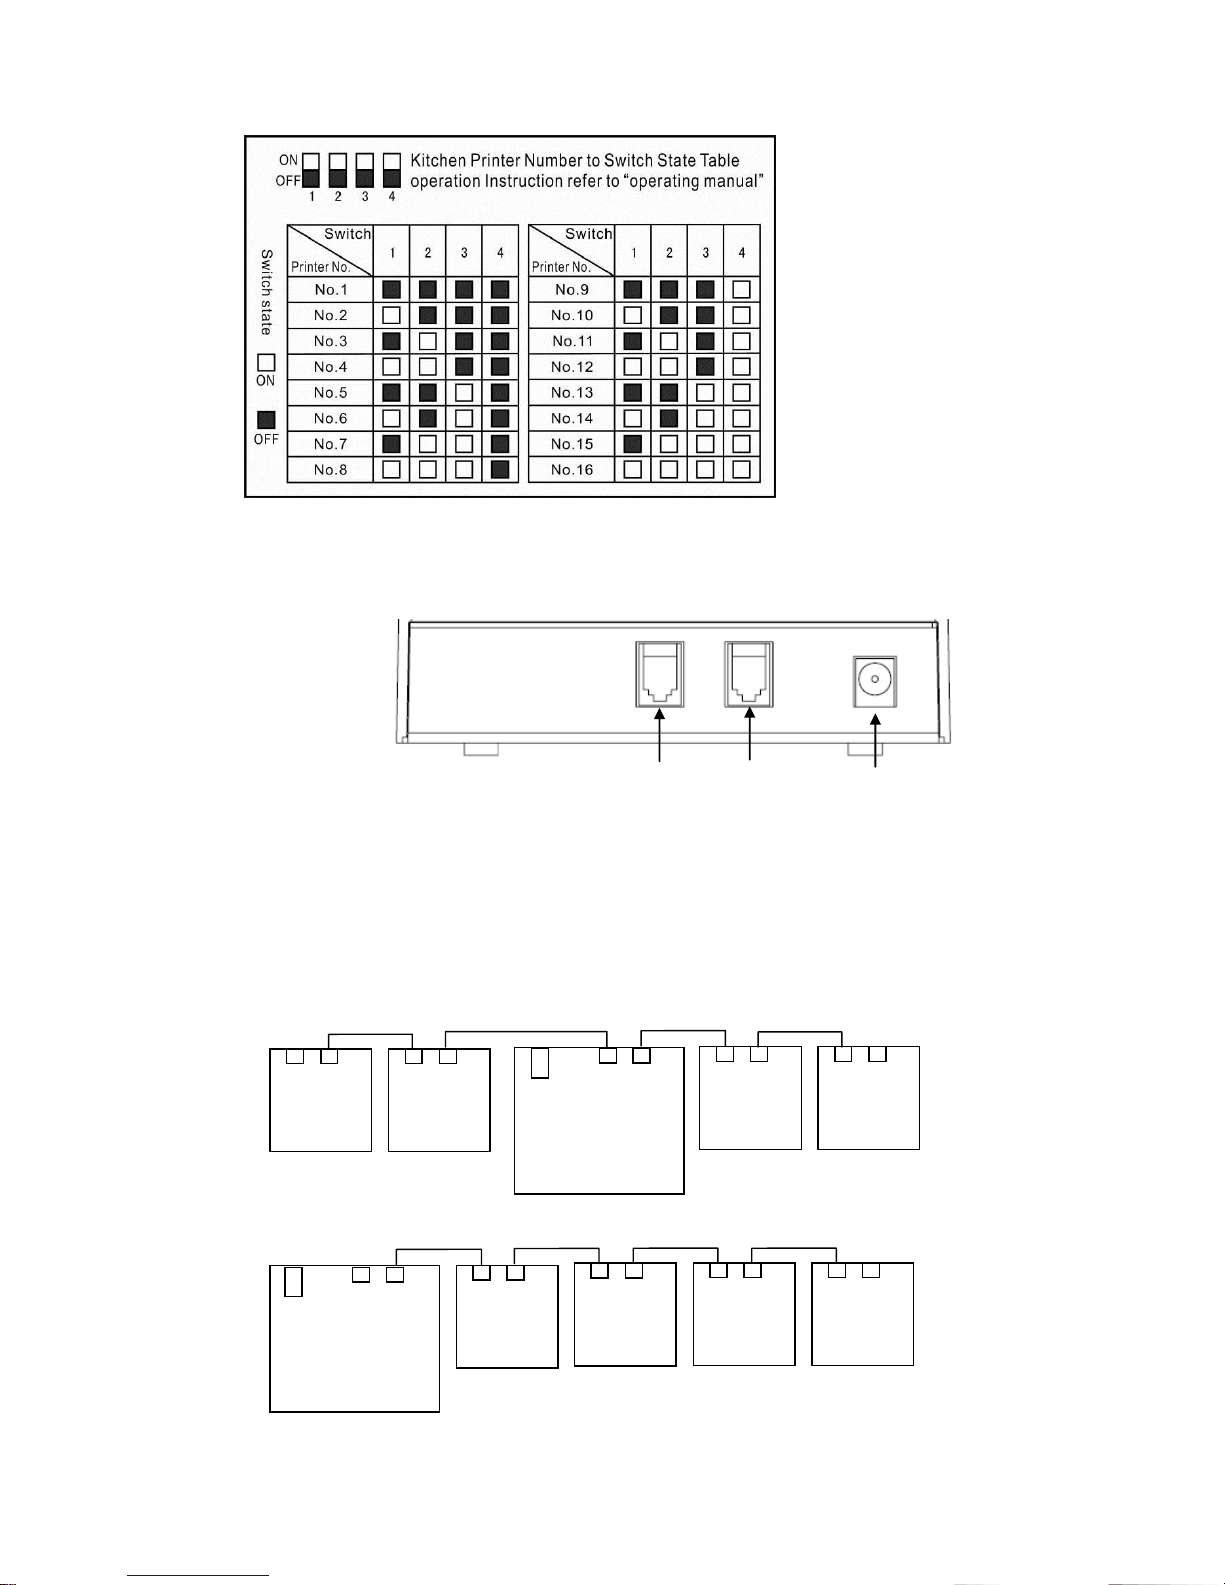
1.5.3 To code instructions
To change the four switches(Switch No. 1, Switch No. 2, Switch No. 3, Switch No. 4) state of the
kitchen printer codes.See Fig.1. The switch is turned off when select “ “. The switch is turned on
when select “ “. The four switches are all turned off (both choose “ “), kitchen printer code is 1.
Switch No. 1 is turned on (select” “). Switch No. 2, Switch No. 3 and Switch No. 4 are turned off
(both select” “), kitchen printer code is 2.
Example: kitchen printer code is 4.
1) Switch No. 1 select “ “
Switch No. 2 select “ “
Switch No. 3 select “ “
Switch No. 4 select “ “
2) Remove the power cord from the outlet. Wait for at least 5 seconds and plug in the power
cord.( kitchen printer reset)
Note
* Kitchen printer reset after the new code to be effective.
Page 11
9
1.5.4 Link kitchen printer method
Kitchen printer communications port see Fig.1:
(standard RJ9 communication port)
Link kitchen printer method
Max. link four kitchen printer of machines at the same time. Communications port with RJ9.
Maximum communication distance 1000 meters. The following link four kitchen printer two
method(Can be link 1-4 kitchen printer of two method).
Method 1
Method 2
Communications
port 1
Communications
port 2
Power Jack
Fig.1
USB RJ9
ECR OP-680
kitchen
printer
kitchen
printer
kitchen
printer
kitchen
printer
USB RJ9
ECR OP-680
kitchen
printer
kitchen
printer
kitchen
printer
kitchen
printer
Fig.1
Page 12

10
LED and Key
Power LED: Plug in the power cord lights. Remove the power cord from the outlet lights went.
Low paper LED: Low paper light flashing, otherwise lights went.
Error LED: Error light flashing , otherwise lights went.
Feed key: Used to feed the receipt paper.
2. Setting up
2.1 System Reset (Ram Clear)
Before programming the cash register, you must initialise the cash register’s memory.
Note
* Do not perform the following steps during programming or sales operation.
These steps will clear all of the settings you have programmed and erase all sales information in
the register
1. Remove the power cord from the outlet.
2. Insert the [MA] key into the control lock and turn the key to “P” position.
3. Press and hold [CLEAR] key, then, plug in the power cord.
4. Continue to hold [CLEAR] key, until “FULL SYSTEM CLEAR” appears on the display.
2.2 Half System Reset (Half Reset)
Due to incorrect operation of the cash register or during programming it is possible at some point
for the cash register to become stuck in a loop.
Use the following procedure to reset the machine.
Note
* Current transaction data will be lost, but, you will not lose any of the program or
sales data.
The only data lost will be any sale not yet finalized by a method of payment.
1. Turn the manager’s key to the “L” position.
2. Remove the power cord from the outlet.
3. Turn the manager’s key to the “P” position.
4. Wait for at least 5 seconds and plug in the power cord.
5. Make sure “HALF SYSTEM CLEAR” appears on the display.
Page 13

11
2.3 Installing the Paper Rolls
When the paper has finished, the front display will show “ERROR Check Printer” error, the rear
display will show “EP 2” error, and it also makes a sound.
1. Open the printer cover(Fig.1).
2. Set the paper roll gently into the paper location. Insert the end of the paper into the paper
entrance(Fig.2) , the paper feed out from printer roll automatically. If the paper not feed out from
printer roll automatically , press FEED key is OK (Fig.3 and Fig.4).
3. Close the printer cover.
2.4 Installing the Batteries
Note
1. Please attend not to change polarity of the battery when changing battery.
2. When display shows " Battery LOW , pls change ! ", please change your battery.
3. Please make sure the ECR power is on when the batteries are changed, otherwise the sales
data, setting data and electronic journal will be lost.
To change the batteries follow the procedure below.
1. Open the printer cover, remove the paper (See Fig.1)
2. Open the battery lid. (See Fig.2)
3. Change the batteries (See Fig.3) and close the lid firmly.
4. Installing the Paper Roll and close the printer cover (See Fig.4).
Fig.1 Fig.2 Fig.3 Fig.4
Fig.1 Fig.2 Fig.3
Fig.4
Page 14

12
3. Programming Layout (Turn the Control Lock to ‘P’ Position)
Note
* All the following settings should be performed in the “P” position.
* All of the amounts and prices shown in examples use two decimal formats if not noted.
* The below keyboard layout is for programming. For key names and functions, please refer
to the layout.
The figures below show the standard keyboard functions for this cash register.
Name Abbreviation Functions
1. Specified input key
2. Page down key
3. Page up key
4. Symbol table open key
5. Capital letter shift key
6. Escape key
7. Delete key
8. Print key
9. Back space key
10. Numeric Keys 0 to 9
Used to turn on/off capital letters.
Used to delete character.
Used to print list of the programming confirmation.
Used to input backspace.
Used to input number
Used to return previous page or menu
Used to jump to the specific line or flag.
Used to open /close the symbols table.
Used to move forward one page.
Used to return one page
Page 15
13
11. Double size key
12. Alphabet key to
13. Symbol keys , to *
14. Decimal Point Key
15. Receipt Feed Key
16. Clear key
17. Entry key
18. Cursor key
* All the explanations of following programming start from the menu below.
Turn the control lock to "P" position
Press [PGDN] key to next items and [PGUP] to go back.
3.1 Basic Data Programming
This chapter describes programming basic information such as date and time.
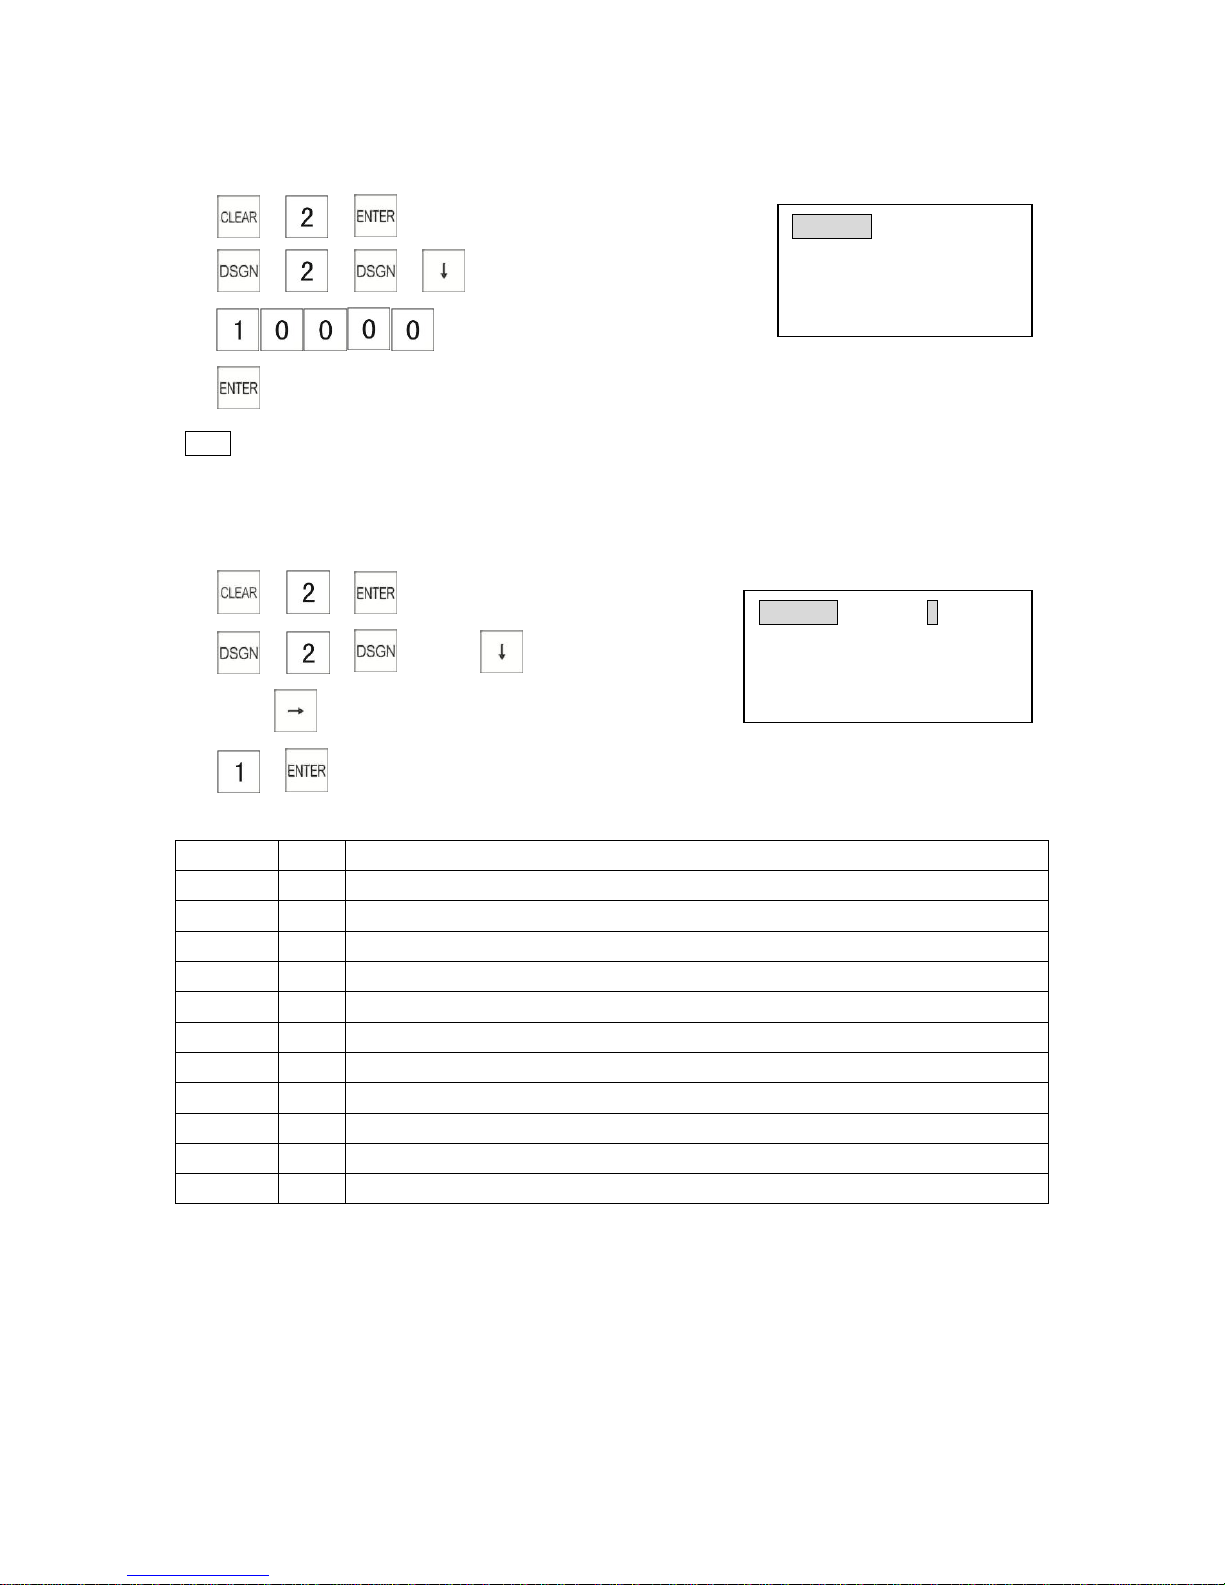
3.1.1 Programming the Date
Example: Program date to 2009-12-20
1) → →
2) → → →
(Year Month Date)
(Enter 4 digits for year, 2 digits for month & 2 for day)
PRGM 1)System Options
2) Dept. Settings
3) PLU Settings
Input # (1-16) + [enter]
System Options
Date: 0000-00-00
Input
YYYYMMDD
(8 digits)
Input # then [enter]
Used to input decimal point.
Used to enter a selection
Used to clear entry of a wrong number, and release an error.
Used to move the cursor
Used to input alpha characters
Used to feed the receipt paper.
Used to switch to double size mode
Used to input symbol
Page 16

14
Note
* After programming the date by pressing [CASH], the system will automatically move to the
next programming item, if you need to confirm the previous step, please press [↑] key to go
back and check the display content. After confirmation, press [↓] key to go to the next item
* If you need to print confirmation of the date, press [PRNT] key.
3.1.2 Programming the Time
Example: Program the time to 18:05
1) → → →
2) → →
(24-hour clock, enter 4 digits for hour & minutes)
Note
* To check the date and time, turn the key to the “R”position and press the [X/TIME] key.
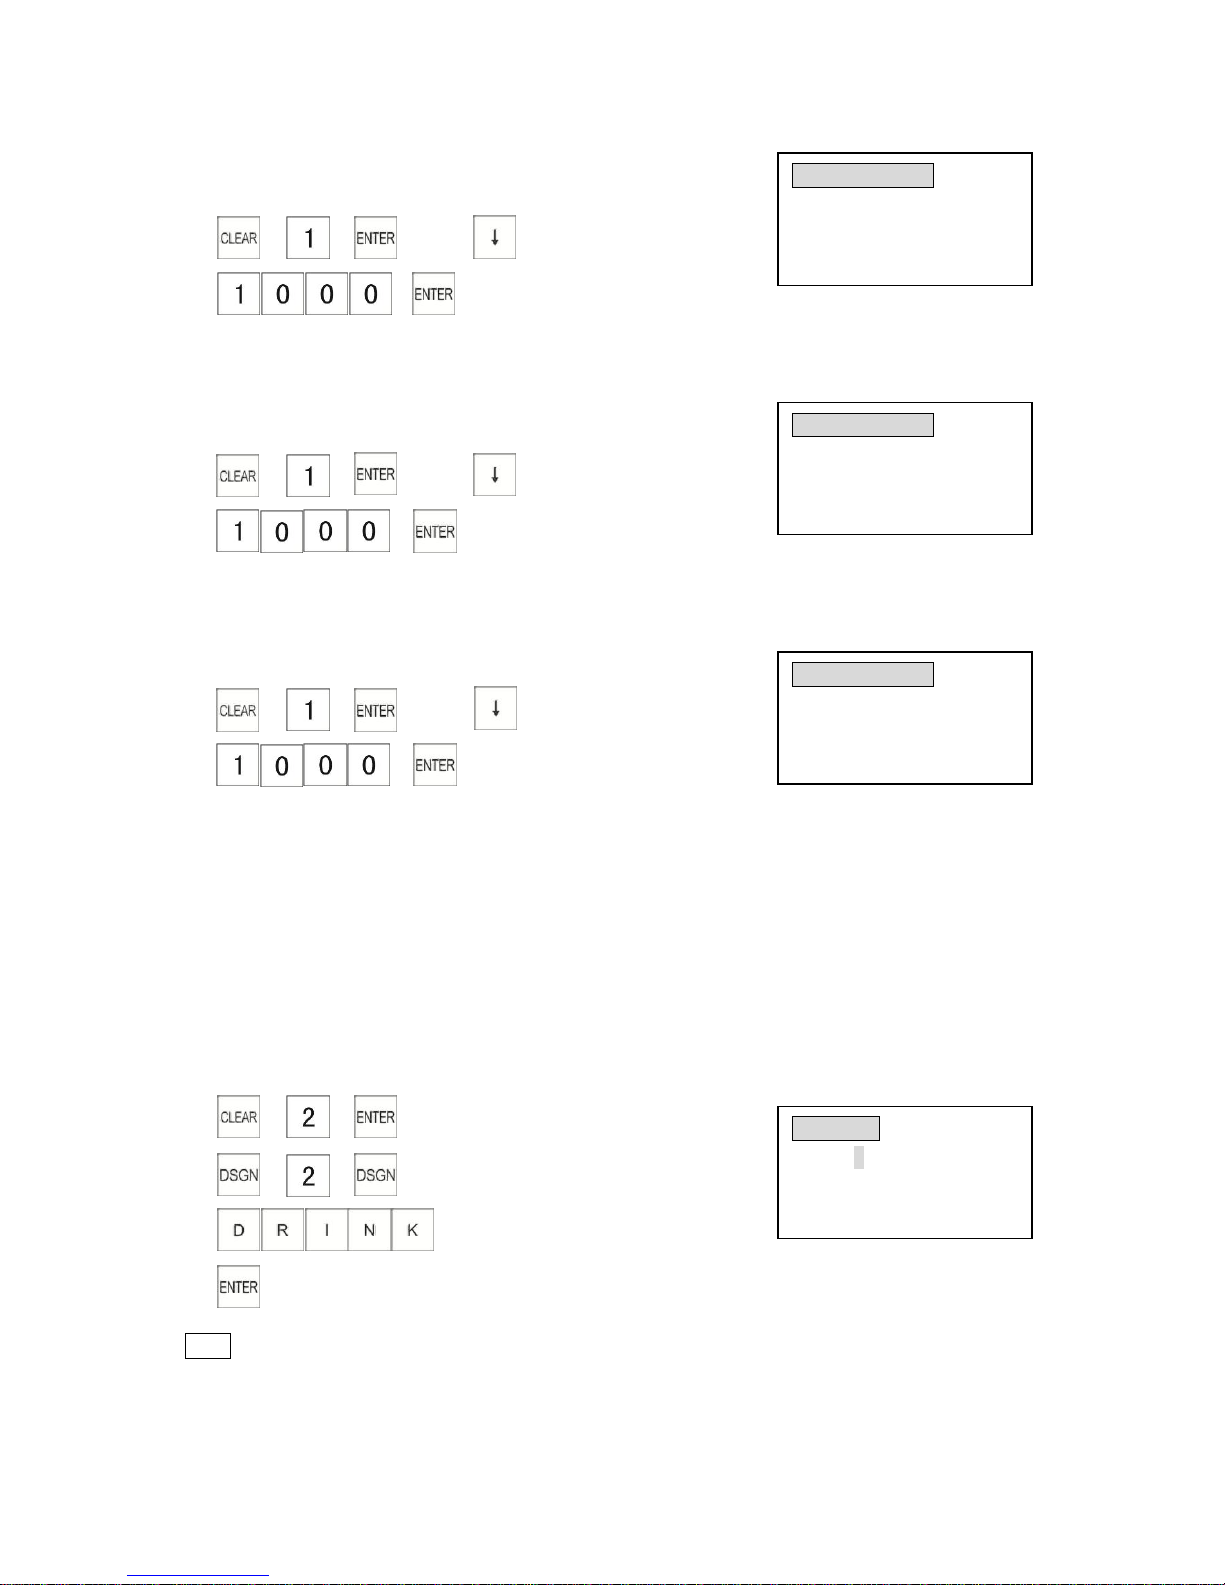
3.1.3 Programming the Transaction Number
Example: Program the initial transaction number to 1000.
1) → → → press twice
2) →
(Transaction No.)
3.1.4 Programming the Machine Number
Example: Program the machine number as 1010.
1) → → →press key 3 times
2) →
(Machine number)
3.1.5 Programming the X 1 Report Number
Example: Program the first X1 report number as 1000.
1) → → →press key 4 times
2) →
(X1 number)
Note
* You can set the first number used when printing reports, once it is set, the number is
increased by one each time a report is issued. Please refer to Chapter 8 “Read and Reset
Reports”.
System Options
Time: 00:00
24 hour system (4 digits)
Input # then [enter]
System Options
Transaction #: 1
Enter # (4 digit max)
Input # then [enter]
System Options
Machine #: 1
Enter # (4 digit max)
Input # then [enter]
System Options
X1 Report #: 0
Enter # (4 digit max)
Input # then [enter]
Page 17
15
3.1.6 Programming the X 2 Report Number
Example: Program the first X2 report number as 1000.
1) → → →press key 5 times
2) →
(X2 number)
3.1.7 Programming the Z 1 Report Number
Example: Program the first Z1 report number as 1000.
1) → → →press key 6 times
2) →
(Z1 number)
3.1.8 Programming the Z 2 Report Number
Example: Program the first Z2 report number as 1000.
1) → → →press key 7 times
2) →
(Z2 number)
3.2 Department Programming
This section explains how to program departments. A maximum of 100 departments can be
programmed.
You must classify products by assigning them to a department. The sales amount and quantity are
reported by department on reports. You can set a price, function flag to control features such as
single-item sale, tax, HALO (High Amount Lock Out) etcetera to each department.
3.2.1 Programming a Department Name
Example: Program the name of Department 2 as “DRINK”.
1) → →
2) → →
3)
4)
Note
* You cannot move to another department programming page when you input symbols.
* Press [PRNT] key to print names of all the departments, and press [FEED] key to stop
printing.
System Options
X2 Report #: 0
Enter # (4 digit max)
Input # then [enter]
System Options
Z1 Report #: 0
Enter # (4 digit max)
Input # then [enter]
System Options
Z2 Report #: 0
Enter # (4 digit max)
Input # then [enter]
Dept0002 (
ABCD) NAME
DRINK
[Uppercase]
Page 18
16
3.2.2 Programming a Department Unit Price
Example: Program the price of Department 2 to $100.00.
1) → →
2) → → →
3) (Price)
4)
Note
* To program the decimal, please refer to System Flag 0101 in Chapter 3.6.
3.2.3 Programming Department Flags
Example: Program Department 2 to enable single-item cash sales.
1) → →
2) → → → Press key 3 times
3) Press key 7 times
4) → (Single Item)
Department Flag 01
#8
Not use
#7
Not use
#6
Not use
#5
Not use
#4
0
Tax rate 4 unavailable
1
Tax rate 4 available
#3
0
Tax rate 3 unavailable
1
Tax rate 3 available
#2
0
Tax rate 2 unavailable
1
Tax rate 2 available
#1
0
Tax rate 1 unavailable
1
Tax rate 1 available
Dept0002 UNIT PRICE
Price 0.00
Enter price (8 digit max)
Input # then [enter]
Dept0002#100000000 SETUP2
Department entry type
0=Normal 1=Single Entry
Input # then [enter]
Page 19
17
Department Flag 02
#8
0
Do not send to kitchen printer 4
1
Send to kitchen printer 4
#7
0
Do not send to kitchen printer 3
1
Send to kitchen printer 3
#6
0
Do not send to kitchen printer 2
1
Send to kitchen printer 2
#5
0
Do not send to kitchen printer 1
1
Send to kitchen printer 1
#4
0
Disable negative department
1
Enable negative department
#3
0
Enable +% department
1
Disable +% department
#2
0
Enable +% department
1
Disable +% department
#1
0
Disable single item cash sale
1
Enable single item cash sale
3.2.4 Programming a Department Group
You can assign a department to a group from 1 to 9. Classified departments according to groups
can help you to check and indicate the sales for each group.
For example, ballpoint pens belong to Department 2 and notebooks belong to Department 3, you
can group them together and you can check sales information from the group “stationery”.
Example: Program Department 2 to Group No.5.
1) → →
2) → → →press key 4 times
3) (Group No. )→
3.2.5 Programming a HALO
Example: Program Department 2 maximum unit price to $400.00.
1) → →
2) → → → press key 5 times
3) →
Dept0002 DEPT HALO
HALO Price 0.00
Enter price (7 digit max)
Input # then [enter]
Dept0002 DEPT GROUP
DEPT Group # 0
Group # (0-9)
Input # then [enter]
Page 20
18
3.3 PLU Programming
This section explains how to program PLUs. A PLU is an item/product. A maximum of 6000 PLU
codes can be programmed.
You must enter a unit price and assign a department to which the PLU belongs.
The PLU programming includes PLU code, PLU name, PLU unit price and PLU linked department.
3.3.1 Programming a PLU Barcode
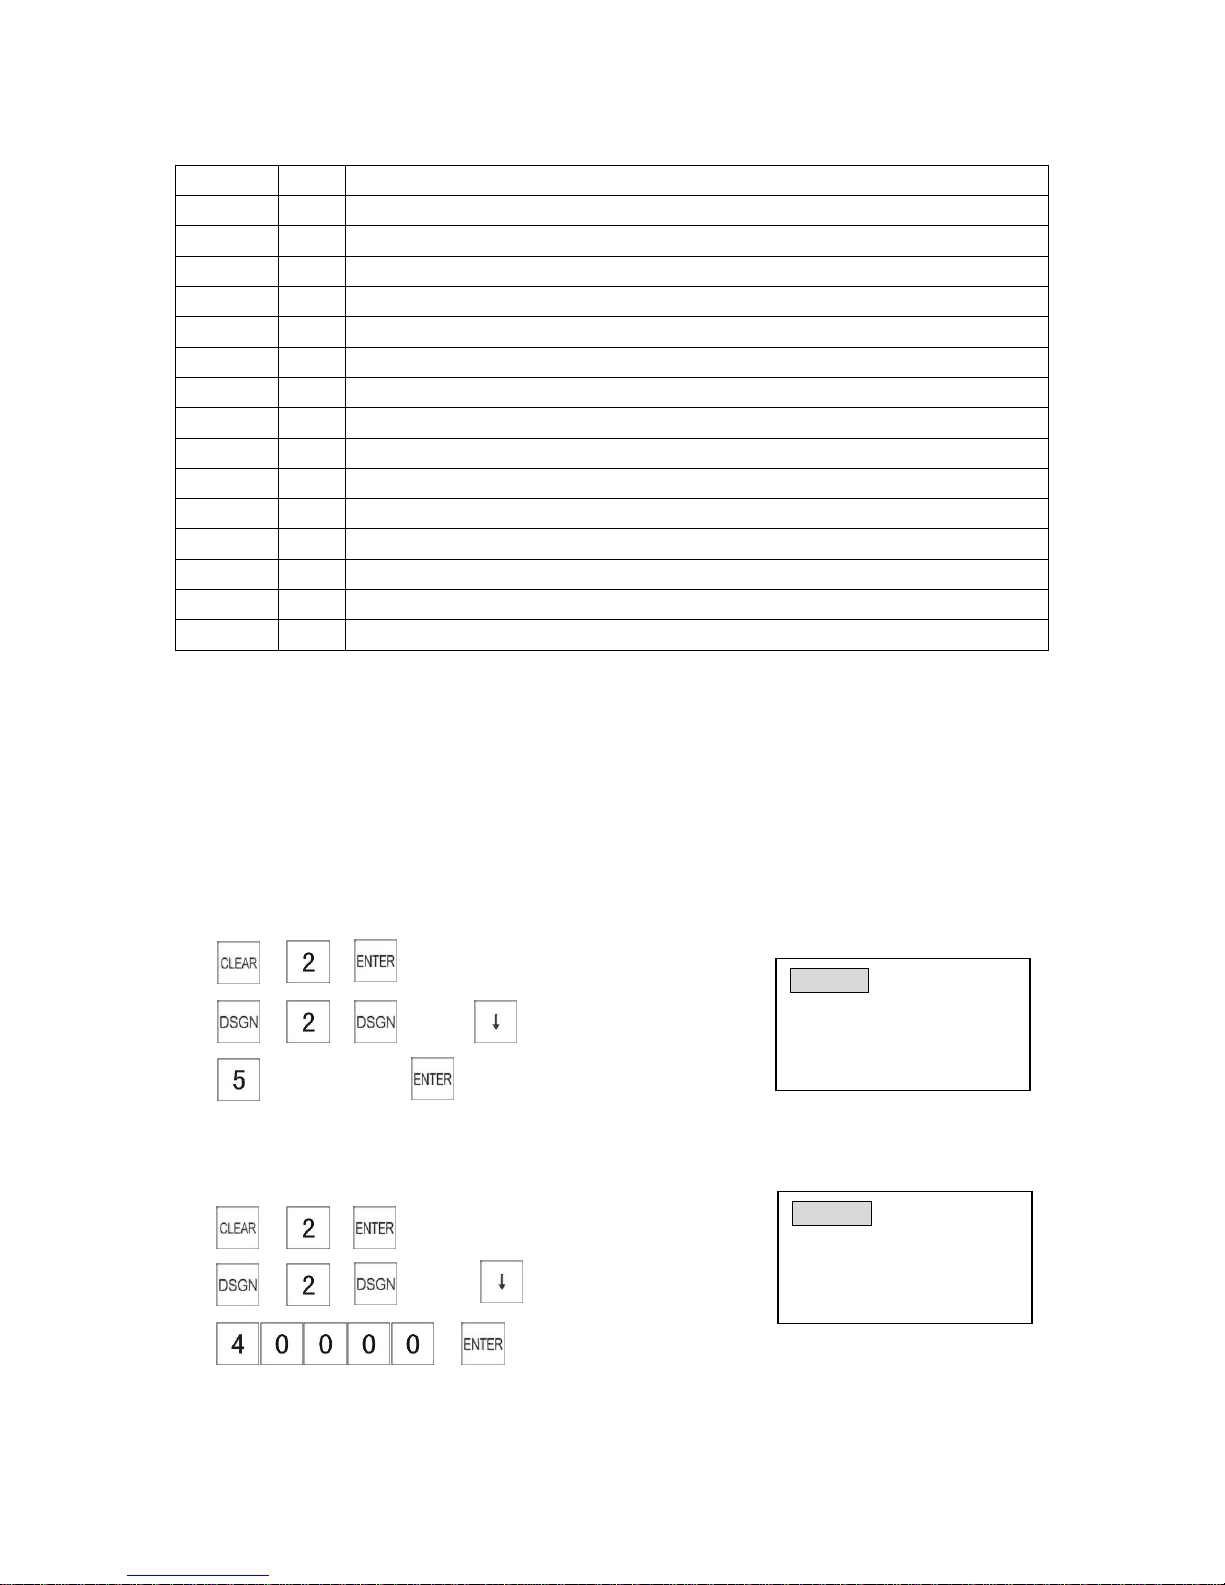
Example: Program the PLU14 to 6901939650707.
1) → →
2) → →
3)
4) (or you can scan barcode with your scanner)
Example: Change the PLU14 barcode 6901939650707 to 9787040091472
1) → →
2) → →
3)
4)
Note
*[CAPS] key must be pressed before entering barcode otherwise the barcode is
programmed at the first available PLU, not a specified PLU.
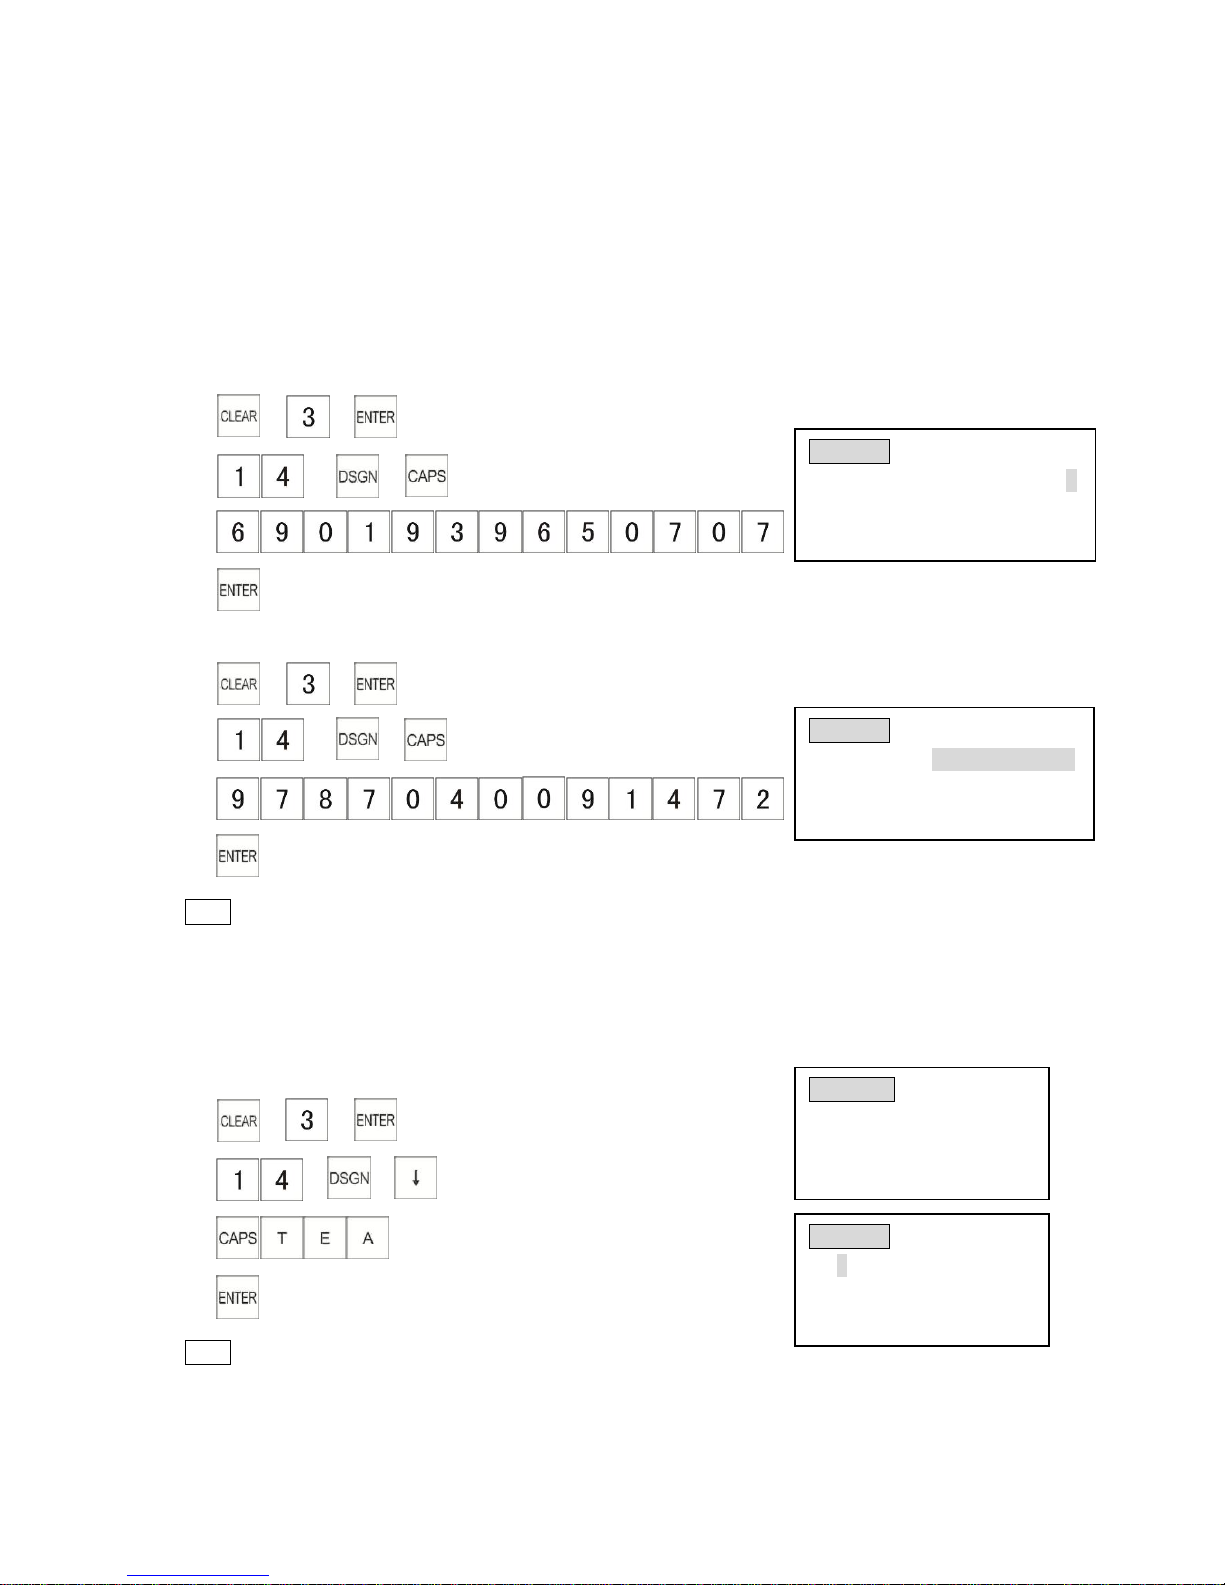
3.3.2 Programming a PLU Name
Example: Program the name of PLU No.14 as “tea”.
1) → →
2) → →
3) (tea)
4)
Note
* You cannot move to another PLU programming page when you input symbols.
* PLU names can be set as 1-16 characters.
PLU 0014 BARCODE #
PLU/Barcode 0
Enter # (13 digit max)
6901939650707
PLU 0014
BARCODE #
PLU/Barcode 6901939650707
Enter # (13 digit max)
9787040091472
PLU 0014 (abcd) NAME
tea
[Lowercase]
PLU 0014 (ABCD)NAME
PLU0014
Enter alpha characters:
[Uppercase]
Page 21
19
3.3.3 Programming a PLU Unit Price
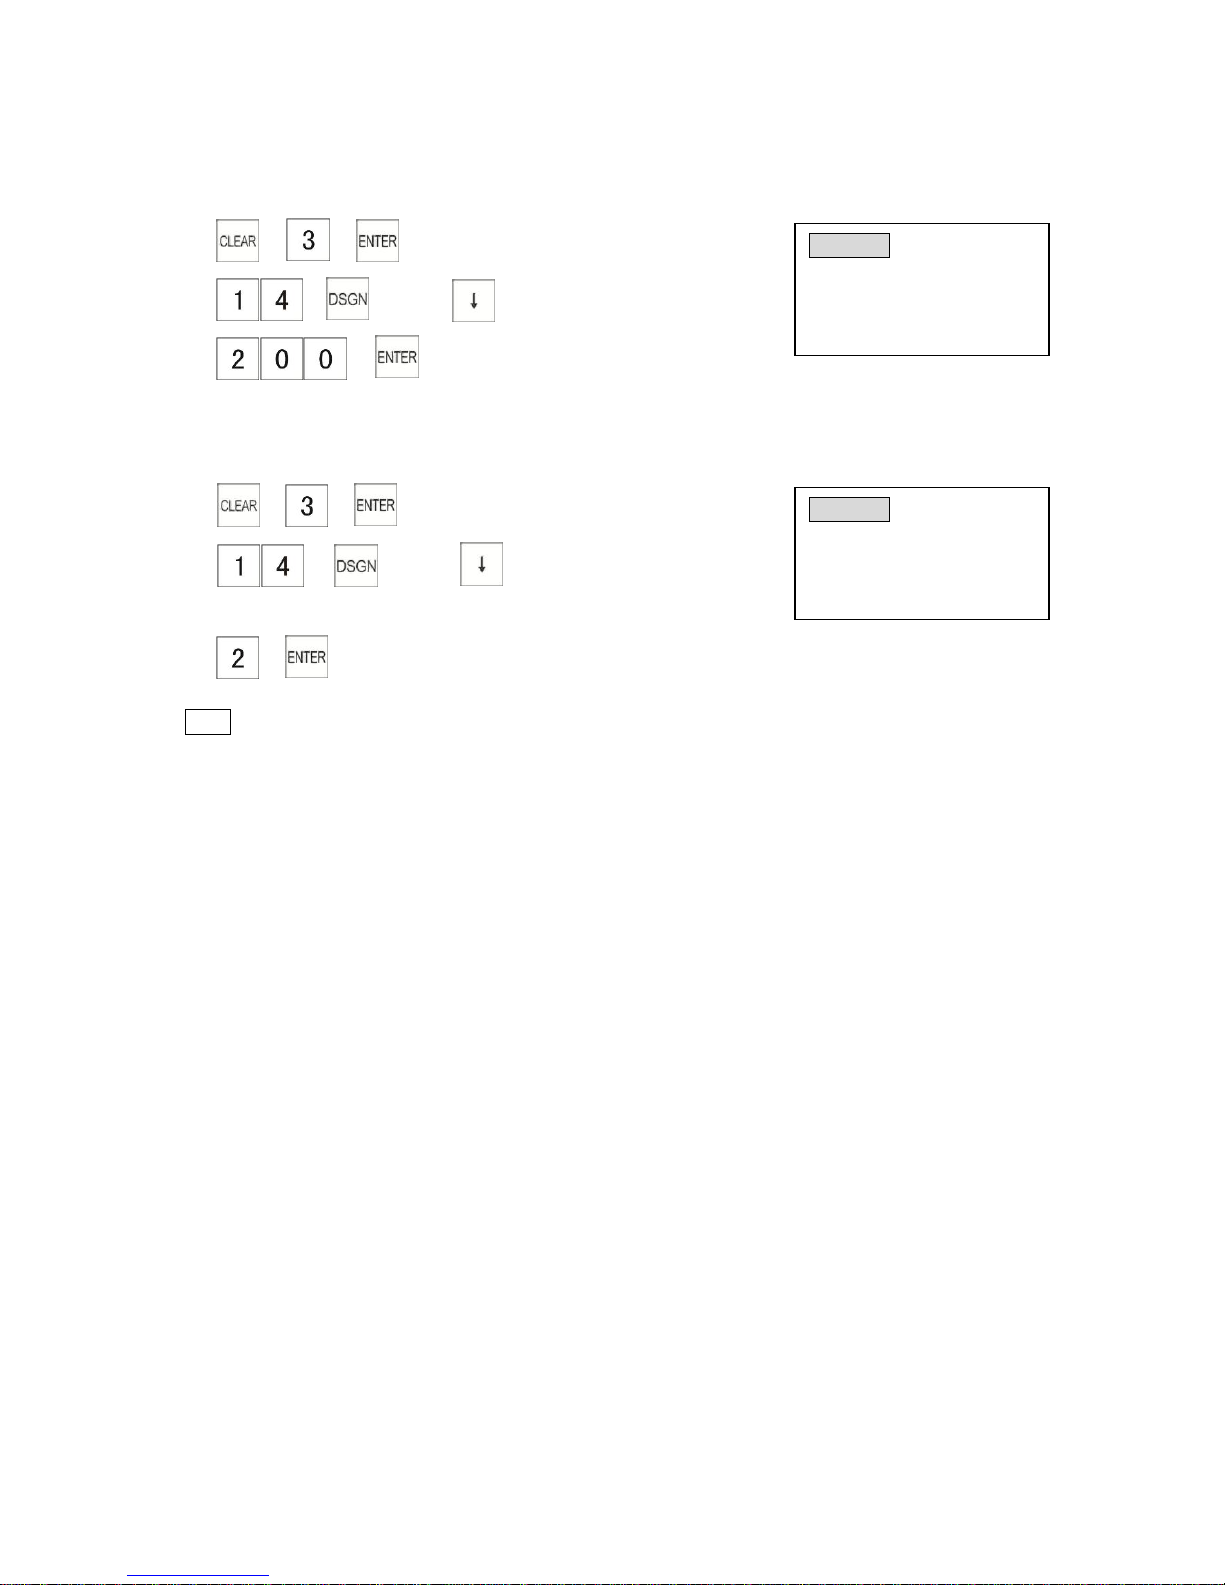
Example: Program the price of “tea” to $2.00.
1) → →
2) → → Press key twice
3) →
3.3.4 Programming a PLU Linked Department
Example: Program “tea” to link to Department 2 (DRINK department)
1) → →
2) → → press key 3 times
(PLU number)
3) →
(Linking department No.)
Note
* A PLU must be linked to a department and its sales data will be included in its department
report. If a PLU is not linked to a department, it is automatically linked to the last department. All of
the programmed department flags will be applied to its linked PLU.
3.3.5 Barcode Learning
A barcode learning function is available by setting the System Flag 1202 to 1. In Registration
Mode, a barcode is scanned without preset contents. The display will show a message to request
the entry of unit price. Please enter a unit price and press a Department key for setting up a
barcode
3.3.6 Searching the Barcode of a PLU
In Registration Mode, to check the price of a programmed PLU, press the double zero [00] key and
scan the barcode, the LCD screen will show the price. If the LCD shows “PLU # not found”, it
means the PLU has not been programmed.
PLU 0014 UNIT PRICE
Price 0.00
Enter price (8 digit max)
Input # then [enter]
PLU 0001 DEPT LINK
DEPT # 0
Dept # (1-100)
Input # then [enter]
Page 22
20
3.4 Tax Programming
You can program up to four tax rates. We call these four taxes TAX1, TAX2, TAX3 and TAX4. To
program a tax rate, you must select a taxation system and enter the rate for that tax. For
instructions on how to add these programmed taxes to an item, see section 3.2.3.
“Programming Department Flags”
Add-on tax
This system calculates tax by using a tax rate you enter and it automatically adds the tax to the
unit price or the price entered.
VAT (Value Added Tax)
The Value Added Tax is a European tax system. It calculates tax by using the tax rate you enter
and includes the calculated tax in the unit price or the price entered.
3.4.1 Programming a Tax Type
Example: Program the Tax 2 as VAT
1) → → → →
2) (VAT)
3)
3.4.2 Programming a Tax Rate
Example: Program the Tax 2 rate of 4.0000%
1) → → → →
2) → (Tax rate is 4%)
3)
3.4.3 Programming a Tax-Free Amount
Example: Program the tax-free amount of tax 2 to $100.00
1) → → → →
2) Press key twice→
(Non-taxable amount: less than 100.00)
3)
TAX 02 TYPE=0
Select Tax Type:
0=ADD-ON 1=VAT
Input # then [enter]
TAX 02 RATE
Percentage 0.0000%
6 digits t t l (4 decimals)
Input # then [enter]
TAX 02 TAX LIMIT
Limit Amount 0.00
Enter price (8 digit max)
Input # then [enter]
Page 23
21
3.5 Programming the [-] Key, the [+%] Key, and the [-%] Key
This section explains how to set [-%], [+%], [-] keys.
Description of [-%] Key and [+%] Key
The [-%] and [+%] keys are used to subtract and add a certain percentage or service charge to the
price of an item. For example, you can use [+%] key to add a premium and use [-%] key to give a
discount. You can use these keys with preset percentage or you can manually enter the
percentage at the time of the sale.
3.5.1 Programming the [+%] Key Rate
Example: Program a surcharge [+%] key rate of 10%.
1) → →
2)
3)
3.5.2 Programming the [+%] Key Flags
1) → →
2) → press key 4 times →
(Tax4 unavailable)
3)
3.5.3 Programming the [-%] Key Rate
Example: Program a discount [-%] key rate of 10%.
1) → →
2) Press key twice →
(-% as [10] → - %)
3)
3.5.4 Programming the [-%] Key Flags
1) → →
2) Press key 3 times → press key 4 times →
(Tax4 unavailable)
3)
-% DISCOUNT %
Percentage 0.00%
4 digits incl decimal
Input # then [enter]
+% ADD-ON%
Percentage 0.00%
4 digits incl decimal
Input # then [enter]
+% #400000000TX SET
Tax4 selection:
0=Tax4 OFF 1=Tax4 ON
Input # then [enter]
-% #400000000TX SET
Tax4 selection
0=Tax4 OFF 1=Tax4 ON
Input # then [enter]
Page 24

22
Functions of various flags of [+%] and [-%] are as follows:
#8
Not use
#7
Not use
#6
Not use
#5
Not use
#4
0
Tax rate 4 unavailable
1
Tax rate 4 available
#3
0
Tax rate 3 unavailable
1
Tax rate 3 available
#2
0
Tax rate 2 unavailable
1
Tax rate 2 available
#1
0
Tax rate 1 unavailable
1
Tax rate 1 available
Note
* The discount and surcharge rate should be entered in two bits of decimal form.
For example, entering [1] [5] [0] means 1.50%.
3.5.5 Programming the [-] Key
Example: Program the [-] key to $5.00
1) → →
2) Press key 5 times →
3)
3.6.6 Programming the [-] Key Flags
1) → →
2) Press key 5 times
3) Press key → press key 4 times→
(Tax4 unavailable)
4)
3.5.7 Programming the [-] Key Limit
Example: Program [-] key high amount lock out to $10.00.
1) → →
2) Press key 5 times→ press key twice
3) →
([-] Key HALO $10.00)
CPN 01 AMOUNT
Preset Coupon $ 0.00
Enter price(4 digit max)
Input # then [enter]
CPN 01 #400000000TX SET
Tax4 selection:
0=Tax4 OFF 1=Tax4 ON
Input # then [enter]
CPN 01
COUPON H
Coupon HALO 0.00
Enter price(7 digit max)
Input # then [enter]
Page 25

23
Note
* You can use [-] key with a preset to subtract an amount or by manually entering an amount
during the transaction.
3.6 System Flag Programming (Configuration Options)
This section explains how to set the system function flags to control the operation of the cash
register.
Entering System Flag settings menu:
→ →
Note
* Press [PGDN] to select next flag setting.
* Press [→] key or [↓] key to select next flag bit setting.
* Press number and [DSGN] to select a flag.
Example: “Enable add +% automatically” (SF6#2)
1) → →
2) →
(Flag 6 #2)
3) (choose the item 1)→
Functions of System Flags are as follows:
Flag 1
Options
Select
Function
0101
0
0 decimal position
1
0.0 decimal position
2
0.00 decimal position
3
0.000 decimal position
0102
Not use
0103
Not use
0104
Not use
0105
0
Select decimal symbol “.”
1
Select decimal symbol “,”
0106
0
Enable PLU No
1
Enable PLU barcode
0107
0
Use journal mode
1
Use receipt mode
0108
0
Allow [ON/OFF] key for receipt on/off
1
Do not allow [ON/OFF] key for receipt on/off
CONFIG OPTIONS 0101=2
Decimal Select: 0=NONE
1=0.0 2=0.00 3=0.000
Input # then [enter]
CONFIG OPTIONS
0602=0
Add +% automatically
0=No 1=Yes
Input # then [enter]
Page 26

24
Flag 2(% Rounding)
Options
Select
Function
0201
0
Rounding down (0.1 – 0.9 becomes 0.0)
5
Rounding (0.1 – 0.4 becomes 0.0 0.5 – 0.9 becomes 1.0)
6
Rounding (0.1 – 0.5 becomes 0.0 0.6 – 0.9 becomes 1.0)
9
Rounding up (0.1 – 0.9 becomes 1.0)
0202
0
Select the last digit in the decimal to be rounded in percentage calculation
1
Select the first digit in the decimal to be rounded in percentage calculation
Flag 3(Tax Rounding)
Options
Select
Function
0301
0
Rounding down (0.1 – 0.9 becomes 0.0)
5
Rounding (0.1 – 0.4 becomes 0.0 0.5 – 0.9 becomes 1.0)
6
Rounding (0.1 – 0.5 becomes 0.0 0.6 – 0.9 becomes 1.0)
9
Rounding up (0.1 – 0.9 becomes 1.0)
0302
0
Select the last digit in the decimal to be rounded in percentage calculation
1
Select the first digit in the decimal to be rounded in percentage calculation
Flag 4
Options
Select
Function
0401
0
Print transaction number on the receipt / journal
1
Do not print transaction number on the receipt/ journal
0402
0
12 hour time system
1
24 hour time system
0403
0
Print the time on the receipt / journal
1
Do not print the time on the receipt /journal
0404
0
Print the date on the receipt / journal
1
Do not print the date on the receipt / journal
0405
0
YYYY-MM-DD
1
MM-DD-YYYY
2
DD-MM-YYYY
0406
Not use
0407
0
Print Header on receipt
1
Do not print Header on receipt
0408
0
Print sales quantity in receipt
1
Do not print sales quantity in receipt
Flag 5
Options
Select
Function
0501
0
VAT taxable on receipt or reports which include VAT
1
VAT taxable on receipt or reports which do not include VAT
Page 27

25
0502
Not use
0503
0
Print total taxable amount
1
Print individual taxable amount
0504
0
Do not print taxable on the receipt
1
Print taxable on the receipt
0505
0
Print tax symbol on receipt
1
Do not print tax symbol on receipt
0506
0
Do not print tax rate on receipt
1
Print tax rate on receipt
0507
Not use
0508
Not use
Flag 6
Options
Select
Function
0601
0
Disable clerk switch while in a transaction
1 Enable clerk switch while in a transaction
0602
0
Disable add +% automatically
1 Enable add +% automatically
0603
0
Discount and plus % totals included in department reports
1 Discount and plus % totals not included in department reports
0604
0
Coupon totals included in department reports
1 Coupon totals not included in department reports
0605
0
Print sales item total on the hourly report
1 Print the sales transaction total on the hourly report
0606
0
Record NRGT by NET on the reports
1 Record NRGT by GROSS on the reports
0607
Not use
0608
0
Enable multiple discounts and plus %
1 Disable multiple discounts and plus %
Flag 7
Options
Select
Function
0701
0
Do not compulsory for tendering
1
Compulsory for tendering
0702
0
Enable calculate charge
1
Disable calculate charge
0703
0
Enable multiple tender
1
Disable multiple tender
0704
0
Enable print mark by [#ST] key
1
Disable print mark by [#ST] key
0705
0
Enable the [#ST] key
1
Disable the [#ST] key
0706
0
Enable negative item key
Page 28

26
1
Disable negative item key
0707
0
Enable [RA]&[PO] key
1
Disable [RA]&[PO] key
0708
Not use
Flag 8
Options
Select
Function
0801
0
Print the commercial message on top of the receipt/report
1
Print the commercial message at the bottom of the receipt/report
0802
0
Print the time, date and clerk at the end of the receipt
1
Print the time, date and clerk at the top of the receipt
0803
Not use
0804
0
Do not reset transaction number to 0 after printing the Z report
1
Reset transaction number to 0 after printing the Z report
0805
0
Reset department shift key after each item
1
Do not reset department shift key after each item
0806
0
Reset department shift after transaction
1
Do not reset department shift after transaction
0807
0
Do not allow duplicate receipt copy
1
Allow duplicate receipt copy
0808
Not use
Flag 9
Options
Select
Function
0901
0
Do not reset clerk ID when lock position is changed
1
Reset clerk ID when lock position is changed
0902
0
Do not reset clerk ID after each transaction
1
Reset clerk ID after each transaction
0903
0
Disable split ticket
1
Enable split ticket
0904
0
Receipt printing after final
1
Receipt printing per line
0905
Not use
0906
0
Enable print training report
1
Disable print training report
0907
0
Word “TRAINING” is printed on the receipt during the training mode
1
The symbol is printed on the receipt during the training mode
0908
0
Print training receipt
1
Do not print training receipt
Flag 10
Options
Select
Function
1001
0
Print void and return totals in net sales report
Page 29

27
1 Do not print void and return totals in net sales report
1002
0
Print Grand Total in reports
1 Do not print Grand Total in reports
1003
0
Print gross sales amount on the report
1 Do not print gross sales amount on the report
1004
0
Print DEPT total amount on the report
1 Do not print DEPT total amount on the report
1005
0
Enable print no taxable on report.
1 Disable print no taxable on report.
1006
0
Report includes Cash&Check in drawer
1 Report do not includes Cash&Check in drawer
1007
0
Print void and return totals in clerk sales report
1 Do not print void and return totals in clerk sales report
1008
0
Skip zero sales on plu report
1 Do not skip zero sales on plu report
Flag 11
Options
Select
Function
1101
0
Print X1 report number
1 Do not print X1 report number
1102
0
Print X2 report number
1 Do not print X2 report number
1103
0
Print Z1 report number
1 Do not print Z1 report number
1104
0
Print Z2 report number
1 Do not print Z2 report number
1105
0
PLU report includes PLU No.
1 PLU report do not includes PLU No.
1106
0
PLU report do not includes PLU sales %
1 PLU report includes PLU sales %
1107
0
Print transaction name in doublu-size
1 Do not print transaction name in doublu-size
1108
0
Disable duplicate report copy
1 Enable duplicate report copy
Flag12
Options
Select
Function
1201
Not use
1202
0
Disable the automatic barcode learning function
1
Enable the automatic barcode learning function
1203
0
Serial report do not include DEPT group report
1
Serial report include DEPT group report
1204
0
Serial report do not include PLU report
Page 30

28
1
Serial report include PLU report
1205
0
Serial report do not include hourly report
1
Serial report include hourly report
1206
0
Serial report do not include cash in-drawer
1
Serial report include cash in-drawer
1207
0
Serial report do not include total report
1
Serial report include total report
1208
Not use
Flag 13
Options
Select
Function
1301
0
Rounding up (0.00 becomes 0.00 , 0.01 – 0.09 becomes 0.10)
4
Rounding (0.00 – 0.04 becomes 0.00 ,
0.05 – 0.09 becomes 0.10)
9
Rounding down (0.00 – 0.09 becomes 0.00)
2
Swiss mode
(0.00 – 0.02 becomes 0.00 , 0.03 – 0.07 becomes 0.05 ,
0.08 – 0.09 becomes 0.10)
12
Danish mode (0.00-0.12 becomes0.00 , 0.13-0.37 becomes 0.25 ,
0.38-0.62 becomes0.50 , 0.63-0.87becomes 0.75.
0.88-0.99 becomes 1.00)
Flag 14
Options
Select
Function
1401
0
Do not round
1
Select the last digit to round
2
Swiss mode
3
Danish mode
Flag15
Options
Select
Function
1501
0~9
Feed lines after receipt number of lines
Flag16
Options
Select
Function
1601
0
Open drawer after CASH key pressed
1
Do not open drawer after CASH key pressed
1602
0
Open drawer after CHECK key pressed
1
Do not open drawer after CHECK key pressed
1603
0
Open drawer after CHARGE key pressed
1
Do not open drawer after CHARGE key pressed
1604
0
Open drawer after CARD1 key pressed
1
Do not open drawer after CARD1 key pressed
Page 31

29
1605
0
Open drawer after CARD2 key pressed
1
Do not open drawer after CARD2 key pressed
1606
0
Open drawer after CARD3 key pressed
1
Do not open drawer after CARD3 key pressed
1607
0
Make a keystroke sound
1
Make a keystroke no sound
1608
0
Disable free key layout
1
Enable free key layout
Flag17
Options
Select
Function
1701
0
Allow negative entry
1
Do not allow negative entry
1702
Not use
1703
Not use
1704
0
Do not allow overtender for Card
1
Allow overtender for Card
1705
Not use
1706
Not use
1707
0
Journal print type is Checklist
1
Journal print type is Sum items
1708
0
Print journal after Z report issued
1
Do not print journal after Z report issued
Flag18
Options
Select
Function
1801
0
Disable display report
1
Enable display report
1802
0
Cancel need password
1
Cancel not need password
1803
0
Void EC and RTN not need password
1
Void EC and RTN need password
1804
0
Do not allow Swiss rounding method
1
Allow Swiss rounding method
1805
0
Round when [subttl] pressed
1
Do not round when [subttl] pressed
1806
0
Round when [charge] pressed
1
Do not round when [charge] pressed
1807
0
Round when [check] pressed
1
Do not round when [check] pressed
1808
0
Round when [total] pressed
1
Do not round when [total] pressed
Page 32

30
Flag 19
Options
Select
Function
1901
Not use
1902
Not use
1903
Not use
1904
Not use
1905
Not use
1906
Not use
1907
Not use
1908
Not use
Flag20
Options
Select
Function
2001
Not use
2002
0
Disable guest function
1
Enable guest function
2003
0
Enable setting guest No. automatically
1
Disable setting guest No. automatically
2004
0
CODI input before item
1
CODI input after item
2005
0
Disable condiment price
1
Enable condiment price
2006
Not use
2007
0
Must be not cash if ER display
1
Must be cash if ER display
2008
Not use
3.7 Function Key Programming
3.7.1 Basic Key Operation Sequence
Example: Change function key in the position of [-] to [FC] key (function key code is 2A).
1) → →
2) (Select the key to be programmed)
3) →
(Input [FC] function key code)
4) Press key twice to exit programming
KEY LAYOUT Key #:07
Key code:45 Input # and [enter] . U/D
to scroll , [ESC] to exit
KEY LAYOUT Key #:07
Key code: 2A FC
Press key to edit, [CLR]
to redo, [ESC] to exit
Page 33

31
3.7.2 Function Code Table
No.
Function
No.
Function
No.
Function
No.
Function
01 0 22
CARD1
43
-%4
6D
COND13
02 1 23
CARD2
44
+%
6E
COND14
03 2 24
CARD3
45 - 6F
COND15
04 3 25
CARD4
46
-2
70
COND16
05 4 26
CARD5
47
-3
71
COND17
06 5 27
CARD6
48
-4
72
COND18
07 6 28
CARD7
49
X/TIME
73
COND19
08 7 29
CARD8
4A
SHIFT
74
COND20
09 8 2A
FC
4B
CANCEL
80
DEPT00
0A 9 2B
FC1
4C
HOLD
81
DEPT01
0B
00
2C
FC2
4D
PBAL
82
DEPT02
0C
000
2D
FC3
4E
NBAL
83
DEPT03
0D
.
2E
FC4
4F
CKPD
84
DEPT04
0E
CLEAR
2F
FC5
50
GLNK
85
DEPT05
0F
ENT/RLS
30
FC6
51
ITEM RLS
86
DEPT06
10
PLU
31
FC7
52
NO SALES
87
DEPT07
11
CASH
32
FC8
53
C 50.00
88
DEPT08
12
CHECK
33
TOTAL
54
C 100.00
89
DEPT09
13
CHECK2
34
SUB TOTL
55
C 10.00
8A
DEPT10
14
CHECK3
35
E/C
56
C 20.00
…
….
15
CHECK4
36
VOID
60
COND00
A8
DEPT40
16
CHECK5
37
RETURN
61
COND01
A9
PLU0001
17
CHECK6
38
XXX
62
COND02
AA
PLU0002
18
CHECK7
39
XXX
63
COND03
AB
PLU0003
19
CHECK8
3A
XXX
64
COND04
AC
PLU0004
1A
CHARGE
3B
XXX
65
COND05
AD
PLU0005
1B
CHARGE2
3C
XXX
66
COND06
AE
PLU0006
1C
CHARGE3
3D
RA
67
COND07
AF
PLU0007
1D
CHARGE4
3E
PO
68
COND08
B0
PLU0008
1E
CHARGE5
3F
ID
69
COND09
B1
PLU0009
1F
CHARGE6
40
-%
6A
COND10
B2
PLU0010
20
CHARGE7
41
-%2
6B
COND11
…
….
21
CHARGE8
42
-%3
6C
COND12
EE
PLU0070
Page 34

32
3.8 Changing Transaction Name
3.8.1 Changing Transaction Words
Transaction words are descriptions applied to function keys and words on the reports. A maximum
8 digits of single size, 4 digits of double size.
Example: Change transaction word “CARD1” to “VISA”.
1) → → 2) → →
(Transaction word number)
3) 4)
In ‘R‘ position, when the customer pays by card, the receipt will show as below.
1) → →
The receipt shows:
Note
* For characters input method, please refer to Chapter 3.17.1 “Input Method”.
3.8.2 Print Transaction Words Table
Control Lock: P
→ → →
TRANWORD0001 (ABCD)
WORD
DEPT TTL
Enter alpha characters:
TRANWORD
0033
(ABCD)WORD
CARD1
Enter alpha characters:
[Uppercase]
TRANWORD
0033
(ABCD) WORD
VISA
Enter alpha characters:
[Uppercase]
DEPT0001 $10.00
------------------------------------------
ITEM CT 1
------------------------------------------
VISA $10.00
CLERK 01 0.00
PAYMENT: 10.00
CARD: 10.00
CHANGE: 0.00
Page 35

33
3.9 LOGO Message Programming
The cash register can be programmed with a maximum 10 lines (240 characters) logo message.
3.9.1 Programming the Number of Lines for Logo Message
Example: Input number of lines (maximum 10)
1) → → → (5 lines)
2)
3.9.2 Programming Logo Message Content
Example: The receipt shows
1) → → → →
2) press key 24 times
3)
4) (Wide) →
→ (Space key)→
5)
6) (Wide) → (Space key)
→ → →
→
7)
8) (Wide) → (Space key)
→ → (Space key)
→
************************
YOUR RECEIPT
Thank You
Call Again
************************
HEADER LINE
Length: 5
# of lines :( 3-10 )
Input # then [enter]
HEADER
(ABCD) 02LN
YOUR RECEIPT
Enter alpha characters:
[Uppercase] WIDE
HEADER
(abcd) 03LN
Thank You
Enter alpha characters:
[Lowercase] WIDE
HEADER
(abcd)04LN
Call Again
Enter alpha characters:
[Lowercase] WIDE
Page 36

34
9)
10) press key 24 times
11)
3.10 Commercial Message Programming
The cash register can be programmed with a maximum of 10 lines (240 characters) for
commercial message.
3.10.1 Programming the Number of Lines for Commercial Message
Example: Input 3 lines for commercial message (maximum 10)
1) → → → →
3.10.2 Programming Commercial Message Content
Example: Program the first line of commercial message as “TOWA BUSINESS CO., LTD”:
1) → → → →
2) →
3) →
→
4) → → →
5)
6)
3.11 Foreign Currency Programming
Your cash register allows you to convert your currency to a foreign currency with a currency
exchange key ([FC] key).
To use the FC key, you must enter a currency exchange rate. You can program up to eight
exchange rates, FC 1 to FC 8.
HEADER
(ABCD) 05LN
*
Enter alpha characters:
[Uppercase]
FOOTER LINE
Length: 0
# of lines : ( 0-10 )
Input # then [enter]
FOOTER
(ABCD)
01LN
TOWA BUSINESS CO., LTD
Enter alpha characters:
[Uppercase]
Page 37

35
3.11.1 Programming Foreign Currency Rate
Example: Program the exchange rate of FC 1 to 0.5: 1.
1) → →
2)
(0.5: 1)
3)
3.11.2 Programming Foreign Currency Name
Example: Program the FC 1 name as “DOLLAR”.
1) → →
2)
3)
4)
3.12 Clerk Programming
This section explains how to program clerk information. You can have a maximum of 10 clerks.
Each clerk includes up to 12 characters for the name and a 4 digit ID number.
Example: Program the ID of Clerk 10 to “7878”, the name as “TOM”.
1) → → 2) → →
3) → 4)
FC 01
CONVRATE
FC to $’ s: 0.0000
8 digits incl decimal
Input # then [enter]
FC 01 (ABCD) NAME
DOLLAR
Enter alpha characters:
[Uppercase]
CLERK 01 PASSCODE
Clerk Passcode 1
Enter #(4 digit max)
Input # then [enter]
CLERK 10 PASSCODE
Clerk Passcode 10
Enter #(4 digit max)
Input # then [enter]
CLERK 10 (ABCD)NAME
TOM
Enter alpha characters:
[Uppercase]
Page 38

36
3.13 Password Programming
Note
Please remember or store your password in a secure place as it will not be possible to use the
respective operation without the password programmed as described below.
3.13.1 Programming the X Report Password
You can program a password to prevent a report being issued without the required password. The
password can be a maximum 4 digit number.
Example: Program the password of X-Report to “2222”
1) → →
2)
3)
To enter the X password, the key sequence is:
Control lock: X position (for operation)
→ →
3.13.2 Programming the Z Report Password
You can program a password to prevent a report issued without the required password. The
password can be a maximum of 4 digit number.
Example: Set the password of Z-Report as “4444”
1) → →
2) →
3)
To enter the Z password, the key sequence is:
Control lock: Z position (for operation)
→ →
3.13.3 Programming the Training Password
This sets the password to access training mode.
The password can be a maximum of 4 digit number.
Example: Program the password of training mode to “3333”
1) → →
2)Press key twice→
3)
MANAGER PASSCODES
X-PASSCODE: ****
Enter #(4 digit max)
Input # then [enter]
MANAGER PASSCODES
Z- PASSCODE: ****
Enter #(4 digit max)
Input # then [enter]
MANAGER PASSCODES
TRAINING PASSCODES: ****
Enter #(4 digit max)
Input # then [enter]
Page 39

37
Control lock: X position To go to the training mode:
1) → 2) → →
Control lock: X position To leave the training mode:
1) → 2) → →
Note
*If you want to use Training Mode, please refer to 5.7 “Training Mode”
3.13.4 Programming the Manager Password
This is the password for Programming mode.
The password can be a maximum of 4 digits.
Example: Program the password to “1111”
1) → →
2) Press key 3 times→
3)
To enter the manager password, the key sequence is:
Control lock: P position (for operation)
→ →
3.14 Kitchen Printer Programming
Max. link four CP-100 kitchen printer of machines at the same time.
3.14.1 Programming Kitchen Printer Flags
Example: Programming print LOGO of No.1 kitchen printer
1) → →
2) Press key 4 times→
3)
Kitchen Printer Flag 01
Options
Select
Function
#8
Not use
#7
Not use
#6
Not use
#5
0
Kitchen printer print forward
1
Kitchen printer print by converse
#4
0
Do not print LOGO with kitchen printer
MANAGER PASSCODES
PROG . PASSCODE : ****
Enter #(4 digit max)
Input # then [enter]
KP 01 #400000000 Flag01
0:KP do not print LOGO
1:KP print LOGO
1
Page 40

38
1
Print LOGO with kitchen printer
#3
0
Print LOGO on footer
1
Print LOGO on header
#2
0
Print by item type
1
Print by item quantity
#1
0
Print by item
1
Unit print
Kitchen Printer Flag 02(Not use)
3.14.2 Programming Print Count
Example: Programming every time print two copies of No.1 Kitchen Printer
1) → →
2) Press key 2 times→
3)
Note
* Programming print count is “0”.Do not print of kitchen printer. System default value is "0".
* The print count max.9
3.14.3 Programming Feed Line Number
Example: Programming feed line 3 of No.4 kitchen printer
1) → →
2) Press key 3 times→Press key 3 times
3)
4)
Note
* The feed line number max.9.
KP 01 Count
0
Print count
2
KP 04 FEED
0
Feed line after bottom
3
Page 41

39
3.15 Guest Programming
This section explains how to program guests. A maximum of 200 guests can be programmed. The
guest can be input max. 4 digits , the name max. 12 characters.
Example: Programming guest number is 4 of guest 4 . Programming name is ABC.
1) → →
2) →
3) →
4)
5)
3.16 Check and Print Programming Data
You can print out the programming data.
The steps are as follows:
1) Before printing the programming data, please turn the control lock to the”P”position.
2) Select the programming item to be checked, then press
[PRNT] key.
Example:
1) Turn the control lock to the”P”position.
2) → → →
As shown in the example on the right
3.17 Character Input Method
3.17.1 Input Method
Input character and symbols. You can input capital and lowercase letters and symbols.
3.17.1.1 Capital Letters (ABCD) and Lower Case (abcd) Input
A. Turn the control lock to the “P” position and select a programming item.
B. Press the [ENTER] key to complete the entry.
* P01 *
DATE 20080707
TIME 1807
CSCN 1000
MCNO 1010
X1 CNT 1000
X2 CNT 1000
Z1 CNT 1000
Z2 CNT 1000
GUEST004 ID
Guest Number 4
Enter #(4 digit max)
Input # then [input]
GUEST004 (ABCD)NAME
ABC
[Uppercase]
Page 42

40
Example: Program the name of DEPT 01 as “Beer”
1) → →
→
(DEPT name)
2)
Note
*The default is capitals. You can use [CAPS] key to change to lowercase.
3.17.1.2 Symbols Input
A. Press [SHFT] key to choose symbol input method;
B. Press the [←] key or the [→] to choose the symbol.
C. Press the [DSGN] key to confirm the symbol.
D. Press the [ENTER] key to finish the entry.
Example: Program the name of DEPT 01 as “+/”
1) → →
2) →Press key twice→ (“+”)
3) →Press key twice → (“/”)
4)
Note
*You can use [↓] key to search for more characters during input mode.
3.17.2 Character Input - Double Width
A. Turn the control lock to the “P” position and select a programming item;
B. Select input method
C. Press [DOUBLE] key before inputting characters, then press [ENTER] key to complete.
Example: The following example shows how to print the name of the Clerk 2 as “TOM” in double
width.
1) → → → → → →
2) (Input in double width) →
3) (Finish the double width input)
3.17.3 Switch Cursor Position
A. Turn the control lock to the “P” position and select a programming item
B. Select symbol input method
Dept0001 (ABCD)NAME
DEPT0001
!”#$%&’()*+,-. /:;<=>?@[\
[Uppercase]
Dept0001 (ABCD)NAME
+/
Enter alpha characters:
[Uppercase]
CLERK 02 (ABCD)NAME
TOM
Enter alpha characters:
[Uppercase]WIDE
Dept0001 (abcd)NAME
Beer
Enter alpha characters:
[Lowercase]
Page 43

41
C. Press [←] and [→] key to switch cursor between name edit line and symbol line.
Example: The following example shows how to switch cursor position while in symbol input
method.
1) → → → → → →
2) (5 times)
3) → (10 times)
4)
5)
3.18 Using Special Function Keys
3.18.1 How to Use the [→] Key and the [←] Key during Setting Flag
Example: Select department flag setting, the display shows;
1) Press key 5 times. 2) Press key .
3.18.2 How to Use the [→] Key and the [←] Key during Inputting the Symbol
Example: Select the symbol input, the display shows:
1) Press key 3 times 2) Press key 9 times
Dept0001#800000000 SETUP1
Input # then [enter]
Dept0001#300000000 SETUP1
Tax3 selection:
0=Tax3 OFF 1=Tax3 ON
Input # then [enter]
Dept0001 (ABCD)NAME
DEPT0001
!”#$%&’()*+,-. /:;<=>?@[\
[Uppercase]
Dept0001 (ABCD)NAME
DEPT0001
!”#$%&’()*+,-. /:;<=>?@[\
[Uppercase]
Dept0001
(ABCD)NAME
DEPT0001
!”#$%&’()*+,-./:;<=>?@[\
[Uppercase]
CLERK 02 (ABCD)NAME
CLERK# 2
Enter alpha characters:
[Uppercase]
Dept0001#400000000 SETUP1
Tax4 selection:
0=Tax4 OFF 1=Tax4 ON
Input # then [enter]
Page 44

42
3.18.3 Using the [↑] Key and the [↓] Key
Example: When you program Department 1 flag04, display shows
If you want to program the department HALO:
1)Press key 3 times . 2) Press key
(Programming the department unit price) (Programming the department group)
3.18.4 Using [ESC] Key
Press key to return to the previous menu
Example: When you program the tax, the display shows as follows:
Press the key
3.18.5 Using [PGUP] and [PGDN] Key
Example: In the main screen in ‘P’ position
Press key 3 times. Press twice
3.18.6 Using [BKSP] Key
To delete the character preceding the cursor.
For example: to program a department name, the display shows:
1) 2)
Dept0001#300000000 SETUP1
Tax3 selection:
0=Tax3 OFF 1=Tax3 ON
Input # then [enter]
Dept0001
DEPT
GROUP
DEPT Group # 0
Group # (0-9)
Input # then [enter]
Dept0001
DEPT
HALO
HALO Price 0. 00
Enter price(7 digit max)
Input # then [enter]
TAX RATE SETTINGS
1)TAX1 3)TAX3
2)TAX2 4)TAX4
Input # then [enter]
PRGM 4)Tax Rate Settings
5)Discount Settings
6)Config. Options
Input # (1-16)+ [enter]
PRGM 1)System Options
2)Dept. Settings
3)PLU Settings
Input # (1-16)+ [enter]
PRGM 10)Receipt Footer
11)FC Settings
12)Clerk Settings
Input # (1-16)+ [enter]
Dept0001 (ABCD)NAME
DEPT0001
Enter alpha characters:
[Uppercase]
Dept0001 (ABCD)NAME
DEPT0001
Enter alpha characters:
[Uppercase]
Dept0001 (ABCD)NAME
EPT0001
Enter alpha characters:
[Uppercase]
PRGM 4)Tax Rate Settings
5)Discount Settings
6)Config. Options
Input # (1-16)+ [enter]
Page 45

43
3.18.7 Using [DEL] Key
To delete the character which the cursor is on.
For example: to program a department name, the display shows:
Press key
Cash
4.Cash Register Operation (“R” mode)
Note
* All the following settings should be performed in the “R” position.
* All of the amounts and prices shown in examples use two decimal format if not noted.
Below shows the standard keyboard functions:
Name Abbreviation Functions
1. Price Look Up Key
2. Multiplication/Times Key
3. Plu Shift Key
4. Received on Account Key
5. Paid-Out Key
Dept0001 (ABCD)NAME
DEPT0001
Enter alpha characters:
[Uppercase]
Dept0001 (ABCD)NAME
DEP0001
Enter alpha characters:
[Uppercase]
*Double function - Used to register multiple quantity of a
PLU/Department
-Used to display the current time or date.
Used to register a PLU. A PLU is used as a code for pre-programming
product prices, to maintain a tally of cost and quantity of the products
sold.
Max.3000 PLUs with periodical total.
Used to record money received on account.
Used to record cash amounts taken out of the cash drawer that is not
part of a sale.
Used to shift between plus on the plu keys
Page 46

44
6. Minus Percentage Key
7. Add Percentage Key
8. Charge Key
9. Total Key
10. Non-Add/Subtotal Key
11. Cash Key
12. Cancel Key
13. Entry Release Key
(PLU price entry and release key)
14. Minus Key
15. Return Key
16. Void Key
17. Clear Key
18. Clerk ID Key
19. Error Correction Key
20. Numeric Keys 1 to 00
21. Department Keys 1 to 15
22. Decimal Point Key
23. Department Key
24. Tax force Key
25. Check Sales Key
Used to give a discount as a percentage of an item.
Used to finalize a transaction by a charge sale
Used to display a subtotal including tax. Also used for issuing 2nd receipt.
Triple function – Used to open the drawer without a sale
Used to display sub-total
Used to enter up to 9 digit reference number which prints on the receipt.
Used to finalize a transaction by cash and calculates the amount of
change due.
Used to temporarily override a preset PLU price
Used to subtract a specific amount from an individual item.
Used to refund a product.
Used to void an item you entered or transaction which was done.
Used to clear a numeric entry or an error
Double function - Used for entering clerk ID.
Used to turn on/off the receipt printing
Used to clear the last product entered
Used to enter numbers
Used to enter a department sale.
Selects decimal point
Used to enter the department number manually.
Used to add a tax amount to the sale according to the rate programmed
for this key. "Tax force" key is normally used to program a second tax rate
require by a particular area or state. It can also be used to override a
preset tax.
Used to finalize a transaction by cheque.
Used to cancel the current transaction.
Used to add a percentage.
Page 47

45
26. Receipt Feed Key
27. Card1 Key
28. $10 Cash Key
29.$20.00 Cash Key Used to finalize a transaction by $20 key and payment the amount
is 20.00.
30.$50.00 Cash Key Used to finalize a transaction by $50 key and payment the amount
is 50.00
31.$100.00 Cash Key Used to finalize a transaction by $100 key and payment the amount
is 100.00
Before using the cash register, please ensure the following has been completed:
A. Confirm all of the programming is completed
(Refer to the related chapters/sections if necessary)
B. Make sure paper rolls are installed correctly;
C.Insert the manager’s key (MA) or the operator’s key (OP) into the control lock and turn the
lock to the “R” position (Refer to the “Control Lock and Functions”)
D.If the clerk ID was set, enter the clerk ID, and then press the [ID] key to sign on.
Example: The following example shows how to sign on a clerk.
→ (Clerk10 password)
Note
* If an error code is shown on the display, press the [CLEAR] key to clear the error code and
input the clerk ID again.
* If the cash register does not respond during a transaction, please reset the cash register.
(Refer to the “System Clear” for more details.)
Explanation of LCD display in ‘R’ mode
Example:
→ → →
CLERK 01 0.00
DEPT0001 [12] X
Price: 1.00 12.00
TOTAL 12.00
1
2
3
4
5
6
7
Used to feed the receipt paper.
Used to receive the payment by card.
Used to finalize a transaction by $10 key and payment the amount
is 10.00.
Page 48

46
1: Current clerk information 2: Input value
3: Sale item name 4: Item quantity
5: Current sales item amount 6: Transaction total amount
7: Unit price
4.1 Basic Operation
4.1.1 Single-item Cash Sale
Single item cash sale is a function which allows you to reduce number of key presses when
registering a single item for a cash sale.
When you press a department key, which has the “single item cash”, function the transaction
finalizes without pressing the [CASH] key.
The department flag must be programmed. (Set Flag2; #1 to “1”).
The following example shows how to sell Department 1 (unit price $100.00) with single-item sale.
Example:
1) The receipt shows
Note
* If you need to cancel the single-item cash sale, press the [ENT RLS] key before the
registration single-item cash sale department.
*If a department is programmed as a single-item cash sale, a PLU linked to the department
will work as a single-item cash sale.
4.1.2 Multiple-item Entries
Example: The following shows you how to sell PLU 0014, PLU 0006 and PLU 0126. (Assuming
PLU 0014 price is $1.00, PLU 0006 price is $3.00 and PLU 0126 price is $10.00)
1) →
2) →
3) →
4)
CLERK 01 0.00
PAYMENT: 100.00
CASH TEND: 100.00
CHANGE: 0.00
CLERK 01 0.00
PLU0126
10.00
TOTAL 14.00
CLERK 01 0.00
PAYMENT: 14.00
CASH TEND: 14.00
CHANGE: 0.00
DEPT0001 $100.00
----------------------------------
ITEM CT 1
----------------------------------
CASH $100.00
Page 49

47
4.1.3 Quantity Sales
The following example shows you how to sell 2 products (PLU 126).
Example:
1) → → → 2)
4.1.4 Duplicate Entries
The following example shows you how to repeat the sale of PLU 0006 3 times.
Example:
1) → 2) →
3)
4.1.5 Barcode Entries
It is possible to sell items by scanning a barcode or manually entering the PLU barcode. The
following example shows how to use this function to sell an item with the barcode No.
6927073400541 (This barcode is programmed to PLU 0001, the unit price is $10.00, and the
System Flag 0106 must be 1.
1) →
(or you can scan barcode with your scanner)
2)
CLERK 01 0.00
PLU0126 [2] X
Price: 10.00 20.00
TOTAL 20.00
CLERK 01 0.00
PAYMENT: 20.00
CASH TEND: 20.00
CHANGE: 0.00
CLERK 01 0.00
PLU0006
3.00
TOTAL 3.00
CLERK 01 0.00
PLU0001
10.00
TOTAL 10.00
CLERK 01 0.00
PAYMENT: 10.00
CASH TEND: 10.00
CHANGE: 0.00
CLERK 01 0.00
PLU0006 [3] X
9.00
TOTAL 9.00
Page 50

48
If it is necessary to manually enter the barcode instead of PLU No. during the PLU code input
mode, press the [SHIFT] key before entering barcode.
Example: The following shows how to use this function to sell an item with the barcode
No.123456789 (This barcode is programmed to PLU0002, the unit price is $12.00, and the
System Flag 0106 must be 0).
1)
2) →
(or you can scan barcode with your scanner)
3)
Note
* To use the barcode function, set the System Flag 0106 to “1”, otherwise the number
entered will be regarded as the PLU code.
4.1.6 Check, Credit and Charge Sales
This section explains how to operate the cash register when you receive a payment by Check,
Credit or Charge.
4.1.6.1 Check Sale
The cash register can finalize a sale with the [CHK] key. The following example shows how to
finalize when the customer pays $34.00 for PLU1500 by cheque.
→ → → →
The receipt shows:
4.1.6.2 Credit Sale
The cash register can finalize a sale by the [CARD] key. The following example shows how to
finalize when customer uses a credit card to pay $30.00 for PLU0006.
→ → → →
The receipt shows:
CLERK 01 0.00
PAYMENT: 34.00
CHECK: 34.00
CHANGE: 0.00
CLERK 01 0.00
PAYMENT: 30.00
CARD: 30.00
CHANGE: 0.00
PLU1500 $34.00
---------------------------------- ITEM CT 1
-----------------------------------
CHECK $34.00
PLU0006 $30.00
------------------------------------
ITEM CT 1
------------------------------------
CARD1 $30.00
Page 51

49
4.1.6.3 Charge Sale
The cash register can finalize a sale with the [CHRG] key. The following example shows how to
finalize if customer pays $20.00 for PLU1700 by charge.
→ → → →
The receipt shows:
4.1.7 Split Payment
You can finalize a transaction by several types of payment methods.
Enter each of the amounts paid by cash, credit, check, or charge in a single sales transaction.
The following example shows that the customer pays $50.00 by cheque and $46.30 by cash for a
$96.30 total amount of PLU 1300.
1) → → → → →
The receipt shows:
2) →
Note
* Payment by charge should be entered last, otherwise an error will occur.
4.1.8 Change Calculation
Change calculation when finalising
The cash register calculates the change due when the amount received from a customer is more
than the sales amount.
The following example shows how to enter an amount of $200.00 received from a customer when
you are selling 11 x No.12 PLU for each $10.00.
PLU1300 $96.30
------------------------------------ ITEM CT 1
-------------------------------------
TOTAL $96.30
CHECK TD $50.00
-------------------------------------
CASH TD $50.00
CHANGE $3.70
CLERK 01 0.00
PAYMENT: 96.30
CHECK: 50.00
BALANCE: 46.30
CLERK 01 0.00
PAYMENT: 20.00
CHARGE: 20.00
CHANGE: 0.00
CLERK 01 0.00
PAYMENT: 46.30
CASH TEND: 50.00
CHANGE: 3.70
PLU1700 $20.00
----------------------------------
ITEM CT 1
----------------------------------
CHARGE
$20.00
Page 52

50
Example: (If the preset price of PLU 0012 is $10.00).
The receipt shows:
1) → → →
2) →
4.1.9 Subtract with the [-] Key
This section explains how to operate the cash register when subtracting from the amount of an
item. You can either use a preprogrammed [-] amount or you can enter the amount manually.
4.1.9.1 Single Item
Example: The following example shows how to give a discount amount of $78.00 for an item.
1) → → →
2) → The receipt shows:
3)
4.1.9.2 Operation for the Total Sale
Example∶ The following example shows how to give a discount amount of $ 2.00 to the total sale.
(If the preset price of PLU 0014 is $ 20.00)
1) → → → → →
2)
The receipt shows:
3) →
4)
DEPT0001 $100.00
DEPT0002 $300.00
COUPON N $78.00
--------------------------------------
ITEM CT 2
--------------------------------------
CASH $322.00
4X $20.00
PLU0014 $80.00
DEPT0002 $30.00
SUB-TTL $110.00
COUPON G $2.00
-------------------------------------
ITEM CT 5
-------------------------------------
CASH $108.00
CLERK 01 0.00
COUPON N1N -78.00
TOTAL 322.00
11X $10.00
PLU0012 $110. 00
---------------------------------- ITEM CT 11
-----------------------------------
TOTAL
$110.00
CASH TD $200.00
CHANGE $90.00
CLERK 01 0.00
COUPON N1G -2.00
TOTAL 108.00
Page 53

51
4.1.10 Using the Discount [-%] Key and Surcharge [+%] Key
This section explains how to operate the cash register when giving a percentage discount or
adding a percentage to the price of an item. You can use the programmed percentage or you can
enter the percentage manually.
4.1.10.1 Operation for Single Item
Example: When you want to add a preset percentage to the price of an item:
(If the preset price of PLU 0014 is $20.00 and [+%] rate as 10%)
1) → → The receipt shows:
2)
Example: The following example shows how to give a discount of percentage 20% for the PLU
0014.
1) → → → 2)
The receipt shows:
PLU0014 $20.00
-%N 20% $4.00
-------------------------------------ITEM CT 1
--------------------------------------
CASH $16.00
PLU0014 $20.00
+%N 10% $2.00
------------------------------------ITEM CT 1
-------------------------------------
CASH $22.00
CLERK 01 0.00
-%N
Rate: 20.00%N -4.00
TOTAL 16.00
CLERK 01 0.00
+%N
Rate: 10.00%N 2.00
TOTAL 22.00
Page 54

52
4.1.10.2 Operation for the Total Sale
Example: Giving a discount from the total amount:
(If the preset price of PLU 0014 is $20.00, and the price of PLU 0126 is $10.00)
1) → → → 2) → → →
3) The receipt shows:
4) →
5)
Note
*The discount will be subtracted from the total amount after pressing [TOTAL] or [#/ST] key.
4.1.11 Void
You can void items registered prior to the last item by using [VOID] key.
Example: How to void the first registered item in a transaction.
(If the preset price of PLU 0014 is $20.00, the price of PLU 0126 is $10.00)
1) → → → → The receipt shows:
2) → →
3)
10X $20.00
PLU0014 $200.00
2X $10.00
PLU0126 $20.00
SUB-TTL $220.00
-%G 10% $22.00
-------------------------------------
ITEM CT 12
-------------------------------------
CASH $198.00
PLU0014 $20.00
PLU0126 $10.00
SUB-TTL $30.00
-VOID-
PLU0014 $20.00
-------------------------------------
ITEM CT 1
-------------------------------------
CASH $10.00
CLERK 01 0.00
PLU0014
VD – 20.00
TOTAL 10.00
CLERK 01 0.00
SUBTTL: 220.00
TOTAL 220.00
CLERK 01 0.00
-%G
Rate:10.00%G -22.00
TOTAL 198.00
Page 55

53
4.1.12 Error Correction Operation
You can void an item immediately after you register it by pressing the [E.C] key.
Example:
1) → (Operator realizes wrong PLU key was pressed)
2) The receipt shows:
3) →
4)
Note
*Once subtotal or total have been pressed you can no longer select the [E.C] key.
4.1.13 Cancel
You can cancel all registered items in the current transaction by using the [CANCEL] key.
1) → 2)
4.1.14 Return Product
This section explains how to refund/return an item.
Example:
1) → → The receipt shows:
2) → → →
3)
RETURN
PLU0014 $20.00
-2X $10.00
PLU0126 $20.00
---------------------------------------
ITEM CT -3
---------------------------------------
CASH $-40.00
CLERK 01 0.00
PAYMENT: -40.00
CASH TEND: -40.00
CHANGE: 0.00
CLERK 01 0.00
*TRANSACTION CANCELLED*
PLU0126 $10.00
-VOID-
PLU0126 $10.00
PLU0014 $20.00
-------------------------------------
ITEM CT 1
-------------------------------------
CASH $20.00
CLERK 01 0.00
PLU0126
VD - 10.00
TOTAL 0.00
CLERK 01 0.00
DEPT0002
1.23
TOTAL 1.23
Page 56

54
4.1.15 Received on Account and Paid Out
This section explains how to process an amount received on account [RA] and a non-sales
amount taken away from the drawer [PO].
A. The following example shows you how to process $25.00 received on account by cash.
1) → 2)
The receipt shows:
B. The following example shows how to register $12.00 petty cash.
1) → 2)
The receipt shows:
4.1.16 Opening Drawer Manually
The cash register allows you to open the drawer without entering a sale.
To open the drawer press the [#/ST] key.
The receipt shows:
4.1.17 Using [CLEAR] Key
The cash register allows you to clear an entry and an error.
The following example shows how to use the [CLEAR] key to correct a price.
1) (Error number) 2)
NOSALE #0
CLERK 01 0.00
CASH TTL: 25.00
CASH TEND: 25.00
CHANGE: 0.00
CLERK 01 0.00
PAYMENT: 12.00
CASH PO: 12.00
CHANGE: 0.00
P/O $12.00
--------------------------------------
--------------------------------------
P/O CA
$12.00
CLERK 01 1.88
CLERK 01 0.00
R/A $25.00
--------------------------------------
--------------------------------------
R/A CA
$25.00
Page 57

55
3) (Correct number) 4) →
The receipt shows:
When the display shows error, you can press the [CLEAR] key to clear the message.
1) → → (error) 2) (clear the error)
3)
4.1.18 Receipt ON/OFF
You can control receipts issued by the [ON/OFF] key. Each time you press the [ON/OFF] key the
Receipt On/Off mode is toggled.
Receipt ON/Off indicator, the will show on the top line when the cash register is in Receipt Off
mode. When switched to print on mode, the indicator will disappear.
Note
*To use this function the System Flag 0108 should be set to “0”.
4.1.19 Printing a Duplicate Receipt
The cash register allows you to print a duplicate receipt. The duplicate can be printed immediately
after finishing a transaction by pressing the [CASH] key.
1) → → → →
2)
Original receipt: A Second Receipt:
COPY RECEIPT
DEPT0001 $4.56
DEPT0002 $7.89
-------------------------------------ITEM CT 2
--------------------------------------
CASH $12.45
DEPT0001 $4.56
DEPT0002 $7.89
------------------------------------ITEM CT 2
-------------------------------------
CASH $12.45
CLERK 01 0.18
CLERK01 0.00
PLU0014
20.00
TOTAL 20.00
DEPT0001 $0.18
-----------------------------------
ITEM CT 1
-----------------------------------
CASH $0.18
CLERK01 0.00
PLU0014
20.00
Oper error , press [clear]
Page 58

56
Note
* To enable this function System Flag 0807 should be set to “1”, if System Flag 0807 is “0” it
will be disabled. If the receipt is off (see the previous section ‘Receipt ON/OFF’) you can issue a
receipt by pressing [CASH].
4.1.20 Changing the Unit Price at the “R” Position
The cash register allows you to change the department or PLU price temporarily during a
transaction. The following examples show how to change the department or PLU price.
A. Temporary change of the department price
The example shows how to change DEPT01 price from preset ($10.00) to temporary ($12.00).
1) → 2)
The receipt shows:
B. Temporary change of the PLU price
This example shows how to change the preset price of PLU 12 ($10.00) to $40.00.
1) → → → 2)
The receipt shows:
Using [PLU] Key:
1) → → →
4.1.21 PLU Price Check at the “R” Position
The cash register allows you to check the price of the PLU during the sale.
→ Scan the bar code of PLU.
CLERK 01 0.00
DEPT0001
12.00
TOTAL 12.00
DEPT0001 $12.00
----------------------------------- ITEM CT 1
------------------------------------
CASH $12.00
CLERK 01 0.00
PLU 0012 #0012
Price 40.00
PLU0012 $40.00
----------------------------------- ITEM CT 1
------------------------------------
CASH $40.00
CLER K01 0.00
PLU0012
40.00
TOTAL 40.00
Page 59

57
4.1.22 Item Tickets Function
This section describes how to print item tickets.
A. Turn the control lock to the “P” position.
B. Set the System Flag 0903 to “1” and set the Department and PLU.
C. Turn the control lock to the “R” position.
Using the item tickets function
Link PLU1 ($100.00) to Department 1 ($110.00)
Link PLU2 ($200.00) to Department 2 ($150.00)
→ → → → → → →
Normal receipt Sample of item ticket
5. Other Operations
5.1 Time or Date Display
The cash register can display current time or date at the “R” position in the non-sales state.
5.2 Clerk Login and Change Clerk during a Transaction
This section explains how to change the clerk during a sale.
Turn the control lock to the “R” position
For example: Clerk 4 ID No. 4444 starts a transaction and Clerk 7 ID No. 3030 takes over Clerk 4’s
transaction
CLERK 01 0.00
12-20-2009 19:18:20
DEPT0001 $110.00
DEPT0001 $110.00
DEPT0002 $150.00
PLU0001 $100.00
PLU0002 $200.00
------------------------------------------ ITEM CT 5
-------------------------------------------
CASH $670.00
CSCN : 1059
DEPT0001 2X
1010 12-20-2009 19 :14
------------------------CSCN : 1059
DEPT0002 1X
1010 12-20-2009 19 :14
------------------------CSCN : 1059
PLU0001 1X
1010 12-20-2009 19 :14
------------------------CSCN : 1059
PLU0002 1X
1010 12-20-2009 19 :14
---------------------------
Page 60

58
A. login Clerk 4 B.Change Clerk 7 during transaction
→ (transaction)→ →
(Input first clerk ID number) (Enter the other clerked number)
Note
*To activate the above function System Flag 0601 should be set to “1”.
5.3 Clerk Log Out
After a clerk logs out, the cash register cannot be operated unless a valid clerk logs in.
To log out a clerk: →
Note
*You cannot log out the clerk until the current transaction is completed.
5.4 Plu Shift
One plu key can be shifted with the [SHIFT] key to another plu.
The following example shows how to register an item of Plu 71.
1) → → 2)
3)
Note
* Please refer to System Flag 0805 and 0806.
5.5 Using [DEPT] Key
[DEPT] key can be used to enter a unit price of a department which is not located on keyboard.
1) → → → 2)
The receipt shows:
5.6 Calculator Mode
‘R’ position
Press [CAL] key to enter calculator mode. In this mode, [$10] is ‘+’ key, [$50] is ‘-’ key, [$20] is ‘×’
key, [$100] is ‘÷’ key and [CASH] is ‘=’ key. Press [CAL] key again to exit calculator mode.
Calculator mode will allow addition, subtraction, multiplication and division. Pressing the [=] key
gives the result.
CLERK 01 ↑ 1.23
CLERK 01 0.00
PLU0071
1.23
TOTAL 1.23
CLERK 01 0.00
DEPT0100
5.13
TOTAL 5.13
DEPT0100 $5.13
-----------------------------------ITEM CT 1
------------------------------------
CASH $5.13
Page 61

59
Before pressing [=] key, number keys and calculation keys can be input repeatedly.
1)
2) → →
→ →
5.7 Training Mode
Training mode allows you to train a new operator to use the cash register.
Enter training mode and then use the ECR as normal.
When the training is finished make sure the cash register is reset to normal operation mode.
1) Turn the control lock to the “X” position. 2) →
3) → (Enter the training password)
(See chapter3.13.3 training password)
Turn the control lock to the “R” position.
→ → The receipt shows
To exit training mode
1) Turn the control lock to the “X” position.
2) →
3) → (enter the training password)
4) Turn the control lock to the “R” position.
CalcMd
CalcMd
3000
[-] 300
2700
XPRT
1:Daily 2:Periodic
3:On-Screen 4:Training
Input # then [enter]
XPRT[TrainMd-Start]
Training PASSCODE:
Please enter 4 digit
Code and press [enter]
TrainMd 0.00
PAYMENT: 10.00
CASH TEND: 10.00
CHANGE: 0.00
TRAINING
DEPT0001 $10.00
---------------------------------------
ITEM CT 1
---------------------------------------
CASH $10.00
Page 62

60
5.8 Foreign Currency
1. Payment by FC1. Enter tendered amount 10.00 (local currency).
1) → → The receipt shows
2)
2. Payment by FC1 and tendering change in Local Currency.
1) → → → The receipt shows
2)
3. Payment by FC1 and tendering change in FC.
1) → → → → →
The receipt shows
CLERK 01 0.00
SUBTTL:10.00 FC 5.00
QTY: 1
TOTAL 10.00
DEPT0001 $10.00
---------------------------------------
ITEM CT 1
---------------------------------------
TOTAL $10.00
(TTL CNVRATE1 5.00)
CNVRATE1 5.00
(CASH TD $10.00)
CLERK 01 0.00
PAYMENT: 10.00
CASH TEND: 100.00
CHANGE: 90.00
DEPT0001 $10.00
---------------------------------------
ITEM CT 1
---------------------------------------
TOTAL $10.00
(TTL CNVRATE1 5.00)
CNVRATE1 50.00
(CASH TD $100.00)
FC_CG 45.00
CLERK 01 0. 00
PAYMENT: 10.00
CASH TEND: 100.00
CHANGE: 90.00
DEPT0001 $10.00
---------------------------------------
ITEM CT 1
---------------------------------------
TOTAL $10.00
(TTL CNVRATE1 5.00)
CNVRATE1 50.00
(CASH TD $100.00)
CHANGE $90.00
Page 63

61
4. Payment by FC1 and local currency
→ → → The receipt shows
→ →
→ →
(Paid 4.00 in FC1 and paid 10.00 in local currency by cash,
the cash of change is 8.00 in local currency.)
Note
* Max 4 Foreign Currencies can be programmed.
* See section 3.11. “Foreign Currency Programming”.
5.9 $100 Sale
Example∶The following to sell Department1
1) → →
6. PBAL NBAL Operation (“R”mode)
The cash register have catering function . Can be setting 200 GUEST. Max. link 40 PLU of a
guest.(system flag2002 is set at “1”)
Note
* Programming PLU name and price See section 3.3 “PLU Programming”.
* Programming system flag See section 3.6 “System Flag Programming”
* Programming guest number and guest name See section 3.15 “Guest Programming”
6.1 PBAL and NBAL Operation
Example: Guest101 sale PLU14 (Setting PLU14 name is DRINK . Setting PLU14 price is
1.80 .Setting 101 guest name is SHT.)
1) → The receipt shows
2) →
(PLU14)
DEPT0001 $10.00
---------------------------------------
ITEM CT 1
--------------------------------------
TOTAL $10.00
(TTL CNVRATE1 5.00)
CNVRATE1 4.00
(CASH TD $8.00)
---------------------------------------
CASH TD $10.00
CHANGE $8.00
PBAL 101SHT
--------------------
DRINK $1.80
------------------------
ITEM CT 1
------------------------
NBAL 1.80
PBAL 101 0.00
DRINK
1.80
TOTAL 1.80
Page 64

62
Automatically Setting Guest Number
Guest number is 0. system flag 2003=0(enable setting guest number automatically). Enter any 1
to 4 digit , guest number is any number.
Example: Setting guest005 number is “0”. Setting guest005 name is “ZST”.
1) → →
Now guest005 guest number automatically setting is 234.
6.2 Additional Operation
Example: Guest101 sale PLU134 (Setting PLU134 price is 2.00 .Setting 101 guest name is SHT.)
1) → The receipt shows
(Has been set guest)
2) → →
6.3 CKPD Operation
Example: Guest101 CKPD
1) → The receipt shows
(guest No.)
2)
PBAL 234 0.00
SUBTT0.00
TOTAL: 0.00
PBAL 101SHT
TOTAL +$1.80
--------------------
PLU0134 $2.00
------------------------
ITEM CT 2
------------------------
NBAL $3.80
NBAL 101 0.00
NO. : 101
SHT
TOTAL 3.80
CKPD 101SHT
DRINK 1Q $1.80
PLU0134 1Q $2.00
TOTAL +$3.80
--------------------
------------------------
ITEM CT 2
------------------------
CASH $3.80
CKPD 101 0.00
SUBTTL:3.80
TOTAL 3.80
Page 65

63
6.4 Change Guest Operation
Example: Guest101 sales amount go to Guest102 (before change is empty of guest102)
1) → The receipt shows
2) → → →
3) → → → → →
(guest101 go to guest102)
The receipt shows
6.5 GLNK Operation
Max.16 main guest . Each main guest link max.20 sub guest.
Example: Guest103 sales amount link Guest101 .
1) → The receipt shows
2) → → →
PBAL 101SHT
--------------------
PLU0018 $28.00
------------------------
ITEM CT 1
------------------------
NBAL $28.00
PBAL 101 0.00
PLU0018
28.00
TOTAL 28.00
PBAL 101SHT
TOTAL +$28.00
--------------------
GMOV GUEST0102
------------------------
ITEM CT 1
------------------------
NBAL $28.00
GMOV 102 0.00
NO. :102
GUEST0102
TOTAL 28.00
PBAL 101SHT
-------------------PLU0018 28.00
ITEM CT 1
NBAL 28.00
NBAL 101 0.00
NO. : 101
SHT
TOTAL 28.00
Page 66

64
3) → → → →
(guest101 go to guest102)
The receipt shows
Note
* Sub guest sale is not CKPD . Main guest can be CKPD . Sub guest and Main guest
together with CKPD .
* Main guest must be not empty guest.
6.6 Cancel GLNK Operation
Example: Guest103 sales amount from Guest101 cancel.
1) → → → → →
The receipt shows
6.7 Read Guest Sales Amount Operation
Example:Resd guest101 sales amount.
1) → → The receipt shows
PBAL 103GUEST0103
--------------------
GLNK SHT
------------------------
ITEM CT 0
------------------------
NBAL $0.00
GLNK 103 0.00
NO. : 103=-> 101
GUEST0103
TOTAL 0.00
PBAL 103GUEST0103
--------------------
*It is the 101`s sub TB*
--------------------
Release 101
------------------------
ITEM CT 0
------------------------
NBAL $0.00
NBAL 103 0.00
NO. : 103
GUEST0103
TOTAL 0.00
GPRT 101SHT
PLU0018 1Q $28.00
TOTAL +$28.00
--------------------
------------------------
ITEM CT 1
------------------------
NBAL $28.00
NBAL 101 0.00
NO. : 101
SHT
TOTAL 28.00
Page 67

65
7. Using Kitchen Printer
7.1 Using Kitchen Printer
Before use Programming kitchen printer and ECR, See section” 1.5 Kitchen Printer
General Specifications” , “3.2.3 Programming Department Flags” , “3.14 Kitchen Printer
Programming”
Example: Programming guest0101 name is SHT . PLU0014 name is DJYT , price is 28.00 , link
Department01 . PLU0016 name is JBY , price is 48.00 , link Department02 . Programming
Department01 and Department02 print to No.1 No.2 No.3 and No.4 kitchen printer .
1) →
2) → → No.1,No.2,No.3 and No.4 kitchen printer
print receipt all are shows
The receipt shows
Note
* If No.1 kitchen printer code is 01 , No.4 kitchen printer code is 01, No.1 kitchen printer can
be print , No.4 kitchen printer can not print . ECR print “No.4 kitchen printer error ” message
and print No.4 kitchen printer receipt .
PBAL 101SHT
-------------------DJYT $28.00
JBY $48.00
------------------------
ITEM CT 2
------------------------
NBAL $76.00
SHT
DJYT 1X
1010 12-20-2009 16:16
-------------------SHT
JBY 1X
1010 12-20-2009 16:16
Page 68

66
8. Read and Reset Reports
(Turn the control lock to the “X” or “Z” position)
You can check daily sales information by two methods and print 13 different types of reports.
Turn the control lock to the “X” position and choose the corresponding report item to print the Read
Report.
Turn the control lock to the “Z” position and choose the corresponding report item to print the
Reset Report.
The cash register provides two types of reports: daily reports and periodical reports.
The daily report can be divided into daily read (X1) and daily reset (Z1) report
The periodical report can be divided into periodical read (X2) and periodical reset (Z2).
You can use the read report to check the current sales information or data.
You can print daily or periodical report in “X” or “Z” mode.
After printing a Z report the sales data is reset.
8.1 Read Report (“X” position)
Turn the control lock to the “X” position
8.1.1 Printing Daily Reports
Select daily mode
1) →
Print daily full sales report
2) →
3)
8.1.2 Printing Periodical Reports
Select periodical mode
1) →
Print periodical full sales report
1) → After printing, the display shows as follows
3)
XRPT (D-Full Sales)
Press [ESC] to go back
XRPT (D-Full Sales)
**Attention**
Please wait, printing
Please don’t pull paper!
XRPT (P-Full Sales)
Press [ESC] to go back
XRPT (P-Full Sales)
**Attention**
Please wait, printing
Please don’t pull paper!
XRPT (Daily)
1) Full Sales Rpt
2) DEPT Sales Rpt
# then [enter] or PG DN
XRPT
1) Daily 2) Periodic
3) On-Screen 4) Training
Input # then [enter]
Page 69

67
8.1.3 Search the Particular Report (Display-only)
Certain data can be displayed when necessary.
1) Turn the control lock to the “X” location
2) →
3) →
4) →
(Net sales)
8.1.4 Serial Report Print
System flag programming
1207 1 Serial report print total report
1206 1 Serial report print cash in-drawer
1205 1 Serial report print hourly report
1204 1 Serial report print PLU report
1203 1 Serial report print DEPT group report(Z position is not)
Example: Print daily serial report of “X” position
1)Turn the control lock to the “X” position
2) →
3)Press key 5 times→ →
Now is printing daily full report , daily cash in-drawer , daily hourly report , daily PLU report , daily
DEPT group report of “X” position.
Note
* Do not print if system flag is 0 .
* Print serial report will clear it of “Z” position
8.1.5 Journal List
System reset is not clearing journal list . Whether to print journal after Z report issued .( please
refer the section 3.6 System Flag1708) .
XRPT (On-Screen)
1)Daily Report
2)Periodic Report
Input # then [enter]
XRPT (Daily OS)
1)Net Sales
2) Cash In-Drawer
# then [enter] or PG DN
XRPT (Daily OS)
Net Sales 150.00
Press [PGUP] go back or
Press [Esc] to exit
Page 70

68
8.2 Reset Report (“Z” position)
8.2.1 Reset Periodical Full Sales Report
Turn the control lock to the “Z” position
1) → 2) →
3)
Table of available reports
Report name
“X” position
(Read report)
“Z” position
(Reset report)
X1
(Daily)
X2
(Periodical)
Z1
(Daily)
Z2
(Periodical)
FULL REPORT
√ √ √
√
FULL DEPARTMENT SALES
√ √
FULL GROUP DEPT SALES
√ √
FULL PLU SALES
√ √ √
√
FULL PLU LINK to DEPT
√ √
ALL CLERK SALES
√ √ √
√
HOURLY REPORT
√ √
DRAWER REPORT
√ √ √
√
TRAINING REPORT
√ √ √
√
JOURNAL LIST
√
SERIAL REPORT
√ √ √
√
CASH DECLARATION
√
GUEST REPORT
√ √ √
√
ZRPT (Periodic)
1) Full Sales Rpt
2) PLU Sales Report
# then [enter] or PG DN
ZRPT (P-Full Sales)
**Attention**
Please wait, printing
Please don’t pull paper!
ZRPT
1) Daily 2 )Periodic
3) Clear Rpt 4) SaveLoad
Input # then [enter]
Page 71

69
1) The report number counter will increase by 1 when each report is printed.
2) It is advised that a Z report is taken on a daily basis.
Note
Training report can be printed while the ECR is in Training mode and not in normal transaction
mode.
See Appendix 3 “Sample report” for details
8.2.2 Using USB Memory for Uploading and Downloading Data
The Cash Register can use USB memory for Uploading and Downloading data directly (Uploading
data means write the setting contents from USB memory to Cash Register, Downloading data
means write the settings or reports from Cash Register to USB memory.)
The operation is as follows
(The operations of following data can just be performed at the Z position):
→
Downloading Data:
1. → → →
Writing the setting data of DEPT,Clerk,MainFlag,KeyLayOut,Tax,Word,Discount,Basic,FC and
Logo to the USB memory.
When you start to write the USB memory, the screen will display as follows:
After finish writing , the screen will display as follows :
Note
*Please don’t perform any operations or pull out the USB memory before the screen
resumed.
2. → → →
Writing the PLU setting data to USB memory.
3. → → →
Writing the Journal list data to USB memory.
ZRPT(SaveLoad)
1) Load
2) Save
Input # then [enter]
ZRPT(Saving)
Programming data
Do not remove power!!
ZRPT(Saving)
**FINISHED**
Press [Esc] to go back
Page 72

70
4. → → →
Writing the daily reports of DEPT,hour,Transaction,Clerk Net Sales,Clerk void, Clerk tax,Clerk
return and Clerk no sales to USB memory.
5. → → →
Writing the PLU daily reports to USB memory.
6. → → →
Writing the periodical reports of DEPT,Transaction,Clerk Net Sales,Clerk void, Clerk tax,Clerk
return and Clerk no sales to USB memory.
7. → → →
Writing the PLU periodical reports to USB memory.
8. → → →
Writing the full reports of DEPT,Transaction,Clerk Net Sales,Clerk void, Clerk tax,Clerk return
and Clerk no sales to USB memory
9. → → →
Writing the PLU full reports to USB memory
10. → → →
Writing the GUST reports to USB memory
11. → → →
Writing the NRGT reports to USB memory
Uploading Data
1. → → →
Writing the USB memory setting data of
DEPT,Clerk,MainFlag,KeyLayOut,Tax,Word,Discount,Basic,FC and Logo to Cash Register.
2. → → →
Writing the PLU setting data from USB memory to Cash Register.
Page 73

71
USB Memory transfer data file names corresponding to the table
Function
File name
Function
File name
DEPT data
Dept.txt
Guest data
Guest.txt
Clerk data
Clerk.txt
Kitchen printer data
KP.txt
MainFlag data
MainFlag.txt
Keyboard data
Key.txt
Word data
Word.txt
-,-%,+%
Discount.txt
Basic data
Basic.txt
Logo data
Logo.txt
DEPT daily report
DeptD.txt
PLU daily report
PluD.txt
Hourly daily report
HourD.txt
Transaction daily report
TrnD.txt
Clerk net sales daily
report
ClkNSD.txt
Clerk void daily report
ClkVD.txt
Clerk return daily report
ClkRTND.txt
Clerk no sales daily report
ClkNoSD.txt
Dept periodical report
DeptP.txt
PLU periodical report
PluP.txt
Transaction periodical
report
TrnP.txt
Clerk net sales periodical
report
ClkNSP.txt
Clerk void periodical
report
ClkVP.txt
Clerk return periodical
report
ClkRtnP.txt
Clerk no sales periodical
report
ClkNoSP.txt
DEPT full report
DeptFull.txt
PLU full report
PluFull.txt
Transaction full report
TrnFull.txt
Clerk net sales full report
ClkNS.txt
Clerk void full report
ClkVF.txt
Clerk return full report
ClkRtnF.txt
Clerk no sales full report
ClkNSF.txt
PLU data
Plu.txt
Page 74

72
APPENDIX
Appendix 1: PC communication mode
The Cash Register communicated by USB or and PC directly. Please make the lock located at L
place when the Cash Register communicated with PC, as other positions can not communicated
with PC.
The Cash Register can connect with USB scanner ( Position PRG and Position REG)
Appendix 2: Error codes and Messages
Error code
Reason/Solution
E 1
Wrong key press. Press [CLEAR] key to cancel.
E 2
The amount entered is too large. Press the [CLEAR] key to cancel and
re-enter the amount.
E 3
The transaction is not finished. Press [CASH] to finalize.
E 4
Password is required. Press the [CLEAR] key and enter password.
E 5
Clerk ID has not been entered. Press the [CLEAR] key to cancel and enter a
clerk ID.
E 6
System error. Please press the [CLEAR] key to clear the error.
E 7
The tender amount has not been entered. Press the [CLEAR] key and then
enter the tendered amount.
E 8
[ON/OFF] key is pressed and the Receipt [ON/OFF] is inactive. See the
information of Config Options 0108.
E 9
Shown when you turn the control key to other position than P while you are
programming a tax table. Turn back to P and finish the programming.
E c
The maximum number of items for the transaction has been reached. Please
finalize the sale.
E r
The report memory is full; please print the “Z” report (including daily report and
periodical report).
EP2
The printer is short of paper. Replace the paper roll.
E
General error. Please press the [CLEAR] key to correct.
E B
Battery low, change your batteries.
BAT LO
Battery low change your batteries immediately.
Page 75

73
Appendix 3: Sample reports
Full report:
***** X 1 *****
FULL REPORT
DEPT0001 8Q
$381.50
DEPT0002 3Q
$32.00
DPT SUBT 11Q
$413.50
TTL DISC -$0.50
DEPT TTL $413.00
-----------------------NOTXBL $413.00
-----------------------GROSS TL $426.00
NET TL $413.00
------------------------
------------------------
-%N 1N
$10.00
-%G 1N
$2.00
+%N 1N
$10.00
+%G 1N
$2.00
COUPON N 1N
$0.50
COUPON G 1N
$0.50
-----------------------CASH 7N
$371.00
CHECK 1N
$12.00
CHARGE 1N
$15.00
CARD1 1N
$15.00
R/A CA 1N
$100.00
P/O CA 1N
$100.00
-----------------------CAID $356.00
CKID $12.00
FCID $15.00
-----------------------RPRT CNT X1 1
------------------------
CLERK 1
ENT TL 10N
$413.00
------------------------
12-20-2009 14:28
CLERK 1 0013
Check sale
Discharge rate for Single item
Surcharge rate for single item
R/A by cash
P/O by cash
Report of cashier
Sales quantity
X1 consecutive
numbers of report
Cash in drawer
Check in drawer
Cash sale times 7
Cash sale amount 371.00
Sales amount
Cash sale
Charge sale
Discharge for subtoral and total
FC in drawer
Card sale
Page 76

OP-680
0912
 Loading...