

Optilia W10x-HD, W20x-HD Installation Instructions Manual
Optilia Instruments AB
www.optilia.eu
Rev E, February 2012
Installation instructions for Optilia HD Cameras
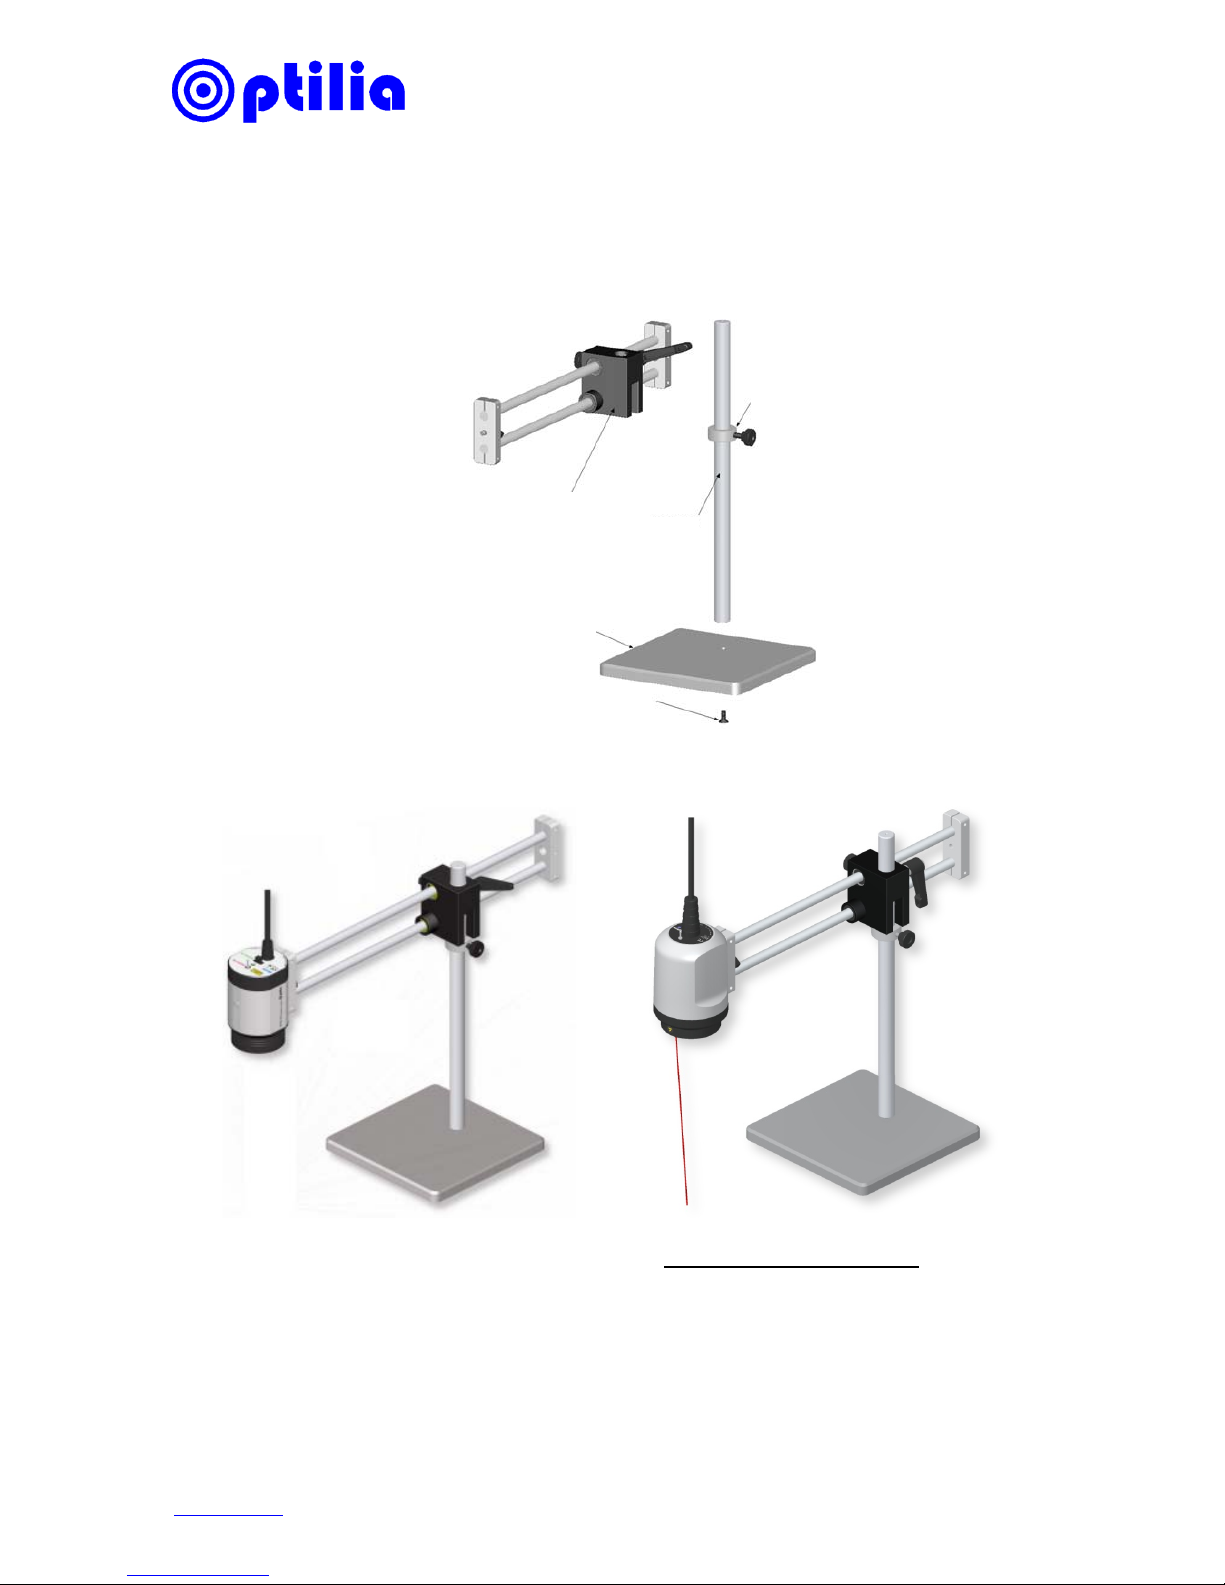
1. Assemble the Boom Stand according to the bellow picture.
2. Put the stand on a flat and stable working bench and mount the W10x-HD/W20x-HD
camera onto the horizontal Boom.
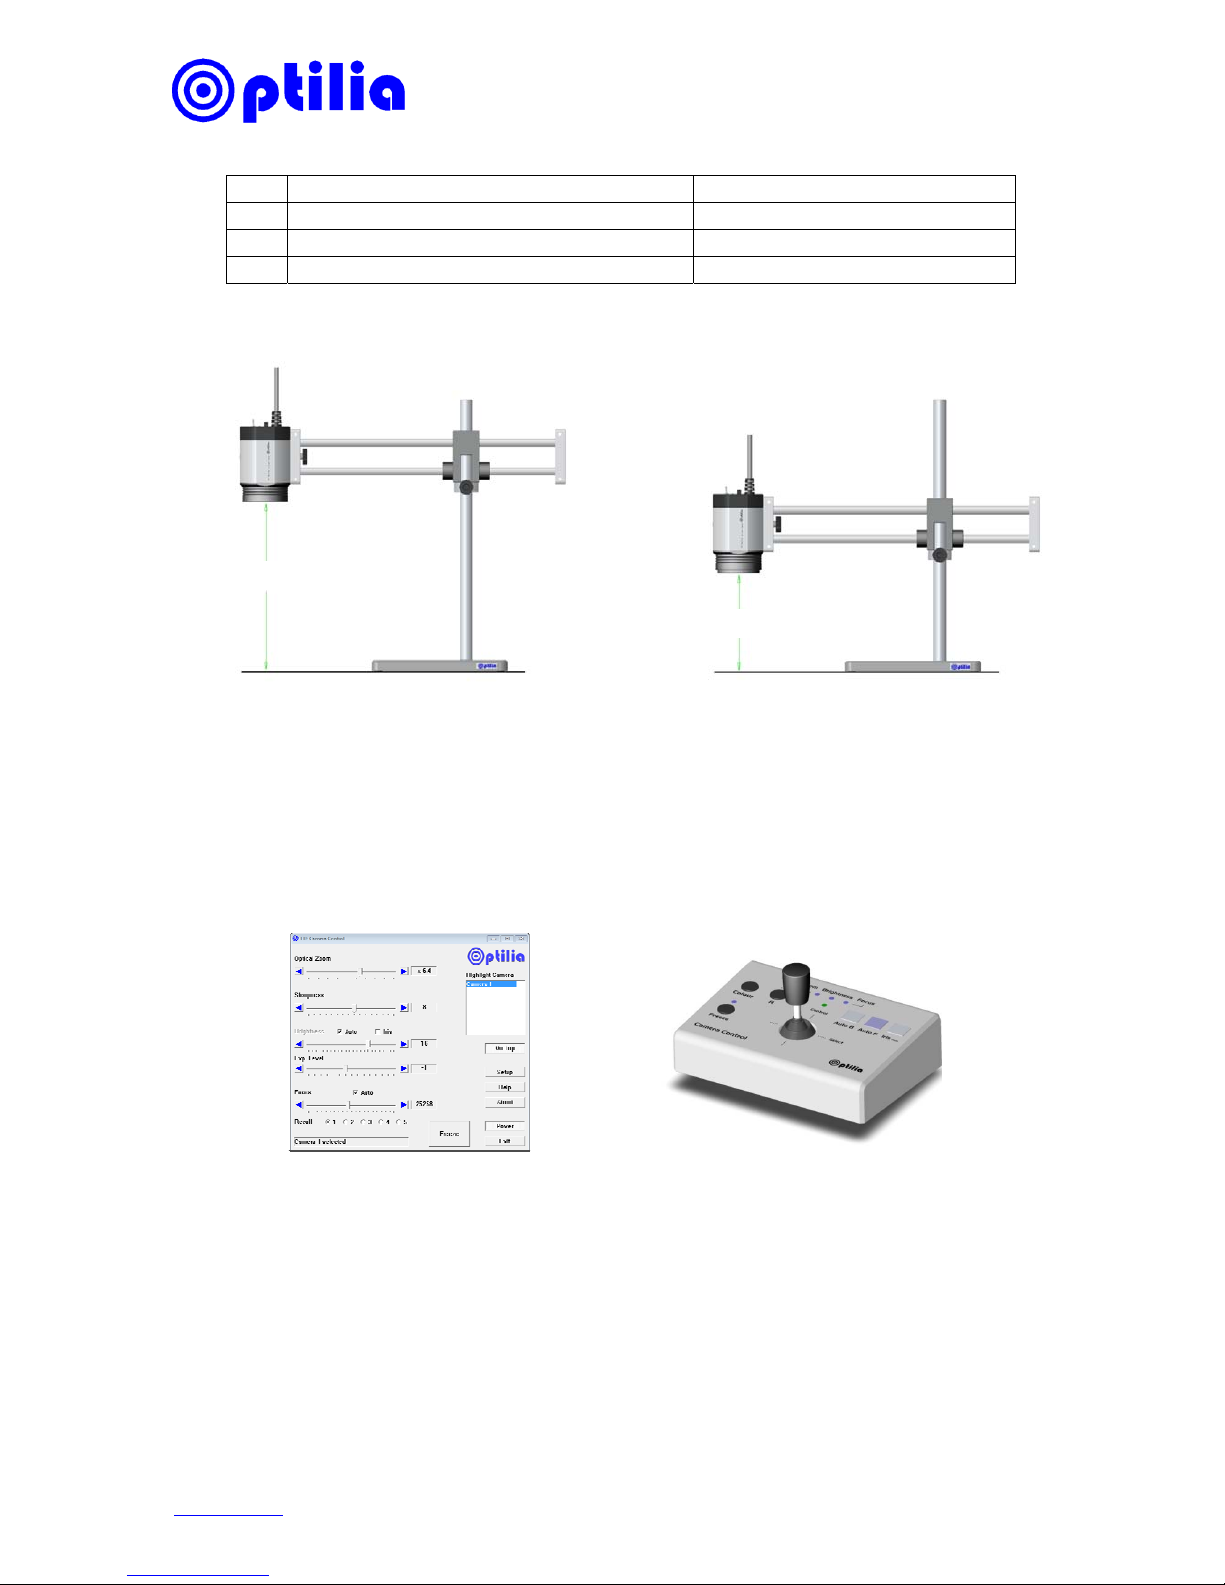
3. Adjust height of the Boom for approximately 245mm Working distance measured
from front edge of the camera. HD cameras with standard optics has a focusing
interval of approximately 190-245mm. Auto focus will not function properly outside
this range.
4. Working distance of the camera needs to be decreased according to the bellow table
if close-up lenses are attached:
Stand Boom Assembly
Stopper Ring
Vertical Rod
Base
M6 screw
Optilia Instruments AB
www.optilia.eu
Rev E, February 2012
No. Lens Working distance range
1 Standard lens (no additional Close-up)~ 245-190 mm
2 +5 Close-up lens (f=200mm)
~
103 to 90 mm
3 +10 Close-up lens (f=100mm)
~
61 to 54 mm
Note: Working distances are measured from front edge of the camera without UV-filter.
5. Connect the camera to Y/Pb/Pr Component Video inputs of a FULL HD monitor or
TV, attach the power supply and connect to COM (or USB) port of your PC or laptop
via provided Y-cable. Select and set input of your monitor to Component video.
6. If you have ordered a Control Unit, please refer to instructions manual of this device
for how to proceed.
7. Install Optilia HD Camera Control software onto your computer.
8. Turn on the HD Camera and start the Control software. Select the camera (Highlight
camera) in order to establish the communication.
Standard Working Distance without extra lenses
Working Distance with +5 Close-up lens
Camera Control Software interface
Camera Control Unit (Optional)
100 mm
240 mm
 Loading...