

Page 1
Optikinetics Ltd.
38 Cromwell Road Luton LU3 1DN England
Phone +44 (0)1582 411413
Fax +44 (0)1582 400613
e-mail [email protected]
Web www.optikinetics.com
TM
Multi-Mirror
GS Multi-Mirror Operating Instructions
The OPTI Multi-Mirror has small mirrors, laid out in a pattern on a convex rotating disc to create
multiple animated imagery. Perfect for use with OPTI Abstract Wheels, especially snow, the
OPTI Multi Mirror also fragments and animates other effects with spectacular results.
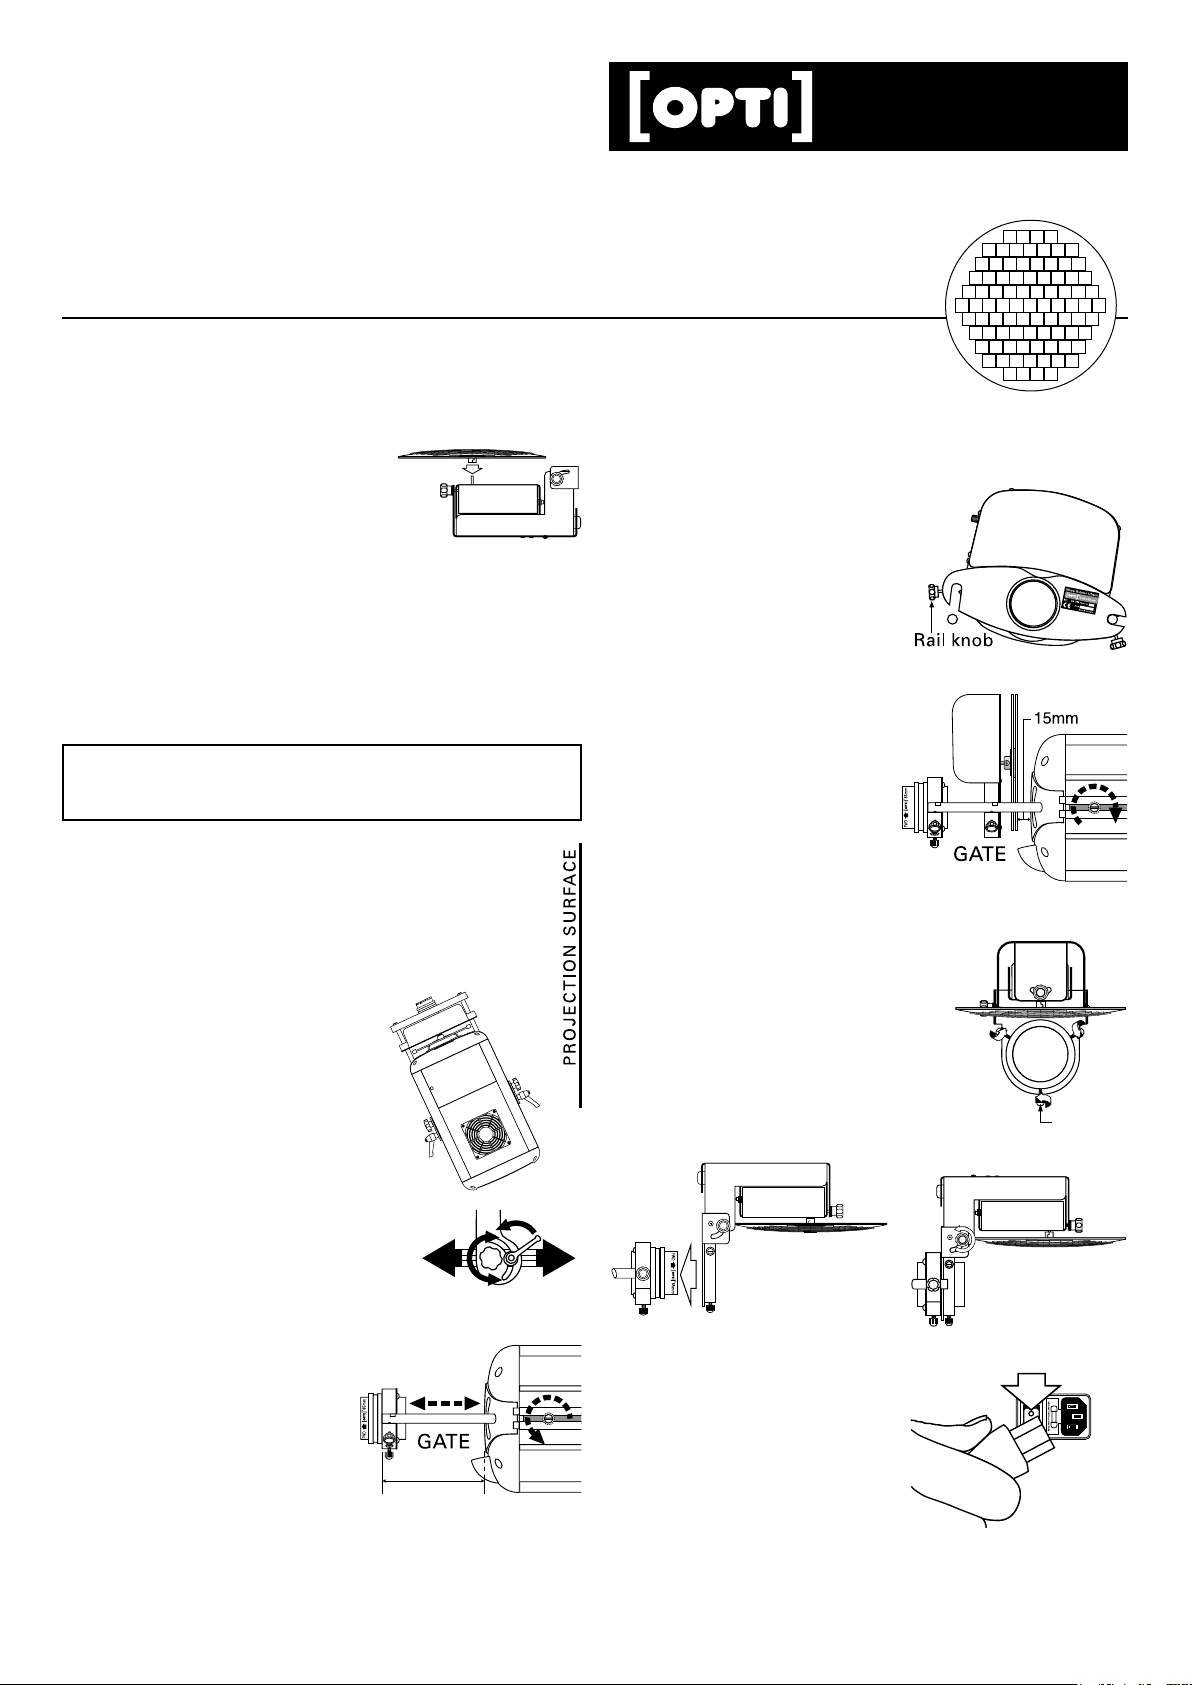
The mirror disc is packed separately
from the main body. Unpack both
items and firmly push the central
boss on the mirror disc over the
‘D’ section drive shaft on the carriage.
The Multi-Mirror is now assembled and ready to fit onto
the Mirror Bracket (supplied) fitted onto the projector.
Caution: Take care to ensure that the load is evenly
distributed while attaching the mirror disc. Avoid twisting
or distorting, as the individual mirrors may become
detached. Should this happen, reattach using silicone
adhesive.
IMPORTANT LENS INFORMATION
Only use 85mm to 150mm lenses. The wide angle
45mm and 60mm lenses are not suitable.
POSITION THE PROJECTOR
Before fitting the mirror place or mount the projector
in a position and at an angle from where the imagery
can be projected onto the desired surface. Then, fit
the required Effect in the gate.
Adjusting the Vertical angle
of the Projector
There are two types of adjustment
both achieved by loosening the
central/pivot knobs and locking levers.
1. Rotated on it’s axis (to adjust
Vertical angle).
2. Moved along the body of the
projector (to adjust balance).
Both adjustments may be necessary
when moving the Hanging Bracket
around the Projector from above to below or vice versa.
Fitting an Effect
1. Fit the Effect(s) onto the Effect Accessory.
This is usually a ‘push-on’ but,
in the case of 575 Safe Wheels,
may require a cross head
screwdriver (see Effect Accessory
instructions for details).
2. Loosen the Rail knobs on the
Effect Accessory until the
screw ends are flush or
recessed.
3. Fit the Effect Accessory onto
the 12V~ Projector rails,
between the body of the
Projector and the
Lens Housing, with
the effect 15mm from the
body of the Projector.
FIT THE MIRROR ONTO LENS HOUSING1.
Loosen the 3 retaining screws
around the mounting collar of
the Mirror until the ends of the
screws, inside the ring, are flush
or recessed.
2. Gently push the Mirror mounting
collar over the ring on the
Lens Housing until flush.
Retaining
Screw
Before Fitting an Effect
Ensure that the rails protrude
at least 105mm from the body
of the Projector.
Avoid rails protruding too far
forward. They can obstruct
the projected light.
1. Loosen the Rail
Adjustment Screws on
the side of the Projector.
* Take care not to overtighten the Rail Adjustment Screws as this may damage them.
2. Slide both Rails in or out
to desired position.
3. Tighten the Rail Screws*.
105mm
Minimum
3. Turn the projector on (with
the effect to be projected,
on the appropriate Effect
Accessory, in the gate).
To turn on, plug the IEC lead
into the socket on the back of
the projector and ‘switch’ on.
The imagery will now project and, if the mirror is already
set at an angle, will be deflected by the static mirrors.
Page 2
MIRROR ADJUSTMENTS
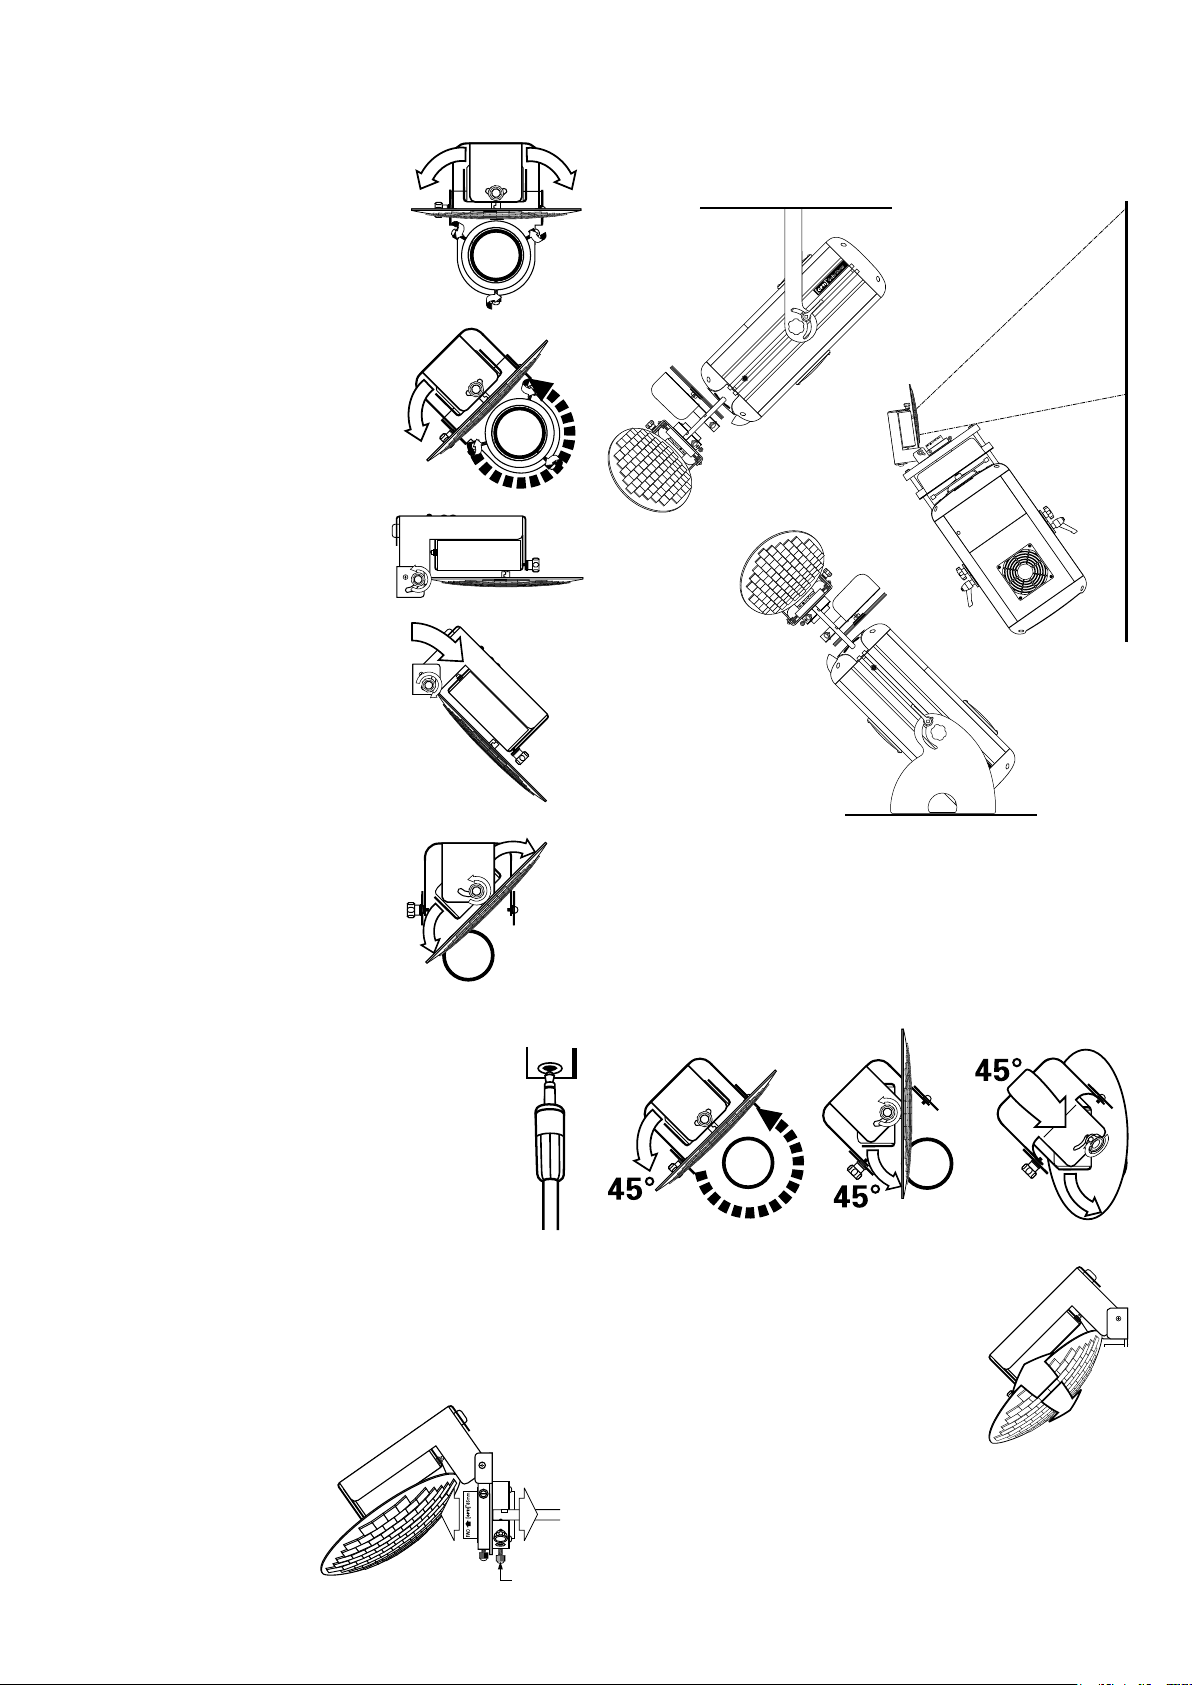
Adjust the position of the Multi-Mirror around
the Projector Lens
1. Loosen the 3 screws around the
perimeter of the Mounting Collar.
2. Rotate the Multi-Mirror body
through 360º to get the imagery
in approximately the desired
location.
3. Tighten the 3 screws on the
collar. Do not fully tighten these,
as further adjustment may be
required.
FALLING OR RISING IMAGERY
Adjust the angles of the Projector
If a “falling” or “rising” image is required, the projector will
need to be set at angles in both the horizontal and vertical
planes. For best results 45º is recommended.
Adjust the Main Angle of
the Multi-Mirror
1. Loosen the knob on the side
of the Mirror Body where
it connects to the Mounting
Collar.
2. Tilt the Multi-Mirror body to
the desired position.
3. Tighten the knob. Do not fully
tighten as further adjustment
may be required.
Adjust the Carriage of the
Multi-Mirror
1. Loosen the knob on the end
of the Mirror Body where
it connects to the Carriage.
2. Tilt the Multi-Mirror Carriage
to the desired position.
3. Tighten the knob. Do not fully
tighten as further adjustment
may be required.
45º
The Projector can be
hanging, mounted or
freestanding using its
bracket or fitted onto a
GS Stand (33.0099).
If a random image direction is required, the angle of the
projector is less important.
Adjust the angles of the
Multi-Mirror
Once again, for best results, it is recommended that each
angle of the Multi-Mirror is adjusted to 45º.
PLUGGING IN THE MIRROR
1. Plug the Mirror Lead into the jack plug
socket on the underside of the Lens Holder.
Ensure the lead does not interfere with the
effect or pass through the gate of the projector.
The motorised Mirror will now start to move
the image.
3. If necessary adjust and re-adjust the Mirror and
Projector to achieve desired movement and position.
Position around
the Projector Lens
Fine-Tune Set-up
FOCUS THE LENS
To focus or re-focus the imagery being projected:
1. Loosen the Lens Retaining Screw.
2. Slide Lens in or out to
achieve desired focus
making sure that the
lens does not rub
against the mirror disc*.
3. Tighten Lens Retaining
Screw
* If desired focus cannot be achieved without the lens rubbing re-adjust the rails on the projector.
Lens
Retaining
Screw
If required, fine tune the set-up using
a combination of tilting and rotating
the Projector and Multi-Mirror until the
desired motion is achieved.
Once the projected imagery is in the
desired location and moving in the correct direction,
tighten all screws, knobs (or lever) and securing bolt. It is
advisable to securely fix the projector whether suspended
or shelf mounted.
If projected image requires any further focus improvement,
adjust focussing lens.
Carriage Angle Main Angle
Issue1: 14.01.2010
 Loading...