

Page 1
Optikinetics Ltd.
38 Cromwell Road
Luton LU3 1DN England
Website www.optikinetics.com
K Mirror
OPERATING INSTRUCTIONS (Circular Motion)
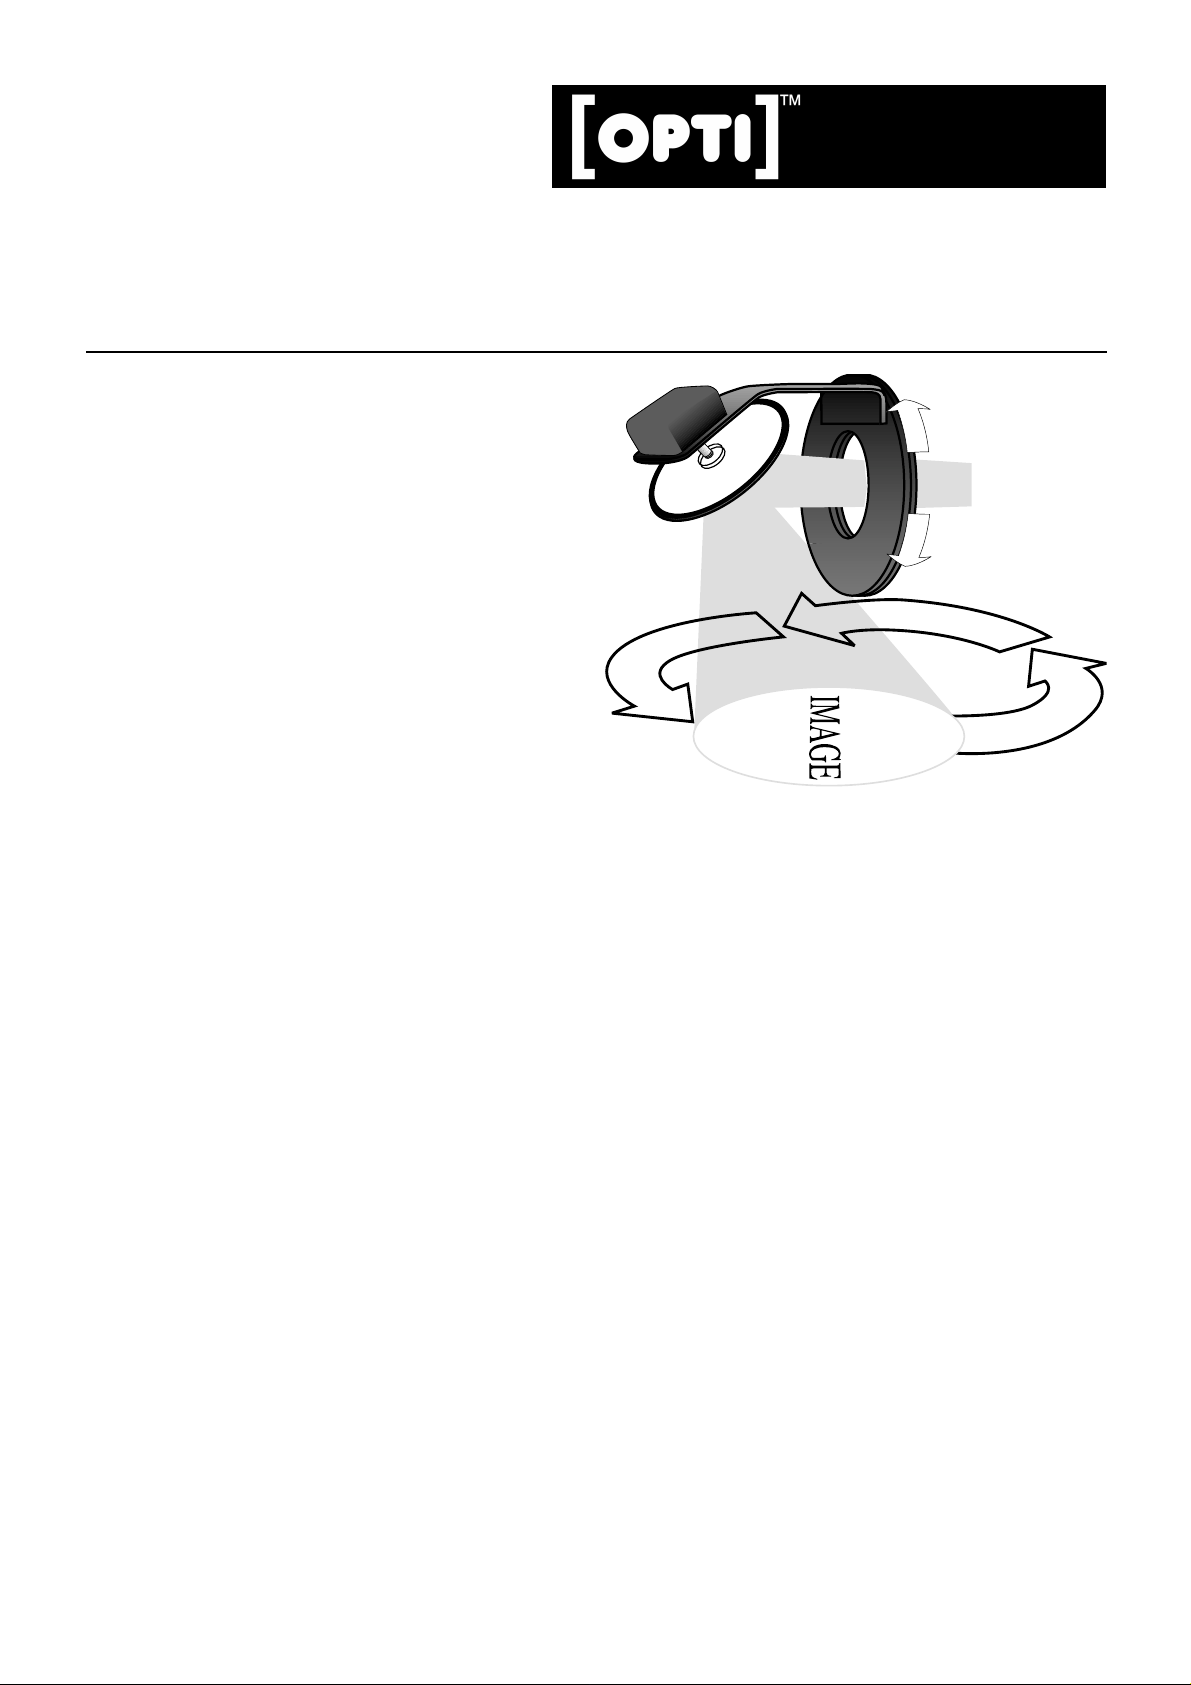
The OPTI K Range Circular Motion Mirror moves an
image in an adjustable circular orbit which can be
positioned at any angle through 360°.
POWER SUPPLY 12V~
PROJECTORS
The K range of Effect Projectors. K2, K2+, K4 and K1 if
fitted with adjustable rails. Also fits the Solar 250 with
K Mirror Mounting Brackets (FG2029).
LENSES
60mm, 85mm, 100mm and zoom lenses. Wider angle
lenses like the 45mm and 25mm are not suitable.
FITTING TO A PROJECTOR
1a. K Range
i) Check le ngth of rails on projector. If necessary,
adjust to appropriate length to accommodate the
mirror by loosening the rail knobs.
ii) Loosen knobs on the angled legs of the mirror
cradle.
iii) Insert angled sections into the ‘T’ section of
the projector’s rails. Re-tighten knobs.
1b. Solar 250
i) Fix mounting brackets to side of projector.
ii) Substitute flat ended nylon spacers for the
scooped saddle washers supplied with the mirror.
iii) Insert thread of knobs on angled legs into the
‘U’ section of the mounting brackets with the
angled metal sections above and spacers below.
iv) Tighten knobs.
2. Loosen the adjuster knob on the ‘ring cradle’ to
rotate whole mirror assembly to desired position
and then re-tighten.
3. Switch on projector with effect in the gate.
4. Tilt mirror by hand to approximately 45° and
focus the projected image by adjusting lens.
5. Tighten rails, lens and mirror fixings.
6. Fit plug into one of the 12V~ sockets on the side
of the Effects Projector. The mirror will now
star t to o p erate.
7. Tilt mirror, by hand, to achieve the desired orbit.
360°
IMPORTANT NOTES
AN EFFECT MUST ALWAYS BE IN THE GATE OF
THE PROJECTOR WHEN IN USE.
READ THE EFFECT PROJECTOR MANUAL OR
INSTRUCTIONS AND THIS INSTRUCTION
SHEET BEFORE USE.
IF SUSPENDED ATTACH A SAFETY CHAIN TO
THE EFFECTS PROJECTOR AND MIRROR.
DO NOT OPERATE IN DAMP OR WET CONDITIONS
OR ALLO W WA TER T O ENTER.
DO NOT OPERATE IF GLASS IS CRACKED.
DO NOT ATTEMPT TO SERVICE THE MIRROR
OR PROJECTOR UNLESS YOU ARE QUALIFIED
AND WORKING UNDER THE DIRECTION OF
THE MANUFACTURER OR THEIR AGENT.
CLEANING
Cleaning can be done in-situ but is best done with the
mirror removed from the projector with the rubber
beading around the mirror also removed. Use a soft
tissue or lens cloth with a little methylated spirit or
pure alcohol.
CHANGING
1. Remove screw from back of mirror which attaches
it to the motor arm.
2. Replace w ith new mirror in reverse procedure.
Page 2

Optikinetics Ltd.
38 Cromwell Road
Luton LU3 1DN England
Website www.optikinetics.com
Solar 100C
IMPORTANT SAFETY INSTRUCTIONS
When using your photographic equipment basic safety precautions should be followed, including the following:
1. Read and understand all instructions before using the equipment.
2. Close supervision is necessary when any appliance is used by, or near, children. Do not leave appliance
unattended while in use.
3. Care must be taken, as burns can occur from touching hot par ts.
4. The appliance switch is provided with the symbol ‘O‘ indicating ‘O FF ’ and ‘l‘ indicating ‘ON‘.
5. Do not operate appliance with a damaged cord, or if the appliance has been dropped, or damaged, until it
has been examined by a qualified service person.
6. Position the cord so that it will not be tripped over, pulled, or come into contact with hot surfaces.
7. If an extension cord is necessary, a cord with a current rating at least equal to that of the appliance should
be used. Cords rated for less amperage than the appliance may overheat.
8. Always unplug appliance from electrical outlet before cleaning and servicing and when not in use. Never
yank cord to pull plug from outlet. Grasp plug and pull to disconnect.
9. Let appliance cool completely before packing. Loop cord loosely around appliance when storing.
10. To reduce risk of electric shock, do not immerse product in water or other liquids.
11. To reduce the risk of electric shock, do not dismantle this appliance, but take it to a qualified repairers when
servicing is required. Incorrect reassembly can cause electric shock when the product is used
subsequently.
12. The use of an accessory attachment not recommended by the manufacturer may cause a risk of fire,
electric shock, or injury to persons.
13. Connect this appliance to a grounded outlet.
14. Disconnect this unit from its source of supply before replacing the projection lamp.
15. The axis across the width of the projector should remain horizontal if possible. Tilting the projector along
this axis may reduce lamp life.
16. During focussing of the projected image beware of rotating the projection lens too far anti-clockwise, as
this may cause the lens to become separated from the projector, and perhaps dropped and broken which may
cause injury.
17. DO NOT attempt lamp replacement while the unit is still hot as there is a risk of burns from the lamp.
18. The procedures described in the Maintenance section must be carried out by qualified service personnel
who should work under the authority of the manufacturers recognised agent.
19. After any maintenance or cleaning all parts must be absolutely dry before refitting to the projector.
20. When replacing the cover of the projector always ensure that the wiring to the lamp and 12V~ sockets
is correctly engaged within the slots in the cover and not trapped.
SAVE THESE INSTR UCTIONS
 Loading...