

Optika TB-3W, TB-5W Instruction Manual

Version: 1
Issued: 08, 06, 2018
Model
TB-3W
TB-5W
TABLET PC
INSTRUCTION MANUAL
Page 2
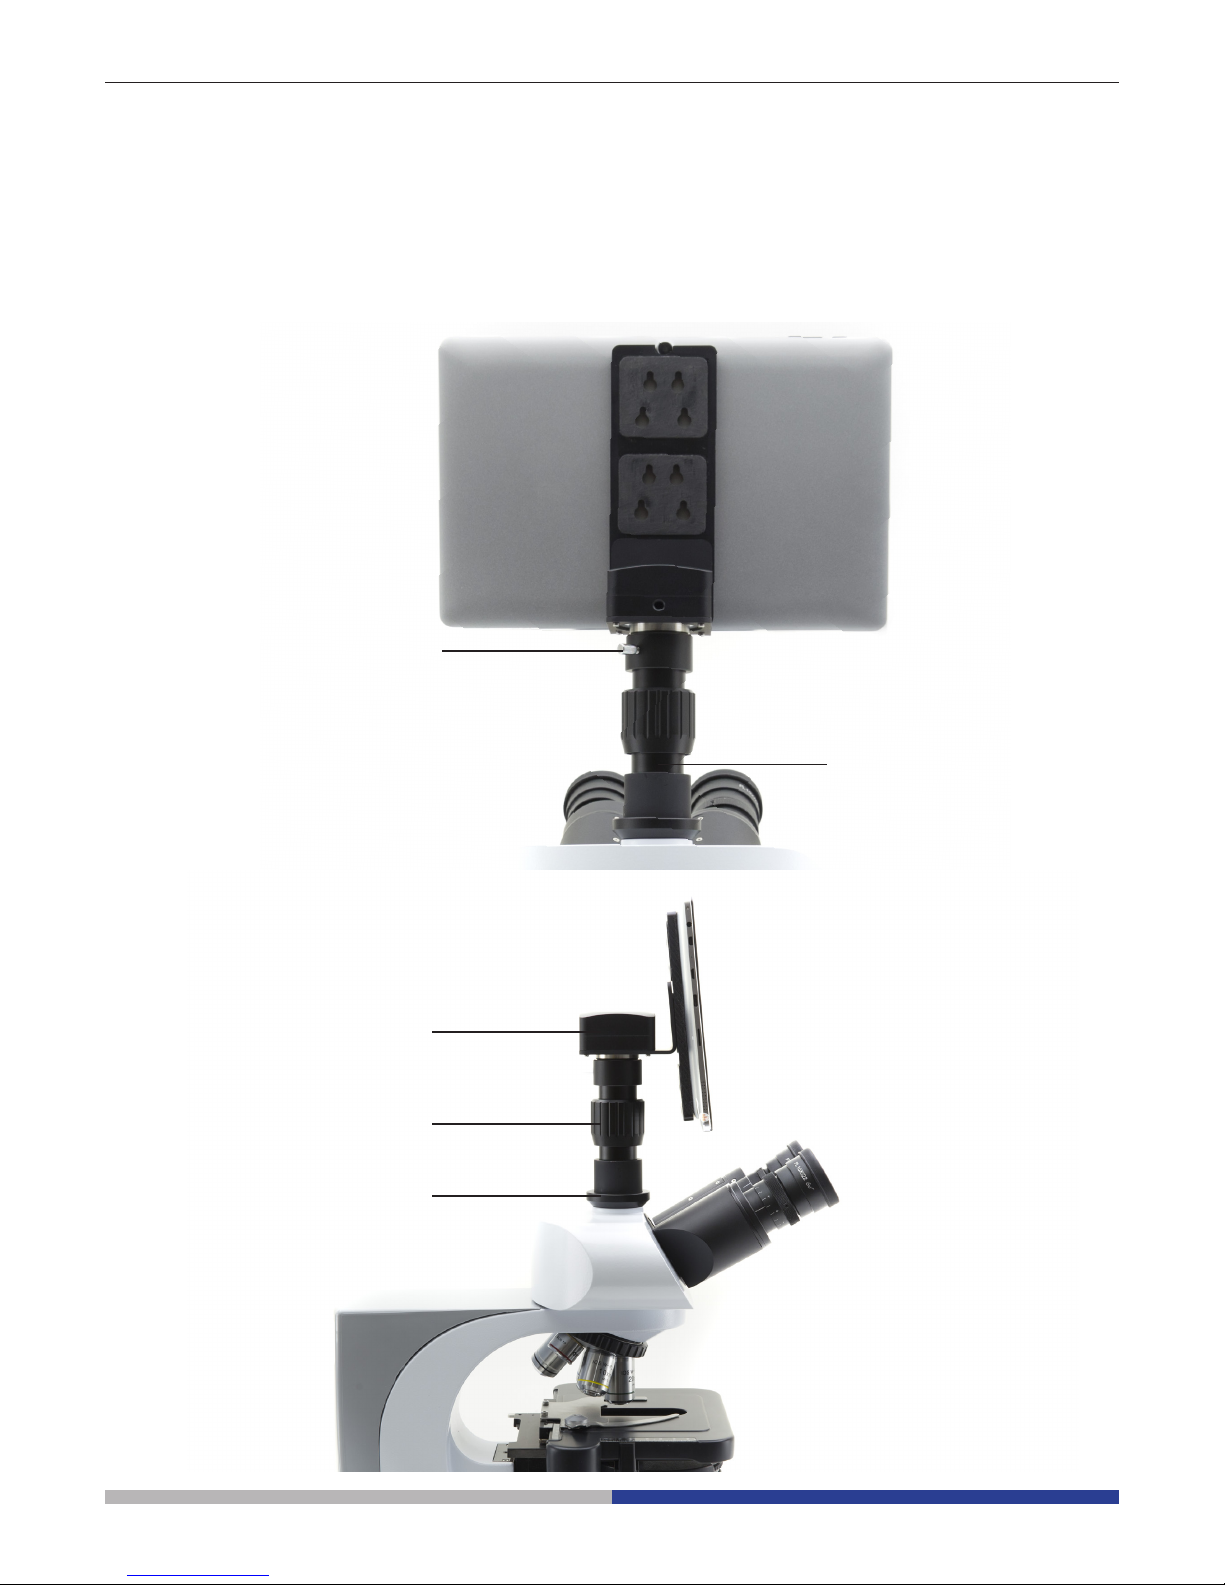
1. SCREW THE ADAPTOR TO THE
C-MOUNT THREAD OF THE
CAMERA
2. PLACE THE
MOUNTED ADAPTOR
INTO THE PHOTO PORT AND
LOCK THE SCREW
TABLET PC – CONNECTION TO PHOTO PORT
Your tablet has been set with the auto-rotation function disabled: this prevents any ipping of the LiveView in
order to get a continuous and as large as possible view of your slide, also when the tablet is removed from the
holder.
To enable this function again is very easy: you can activate the auto-rotation by swiping the screen on his bottom
right side and selecting Settings + Screen. Anyway, it’s not suggested to activate the function when the camera
is in LiveView mode as it may give troubles when the camera runs at high resolution.
CAMERA
ADAPTOR
LOCKING
SCREW
Page 3
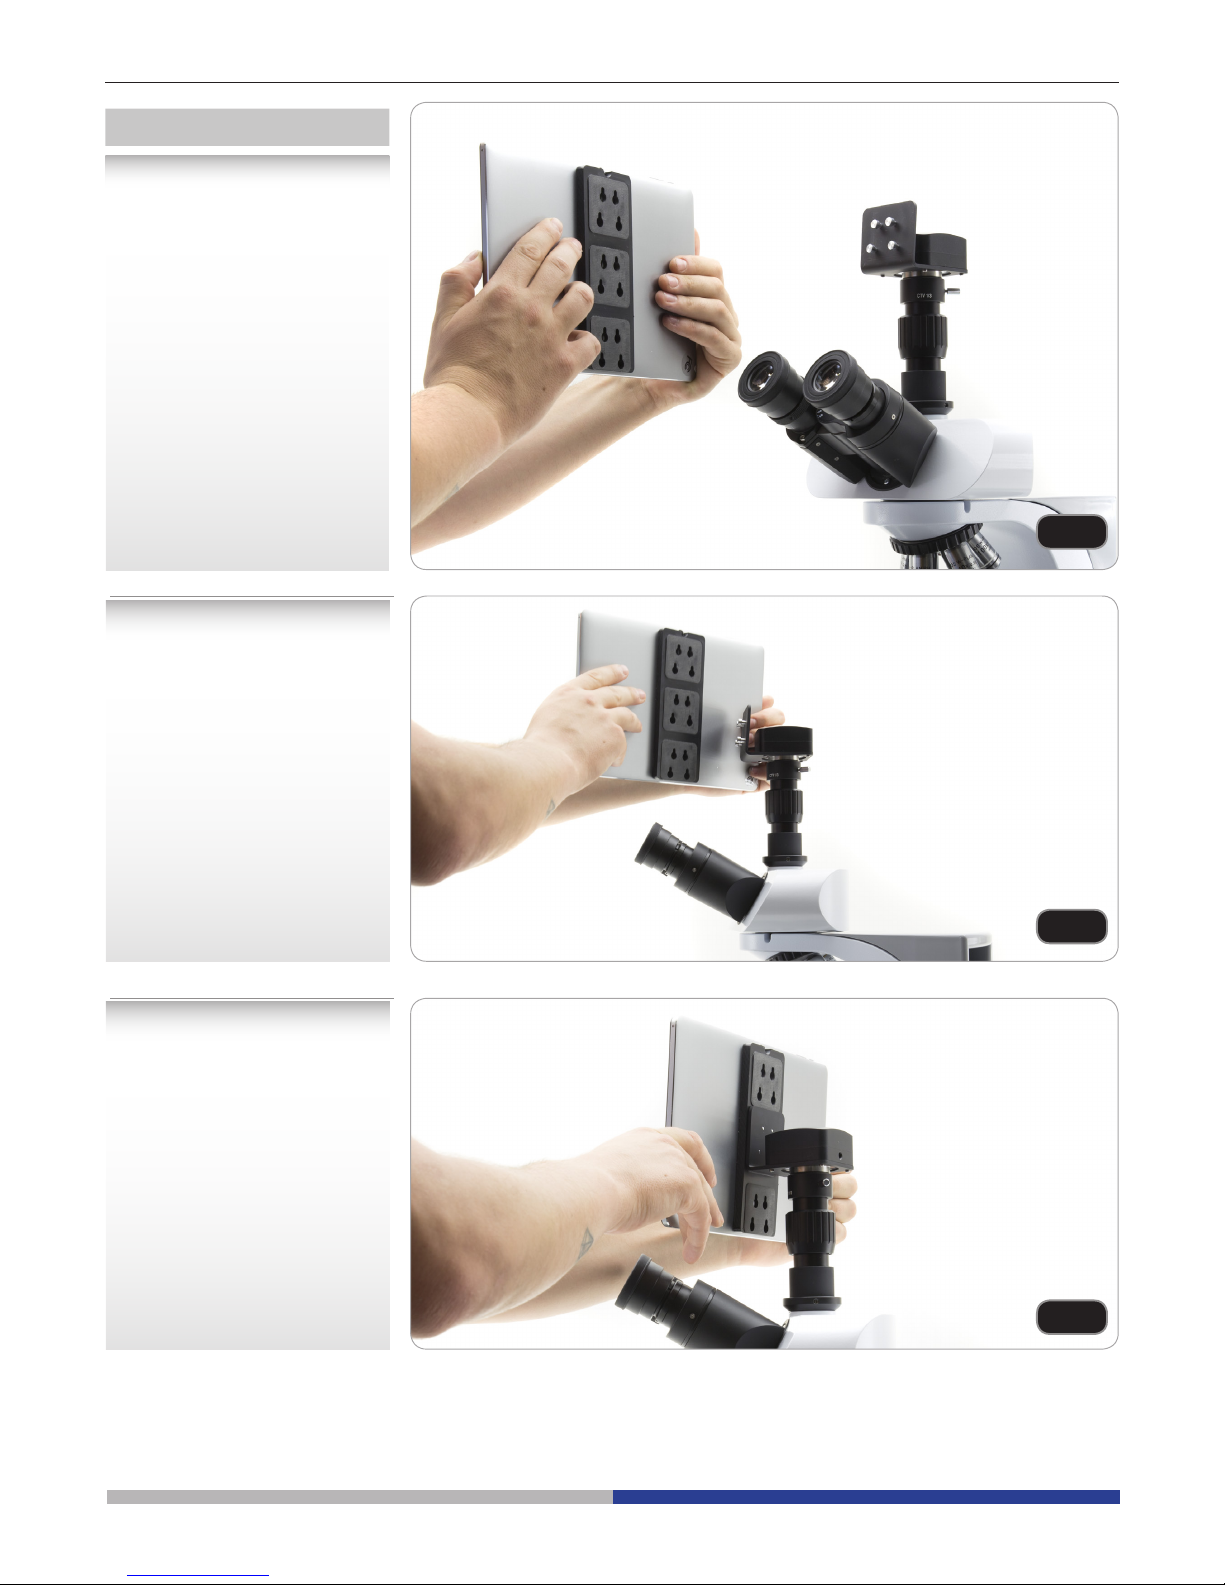
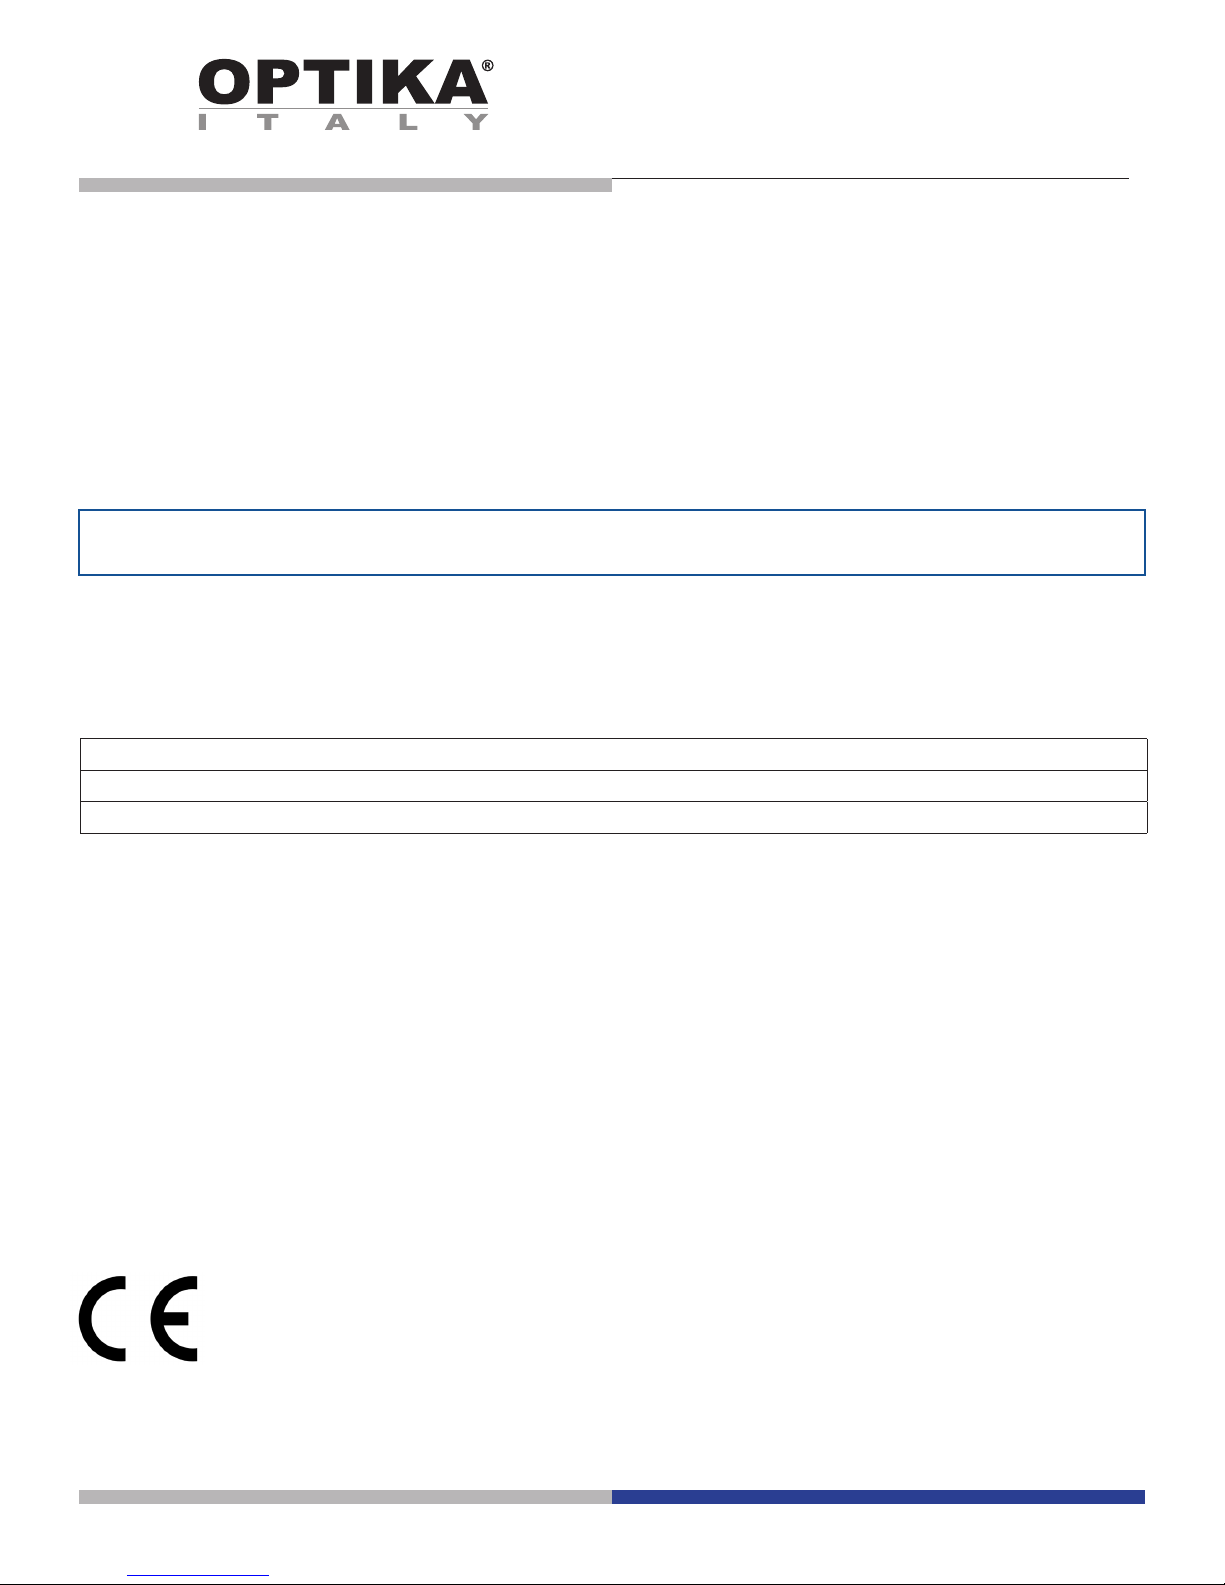
You can choose three
different height positions.
Insert the round holes into
the screw heads, then push
downward. The tablet is
now ready to be connected
to the camera.
Fig.1
Fig.2
Fig.3
DETACHABLE SYSTEM
The tablet can be xed to the
camera, using the special
locking-screw system.

Page 4

Modello
TB-3W
TB-5W
TABLET PC
MANUALE D’ISTRUZIONI
Versione: 1
Emesso il: 08, 06, 2018

Pagina 6
TABLET PC – COLLEGAMENTO A TERZA USCITA
Questo Tablet è stato impostato con la rotazione dello schermo disattivata: questo evita la rotazione del video
della telecamera e quindi ne permette una visualizzazione a tutto schermo continuativa anche durante la
rimozione del Tablet dalla staffa.
Per riattivare la rotazione basta semplicemente strisciare verso destra nella parte bassa dello schermo e
selezionare Settings + Screen.
Questo non è comunque consigliato con la telecamera collegata in modalità Live in quanto potrebbe creare
disturbi alla visualizzazione del Live stesso a risoluzioni elevate.
CAMERA
ADATTATORE
VITE DI FISSAGGIO
1. AVVITARE L’ADATTATORE SULLA
FILETTATURA DELLA TELECAMERA
2. COLLOCARE
L’ADATTATORE NELLA TERZA
USCITA FOTO/VIDEO E
STRINGERE LA VITE DI
FISSAGGIO

Pagina 7
E’ possibile scegliere tra tre
diverse posizioni in altezza.
Inserire la parte arrotondata
dei fori nelle teste delle viti
di ssaggio, quindi premere
verso il basso. Il tablet è ora
pronto per essere connesso
alla telecamera.
SISTEMA RIMOVIBILE
Il tablet può essere ssato
alla telecamera, utilizzando
lo speciale sistema di ssaggio a viti.
Fig.1
Fig.2
Fig.3

Pagina 8
Modelo
TB-3W
TB-5W
TABLET PC
MANUAL DE INSTRUCCIONES
Versión: 1
Publicado: 08, 06, 2018
 Loading...