

OPTIKA MICROSCOPES - ITALY
www.optikamicroscopes.com - info@optikamicroscopes.com
Ver. 1.0.0
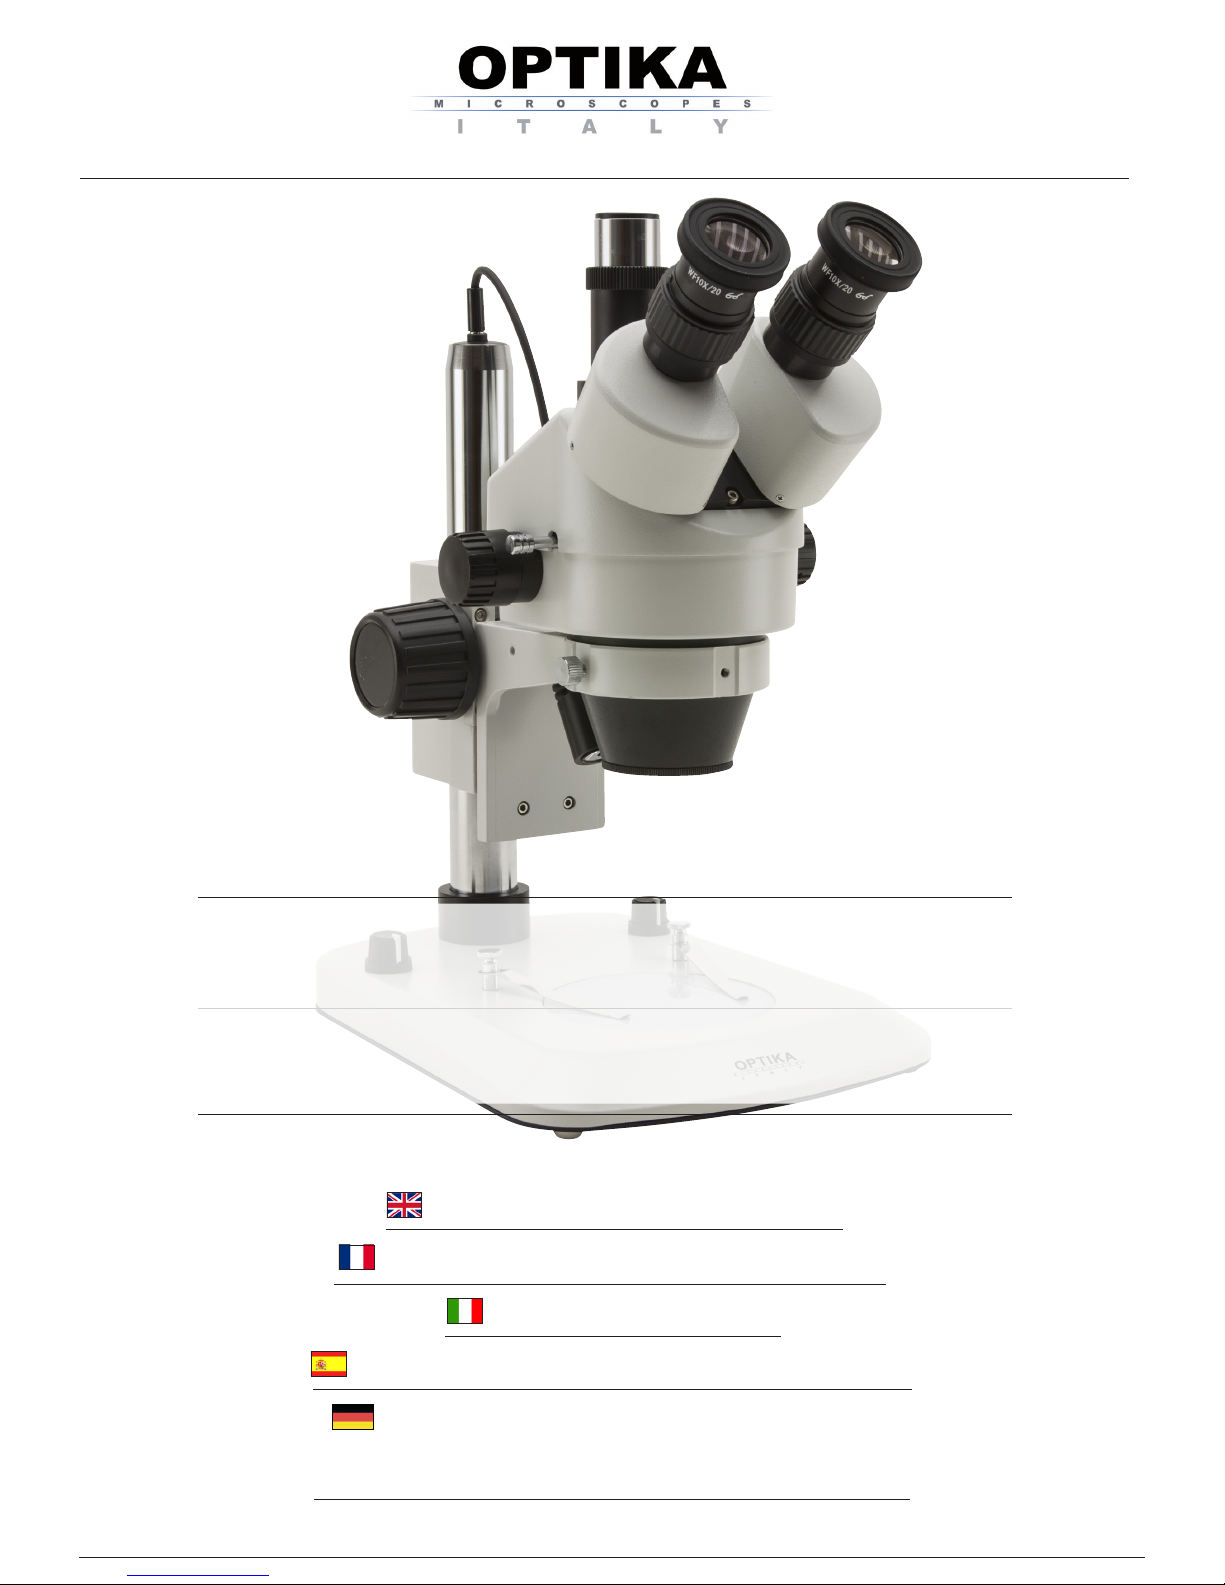
SZM-LED1
SZM-LED2
OPERATION MANUAL
MANUEL D’INSTRUCTIONS
GUIDA UTENTE
MANUAL DE INSTRUCCIONES
BEDIENUNGSANLEITUNG

Page 2
INDEX
1.0 DESCRIPTION page 4
2.0 INTRODUCTION page 5
3.0 UNPACKING AND ASSEMBLY page 5
4.0 USING THE MICROSCOPE page 6
5.0 MAINTENANCE page 7
6.0 ELECTRICAL SPECIFICATIONS page 8
7.0 OPTIONAL ACCESSORIES page 8
8.0 RECOVERY AND RECYCLING page 9
Page 3
This microscope is a scientic precision instrument designed to last for many years with a minimum of maintenance. It is built to high optical and mechanical standards and to withstand daily use.
Optika reminds you that this manual contains important information on safety and maintenance, and that it
must therefore be made accessible to the instrument users.
Optika declines any responsibility deriving from instrument uses that do not comply with this ma-nual.
Safety guidelines
This manual contains important information and warnings regarding safety about installation, use and
maintenance of the microscope. Please read this manual carefully before using the equipment. To
ensure safe use, the user must read and follow all instructions in this manual. OPTIKA products are
designed for safe use in normal operating conditions. The equipment and accessories described in
the manual are manufactured and tested according to industry standards for safety instrumentation
laboratory. Misuse can cause personal injury or damage to the instrument. Keep this manual at hand
close to the instrument, for an easy consultation.
Electrical safety
Before connecting the power cord to wall outlet, ensure that your mains voltage for your region corresponds to the voltage supply of the instrument, and that the illuminator’s switch is in position OFF. The
user must observe the safety regulations in force in his region. The instrument is equipped with CE
safety marking, in any case the user has full responsibility concerning the safe use of that instrument.
Warning/Caution symbols used in this manual
The user should be aware of safety aspects when using the instrument. Warning or hazard symbols
are shown below. These symbols are used in this manual.
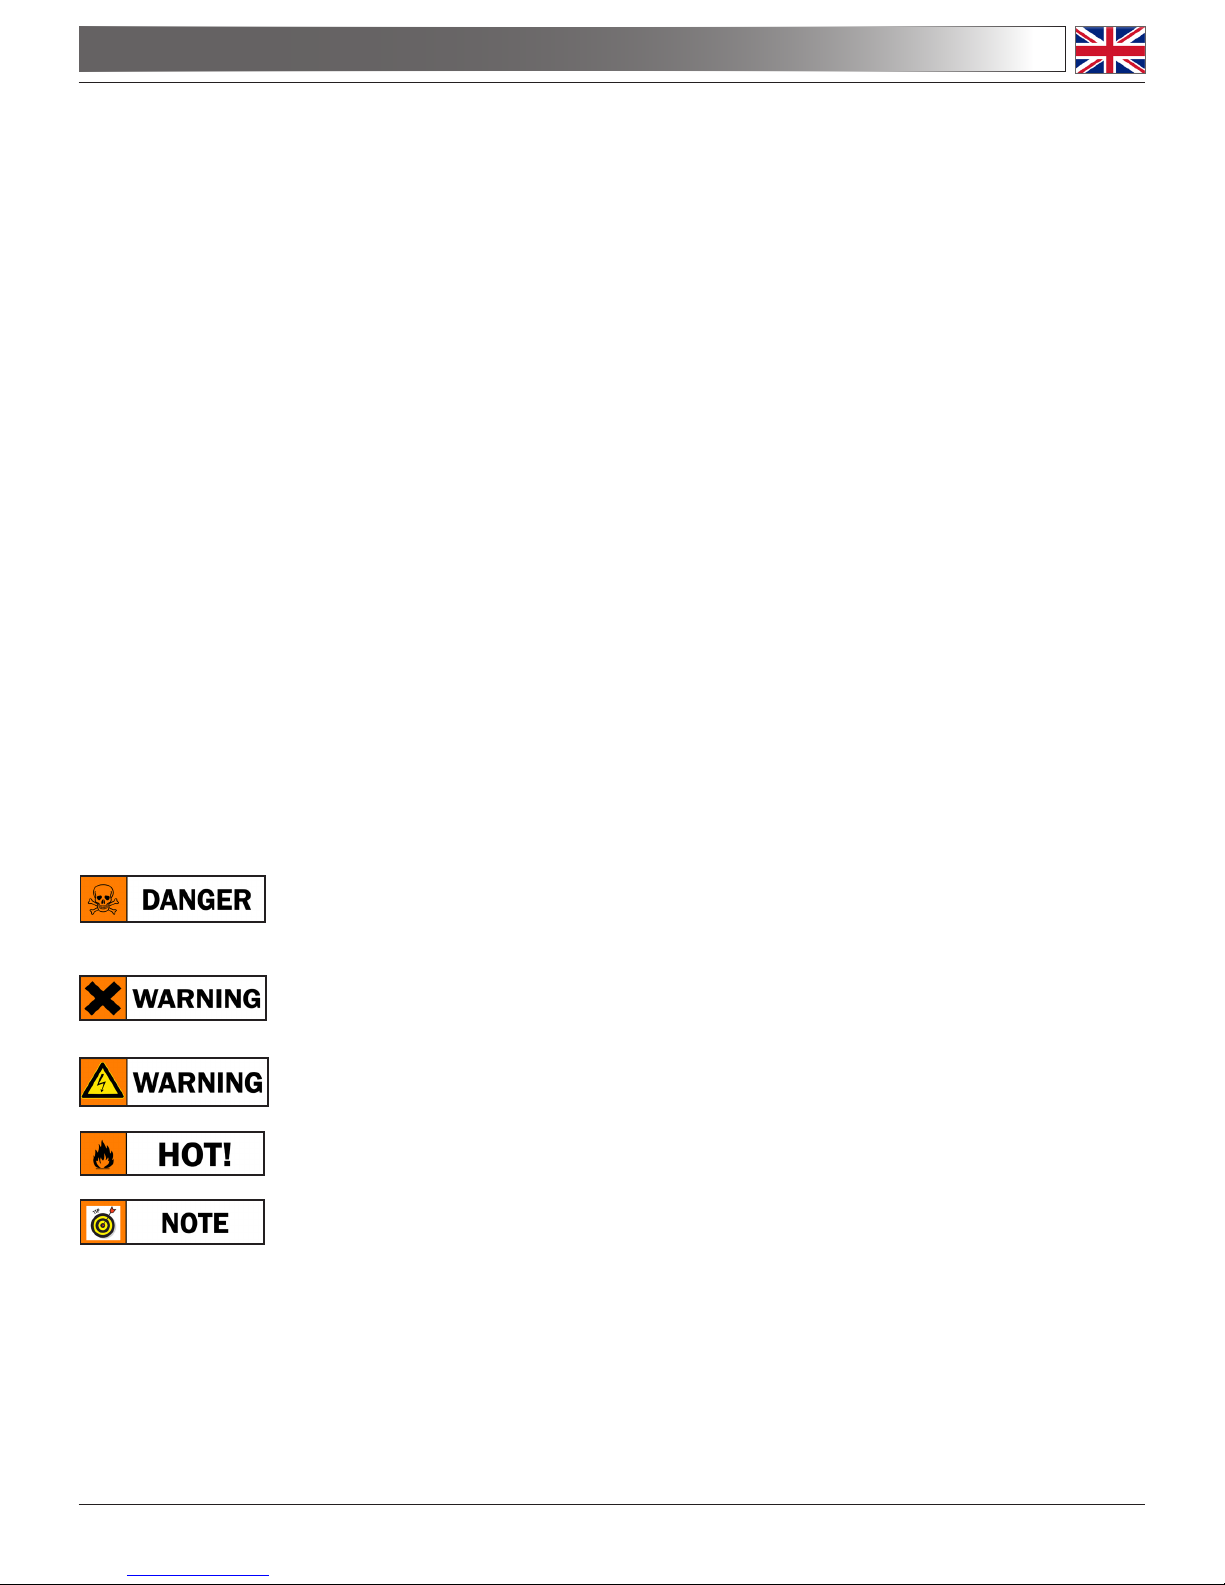
The instructions on this symbol to avoid possible severe personal injuries.
Warning of use; the incorrect operation on the instrument can cause damages
to the person or instrument.
Possibility of electric shock.
Attention: high temperature surfaces. Avoid direct contact.
Technical notes or usage tips.
SAFETY GUIDELINES
Page 4
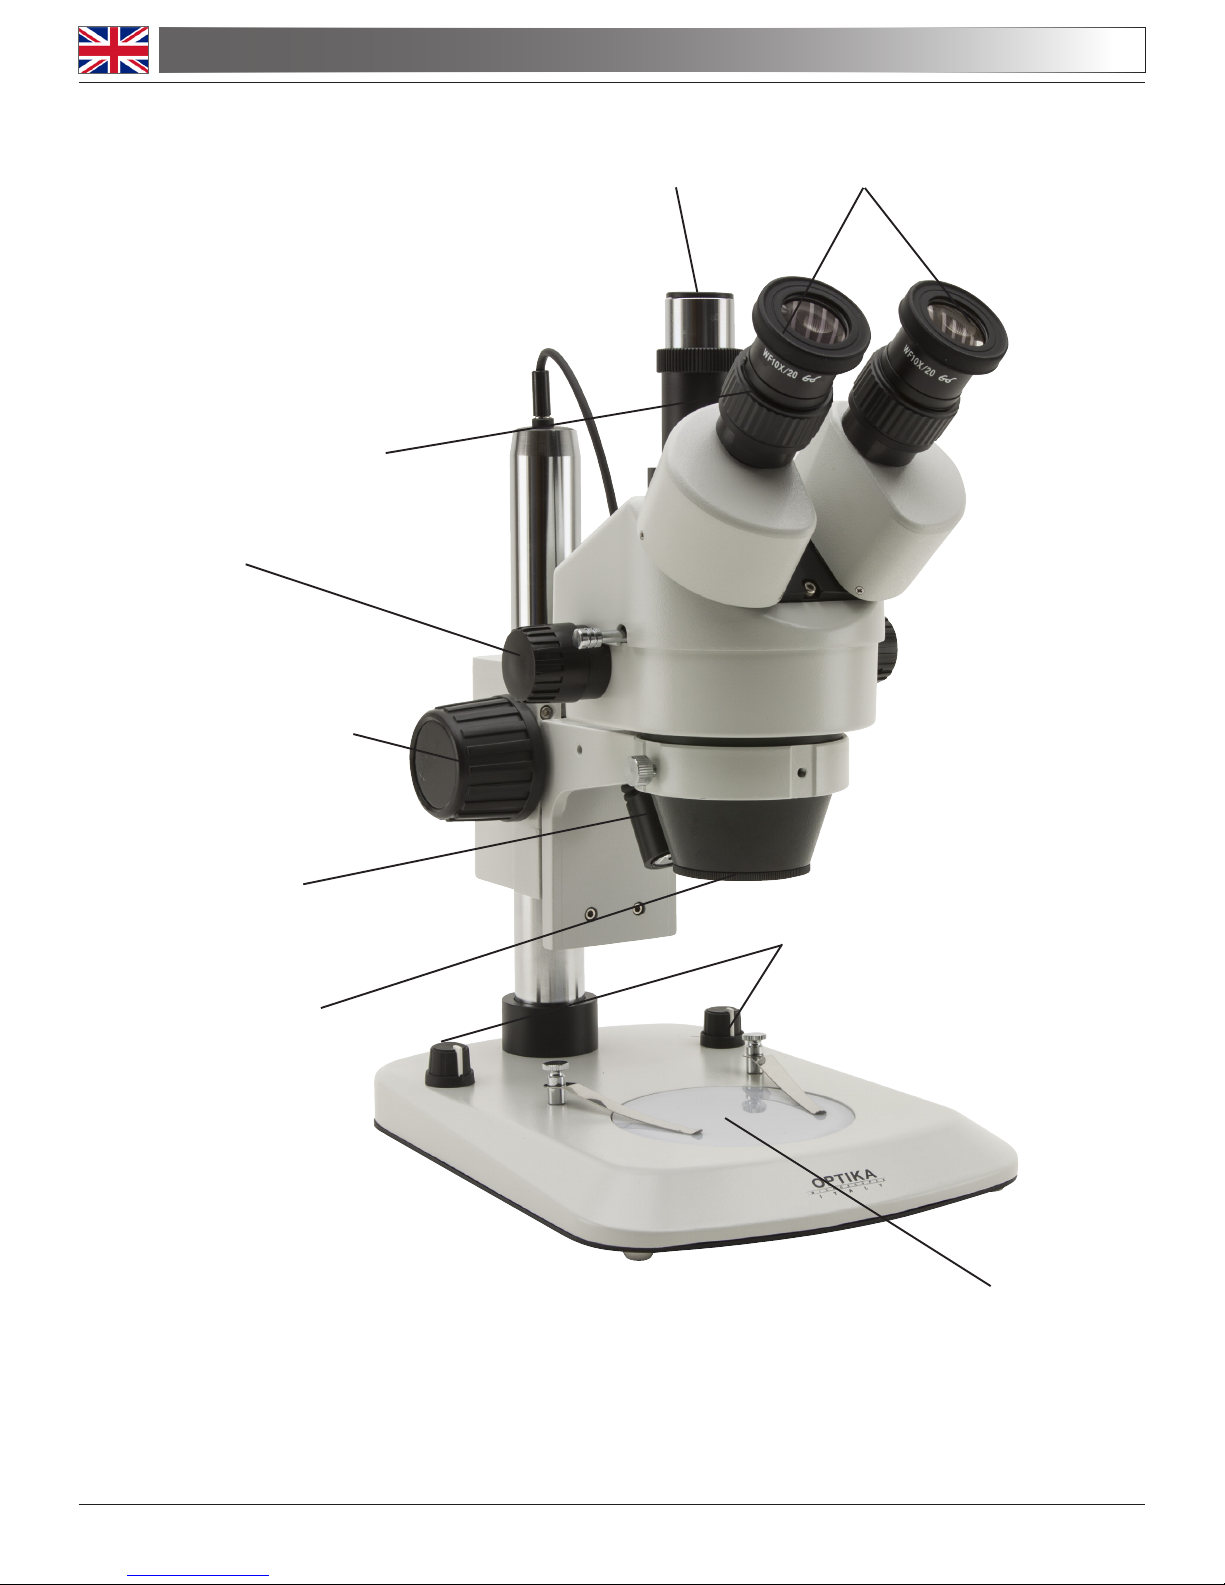
1.0 DESCRIPTION
SZM-LED2
EYEPIECE
DIOPTRIC
COMPENSATION
FOCUSING KNOB WITH TENSION
CONTROL
OBJECTIVES
INCIDENT
ILLUMINATOR
TRANSMITTED
ILLUMINATOR
ZOOM KNOB
BRIGHTNESS
CONTROLS
PHOTO/VIDEO
TUBE
Page 5
2.0 INTRODUCTION
The OPTIKA zoom stereo microscopes SZM series are high performance Greenough microscopes with continuous zoom system 0.7:4.5.
These instruments are made for examining any three dimensional object in industrial, biological and educational applications. They are equipped with two separate optical systems that give an excellent eld depth to
the image, a stereoscopic effect.
3.0 UNPACKING AND ASSEMBLY
The components for the SZM series are shipped in a Styrofoam box for protection. Open the box with care to
avoid that any components fall out and get damaged.
If the instrument has been damaged during the transport, please contact both the carrier and your supplier
immediately.
Unpack the stand and put it on a good stable table. Loosen the lock screw of the focusing carrier, adjust the
height of the focusing carrier and lock the lock screw again.
Put the stereo head onto the focusing carrier and lock it by the lock screw on the side of the focusing carrier.
During the operation of the microscope, this screw should always be locked to maintain maximum stability.
Unpack the eyepieces and other optical parts carefully and place the eyepieces into the eyepiece tubes.
When handling the optical parts, avoid touching any lens surface with naked hand or ngers. Any ngerprints
or grease stains will negatively affect the image quality.
Connect the external power supply plug into the socket at the base
The power cord should be used only on network sockets equipped with adequate grounding.
Contact a technician to check the state of your electrical system. If there is no need to install additional
accessories, the instrument is now ready for use. Once positioned and installed with the necessary
components, the microscope is ready to be used. Your microscope is a laboratory instrument designed to last. Handle it always carefully and avoid abrupt vibrations or shocks. Always disconnect the
power cable from the microscope when not in use for long time, while you clean it or when you perform
any maintenance.
AVOID DISASSEMBLING THE INSTRUMENT
Do not disassemble the instrument. This entails the cancellation of the warranty and may cause
malfunction.
Page 6
4.0 USING THE MICROSCOPE
4.1 Illumination system
The SZM-LED1 and SZM-LED2 come with an integrated illumination system with incident and transmitted light. Before starting, read the section 5.3 about electrical safety precautions. Then, insert
the external power supply and use the brightness controls to turn on the LEDs and control the light
intensity.
The base is equipped with two clips that can be used to block the specimen.
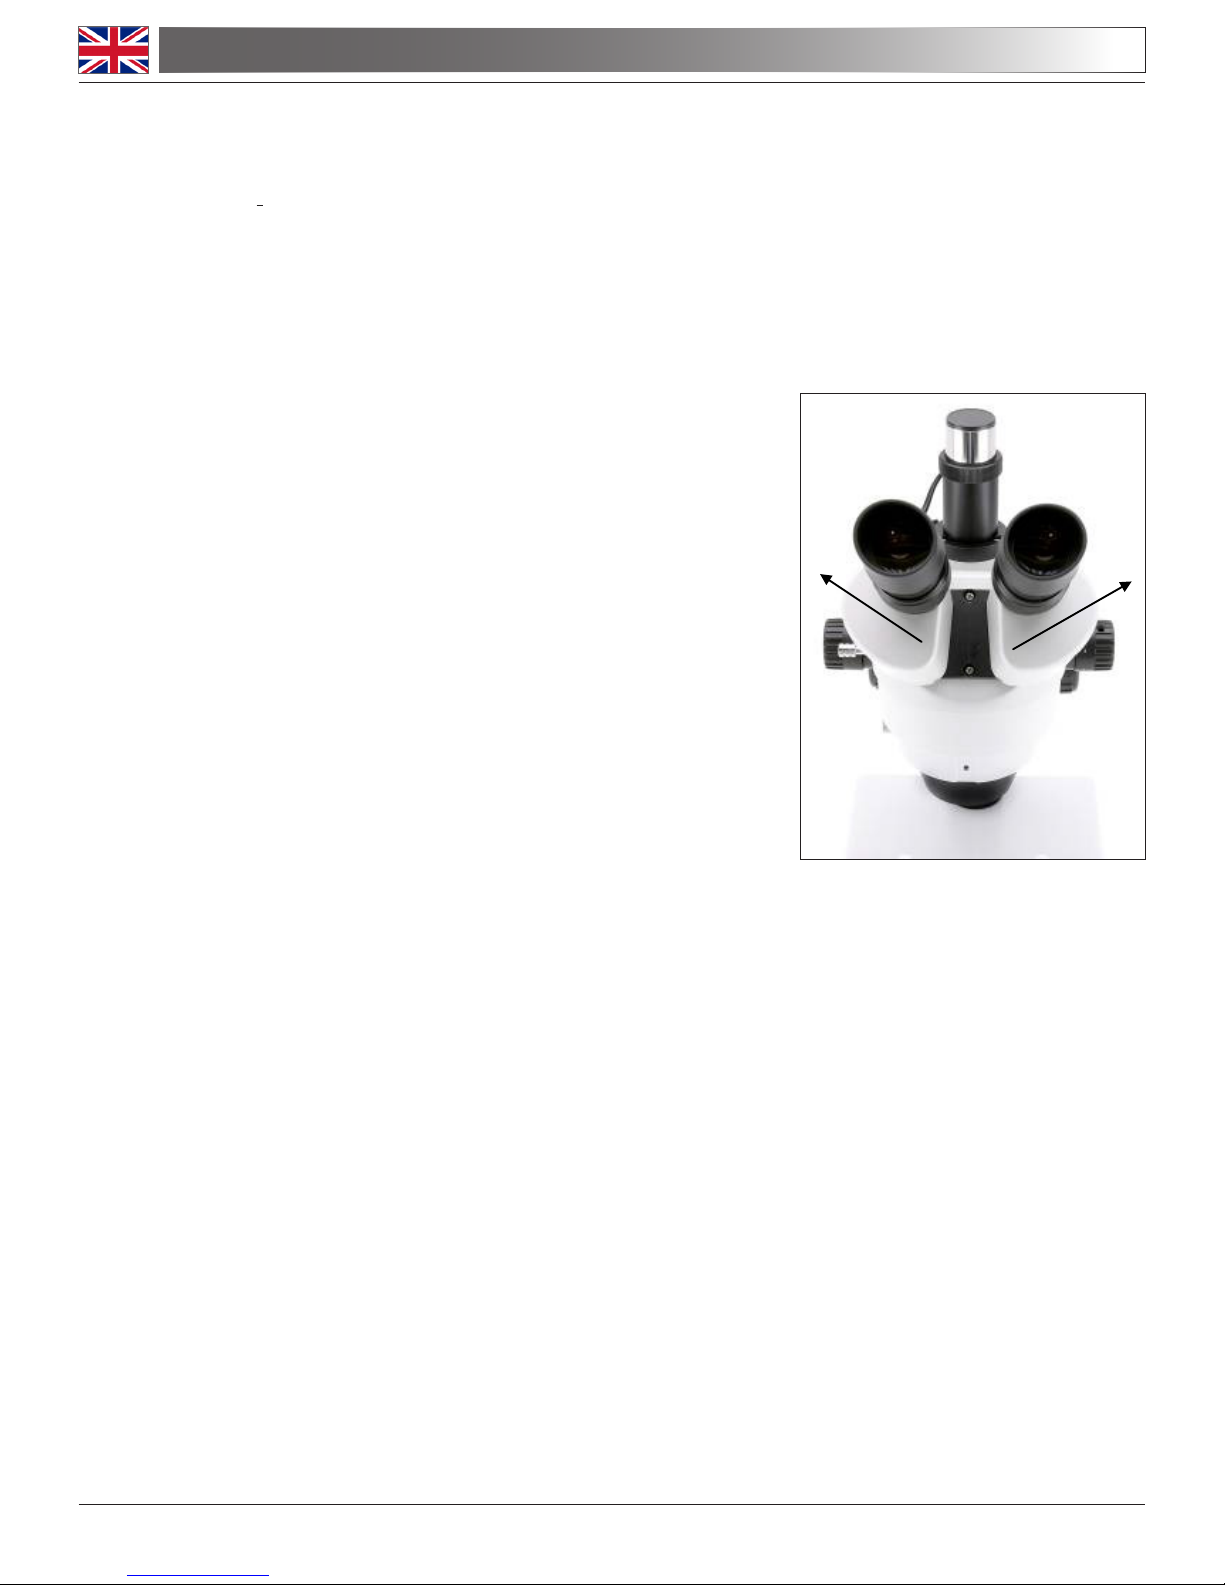
4.2 Adjust interpupillary distance
Hold the right and left parts of the observation head by both hands and adjust the interpupillary distance by moving the two parts until one circle of light can be seen. If two circles appear, the interpupillary distance is too big, and if two overlapped circles appear,
the interpupillary distance is too small.
4.3 Focus and regulation of the focusing tension
Put the sample to be observed on the plate and turn the zoom
to the highest magnication using the bilateral zoom knob. Try
to focus the sample using the focusing knobs.
4.4 Dioptric compensation
This compensation makes it possible for people with glasses
to adjust the microscope to their eyes and use the microscope
without glasses. Turn the zoom down to the lowest magnication. Adjust the diopter compensation ring of the right eyepiece
tube until the image of the right eyepiece is clear and sharp.
Repeat the procedure for the left eyepiece. Then, check the
focus of the image for the whole zoom range. It should now
be perfectly parfocal (focus is always maintained during the
change of magnication).
4.5 Magnicationandworkingdistance
The total magnication varies from 1.75x to 180x depending on the eyepieces and auxiliary objectives used. With the bilateral zoom knob, the user can change the magnication in a factor of 6.4 with
perfect parfocality and the image is always centred.
Select the desired magnication by adjusting the bilateral zoom knob. Change the eyepieces and/or
add an appropriate magnifying objective lens if necessary. The total magnication used can be calculated by the following equation:
Total magnication = Eyepiece magnication x Zoom magnication x Objective lens magnication
Normal working distance for the standard conguration (1x objective lens) is 95 mm.
4.6 Video capturing (optional)
Two kinds of observation heads, binocular or trinocular, are available for the SZM series. They can all
be connected to cameras via an adaptor, for digital and analogical photo and video capturing.
Before taking a picture or lming video, pull out the light path selector lever so the light will be deected into the photo tube. At the same time, no light will enter into the right eyepiece tube for observation.
Please refer to the adaptor and camera manuals for further details.

Page 7
5.1 Microscopy environment
This microscope is recommended to be used in a clean, dry and shock free environment with a tem-
perature of 0-40°C and a maximum relative humidity of 85 % (non condensing). Use a dehumidier if
needed.
5.2 Tothinkaboutwhenandafterusingthemicroscope
• The microscope should always be kept vertically when moving it and be careful so that no moving
parts, such as the eyepieces, fall out.
• Never mishandle or impose unnecessary force on the microscope.
• Never attempt to service the microscope yourself.
• After use, turn off the light immediately, cover the microscope with the included dust-cover, and keep
it in a dry and clean place.
5.3 Electrical safety precautions
• Users should observe all safety regulations of the region. The equipment has acquired the CE safety
label. However, users do have full responsibility to use this equipment safely.
5.4 Cleaning the optics
• If the optical parts need to be cleaned try rst to: use compressed air.
• If that is not sufcient: use a soft lint-free piece of cloth with water and a mild detergent.
• And as a nal option: use the piece of cloth moistened with a 3:7 mixture of ethanol and ether.
Note: ethanol and ether are highly ammable liquids. Do not use them near a heat source, near
sparks or near electric equipment. Use these chemicals in a well ventilated room.
• Remember to never wipe the surface of any optical items with your hands. Fingerprints can damage
the optics.
• Do not disassemble objectives or eyepieces in attempt to clean them.
5.0 MAINTENANCE

Page 8
Input Voltage: 110/240Vac, 50/60 Hz
Transmitted light: 40mm LED diffusing disc (1,5W power)
Incident light: single X-LED3 (3.6W power)
7.0 OPTIONAL ACCESSORIES
7.1 Eyepieces and auxiliary objectives
With the standard equipment is included a pair of 10x eyepieces. There are also 15x and 20x eye-
pieces available as optional accessories.
To change the eyepieces, remove the original eyepieces and replace with the new pair.
The standard objective is 1x and as optional accessories there are 0,5x, 1,5x, and 2x additional objec-
tives. An additional objective can be needed to obtain a specic magnication or a different working
distance.
The additional objective is mounted simply by screwing it onto the stereo-head. The height of the mi-
croscope has to be re-adjusted as the working distance is changed when additional objective is used.
7.2 Darkeldcondenser
The dark eld condenser has to be used with transmitted light system. By putting this accessory onto
the transmitted light outlet, it creates the dark eld effect. It is especially useful in jewellery or gem
study and special techniques in biomedical applications.
7.3 Photo/Video adapter
This accessory, mounted on the trinocular port, allows a reex camera of any brand to be used on the
microscope in order to capture photos. T2 ring, specic to each model of camera, must be inserted
into the adapter before mounting it on the camera. T2 ring can be purchased in any photocamera
store.
7.4 “C-mount“ adapter
This accessory, mounted on the trinocular port, allows a digital or analog camera to be used on the
microscope in order to capture photos. The camera must have a C-mount or CS-mount connection
type.
6.0 ELECTRICAL SPECIFICATIONS
Page 9
8.0 RECOVERY AND RECYCLING
Art.13 Dlsg 25 july 2005 N°151. “According to directives 2002/95/EC, 2002/96/EC and 2003/108/EC relating to the reduction in the use of hazardous substances in electrical and electronic equipment and waste
disposal.”
The basket symbol on equipment or on its box indicates that the product at the end of its useful life should be
collected separately from other waste.
The separate collection of this equipment at the end of its lifetime is organized and managed by
the producer. The user will have to contact the manufacturer and follow the rules that he adopted for end-of-life equipment collection. The collection of the equipment for recycling, treatment
and environmentally compatible disposal, helps to prevent possible adverse effects on the environment and health and promotes reuse and/or recycling of materials of the equipment. Improper
disposal of the product involves the application of administrative penalties as provided by the laws in force.

Page 10
INDEX
1.0 DESCRIPTION pag. 12
2.0 INTRODUCTION pag. 13
3.0 DÉBALLAGE ET MONTAGE pag. 13
4.0 UTILISATION DU MICROSCOPE pag. 14
5.0 MAINTENANCE pag. 15
6.0 CARACTÉRISTIQUES ÉLECTRIQUES pag. 16
7.0 ACCESSOIRES FACULTATIFS pag. 16
8.0 RÉCYCLAGE ET RÉCUPÉRATION pag. 17
Page 11
Ce microscope est un appareil scientique de précision pensé pour durer de nombreuses années avec un
entretient minimum. Pour son élaboration il a été utilisé des éléments optiques et mécaniques de grande qui
le convertisse en un appareil idéal pour une utilisation journalière dans les salles de classes et les laboratoires. Optika informe que ce manuel contient d’importantes informations concernant la sécurité et l’entretient
de ce produit et par conséquent il doit être accessible à toutes personnes susceptibles d’utiliser cet appareil.
Optika décline toute responsabilité dérivant d’une utilisation inappropriée de cet appareil non contemplée
dans ce mode d’emploi.
Sécurité
Ce manuel inclu d’importantes informations concernant la sécurité de l’installation, de l’utilisation et
de l’entretient du microscope. Il est important de lire attentivement le manuel avant d’utiliser l’appareil.
Pour une utilisation sûre, l’utilisateur devra lire et suivre attentivement tous les indications de ce
manuel.
Les produits OPTIKA ont été créés pour être utilisés dans des conditions normales d’utilisation. L’appareil et les accessoires décrits dans le manuel ont été réalisés et testés selon les normes industrielles
de sécurité des appareils de laboratoire.
Une utilisation innapropriée pourrait emdommager l’appareil et provoquer des lésions à l’utilisateur.
Garder ce présent manuel près de l’appareil pour faciliter sa consultation.
Précautions de sécurité électrique
Avant de brancher le cable d’alimentation à la prise, s’assurer que la tension dans votre région corresponde à la tension de l’instrument et que l’interrupteur de l’éclairage soit éteint.
L’utilisateur se doit de suivre les normes de sécurité de son propre pays.
L’instrument a un marquage de sécurité CE, l’utilisateur est responsable de l’utilisation appropriée de
l’instrument.
Symboles d’avertissement / risque utilisés dans le manuel
Avant d’utiliser l’instrument, l’utilisateur doit connaitre toutes les précautions liées à la sécurité.
Les symboles d’avertissement ou de danger sont indiqués ci-dessous.
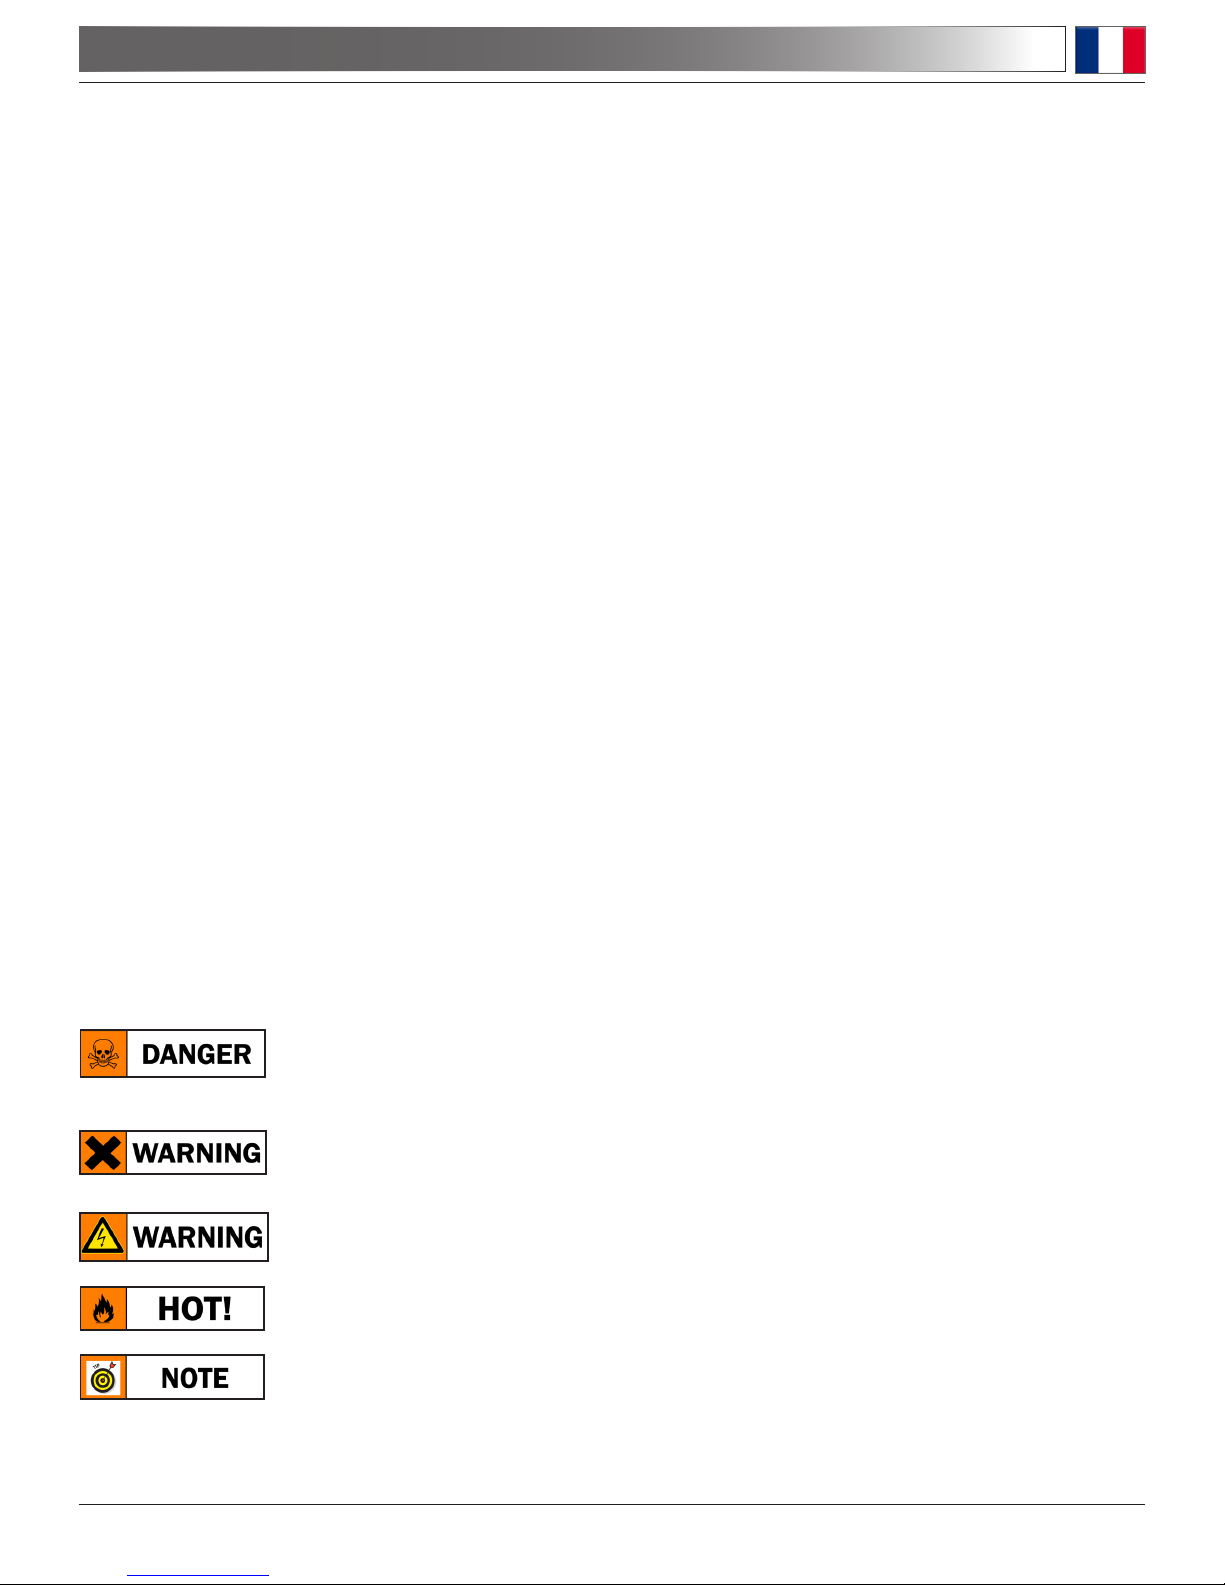
Suivez les instructions marquées de ce symbole an d’éviter d’éventuelles
blessures.
Avvertissement concernant l’utilisation; l’utilisation inapproprièe du microscope
riquerait de provoquer des blessures à l’utilisateur et d’abimer l’instrument.
Risque de choc életrique.
Attention: surfaces à haute température. Eviter le contact direct.
Notes techniques et conseils pour l’utilisation.
PRÉCAUTIONS DE SÉCURITÉ
Page 12
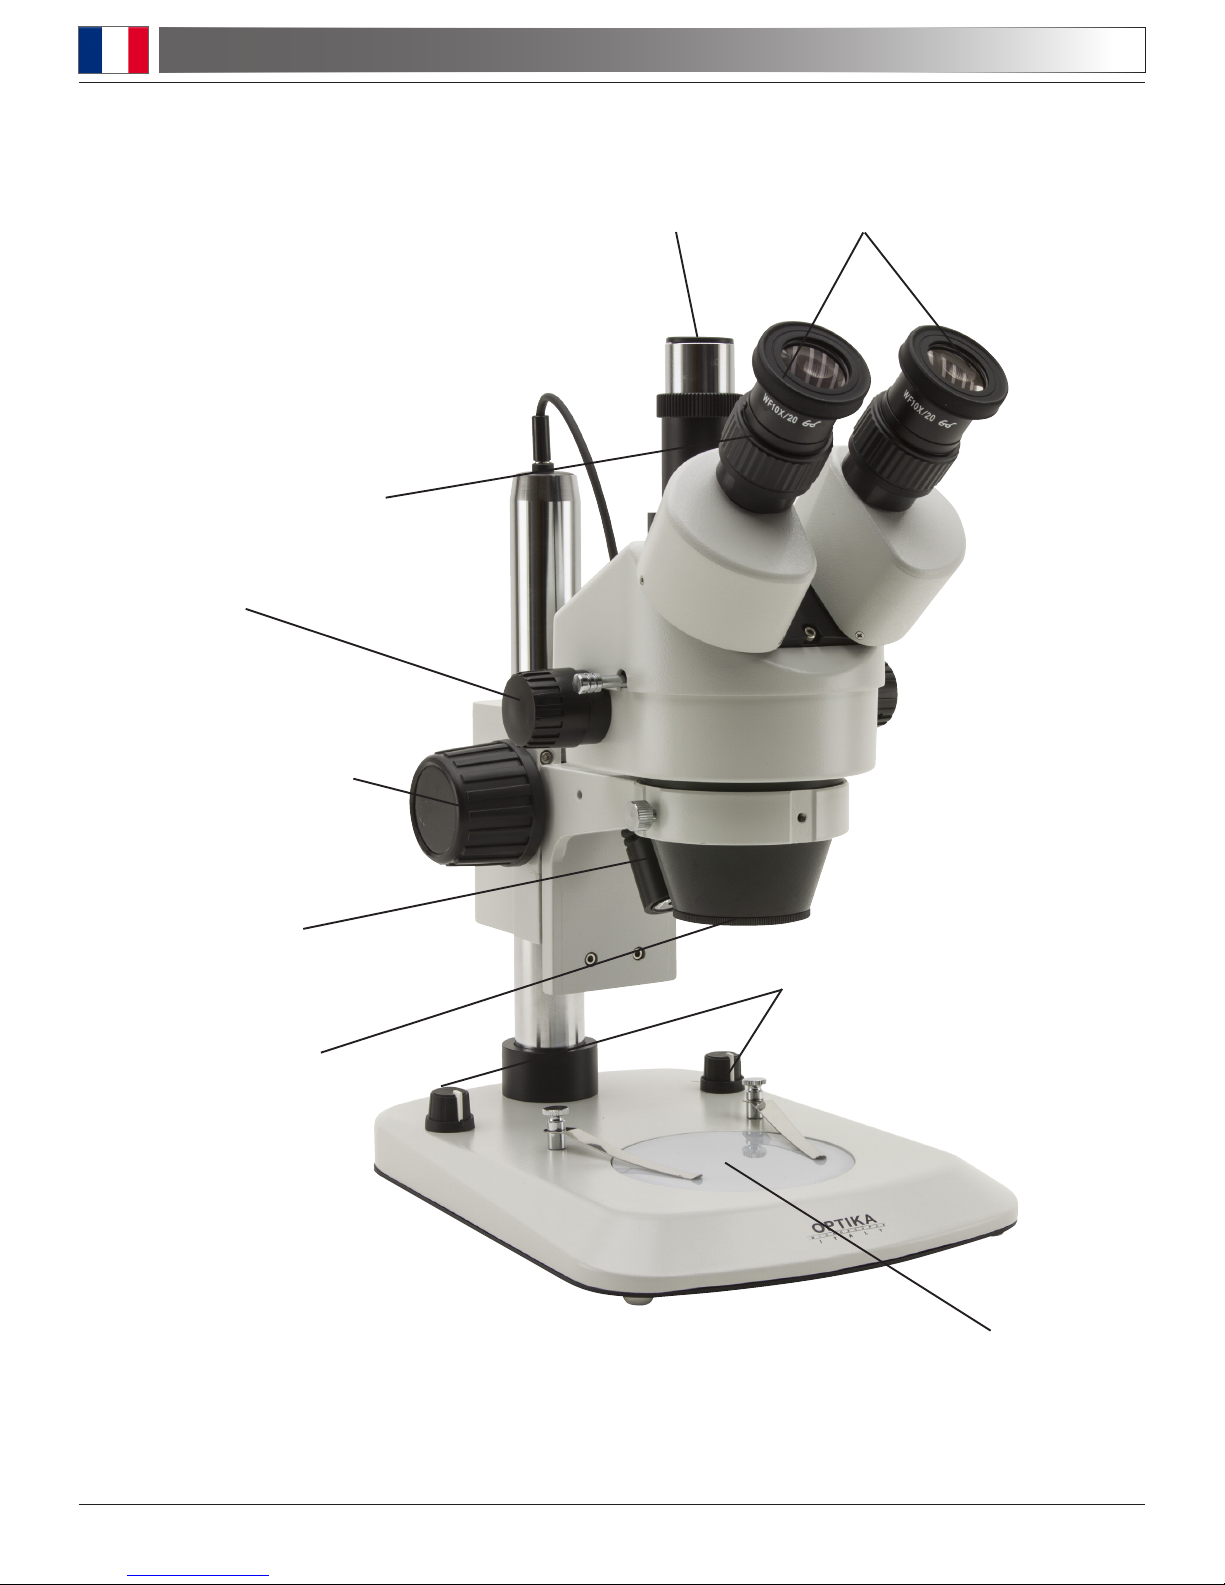
1.0 DESCRIPTION
SZM-LED2
OCULAIRE
COMPENSATION
DIOPTRIQUE
RÉGLAGE GROSSISSE-MENT
ZOOM
OBJECTIFS
ECLAIRAGE INCIDENT
TRANSMIS
ÉCLAIRAGE
ZOOM
RÉGLAGE DE L’INTENSITÉ
LUMINEUSE
PHOTO/VIDÉO

Page 13
2.0 INTRODUCTION
Les stéréomicroscopes OPTIKA de la série SZM sont composés de microscopes Greenough, instruments
d’excellentes prestations, dôtés d’objectif zoom de grossissement continu 0.7x... 4.5x.
Ces instruments sont désignés pour examiner tout objet en trois dimensions dans les applications industrielles, biologiques et didactiques. Ils sont équipés de deux systèmes optiques séparés qui donnent à l’image
une profondeur excellente du champ, un effet stéréoscopique.
3.0 DÉBALLAGE ET MONTAGE
Les composantes du microscope se trouvent dans leur emballage de polystyrolène pour une meilleure protection. Ouvrir la boîte et extraire toutes les composantes, prendre bien soin de ne pas les endommager et
surtout ne rien oublier à l’intérieur de la boîte.
Lorsque le matériel est endommagé durant le transport, nous vous prions de contacter immédiatement aussi
bien le transporteur que le fournisseur.
Poser le statif sur une table ferme après l’avoir déballé, desserrer les vis de blocage du support du corps
stéréoscopique, régler la hauteur et verouiller en serrant les vis appropriés.
Placer le corps stéréoscopique sur son support et verouiller avec la vis se trouvant sur le côté droit du support. Durant l’utilisation du microscope, cette vis devrait être toujours vérouillée pour maintenir la stabilité
maximale.
Déballer soigneusement les oculaires ainsi que toutes les composantes optiques et insérer les oculaires
dans les tubes oculaires. En manipulant les parties optiques, éviter de toucher la supercie des lentilles avec
les mains ou les doigts nus. Les empreintes digitales ou taches de graisse peuvent affecter négativement la
qualité de l’image.
Le câble d’alimentation doit être utiliser uniquement dans des prises avec mise à la terre appropriée.
Contacter votre téchnicien pour vérier l’état de votre circuit électrique.
Si vous ne devez installer aucun autre accessoire, le microscope est prêt à l’utilisation
Votre microscope est un instrument de laboratoire conçu por durer longtemps. Traitez le avec soin et évitez de le soumettre à chocs et vibrations. Débranchez toujours le câble d’alimentation quand le microscope n’est pas utiliser pendant longtemps, lors du nettoyage ou lorsque que vous en effectuez l’entretien.
NE PAS DEMONTER LINSTRUMENT
Ne pas démonter l’instrument. Ceci annulerait la validité de la garantie et risquerait de provoquer des
dysfonctionnements.

Page 14
4.0 UTILISATION DU MICROSCOPE
4.1 Système d’illumination
Le SZM-LED1 et SZM-LED2 sont dôtés d’un système d’illumination intégré avec lumière incidente
et transmise. Avant de commencer, lire attentivement la section 5.3 sur les précautions de sécurité
électrique. Utiliser les commandes de luminosité pour allumer les LED et ajuster l’intensité lumineuse.
La base est équipée de deux valets qui peuvent être utilisés pour xer l’échantillon.
4.2 Distance nterpupillaire
Agir sur les deux tubes porte-oculaires jusqu’à la vision d’un
champ lumineux unique et circulaire. Le fait de voir deux
cercles signie que la distance interpupillaire est trop grande ;
par contre l’apparition de deux cercles superposés signie que
la distance interpupillaire est trop petite.
4.3 Mise au point et réglage de la tension de la mise au point
Placer un objet à observer sur le plan d’observation, éssayer
de faire la mise au point en plaçant le bouton de réglage zoom
sur le facteur d’agrandissement maximum. Si cela n’était pas
possible, régler la hauteur du microscope au long du tube.Se
rappeler de xer solidement les vis de blocage de la bandelette en dessous du corps stéréoscopique après avoir rajusté
la hauteur du microscope. La tension de la mise au point peut
être ajustée en tournant le bouton de commande de mise au
point droit en maintenant toujours ferme celui de gauche.
4.4 Compensation dioptrique
Cette compensation permet aux porteurs de lunettes d’ajuster le microscope de manière à pouvoir
l’utiliser sans lunettes. Régler la commande de compensation dioptrique de l’oculaire droit jusqu’à
l’obtention d’une image claire et nette dans l’oculaire droit. Répéter l’opération pour l’oculaire gauche.
A ce point contrôler la mise au point de l’image pour chaque intervalle de grossissement, il devrait
résulter parfaitement parafocale (la mise au point est maintenue durant le changement de grossissements).
4.5 Grossissement et distance de travail
Le grossissement total varie de 1.75x à 180x et dépend des oculaires et des objectifs auxiliaires
utilisés. Avec le bouton de zoom bilatéral, l’usager peut changer le grossissement en un facteur de
6.4 de manière parfaitement parafocale tout en maintenant toujours le centrage de l’image.
Sélectionner le grossissement désiré à travers la rotation des commandes de réglage de l’objectif
zoom. Changer les oculaires et/ajouter si nécéssaire une lentille (objectif) de grossissement.
Le grossissement total peut être calculé ainsi :
Grossissement total = grossissement des oculaires x grossissement zoom x grossissement lentille objectif.
La distance de travail dans la conguration standard (lentille-objectif 1x) est de 95 mm.

Page 15
4.6 Acquisition photo/vidéo (facultative)
La série SZM est disponible en têtes d’observation binoculaire et trinoculaire. Il est possible de les
connecter à une caméra ou à un appareil photo en utilisant un adaptateur pour la câpture d’image
vidéo et pour l’acquisition de photographies numériques et analogiques .
Pour l’acquisition d’image photo ou de vidéo, enlever avant tout le levier de sélection du parcours
lumineux, ainsi la lumière sera détournée dans le tube photographique. A partir de ce moment précis aucune autre lumière ne devrait pénétrer dans le tube oculaire d’observation. Pour avoir plus
de détails sur les adaptateurs, appareils photo et caméra, consulter les manuels d’instructions.
5.0 MAINTENANCE
4.0 UTILISATION DU MICROSCOPE
5.1 Environnement du microscope
Il est conseillé d’utiliser ce microscope dans un environnement propre et sec, à une temperature de
0-40°C et une humidité relative, au maximum de 85 % (non condensé). Si nécéssaire déshumidier.
5.2 Conseils durant et après l’utilisation du microscope
• Le microscope devrait être tenu en position verticale durant son déplacement, prendre bien soin de
protéger toutes les parties délicates, eviter le choc de certaines composantes composantes comme
les oculaires.
• Eviter l’utilisation incorrecte de l’instrumement ou l’application d’une force inutile au microscope.
• Ne jamais éssayer d’éffectuer les réparations vous-mêmes.
• Après utilisation, éteindre immédiatement la lumière, couvrir le microscope avec la housse de protec-
tion et le conserver dans un endroit propre et sec.
5.3 Précautions de sécurité électrique
• Les usagers doivent respecter toutes les précautions de sécurité de leur région. Bien que l’étiquette
CE soit une garantie de la conformité de l’équipement aux normes de sécurité, en réalité selus les
usagers ont la responsabilité entière d’en faire un bon usage tout en respectant toutes les normes de
sécurité.
5.4 Nettoyage des composantes optiques
• Pour nettoyer les composantes optiques il faut utiliser tout d’abord une confection d’air comprimé.
• En cas de nécéssité utiliser un tissu de lentille doux humecté d’eau et un détersif léger.
• Comme dernière solution: utiliser un morceau de tissu doux humecté légèrement avec du 3:7 mixture
d’éthanol et d’éther.
Note : L’ethanol et l’éther sont des liquides extrêmement inammables. Ne les utilisez pas aux alentours
d’une source de chaleur, des étincelles, ou près de l’équipement électrique. Utilisez ces produits
chimiques dans une pièce bien aérée.
• Se rappeler de ne pas éssuyer la surface des composantes optiques avec vos mains, les empreintes
digitales peuvent nuire à l’optique.
• Ne démonter pas les objectifs ou les oculaires pour éssayer de les nettoyer vous-mêmes.

Page 16
6.0 CARACTÉRISTIQUES ÉLECTRIQUES
Puissance universelle: 110/240Vac, 50/60 Hz
Éclairage transmis: 40mm LED disque diffusant (1,5W puissance)
Éclairage incident: Simple X-LED3 (3.6W puissance)
7.0 ACCESSOIRES FACULTATIFS
7.1 Oculaires et objectifs auxiliaires
Une paire d’oculaires l0x est inclus dans l’équipement standard . Les oculaires 15x et 20x disponibles
en accessoires facutatifs. Pour changer les oculaires il suft d’enlever les oculaires originaux et de
les remplacer par la nouvelle paire. L’objectif standard est 1x et les objectifs additionnels 0,5x, 1,5x et
2x sont disponibles en accessoires facultatifs. Un objectif additionnel peut être nécessaire juste pour
obtenir un grossissement spécique ou une distance de travail différente.
L’objectif additionnel est monté simplement sur la tête stéréo en vissant. La hauteur du microscope
doit être rajustée vu le changement de la distance de travail lorsque l’objectif additionnel est utilisé.
7.2 Condenseur pour fond noir
Le condenseur pour fond noir doit être utilisé avec le système d’éclairage transmis. En mettant cet
accessoire à la place l’éclairage transmis, il crée l’effet obscur du champ. Il est utilisé particulièrement
dans les bijouteries ou l’étude de pierre précieuse et les techniques spéciales dans les applications
Bio-Med et l’observation d’embryon.
7.3 Adaptateur photo
Cet accessoire monté sur la tête trinoculaire permet l’utilisation d’un appareil photo de n’importe
quelle marque pour l’acquisition d’images. L’aneau T2 selon le type d’appareil en votre possession
doit être inséré dans l’adaptateur avant d’installer l’appareil. L’aneau T2 se trouve dans n’importe quel
magasin de photographie.
7.4 Monture C pour caméra
Cet accessoire monté sur la tête trinoculaire permet d’insérer une caméra en circuit fermé dans le
tube trinoculaire pour connexion à écran TV. Selon la caméra utilisée il faudra une monture C ou CS.

Page 17
8.0 RÉCYCLAGE ET RÉCUPÉRATION
Conformément à l’Article 13 du D.L du 25 Juillet 2005 nº151
Action des Directives 2002/95/CE, 2002/96/CE et 2003/108/CE, relatives à la réduction de l’utilisation de
substances dangereuses dans l’appareil électrique et électronique et à l’élimination des résidus.
Le Symbole du conteneur qui gure sur l’appareil électrique ou sur son emballage indique que le produit
devra être, à la n de sa vie utile, séparé du reste des résidus. La gestion du ramassage sélectif du présent
instrument sera effectuée par le fabricant. Par conséquent, l’utilisateur qui souhaite éliminer l’appareil devra
se mettre en contact avec le fabricant et suivre le système que celui-ci a adopté pour permettre le ramassage
sélectif de l’appareil. Le ramassage sélectif correct de l’appareil pour son recyclage, traitement et élimination compatible avec l’environnement contribue à éviter d’éventuels effets négatifs sur l’environnement et
la santé et favorise sa réutilisation et/ou recyclage des composants de l’appareil. L’élimination du produit de
manière abusive de la part de l’utilisateur entraînera l’application de sanctions administratives sur la norme
en vigueur.

Pagina 18
INDICE
1.0 DESCRIZIONE pag. 20
2.0 INTRODUZIONE pag. 21
3.0 DISIMBALLAGGIO E MONTAGGIO DEL MICROSCOPIO pag. 21
4.0 ALLINEAMENTO E UTILIZZO DEL MICROSCOPIO pag. 22
5.0 MANUTENZIONE DEL MICROSCOPIO pag. 23
6.0 SPECIFICHE ELETTRICHE pag. 24
7.0 ACCESSORI OPZIONALI pag. 24
8.0 MISURE ECOLOGICHE pag. 25

Pagina 19
Il presente microscopio è uno strumento scientico di precisione studiato per durare molti anni con una manutenzione minima, essendo costruito secondo i migliori standard ottici e meccanici e progettato per un utilizzo
quotidiano.
Optika ricorda che il presente manuale contiene informazioni importanti per un uso sicuro e una corretta manutenzione dello strumento. Esso deve quindi essere accessibile a chiunque lo utilizzi.
Optika declina ogni responsabilità derivante da un uso improprio dei suoi strumenti non indicato dalla presente guida.
Avvertenze di sicurezza
Questo manuale contiene importanti informazioni e avvertenze riguardanti la sicurezza riguardo l’installazione, l’utilizzo e la manutenzione del microscopio. Si raccomanda di leggere attentamente il
manuale prima di qualsiasi utilizzo dello strumento. Per assicurare un utilizzo sicuro l’utente deve
leggere e seguire tutte le istruzioni poste nel presente manuale.
I prodotti OPTIKA sono studiati per un utilizzo sicuro in condizioni operative normali. Lo strumento e
gli accessori descritti nel manuale sono realizzati e testati secondo standard industriali di sicurezza
per strumentazione da laboratorio.
L’utilizzo non corretto può causare lesioni alla persona o danni allo strumento.
Mantenere questo manuale a portata di mano vicino allo strumento, per una facile consultazione.
Precauzioni di sicurezza elettrica
Prima di collegare il cavo di alimentazione alla presa di rete, assicurarsi che la tensione di rete della
vostra regione corrisponda alla tensione di alimentazione dello strumento, e che l’interruttore dell’illuminatore sia in posizione spenta.
L’utente deve osservare la regolamentazione riguardante la sicurezza in vigore nel proprio Stato. Lo
strumento è dotato di marcatura di sicurezza CE, in ogni caso l’utente ha piena responsabilità riguardo all’utilizzo sicuro dello strumento stesso.
Simboli di avvertenza/pericolo usati nel manuale
L’utente deve essere a conoscenza degli aspetti legati alla sicurezza nel momento in cui utilizza lo
strumento. I simboli di avvertenza o pericolo sono indicati sotto. Tali simboli sono utilizzati in questo
manuale di istruzioni.
Seguire le istruzioni contrassegnate da questo simbolo per evitare possibili gravi danni alle persone.
Avvertimento di utilizzo; la non corretta operazione sullo strumento può causare
danni alla persona o allo strumento.
Possibilità di shock elettrico.
Attenzione: superci ad elevata temperatura. Evitare il contatto diretto.
Note tecniche o consigli di utilizzo.
INDICAZIONI PER LA SICUREZZA

Pagina 20
1.0 DESCRIZIONE
SZM-LED2
OCULARI
REGOLAZIONE
DIOTTRICA
MANOPOLA DI
COMANDO DELLA
MESSA A FUOCO
CON CONTROLLO TENSIONE
OBIETTIVI
ILLUMINATORE
INCIDENTE
ILLUMINAZIONE
TRASMESSA
ZOOM
REGOLATORE DELLA
LUMINOSITÀ
TUBO
FOTO/VIDEO

Pagina 21
2.0 INTRODUZIONE
Gli stereomicroscopi OPTIKA della serie SZM sono composti da stereomicroscopi Greenough dalle eccellenti
prestazioni dotati di obiettivo a zoom ad ingrandimento continuo da 0,7 a 4,5.
Connettere l’alimentatore esterno nella presa posta nella base dello stativo.
Il cavo di alimentazione deve essere utilizzato solo su prese di rete dotate di adeguata messa a terra.
Contattare un vostro tecnico per assicurarsi sullo stato dell’impianto elettrico. Se non vi è necessità di
installare altri accessori, lo strumento è ora pronto per l’utilizzo. Una volta posizionato e installato con
i necessari componenti, il microscopio è pronto per l’utilizzo. Il vostro microscopio è uno strumento da
laboratorio progettato per durare a lungo. Maneggiatelo sempre con cura ed abitate brusche vibrazioni o colpi. Scollegare sempre il cavo di alimentazione dal microscopio quando non viene utilizzato per
lunghi tempi, mentre lo si pulisce o quando si esegue una qualsiasi manutenzione.
EVITARE DI SMONTARE LO STRUMENTO
Non disassemblare lo strumento. Questo comporta l’annullamento della garanzia e potrebbe causare
malfunzionamenti.
3.0 DISIMBALLAGGIO E MONTAGGIO DEL MICROSCOPIO
3.1 Disimballaggio
I componenti del microscopio sono consegnati imballati per prevenire rotture accidentali durante il
trasporto. Aprire la scatola in cartone e poi l’imballo in polistirolo, avendo cura di non lasciare alcun
componente all’interno della confezione. Non scartare alcun componente no a che tutto il materiale
è stato estratto. Nel caso di merce danneggiata durante il trasporto, si prega di contattare immediatamente sia il trasportatore che il fornitore.
3.2 Montaggio del Microscopio
Nel maneggiare le componenti, in particolare quelle ottiche, avere cura di non toccare la supercie
degli obiettivi con le dita. Eventuali impronte e tracce di grasso/unto possono pregiudicare la buona
qualità delle immagini. Dopo aver predisposto lo stativo, appoggiarlo su di un piano stabile, quindi
allentare la vite di bloccaggio del supporto del corpo stereoscopico, inserire la testata nella sua sede,
regolare l’altezza dello stesso e stringere la vite di bloccaggio. Posizionare il corpo stereoscopico sul
suo supporto, quindi ssarlo con la vite di bloccaggio che si trova sulla destra del sostegno. Dopo
aver tolto dalla confezione gli oculari e le altri componenti ottiche facendo attenzione a non toccare la
supercie delle lenti, inserire gli oculari nella loro sede.

Pagina 22
4.0 ALLINEAMENTO E UTILIZZO DEL MICROSCOPIO
4.1 Sistema d’illuminazione
I modelli SZM-LED1 e SZM-LED2 sono forniti di un sistema integrato di illuminazione con luce inci-
dente e trasmessa.
Prima dell’utilizzo leggere la sezione 5.3 riguardante le precauzioni di sicurezza del sistema elettrico.
Quindi inserire l’alimentatore esterno ed utilizzare gli appositi regolatori per controllare l’intensità lu-
minosa.
La base è equipaggiata con due clip per bloccare il campione in posizione.
4.2 Distanza Interpupillare
Muovere i due tubi porta-oculari no ad ottenere la visione di un unico campo luminoso circolare. Se
si vedono due cerchi, allora la distanza interpupillare è troppo
grande. Se invece appaiono due cerchi sovrapposti, signica
che la distanza interpupillare è troppo piccola.
4.3 Messa a fuoco del microscopio
Porre un oggetto sul piano di osservazione. Cercare di mettere a fuoco il campione posizionando la manopola di comando
zoom sul fattore di ingrandimento massimo. Se ciò non fosse possibile, regolare l’altezza del microscopio lungo l’asta
di scorrimento. Assicurarsi di avvitare saldamente la vite di
bloccaggio e la fascetta al di sotto del corpo stereoscopico
dopo aver aggiustato l’altezza del microscopio. Selezionare
l’ingrandimento massimo con lo zoom. Provare a mettere a
fuoco il campione, ruotando le apposite manopole di messa a
fuoco, nché l’immagine non risulta nitida e ben denita.
Ora posizionare la manopola di comando zoom sul fattore di
ingrandimento minimo. Regolare la manopola di compensazione diottrica dell’oculare destro no ad avere un’immagine
chiara e nitida nell’oculare destro.
Ripetere l’operazione per l’oculare sinistro. A questo punto controllare la messa a fuoco dell’immagine
per tutto l’intervallo di ingrandimento. Dovrebbe risultare perfettamente parafocale.
4.4 Ingrandimento e distanza di lavoro
Selezionare l’ingrandimento desiderato attraverso la rotazione delle manopole di regolazione dell’obiettivo zoom. Sostituire gli oculari e/o aggiungere se necessario una lente (obiettivo) di ingrandimento. L’ingrandimento totale può essere calcolato nel seguente modo:
Ingrandimento totale = ingrandimento oculari x ingrandimento zoom x ingrandimento lente addi-
zionale
La distanza di lavoro nella congurazione standard (lente-obiettivo 1x) è di 95mm.
4.5 Regolazione della tensione della manopola di messa a fuoco
Per mettere a fuoco il vetrino con preparato, operare sull’apposita coppia di manopole situata su
entrambi i lati del sostegno. Esse servono per spostare il microscopio in verticale lungo il braccio e
mettere a fuoco il campione sul vetrino. Tale movimento è reso possibile da un meccanismo a pignone e cremagliera. Per regolare la tensione della manopola di messa a fuoco è sufciente ruotare la
manopola di destra mantenendo ferma quella di sinistra.

Pagina 23
4.6 Tubo trinoculare per SZM
Il tubo trinoculare è identico a quello binoculare per quanto riguarda la regolazione della distanza
interpupillare e il blocco dell’oculare. Tirando verso l’esterno la levetta di inserimento dell’uscita trinoculare, tutta la luce proveniente dall’oculare destro verrà deviata nel tubo per acquisizione foto per
operazioni di foto- e videomicroscopia. Contemporaneamente si blocca l’entrata della luce per l’osservazione nell’oculare destro. All’estremità superiore del tubo trinoculare si trova il raccordo foto/video
al quale è possibile collegare, tramite apposito adattatore, macchine fotograche o videocamere con
ottica reex, nonché telecamere CCD.
5.0 MANUTENZIONE
4.0 ALLINEAMENTO E UTILIZZO DEL MICROSCOPIO
5.1 Ambiente di lavoro
Si raccomanda di utilizzare il presente microscopio in un ambiente pulito, asciutto e di evitare urti. La
temperatura d’esercizio consigliata è di 0-40°C e l’umidità relativa massima di 85 % (in assenza di
condensa). Se necessario, si utilizzi un deumidicatore.
5.2 Da non dimenticare prima e dopo l’utilizzo del microscopio:
• Durante gli spostamenti, tenere sempre il microscopio in posizione verticale e fare attenzione a non
far cadere nessun elemento mobile, come gli oculari.
• Maneggiare con cura e non imprimere più forza del necessario al microscopio.
• Non cercare di provvedere da soli alla riparazione.
• Spegnere la luce immediatamente dopo l’uso, coprire il microscopio con l’apposita custodia antipol-
vere e tenerlo in un luogo asciutto e pulito.
5.3 Precauzioni di sicurezza relative al sistema elettrico:
• L’utente deve osservare tutte le norme di sicurezza del proprio Paese. Lo strumento è dotato di eti-
chetta di sicurezza CE. Ciononostante l’utente si assume la completa responsabilità di un utilizzo
sicuro del presente strumento.
5.4 Pulizia delle ottiche
• Nel caso sia necessario pulire le componenti ottiche, si provi ad utilizzare innanzitutto aria compres-
sa.
• Nel caso non sia sufciente, pulire le ottiche con un apposito panno che non sia slacciato inumidito
con acqua e detersivo neutro.
• Nel caso anche questo non sia sufciente, inumidire un apposito panno con un miscuglio di 3 parti di
etanolo e 7 parti di etere.
Nota: l’etanolo e l’etere sono liquidi altamente inammabili. Da non utilizzare vicino a fonti di calore, scintilla
o attrezzature elettriche. Utilizzare in ambiente ben aerato.
• Non stronare la supercie di nessuna componente ottica con le mani. Le impronte digitali possono
danneggiare le ottiche.
• Non smontare gli obiettivi o gli oculari nel tentativo di pulirli.

Pagina 24
6.0 SPECIFICHE ELETTRICHE
Alimentazione: 110/240Vac, 50/60 Hz
Luce trasmessa: Disco diffusivo LED 40mm (potenza 1,5W)
Luce incidente: X-LED3 singolo (potenza 3.6W)
7.0 ACCESSORI OPZIONALI
7.1 Oculari e obiettivi addizionali
Si può scegliere fra oculari con vario potere di ingrandimento, fra cui 10x, 15x e 20x. L’attrezzatura
standard comprende una coppia di oculari 10x. Per cambiare gli oculari, sostituire quelli originali con
una coppia di oculari nuovi. Tra gli obiettivi addizionali con diverso potere di ingrandimento sono disponibili lenti 0,5x, 1,5x e 2x. Si consiglia all’utente di utilizzare gli obiettivi addizionali in funzione delle
necessità legate alla distanza di lavoro e all’ingrandimento desiderato. Per aggiungere un obiettivo
addizionale al microscopio, è sufciente avvitare l’obiettivo scelto alla testata stereoscopica. Ogni
volta che si utilizza un obiettivo addizionale si varia la distanza di lavoro; di conseguenza va regolata
nuovamente l’altezza del microscopio.
Sono disponibili a richiesta altri accessori per la serie SZM da utilizzare per applicazioni speciali:
7.2 Condensatore per campo oscuro
Da utilizzare con illuminatore per luce trasmessa. Posizionando il condensatore sul foro di uscita della
luce trasmessa, esso permette di creare l’effetto campo oscuro. Tra i campi di applicazione suggeriti:
la gioielleria/oreceria e lo studio gemmologico, nonché tecniche speciali nelle applicazioni biomedicali, compresi l’osservazione embrionale e la colorazione per acquisizione d’argento in situ.
7.3 Adattatorefotograco
Questo accessorio montato sulla testata trinoculare permette l’utilizzo di una macchina fotograca di
qualsiasi marca sul microscopio per l’acquisizione di foto. L’anello T2 relativo al tipo di macchina fotograca posseduta va inserito nell’adattatore prima di montarvi la macchina. L’anello T2 può essere
acquistato in qualsiasi negozio di fotograa.
7.4 Adattatore “passo C” per telecamera
Questo accessorio montato sulla testata trinoculare permette di inserire una telecamera a circuito
chiuso sul tubo trinoculare per collegamento a monitor TV. A seconda della telecamera utilizzata servirà un adattatore “passo C” oppure “CS”.

Pagina 25
8.0 MISURE ECOLOGICHE
Ai sensi dell’articolo 13 del decreto legislativo 25 luglio 2005 n°151. “Attuazione delle direttive 2002/95/CE,
2002/96/CE e 2003/108/CE, relative alla riduzione dell’uso di sostanze pericolose nelle apparecchiature elettriche ed elettroniche, nonché allo smaltimento dei riuti”.
Il simbolo del cassonetto riportato sulla apparecchiatura o sulla sua confezione indica che il prodotto alla
ne della propria vita utile deve essere raccolto separatamente degli altri riuti. La raccolta differenziata della
presente apparecchiatura giunta a ne vita è organizzata e gestita dal produttore.
L’utente che vorrà disfarsi della presente apparecchiatura dovrà quindi contattare il produttore e seguire il
sistema che questo ha adottato per consentire la raccolta separata dell’apparecchiatura giunta a ne vita.
L’adeguata raccolta differenziata per l’avvio successivo della apparecchiatura dismessa al riciclaggio, al trattamento e allo smaltimento ambientalmente compatibile contribuisce ad evitare possibili effetti negativi sull’ambiente e sulla salute e favorisce il reimpiego e/o riciclo dei materiali di cui è composta l’apparecchiatura.
Lo smaltimento abusivo del prodotto da parte del detentore comporta l’applicazione delle sanzioni amministrative previste dalla normativa vigente.

Página 26
INDICE
1.0 DESCRIPCIÓN pag 28
2.0 INTRODUCCIÓN pag 29
3.0 DESEMBALAJE Y MONTAJE DEL MICROSCOPIO pag 29
4.0 ALINEACIÓN Y USO DEL MICROSCOPIO pag 30
5.0 MANTENIMIENTO pag 31
6.0 ESPECIFICACIONES ELÉCTRICAS pag 32
7.0 OTROS ACCESORIOS pag 32
8.0 MEDIDAS ECOLÓGICAS pag 33

Página 27
NORMAS DE SEGURIDAD
El presente microscopio es un instrumento cientíco de precisión proyectado para durar muchos años con
un mínimo nivel de mantenimiento. Para su construcción se han utilizado elementos ópticos y mecánicos
de elevada calidad que lo convierten en el instrumento ideal para ser utilizado a diario en las aulas y en el
laboratorio.
Optika avisa que esta guía contiene importante información sobre la seguridad y el mantenimiento del pro-
ducto y por lo tanto debe ser accesible a todos aquellos que utilizan dicho instrumento.
Optika declina cualquier responsabilidad derivada de un uso inapropiado del presente instrumento no con-
templado en la presente guía.
Advertencias de seguridad
Este manual incluye importante información y normas sobre la seguridad de instalación, utilización y
mantenimiento del microscopio. Se ruega leer atentamente el manual antes de utilizar el instrumento. Para una utilización segura, el usuario debe leer y seguir atentamente todas la instrucciones del
manual.
Los productos OPTIKA han sido diseñados para ser utilizados en condiciones normales de trabajo. El
instrumento y los accesorios descritos en el manual han sido realizados y testados según las normas
industriales de seguridad para instrumentación de laboratorio.
Una utilización inadecuada podría dañar el instrumento o provocar lesiones al usuario.
Mantener el presente manual cerca del instrumento para facilitar su consulta.
Normas de seguridad sobre el sistema eléctrico
Antes de conectar el microscopio a la toma de corriente, asegurarse que la tensión de entrada del
lugar donde se usa coincide con la tensión de utilización del microscopio y que el interruptor del iluminador esté en la posición off.
El usuario debe consultar las normas de seguridad de su país. El instrumento incluye
una etiqueta de seguridad CE. No obstante estas pautas, el usuario debería utilizar el microscopio en
función de sus necesidades pero con un mínimo de responsabilidad y seguridad.
Símbolos de advertencia/peligro utilizados en el presente manual
El usuario debe conocer las indicaciones relacionadas con la seguridad cuando utiliza el microscopio.
A continuación se indican los símbolos de advertencia o peligro. Dichos símbolos se han utilizado en
este manual de instrucciones.
Seguir las instrucciones indicadas para evitar posibles daños severos al
usuario.
Advertencia de utilización; la utilización inadecuada del instrumento podría
dañar el instrumento o provocar daños al usuario.
Posibilidad de descarga eléctrica.
Atención: supercie de elevada temperatura. Evitar el contacto directo.
Notas técnicas o consejos de utilización.

Página 28
1.0 DESCRIPCIÓN
SZM-LED2
OCULARE
REGULACIÓN
DIÓPTRICA
MANDO DEL
ENFOQUE
OBJETIVOS
ILUMINADOR
INCIDENTE
LUZ TRANSMITIDA
ZOOM
REGULACIÓN DE
LA INTENSIDAD
LUMINOSA
TUBO
FOTO/VIDEO

Página 29
2.0 INTRODUCCIÓN
La serie de estéreomicroscopios SZM está expresamente dedicada a los laboratorios y a la industria. Sus
características funcionales, la calidad óptica y mecánica ha conseguido convertir esta serie en una referencia
para el mercado por su relación calidad/precio.
El pilar de la serie SZM está representado por sus cabezales dotados de objetivo zoom de aumentos continuos (desde 0.7x a 4.5x). Los aumentos varían desde 45x hasta 180x en función de los oculares y de los
objetivos adicionales (no suministrados de serie).
3.1 Desembalaje del estereomicroscopio
Los componentes de los estereomicroscopios se suministran embalados en cajas de cartón con revestimiento de poliestireno para prevenir roturas accidentales durante el transporte. Abierta la caja,
extraer el revestimiento y disponerlo encima de una mesa, poniendo atención en el desembalaje.
Comprobar que no quede algún componente dentro de la caja. No descartar ninguna pieza hasta que
todo el material haya sido extraído, controlado y montado.
3.2 Montaje del estereomicroscopio
Durante la fase de apertura de las cajas y de las fundas de plástico que contienen los componentes
del microscopio, hay que tener cuidado en no golpear y tocar con los dedos las partes ópticas. A
continuación explicaremos como preparar cada uno de ellos:
Introducir la alimentación externa en la toma situada en la base del microscopio.
El cable de alimentación se debe utilizar solamente en tomas eléctricas con toma a tierra. Consultar
un técnico para asegurarse del estado de la red eléctrica. Después de haber situado e instalado el
microscopio con los componentes necesarios, estará listo para su utilización. El microscopio es un
instrumento de laboratorio proyectado para durar mucho tiempo. Manejarlo siempre con mucha precaución, evitando las vibraciones bruscas y los golpes. Desconectar siempre el cable de alimentación
del microscopio cuando no se utiliza durante un largo periodo de tiempo, mientras se limpia o cuando
se realiza cualquier trabajo de mantenimiento.
NO DESMONTAR EL MICROSCOPIO
No desmontar el microscopio para evitar anular la garantía y provocar el funcionamiento incorrecto.
3.0 DESEMBALAJE Y MONTAJE DEL MICROSCOPIO

Página 30
4.0 ALINEACIÓN Y USO DEL MICROSCOPIO
4.1 Sistema de iluminación
Los modelos SZM-LED1 y SZM-LED2 están provistos de un sistema integrado de iluminación incidente y transmitida. Antes de utilizar el microscopio, leer atentamente la sección 5.3 sobre las precauciones de seguridad del sistema eléctrico. A continuación, introducir la alimentación externa y utilizar los correspondientes mandos para regular la intensidad luminosa.
La platina está equipada con dos pinzas de sujeción de la muestra.
4.2 Distancia interpupilar
Mover los dos tubos porta oculares hasta obtener la visión de un único campo luminoso circular.
Si se observan dos discos, la distancia interpupilar es demasiado grande. En cambio, si aparecen
dos discos superpuestos, signica que la distancia interpupilar es
demasiado pequeña.
4.3 Enfoque del microscopio
Situar un objeto en la platina portapreparados. Enfocar la muestra
situando el mando de regulación de los aumentos en su valor más
alto. Si no fuera posible, regular la altura del microscopio a lo largo
de la barra de desplazamiento.
Asegurarse de haber estrechado el tornillo de jación y la palanca situada debajo de la base del microscopio, después de haber
ajustado la altura del microscopio. Seleccionar con el zoom los aumentos máximos. Enfocar la muestra girando los correspondientes
mandos de enfoque hasta que la imagen no resulte nítida y denida. A continuación, situar el mando zoom en el valor mínimo.
Repetir la operación con el ocular izquierdo. Controlar el enfoque
de la imagen a lo largo de todo el intervalo zoom. Debería resultar
perfectamente parafocal.
4.4 Aumentos y distancia de trabajo
Seleccionar los aumentos deseados, girando los mandos de regulación del objetivo zoom. Sustituir
los oculares y si fuera necesario, añadir una lente (objetivo) adicional. Los aumentos totales se pueden calcular de la siguiente manera:
Aumentos totales = aumentos de los oculares x aumentos zoom x aumentos lente suplementaria
La distancia de trabajo estándar es 100 mm.
4.5 Regulación de la tensión del enfoque
Para enfocar la preparación, girar los mandos situados a ambos lados del soporte. Sirven para desplazar verticalmente el microscopio a lo largo del brazo y enfocar la preparación. Dicho movimiento es
posible mediante un mecanismo de piñón y cremallera. Para regular la tensión del mando de enfoque
será suciente girar el mando derecho manteniendo inmóvil el mando izquierdo.
4.6 Tubo trinocular para SZM
La regulación de la distancia interpupilar y el bloqueo del ocular del tubo trinocular es idéntico al
binocular. Extrayendo hacia el exterior la palanca de introducción del tubo trinocular, toda la luz proveniente del ocular derecho se desviará al tubo trinocular para realizar operaciones de foto y videomicroscopia. Simultáneamente, bloquear la entrada de la luz de la observación por el ocular derecho.
En el extremo superior del tubo trinocular se sitúa la unión foto/video a la cual es posible conectar,
mediante el correspondiente adaptador, cámaras fotográcas o videocámaras con óptica réex y tele
cámaras CCD.

Página 31
5.1 Ambiente de trabajo
Se aconseja utilizar este microscopio en un ambiente limpio y seco; también se deben evitar los im-
pactos. La temperatura de trabajo recomendada es de 0-40°C y la humedad relativa máxima es de
85 % (en ausencia de condensación). Si es neceario, utilizar un deshumidicador.
5.2 Consejos a seguir antes y después de utilizar el microscopio:
• Durante los desplazamientos, mantener el microscopio en posición vertical y prestar mucha atención
para evitar que se caigan los accesorios móviles, por ejemplo, los oculares.
• Manejar con cuidado el microscopio evitando usar una fuerza mayor de la necesaria.
• Evitar reparar el microscopio por su cuenta.
• Apagar la luz inmediatamente después de haber utilizado el microscopio, cubrirlo con su correspon-
diente funda antipolvo y mantenerlo en un ambiente limpio y seco.
5.3 Precauciones de seguridad relativas al sistema eléctrico:
• El usuario debe consultar las normas de seguridad de su País. El instrumento está dotado de una
etiqueta de seguridad CE. No obstante, el usuario debe asumir la completa responsabilidad del uso
seguro del presente instrumento.
5.4 Limpieza de las ópticas
• Si es necesario limpiar los componentes ópticos utilizar, en primer lugar, aire comprimido.
• Si no es suciente, limpiar las ópticas con un paño, que no esté deshilachado, humedecido en agua
y detergente neutro.
• Si todavía no es suciente, humedecer un paño con una mezcla de 3 partes de etanol y 7 partes de
éter.
Nota: el etanol y el éter son líquidos altamente inamables. No se deben utilizar cercanos a una fuente de
calor, chispas o instrumentación eléctrica. Utilizar en un ambiente bien aireado.
• No frotar la supercie de nigún componente óptico con la manos. Las huellas digitales pueden dañar
las ópticas.
• No desmontar los objetivos o los oculares para intentar limpiarlos.
5.0 MANTENIMIENTO

Página 32
Alimentación: 110/240Vac, 50/60 Hz
Luz transmitida: Disco de difusión LED 40 mm (potencia 1,5W)
Luz incidente): único X-LED3 (potencia 3.6W)
7.1 Oculares y objetivos adicionales
Es posible seleccionar los oculares con diverso poder de aumentos: 10x, 15x y 20x.
La dotación estándar incluye una pareja de oculares 10x. Para cambiar los oculares, sustituir los ori-
ginales por una pareja de oculares nuevos. Los objetivos adicionales disponibles, con diverso poder
de ampliación, son: 0,5x, 1,5x y 2x. Se aconseja al usuario utilizar los objetivos adicionales en función
de las necesidades relacionadas con la distancia de trabajo y los aumentos deseados. Para añadir un
objetivo suplementario al microscopio, será suciente atornillar el objetivo seleccionado en el cabezal
del estereomicroscopio. Cada vez que se utilice un objetivo adicional, variará la distancia de trabajo,
por lo que habrá que regular de nuevo la altura del microscopio.
Para aplicaciones especiales, es posible solicitar otros accesorios de la serie SZM.
7.2 Condensador para campo oscuro:
Se utiliza con iluminadores para luz transmitida. Situando el condensador en el oricio de salida de
la luz transmitida, se podrá crear el campo oscuro. Los campos de aplicación sugeridos son: joyería/orfebrería, estudio gemológico, aplicaciones especiales de biomedicina, incluidas la observación
embrionaria y la coloración para adquisición de plata in situ.
7.3 Adaptadorfotográco
Este accesorio, montado sobre el cabezal trinocular, permite la utilización de cualquier cámara
fotográca en el microscopio para la adquisición de fotos. El anillo T2, correspondiente al tipo de
cámara adquirida, se deberá introducir en el adaptador antes de montar la cámara. Es posible
adquirir el anillo T2 en cualquier tienda de fotografía.
7.4 Adaptador “de paso C” para tele cámaras
Este accesorio, montado en el cabezal trinocular, permite introducir una tele cámara de circuito ce-
rrado en el tubo trinocular para conectarlo a un monitor de TV. En función de la tele cámara utilizada,
será necesario un adaptador de “paso C” ó “CS”.
6.0 ESPECIFICACIONES ELÉCTRICAS
7.0 OTROS ACCESORIOS

Página 33
En conformidad con el Art. 13 del D.L. de 25 julio 2005 n°151.Actuación de las Directivas 2002/95/CE,
2002/96/CE y 2003/108/CE, relativas a la reducción del uso de sustancias peligrosas en la instrumentación
eléctrica y electrónica y a la eliminación de residuos.
El símbolo del contenedor que se muestra en la instrumentación o en su embalaje indica que el producto
cuando alcanzará el nal de su vida útil se deberá recoger de forma separada del resto de residuos. La gestión de la recogida selectiva de la presente instrumentación será llevada a cabo por el fabricante.Por lo tanto,
el usuario que desee eliminar la presente instrumentación tendrá que ponerse en contacto con el fabricante y
seguir el sistema que éste ha adoptado para permitir la recogida selectiva de la instrumentación. La correcta
recogida selectiva de la instrumentación para su posterior reciclaje, tratamiento y eliminación compatible con
el ambiente contribuye a evitar posibles efectos negativos al ambiente y a la salud y favorece su reutilización
y/o reciclado de los componentes de la instrumentación.
La eliminación del producto de forma abusiva por parte del usuario implicaría la aplicación de las sanciones
administrativas previstas en la normativa vigente.
8.0 MEDIDAS ECOLÓGICAS

Seite 34
INHALT
1.0 BESCHREIBUNG Seite 36
2.0 EINLEITUNG Seite 37
3.0 AUSPACKEN UND MONTAGE Seite 37
4.0 VERWENDUNG DES MIKROSKOPS Seite 38
5.0 WARTUNG Seite 39
6.0 STROMVERSORGUNG
Seite 40
7.0 ZUBEHÖRTEILE Seite 40
8.0 WIEDERVERWERTUNG Seite 41

Seite 35
Dieses Mikroskop ist ein wissenschaftliches Präzisionsgerät, es wurde entwickelt für eine jahrelange Verwendung bei einer minimalen Wartung. Dieses Gerät wurde nach den höchsten optischen und mechanischen
Standards und zum täglichen Gebrauch hergestellt.
Diese Bedienungsanleitung enthält wichtige Informationen zur korrekten und sicheren Benutzung
des Geräts. Diese Anleitung soll allen Benutzern zur Verfügung stehen.
Optika lehnt jede Verantwortung für eine fehlerhafte, in dieser Bedienungsanleitung nicht gezeigten Verwendung Ihrer Produkte ab.
Sicherheitshinweise
Diese Bedienungsanleitung enthält wichtige Sicherheitsinformationen bezüglich auf die Installation,
Verwendung und Wartung des Mikroskops. Wir empfehlen, die Bedienungsanleitung sorgfältig zu
lesen vor der Verwendung. Um das Gerät sicher zu verwenden muss der Benutzer den angegebenen
Anleitungen folgen. Die OPTIKA Produkte sind für eine sichere Verwendung bei normalen Arbeitsbedingungen entwickelt worden. Das Gerät und die in dieser Bedienungsanleitung beschriebenen Zubehörteile sind gemäß industriellen Sicherheitsrichtlinien für Laborinstrumente hergestellt und getestet
worden.
Eine falsche Verwendung kann Verletzungen verursachen und das Gerät beschädigen.
Diese Bedienungsanleitung muss immer in der Nähe des Geräts sein, um eine schnelle Beratung zu
ermöglichen.
ElektrischeVorsichtsmaßnahmen
Bevor Sie das Netzkabel anstecken, vergewissern Sie sich, dass die Spannung für das Mikroskop
geeignet ist und dass der Beleuchtungsschalter sich in Position OFF bendet.
Beachten Sie alle Sicherheitsvorschriften des Arbeitsplatzes, an dem Sie mit dem Mikroskop
arbeiten. Das Gerät entspricht den CE-Normen. Die Benutzer tragen während der Nutzung
des Geräts die volle Verantwortung dafür.
Wartung- und Gefahrzeichen
Der Benutzer muss alle Sicherheitsaspekte wissen als er das Gerät verwendet. Wartung- und Gefahrzeichen werden unten angegeben und in dieser Bedienungsanleitung verwendet.
Beachten Sie die Hinweise um mögliche schwere Verletzungen zu vermeiden.
Verwendungsermahnung; eine falsche Verwendung des Geräts kann Verletzungen oder Beschädigungen verursachen.
Elektrischer Schlag möglich
Achtung: Oberäche mit hoher Temperatur. Vermeiden Sie einen direkten Kontakt.
Technische Hinweise und Verwendungsempfehlungen
VORSICHTSMASSNAHMEN

Seite 36
1.0 BESCHREIBUNG
SZM-LED2
OKULARE
DIOPTRIENVERSTELLUNGSRING
SCHARFSTELLUNGSKOPF MIT
SPANNUNGSTEUERUNG
OBJEKTIV
AUFLICHT
DURCHLICHT
ZOOMSTEUERUNG
HELLIGKEITSEINSTELLUNG
FOTO/VIDEO

Seite 37
2.0 EINLEITUNG
Die OPTIKA Stereomikroskope der SZM Serie bestehen aus Greenough Stereomikroskopen mit einem stufenlosen Zoomobjektiv von 0,7 bis 4,5 Vergrößerungen, die eine hervorragende Leistung anbieten. Die Gesamtvergrößerung reicht von 1,75x bis 180x gemäß der Okulare und der Objektive, die verwendet werden.
Die SZM Geräte sind besonders geeignet, um Objekte in drei Dimensionen, in biologischen, industriellen und
didaktischen Anwendungen zu betrachten.
Dank der beidseitigen Zoomeinstellungknöpfe kann der Benutzer die Vergrößerung mit einem Zoomverhältnis von 6,428 ändern, indem das System perfekt parfokal (der Fokus wird gehalten als die Vergrößerung
geändert wird) und zentriert bleibt (die Vergrößerung ändert sich in konzentrischer Art).
3.0 AUSPACKEN UND MONTAGE
3.1 Auspacken
Die Mikroskopkomponenten werden in ihrer Verpackung geliefert, um während des Transports Schaden zu vermeiden. Öffnen Sie erst die Kartonschachtel und dann die Verpackung aus Polystyrol.
Stellen Sie sicher, dass keine Teile in der Verpackung bleiben.
Vor dem Auspacken der einzelnen Teile nehmen Sie alles aus der Schachtel heraus. Falls die Ware
beschädigt ist, setzen Sie sich sofort mit dem Lieferanten und dem Spediteur in Verbindung.
3.2 Montage
Scheuern Sie keine Oberäche der optischen Komponenten mit den Händen, da Fingerabdrücke und
Fettecke die Optik beschädigen können.
Positionieren Sie den stereoskopischen Körper an seiner Stütze und befestigen ihn dank der Spannschraube an der linken Seite. Nehmen Sie die Okulare und die anderen optischen Komponenten aus
der Verpackung heraus. Achten Sie darauf, die Linsenoberäche nicht zu berühren, dann setzen Sie
die Okulare in Ihrem Sitz ein.
Stecken Sie das Netzteil in die Steckdose auf dem Stativ.
Bevor Sie die Stromversorgung sicher, dass die Spannung des Mikroskops richtig
Lassen Sie das elektrische System von einem Techniker prüfen. Falls keine weitere Zubehörteile ins-
talliert werden muss, ist das Gerät Verwendungsbereit.
Dieses Mikroskop wurde für eine lange Verwendung entwickelt. Behandeln Sie es mit Vorsicht und
gebrauchen Sie nicht zu viel Kraft. Entfernen Sie immer das Netzkabel vom Mikroskop als es für eine
lange Zeit nicht verwendet wird, bei der Reinigung und der Wartung.
MONTIEREN SIE NICHT DAS GERÄT AB.
Betriebsstörungen können entstehen und die Garantie wird ungültig.

Seite 38
4.0 VERWENDUNG DES MIKROSKOPS
4.1 Beleuchtung
Die Mikroskope SZM-LED1 und SZM-LED2 verfügen über ein Beleuchtungssytem mit Auf- und
Durchlicht. Vor der Verwendung lesen Sie sorgfältig den Abschnitt 5.3 über die elektrischen Vorsichtsmaßnahmen. Dann stecken Sie das Netzkabel an und stellen die Helligkeit ein. Der Tisch hat zwei
Halterungen um die Probe zu halten.
4.2 Augenabstand
Bewegen Sie die zwei Okulartuben bis ein einzelnes rundes Hellfeld gefunden wird. Falls zwei Kreise erscheinen, ist der Augenabstand zu groß. Wenn dagegen zwei Kreise übereinander sind, ist der
Augenabstand zu klein.
4.3 Fokusverstellung
Legen Sie ein Objekt auf die Objektplatte. Stellen Sie das
Zoomobjektiv auf die höchste Vergrößerung ein um den Objekt scharf zu betrachten. Falls dies nicht möglich sein sollte, dann ändern Sie die Mikroskophöhe am vertikalen Schaft.
Nach der Einstellung befestigen Sie die Spannschraube und
den Binder unter dem stereoskopischen Körper.
Wählen Sie die höchste Vergrößerung und versuchen Sie,
den Objekt mit Hilfe der Fokusknopfe scharf zu stellen bis
das Bild klar und scharf ist.
Jetzt wählen Sie die niedrigste Vergrößerung aus und stellen die Dioptrienverstellung bei der rechten Okular ein, bis ein
scharfes Bild an der rechten Okular betrachtet werden kann.
Wiederholen Sie dieses Verfahren mit dem linken Okular. Jetzt
prüfen Sie die Bildscharfstellung bei allen Vergrößerungen. Alles soll perfekt parfokal sein.
4.4 VergrößerungundArbeitsabstand
Wählen Sie die Vergrößerung mit Hilfe von den Zoom-Drehknöpfen. Falls notwendig wechseln Sie
die Okulare und/oder fügen Sie eine Vorsatzlinse hinzu. Die Gesamtvergrößerung kann wie folgt kalkuliert werden:
Okularvergrößerung x Zoomvergrößerung x Vorsatzlinsevergrößerung
Der Arbeitsabstand ist 95mm bei einer normalen Konguration (Linse-1x Objektiv).
4.5 EinstellungderFokusknopfspannung
Um den Objektträger scharf zu stellen verwenden Sie die Drehknöpfe an beiden Seiten des Stativs.
Sie ermöglichen die vertikale Bewegung des Kopfes dank einem Zahnstangenantrieb. Um die Spannung des Scharfstellungsdrehknopfes einzustellen drehen Sie den rechten Drehknopf indem den
linken angehalten wird.
4.6 TrinokularerTubus
Der trinokulare Tubus ist identisch zum binokularer bezüglich auf den Augenabstand und die Okularesperre.
Ziehen Sie den Hebel für den trinokularen Ausgang und das ganze Licht vom rechten Okular geht
in den Tubus für Foto- und Videomikroskopie. Gelichzeitig wird der Lichteingang ins rechten Okular
gesperrt. Am trinokularen Tubus kann man durch den spezischen Adapter Reex Kameras und Videokameras, wie auch CCD Kameras, verbinden

Seite 39
5.1 Arbeitsumfeld
- Arbeitsumfeldtemperatur zwischen 0° und 40°C
- Feuchtigkeit nicht über 85% (ohne Kondensation). Wenn nötig wird die Verwendung eines Luftentfeuchters empfohlen.
5.2 Vorsichtsmaßnahmen
- Wenn das Gerät bewegt wird, halten Sie es immer vertikal und achten Sie darauf, keine Teile (z.B. die
Okulare) fallen zu lassen.
- Behandeln Sie das Mikroskop mit Vorsicht und verwenden Sie nicht zu viel Kraft.
- Führen Sie selber keinerlei Reparaturen durch.
- Schalten Sie das Licht sofort nach der Verwendung aus und decken Sie das Mikroskop mit der mitgelieferten Staubabdeckung und bewahren Sie es an einem sauberen, trockenen Ort auf.
5.3 ElektrischeVorsichtsmaßnahmen
- Bevor Sie das Netzkabel anstecken, vergewissern Sie sich, dass die Spannung für das Mikroskop
geeignet ist und dass der Beleuchtungsschalter sich in Position OFF bendet.
5.4 Reinigung der optischen Teile
- Falls die optischen Teile gereinigt werden müssen, verwenden Sie erst Druckluft.
- Falls dies nicht genügen sollte, so verwenden Sie bitte einen fusselfreien, mit Wasser und einem Reinigungsmittel befeuchtet Tuch.
- Anschließend können Sie einen befeuchten Tuch mit einer 3:7 Lösung von Äthylalkohol und Äther
verwenden.
Achtung: Äthylalkohol und Äther sind leicht ammbare Elemente. Verwenden Sie diese nicht in der
Nähe einer Wärmequelle, in der Nähe von Funken oder elektrischer Geräte. Sie sollten dagegen an
einem belüfteten Ort verwendet werden.
5.0 WARTUNG

Seite 40
Stromversorgung: 110/240Vac, 50/60 Hz
Durchlicht: 40mm LED Streuscheibe (1,5 W Leistung)
Auicht: einzigen X-LED3 (3,6 W Leistung)
7.0 ZUBEHÖRTEILE
7.1 OkulareundVorsatzlinsen
Okulare mit unterschiedlichen Vergrößerungen stehen zur Verfügung, und zwar 10x, 15x und 20x.
Die Standardausrüstung beinhaltet ein Paar von 10x Okularen. Unter den Vorsatzlinsen stehen Vergrößerungen von 0,5x, 1,5x und 2x zur Verfügung. Es wird empfohlen, die Vorsatzlinsen gemäß dem
nötigen Arbeitsabstand und der Vergrößerung auszuwählen.
Um eine Vorsatzlinse zu montieren muss man nur sie an dem stereoskopischen Kopf einzuschrau-
ben. Als eine Vorsatzlinse verwendet wird, wird auch den Arbeitsabstand geändert, deshalb muss
man jedes mal die Mikroskophöhe einstellen.
Weitere Zubehörteile
Andere Zubehörteile für die SZM Serie für spezielle Anwendungen stehen auf Anfrage zur Verfügung:
7.2 Dunkelfeldkondensor
Legen Sie den Kondensor auf das Durchlichtausgangsloch, um ein Dunkelfeld zu schaffen.
Empfehlung für dieseBereiche: Goldschmiedekunst, Gemmologie, spezielle Anwendungen im bio
medizinischen Feld wie embryonale Betrachtung und Färbung.
7.3 FotograscherAdapter
Dieses Zubehör, das an dem trinokularen Kopf montiert wird, ermöglicht die Verbindung aller Fotoka-
meras zum Mikroskop um Bilder aufzunehmen. Der T2-Ring der Kamera muss in den Adapter vor der
Kameramontage eingesteckt werden. Der T2-Ring kann in jedem Fotogeschäft gekauft werden.
7.4 C-Mount-AdpaterfürVideokameras
Dieses Zubehör, das an dem trinokularen Kopf montiert wird, ermöglicht das Einfügen einer Videoka-
mera mit Endlosaufzeichnung zur Verbindung mit einem TV-Bildschirm. Gemäß der Kamera braucht
man entweder einen C-Mount- oder einen CS-Mount-Adapter.
6.0 STROMVERSORGUNG

Seite 41
8.0 WIEDERVERWERTUNG
Gemäß dem Artikel 13 vom Dekret Nr. 151 vom 25.07.2005
“Umsetzung der Richtlinien 2002/95/EG, 2002/96/EG und 2003/108/EG in Bezug auf die Verwendung gefährlicher Stoffe in elektrischen und elektronischen Geräten sowie die Abfallentsorgung”
Das Symbol vom Müllcontainer erscheint auf dem Gerät oder der Verpackung und weist darauf hin, dass das
Produkt Ende des Lebens separat von anderen Abfällen entsorgt werden muss. Die getrennte Sammlung von
Geräten, die am Ende Ihrer Lebensdauer sind, wird vom Hersteller organisiert. Der Benutzer, der dieses Gerät entsorgen möchtet, muss dann Kontakt mit dem Hersteller aufnehmen und der Vorgehensweise folgen,
die zur separaten Entsorgung eingeführt geworden ist. Die korrekte Sammlung von Geräten um die nachfolgende Behandlung, Entsorgung und umweltfreundliche Wiederverwendung zu ermöglichen ist ein Beitrag
um negative Auswirkungen auf der Umwelt und der Gesundheit zu vermeiden und die Wiederverwendung
der Gerätkomponenten zu begünstigen. Die Illegale Entsorgung des Produkts vom Benutzer wird gemäß den
geltenden Bestimmungen bestraft.


www.optikamicroscopes.com
info@optikamicroscopes.com
OPTIKA
Tel.: ++39 035 571392 (6 linee) Telefax: ++ 39 035
Via Rigla 30, Ponteranica (BG) -
S.R.L.
ITALY
571435
MAD Iberica Aparatos
c/. Puig i Pidemunt, nº 28 1º 2ª - (Pol. Ind. Plà d’en Boet) 08302 MATARO
(Barcelona) España Tel: +34 937.586.245 +34 937.414.529
Cientificos
New York Microscope Company Inc
100 Lauman Lane, Suite A, Hicksville, New York 11801, USA
Tel.: 877.877.7274 - Fax: 516.801.2046
www.microscopeinternational.com -
OPTIKA MICROSCOPES -
www.optikamicroscopes.com -
info@nyscopes.com
ITALY
info@optikamicroscopes.com
 Loading...