

Page 1
SOFTWARE SETUP
Model
B-150D-MRPL
B-150D-BRPL
B-190TB
B-290TB
Version: 2 2019
Page 2

Table of Contents
1. Software installation 3
1.1 B-190TB / B-290TB 3
1.2 B-150D series 3
2. Using the camera 3
2.1 Run the Software 3
2.2 Using the Software 3
2.3 Setting camera parameters 4
Page 2
Page 3
1. Software installation
1.1 B-190TB / B-290TB
No software installation is required.
Software is pre-installed before the shipment from the factory.
1.2 B-150D series
The camera is driven by the PROVIEW software.
PROVIEW can be downloaded from the site:
http://www.optikamicroscopes.com/optikamicroscopes/optika-support/download-drivers-softwares/
You will have to register to download the Optikaproview.zip le.
Once the le has been downloaded, you will have unzip it and run the setup.exe le.
At the end of the installation it is possible to start the Software.
• NOTE: no driver installation is required for the cameras. The installation of the Software automatically installs all the needed drivers for the correct operation of the camera.
2. Using the camera
2.1 Run the Software
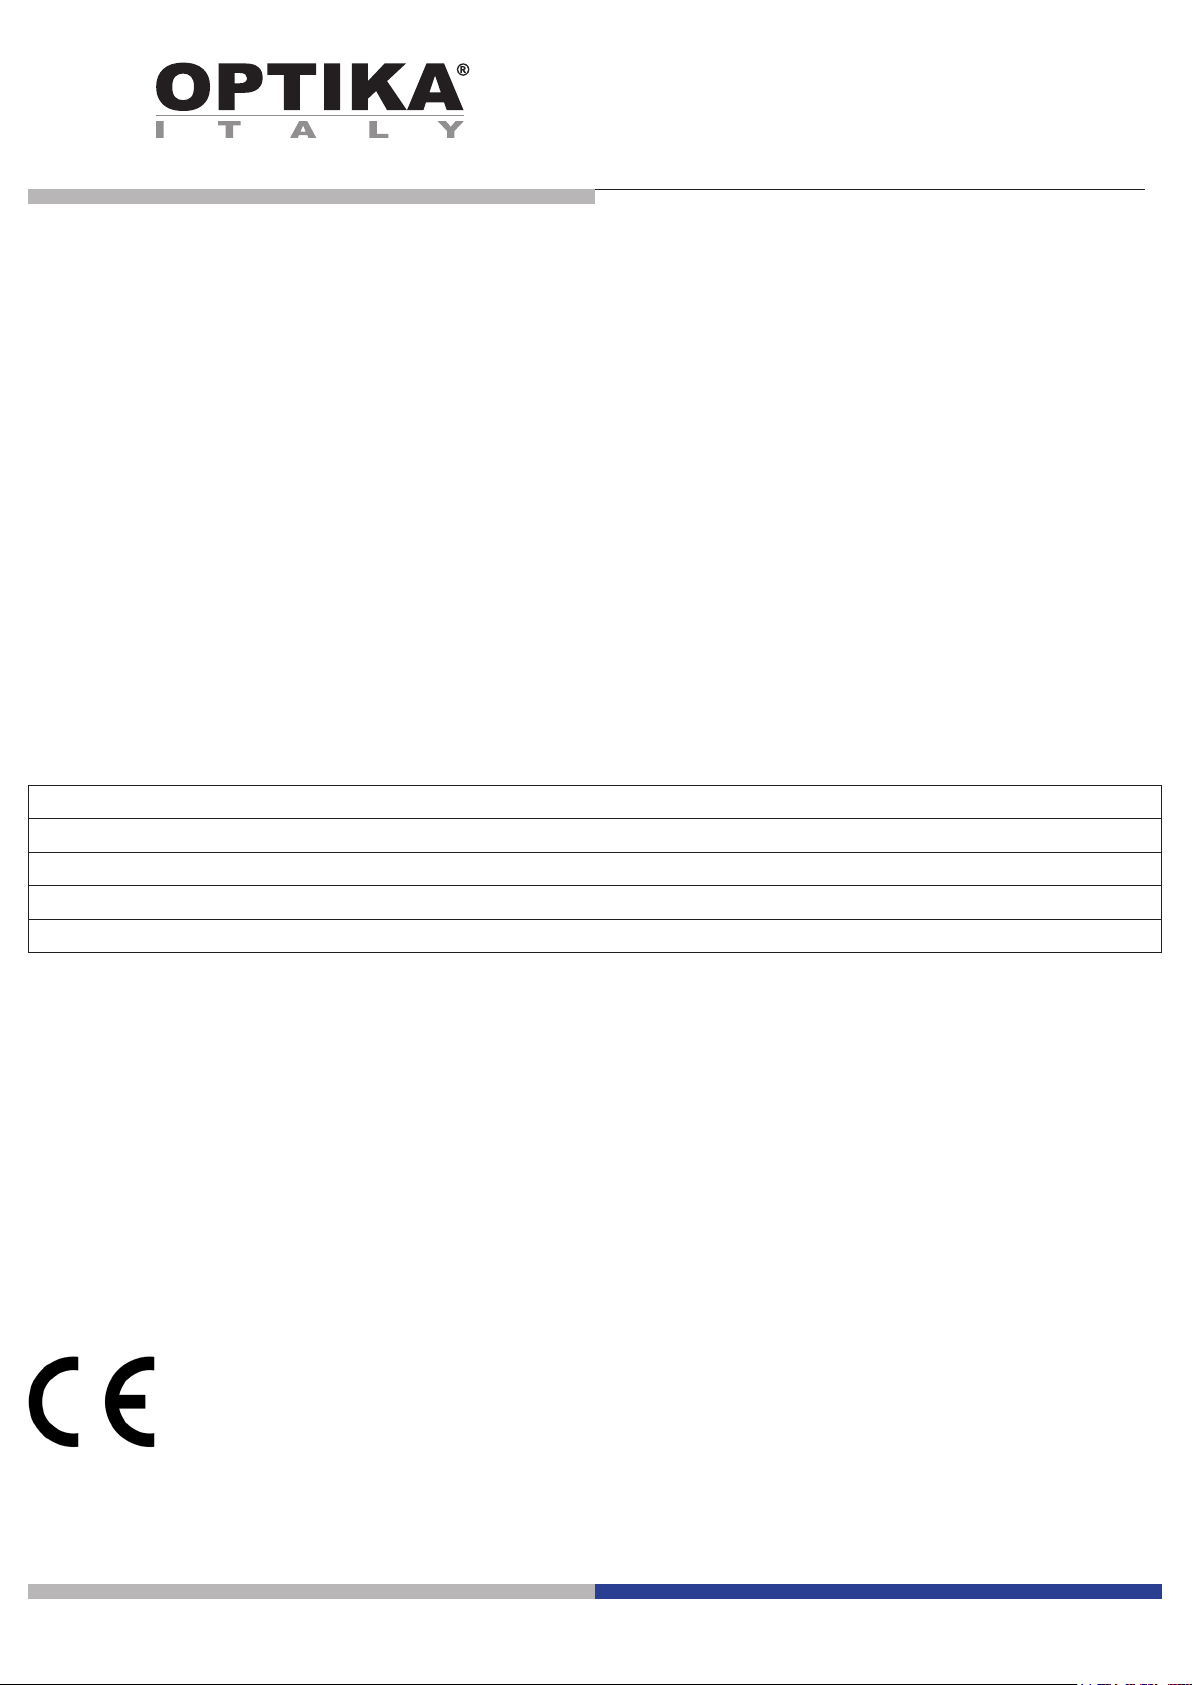
1. Double click on the PROVIEW icon on the desktop.
2.2 Using the Software
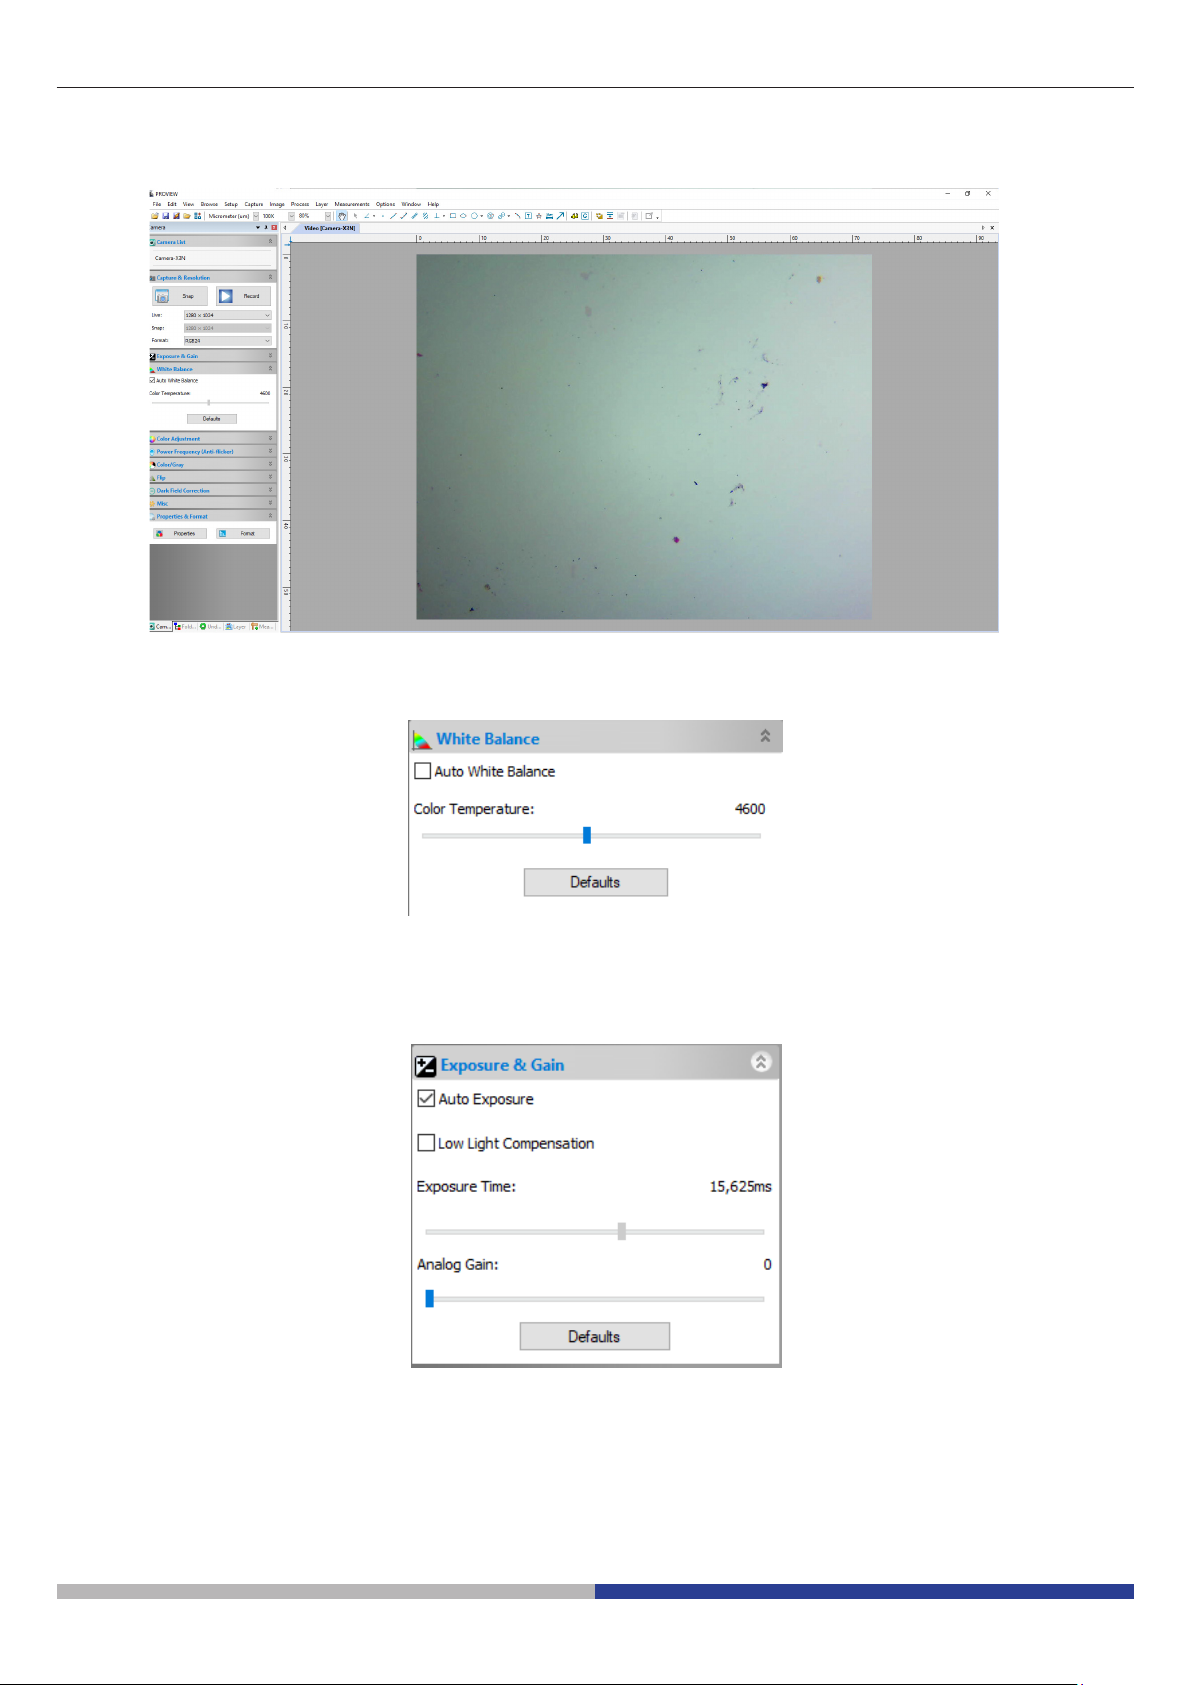
1. The Software main screen appears:
Page 3
Page 4

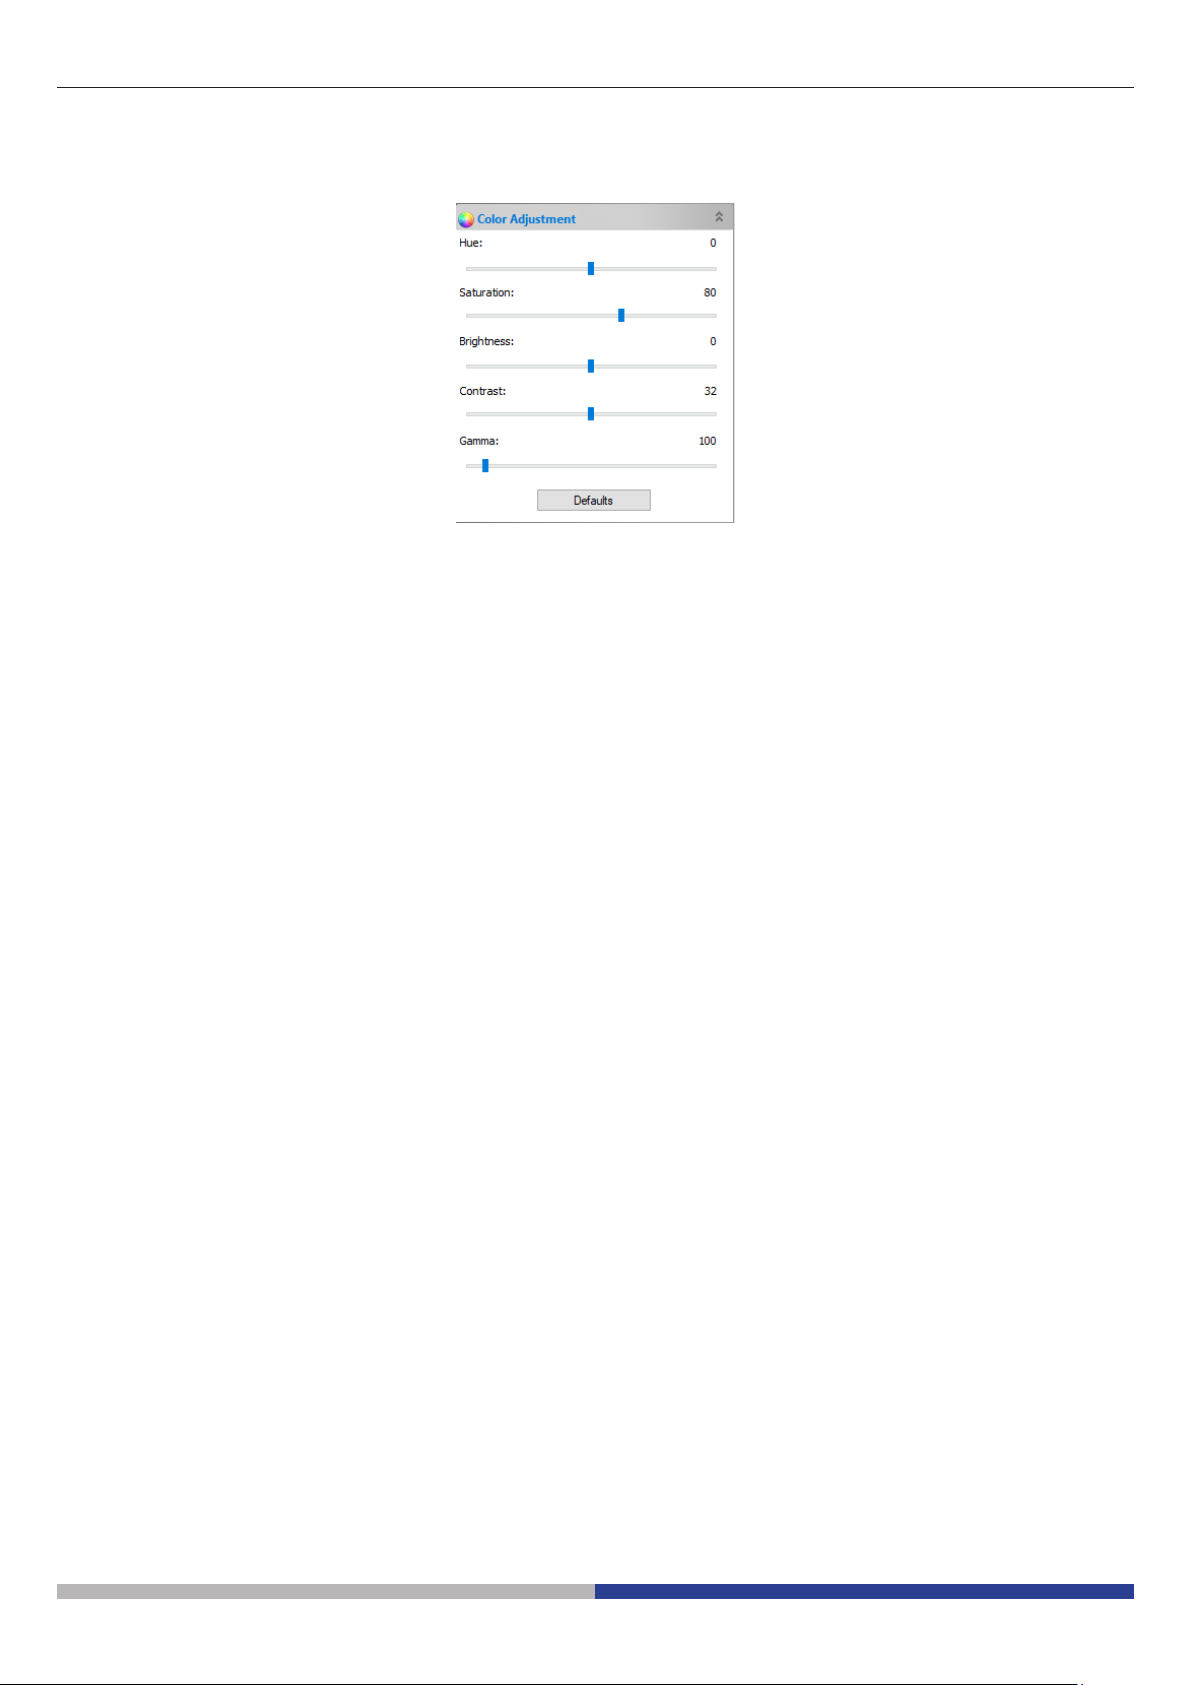
2. In the Camera List section select the available camera named Camera-X3N.
3. Live image starts.
2.3 Setting camera parameters
The Software user manual is available in PDF format within the Software itself and can be opened using the F1
function key.
You must have Acrobat Reader installed to view the manual.
The manual contains all the operating instructions for using the camera and for the various functions of the Software.
Only some initial setting has to be done using this camera in order to have a proper white balance:
1. While observing the live image, move the slide to an empty zone (no specimen is visible).
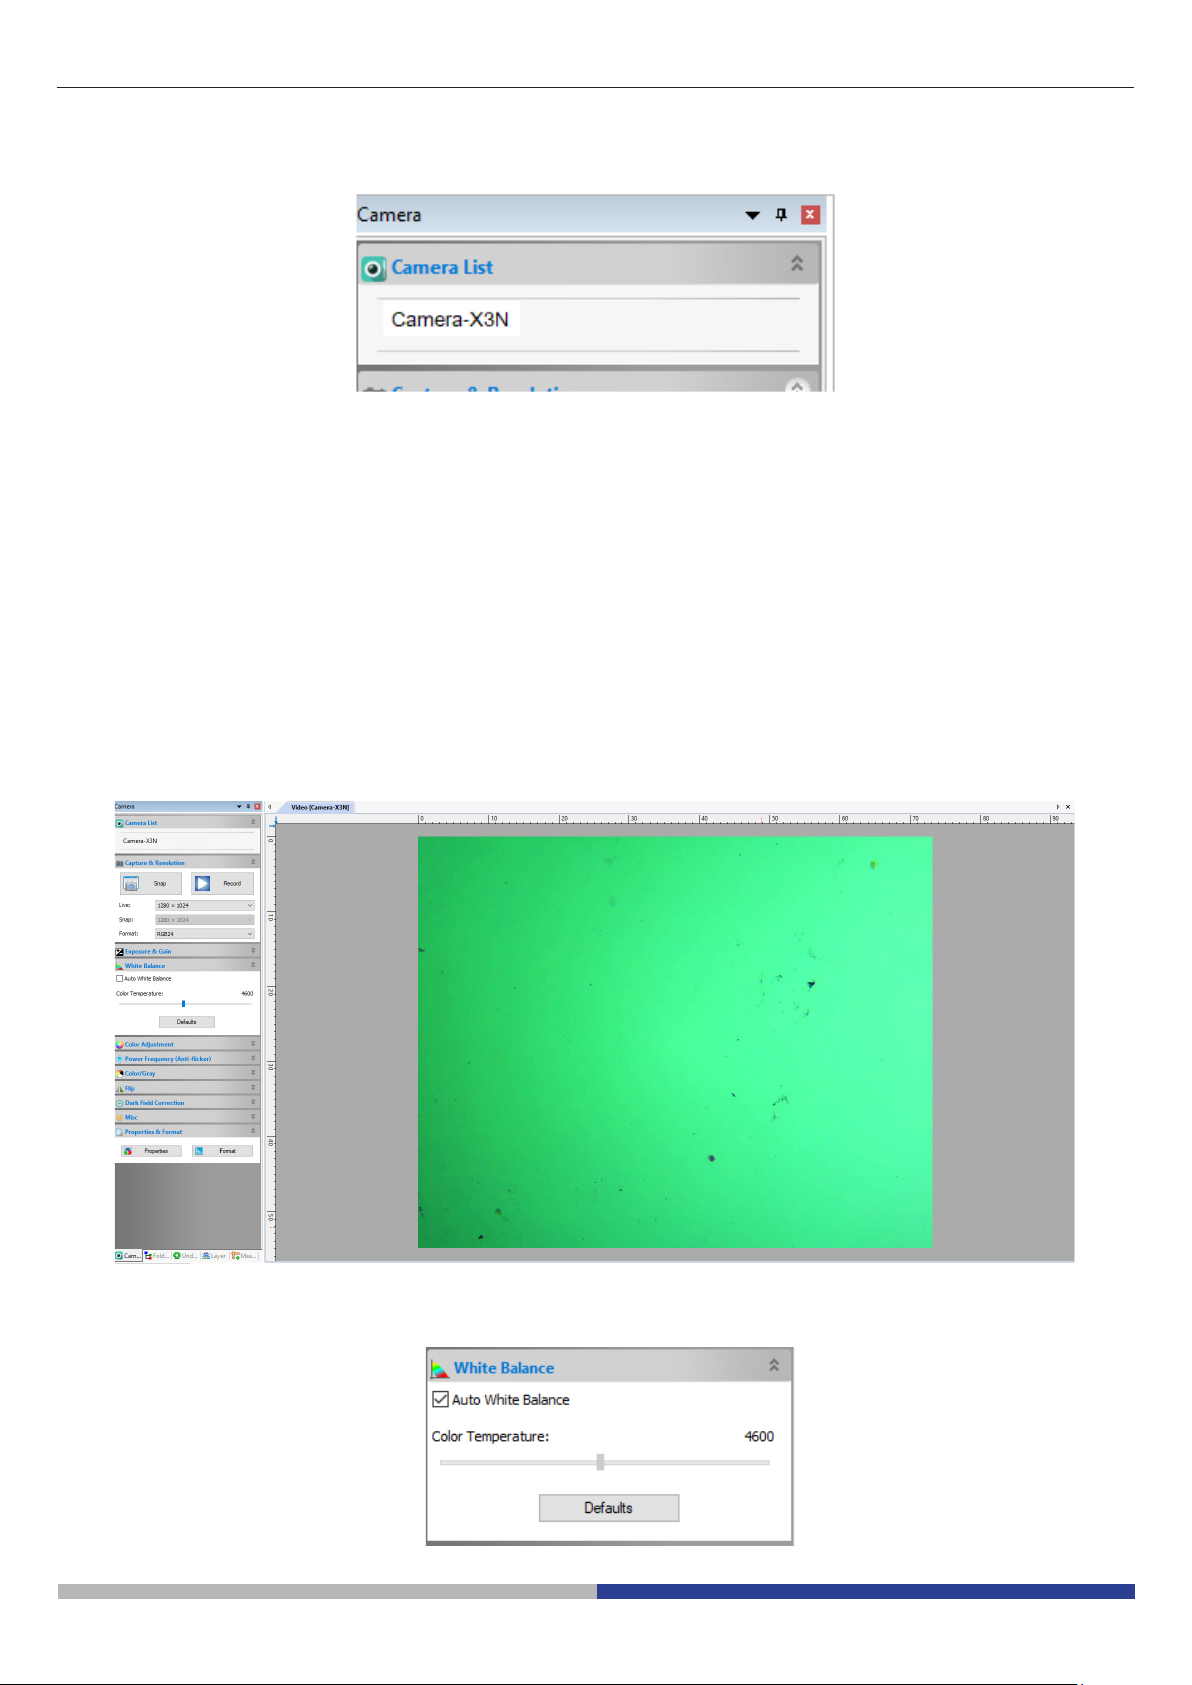
2. Now in the White Balance section activate the checkbox Auto White Balance.
Page 4
Page 5

3. Live image changes accordingly.
4. Deselect the checkbox Auto White Balance. In this way the white balance will be kept by the system,
unless the user changes the light intensity or some parameter in the microscope.
• NOTE: if the checkbox Auto White Balance is always selected, the system will change the white
balance setting according to the specimen, creating false colors in the image.
5. Set the exposure time in the Exposure & Gain section.
6. User can activate the checkbox Auto Exposure or use the Manual exposure.
Page 5
Page 6
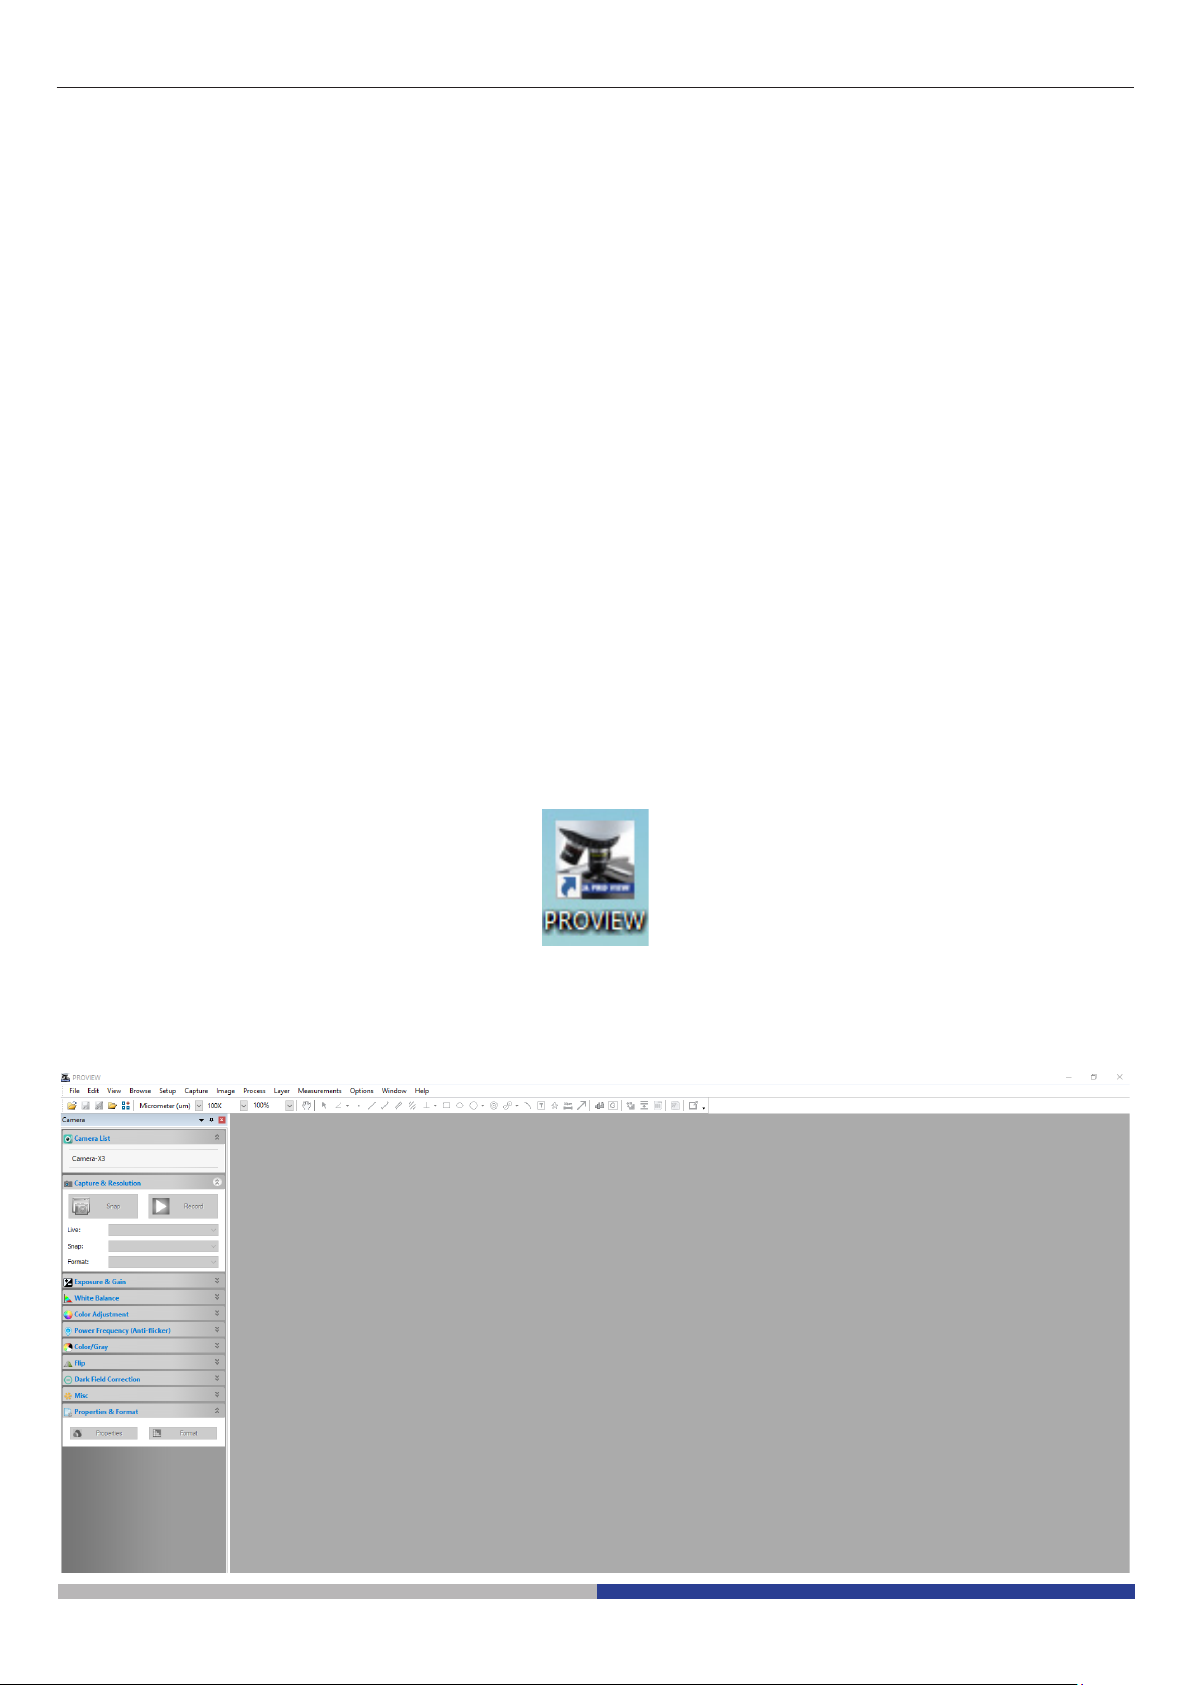
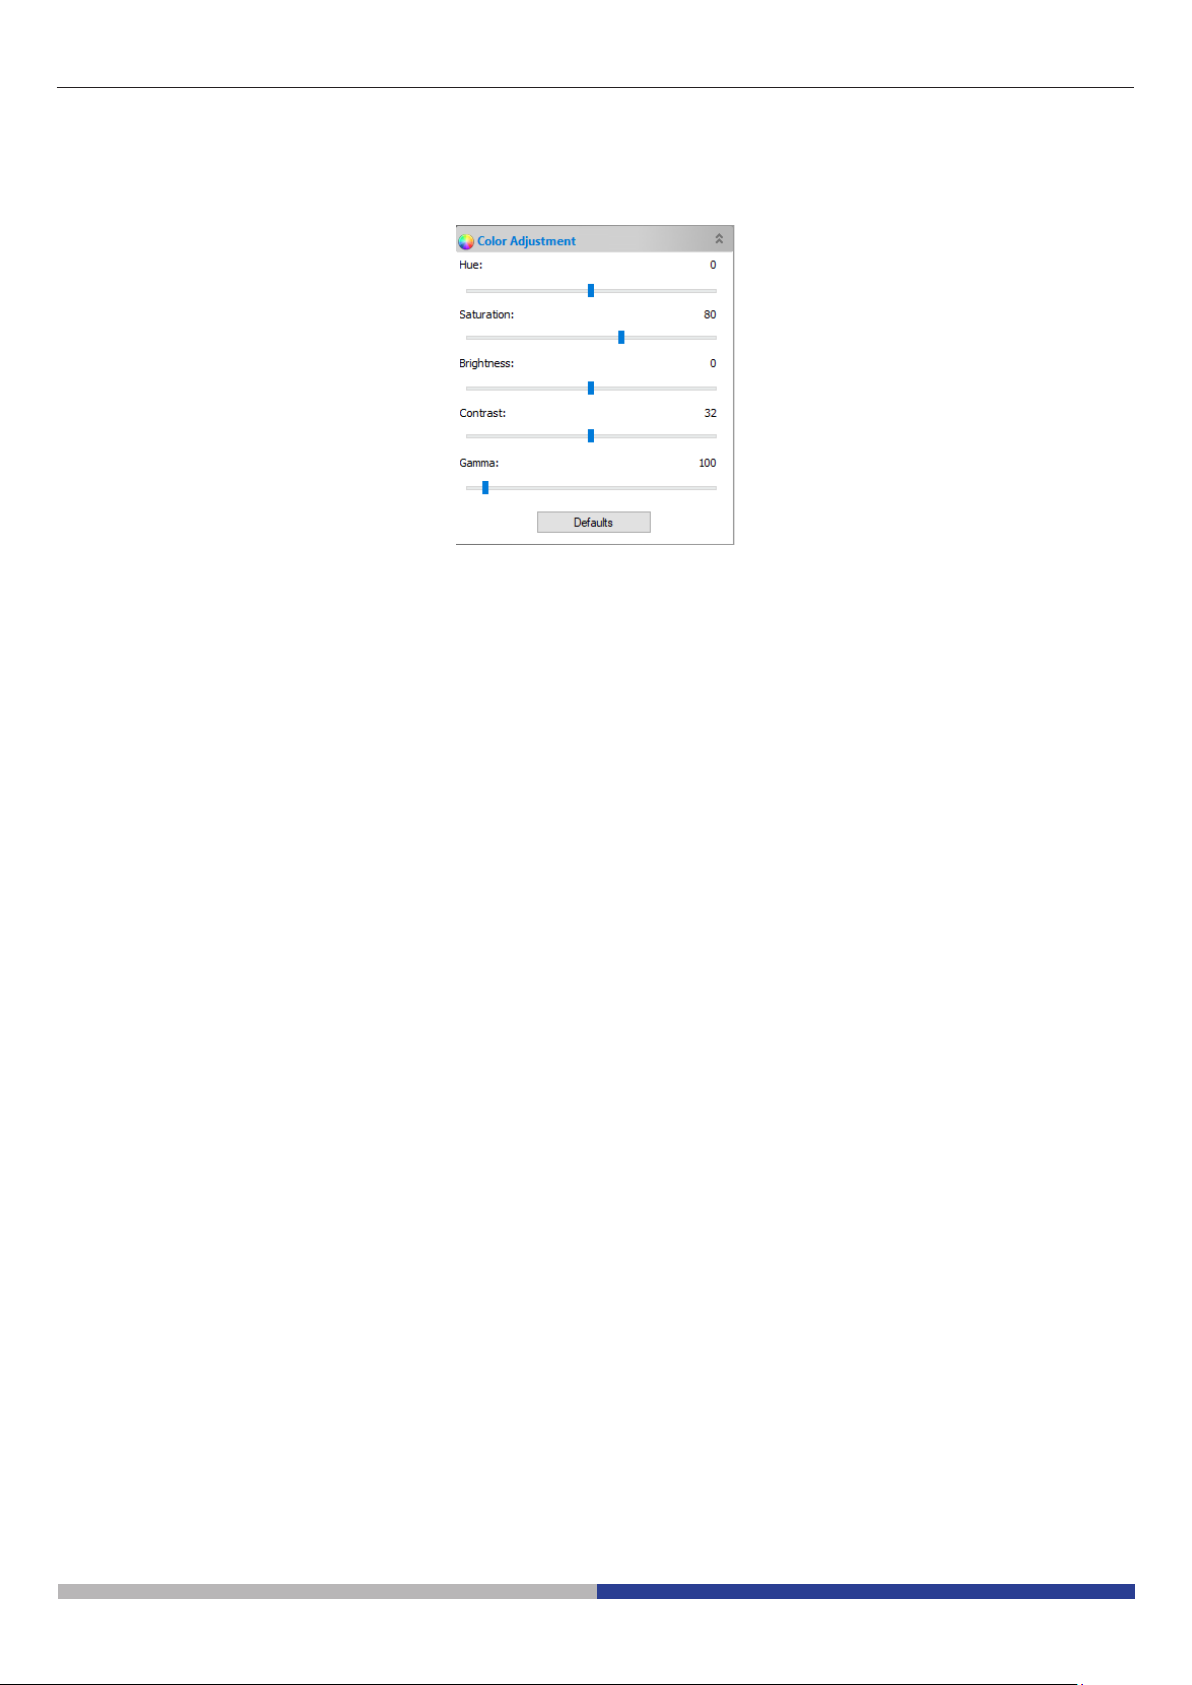
7. To have a fine tuning of the exposure time, user can use the settings in the Color Adjustment section by
changing the setting of the Brightness or Contrast sliders.
8. Once these settings have been performed, system is ready to be used.
9. Now the user can refer to the complete instruction manual for all the other relevant informations.
Page 6
Page 7

OPTIKA S.r.l.
®
Via Rigla, 30 - 24010 Ponteranica (BG) - ITALY Tel.: +39 035.571.392
info@optikamicroscopes.com - www.optikamicroscopes.com
OPTIKA Spain
®
spain@optikamicroscopes.com
OPTIKA USA
®
usa@optikamicroscopes.com
OPTIKA China
®
china@optikamicroscopes.com
OPTIKA India
®
india@optikamicroscopes.com
OPTIKA Central America
®
camerica@optikamicroscopes.com
Page 8

SET-UP DEL SOFTWARE
Modello
B-150D-MRPL
B-150D-BRPL
B-190TB
B-290TB
Versione: 2 2019
Page 9

Sommario
1. Installazione del Software 10
1.1 B-190TB / B-290TB 10
1.2 Serie B-150D 10
2. Uso della telecamera 10
2.1 Avviare il Software 10
2.2 Uso del Software 10
2.3 Impostare i parametri della telecamera 11
Page 9
Page 10

1. Installazione del Software
1.1 B-190TB / B-290TB
Non è necessaria l’installazione di nessun software.
Il software è pre-installato prima della spedizione dalla fabbrica.
1.2 Serie B-150D
La telecamera viene comandata del software PROVIEW.
PROVIEW può essere scaricato dal sito:
http://www.optikamicroscopes.com/optikamicroscopes/optika-support/download-drivers-softwares/
Si dovrà provvedere alla registrazione per poter scaricare il le Optikaproview.zip.
Dopo avere scaricato il le si deve scompattare e poi eseguire il le setup.exe.
Alla ne dell’installazione è possibile avviare il software.
• NOTA: non è richiesta l’installazione di nessun driver per le telecamere. L’installazione del Software
installa automaticamente tutti i driver necessari al corretto funzionamento della telecamera.
2. Uso della telecamera
2.1 Avviare il Software
1. Fare doppio click sull’icona PROVIEW sul desktop.
2.2 Uso del Software
1. Appare la schermata principale del Software:
Page 10
Page 11
2. Nella sezione Camera List selezionare la telecamera Camera-X3N.
3. L’immagine live viene avviata.
2.3 Impostare i parametri della telecamera
Il manuale di utilizzo del software è disponibile in formato PDF all’interno del software stesso e si può aprire
mediante il tasto funzione F1.
È necessario avere installato Acrobat Reader per visualizzare il manuale.
Il manuale contiene tutte le istruzioni operative per l’utilizzo della telecamera e per le varie funzioni del software.
Solo alcune impostazioni iniziali devono essere effettuate utilizzando questa fotocamera per avere un corretto
bilanciamento del bianco:
1. Durante l’osservazione dell’immagine dal vivo, spostare il vetrino in una zona vuota (nessun campione è
visibile).
2. Nella sezione Bilanciamento del Bianco selezionare il tasto Bilanciamento del Bianco Automatico.
Page 11
Page 12
3. L’immagine live si modifica di conseguenza.
4. Deselezionare il tasto Bilanciamento del Bianco Automatico. In questo modo il bilanciamento del bianco
sarà mantenuto dal sistema, a meno che l’utente non cambi l’intensità della luce o qualche parametro nel
microscopio.
• NOTA: se il tasto Bilanciamento automatico del bianco è sempre selezionato, il sistema modificherà
l’impostazione del bilanciamento del bianco in base al campione, creando falsi colori nell’immagine.
5. Impostare il tempo di esposizione nella sezione Esposizione e Guadagno.
6. L’utente può attivare il tasto Esposizione automatica o utilizzare l’esposizione Manuale.
Page 12
Page 13
7. Per avere una regolazione fine del tempo di esposizione, l’utente può utilizzare le impostazioni nella sezione Regolazione colore modificando l’impostazione dei cursori Luminosità o Contrasto.
8. Una volta eseguite queste impostazioni, il sistema è pronto all’uso.
9. Ora l’utente può consultare il manuale di istruzioni completo per tutte le altre informazioni rilevanti.
Page 13
Page 14

OPTIKA S.r.l.
®
Via Rigla, 30 - 24010 Ponteranica (BG) - ITALY Tel.: +39 035.571.392
info@optikamicroscopes.com - www.optikamicroscopes.com
OPTIKA Spain
®
spain@optikamicroscopes.com
OPTIKA USA
®
usa@optikamicroscopes.com
OPTIKA China
®
china@optikamicroscopes.com
OPTIKA India
®
india@optikamicroscopes.com
OPTIKA Central America
®
camerica@optikamicroscopes.com
Page 15

SETUP SOFTWARE
Modelos
B-150D-MRPL
B-150D-BRPL
B-190TB
B-290TB
Versión: 2 2019
Page 16

Cuadro de contenidas
1. Instalación del software 17
1.1 B-190TB / B-290TB 17
1.2 Serie B-150D 17
2. Uso de la cámara 17
2.1 Ejecutar el software 17
2.2 Uso del software 17
2.3 Ajuste de los parámetros de la cámara 18
Page 16
Page 17

1. Instalación del software
1.1 B-190TB / B-290TB
No es necesario instalar ningún software.
El software se preinstala antes del envío desde la fábrica.
1.2 Serie B-150D
La cámara es controlada por el software PROVIEW.
PROVIEW puede ser descargado desde el sitio:
http://www.optikamicroscopes.com/optikamicroscopes/optika-support/download-drivers-softwares/
Tendrá que registrarse para descargar el archivo Optikaproview.zip.
Una vez que el archivo haya sido descargado, lo habrá descomprimido y ejecutado el archivo setup.exe.
Al nal de la instalación es posible iniciar el Software.
• NOTA: no es necesaria la instalación de controladores para las cámaras. La instalación del Software
instala automáticamente todos los controladores necesarios para el correcto funcionamiento de la
cámara.
2. Uso de la cámara
2.1 Ejecutar el software
1. Haga doble clic en el icono PROVIEW en el escritorio.
2.2 Uso del software
1. Aparece la pantalla principal del Software:
Page 17
Page 18

2. En la sección Lista de Cámaras seleccione la cámara disponible llamada Camera-X3N.
3. La imagen en vivo comienza.
2.3 Ajuste de los parámetros de la cámara
El manual del usuario del Software está disponible en formato PDF dentro del propio Software y puede abrirse
utilizando la tecla de función F1.
Debe tener instalado Acrobat Reader para ver el manual.
El manual contiene todas las instrucciones de funcionamiento para el uso de la cámara y para las diversas
funciones del Software.
Sólo es necesario realizar un ajuste inicial utilizando esta cámara para tener un balance de blancos adecuado:
1. Mientras observa la imagen en vivo, mueva la diapositiva a una zona vacía (no se ve ningún espécimen).
2. Ahora, en la sección Balance de blancos, active la casilla de verificación Balance de blancos automáti-
co.
Page 18
Page 19

3. La imagen en vivo cambia en consecuencia.
4. Desmarque la casilla de selección Balance de blancos automático. De esta manera el sistema mantendrá el balance de blancos, a menos que el usuario cambie la intensidad de la luz o algún parámetro en el
microscopio.
• NOTA: si la casilla de verificación Balance de blancos automático está siempre seleccionada, el
sistema cambiará la configuración de balance de blancos según el espécimen, creando colores falsos en la imagen.
5. Ajuste el tiempo de exposición en la sección Exposición y Ganancia.
6. El usuario puede activar la casilla de verificación Exposición automática o utilizar la opción Exposición
manual.
Page 19
Page 20

7. Para obtener un ajuste fino del tiempo de exposición, el usuario puede utilizar los ajustes de la sección Ajuste de color cambiando el ajuste de los controles deslizantes de Brillo o Contraste.
8. Una vez realizados estos ajustes, el sistema está listo para ser utilizado.
9. Ahora el usuario puede consultar el manual de instrucciones completo para obtener toda la información
relevante.
Page 20
Page 21

OPTIKA S.r.l.
®
Via Rigla, 30 - 24010 Ponteranica (BG) - ITALY Tel.: +39 035.571.392
info@optikamicroscopes.com - www.optikamicroscopes.com
OPTIKA Spain
®
spain@optikamicroscopes.com
OPTIKA USA
®
usa@optikamicroscopes.com
OPTIKA China
®
china@optikamicroscopes.com
OPTIKA India
®
india@optikamicroscopes.com
OPTIKA Central America
®
camerica@optikamicroscopes.com
Page 22

CONFIGURATION DU LOGICIEL
Modèle
B-150D-MRPL
B-150D-BRPL
B-190TB
B-290TB
Version: 2 2019
Page 23

Sommaire
1. Installation du logiciel 24
1.1 B-190TB / B-290TB 24
1.2 Série B-150D 24
2. Utilisation de la caméra 24
2.1 Exécuter le logiciel 24
2.2 Utilisation du logiciel 24
2.3 Réglage des paramètres de la caméra 25
Page 23
Page 24

1. Installation du logiciel
1.1 B-190TB / B-290TB
Aucune installation de logiciel n’est requise.
Le logiciel est préinstallé avant l’expédition de l’usine.
1.2 Série B-150D
La caméra est pilotée par le logiciel PROVIEW.
PROVIEW peut être téléchargé à partir du site:
http://www.optikamicroscopes.com/optikamicroscopes/optika-support/download-drivers-softwares/
Vous devrez vous enregistrer pour télécharger le chier Optikaproview.zip.
Une fois le chier téléchargé, vous devrez le décompresser et exécuter le chier setup.exe.
A la n de l’installation, il est possible de démarrer le logiciel.
• REMARQUE : aucune installation de pilote n’est requise pour les caméras. L’installation du logiciel
installe automatiquement tous les pilotes nécessaires au bon fonctionnement de la caméra.
2. Utilisation de la caméra
2.1 Exécuter le logiciel
1. Double-cliquez sur l’icône PROVIEW sur le bureau.
2.2 Utilisation du logiciel
1. L’écran principal du logiciel apparaît:
Page 24
Page 25

2. Dans la section Liste des caméras, sélectionnez la caméra disponible nommée Camera-X3N.
3. L’image en direct démarre.
2.3 Réglage des paramètres de la caméra
Le manuel d’utilisation du logiciel est disponible en format PDF dans le logiciel lui-même et peut être ouvert à
l’aide de la touche de fonction F1.
Vous devez avoir Acrobat Reader installé pour visualiser le manuel.
Ce manuel contient toutes les instructions d’utilisation de l’appareil photo et les différentes fonctions du logiciel.
Seul un réglage initial doit être effectué à l’aide de cette caméra afin d’obtenir une bonne balance des blancs:
1. Pendant l’observation de l’image en direct, déplacez la lame sur une zone vide (aucun spécimen n’est visible).
2. Dans la section Balance des blancs, cochez la case Balance des blancs automatique.
Page 25
Page 26

3. L’image en direct change en conséquence.
4. Désactivez la case à cocher Balance des blancs automatique. De cette façon, la balance des blancs sera
conservée par le système, à moins que l’utilisateur ne modifie l’intensité lumineuse ou un paramètre du
microscope.
• REMARQUE: si la case Balance des blancs automatique est toujours cochée, le système modifiera
le réglage de la balance des blancs en fonction de l’échantillon, créant ainsi de fausses couleurs
dans l’image.
5. Réglez le temps d’exposition dans la section Exposition et Gain.
6. L’utilisateur peut activer la case à cocher Exposition automatique ou utiliser l’exposition manuelle.
Page 26
Page 27

7. Pour affiner le temps d’exposition, l’utilisateur peut utiliser les réglages de la section Réglage des couleurs
en modifiant le réglage des curseurs de Luminosité ou de Contraste.
8. Une fois ces réglages effectués, le système est prêt à être utilisé.
9. L’utilisateur peut maintenant se référer au manuel d’utilisation complet pour toutes les autres informations
pertinentes.
Page 27
Page 28

OPTIKA S.r.l.
®
Via Rigla, 30 - 24010 Ponteranica (BG) - ITALY Tel.: +39 035.571.392
info@optikamicroscopes.com - www.optikamicroscopes.com
OPTIKA Spain
®
spain@optikamicroscopes.com
OPTIKA USA
®
usa@optikamicroscopes.com
OPTIKA China
®
china@optikamicroscopes.com
OPTIKA India
®
india@optikamicroscopes.com
OPTIKA Central America
®
camerica@optikamicroscopes.com
Page 29

SOFTWARE EINSTELLEN
Modell
B-150D-MRPL
B-150D-BRPL
B-190TB
B-290TB
Version: 2 2019
Page 30

Inhalt
1. Software installieren 31
1.1 B-190TB / B-290TB 31
1.2 B-150D-Serie 31
2. Verwendung der Kamera 31
2.1 Starten die Software 31
2.2 Verwendung der Software 31
2.3 Anpassen der Kameraeinstellungen 32
Page 30
Page 31

1. Software installieren
1.1 B-190TB / B-290TB
Es ist keine Softwareinstallation erforderlich.
Die Software ist vorinstalliert, bevor sie ab Werk ausgeliefert wird.
1.2 B-150D-Serie
Die Kamera wird von der PROVIEW-Software gesteuert.
PROVIEW kann von der Website heruntergeladen werden:
http://www.optikamicroscopes.com/optikamicroscopes/optika-support/download-drivers-softwares/
Für den Download der Datei Optikaproview.zip müssen Sie sich registrieren.
Sobald die Datei heruntergeladen wurde, müssen Sie sie dekomprimieren und die Datei setup.exe ausführen.
Am Ende der Installation ist es möglich, die Software zu starten.
• HINWEIS: Für Kameras ist keine Treiberinstallation erforderlich. Die Installation der Software installiert automatisch alle Treiber, die für den ordnungsgemäßen Betrieb der Kamera erforderlich sind.
2. Verwendung der Kamera
2.1 Starten die Software
1. Doppelklicken auf das PROVIEW-Symbol auf dem Desktop.
2.2 Verwendung der Software
1. Der Hauptbildschirm der Software erscheint:
Page 31
Page 32

2. Wählen Sie im Abschnitt Kameraliste die verfügbare Kamera Camera-X3N aus.
3. Das Livebild startet.
2.3 Anpassen der Kameraeinstellungen
Das Software-Benutzerhandbuch liegt im PDF-Format in der Software selbst vor und kann mit der Funktionstaste F1 geöffnet werden.
Sie müssen den Acrobat Reader installiert haben, um das Handbuch anzeigen zu können.
Dieses Handbuch enthält alle Anweisungen zur Verwendung der Kamera und der verschiedenen Funktionen
der Software.
Mit dieser Kamera sollte nur eine erste Einstellung vorgenommen werden, um einen guten Weißabgleich zu
erreichen:
1. Pendant l’observation de l’image en direct, déplacez la lame sur une zone vide (aucun spécimen n’est visible).
2. Bewegen Sie den Schlitten unter Beobachtung des Livebildes in einen leeren Bereich (keine Probe ist
sichtbar).
Page 32
Page 33

3. Das Livebild ändert sich entsprechend.
4. Deaktivieren Sie das Kontrollkästchen Automatischer Weißabgleich. Auf diese Weise wird der
Weißabgleich vom System aufrechterhalten, es sei denn, der Benutzer ändert die Lichtintensität oder einen
Mikroskopparameter.
• HINWEIS: Wenn das Kontrollkästchen Automatischer Weißabgleich weiterhin aktiviert ist, ändert
das System die Weißabgleichseinstellung entsprechend dem Muster und erzeugt falsche Farben im
Bild.
5. Stellen die Belichtungszeit im Abschnitt Belichtung und Verstärkung ein.
6. Der Benutzer kann das Kontrollkästchen Auto-Exposure aktivieren oder die manuelle Belichtung verwenden.
Page 33
Page 34

7. Um die Belichtungszeit zu verfeinern, kann der Benutzer die Einstellungen im Abschnitt Farbanpassung
verwenden, indem er die Einstellungen des Schiebereglers Helligkeit oder Kontrast ändert.
8. Sobald diese Einstellungen vorgenommen wurden, ist das System betriebsbereit.
9. Für alle anderen relevanten Informationen kann der Benutzer nun das komplette Benutzerhandbuch einsehen.
Page 34
Page 35

OPTIKA S.r.l.
®
Via Rigla, 30 - 24010 Ponteranica (BG) - ITALY Tel.: +39 035.571.392
info@optikamicroscopes.com - www.optikamicroscopes.com
OPTIKA Spain
®
spain@optikamicroscopes.com
OPTIKA USA
®
usa@optikamicroscopes.com
OPTIKA China
®
china@optikamicroscopes.com
OPTIKA India
®
india@optikamicroscopes.com
OPTIKA Central America
®
camerica@optikamicroscopes.com
Page 36

CONFIGURAÇÃO DO SOFTWARE
Modelos
B-150D-MRPL
B-150D-BRPL
B-190TB
B-290TB
Versão: 2 2019
Page 37

Tabela de Conteúdos
1. Instalação do Software 38
1.1 B-190TB / B-290TB 38
1.2 Série B-150D 38
2. Utilização da câmara 38
2.1 Executar o software 38
2.2 Utilização do software 38
2.3 Denirosparâmetrosdacâmara 39
Page 37
Page 38

1. Instalação do Software
1.1 B-190TB / B-290TB
Nenhum software precisa ser instalado.
O software é pré-instalado antes do envio da fábrica.
1.2 Série B-150D
A câmara é controlada pelo software PROVIEW.
PROVIEW pode ser baixado do site:
http://www.optikamicroscopes.com/optikamicroscopes/optika-support/download-drivers-softwares/
Você precisará se registrar para baixar o arquivo Optikaproview.zip.
Uma vez que o arquivo tenha sido baixado, você terá descompactado e executado o arquivo setup.exe.
No nal da instalação é possível iniciar o Software.
• NOTA:Nãoénecessário instalar controladores para ascâmaras.Ainstalaçãodosoftwareinstala
automaticamentetodososdriversnecessáriosparaocorrectofuncionamentodacâmara.
2. Utilização da câmara
2.1 Executar o software
1. Clique duas vezes no ícone PROVIEW na área de trabalho.
2.2 Utilização do software
1. A tela principal do software aparece:
Page 38
Page 39

2. Na secção Lista de câmaras seleccione a câmara disponível chamada Camera-X3N.
3. A imagem ao vivo começa.
2.3 Denirosparâmetrosdacâmara
O Manual do Utilizador do Software está disponível em formato PDF dentro do próprio Software e pode ser
aberto utilizando a tecla de função F1.
O Acrobat Reader deve ser instalado para visualizar o manual.
O manual contém todas as instruções de operação para o uso da câmera e para as várias funções do software.
Somente um ajuste inicial usando esta câmera é necessário para ter um equilíbrio de branco adequado:
1. Enquanto visualiza a imagem ao vivo, mova o slide para uma área vazia (nenhum espécime é visível).
2. Agora, na seção Balanço de brancos, marque a caixa de seleção Balanço de brancos automático.
Page 39
Page 40

3. A imagem ao vivo muda em conformidade.
4. Desmarque o campo de seleção Equilíbrio de brancos automático. Desta forma, o sistema manterá o
equilíbrio de branco, a menos que o usuário altere a intensidade da luz ou algum parâmetro no microscópio.
• NOTA:SeacaixadeverificaçãoEquilíbrioAutomáticodeBrancosestiversempreseleccionada, o
sistemairáalteraradefiniçãodoequilíbriodebrancosdeacordocomoespécime,criandocores
falsas na imagem.
5. Ajuste o tempo de exposição na secção de ExposiçãoeGanho.
6. O usuário pode ativar a caixa de seleção Exposiçãoautomática ou usar a opção Exposição manual.
Page 40
Page 41

7. Para obter um ajuste fino do tempo de exposição, o usuário pode usar as configurações na seção Ajuste
de cor alterando a configuração dos controles deslizantes Brilho ou Contraste.
8. Uma vez feitas essas opções, o sistema está pronto para uso.
9. O utilizador pode agora consultar o manual de instruções completo para obter todas as informações relevantes.
Page 41
Page 42

OPTIKA S.r.l.
®
Via Rigla, 30 - 24010 Ponteranica (BG) - ITALY Tel.: +39 035.571.392
info@optikamicroscopes.com - www.optikamicroscopes.com
OPTIKA Spain
®
spain@optikamicroscopes.com
OPTIKA USA
®
usa@optikamicroscopes.com
OPTIKA China
®
china@optikamicroscopes.com
OPTIKA India
®
india@optikamicroscopes.com
OPTIKA Central America
®
camerica@optikamicroscopes.com
 Loading...