

Page 1
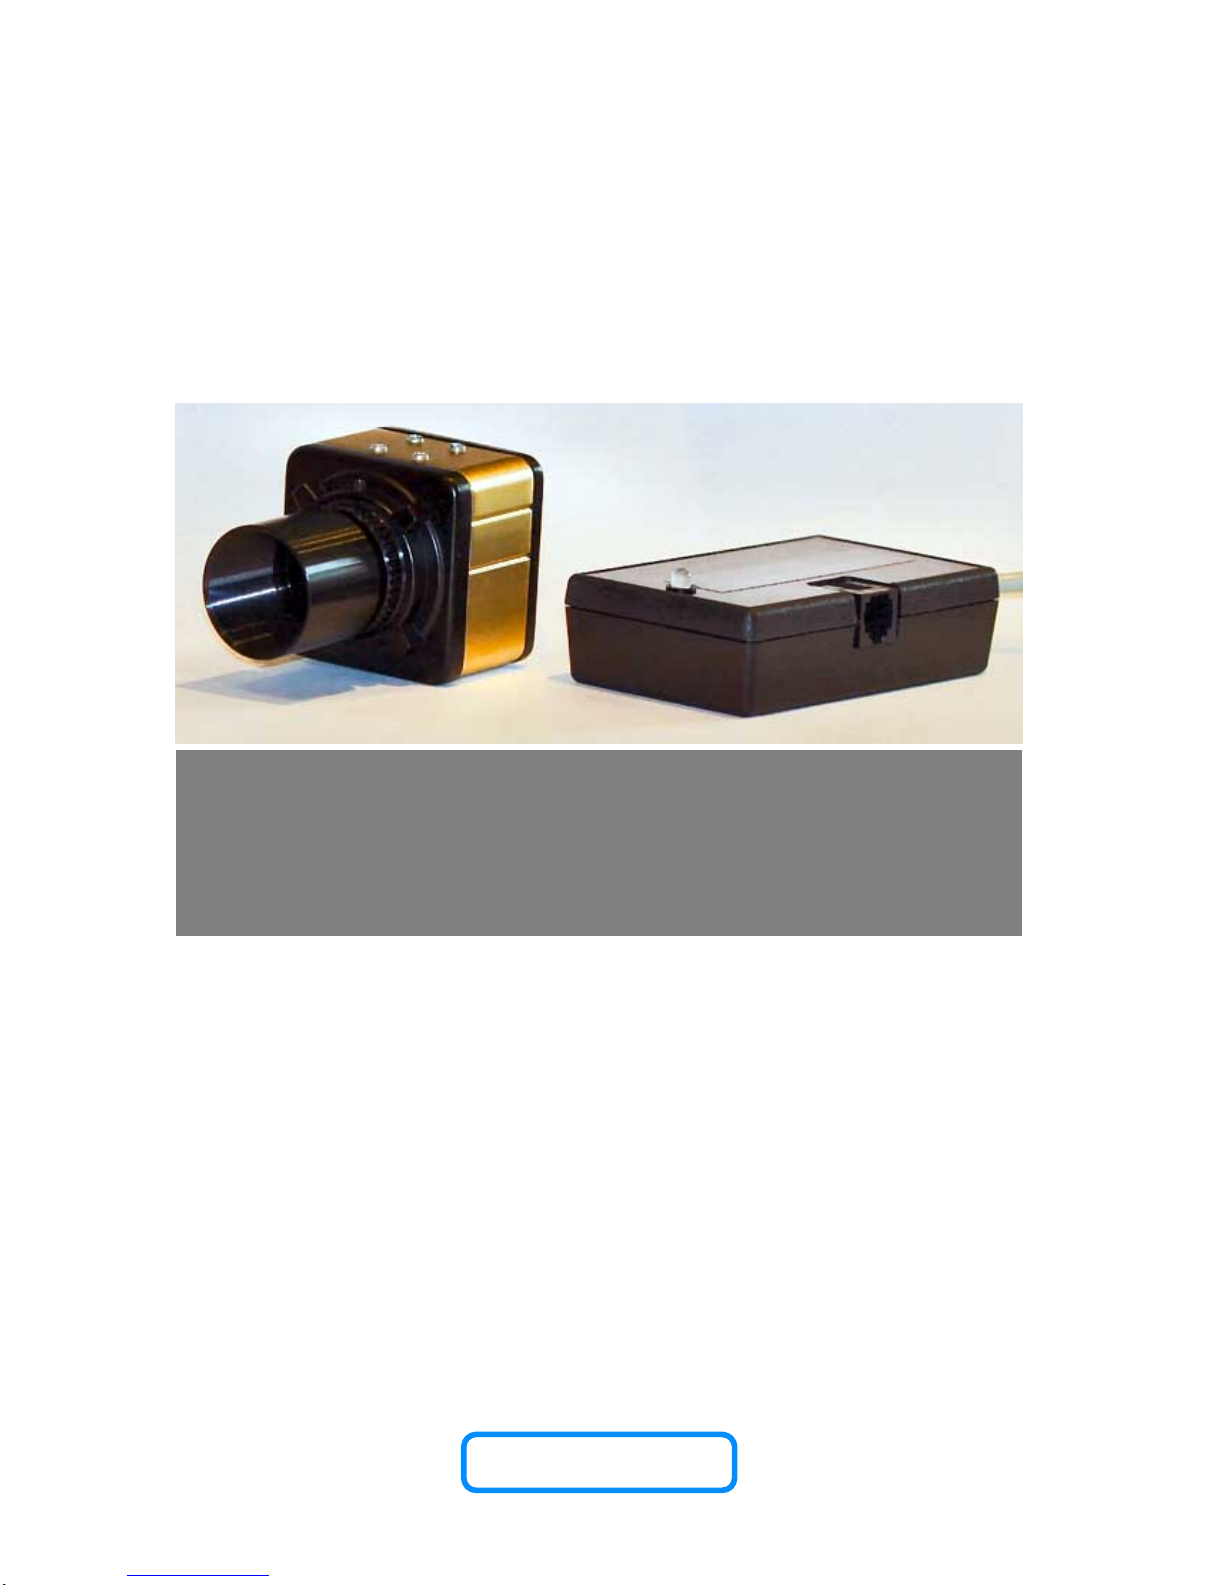
Opticstar AG-130M Auto-guiding System
& PL-130M Monochrome Camera
Setup Guide
OPTICSTAR
Page 2

1
Page 3

AUTO-GUIDING WITH THE OPTICSTAR AG-130M AUTO-GUIDING KIT
CONTENTS
Introduction............................................................................................................3
Imaging and Auto-guiding With Two Scopes......................................................3
Imaging and Auto-guiding With a Single Scope.................................................4
Set-up......................................................................................................................5
PL-130M Camera Installation.............................................................................5
ASCOM 4.1 ..........................................................................................................6
Guidemaster........................................................................................................6
Shoestring...........................................................................................................6
Assembling your Auto-guiding Hardware........................................................7
Troubleshooting.....................................................................................................8
Requirements......................................................................................................8
Speed Issues.......................................................................................................8
Installation Issues...............................................................................................8
PL-130M Driver Issues .......................................................................................9
CD Contents...........................................................................................................9
1. Please read and follow the installation instructions on page 5 and 6 for a
trouble free installation!
2. Do not drop your camera as this can result in serious damage.
3. Only use the supplied power supply unit if you camera comes with one.
4. Do not point the camera to a bright light source like the Sun without the
appropriate filters as this will damage the sensor.
CAUTION
!
2
Page 4
AUTO-GUIDING WITH THE OPTICSTAR AG-130M AUTO-GUIDING KIT
Introduction
There a umber of ways you can guide a telescope but there are mainly two ways of doing so. The
most versatile method is to use two scopes mounted on the same mount, one for imaging and the
second for guiding. Alternatively you could use a single scope to perform this function. While this
method is easier it will limit your choice of locating a suitable guide star.
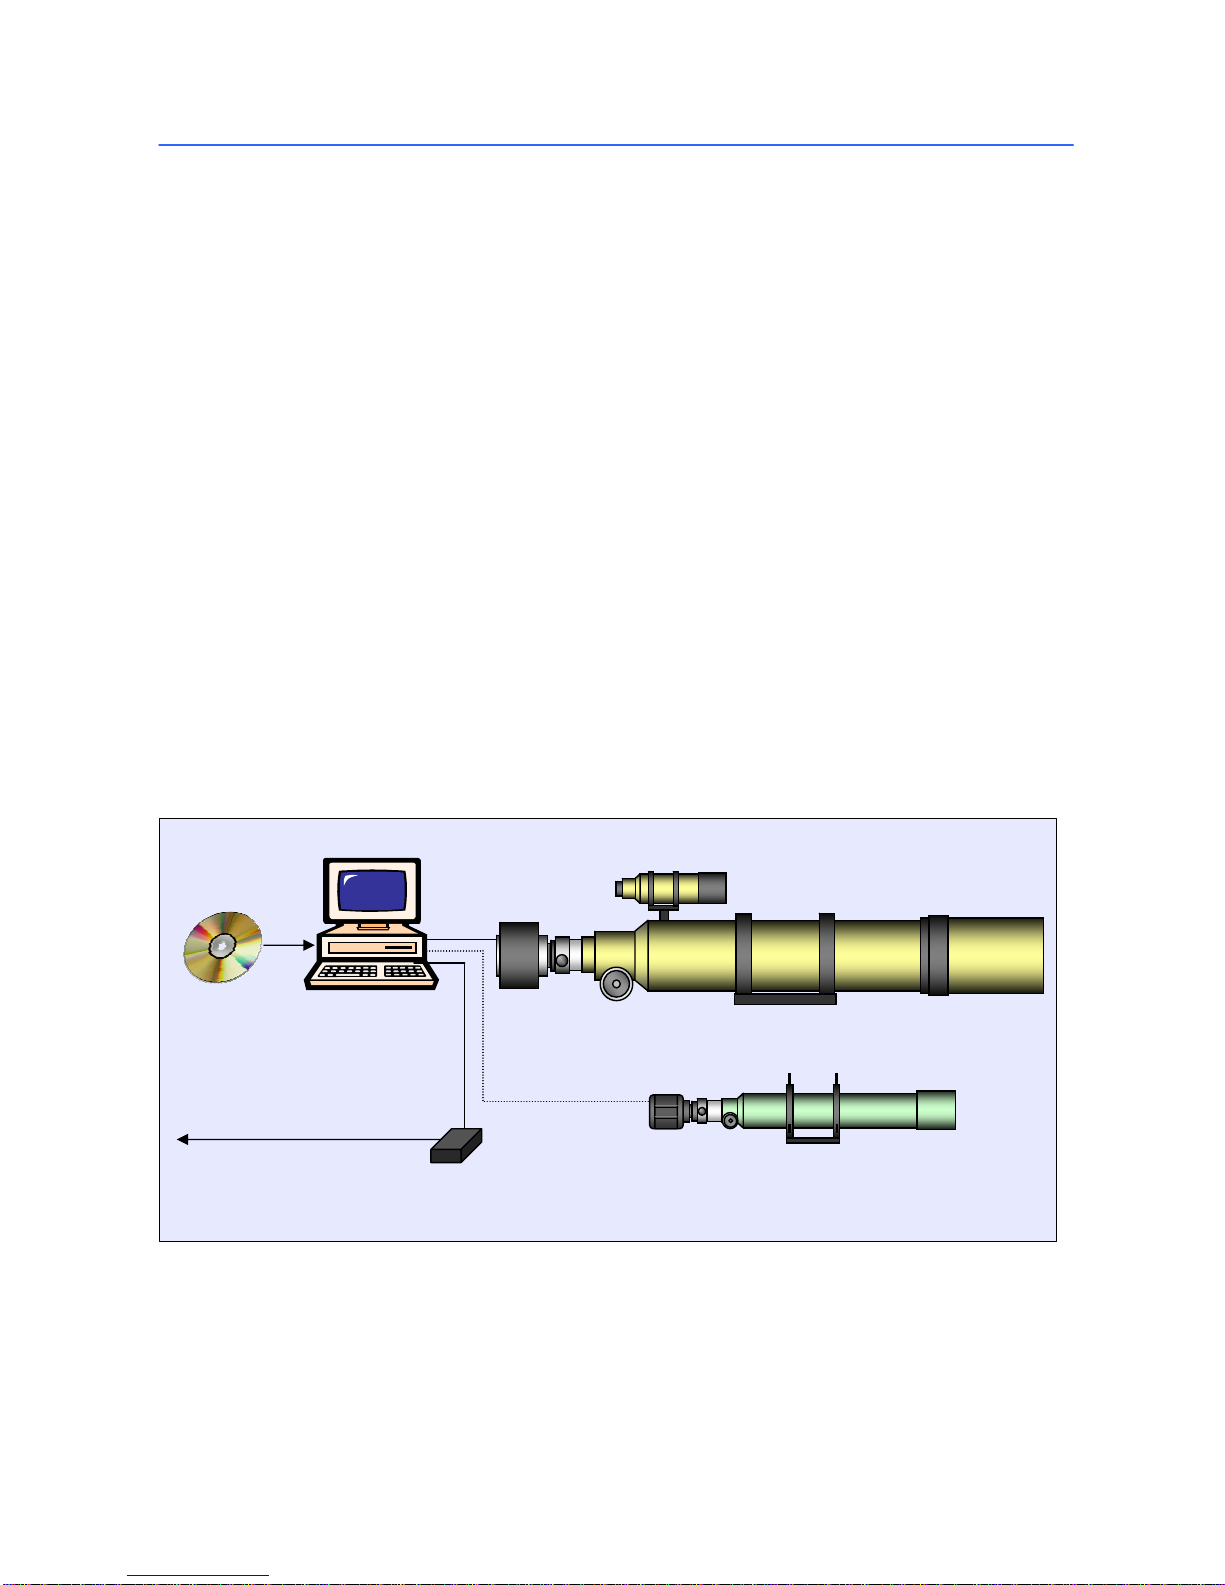
Imaging and Auto-guiding With Two Scopes
In general to be able to auto-guide with the Opticstar AG-130M Auto-guiding Kit you will require
the following:
1. An imaging camera, i.e. Opticstar DS-335C ICE.
2. An imaging scope, i.e. A&M 80mm f7.5 Super APO.
3. A secondary scope for auto-guiding, i.e. 70mm f13 achromat
4. An ST-4 compatible mount, i.e. Skywatcher EQ6 or HEQ5.
5. ASCOM software platform V4.1 or later (freely available)
6. PC with USB2.0 ports running Windows 2000/XP or later
7. The Shoestring auto-guide controller and cables, i.e. Shoestring GPUSB kit.
8. Auto-guiding software, i.e. Guidemaster or PHD Guiding.
9. Opticstar PL-130M camera and drivers.
Shoestring Autoguider Control Box
Main imaging telescope
PL-130M
camera
Imaging camera
PC Windows
2000/XP
Telescope used for auto-guiding
USB cables
Camera autoguiding
software
To ST-4 compatible
telescope mount
The Opticstar AG-130M auto-guiding kit contains items 7, 8 and 9 in the above list. You will
therefore also need to provide your own imaging camera, imaging telescope, secondary telescope
for auto-guiding, PC running Windows 2000/XP and ST-4 compatible telescope mount.
Please note that the secondary scope that is used for auto-guiding would further increase your
choices for locating a suitable guide star if it was held in brackets, like a huge finder scope. This
would allow you to easily locate a suitable guide-star even under very difficult conditions.
3
Page 5
Imaging and Auto-guiding With a Single Scope
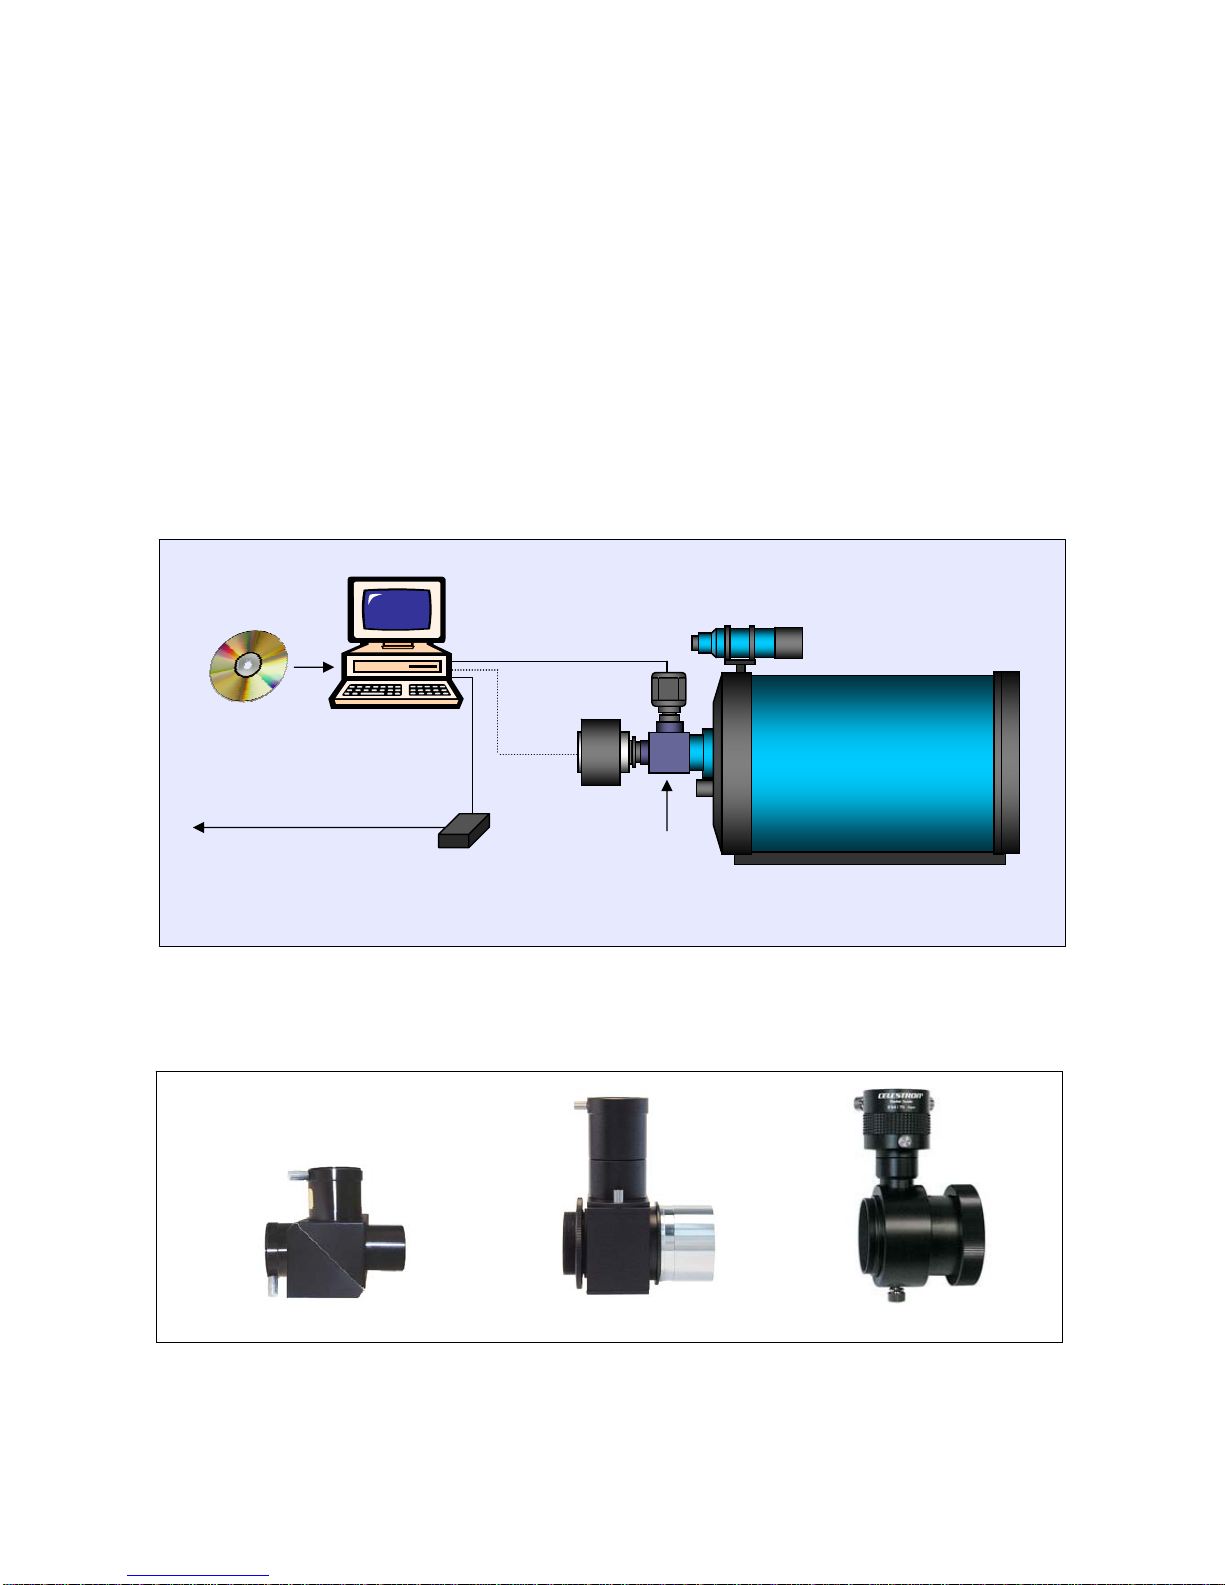
An alternative setup will involve a single telescope for imaging and auto-guiding purposes instead
of two different telescopes. As such you will require the following items to be able to image and
auto-guide.
1. An imaging camera, i.e. DS-335C ICE.
2. An imaging scope, i.e. A&M 80mm f7.5 Super APO.
3. An off-axis guider
4. An ST-4 compatible mount, i.e. Skywatcher EQ6 or HEQ5.
5. ASCOM software platform V4.1 or later (freely available)
6. PC with USB2.0 ports running Windows 2000/XP or later
7. The Shoestring auto-guide controller and cables, i.e. Shoestring GPUSB kit.
8. Auto-guiding software, i.e. Guidemaster, PHD Guiding.
9. Opticstar PL-130M camera and drivers.
Telescope used for both imaging and
auto-guiding
Shoestring Auto-
guider Control Box
PL-130M
auto-guiding
camera
Main Ima
g
er
Personal
Computer
Windows 2000/XP
Off-axis
guider
USB cables
Camera control
and Auto-guiding
software
To ST-4 compatible
telescope mount
The Opticstar AG-130M auto-guiding kit contains items 7, 8 and 9 in the above list. You will
therefore also need to provide your own imaging camera, telescope, off-axis guider, PC running
Windows 2000/XP and ST-4 compatible telescope mount.
Astroport beam splitter Vixen off-axis guider Celestron off-axis radial guider
An off-axis guider provides an easy and affordable way to auto-guide with a single scope. It
minimises possible tube flexure but has the disadvantage of having a limited field of view. Also the
amount of light that hits the prism/mirror is relatively small making less bright stars more difficult
to see and track.
4
Page 6
Set-up
You will first need to install the software and the PL-130M camera making certain that everything
works before attaching and trying out the camera on your telescope. You will need to install the
AG-130M system in the following order.
1. Install the PL-130M camera AMCAP/View software and drivers last.
2. Install the ASCOM 4.1 platform (free to download at: http://ascom-standards.org)
3. Install Guidemaster
4. Install the Shoestring Controller
5. Assemble your auto-guiding setup.
6. Test that installed software and camera are operational.
PL-130M Camera Installation
You will first need to install the AMCAP software before connecting the camera to your PC. Please
follow the instructions below.
1. Make certain that the camera is not connected to your PC.
2. Place the AG-130M CD in your CD/DVD drive.
3. Double click on setup.exe in the Install folder on the CD to install the AMCAP camera
software, follow the on-screen instructions. If the Software Installation screen appears press
Continue Anyway. Reset the PC if prompted by Windows.
4. Camera Driver Installation
a) Plug the PL-130M camera to a USB2.0 port on your PC. After a few seconds
Windows will locate the camera. The Windows hardware Wizard will appear at that
point.
b) Select No, not this time, press Next >.
c) Select Install the software automatically, press Next >.
d) If the Hardware Installation screen appears press Continue Anyway.
e) Click on Yes if Windows prompts you to overwrite files that are newer.
f) Click on Finish. Reset the PC if prompted by Windows.
5. Double click on setup.exe in the Viewer folder on the CD to install the Viewer camera
software, follow the on-screen instructions. This software is offered as an alternative to
AMCAP as some PCs tend to work more efficiently with one of the two applications.
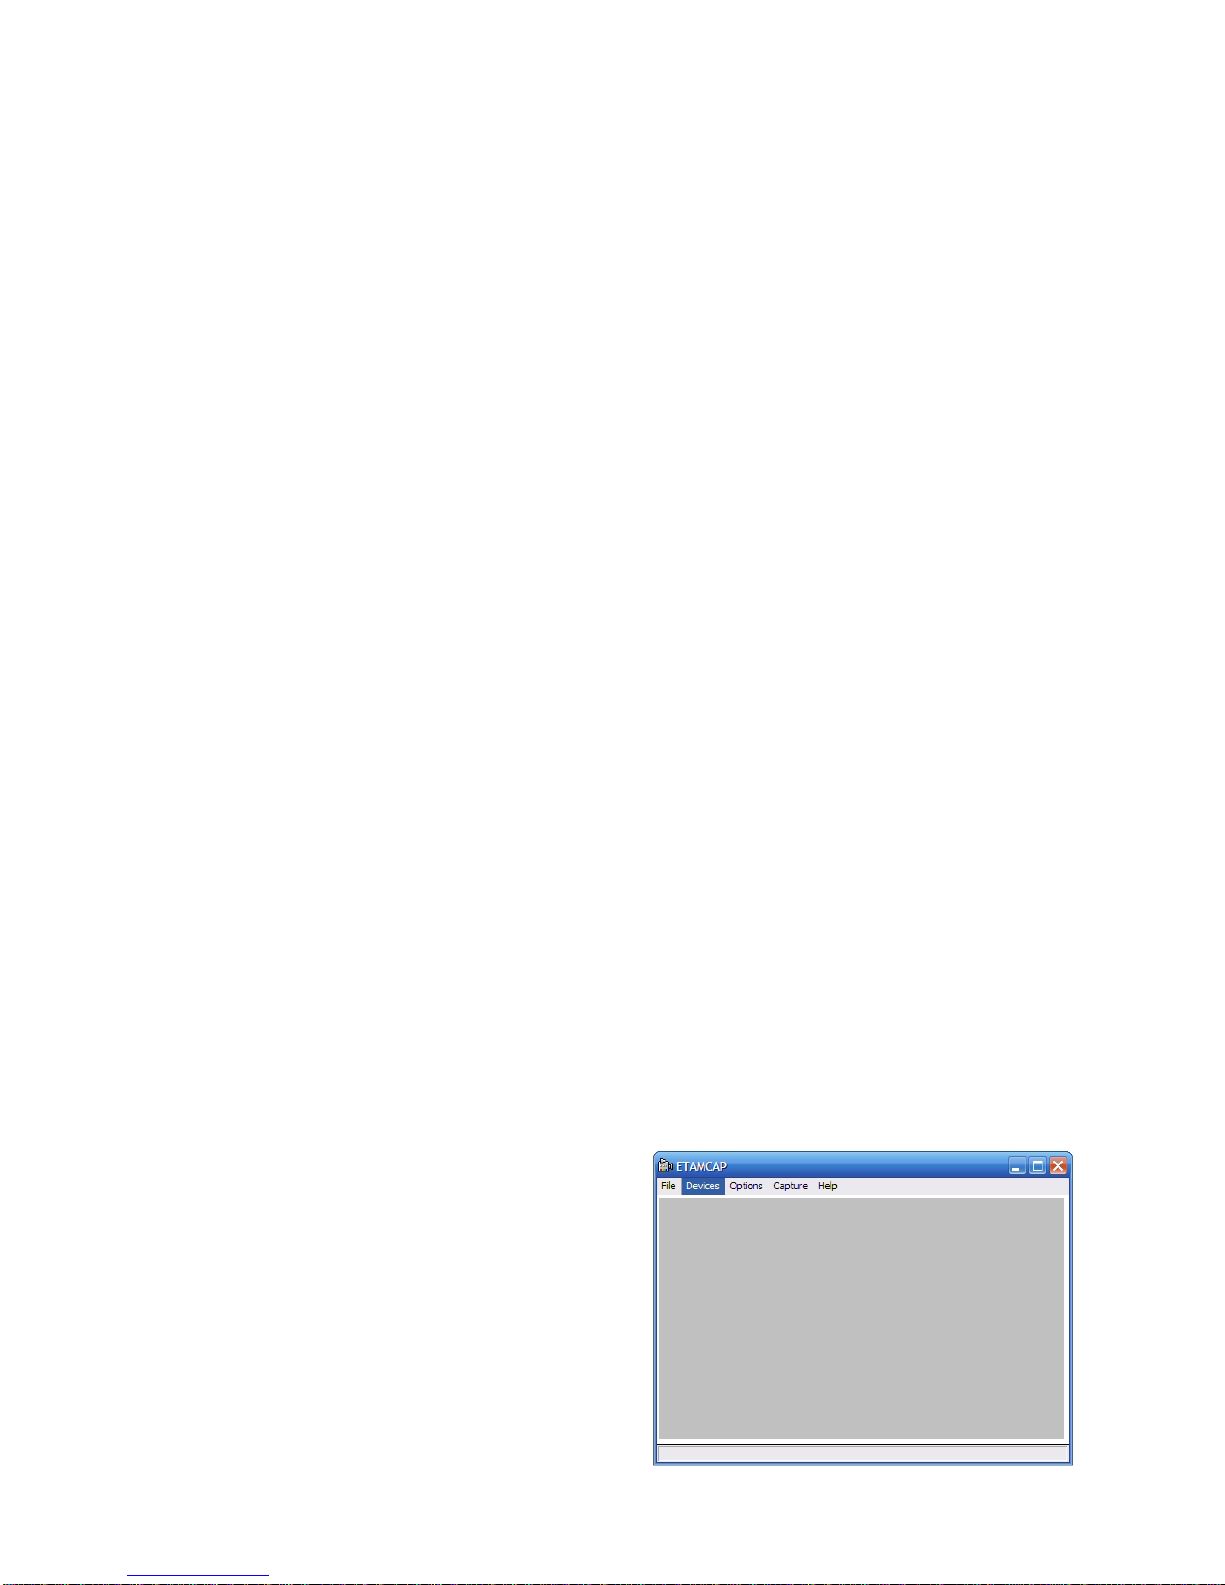
Run the etAMCAP application and test that your
camera works after you select it from the Devices
menu.
If the camera is not connected to a telescope simply
turn the camera towards a light source, the glow of
the light should be captured by the camera and
should appear on your computer screen.
Make certain that the camera is set to AUTO
exposure or that the exposure is long enough for
this to happen.
5
Page 7
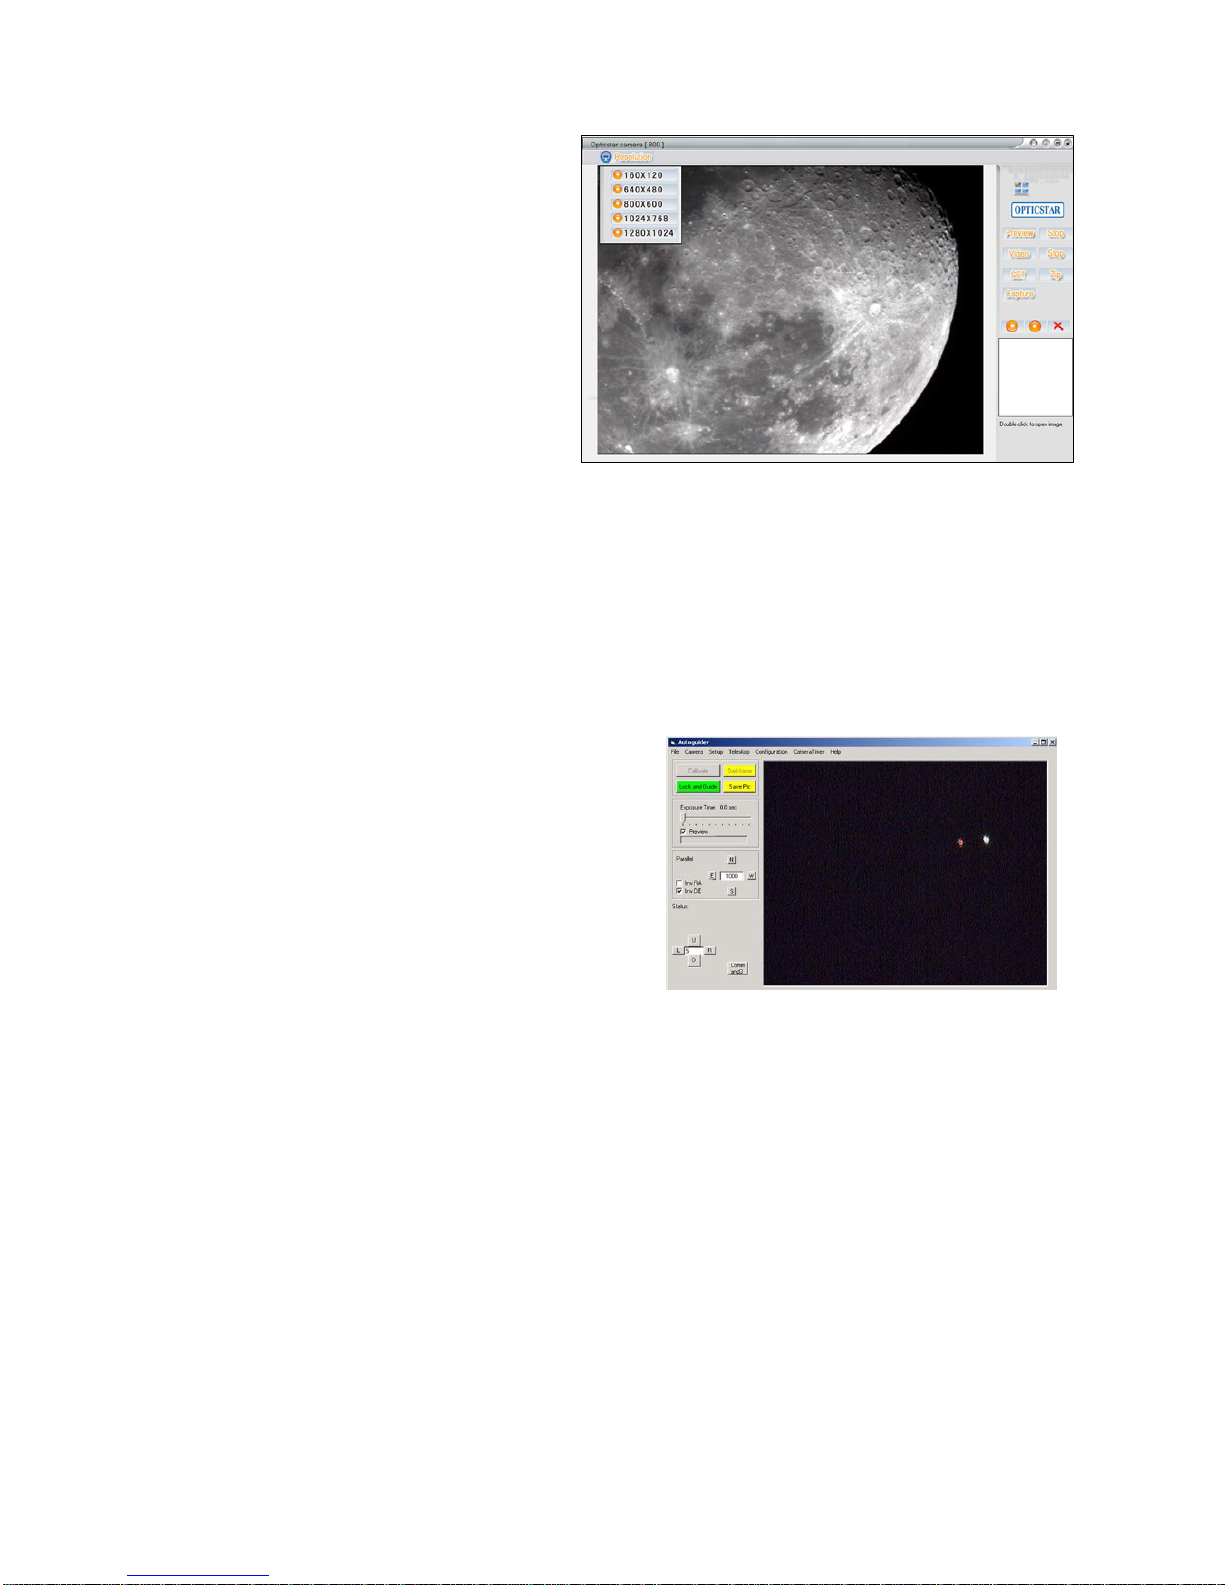
If the PL-130M camera has been attached to
a telescope make certain that the camera and
telescope combination is properly focused.
Please note that if the telescope is not
focused it may not be able show a visible
image at all on your computer screen if the
light source is relatively weak.
The Viewer software has also been included
on the CD and offers an alternative to
AMCAP. Some PCs tend to work more
efficiently with one of the two applications.
ASCOM 4.1
You will need the ASCOM platform to be able to auto-guide. The ASCOM platform is freely
available and can be downloaded at http://ascom-standards.org. Please visit the ASCOM website
for more information.
Guidemaster
Before you install Guidemaster please make certain
that you install ASCOM platform 4.1 or a later version
of the software. Guidemaster will not work without
the ASCOM platform.
Double-click on the Opticstar Guidemaster
Setup.exe on the supplied CD in the Guidemaster
folder to install the Guidemaster application. Follow
the on-screen instructions to complete the installation.
To test Guidemaster exit the View application and run Guidemaster with your camera connected to
your computer. You must select the camera type (WDM) and desired resolution before the camera
will operate with Guidemaster.
Shoestring
Plug the Shoestring device into a USB port. The red LED on the GPUSB should light immediately.
A “Found New Hardware” balloon will pop up on your monitor. Wait a few moments and the text
in the balloon should change to say “Your new hardware is installed and ready to use”.
Once you have completed the initial installation, you may want to verify that the GPUSB is
working properly before you begin to use it with your auto-guide software. To do this, you can
download and install GPUSBCheck from the Shoestring GPUSB product page found on the
Opticstar website and on the supplied CD in the Shoestring folder.
6
Page 8
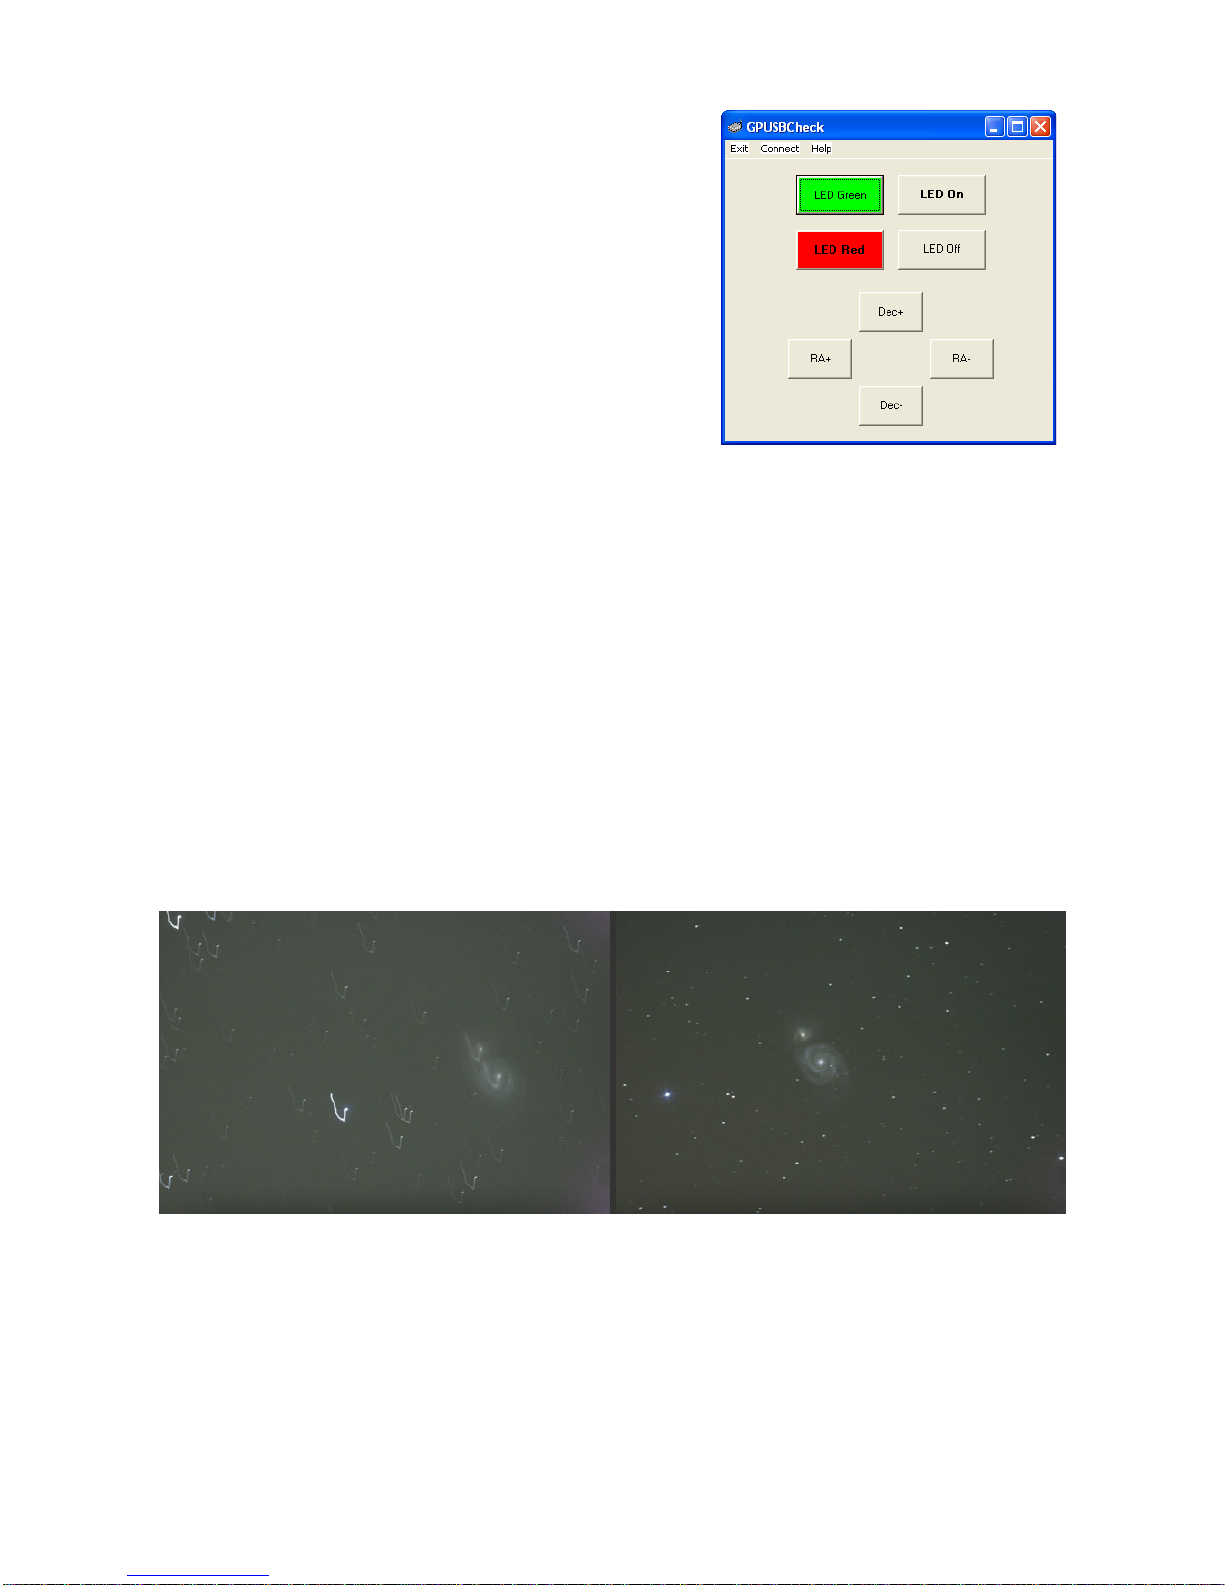
This is simple software that allows you to turn the LED on
and off, change the colour of the LED from red to green,
and to control the directional movement of your scope
mount.
It is intended to allow you to verify that everything is
working properly. Should you have trouble getting your
third-party auto-guide software to work, using
GPUSBCheck will also allow you to troubleshoot your
setup.
In other words, if everything works with GPUSBCheck,
then your problem most likely is with your third-party
software.
Assembling your Auto-guiding Hardware
Once the PL-130M camera is operational and all software have been successfully installed you will
be ready to set up your telescope.
Please make all the physical connections required with reference to the illustrations earlier in this
document.
If you are using two USB cameras at the same time it is advisable that the two cameras are attached
to different USB controllers. Almost all PCs have two internal USB controllers and four USB ports.
Every controller is allocated its own bandwidth to be shared by its two USB ports.
Attaching two cameras to the same USB controller will affect performance and speed depending on
the amount of data that needs to be transferred to the PC.
M51: 23.03.2006. by Ulrich Gurschen - 3 minutes exposure without and with Guidemaster guiding
Once you have ensured that your software and hardware is operational you should be able to autoguide your mount and telescope.
Please make certain that all your USB devices are properly plugged in. Stretched cables can lead to
momentary loss of communication than can crash a camera, controller or any other USB device
connected to your PC.
7
Page 9

Troubleshooting
If you have problems with installing the camera software and drivers this may be because of
number of reasons related to your computer, operating system and other devices already connected
to it.
The following sections outline the most common problems and suggest ways in which you should
be able to solve them.
Requirements
Please make certain that your computer runs Windows 2000/XP or later, has the latest updates from
Microsoft and also has USDB2.0 ports. The PL-130M camera will not work with USB1.1.
If your computer has USB1.1 ports you will need to obtain a PCI USB2.0 type card if you have a
desktop or a PCMCIA USB2.0 card if you have a laptop computer.
Try both the USB ports on the front and back of your desktop if the PC does not recognise the
camera on a particular USB port. USB ports attached directly to the motherboard are more efficient.
Speed Issues
To obtain maximum update speeds from your camera you will need a fast computer. Alternatively
you have the option to reduce the camera resolution if speed is more important than resolution.
Also connecting the camera to its own USB controller is vital in obtaining high speeds. Almost all
PCs have two USB controllers, each one controls two USB ports.
Installation Issues
If your camera fails to install you may have to manually install the drivers. Please follow the
procedure below:
1. Make certain that the camera is not connected to your PC.
2. Uninstall the camera software from Control Panel Æ Add Remove Programs
3. Double click on setup.exe in the Viewer folder on the CD to install the camera software,
follow the on-screen instructions to re-install the software.
4. Camera Driver Installation
5. Plug the PL-130M camera to a USB2.0 port on your PC. After a few seconds Windows will
locate the camera. The Windows hardware Wizard will appear at that point.
6. Select No, not this time, press Next >.
7. Do NOT Install the software automatically, instead choose to install the drivers yourself, press
Next >.
8. When Windows asks for the drivers point Window to the Drivers folder on the CD.
9. If the
Hardware Installation screen appears at any time press Continue Anyway.
10. Click on Yes if Windows prompts you to overwrite files that are newer.
11. Click on Finish.
8
Page 10

PL-130M Driver Issues
To check if the drivers have been installed and are working properly please follow the procedure
below:
Right-click on the Your Computer icon on your desktop
1. Click on Properties
2. Click on Hardware
3. Click on Device Manager
4. The Opticstar drivers should appear under Imaging Devices, also check Universal Serial Bus
Controllers.
If the Opticstar camera driver is not present then the drivers have not been installed properly. This
would require uninstalling the camera and its software and trying to install these again but on a
different USB controller/port. This should solve the problem.
If there is an exclamation mark or question mark over any of the drivers then this means that there
is some device conflict. You may need to resolve this conflict before you camera would work.
Any unknown devices present in these lists may also be causing the problem and can be
momentarily disabled or removed all together.
You can remove, disable or update any driver by right clicking on it. A sub-menu will appear with a
list of options.
CD Contents
1. AG-130M Setup Manual
2. Camera Viewer software folder
a. Viewer camera control software installation files
3. Camera Install folder
a. etAMCAP camera control software
b. Camera drivers
4. Shoestring folder
a. GPUSB folder
i. GPUSB Manual
ii. GPUSB Test Utility
iii. GPUSB ASCOM driver
iv. GPUSB cabling reference
b. GPINT folder
i. GPINT Manual
ii. GPINT Test Utility
iii. GPINT cabling reference
5. Guidemaster folder
a. Software Installation files
NOTE: For an alternative guiding software solution capable of extended exposures
please try the free PHD guiding. PHD guiding can be downloaded at
www.stark-labs.com
9
Page 11

10
Page 12

OPTICSTAR
11
Opticstar Ltd,
Vantage House, 26A Northenden Road, Sale, Cheshire, M33 3BR, United Kingdom.
Tel: +44(0)161 969 9008 - Web: www.opticstar.com - Email: [email protected]
 Loading...