

Opticstar 450CD User Manual

OPTICSTAR 450CD series
Opticstar Ltd
MANCHESTER
UNITED KINGDOM
© Opticstar Ltd 2003,2004
Any breach of Opticstar’s be vigorously prosecuted
OPTICSTAR
www.opticstar.com
Intellectual Property Rights will

Contents
Contents 2
Welcome 3
Connecting your Opticstar Camera to a Telescope 4
Connecting your Opticstar Camera to other Devices 6
Using your Opticstar Camera 7
Frame Integration Mode 9
Working in Frame Integration Mode 11
On-screen Display (OSD) 12
OSD Menu Structure 16
Technical Specification 17
Opticstar Warranty 19
© Opticstar Ltd 2003, 2004
2

Welcome to the exciting world of video astronomy. Thank you for buying this
Opticstar product and we sincerely hope that you enjoy it. Your Opticstar 450CD
serie
plan
objects.
Its colour 1/3 inch advanced CCD, sophis
doub
nois
com anding lighting conditions.
You l
Specification section.
Video astronom
popu
reco cstar deo c era will offer unequalled
views of the night sky beyond what an eyepiece can offer allowing to share these
view
Please read this manual carefully to get the most out of your Opticstar 450CD video
cam
Enjo
The
Welcome
s wide dynamic video camera will allow you to enjoy exciting views of the
s and their satellites in full colour as well as pleasing views of brighter deep sky et
ticated integrated circuitry and unusual
le frame store, not found in other frame integration or Starlight cameras, manage
e, drastically reduce smear and produce very high quality images even under
plex and dem
can find more information about your Opticstar under the Technica
y is an extension to astrophotography that has been gaining in
larity during the last few years. When connected to a TFT monitor, TV set, video
rder or personal computer your Opti vi am
s with friends away from your telescope.
era. If you have any questions please contact us by email at info@Opticstar.com
y,
Opticstar team
© Opticstar Ltd 2003, 2004
3
© Opticstar Ltd 2003, 2004
3

Connecting your Opticstar Camera to a Telescope
Please handle your new Opticstar astro-video camera at all times with great care as
you would handle an expensive eyepiece. The procedure for connecting an Opticstar
camera to any telescope is near identical.
AV-TFT TV Video-In
Please follow the following steps below to attach your Opticstar camera to your
telescope.
• ensure that your telescope can accept 1.1/4” eyepieces.
• set up your telescope according to the manufacturer’s instructions.
yepiece if one is installed, you do not need an eye-piece in place.
• locate the Opticstar adaptor.
• remove your Opticstar camera with great care from its holder.
• remove the camera cap and carefully screw the Opticstar adaptor in its place.
• attach the camera to the telescope as if it was as an eyepiece and tighten up the
locking screw. Make sure the locking screw is securely tightened.
• attach the Opticstar RF cable to the camera and to your Opticstar-TFT
monitor, TV (SCART cable). video or computer via a video grabber.
• connect power leads, ensure that they are arranged in a tidy manner.
• power-on all devices.
• point you telescope to the sky and enjoy the views through your video camera.
• remove the e
Opticstar
video camera
Opticstar Opticstar
power adaptor Adaptor
Video Grabber
Personal Computer
Opticstar RF cable
Modulator/SCART
Caution: Ensure that any air vents on the camera body remain
unobstructed during operation. Failure to observe this will cause
overheating that may subsequently damage your camera.
© Opticstar Ltd 2003, 2004
4
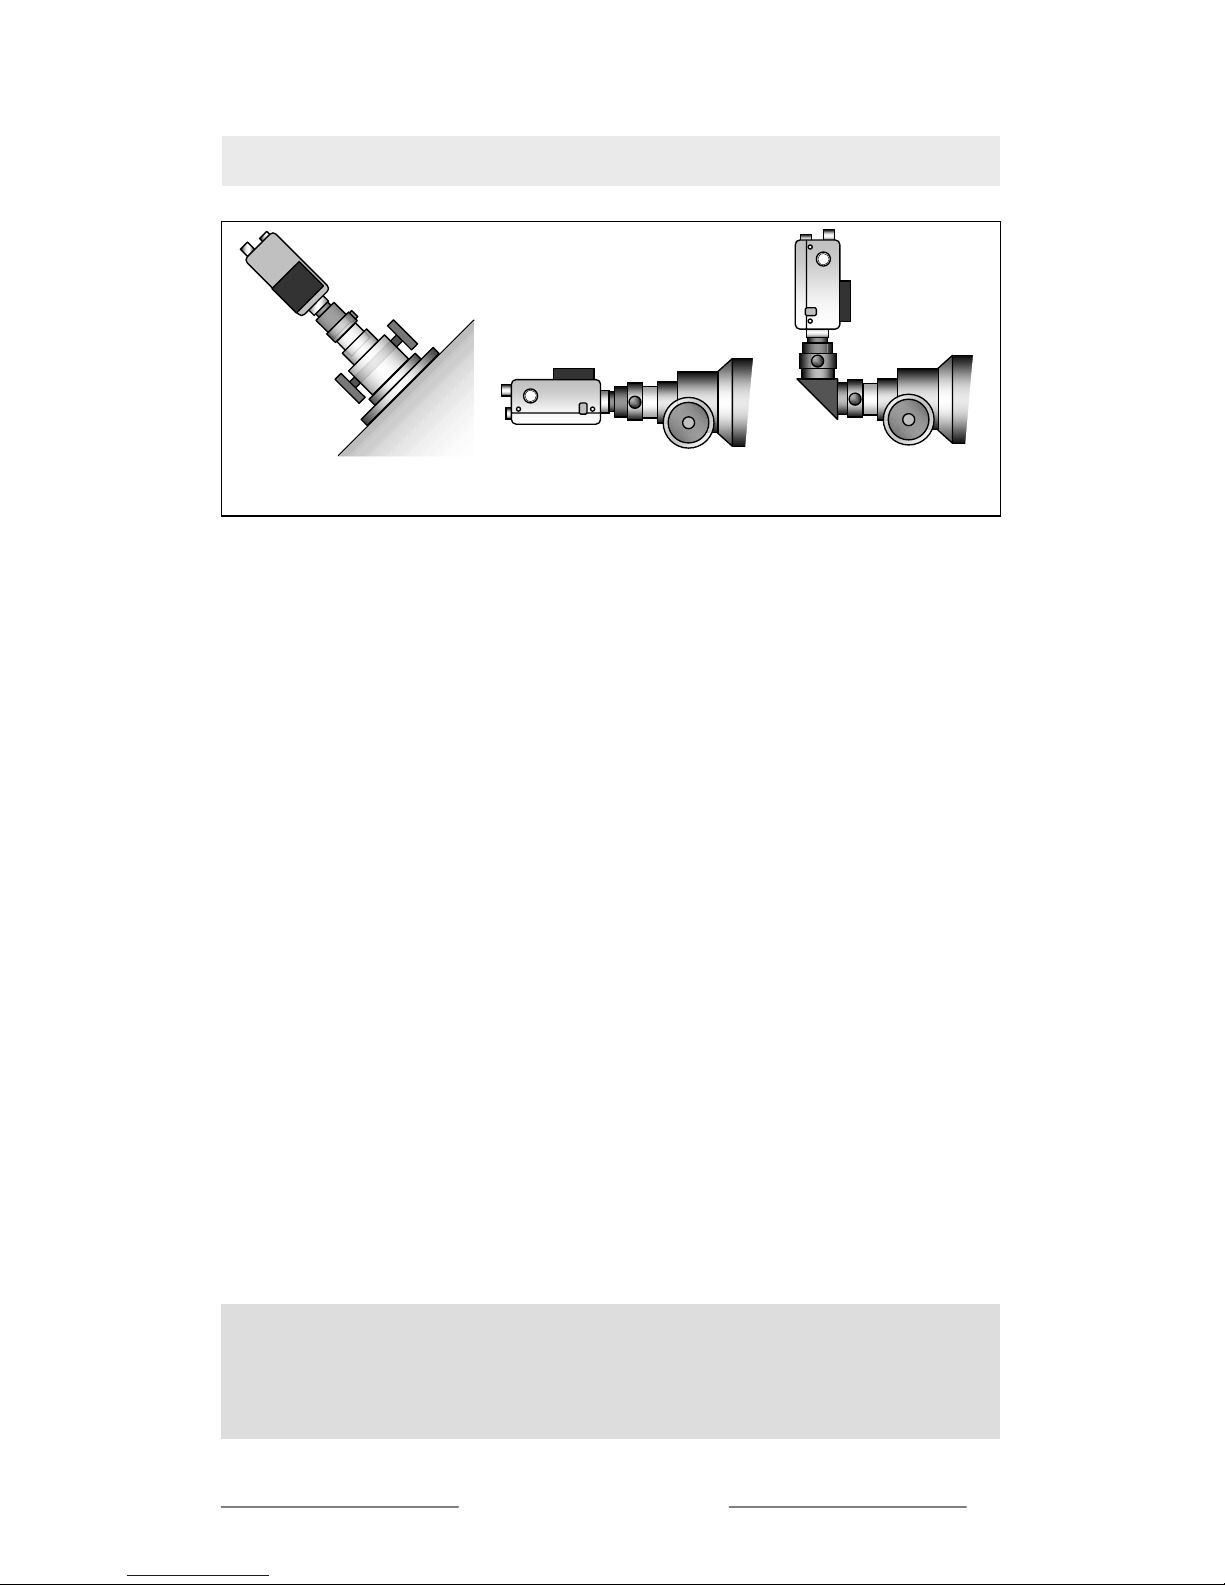
When attaching your Opticstar camera to your telescope please do not make use of a
star diagonal unless absolutely necessary. Star diagonals make the whole arrangement
less stable and bulky.
If you decide that you require a star diagonal in place please ensure that the
arrang secure. The effec rofo ort tube telescopes like
Maksutovs or Schmidt-Cassegrai
ement is t is less p
ns.
und on sh
Recommended Recommended Not recommended
Connecting your Opticstar Camera to a Telescope
Caution: Do not open the casing of your Opticstar camera under any
circumstances. Opening the casing will invalidate your warranty. Opticsta
r
will not accept responsibility for any damage or injury caused by such
actions.
© Opticstar Ltd 2003, 2004
5
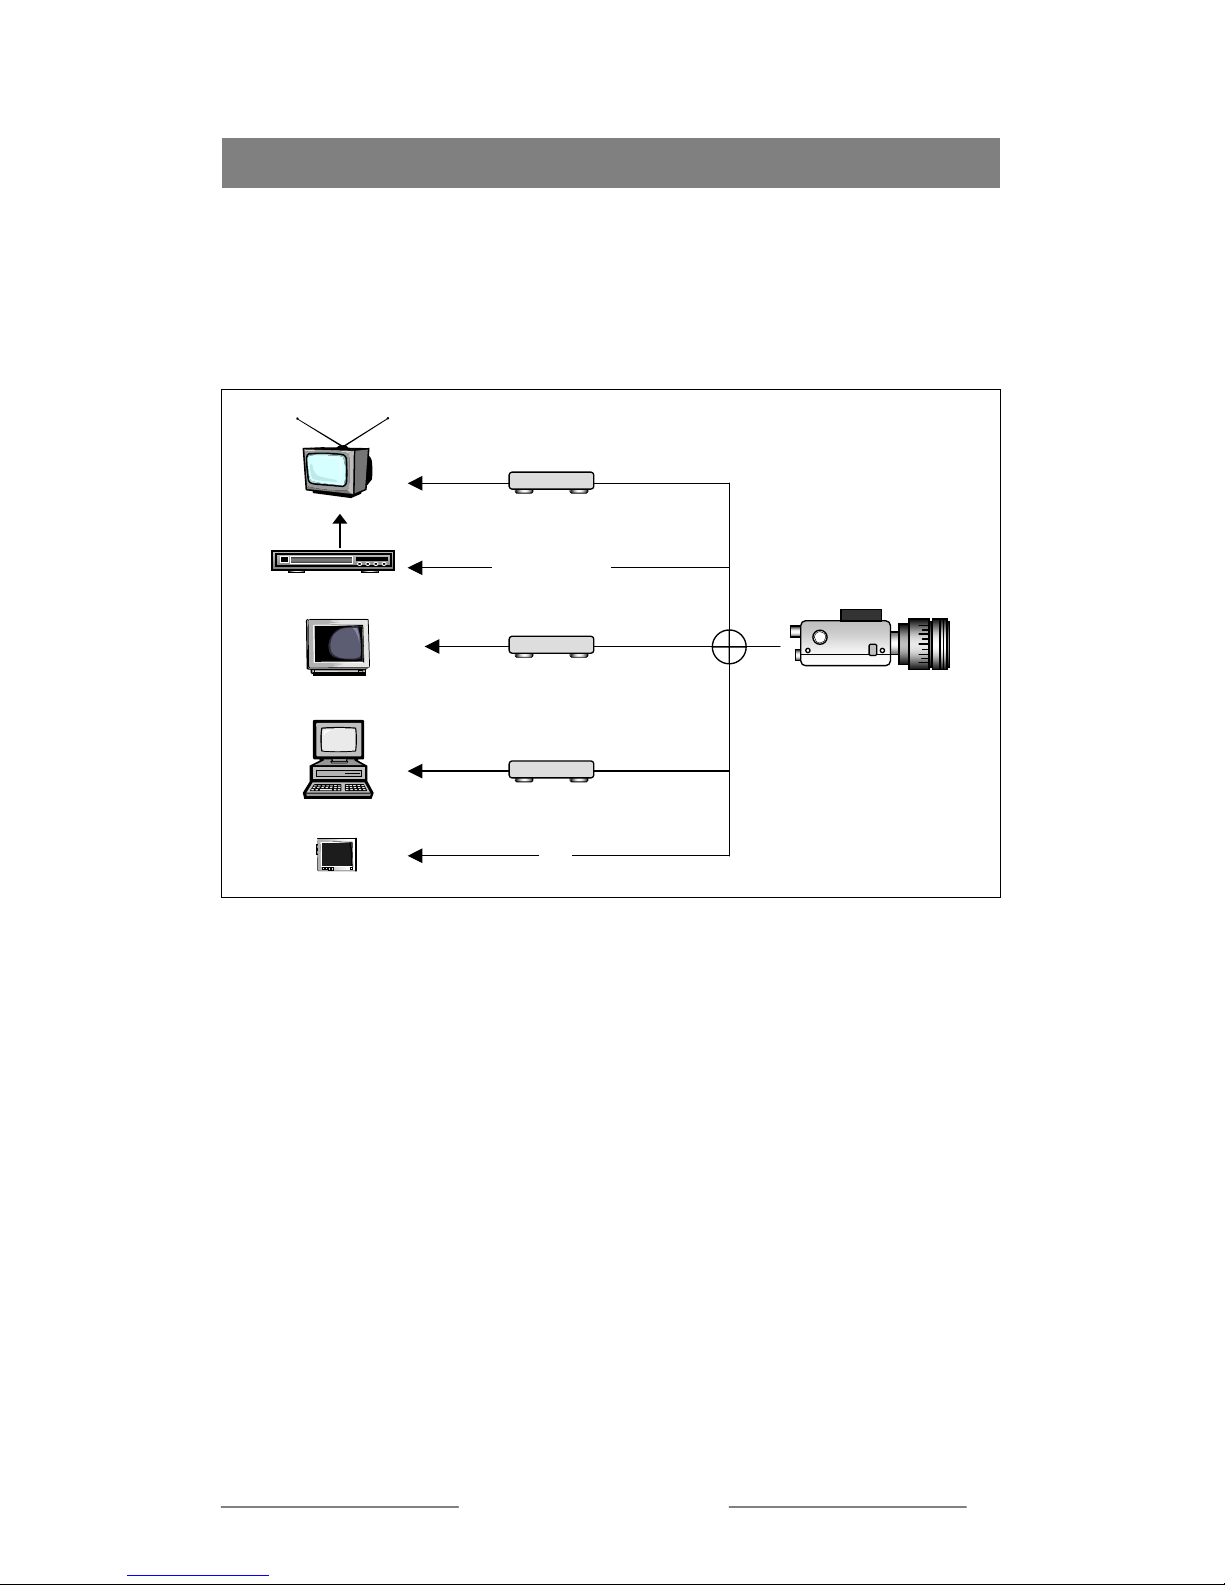
Introduction
lease ensure that your Opticstar camera is securely attached to your telescope as per
e instructions above. You can connect the camera via the provided RF cable to a
umber of devices including video recorders, TFT monitors with AV inputs, TV via a
CART cable or personal computer via a video grabber.
onnecting your Opticstar Camera to an AV Enabled Display
onnecting the camera to an AV TFT, TV or monitor will require no further action.
n image through your telescope should be displayed on the display once the AV
hannel has been selected.
onnecting your Opticstar Camera to a Video Recorder or TV
onnecting the camera to a video recorder will require that you tune the receiving
evice to your Opticstar camera. Please refer to the manufacturer’s instructions. Once
ned in properly, an image through your telescope should be displayed on the
isplay. Connecting your camera directly to a TV set will require a modulator.
lternatively if your TV has a SCART input a SCART cable will suffice.
onnecting your Opticstar Camera to a Personal Computer
onnecting the camera to a personal computer is normally only possible via a video
bber available from Opticstar or at your local computer store. In some cases video
r
s
r
telescope should be displayed on the computer’s display.
P
th
n
S
Connecting Your Opticstar Camera to other Devices
RF MODULATOR or SCART
Com
p
osite Video to VGA Converte
r
S-VHS or BNC
Video Grabbe
r
AV
TV
Video recorder
(
VCR)
VGA Monito
r
PC
AV Display
C
C
A
c
C
C
d
tu
d
A
C
C
gra
cards may have an RF-in that may allow you to connect the camera directly to you
omputer without the need of a video grabber. Please refer to the manufacturer’
structions to complete the installation. Once set-up properly, an image through you
c
in
© Opticstar Ltd 2003, 2004
6
 Loading...