

Opticron CMOS Telecam User Manual
PO Box 370 • Unit 21 • Titan Court • Laporte Way • Luton • Bedfordshire • LU4 8YR • UK
Telephone: 01582 726522 • Facsimile: 01582 723559 • E-mail: sales@opticron.co.uk
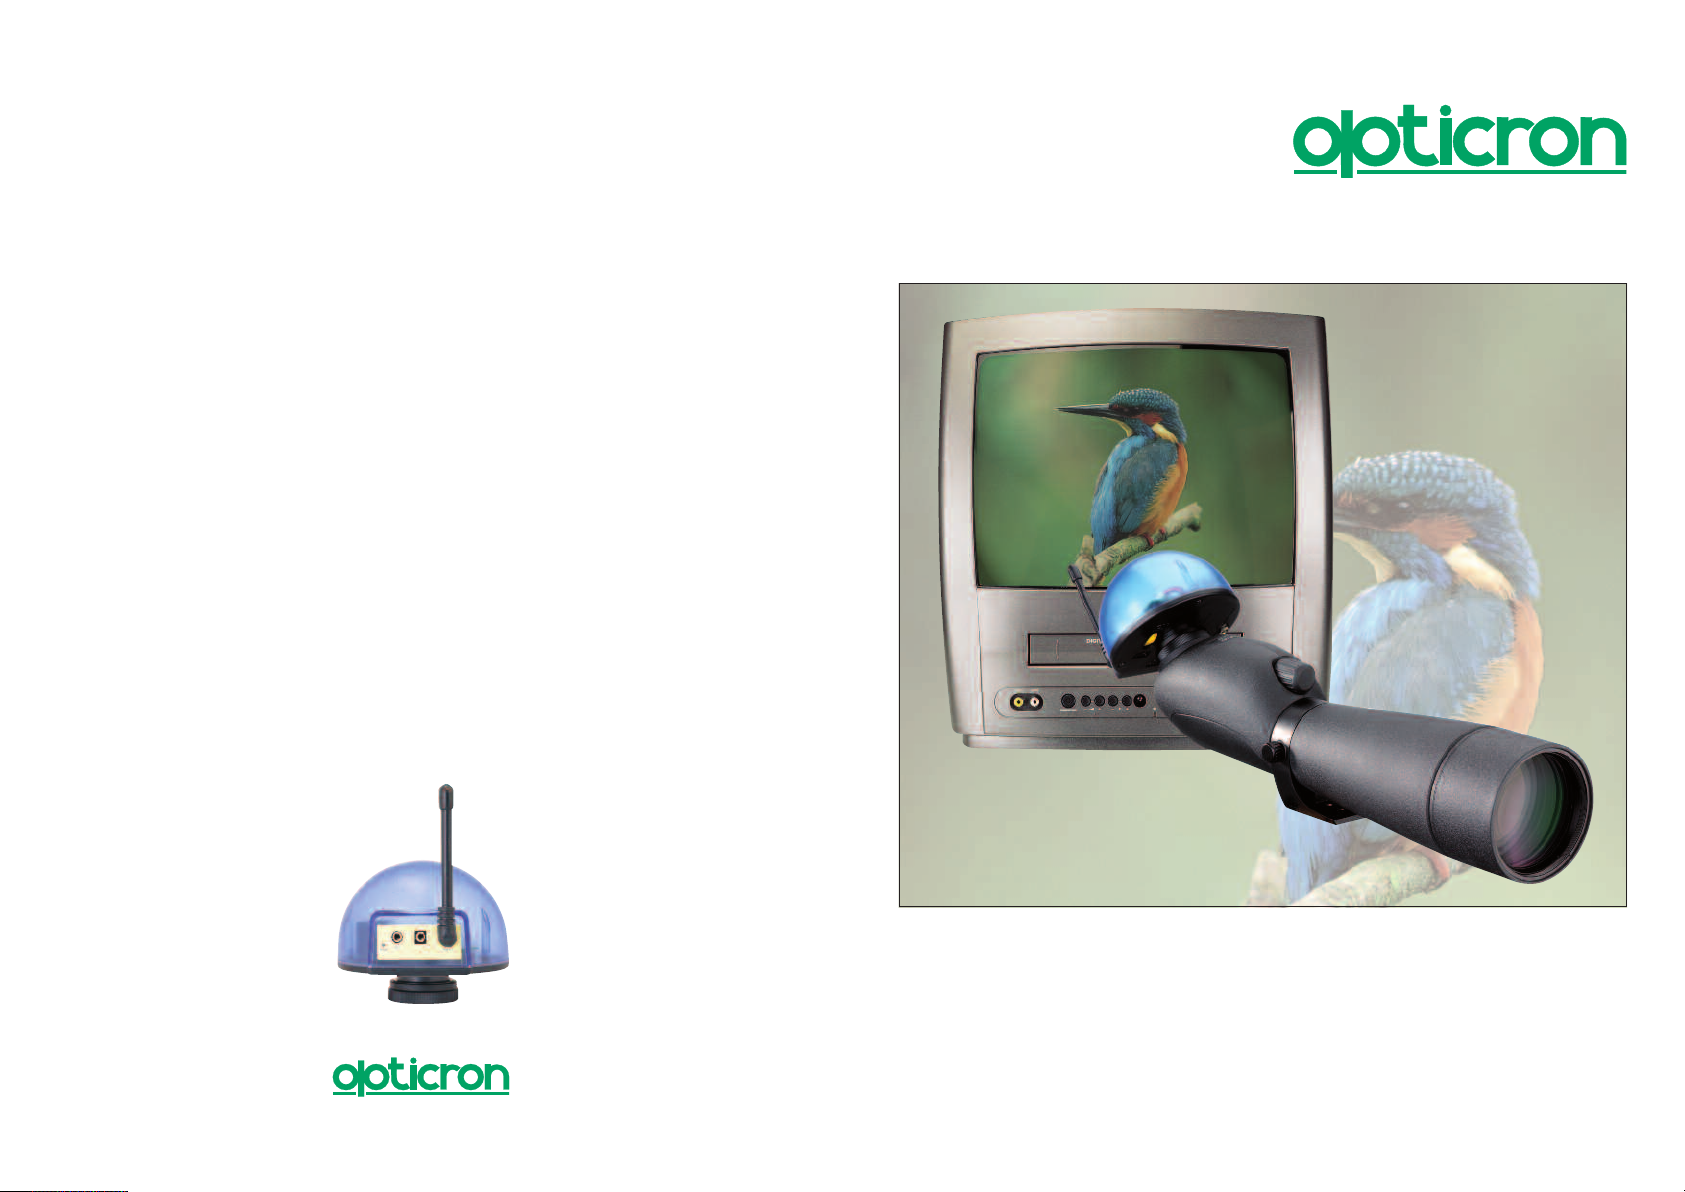
40950 CMOS Wireless Telecam
Instruction Guide

Introduction
Fitted directly to the telescope in place of a
conventional viewing eyepiece, the CMOS Wireless
Telecam transmits high magnification real-time images
from HR, ES & GS ‘scopes directly to a TV or PC
Notebook fitted with an analogue TV card. As such it
provides the opportunity to show real-time footage to
groups in public spaces as well as offering the visually
impaired an easier way of viewing through a telescope.
The unit features cable or wireless connection for
flexibility in the positioning of the telescope in a hide or
viewing area. Images relayed to a TV can be recorded
directly to video while images relayed to a PC can be
recorded if the TV card supports this option.
Equipment
CMOS Wireless Telecam
Relay lens 36mm
Transmitting antenna [effective distance: 15m]
Receiving antenna
Extension cable for receiving antenna + duplex switch
and mounting screws
Cable for direct connect Video out jack [black] ~ Video
in jack [yellow]
9V battery [For CMOS unit]
7.5V DC Adapter
Specifications
Image Device: CMOS 300,000 pixels
TV connection: Wireless Frequency 210.24Mhz PAL B
[Channels 8,9 or 10]
Direct connect Video out jack [black] ~ Video in jack
[yellow]
DC 9V in jack
Dimensions: [excluding antenna] mm: 110x110x70
Weight: [including battery]: 237g
Instructions for Use
attery Cover Plate
B
1. Preparing the CMOS Wireless Telecam
a. Fitting the battery: The unit uses a 9V battery
which is fitted in an underside compartment. To
fit the battery - remove cover plate using a cross
headed screwdriver, insert and connect battery
then replace cover plate and tighten screw.
Power can also be supplied using the 9V DC
Adapter supplied.
b. To test the unit is working slide the yellow switch
on the underside of the unit to the ‘ON’ position.
The POWER light will indicate red if the unit
ON/OFF Switch
is working.
2. Fitting the CMOS Wireless Telecam to an
Opticron Telescope
The CMOS Wireless Telecam fits directly to the
following Opticron Telescopes
1
: HR 66 GA,
HR 80 GA, ES 80, ES 100, IMAGIC 65,
IMAGIC 80. The unit can also be used with
IS 50, IS 60 and MM2 52 models on
modification and to special order only.
a. Connect the Telescope body to a suitable tripod
or mount.
Power Indicator
b. Remove viewing eyepiece if fitted.
c. Connect the CMOS Wireless Telecam to the
Telescope via the collar thread which screws
directly onto the bigger of the two external
Video out
9V DC in
[exposed] threads [Size: M 41.5 x 1.1 - 6e]
1
Suitability is subject to change without prior notification although advice will be given in writing wherever possible.
3. Making a connection from the CMOS Wireless Telecam to a Television or PC TV card
The 40950 CMOS Wireless Telecam has two modes of connection to a TV
A Wireless - Frequency 210.24Mhz PAL B [Channels 8,9 or 10]
B Direct connect Video out jack [black] ~ Video in jack [yellow]
A Wireless Frequency 210.24Mhz PAL B [Channels 8,9 or 10]
a. Attach fixed length black antenna into socket marked ANTENNA on CMOS unit.
b. Attach telescopic antenna to socket on the TV. If you wish to retain an existing ariel
connection while using the TV use the duplex switch supplied.
c. Manually tune TV to Channel 210.24 Mhz [Channels 8,9 or 10]
Note. If you experience audio disturbance using this method use the MUTE switch on the TV audio.
B Direct connect Video out jack [black] ~ Video in jack [yellow]
a. Connect Video out jack [black] to VIDEO socket on CMOS unit.
b. Connect Video in jack [yellow] to VIDEO socket on TV.
c. Tune the TV to AV1 or AV2.
 Loading...