

Page 1
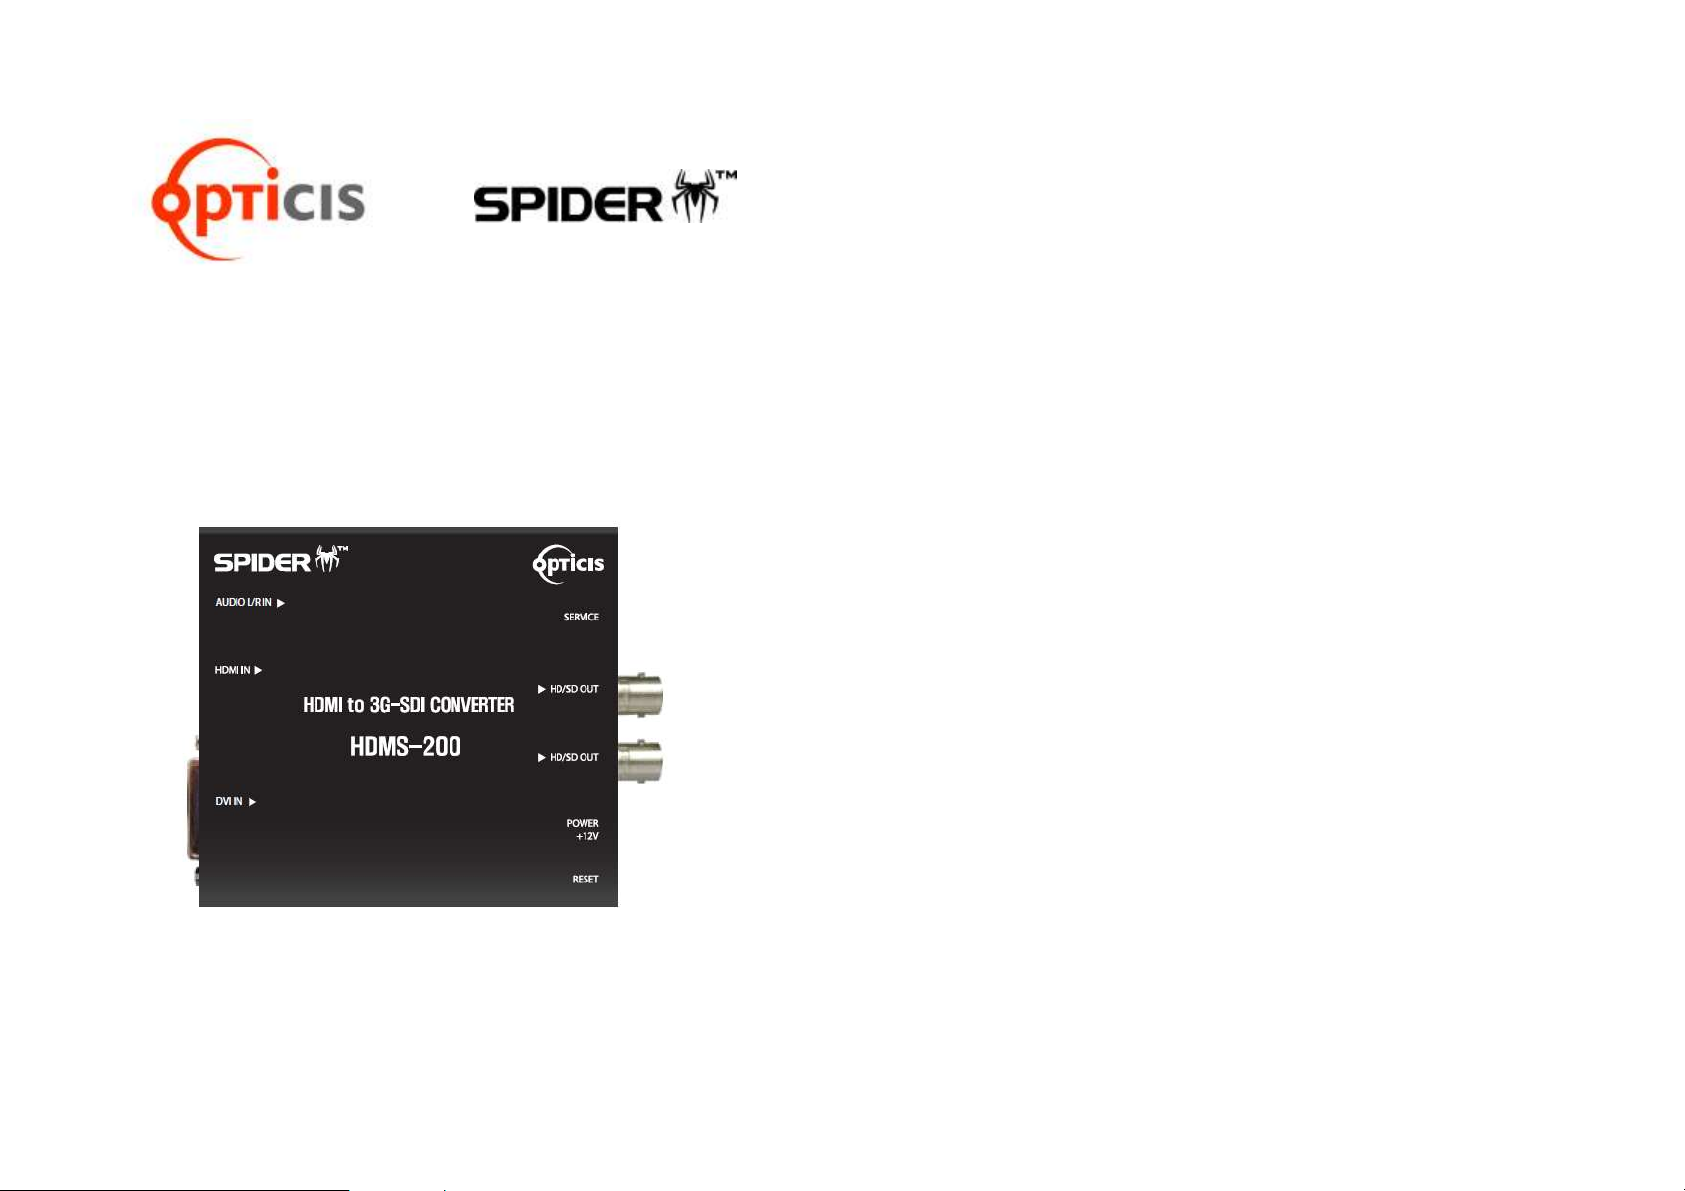
HDMI and DVI to 3G-SDI Video
Converter,
New HDMS-200
User’s Manual
Doc No. : OC-HD140307 / Rev1.1
CONTENTS
Contents 1-1
Specification / Supporting resolution 1-2
Installation 1-4
Firmware update 1-5
Warranty Information 1-8
Troubleshooting 1-9
1-1 Contents
Page 2
Specification
ITEM
DESCRIPTION
Input Signal
HDMI, DVI
Output Signal
SDI
VIDEO
Input format
RGB(444), YCbCr (444), YCbCr (422)
VIDEO
Output format
YCbCr (422)
Input format
AUDIO
Standard Analog Audio L/R
Power
5~24V DC
Power Consumption
7W
Dimension (WDH)
106.6 x 96 x 26.2 (mm)
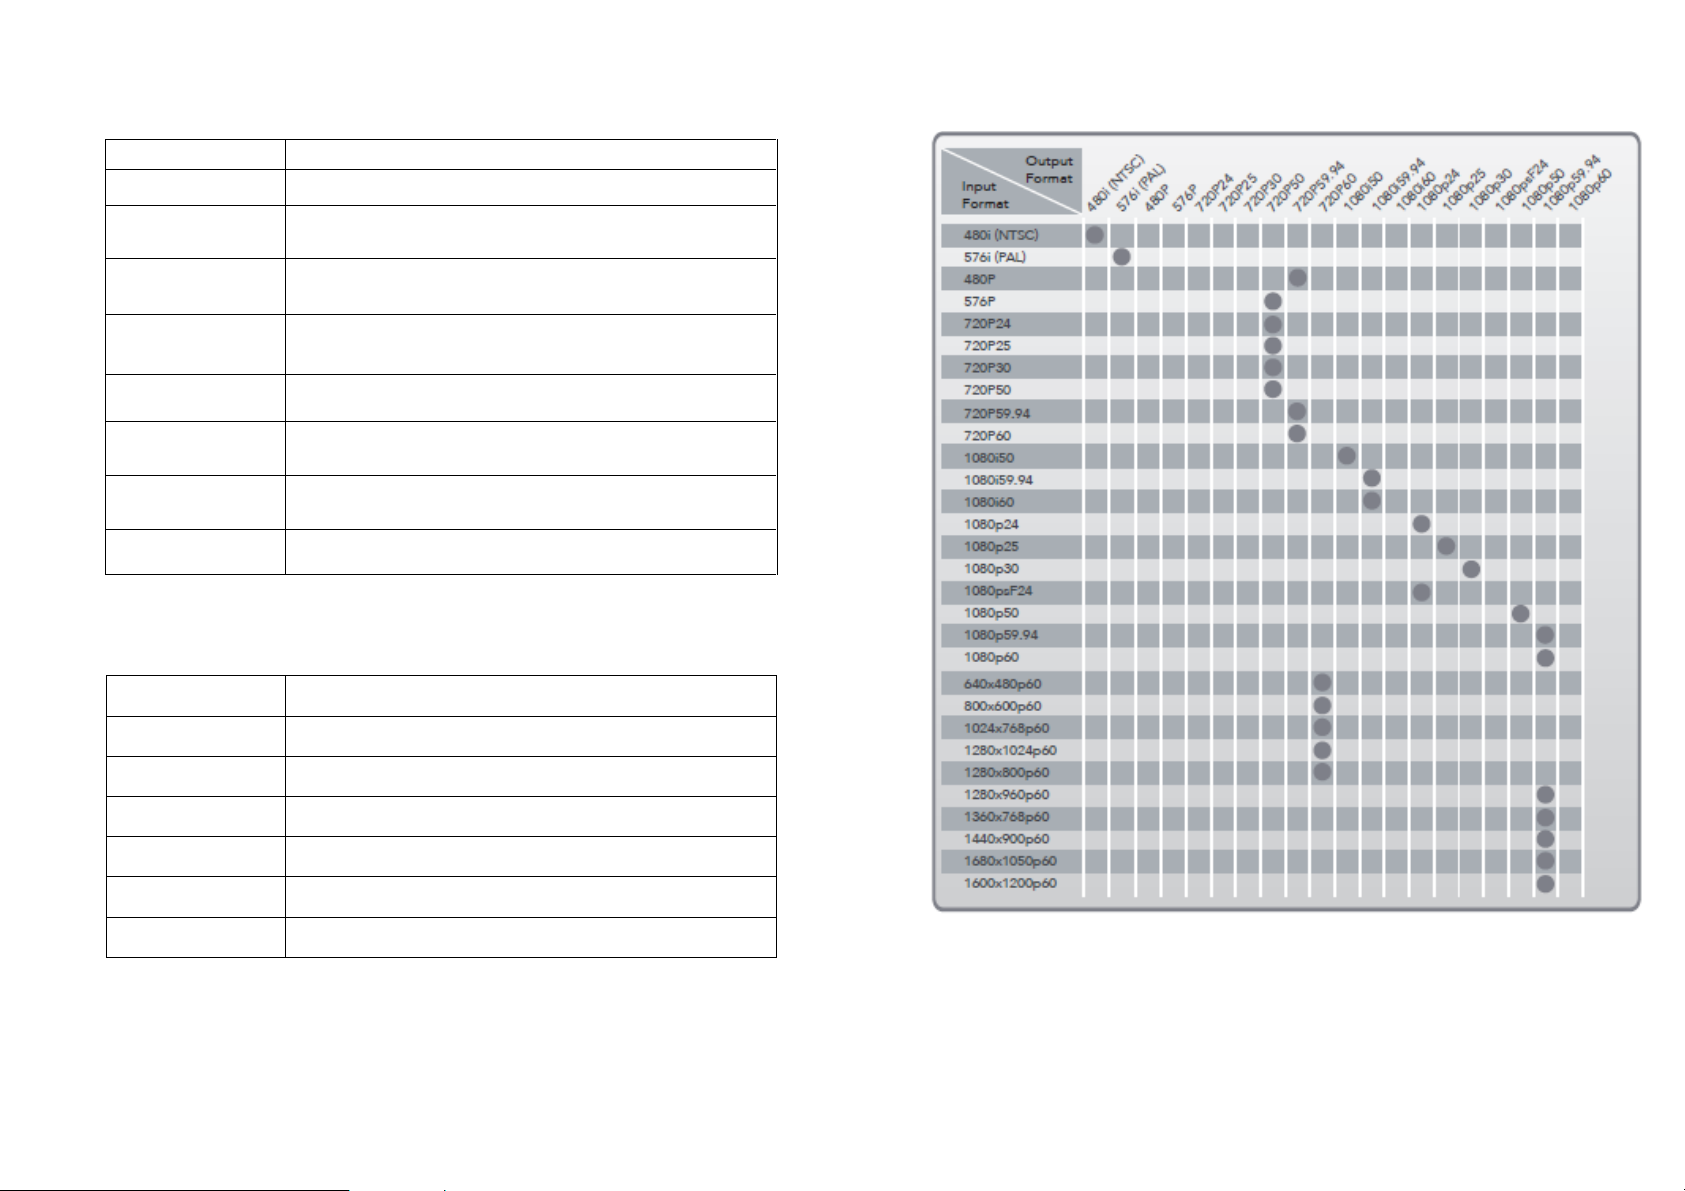
Supporting resolution
SMPTE
Video Formats
SMPTE-425M
3G : 1920*1080p(60/59.94/50)
SMPTE-274M
HD : 1920*1080i (60/59.94/50)
SMPTE-274M
HD : 1920*1080p (30/29.97/25/24/23.98)
SMPTE-296M
HD : 1280*720p (60/59.94/50)
SMPTE-125M
SD : 601*525i (486_ NTSC)
SMPTE-125M
SD : 601*625i (576_PAL)
1-2 Specification / Supporting Resolution (continued)
Supporting resolution
1-3 Supporting Resolution
Page 3
Installation
STEP1
Plug the AC/DC adapter to AC inlet and connect to receptacle on the
product.
STEP2 (HDMI)
Connect HDMI source to HDMI input port of HDMS-200 with HDM cable. If
necessary, connect the audio cable to audio jack.
STEP2 (DVI)
Connect PC or DVI source to DVI input port of HDMS-200 with DVI cable. If
necessary, connect the audio cable to audio jack.
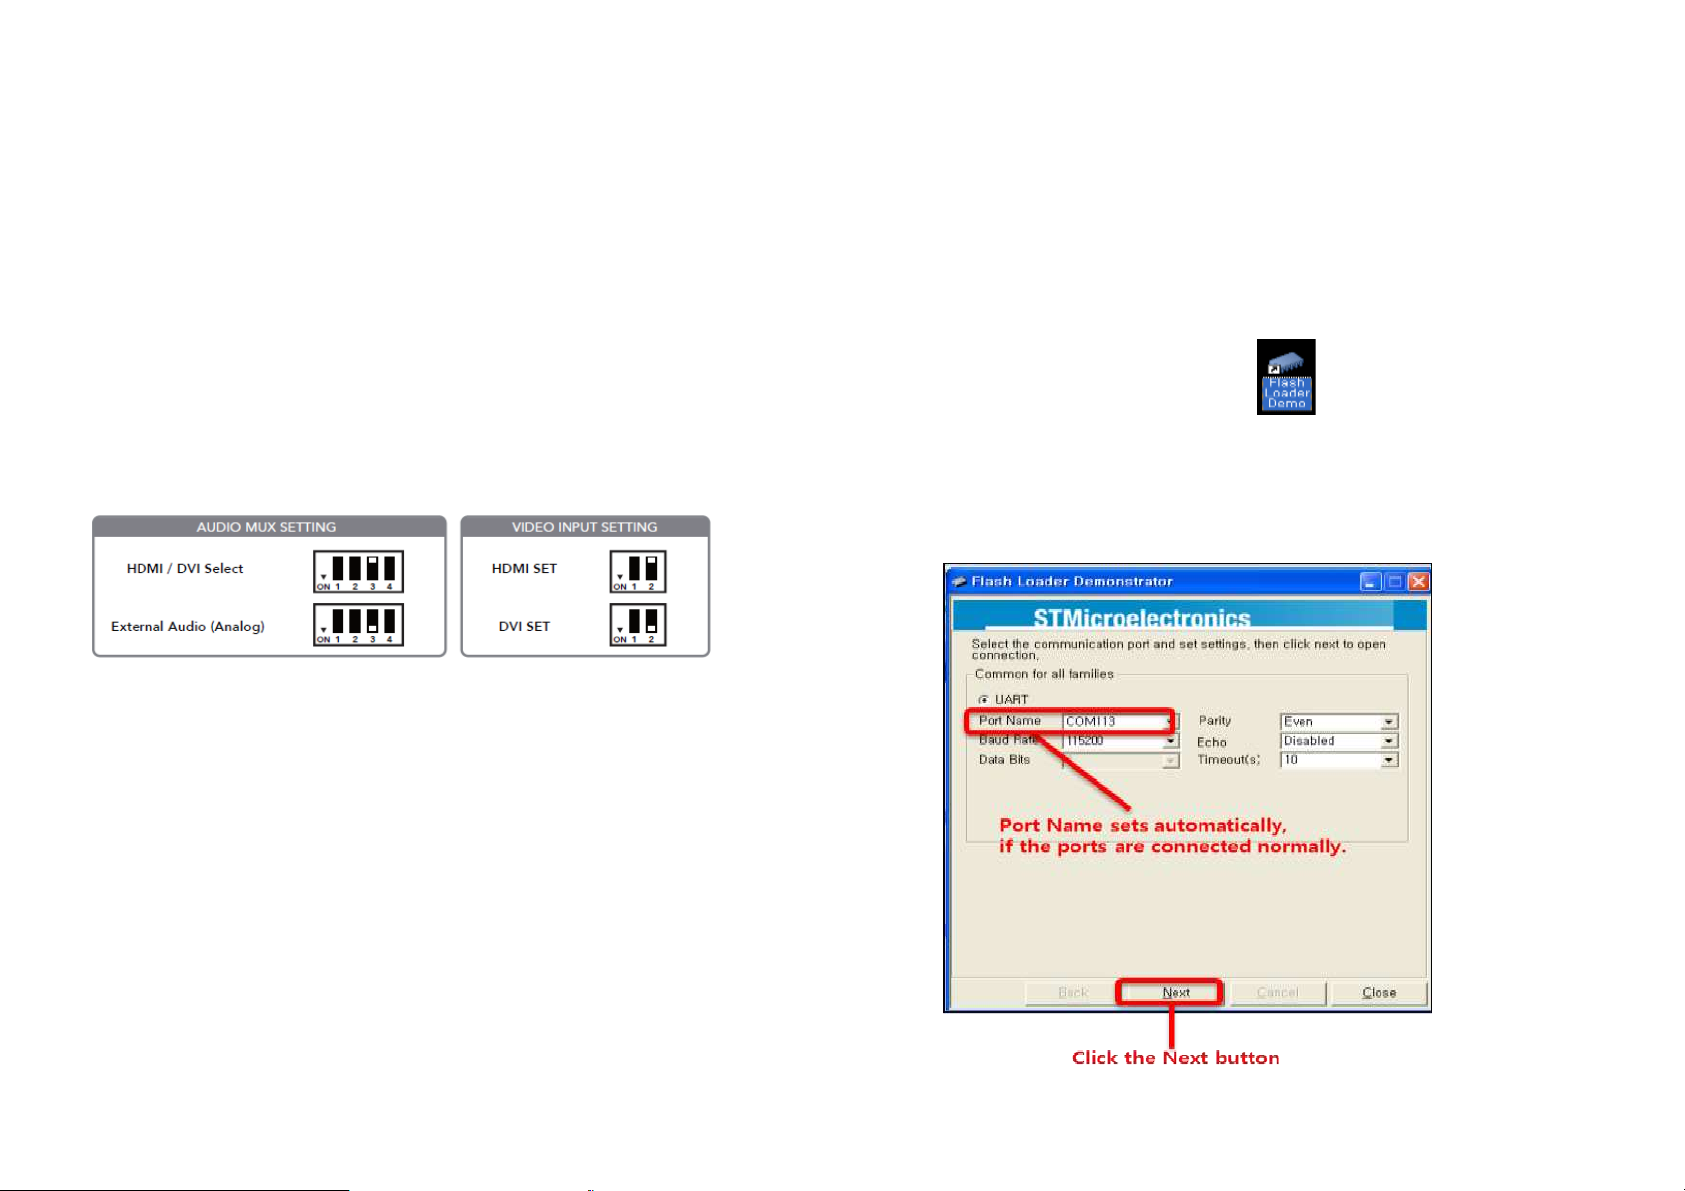
Note.1
Please see the D/P switch function as below.
STEP3
Connect SDI display to SDI output port of HDMS-200 with SDI coaxial cable.
Note.2
HDMS-200 has two (2) SDI outputs.
Note.3
HDMS-200 does not have scaling up/down feature. It just converts
HDMI or DVI to SDI format with same resolution and refresh ratio.
1-4 Installation
Firmware update
STEP1
Please “Off” D/P switch No.2 to set the firmware mode. Then, plug in the
adaptor.
STEP2
Connect Service port of New HDMS-200 and PC using a download cable.
STEP2
STEP3
Install the Flash Loader Demo file.
STEP4
Check the PortName and Click the Next button as below.
1-5 Firmware update (continued)
Page 4
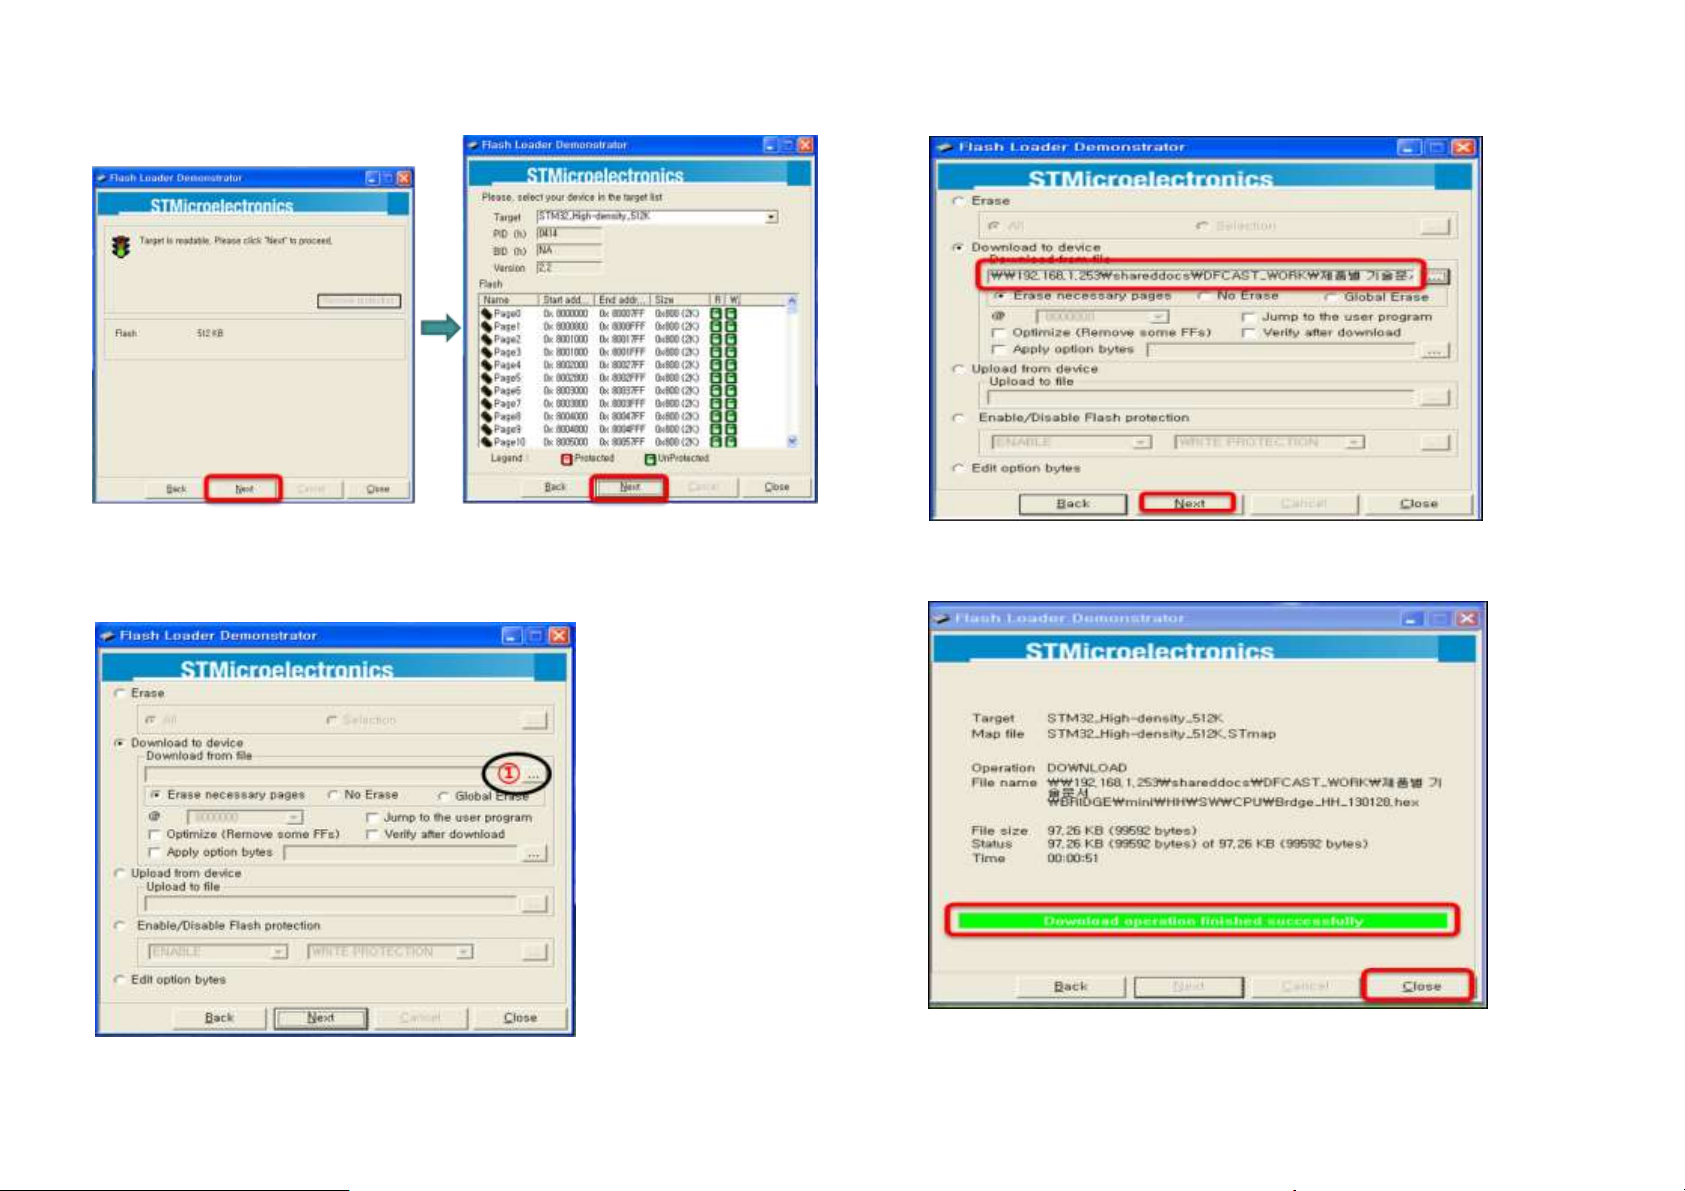
STEP5
Click the Next button as below
STEP6
Click ①, Open of ‘Download to device’ to select directory and file (hex.
format) to be uploaded.
1-6 Firmware update (continued)
STEP7
Please check the file and Click the Next button as below
STEP8
Then, the firmware will be uploaded and click the Close button, if it’s completed.
STEP6
Please close the program and “On” D/P switch No.2 again to run it under new
firmware.
1-7 Firmware update
Page 5

Warranty Information
1 (One) Year Warranty
OPTICIS warrants OPTICIS HDMS-200 HDMI to 3G-SDI converter to be
free from defects in workmanship and materials, under normal use and
service, for a period of one (1) year from the date of purchase from OP
TICIS or its authorized resellers.
If a product does not work as warranted during the applicable warranty
period, OPTICIS shall, at its option and expense, repair the defective pr
oduct or part, deliver to customer an equivalent product or part to replac
e the defective item, or refund to customer the purchase price paid for t
he defective product.
All products that are replaced will become the property of OPTICIS.
Replacement products may be new or reconditioned.
Any replaced or repaired product or part has a ninety (90) day warranty
or the reminder of the initial warranty period, whichever is longer.
OPTICIS shall not be responsible for any software, firmware, information,
or memory data of customer contained in, stored on, or integrated with
any products returned to OPTICIS for repair under warranty or not.
Warranty Limitation and Exclusion
OPTICIS shall have no further obligation under the foregoing limited warranty
if the product has been damaged due to abuse, misuse, neglect, accident,
unusual physical or electrical stress, unauthorized modifications, tampering,
alterations, or service other than by OPTICIS or its authorized agents, causes
other than from ordinary use or failure to properly use the Product in the
application for which said Product is intended.
1-8 Warranty Information
Troubleshooting
Problem
Remedy Actions
Converter does not
Operate
Make sure the 12V power supply is plugged
firmly to DC receptacle and AC inlet.
Check if the white LED light is on.
No picture (or signal)
Or Poor picture
1. If you are using copper based HDMI or DVI
cable, overall length should not exceed
20ft. Longer than this will result in no or
poor picture quality. To extend beyond 20ft,
please use fiber optical HDMI or DVI
extension cables.
2. Make sure all HDMI, DVI, SDI connectors
are tightly secured to all HDMI, DVI, SDI
ports. Loose plugging on the connectors
will result in no or poor picture.
3. Reboot the converter.
Incorrectly sized picture /
resolution or No picture
Reset HDMS-200 by pressing the reset
button.
1-9 Troubleshooting
Page 6

© 2014 Opticis Co., Ltd. All Rights Reserved
Revision 1.1. 7, March, 2014
Opticis Locations
Headquarters
Opticis Co., Ltd.
# 16Fl, Kins Tower
8 Sungnam-daero, 331 beon-gil,
Bundang-gu,
Seongnam-si, Gyunggi-do, 463-844
South Korea
Te l: +82 (31) 719-8033
Fax: +82 (31) 719-8032
www.opticis.com
For order support, please contact your Distributor or Reseller.
For technical support, check with the with the Opticis web site www.opticis.com or
contact [email protected]
 Loading...