

Page 1
OPTEX OS-12C T Quick Setup Guide
For detailed information, please refer to the installation manual supplied with each sensor.
Settings
The OS-12C T has four settings:
A. Test input = Low, Safety output = N.O. (Normally Open)
B. Test input = High, Safety output = N.O. (Normally Open). Most commonly used on non-monitored automatic doors.
C. Test input = Low, Safety output = N.C. (Normally Closed)
D. Test input = High, Safety output = N.C. (Normally Closed)
Programming the OS-12C T
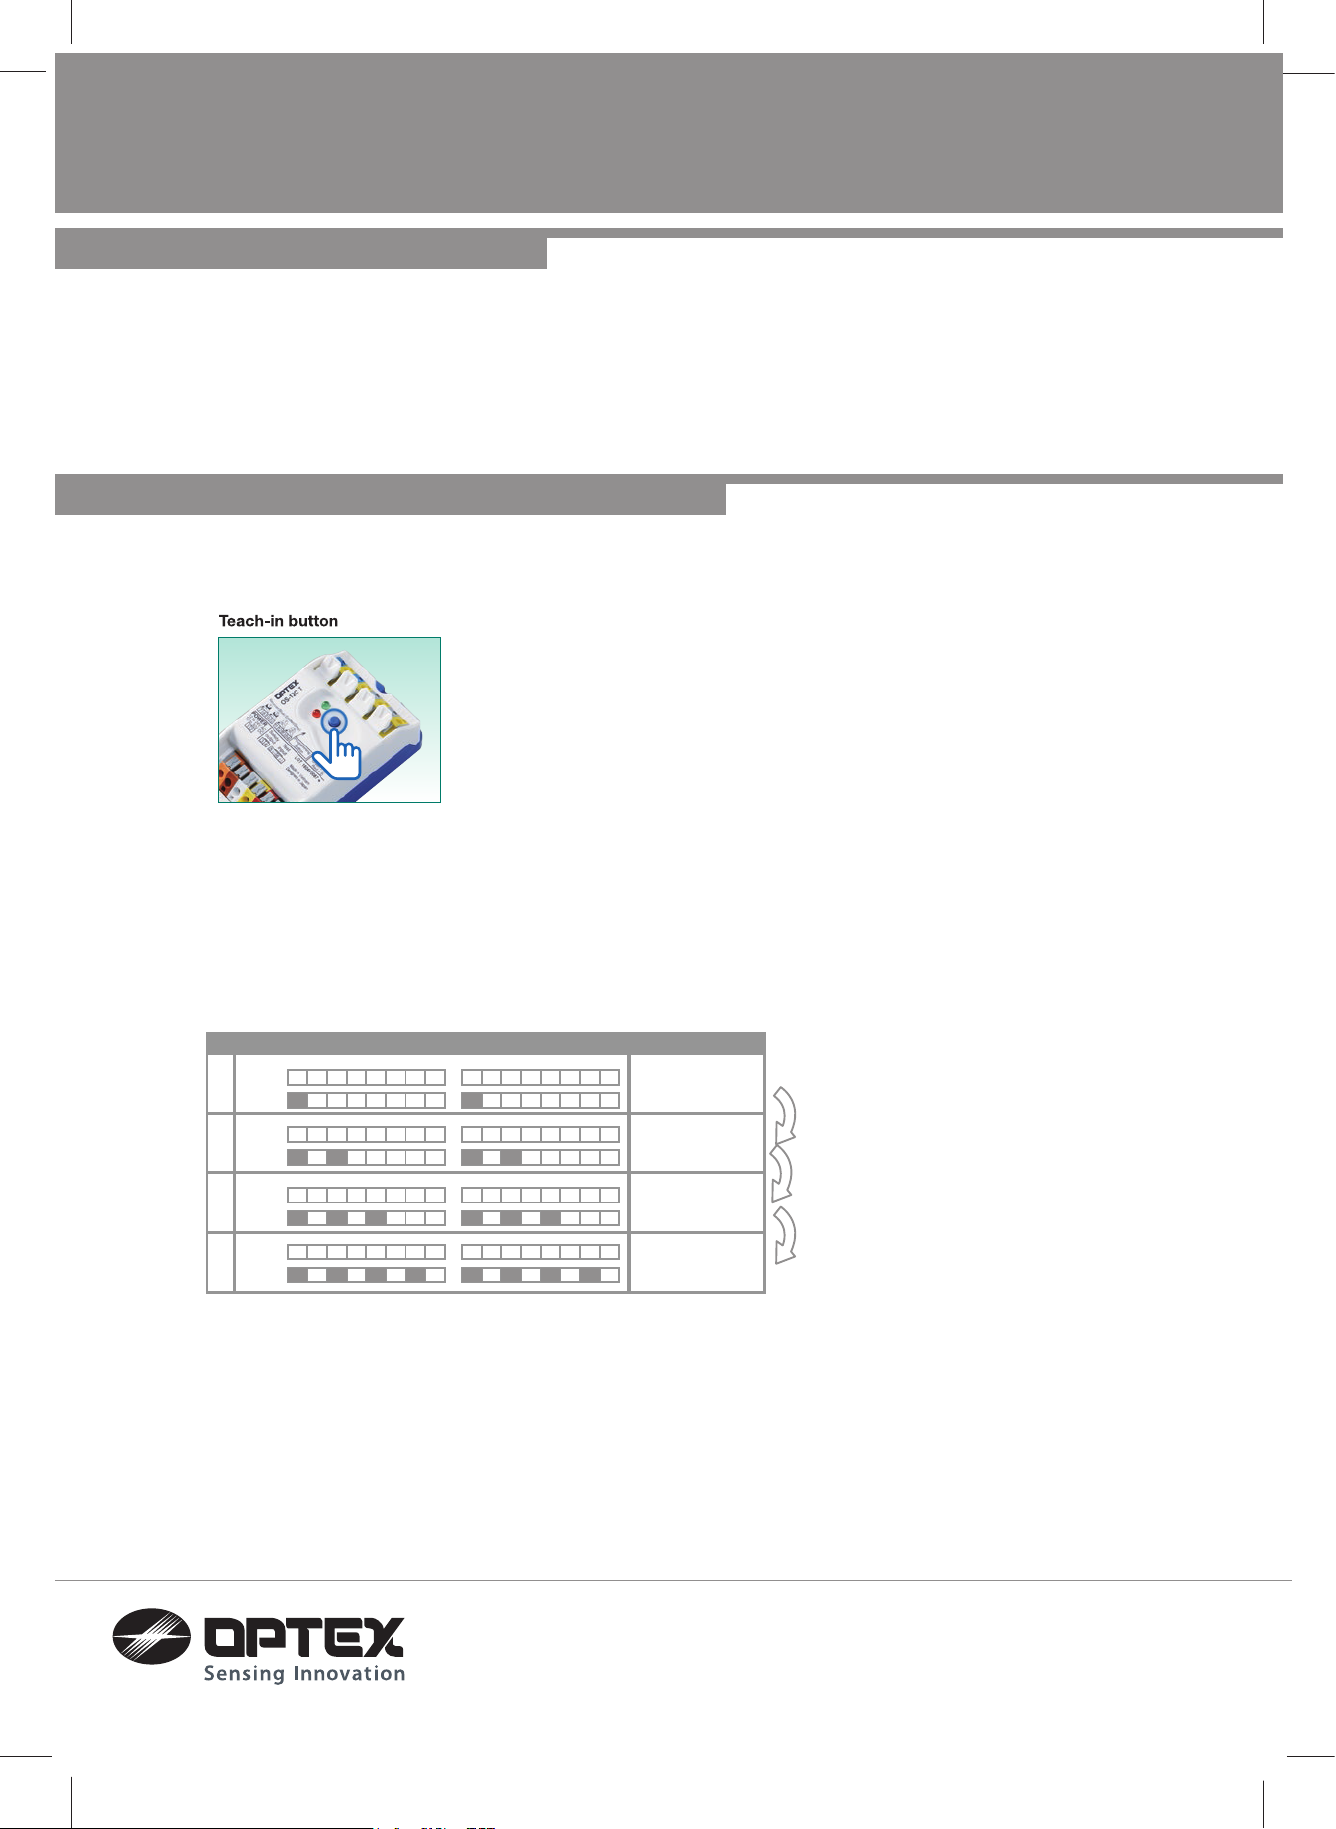
1. Press and hold down the blue “Teach-in button” until the red LED starts blinking on the OS-12C T.
This will initialize the programming function of the OS-12C T.
2. Use the blue “Teach-in button” to scroll to the correct (A thru D) setting. The OS-12C T will be in
program mode for approximately 10 seconds. Most non-monitored automatic doors will use setting B
indicated by two Red LED ashes on the OS-12C T.
3. Press and hold down the blue “Teach-in button” until the green and red LEDs on the OS-12C T
stop blinking. When the green and red LEDs stop blinking, that indicates the OS-12C T is in normal
operation.
Amplifier Mode
A
B
C
D
Green
Red
Green
Red
Green
Red
Green
Red
Active-Low/N.O.
One push
Active-High/N.O.
One push
Active-Low/N.C.
One push
Active-High/N.C.
18730 Wilmington Ave, Unit 100
Rancho Dominguez, CA 90220
Ph 310 214-8644
Fax 310 898-1098
Toll free 800 877-6656
www.ot-inc.com
OPTEX Technologies Inc.
(East Coast Ofce)
8510 McAlpine Park Dr.
Suite 108
Charlotte, NC 28211
OPTEX Technical Support (800) 877-6656
East Coast: Perry Watkins, Ext. 220
Central U.S.: Jason Kirn, Ext. 201
Support: Refugio Guadaljara, Ext. 202
 Loading...