

Page 1
Page 2

Page 3

Contents / Inhoudsopgave / Table des matières / Índice / Sommario / Inhalt
English
1. Introduction ..................................................................................................... 11
About this manual .................................................................................... 11
What’s in the box? .................................................................................... 12
2. Getting started ................................................................................................ 13
Using the Compact 4 HD.......................................................................... 13
Cleaning the camera lens and mirror ....................................................... 15
Buttons ..................................................................................................... 16
Switching the power on and off ................................................................ 18
Adjusting the magnification ...................................................................... 18
Selecting a viewing mode ........................................................................ 20
Using the snapshot button........................................................................ 20
3. Charging the battery ....................................................................................... 22
Charging the Compact 4 HD .................................................................... 22
Standby and Auto Power Off .................................................................... 23
Battery warning ........................................................................................ 23
4. The Compact 4 HD Menu ............................................................................... 24
Activating the menu .................................................................................. 25
Navigating the menu ................................................................................ 25
Exiting the menu ...................................................................................... 25
Menu: Information .................................................................................... 26
Page / Pagina/ Página / Seite 1
Page 4

Menu: Brightness ..................................................................................... 27
Menu: Power ............................................................................................ 28
Menu: Beeps ............................................................................................ 30
Menu: Light .............................................................................................. 31
Menu: Color .............................................................................................. 32
Menu: Reset ............................................................................................. 33
Appendix A: Safety ............................................................................................. 34
Appendix B: Technical information ...................................................................... 35
Appendix C: Warranty Conditions ....................................................................... 37
Nederlands
1. Inleiding .......................................................................................................... 42
Over deze handleiding ............................................................................. 42
Inhoud van de verpakking ........................................................................ 43
2. Aan de slag ..................................................................................................... 44
Het gebruik van de Compact 4 HD ........................................................... 45
Het schoonhouden van de camera lens en de spiegel ............................. 47
Knoppen ................................................................................................... 48
Het apparaat aan- en uitzetten ................................................................. 50
Aanpassen van de vergroting ................................................................... 50
Een leesstand selecteren ......................................................................... 52
Het gebruik van de snapshot functie ................................ ........................ 53
3. Opladen van de batterij ................................................................ ................... 54
Page / Pagina/ Página / Seite 2
Page 5

De Compact 4 HD opladen ...................................................................... 54
Stand-by en Automatisch Uitschakelen .................................................... 55
Batterij waarschuwing .............................................................................. 55
4. Het Compact 4 HD Menu ................................................................................ 56
Activeren van het menu ........................................................................... 57
Navigeren in het menu ............................................................................. 57
Verlaten van het menu ............................................................................. 57
Menu: Informatie (Information) ................................................................. 58
Menu: Helderheid (Brightness) ................................................................. 59
Menu: Stroominstellingen (Power) ........................................................... 60
Menu: (Geluiden) Beeps .......................................................................... 62
Menu: Verlichting (Light) .......................................................................... 63
Menu: Kleuren (Color) .............................................................................. 64
Menu: Fabrieksinstellingen (Reset) .......................................................... 65
Bijlage A: Veiligheid ............................................................................................ 66
Bijlage B: Technische informatie ......................................................................... 67
Français
1. Introduction ..................................................................................................... 73
À propos du manuel ................................................................................. 74
Ce que contient la boîte ................................................................ ........... 74
2. Connaître votre Compact 4 HD ....................................................................... 75
Utiliser votre Compact 4 HD ..................................................................... 76
Page / Pagina/ Página / Seite 3
Page 6

Nettoyer la lentille de la caméra et le miroir ............................................. 77
Les boutons .............................................................................................. 78
Allumer et éteindre le Compact 4 HD ....................................................... 80
Régler le niveau de grossissement .......................................................... 80
Sélectionner le mode de visualisation ...................................................... 82
Utiliser le bouton photo instantanée ......................................................... 83
3. Chargement de la pile ..................................................................................... 85
Charger le Compact 4 HD ........................................................................ 85
Mise en veille et mise hors tension automatique ...................................... 86
4. Le menu du Compact 4 HD ............................................................................ 88
Ouvrir le menu .......................................................................................... 89
Naviguer dans le menu ................................................................ ............ 89
Fermer le menu ........................................................................................ 89
Menu: Information .................................................................................... 90
Menu: Luminosité ................................................................ ..................... 91
Menu: Alimentation .................................................................................. 92
Menu: Son ................................................................................................ 95
Menu: Lumière ......................................................................................... 96
Menu: Couleur .......................................................................................... 97
Menu: Configuration par défaut ................................................................ 98
Annexe A: Mesures de sécurité .......................................................................... 99
Annexe B: Renseignements techniques ........................................................... 100
Annexe C: Conditions de garantie .................................................................... 102
Page / Pagina/ Página / Seite 4
Page 7

Italiano
1. Introduzione .................................................................................................. 109
A proposito di questo manuale ............................................................... 110
Contenuto della confezione .................................................................... 110
2. Per iniziare .................................................................................................... 111
Come usare Compact 4 HD ................................................................... 111
Pulizia della lente ................................................................................... 113
Pulsanti .................................................................................................. 114
Accensione e spegnimento .................................................................... 116
Regolazione dell’ingrandimento ............................................................. 116
Selezionare una modalità di visualizzazione .......................................... 118
Uso del pulsante Foto ............................................................................ 118
3. Ricarica della batteria ................................................................................... 120
Come caricare Compact 4 HD ............................................................... 120
Standby e Autospegnimento .................................................................. 121
Avviso Batteria ....................................................................................... 121
4. Menu di Compact 4 HD ................................................................................. 122
Attivare il menu ...................................................................................... 123
Navigare nel menu ................................................................ ................. 123
Uscire dal menu ..................................................................................... 123
Menu: Informazioni ................................................................................. 124
Menu: Luminosità ................................................................ ................... 125
Menu: Alimentazione .............................................................................. 126
Page / Pagina/ Página / Seite 5
Page 8

Menu: Audio ........................................................................................... 128
Menu: Luce ............................................................................................ 129
Menu: Colore .......................................................................................... 130
Menu: Reset ........................................................................................... 131
Appendice A: Sicurezza .................................................................................... 132
Appendice B: Scheda tecnica ........................................................................... 133
Appendice C: Condizioni di garanzia ................................................................ 135
Español
1. Introducción .................................................................................................. 141
Acerca de este manual .......................................................................... 142
¿Qué contiene la caja? ................................................................ .......... 142
2. Conocer su Compact 4 HD ........................................................................... 143
Utilizar el Compact 4 HD ........................................................................ 143
Limpiar el lente de la cámara y el espejo ............................................... 145
Botones .................................................................................................. 146
Encender y apagar la unidad ................................................................. 148
Ajustar la amplificación .......................................................................... 148
Seleccionar un modo de visualización ................................................... 150
Utilizar el botón de foto instantánea ....................................................... 150
3. Carga de la batería ....................................................................................... 152
Cargar el Compact 4 HD ........................................................................ 152
Modo de reposo y función de apago automático .................................... 153
Page / Pagina/ Página / Seite 6
Page 9

Aviso de batería vacía ............................................................................ 153
4. El menú del Compact 4 HD .......................................................................... 154
Activar el menú ...................................................................................... 155
Navegar en el menú ............................................................................... 155
Salir del menú ........................................................................................ 155
Menú Información .................................................................................. 156
Menú Brillo ............................................................................................. 157
Menú Alimentación ................................................................................. 158
Menú Sonido .......................................................................................... 161
Menú Iluminación ................................................................................... 162
Menú Color ............................................................................................. 163
Menú Restablecer .................................................................................. 164
Apéndice A: Seguridad ..................................................................................... 165
Apéndice B: Características técnicas ................................................................ 166
Apéndice C: Condiciones de garantía ............................................................... 168
Deutsch
1. Einführung .................................................................................................... 174
Über dieses Handbuch ........................................................................... 176
Lieferumfang .......................................................................................... 176
2. Erste Schritte ................................................................................................ 177
Benutzung des Compact 4 HD ............................................................... 177
Reinigung Kameralinse und Spiegel ...................................................... 179
Page / Pagina/ Página / Seite 7
Page 10

Tastenbelegung ..................................................................................... 180
Compact 4 HD Ein- und Ausschalten ..................................................... 182
Einstellen der Vergrößerung .................................................................. 182
Auswahl des Darstellungsmodus ........................................................... 184
Schnappschuss-Funktion ....................................................................... 184
3. Aufladen des Akkus ...................................................................................... 186
Aufladen des Compact 4 HD .................................................................. 186
Standby und automatisches Ausschalten .............................................. 187
Akkuwarnung ......................................................................................... 187
4. Das Compact 4 HD Menü ............................................................................. 188
Das Menü aktivieren .............................................................................. 189
Navigieren im Menü ............................................................................... 189
Verlassen des Menüs ............................................................................. 189
Menü: Information .................................................................................. 190
Menü: Brightness Helligkeit ................................................................ 191
Menü: Power Ein-und Ausschalten .................................................... 192
Menü: Sound Signalton ...................................................................... 194
Menü: Light Objektbeleuchtung ......................................................... 195
Menü: Color Farbe ............................................................................. 196
Menü: Reset Zurücksetzen ................................................................ 197
Anhang A: Sicherheitshinweise ........................................................................ 198
Anhang B: Technische Informationen ............................................................... 199
Anhang C: Garantiebedingungen ..................................................................... 201
Page / Pagina/ Página / Seite 8
Page 11

Optelec Compact 4 HD
Compact 4 HD
User Manual
Version 1.1
© 2012 Optelec, the Netherlands
All rights reserved
Optelec
P.O. Box 399
2990 AJ Barendrecht
The Netherlands
Phone: +31 (0)88 678 34 44
E-mail: [email protected]
Internet: www.optelec.com
English Page 9
Page 12

Optelec Compact 4 HD
WEEE Notice
The directive on Waste Electrical and Electronic Equipment (WEEE), which entered into force as
European law on 13th February 2003, resulted in a major change in the treatment of electrical
equipment at end-of-life.
The purpose of this Directive is, as a first priority, the prevention of WEEE, and in addition, to
promote the reuse, recycling and other forms of recovery of such wastes so as to reduce disposal.
The WEEE logo (shown at the left) on the product or its box indicates that this product
must not be disposed of or dumped with your other household waste. You are liable to
dispose of all your electronic or electrical waste equipment by relocating over to the
specified collection point for recycling of such hazardous waste. Isolated collection and
proper recovery of your electronic and electrical waste equipment at the time of disposal
will allow us to help conserving natural resources. Moreover, proper recycling of the electronic and
electrical waste equipment will ensure safety of human health and environment. For more information
about electronic and electrical waste equipment disposal, recovery, and collection points, please
contact your local city centre, household waste disposal service, shop from where you purchased the
equipment, or manufacturer of the equipment.
English Page 10
Page 13

Optelec Compact 4 HD
1. Introduction
Congratulations on choosing the Compact 4 HD!
Optelec’s unique auto focus electronic video magnifier enables you to view and magnify
printed text and images in high resolution HD quality in full color or one of the high contrast
modes. The Compact 4 HD 4.3-inch display, combined with its low magnification of 1.7
times, gives you maximum overview, while providing up to 12 times magnification for those
who need a higher zoom level.
With its multifunctional design, unique lighting concept, auto-focus and integrated reading
stand, the Compact 4 HD can be used for reading, viewing images, price tags, displays and
much more while at home or on the go.
If you have questions or suggestions concerning the use of this product, please contact your
distributor or the Optelec headquarters using the contact information on the last page of this
manual. Your feedback is greatly appreciated. We hope you enjoy working with your
Compact 4 HD!
About this manual
This manual will familiarize you with the features and basic operation of the Compact 4 HD.
Please read this manual carefully before using your device.
English Page 11
Page 14

Optelec Compact 4 HD
What’s in the box?
The Compact 4 HD packaging contains the following:
The Compact 4 HD video magnifier viewer
The Compact 4 HD stand
A protective pouch for the Compact 4 HD Viewer
A wrist strap
A power supply
4 country specific power plugs (EU, US, UK and AU),
A screen cleaning cloth
A user manual
If any items are missing from your package, please contact your distributor.
English Page 12
Page 15
Optelec Compact 4 HD
2. Getting started
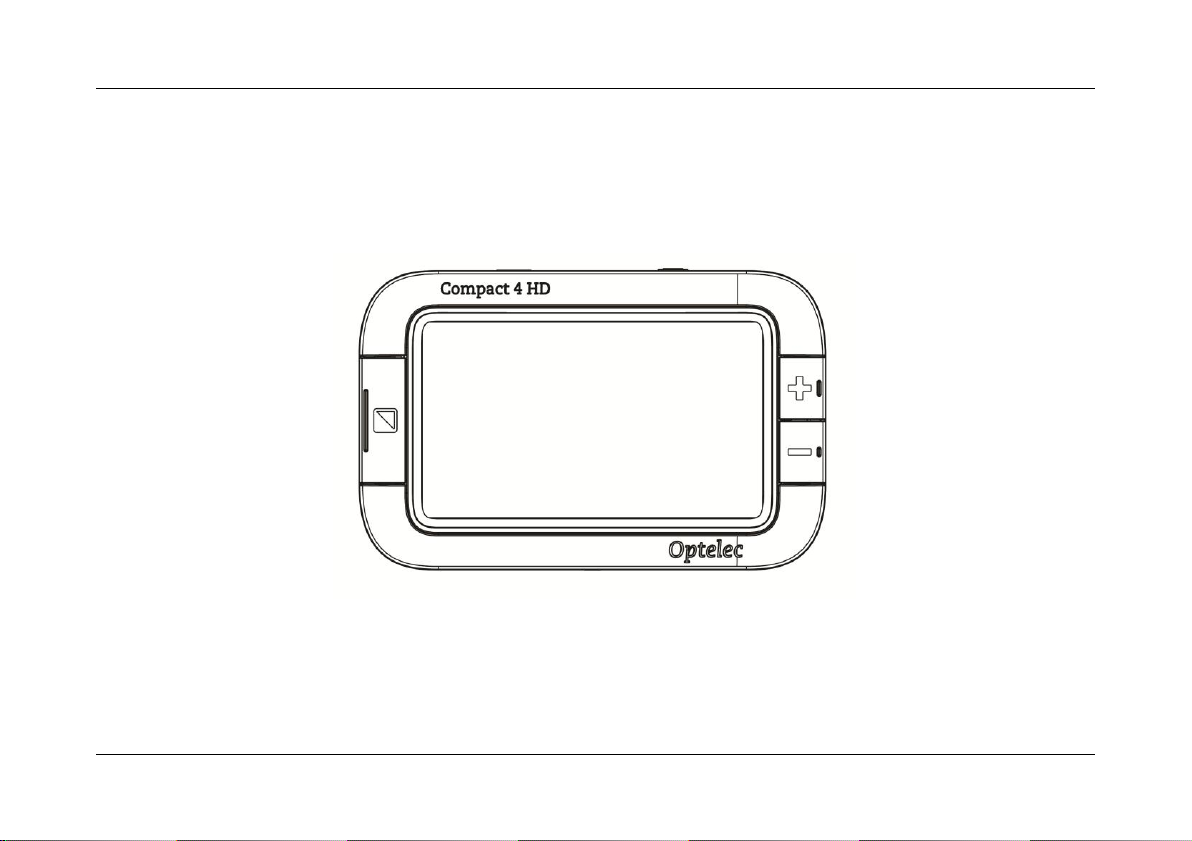
The Compact 4 HD is placed correctly in front of you when the screen is facing up and the
Optelec logo is at the bottom of the screen.
Using the Compact 4 HD
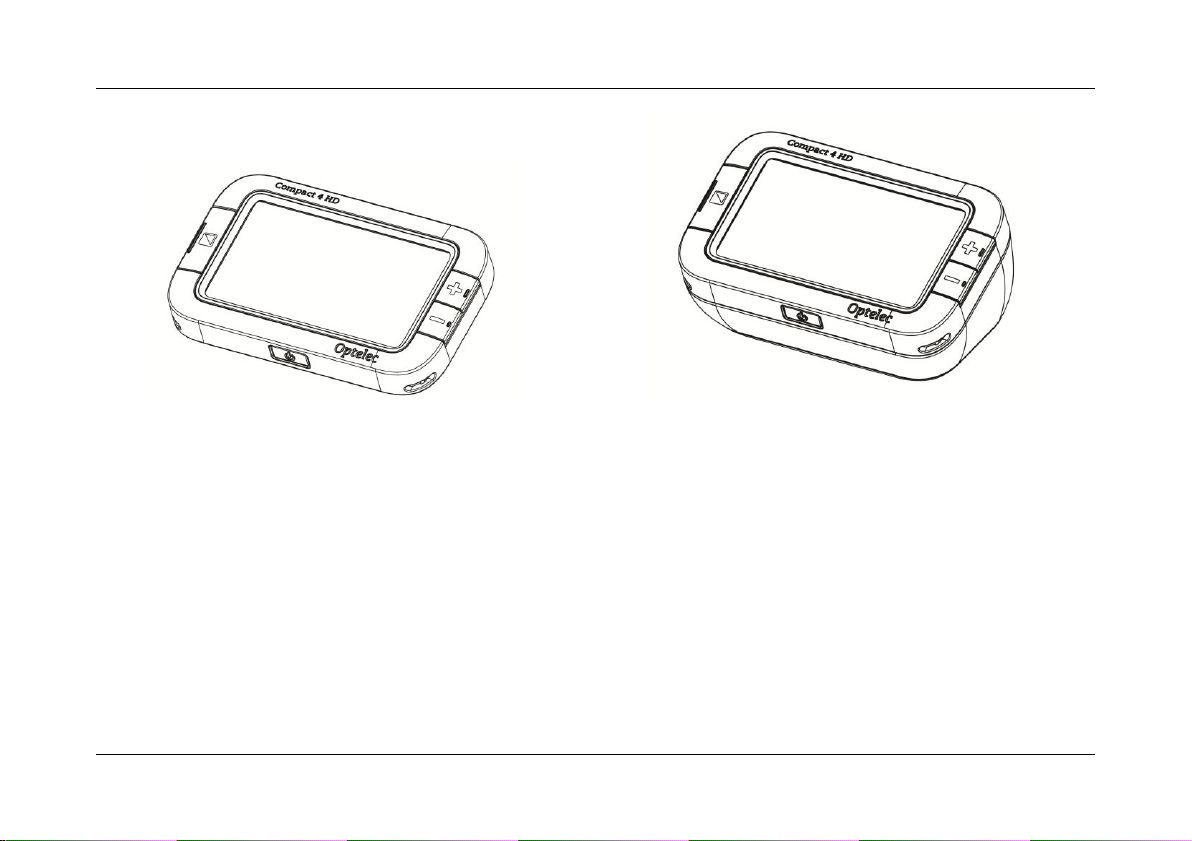
The Compact 4 HD can be used in two ways: Use the Compact 4 HD viewer with or without
the stand.
English Page 13
Page 16
Optelec Compact 4 HD
Compact 4 HD viewer (without the stand) Compact 4 HD viewer with the stand
To use the Compact 4 HD viewer without the stand, hold the viewer in your hand and point
the camera (located at the back of the unit) to the object or text you wish to view or read. The
distance between the camera and object or text needs to be between 5 cm (2 inch) and 30
cm (12 inch) for an optimal image quality.
The Compact 4 HD viewer is ideal to quickly scan and view objects or documents.
When the Compact 4 HD viewer is placed on the stand, the screen will be set in an
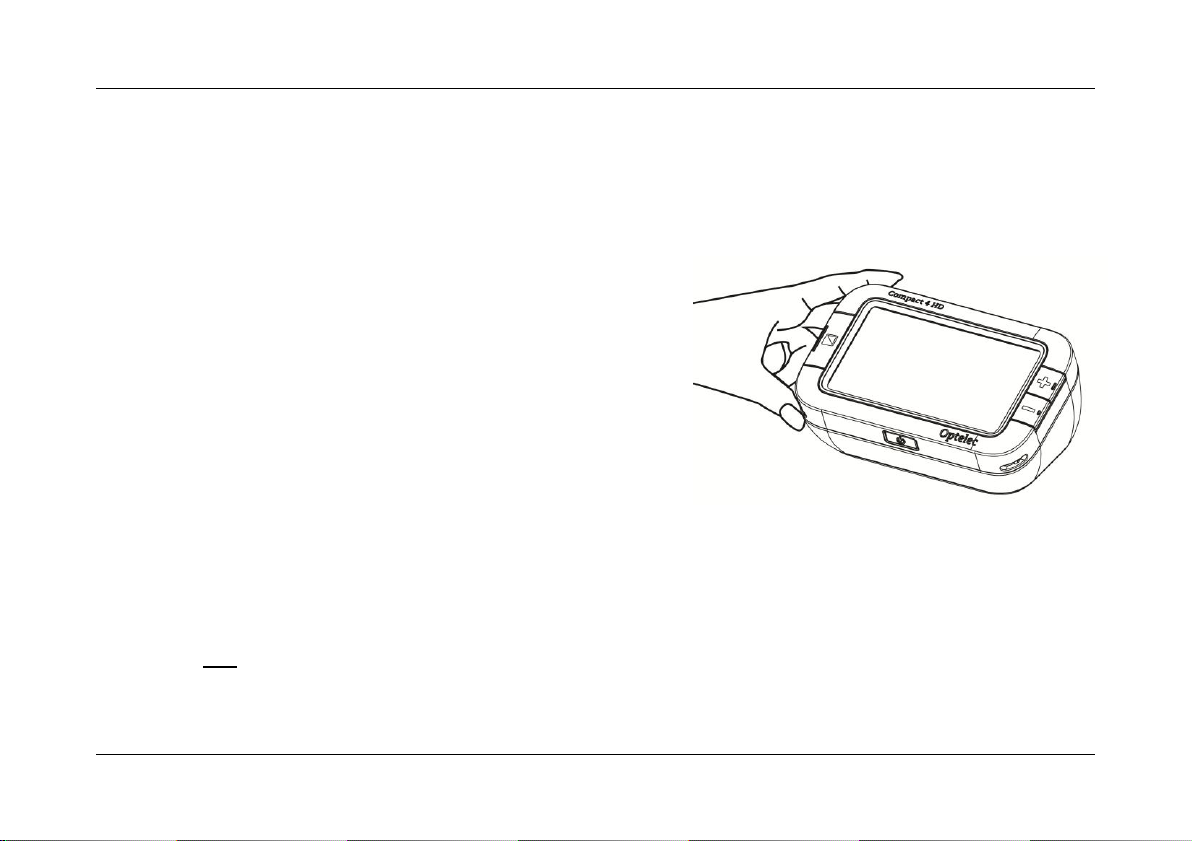
ergonomic angle for reading with the camera pointing downwards. The stand makes it
English Page 14
Page 17
Optelec Compact 4 HD
extremely easy to hold the Compact 4 HD in your hands and move the unit over the text,
enabling you to read longer texts.
To place the Compact 4 HD viewer on the stand, follow these steps:
1. Place the stand in front of you
2. Place the Compact 4 HD viewer on top of
the stand so that the screen is facing up
and the Optelec logo is at the bottom of
the screen. The magnets in the stand will
automatically position the Viewer
correctly onto the stand.
Cleaning the camera lens and mirror
For an optimal quality image, it is recommended to
ensure that the camera lens is kept clean. A dirty lens will result in a fuzzy image and may
cause the auto focus camera to incorrectly focus. To clean the camera lens, use the included
cleaning cloth or another soft lens cleaning cloth.
Note: Do not use water or a cleaning agent to clean the lens.
English Page 15
Page 18

Optelec Compact 4 HD
Mode
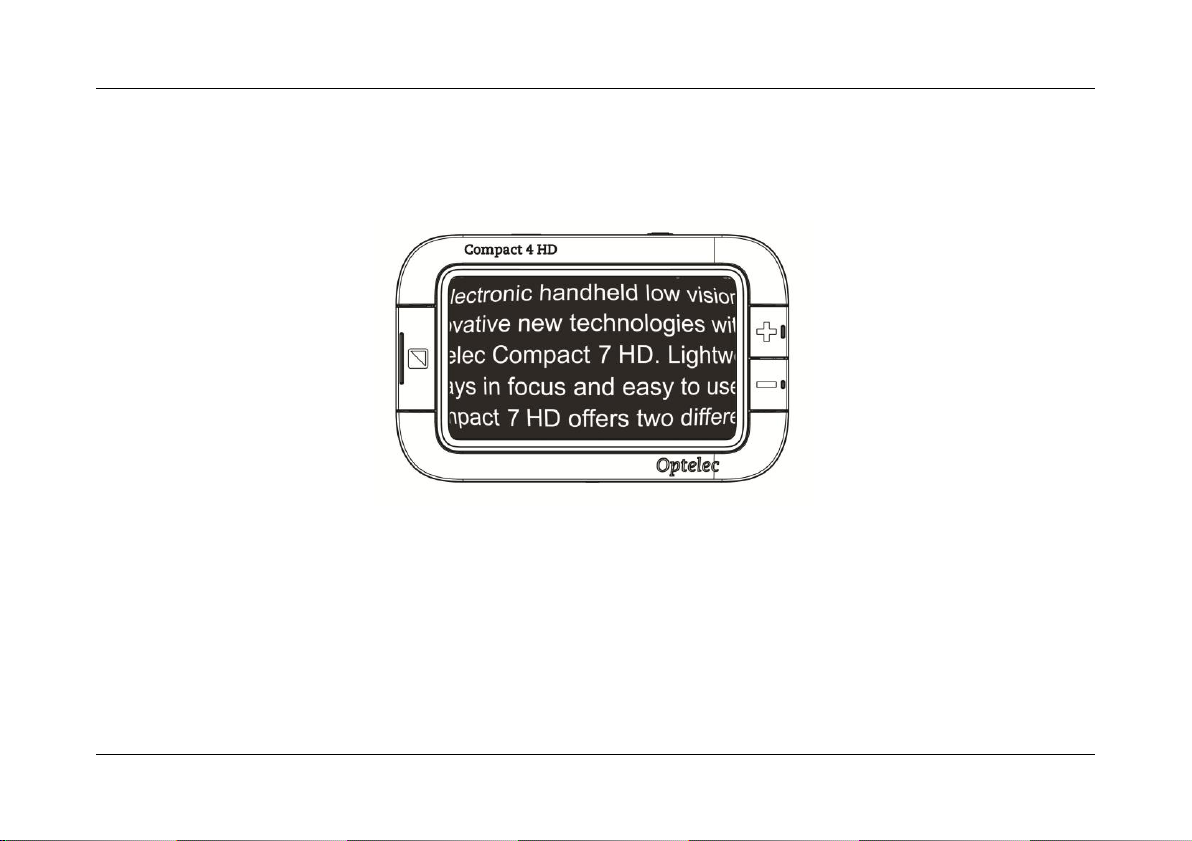
Pressing the Mode button to the left of the screen
allows you to select one of the viewing modes.
Pressing this button for three seconds will turn off
the object lighting.
Magnification
Pressing the + or – button to the right of the
screen for one second allows you to increase or
decrease the magnification. Pressing the + and –
buttons simultaneously for one second will allow
you to enter or exit the Compact 4 HD menu.
Snapshot
button
The snapshot button located on the top right of
the unit allows you to take a temporary picture of
a distant text or image, enabling you to bring the
image closer to your eyes.
Buttons
The Compact 4 HD has the following buttons:
English Page 16
Page 19
Optelec Compact 4 HD
On/Off Switch
Pressing the grey button with orange icon,
located at the centre of the front side of the
Compact 4 HD, for one second, will switch the
unit on and off.
5V DC IN jack
The 5V DC IN jack is located on the top side, left
of the snapshot button. The power supply cable
connects to this jack. Use only the power supply
that comes with the Compact 4 HD to power and
charge the unit.
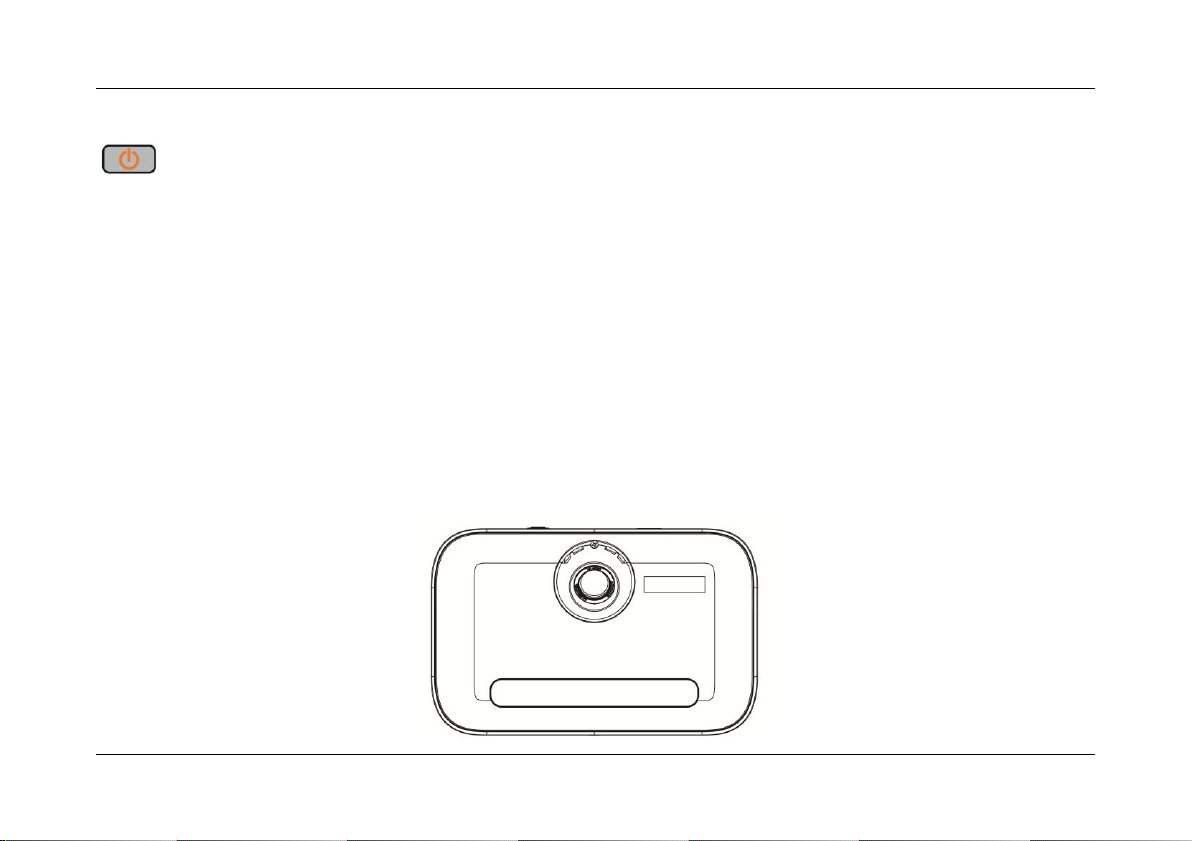
The camera of the Compact 4 HD is located at the back of the unit.
English Page 17
Page 20

Optelec Compact 4 HD
Switching the power on and off
To switch the Compact 4 HD on for the first time, the unit needs to be charged. Once the unit
is charged, press the grey on / off button with the orange icon, located at the centre of the
front side of the Compact 4 HD for one second. The unit will start up in the mode in which it
was switched off. To switch off the Compact 4 HD, press the orange button again for one
second.
When switching on the Compact 4 HD, it will take approximately 3 seconds before an image
is displayed on the screen.
Adjusting the magnification
To change the magnification, simply press the + or – buttons located on the right side of the
screen. Press the + button to increase or the – button to decrease the magnification. When
placed on the stand, the magnification range starts at 1.7 times and can be increased to 12
times. The Compact 4 HD is equipped with an auto-focus camera. This allows you to use the
Compact 4 HD Viewer without the stand while holding the Viewer in your hands. This will
provide more overview, but will decrease the minimum and maximum magnification,
depending on the distance of the viewer to the object or text.
English Page 18
Page 21
Optelec Compact 4 HD
Note: in the smallest magnification of 1.7 times, text lines may be displayed with a slight
curve. This will be most visible when reading small texts. This “fish eye” effect is caused by
the ultra wide angle of the lens.
Fish-eye effect in the smallest magnification
English Page 19
Page 22

Optelec Compact 4 HD
Selecting a viewing mode
Pressing the Mode button to the left side of the screen, allows you to select one of the
following viewing modes:
Photo mode: view full color texts and photos
Negative mode: reading in high contrast white on black
Positive mode: reading in high contrast black on white
High contrast color combination 1
High contrast color combination 2
Pressing the Mode button for 3 seconds will toggle the object lighting on or off. Switching
modes will automatically turn the object lighting back on.
Using the snapshot button
The snapshot button allows you to take a temporary picture of a text or an image.
- Hold or place the Compact 4 HD over the text or image you wish to take a snapshot
of.
- Press and hold the snapshot button located on the top right side of the unit.
o You will hear a beep when pressing the snapshot button.
o Keep the snapshot button pressed.
English Page 20
Page 23

Optelec Compact 4 HD
o The Compact 4 HD will display a camera icon and take a snapshot and sound
two beeps.
o Release the snapshot button.
o The Compact 4 HD will display the picture taken.
- The image will be temporarily stored inside the Compact 4 HD memory. Bringing the
Compact 4 HD closer to your eyes will enable you to view the object or text closely.
- Use the magnification buttons located to the right side of the screen to change the
magnification of the displayed image.
- Press the Mode button to change the viewing mode.
- Press the snapshot button again to unfreeze the image. It is now possible to take a
new snapshot.
Note: if the snapshot button is released prior to sounding the two beeps, no snapshot will be
taken and the Compact 4 HD will revert back to its original magnification level and viewing
mode (those that were set before the snapshot button was pressed).
English Page 21
Page 24

Optelec Compact 4 HD
3. Charging the battery
Charging the Compact 4 HD
The Compact 4 HD is delivered with a power supply and four country-specific power plugs.
The power plugs are available in EU, US, UK and AU versions. Select the power plug
appropriate to your country and mount this onto the power supply.
To charge the Compact 4 HD, connect the power supply to the 5V DC IN jack, located at the
left side of the unit. Plug the other side of the power supply into a power outlet. The orange
LED indicator next to the 5V DC IN jack will glow continuously while the Compact 4 HD is
charging. When the unit is fully charged, the LED indicator will turn green. If the Orange LED
indicator flashes, there is a charging problem. In this case, disconnect the power supply and
try again. In a warm environment, or when the Compact 4 HD is switched on while charging,
charging may temporarily be paused. If the charging is being paused, the LED indicator will
flashes green. The Compact 4 HD will automatically resume charging when the charging
protection mechanism detects a temperature drop. Switching the Compact 4 HD off will help
to lower the temperature to resume charging the battery.
Charging the Compact 4 HD takes approximately 3.5 hours. A fully charged Compact 4 HD
can operate for an average time of 3 hours, depending on the power settings. Please note
that, for safety reasons, only the power supply that was delivered with the Compact 4 HD
can be used to charge the unit’s battery.
English Page 22
Page 25

Optelec Compact 4 HD
Standby and Auto Power Off
The Compact 4 HD will automatically go into standby mode after two minutes if no button is
pressed or no image change is detected. Pressing any button will wake the unit up again.
Four minutes after the Compact 4 HD goes into standby mode, the unit will automatically
switch off. Pressing the orange on / off button will switch it back on again. The standby time
and power off time can be changed or disabled in the Compact 4 HD menu. Please refer to
the next chapter on how to change these settings.
Battery warning
When the battery charge is below 5% of its total capacity, a battery
warning will be issued every minute by displaying the battery empty icon
for 2 seconds and sounding a beep. When this occurs, be sure to charge
your unit as soon as possible. When the battery is empty, the unit will
automatically switch off.
If a unit does not switch on, please make sure it is charged.
English Page 23
Page 26
Optelec Compact 4 HD
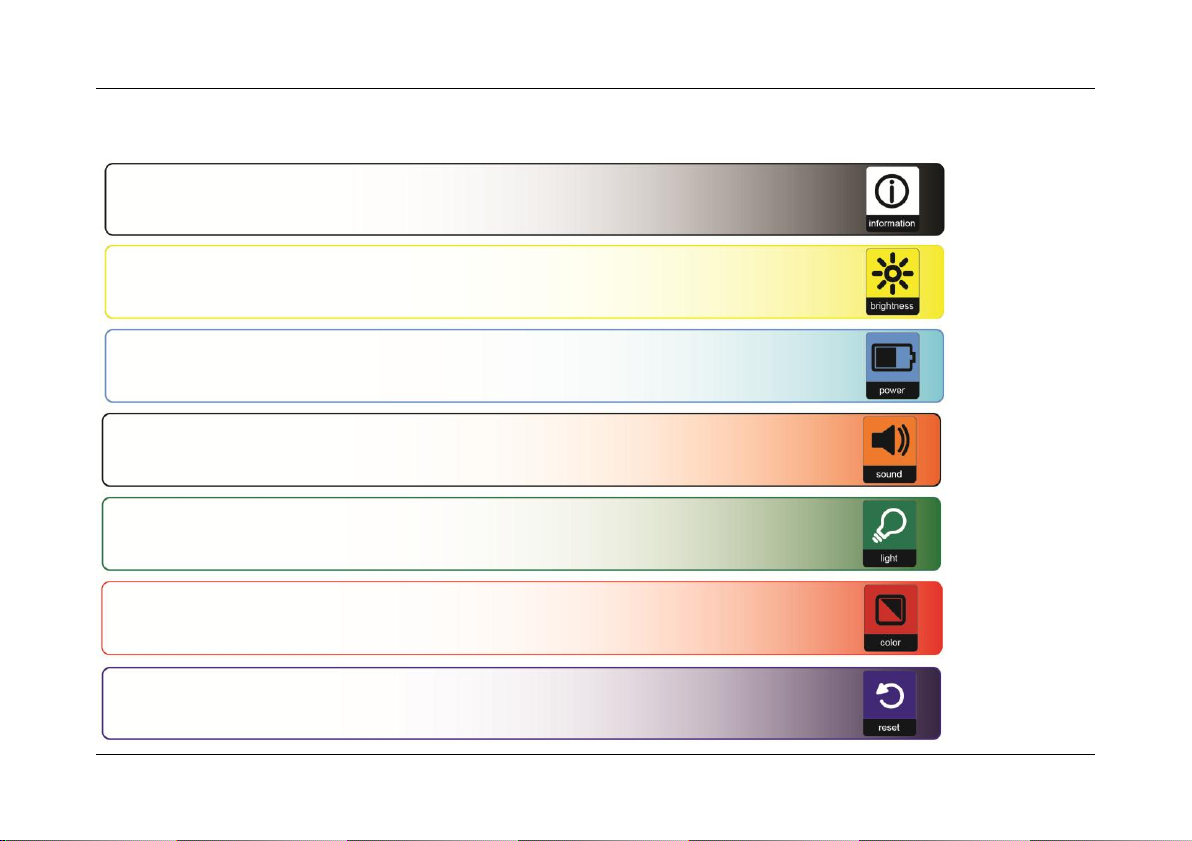
Shows the battery status and firmware version.
Allows you to adjust the screen brightness.
Allows you to configure the power settings.
Allows you to switch the sound on or off.
Allows you to enable or disable the object lighting settings.
Allows you to change the colors of the 4 high contrast
Allows you to reset all factory settings to default.
4. The Compact 4 HD Menu
English Page 24
Page 27

Optelec Compact 4 HD
Activating the menu
To enter the menu, press the + and – buttons simultaneously for one second.
Navigating the menu
Use the + or – buttons to navigate between the menu items. The Mode button
located to the left of the screen will activate the chosen menu item or confirm the
selection. To change a selection, use the + or – buttons.
Exiting the menu
To exit the menu, press the + and – buttons simultaneously for one second.
English Page 25
Page 28

Optelec Compact 4 HD
Menu: Information
This menu item shows the battery status and the current firmware version of the unit. In this
menu, it is not possible to make any changes.
- Activate the menu by pressing the + and – buttons simultaneously for one second.
- The first option in the menu is Information.
- To exit the menu, press the Mode button or the + and – buttons simultaneously for
one second.
English Page 26
Page 29

Optelec Compact 4 HD
Menu: Brightness
This menu item allows you to adjust the brightness of the display.
- Activate the menu by pressing the + and – buttons simultaneously for one second.
- Use the + button to move up and the – button to move down within the menu. Select
the menu option Brightness and activate this menu by pressing the Mode button.
- Select the brightness level by using the – button to decrease and the + button to
increase the brightness level. There are 5 brightness levels to choose from. The
default brightness level is 5.
- Press the Mode button to confirm your choice and exit the menu.
English Page 27
Page 30
Optelec Compact 4 HD
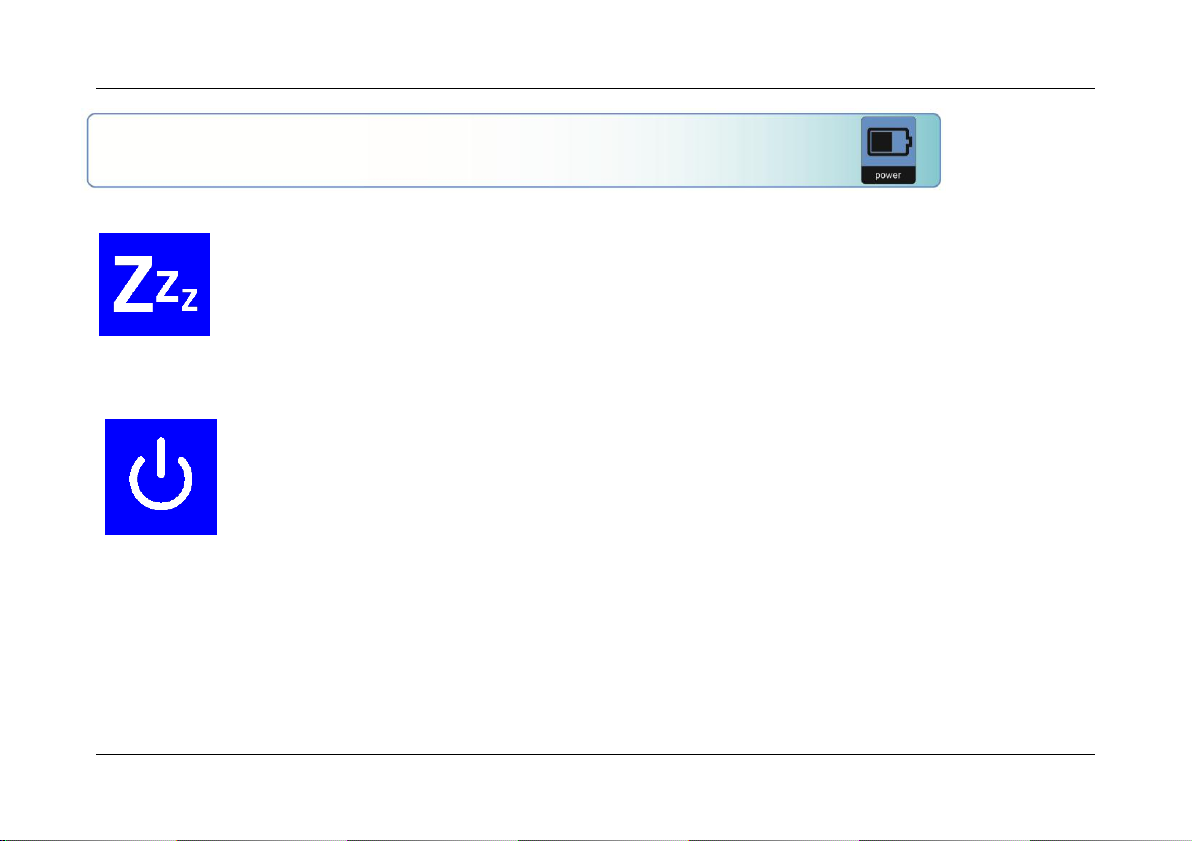
Standby
Sets the time before the Compact 4 HD goes into standby
mode to conserve power. Pressing any button will take the
unit out of standby mode. By default, the standby time is set to
2 minutes.
Power off
Sets the time before the Compact 4 HD is automatically
switched off. By default, the power off time is set to 4 minutes.
These 4 minutes are activated after the default standby time of
2 minutes. By default, the unit is therefore automatically
switched off after 6 minutes.
Menu: Power
This menu item contains two submenus:
Submenu Standby
By default, the standby time is set to 2 minutes. To adjust the standby time of the Compact 4
HD:
- Activate the menu by pressing the + and – buttons simultaneously for one second.
English Page 28
Page 31

Optelec Compact 4 HD
- Use the + button to move up and the – button to move down within the menu. Select
the menu option Power and activate this menu by pressing the Mode button.
- Select the Standby option by using the + and – buttons to scroll through the options.
Press the Mode button to confirm your choice.
- Select the time before the unit will go into standby by using the – button to decrease
and the + button to increase the time. Press the Mode button to confirm your choice.
Selecting DISABLED will disable the automatic standby function.
- Press the Mode button to confirm your choice and exit the menu.
Submenu Power off
To activate the Compact 4 HD power off time:
- Activate the menu by pressing the + and – buttons simultaneously for one second.
- Use the + button to move up and the – button to move down within the menu. Select
the menu option Power and activate this menu by pressing the Mode button.
- Select the Power off option by using the + and – buttons to scroll through the options.
Press the Mode button to confirm your choice.
- Select the time before the unit will power off by using the – button to decrease and the
+ button to increase the time. Press the Mode button to confirm your choice. Selecting
DISABLED will disable the automatic power off function.
- Press the Mode button to confirm your choice and exit the menu.
English Page 29
Page 32

Optelec Compact 4 HD
Menu: Beeps
This menu item allows you to enable or disable the feedback tones. By default, the tones are
enabled.
- Activate the menu by pressing the + and – buttons simultaneously for one second.
- Use the + button to move up and the – button to move down within the menu. Select
the menu option Sound and activate this menu by pressing the Mode button.
- To enable the beeps, select the value ON by using the + and – buttons. Press the
Mode button to confirm your choice. Selecting OFF will disable the beeps.
- Press the Mode button to confirm your choice and exit the menu.
English Page 30
Page 33

Optelec Compact 4 HD
Menu: Light
This menu item allows you to enable or disable the object lighting of the viewer when used
without the stand. By default, the object lighting is enabled.
- Activate the menu by pressing the + and – buttons simultaneously for one second.
- Use the + button to move up and the – button to move down within the menu. Select
the menu option Light and activate this menu by pressing the Mode button.
- To enable the object lighting, select the value ON by using the + and – buttons. Press
the Mode button to confirm your choice. Selecting OFF will disable the object lighting.
- Press the Mode button to confirm your choice and exit the menu.
English Page 31
Page 34

Optelec Compact 4 HD
Menu: Color
The Compact 4 HD supports four high contrast modes. For each of these four modes, the
foreground and background colors can be selected. Three of the high contrast modes can be
disabled if just one high contrast mode is required.
- Activate the menu by pressing the + and – buttons simultaneously.
- Use the + button to move up and the – button to move down within the menu. Select
the menu option Color and activate this menu by pressing the Mode button.
- Select the high contrast mode with the + button to move up and the – button to move
down in the submenu Color. Press the Mode button to confirm your choice.
- To select a new high contrast color for the foreground and background, use the +
button to move up and the – button to move down in the list of color combinations.
Select a color combination by pressing the Mode button.
- High contrast modes 2, 3 and 4 can be disabled by selecting the DISABLED value.
- Press the Mode button to confirm your choice and exit the menu.
English Page 32
Page 35
Optelec Compact 4 HD
Menu: Reset
The Compact 4 HD can be reset to the factory default settings. Any settings that have been
adjusted, will be restored to the factory defaults.
- Activate the menu by pressing the + and – buttons simultaneously for one second.
- Use the + button to move up and the – button to move down within the menu. Select
the menu option Reset and activate this menu by pressing the Mode button.
- To restore the factory defaults, select YES by using the + and – buttons. Choosing NO
will leave all settings as they were.
- Press the Mode button to confirm your choice and exit the menu.
English Page 33
Page 36

Optelec Compact 4 HD
Appendix A: Safety
Do not expose the Compact 4 HD to excessive heat or direct sunlight to avoid the risk
of fire.
Do not remove any parts of the Compact 4 HD. Contact an Optelec authorized service
organisation in your area.
To avoid risk of electrical damage, keep your Compact 4 HD away from fluids and
chemicals.
Handle the Compact 4 HD with care. Rough handling will damage the internal
components.
Do not use the Compact 4 HD near inadequately shielded medical devices.
Do not try to open the battery compartment or try to remove the battery.
Contact your dealer to service this equipment if necessary. Do not disassemble your
unit as it will void the warranty.
Always unplug the system before cleaning. Use a soft dry cloth to clean the exterior.
Do not use cleaning agents or abrasive materials as they will damage your unit.
Use of the Compact 4 HD other than described in this manual will exclude it from warranty
conditions.
English Page 34
Page 37

Optelec Compact 4 HD
Appendix B: Technical information
Magnification 1.7 – 12 times
Viewing modes Full color photo mode
High contrast white on black
High contrast black on white
High contrast color combination 1
High contrast color combination 2
Focus Auto-focus
Screen 4.3” TFT, 480 x 270
High contrast ratio 800:1
High brightness screen 500 cd/m2
Dimensions without Stand 130 x 82.5 x 27.5 mm / 5.1 x 3.2 x 1.1 inches
Dimensions with Stand 130 x 94 x 73 mm / 5.1 x 3.7 x 2.9 inches
Battery average 3 hours continuous use
3.5 hours charging time
Li-ion battery rechargeable, 3.7V, 2800 mAh or 3240mAh
Weight Viewer 248 grams / 8.7 ounces
Weight Sand 140 grams / 4.9 ounces
Power supply input 100-240V, 50-60Hz, 0.3A
Power supply output DC5V-2A
English Page 35
Page 38

Optelec Compact 4 HD
Operating conditions
Temperature +10°C to 35°C / 50°F to 95°F
Humidity < 70%, no condensation
Altitudes up to 3000 m (9842 feet)
Pressure ` 700 – 1060 hPa
Storage & transportation conditions
Temperature +10°C to 40°C / 50°F to 104°F
Humidity < 95%, no condensation
Altitudes up to 12192 m (40000 feet)
Pressure ` 186 – 1060 hPa
English Page 36
Page 39

Optelec Compact 4 HD
Appendix C: Warranty Conditions
Optelec warrants the Compact 4 HD, effective from the date of delivery, to be free of any
defects in material and workmanship.
The warranty is not transferable and does not apply to groups, multi-users and agencies.
The Compact 4 HD was designed for the individual purchaser to be used at home and onthe-go. Optelec reserves the right to repair or replace any purchased Compact 4 HD with a
similar or improved product.
In no event shall Optelec or its suppliers be held liable for any indirect or consequential
damages. The original user’s remedies are limited to replacement of the Compact 4 HD. This
warranty is valid only when serviced in the country of original purchase, and with intact seals.
For additional warranty claims or service during or after warranty period, please contact your
Optelec distributor.
Optelec is not responsible for any uses of this device other than those described in this
manual. Use of the Compact 4 HD other than described in this manual will exclude it from
warranty conditions.
English Page 37
Page 40

Optelec Compact 4 HD
RoHS Compliance
This product is in compliance with Directive 2002/95/EC of the European Parliament and of
the Council of 27 January 2003, on the restriction of the use of certain hazardous substances
in electrical and electronic equipment (RoHS) and its amendments.
European Union Notice
Products with CE marking comply with the EMC Directive (2004/108/EC), and the Low
Voltage Directive (2006/95/EC) issued by the Commission of the European Community.
Compliance with these directives implies conformity to the following international standards:
EMC
EN 55022
EN 55024
FCC Safety
FCC part 15 Class B UL 60950-1
English Page 38
Page 41

Optelec Compact 4 HD
WARNING: The use of accessories, transducers and cables, with the exception of
transducers and cables sold by the manufacturer of the Compact 4 HD as replacement parts
for components, may result in increased emissions or decreased immunity of the Compact 4
HD.
This device bears the CE and FCC approval mark
Federal Communications Commission (FCC) Statement:
This Equipment has been tested and found to comply with the limits for a Class B digital
device, pursuant to Part 15 of the FCC rules. These limits are designed to provide
reasonable protection against harmful interference in a residential installation. This
equipment generates, uses and can radiate radio frequency energy and, if not installed and
used in accordance with the instructions, may cause harmful interference to radio
communications. However, there is no guarantee that interference will not occur in a
particular installation. If this equipment does cause harmful interference to radio or television
reception, which can be determined by turning the equipment off and on, the user is
encouraged to try to correct the interference by one or more of the following measures:
- Reorient or relocate the receiving antenna.
- Increase the separation between the equipment and receiver.
- Connect the equipment into an outlet on a circuit different from that to which the receiver is
connected.
English Page 39
Page 42

Optelec Compact 4 HD
- Consult the dealer or an experienced radio/TV technician for help.
WARNING: You are cautioned that changes or modifications not expressly approved by the
party responsible for compliance could void your authority to operate the equipment.
This device complies with Part 15 of the FCC Rules. Operation is subject to the following two
conditions:
(1) This device may not cause harmful interference, and
(2) This device must accept any interference received; including interference that may cause
undesired operation.
WARNING: Risk of explosion if the battery is replaced by an incorrect type. Please dispose
of used batteries according to the disposal and recycling regulations that are applicable in
your country or region!
English Page 40
Page 43

Optelec Compact 4 HD
Compact 4 HD
Gebruikershandleiding
Version 1.1
© 2012 Optelec, the Netherlands
All rights reserved
Optelec
P.O. Box 399
2990 AJ Barendrecht
The Netherlands
Phone: +31 (0)88 678 34 44
E-mail: [email protected]
Internet: www.optelec.com
Nederlands Pagina 41
Page 44

Optelec Compact 4 HD
1. Inleiding
Gefeliciteerd met uw aankoop van de Compact 4 HD!
Optelec’s unieke autofocus elektronische beeldschermloep laat u gedrukte teksten en
afbeeldingen bekijken en vergroten in hoge resolutie HD kwaliteit, volledig in kleur of in één
van de hoog contrast standen. Het 4.3” scherm van de Compact 4 HD, gecombineerd met
de lage vergroting van 1.7 keer, geeft u maximaal overzicht en biedt tegelijkertijd tot 12 keer
vergroting voor gebruikers die een hogere vergroting wensen.
Met zijn multifunctionele ontwerp, unieke verlichting, auto focus en geïntegreerde
leeshouder, kan de Compact 4 HD gebruikt worden voor lezen, het bekijken van
afbeeldingen, prijskaartjes, displays en nog veel meer, zowel thuis als onderweg.
Mocht u vragen of suggesties hebben betreffende het gebruik van dit product, neem dan
contact op met uw leverancier of direct met het Optelec hoofdkantoor (zie gegevens op de
laatste pagina van deze handleiding). Uw reactie stellen wij op prijs. Wij wensen u veel
plezier met het gebruik van uw Compact 4 HD!
Over deze handleiding
Deze handleiding geeft u een overzicht van de mogelijkheden en het gebruik van de
Compact 4 HD. Wij raden u aan deze handleiding aandachtig te lezen alvorens u het product
gaat gebruiken.
Nederlands Pagina 42
Page 45

Optelec Compact 4 HD
Inhoud van de verpakking
De Compact 7 HD verpakking bevat de volgende items:
De Compact 4 HD beeldschermloep
De Compact 4 HD houder
Een beschermende tas voor de beeldschermloep
Een adapter met netsnoer
4 landspecifieke adapter opzetstukken (EU, US, UK en AU)
Een reinigingsdoekje voor het scherm en de spiegel
Deze handleiding
Indien één of meerdere items ontbreken, neem dan contact op met uw leverancier.
Nederlands Pagina 43
Page 46
Optelec Compact 4 HD
2. Aan de slag
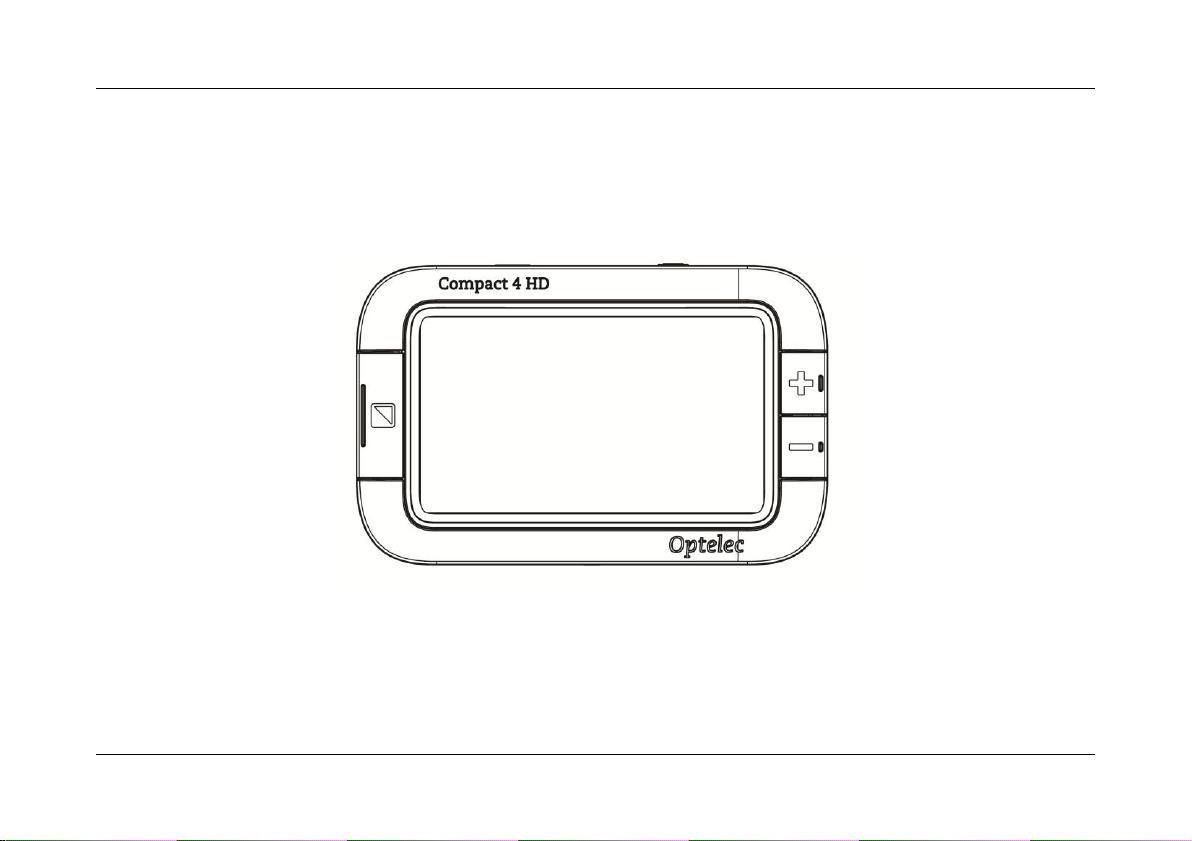
De Compact 4 HD is op de juiste wijze voor u geplaatst wanneer het beeldscherm naar
boven wijst en het Optelec logo onderaan het scherm zitten.
Nederlands Pagina 44
Page 47
Optelec Compact 4 HD
Het gebruik van de Compact 4 HD
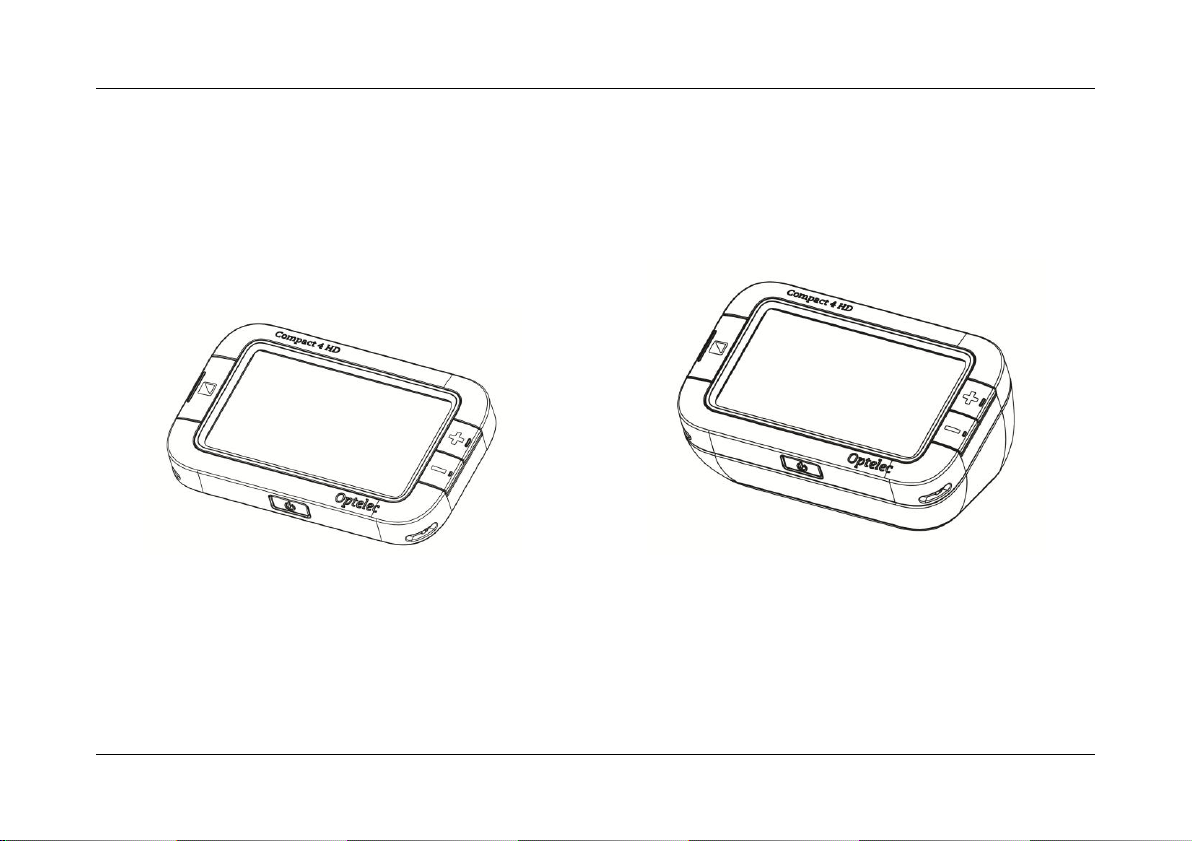
De Compact 4 HD kan op twee manieren worden gebruikt. Gebruik de Compact 4 HD
beeldschermloep met of zonder houder.
Compact 4 HD (zonder houder) Compact 4 HD met houder
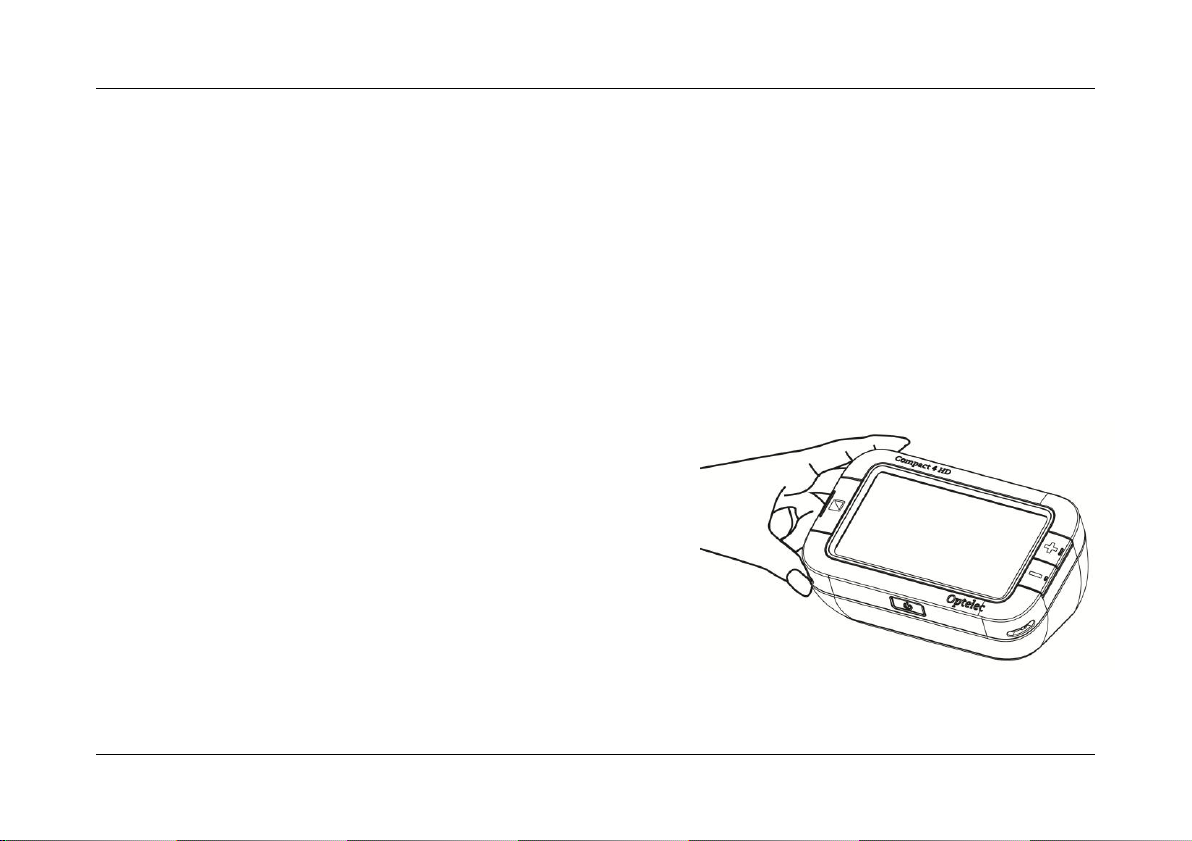
Om de Compact 4 HD te gebruiken zonder de houder, houdt u de beeldschermloep in uw
hand en wijst u met de camera (die zich aan de achterzijde van het apparaat bevindt)
Nederlands Pagina 45
Page 48
Optelec Compact 4 HD
richting het object of de tekst die u wenst te bekijken. De afstand tussen de camera en het
object of de tekst moet tussen 5 cm en 30 cm liggen voor een optimale weergave.
De losse beeldschermloep is ideaal om snel objecten en documenten te bekijken.
Wanneer de Compact 4 HD beeldschermloep op de houder is geplaatst, staat het scherm in
een ergonomische hoek waarbij de camera naar beneden gericht staat. De houder maakt
het zeer comfortabel om de 4 HD te bewegen en te gebruiken om langere teksten te lezen.
Om de Compact 4 HD op de houder te plaatsen, volgt u deze stappen:
3. Plaats de houder voor u.
4. Plaats de Compact 4 HD
beeldschermloep op de houder, zodanig
dat het scherm aan de bovenkant zit en
het Optelec logo onderaan het scherm.
De magneten in de houder zorgen dat de
Compact 4 HD correct geplaatst wordt op
de houder.
Nederlands Pagina 46
Page 49

Optelec Compact 4 HD
Het schoonhouden van de camera lens en de spiegel
Voor een optimaal beeld, is het aanbevolen om ervoor te zorgen dat de camera lens en de
spiegel van het apparaat schoongehouden worden. Een vieze lens resulteert in een troebel
beeld en kan ervoor zorgen dat de autofocus camera niet goed kan scherpstellen. Een
schone spiegel is belangrijk om donkere en lichte vlekken te voorkomen en om een egaal
verlicht beeld te krijgen. Om de camera lens en de spiegel te reinigen, gebruikt u het
meegeleverde reinigingsdoekje of een andere zachte doek die geschikt is voor camera
lenzen.
Let op: Gebruik geen water of schoonmaakmiddelen om de camera lens en spiegel te
reinigen.
Nederlands Pagina 47
Page 50

Optelec Compact 4 HD
Modus
Door op de modus knop links op het scherm te
drukken kunt u één van de verschillende
leesstanden selecteren. Door deze knop drie
seconden ingedrukt te houden kunt u de
objectverlichting uitschakelen.
Vergroting
Door de + of – knop rechts van het scherm
ingedrukt te houden kunt u de vergroting
verhogen of verlagen. Door deze knoppen 1
seconde tegelijkertijd ingedrukt te houden opent
of sluit u het menu van de Compact 4 HD.
Snapshot
knop
Met de snapshotknop rechts boven op het
apparaat kunt u een tijdelijke foto maken van een
tekst of object, waarna u deze dichter bij u ogen
kunt brengen en kunt vergroten.
Knoppen
De Compact 4 HD heeft de volgende knoppen:
Nederlands Pagina 48
Page 51
Optelec Compact 4 HD
Aan/Uit knop
Zet de Compact 4 HD aan of uit door één
seconde op grijze knop met oranje icon, die in het
midden op de voorkant zit, te drukken.
5V DC IN jack
De 5V adapter aansluiting bevindt zich aan
bovenzijde, naast de snaphot knop. De adapter
connector past in deze aansluiting. Gebruik
alleen de meegeleverde adapter om uw Compact
4 HD op te laden
De camera van de Compact 4 HD bevindt zich aan de achterkant van het apparaat.
Nederlands Pagina 49
Page 52

Optelec Compact 4 HD
Het apparaat aan- en uitzetten
Om de Compact 4 HD aan te kunnen zetten, dient het apparaat opgeladen te zijn. Als het
apparaat is opgeladen, drukt u één seconde op de grijze aan/uit knop met oranje icoon in het
midden van de voorzijde. Het apparaat start in de modus waarin deze is uitgezet. Om het
apparaat uit te schakelen, drukt u nogmaals één seconde op de oranje knop.
Wanneer u de Compact 4 HD aanzet, duurt het ongeveer 3 seconden voordat het
camerabeeld wordt getoond op het scherm.
Aanpassen van de vergroting
Om de vergrotingsinstellingen van het apparaat aan te passen, drukt u op de + of – knop die
zich rechts van het scherm bevinden. Druk de + knop om de vergroting te verhogen of de –
knop om de vergroting te verlagen. Wanneer de beeldschermloep in de houder zit, begint de
vergroting bij 1.7 keer en kan deze worden verhoogd tot 12 keer vergroting. De Compact 4
HD is voorzien van een autofocus camera. Deze maakt het mogelijk om het apparaat te
gebruiken zonder de houder. Dit geeft u meer overzicht, maar zal de minimale en maximale
vergroting verlagen, afhankelijk van de afstand tussen het object of de tekst en de
beeldschermloep.
Nederlands Pagina 50
Page 53
Optelec Compact 4 HD
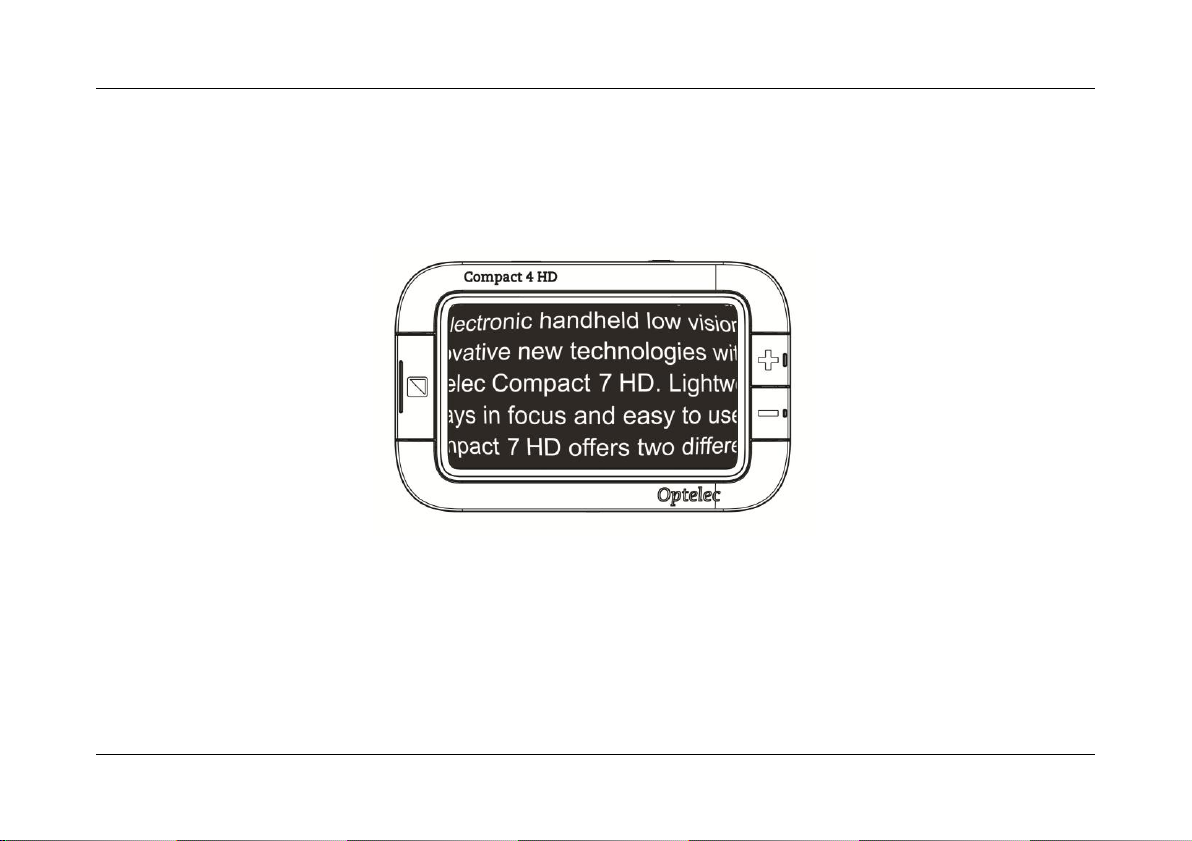
Let op: in de kleinste vergroting van 1.7 keer, kunnen tekstregels worden getoond met een
kleine kromming. Dit is het meest zichtbaar tijdens het lezen van teksten met een kleine
vergroting. Dit zogenaamde “visoog” effect wordt veroorzaakt door de wijde hoek van de
lens.
Visoog effect in de kleinste vergroting
Nederlands Pagina 51
Page 54

Optelec Compact 4 HD
Een leesstand selecteren
Door op de modus knop links van het scherm te drukken, kunt u een keuze maken uit één
van onderstaande leesstanden:
Foto: voor het bekijken van kleuren foto’s of teksten
Negatief: voor het lezen in hoog contrast wit op zwart
Positief: voor het lezen in hoog contrast zwart op wit
Hoog contrast kleurencombinatie 1
Hoog contrast kleurencombinatie 2
Door de modus knop 3 seconden ingedrukt te houden kunt u de objectverlichting in- of
uitschakelen. Bij het veranderen van een leesstand zal de objectverlichting automatisch
inschakelen.
Nederlands Pagina 52
Page 55

Optelec Compact 4 HD
Het gebruik van de snapshot functie
Met de snapshot functie maakt u een tijdelijke foto te maken van een afbeelding of tekst.
- Plaats of houd de Compact 4 HD op de afbeelding of tekst die u wilt vastleggen.
- Druk op de snapshot knop (rechts bovenop het apparaat) en houd deze ingedrukt.
o U hoort een piepgeluid bij het indrukken van de snapshot knop.
o Houd de snapshot knop ingedrukt.
o De Compact 4 HD toont een camera icoon, maakt een foto en geeft vervolgens
twee piepjes.
o Laat de snapshot knop los.
o De Compact 4 HD zal de genomen snapshot tonen.
- De afbeelding wordt tijdelijk opgeslagen in het geheugen van de Compact 4 HD.
Door de Compact 4 HD dichter bij uw ogen te brengen, kunt u de afbeelding of tekst
van dichtbij bekijken.
- Gebruik de + of – knop om de vergroting van het getoonde beeld aan te passen.
- Druk op de modus knop om de leesstand aan te passen.
- Druk nogmaals op de snapshot knop om het opgeslagen beeld te verwijderen. Het is
nu mogelijk om een nieuwe snapshot te maken.
Let op: als de snapshot knop wordt losgelaten voordat deze twee piepjes heeft gegeven,
wordt er geen foto gemaakt en zal de Compact 4 HD teruggaan naar de oorspronkelijke
vergroting- en leesstand (zoals deze waren ingesteld voordat de snapshot knop werd
ingedrukt).
Nederlands Pagina 53
Page 56

Optelec Compact 4 HD
3. Opladen van de batterij
De Compact 4 HD opladen
De Compact 4 HD wordt geleverd met een adapter met netwerksnoer en 4 landspecifieke
adapter opzetstukken. Er zijn opzetstukken voor EU, US, UK en AU stopcontacten. Kies het
opzetstuk dat geschikt is voor uw land en koppel deze aan de adapter.
Om de Compact 4 HD op te laden dient u de adapter aan te sluiten op de adapter ingang
aan de bovenzijde van het apparaat. Steek de andere kant van de adapter in het
stopcontact. De oranje LED lamp naast de 12V DC IN aansluiting zal continu branden
gedurende de tijd dat de Compact 4 HD oplaadt. Wanneer het apparaat volledig opgeladen
is, zal de LED lamp groen branden. Wanneer de oranje LED lamp knippert betekent het dat
er een probleem is met het opladen. In dit geval dient u de adapter los te koppelen en
opnieuw aan te sluiten.
In een warme omgeving of wanneer de 4 HD wordt aangezet tijdens het laden, wordt het
opladen soms gepauzeerd; op dat moment gaat de groene LED knipperen. De 4 HD gaat
automatisch door met laden als er een lagere temperatuur wordt gedetecteerd. Uitzetten van
de Compact 4 HD helpt om de temperatuur te laten dalen en het laden weer te starten.
Het opladen van de Compact 4 HD duurt ongeveer 3,5 uur. Een volledig opgeladen Compact
4 HD kan ongeveer 3 uur werken, afhankelijk van de stroominstellingen.
Nederlands Pagina 54
Page 57

Optelec Compact 4 HD
In verband met uw veiligheid wijzen wij u erop dat alleen de adapter die meegeleverd is met
uw Compact 4 HD gebruikt mag worden voor het opladen van het apparaat.
Stand-by en Automatisch Uitschakelen
De Compact 4 HD zal automatisch naar de stand-by modus gaan indien er gedurende twee
minuten geen knoppen zijn ingedrukt of indien er geen verandering van het beeld geweest
is. Door op een willekeurige knop te drukken zal het apparaat weer worden ingeschakeld.
Vier minuten nadat de Compact 4 HD in stand-by modus is gegaan, zal deze automatisch
worden uitgeschakeld. Door op de oranje aan/uit knop te drukken zal het apparaat weer
ingeschakeld worden. De stand-by tijd en de automatisch tijd voor uitschakelen kunnen
beiden worden aan- of uitgezet in het menu van de Compact 4 HD. In het volgende
hoofdstuk kunt u meer informatie vinden over het wijzigen van deze instellingen.
Batterij waarschuwing
Wanneer de capaciteit van de batterij lager dan 5% van de totale
capaciteit is, zal er iedere minuut een batterij waarschuwing worden
gegeven middels een batterij icoontje in het beeldscherm en een
piepgeluid. Wanneer dit gebeurt, dient u het apparaat zo snel mogelijk op
te laden. Wanneer de batterij leeg is, zal het apparaat automatisch
worden uitgeschakeld.
Controleer altijd, als het apparaat niet aangaat, of de batterij is opgeladen.
Nederlands Pagina 55
Page 58
Optelec Compact 4 HD
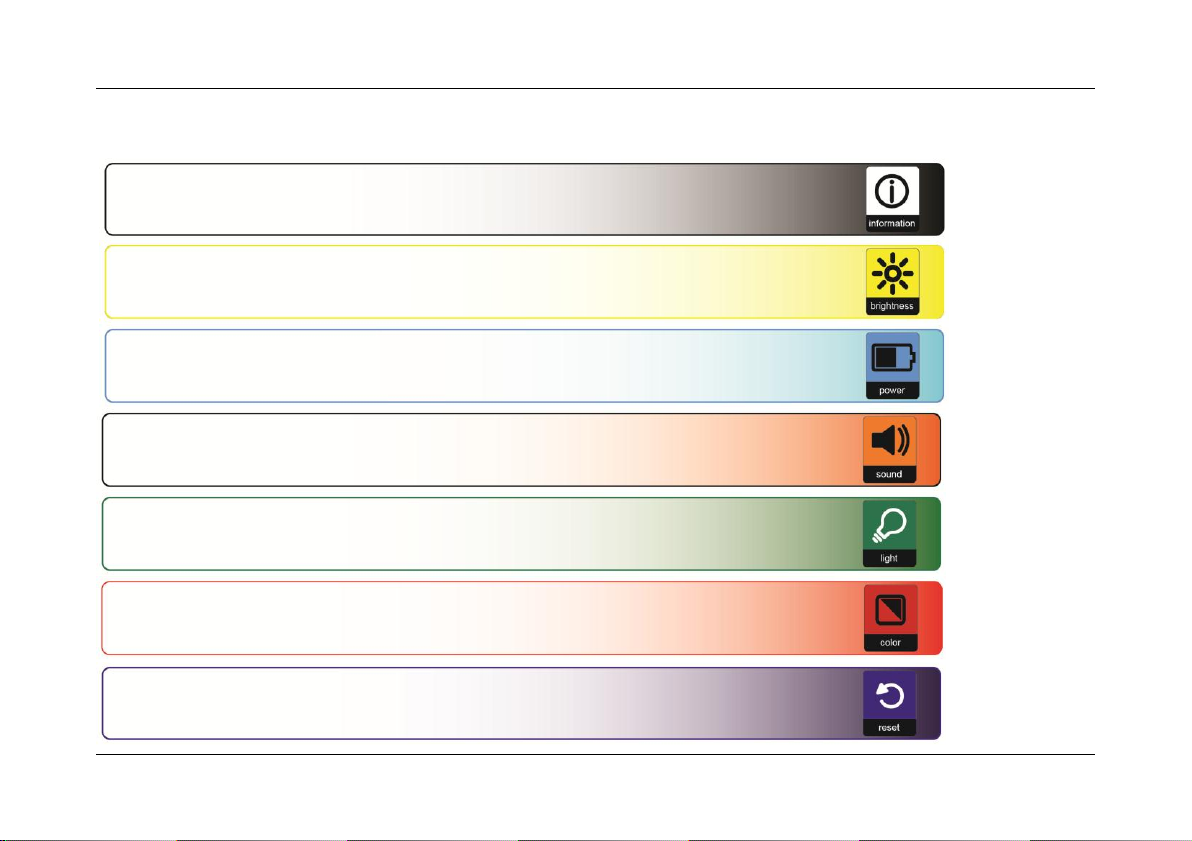
Toont de batterij status en de firmware versie.
Aanpassen van de helderheid van het beeldscherm.
Aanpassen van de stroominstellingen.
In- of uitschakelen van het geluid.
In- of uitschakelen van de objectverlichting.
Aanpassen van de kleuren van de 4 hoogcontrast standen.
Terugzetten van de standaard fabrieksinstellingen.
4. Het Compact 4 HD Menu
Nederlands Pagina 56
Page 59

Optelec Compact 4 HD
Let op: het menu van de Compact 4 HD is in het Engels. Voor uw gemak zullen wij in deze
handleiding alle menu opties vertalen naar het Nederlands
Activeren van het menu
Om het menu te activeren, drukt u tegelijkertijd op de + en – knop gedurende één
seconde.
Navigeren in het menu
Gebruik de + of – knop om te navigeren tussen de verschillende menu opties. De
modus knop aan de linkerkant van het beeldscherm zal de gekozen menu optie
activeren of de keuze bevestigen. Gebruik de + of – knop om een keuze te
wijzigen.
Verlaten van het menu
Om het menu te verlaten, drukt u de + en – knop tegelijkertijd in gedurende één
seconde.
Nederlands Pagina 57
Page 60

Optelec Compact 4 HD
Menu: Informatie (Information)
Deze menukeuze toont de status van de batterij en de huidige firmware versie van uw
apparaat. In deze menu optie kunt u geen wijzigingen aanbrengen.
- Activeer het menu door tegelijkertijd op de + en – knop te drukken gedurende één
seconde.
- De eerste menu optie is Informatie.
- Om het menu te verlaten, druk de modus knop of tegelijkertijd op de + en – knop
gedurende één seconde.
Nederlands Pagina 58
Page 61

Optelec Compact 4 HD
Menu: Helderheid (Brightness)
Deze menukeuze geeft u de mogelijkheid om de helderheid van het beeldscherm in te
stellen.
- Activeer het menu door tegelijkertijd op de + en – knop te drukken gedurende één
seconde.
- Gebruik de + of – knop om respectievelijk omhoog of omlaag te navigeren binnen het
menu. Kies voor de optie Helderheid en activeer uw keuze door op de modus knop te
drukken.
- Kies de helderheid van het beeldscherm door te drukken op de + of – knop om
respectievelijk de helderheid te verhogen of verlagen. Er zijn 5 helderheidniveaus om
uit kiezen. De standaard instelling is niveau 5.
- Druk op de modus knop om uw keuze te bevestigen en het menu te verlaten.
Nederlands Pagina 59
Page 62
Optelec Compact 4 HD
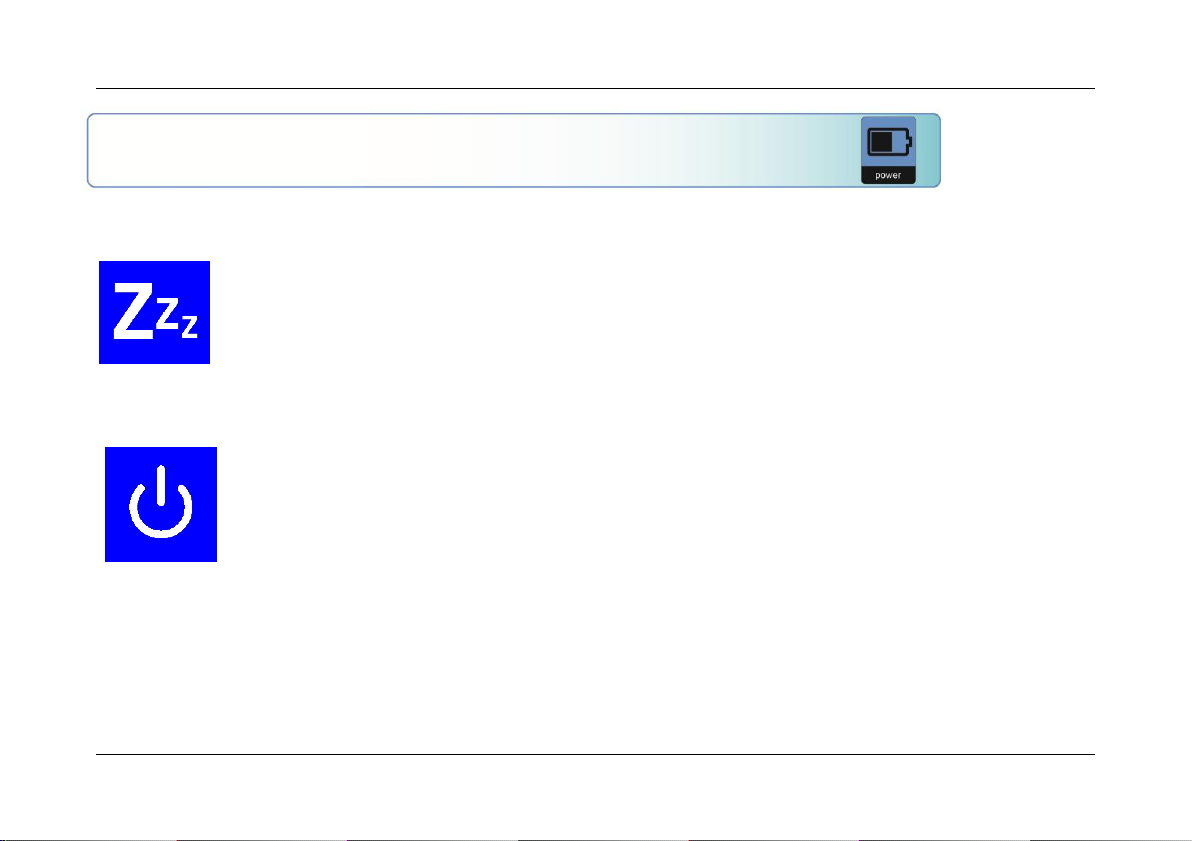
Standby
Stelt de tijd in waarop de Compact 4 HD in stand-by modus
gaat om stroom te besparen. Door op een willekeurige knop te
drukken wordt het apparaat uit stand-by gehaald. Standaard is
de stand-by tijd ingesteld op 2 minuten.
Power off
Stelt de tijd in waarop de Compact 4 HD automatisch
uitschakelt. Standaard is deze ingesteld op 4 minuten. Deze 4
minuten worden geactiveerd na de standaard stand-by tijd van
2 minuten. Dit betekent dat het apparaat standaard
automatisch uitschakelt na 6 minuten.
Menu: Stroominstellingen (Power)
Deze menukeuze bevat twee submenu’s:
Submenu Stand-by (Standby)
Standaard is de stand-by tijd ingesteld op 2 minuten. Om deze stand-by tijd aan te passen:
- Activeer het menu door tegelijkertijd op de + en – knop te drukken gedurende één
seconde.
Nederlands Pagina 60
Page 63

Optelec Compact 4 HD
- Gebruik de + of – knop om respectievelijk omhoog of omlaag te navigeren binnen het
menu. Kies voor de optie Power en activeer uw keuze door met de modus knop.
- Kies voor het submenu Standby door middel van de + en – knop en activeer uw
keuze nogmaals door op de modus knop te drukken.
- Kies de tijd waarop het apparaat automatisch in de stand-by modus schakelt door op
de + of – knop te drukken om respectievelijk de tijd te verhogen of verlagen. Druk op
de modus knop om uw instellingen te bevestigen. Door voor Disabled (uitschakelen)
te kiezen zal de automatische stand-by functie worden gedeactiveerd.
- Druk op de modus knop om uw keuze te bevestigen en het menu te verlaten.
Submenu Uitschakelen (Power Off)
Om de tijd waarop de Compact 4 HD automatisch wordt uitgeschakeld in te stellen (staat
standaard op 4 minuten):
- Activeer het menu door één seconde tegelijkertijd op de + en – knop te drukken.
- Gebruik de + of – knop om respectievelijk omhoog of omlaag te navigeren binnen het
menu. Kies voor de optie Power Off en activeer uw keuze met de modus knop.
- Kies de uitschakeloptie door te drukken op de + of – knop om door de opties te
scrollen. Druk op de modus knop om uw keuze te bevestigen.
- Kies de tijd waarop het apparaat automatisch wordt uitgeschakeld door op de + of –
knop te drukken om respectievelijk de tijd te verhogen of verlagen. Druk op de modus
knop om uw instellingen te bevestigen. Door voor Disabled (uitschakelen) te kiezen
zal de automatische uitschakeltijd worden gedeactiveerd.
- Druk op de modus knop om uw keuze te bevestigen en het menu te verlaten
Nederlands Pagina 61
Page 64

Optelec Compact 4 HD
Menu: (Geluiden) Beeps
Deze menukeuze geeft u de mogelijkheid om de geluiden (feedback geluiden) in- of uit te
schakelen. Standaard zijn de geluiden ingeschakeld.
- Activeer het menu door tegelijkertijd op de + en – knop te drukken gedurende één
seconde.
- Gebruik de + of – knop om respectievelijk omhoog of omlaag te navigeren binnen het
menu. Kies voor de optie Sound en bevestig uw keuze door op de modus knop te
drukken.
- Om de geluiden in te schakelen, kies voor ‘ON’ door middels de + en – knop te
scrollen. Druk op de modus knop om uw keuze te bevestigen. Door ‘OFF’ te kiezen
zullen de geluiden worden uitgeschakeld.
- Druk op de modus knop om uw keuze te bevestigen en het menu te verlaten
Nederlands Pagina 62
Page 65

Optelec Compact 4 HD
Menu: Verlichting (Light)
Deze menukeuze geeft u de mogelijkheid om de objectverlichting van de beelschermloep inof uit te schakelen bij gebruik zonder de houder. Standaard is de objectverlichting
ingeschakeld.
- Activeer het menu door tegelijkertijd op de + en – knop te drukken gedurende één
seconde.
- Gebruik de + of – knop om respectievelijk omhoog of omlaag te navigeren binnen het
menu. Kies voor de optie Light en bevestig uw keuze door op de modus knop te
drukken.
- Om de verlichting in te schakelen, kies voor ‘ON’ met de + en – knop. Druk op de
modus knop om uw keuze te bevestigen. Door ‘OFF’ te kiezen zal de verlichting
worden uitgeschakeld.
- Druk op de modus knop om uw keuze te bevestigen en het menu te verlaten.
Nederlands Pagina 63
Page 66

Optelec Compact 4 HD
Menu: Kleuren (Color)
De Compact 4 HD ondersteunt vier hoogcontrast standen. Voor elk van deze vier standen
standen de voorgrond en de achtergrond kleuren worden ingesteld. Drie van de vier
hoogcontrast standen kunnen worden uitgeschakeld indien er slecht één stand nodig is.
- Activeer het menu door tegelijkertijd op de + en – knop te drukken gedurende één
seconde.
- Gebruik de + of – knop om respectievelijk omhoog of omlaag te navigeren binnen het
menu. Kies voor de optie Color en bevestig uw keuze door op de modus knop te
drukken.
- Selecteer de hoog contrast stand die u in wenst te stellen door met de + en – knop in
het menu te navigeren. Druk op de modus knop om uw keuze te bevestigen.
- Om een nieuwe hoogcontrast kleur in te stellen voor de voor- en achtergrond gebruikt
u de + en – knop om te navigeren door de lijst met kleurcombinaties. Kies de
gewenste combinatie door op de modus knop te drukken.
- Hoogcontrast stand 2, 3 en 4 kunnen worden uitgeschakeld door OFF te kiezen.
- Druk op de modus knop om uw keuze te bevestigen en het menu te verlaten.
Nederlands Pagina 64
Page 67

Optelec Compact 4 HD
Menu: Fabrieksinstellingen (Reset)
De Compact 4 HD kan worden teruggezet naar de standaard fabrieksinstellingen. Alle opties
die zijn aangepast worden hiermee teruggezet naar de fabrieksinstellingen.
- Activeer het menu door tegelijkertijd op de + en – knop te drukken gedurende één
seconde.
- Gebruik de + of – knop om respectievelijk omhoog of omlaag te navigeren binnen het
menu. Kies voor de optie Reset en bevestig uw keuze door op de modus knop te
drukken.
- Om de fabrieksinstellingen terug te zetten, kiest u ‘YES’ door middel van de + en –
knop. Door ‘NO’ te kiezen blijven alle instellingen ongewijzigd.
- Druk op de modus knop om uw keuze te bevestigen en het menu te verlaten.
Nederlands Pagina 65
Page 68

Optelec Compact 4 HD
Bijlage A: Veiligheid
Stel de Compact 4 HD niet bloot aan hitte of direct zonlicht om het risico op brand te
verminderen.
Verwijder geen onderdelen van de Compact 4 HD. Laat reparatie en service over aan
door Optelec geautoriseerd personeel of uw leverancier.
Om schade te vermijden, vermijd contact met vocht en chemicaliën of andere
vloeistoffen.
Ga voorzichtig om met uw Compact 4 HD. Ruw gebruik van uw unit kan beschadiging
veroorzaken aan de interne componenten.
Gebruik uw Compact 4 HD niet in de omgeving van medische apparatuur.
Maak het apparaat niet open en probeer niet om de batterij te verwijderen.
Neem contact op met uw leverancier voor onderhoud of reparatie. Maak het apparaat
niet open, aangezien hiermee de garantie komt te vervallen.
Schakel het apparaat altijd uit en verwijder de adapter voordat u deze schoonmaakt.
Gebruik een zachte droge doek om de buitenkant te reinigen. Gebruik in geen geval
oplosmiddelen, zoals alcohol of schoonmaakmiddelen. Deze kunnen het apparaat
ernstige schade toebrengen.
Bij gebruik van de Compact 4 HD anders dan omschreven in deze handleiding vervalt het
recht op garantie.
Nederlands Pagina 66
Page 69

Optelec Compact 4 HD
Bijlage B: Technische informatie
Vergroting 1.7x - 12x
Leesstanden Foto
Hoog contrast wit op zwart
Hoog contrast zwart op wit
Hoogcontrast kleurencombinatie 1
Hoogcontrast kleurencombinatie 2
Focus Autofocus
Scherm 4.3” TFT, 480 x 270
Hoogcontrast ratio 800:1
Helderheid beeldscherm 500 cd/m2
Afmetingen zonder houder 130 x 82.5 x 27.5 mm
Afmetingen met houder 130 x 94 x 73 mm
Batterij ongeveer 3 uur continu gebruik
3,5 uur oplaadtijd
Li-ion batterij oplaadbaar, 3.7V 2800 mAH of 3240 mAh
Gewicht beeldschermloep 248 gram
Gewicht houder 140 gram
Netvoeding POWER WIN, PW-M024A-1Y120K
Input 100 – 240V, 50-60 Hz, 0.3A
Output DC5V-2A
Nederlands Pagina 67
Page 70

Optelec Compact 4 HD
Gebruiksomstandigheden
Temperatuur +10°C tot 35°C
Vochtigheid < 70%, geen condensatie
Hoogte tot 3000 m
Druk ` 700 – 1060 hPa
Opslag- en transportomstandigheden
Temperatuur +10°C tot 40°C
Vochtigheid < 95%, geen condensatie
Hoogte tot 12192 m
Druk ` 186 – 1060 hPa
Nederlands Pagina 68
Page 71

Optelec Compact 4 HD
Dit product voldoet aan de volgende bepalingen en richtlijnen:
EMC
EN 55022
EN 55024
Safety
UL 60950-1
FCC
FCC part 15 Class B
Dit apparaat voldoet aan de richtlijnen en standaarden van CE en FCC.RoHS
Nederlands Pagina 69
Page 72

Page 73

Optelec Compact 4 HD
Compact 4 HD
Manuel d’utilisation
Version 1.1
© 2012 Optelec, Pays-Bas
Tous droits réservés
Optelec
P.O. Box 399
2990 AJ Barendrecht
Pays-Bas
Tel.: +31 (0)88 678 34 44
Courriel: [email protected]
Internet: www.optelec.com
Français Page 71
Page 74

Optelec Compact 4 HD
Avis DEEE
La directive relative aux déchets d'équipements électriques et électroniques (DEEE), qui a
pris effet en tant que loi européenne le 13 février 2003, a apporté des changements
importants en matière d'élimination des équipements électriques et électroniques (EEE)
arrivés en fin de vie.
L’objectif premier de cette directive est de mettre en pratique les mesures de prévention de la
directive DEEE, et aussi de promouvoir le réemploi et le recyclage, ainsi que toute autre
forme de récupération des EEE afin d’en réduire leur élimination.
Le pictogramme du DEEE, lorsque apposé sur un produit ou son boîtier, vous indique que ce
produit ne doit pas être éliminé ou jeté avec vos ordures domestiques. Vous êtes tenus
d'éliminer tous vos EEE en les déposant dans un centre de recyclage destiné à l’élimination
des déchets dangereux. La cueillette isolée ainsi que la récupération appropriée des EEE au
moment de leur élimination, servent à préserver nos ressources naturelles. Ainsi, le
recyclage approprié des EEE assure la protection de la santé humaine et de
l’environnement. Pour plus de renseignements sur l'élimination et la récupération des EEE et
pour connaître les centres destinés à la cueillette de ces déchets, veuillez communiquer avec
le service des ordures et des déchets dangereux de votre localité. Vous pouvez également
communiquer avec le vendeur ou avec le fabricant de votre produit.
Français Page 72
Page 75

Optelec Compact 4 HD
1. Introduction
Nous vous félicitons d’avoir choisi le Compact 4 HD !
Unique au monde, le Compact 4 HD d’Optelec est un téléagrandisseur électronique doté
d’une fonction de mise au point automatique qui vous permet de grossir des textes imprimés
et de visualiser des images en haute résolution de qualité HD, en mode pleine couleur ou à
contraste élevé. Son écran de 4,3 pouces vous offre un niveau de grossissement allant de
1,7 fois pour une meilleure vue d’ensemble et jusqu’à 12 fois pour un niveau de
grossissement plus puissant.
Son design unique et polyvalent, sa conception d'éclairage unique, sa mise au point
automatique, ainsi que son support de lecture intégré, font du Compact 4 HD un outil
essentiel pour lire, regarder des photos, voir les prix en magasin et bien plus encore, que
vous soyez à la maison ou à l’extérieur.
Si vous avez des questions ou des suggestions à nous faire concernant l’utilisation de ce
produit, veuillez communiquer avec votre distributeur ou avec le siège social d’Optelec, en
consultant la liste des coordonnées des différents bureaux d’Optelec, présentée à la dernière
page de ce manuel. Vos commentaires sont grandement appréciés. Nous vous souhaitons
beaucoup de plaisir avec votre Compact 4 HD !
Français Page 73
Page 76

Optelec Compact 4 HD
À propos du manuel
Ce manuel vous permettra de vous familiariser avec les caractéristiques et le fonctionnement
du Compact 4 HD. Veuillez lire attentivement ce manuel avant d’utiliser votre appareil.
Ce que contient la boîte
Le matériel du Compact 4 HD comprend les éléments suivants :
Le téléagrandisseur Compact 4 HD
Un support
Un étui de protection
Une dragonne
Un câble d’alimentation
4 adaptateurs régionaux (Europe, États-Unis, Royaume-Uni et Australie)
Un linge de nettoyage d’écran
Un manuel d’utilisation
Si vous constatez que l’un des éléments mentionnés ci-haut est manquant, veuillez
communiquer avec votre distributeur.
Français Page 74
Page 77
Optelec Compact 4 HD
2. Connaître votre Compact 4 HD
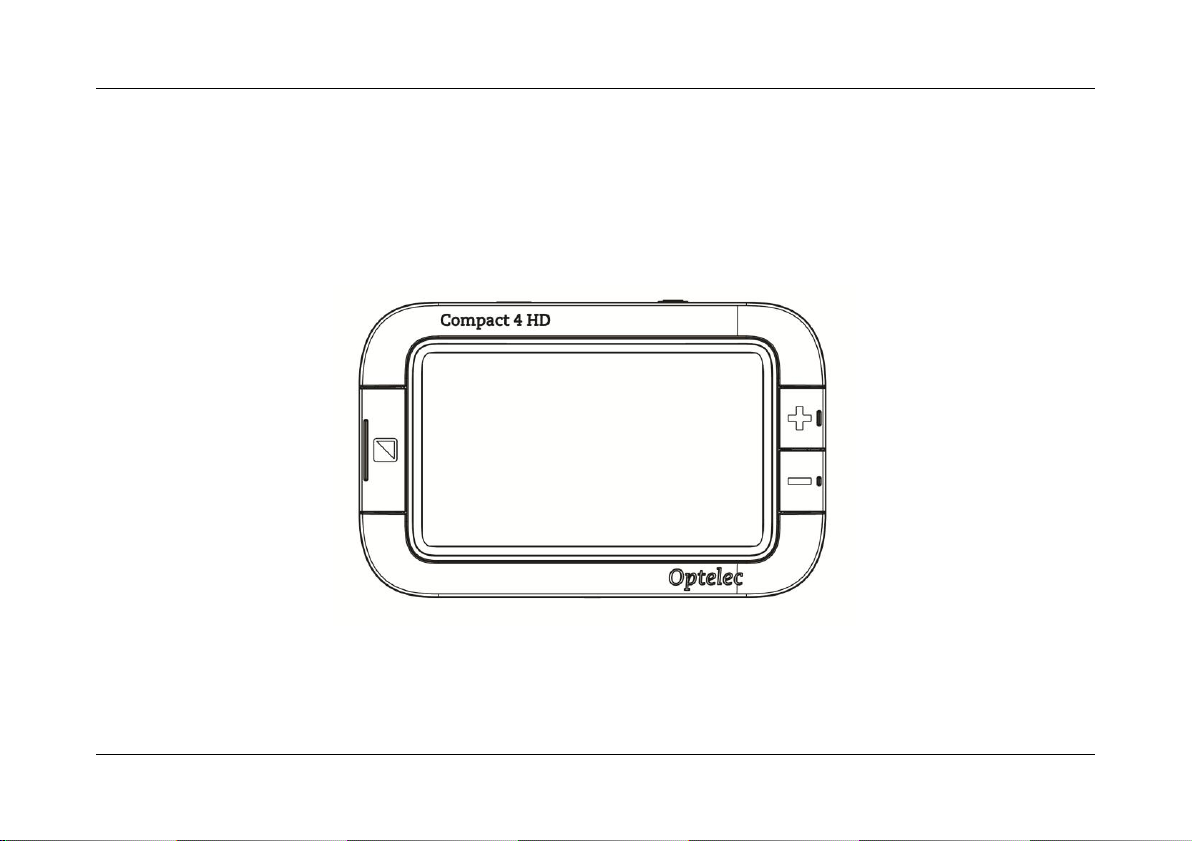
Le Compact 4 HD est placé correctement devant vous lorsque l’écran est orienté vers le haut
et que le logo Optelec se trouve au-dessous de l’écran.
Français Page 75
Page 78
Optelec Compact 4 HD
Utiliser votre Compact 4 HD
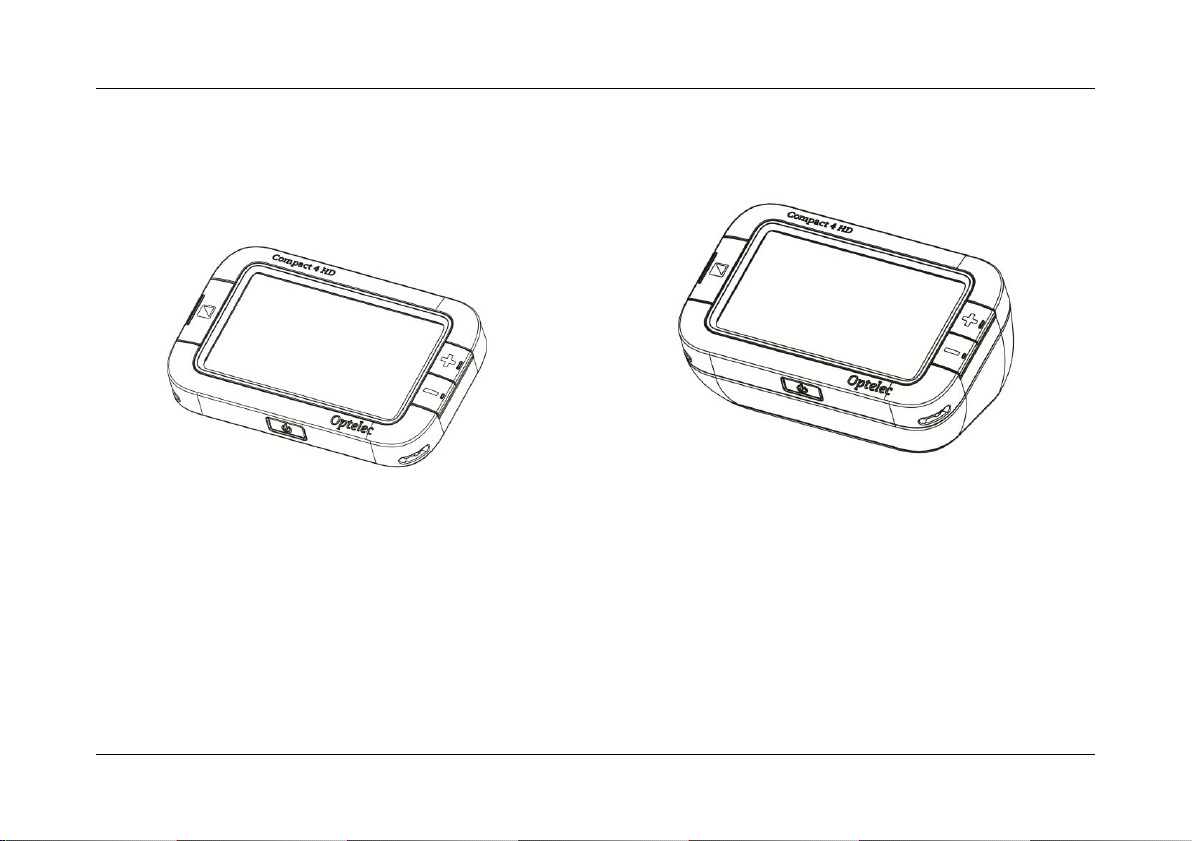
Le compact 4 HD peut être utilisé de deux façons; soit avec ou sans support.
Le Compact 4 HD avec support
Le Compact 4 HD sans support
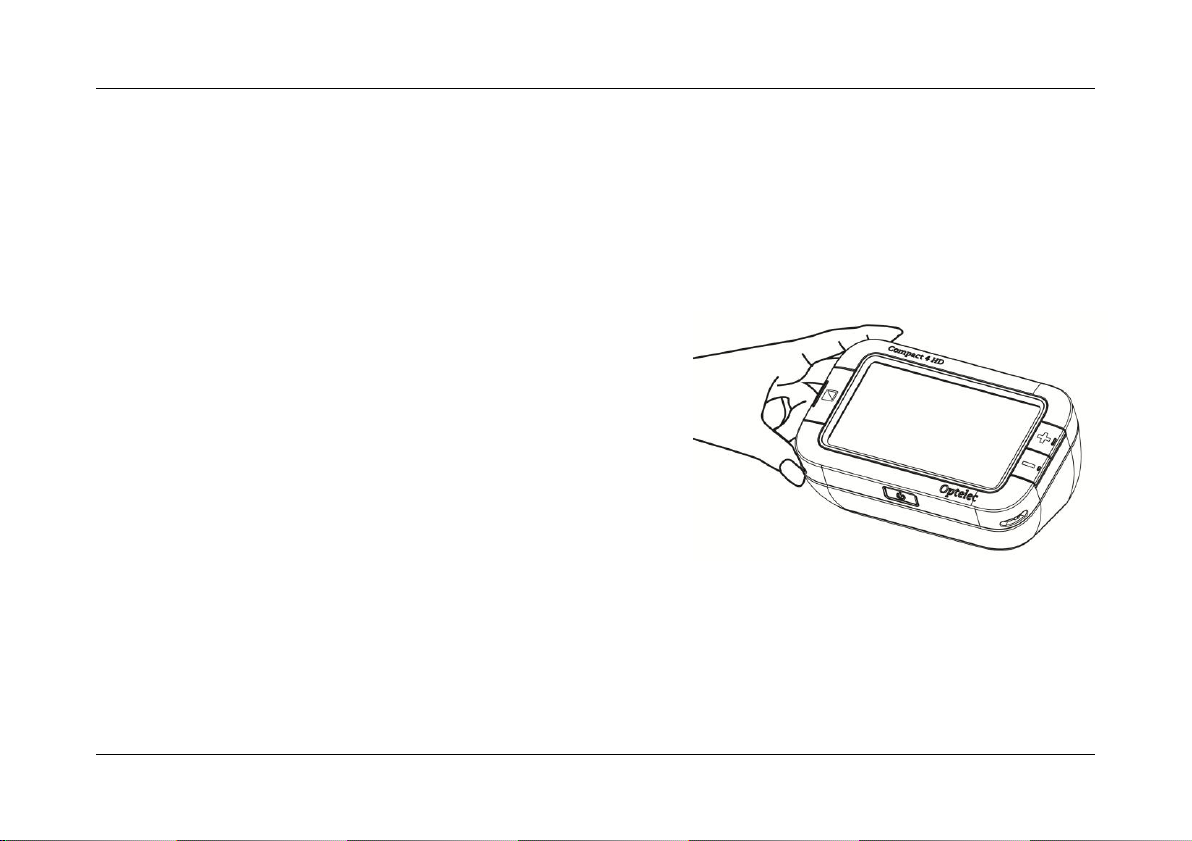
Pour utiliser le Compact 4 HD sans son support, tenez l’unité dans votre main et pointez la
caméra située à l’arrière de l’unité vers l’objet ou le texte que vous désirez visualiser ou lire.
Pour obtenir la meilleure qualité d’image possible, la distance entre la caméra et l’objet ou
texte devrait se situer entre 5 cm (2 pouces) et 30 cm (12 pouces). Il est idéal d’utiliser le
Compact 4 HD sans son support pour parcourir rapidement des documents ou visualiser des
objets.
Français Page 76
Page 79
Optelec Compact 4 HD
Lorsque le Compact 4 HD est posé sur son support, l’écran se retrouve dans un angle
ergonomique pour la lecture et la caméra pointe vers le bas. Il est alors très facile de tenir le
Compact 4 HD dans vos mains et de le déplacer au-dessus du texte. Cela vous permet de
lire sur une longue période.
Pour placer votre Compact 4 HD sur son support, suivez les étapes suivantes :
5. Placez le support devant vous.
6. Placez le Compact 4 HD sur le support
de façon à ce que l’écran soit vers le haut
et que le logo Optelec soit au-dessous de
l’écran. Les aimants dans le support
positionneront automatiquement le
Compact 4 HD correctement.
Nettoyer la lentille de la caméra et le
miroir
Pour une meilleure qualité d’image, nous vous suggérons de maintenir la lentille de la
caméra propre. Une lentille sale pourrait produire des images floues et affecter le bon
fonctionnement de la mise au point automatique. Pour nettoyer la lentille de la caméra,
utilisez le linge de nettoyage fourni ou un autre chiffon à nettoyage de lentille.
Nota : Ne pas utiliser d’eau ou d’agent nettoyant lors du nettoyage de la lentille et du miroir.
Français Page 77
Page 80

Optelec Compact 4 HD
Mode
Le bouton Mode situé sur le côté gauche de
l’écran vous permet de sélectionner l’un des
modes de visualisation. Appuyer sur ce bouton
pendant environ trois secondes, éteint les deux
lumières d'objet.
Grossissement
Les touches + et – situées sur le côté droit de l’
écran vous permettent d’augmenter ou de réduire
le niveau de grossissement. Appuyer sur ces
deux boutons simultanément vous permettra
d’ouvrir ou de fermer le menu du compact 4 HD.
Touche photo
instantanée
La touche photo instantanée située sur le côté
supérieur droit de l’unité vous permet de prendre
une photo temporaire d’un texte ou d’une image
éloignée pour une visualisation plus rapprochée.
Interrupteur
Appuyer pendant une seconde sur le bouton gris
à l'icône orange, qui est situé au centre du devant
Les boutons
Le Compact 4 HD comprend les boutons suivants :
Français Page 78
Page 81
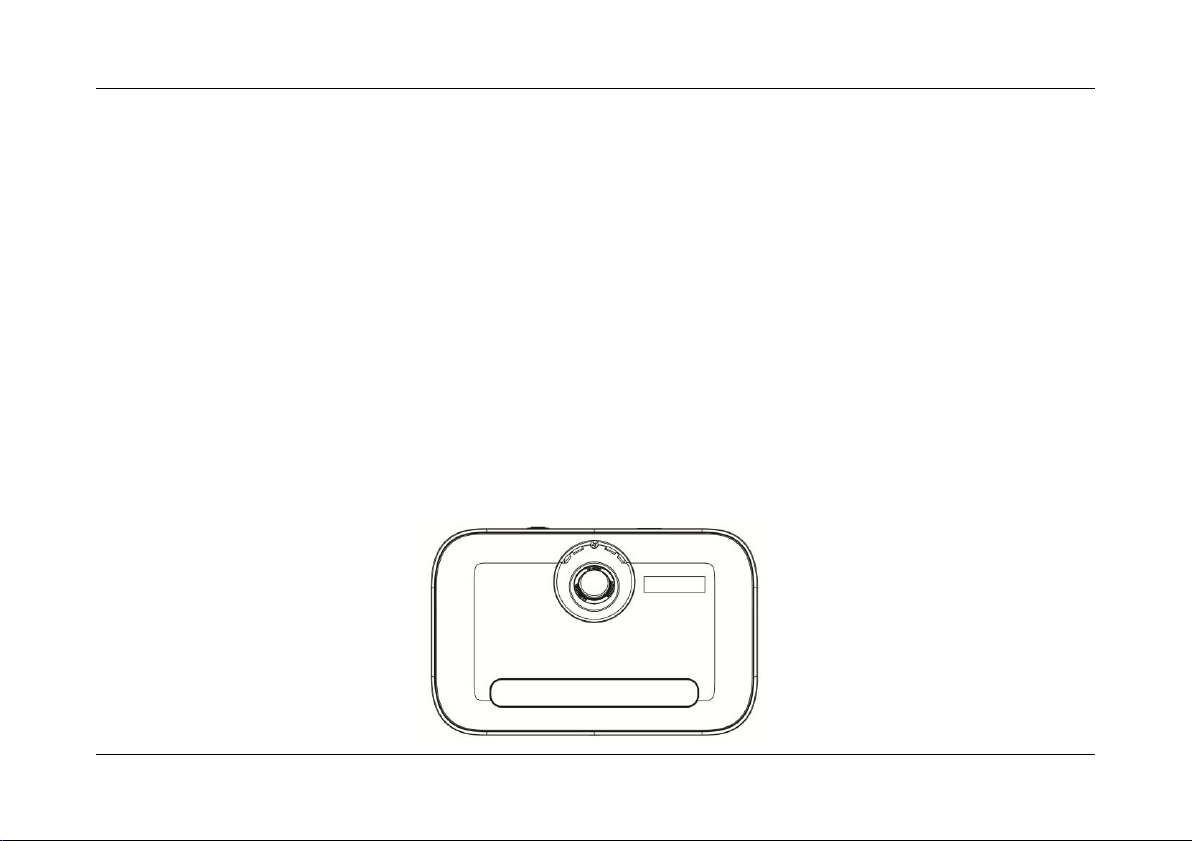
Optelec Compact 4 HD
de l’appareil, allumera ou éteindra votre Compact
4 HD.
Prise d’entrée
DC 5V
La prise d’entrée DC 5V est située sur le côté
supérieur de l’appareil, à gauche de la touche
photo instantanée. Le câble d’alimentation doit
être connecté dans cette prise. Utilisez
uniquement le câble d’alimentation fourni avec
votre Compact 4 HD pour alimenter l’unité et
recharger sa pile.
La caméra du Compact 4 HD se trouve à l’arrière de l’unité.
Français Page 79
Page 82

Optelec Compact 4 HD
Allumer et éteindre le Compact 4 HD
Lorsque vous allumerez le Compact 4 HD pour la première fois, assurez-vous que la pile est
chargée à pleine capacité. Une fois chargée, appuyez pendant une seconde sur le bouton
gris à l'icône orange qui est situé au centre du devant de l’appareil. L’unité s’allumera et
reviendra au réglage dans lequel vous l’aviez éteinte. Pour éteindre le Compact 4 HD,
appuyez de nouveau sur le bouton gris et orange de l’interrupteur pendant une seconde.
Le Compact 4 HD prendra environ trois secondes pour afficher une image à l’écran suivant
sa mise en marche.
Régler le niveau de grossissement
Pour régler le niveau de grossissement, appuyez sur les boutons + ou – qui se trouvent sur
le côté droit de l’écran. Appuyez sur le bouton + pour augmenter le niveau de grossissement
ou sur le bouton – pour le réduire. Lorsque l’unité est placée sur son support, le niveau de
grossissement commence à 1,7 fois et peut être augmenté jusqu’à un maximum de 12 fois.
Le Compact 4 HD est muni d’une caméra à mise au point automatique, ce qui vous permet
d’utiliser l’unité en la tenant sans son support dans votre main. Cette caractéristique vous
permet d’obtenir une meilleure vue d’ensemble, mais les niveaux de grossissement minimum
et maximum s’en trouvent diminués selon la distance de l’objet ou du texte.
Français Page 80
Page 83
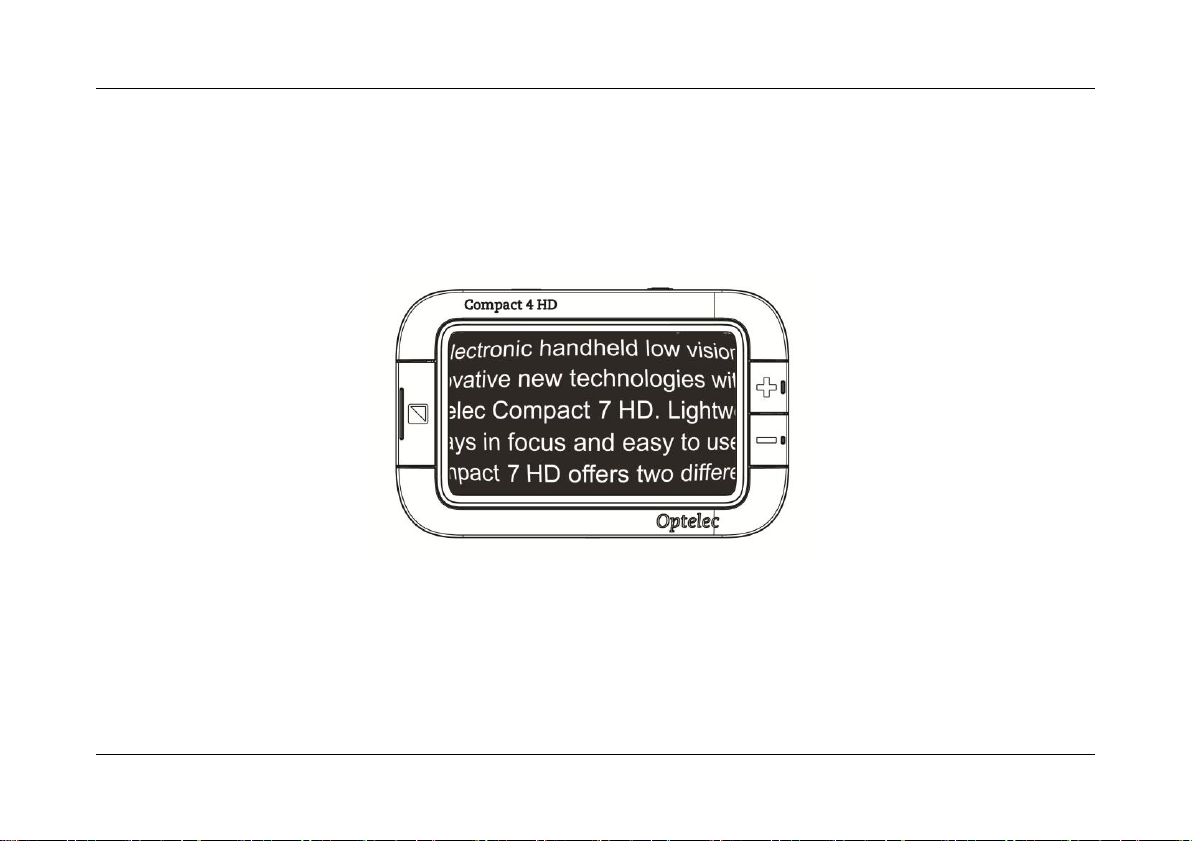
Optelec Compact 4 HD
Nota: lorsque le niveau de grossissement est à son minimum de 1,7 fois, les lignes d’un
texte pourraient paraître courbées à l’ écran. On observe souvent ce phénomène lors de la
lecture de textes en petits caractères. Cet effet est causé par le très grand angle de
visualisation de la lentille.
L’effet “Fish-eye” au niveau de grossissement 1,7x
Français Page 81
Page 84

Optelec Compact 4 HD
Sélectionner le mode de visualisation
Appuyez sur le bouton Mode qui se trouve sur le côté gauche de l’unité pour choisir l’un des
modes de visualisation suivants :
Mode photo: visualisation de textes et d’images en couleur
Mode négatif : lecture à contraste élevé, blanc sur noir
Mode positif: lecture à contraste élevé, noir sur blanc
Combinaison de couleurs 1 à contraste élevé
Combinaison de couleurs 2 à contraste élevé
Appuyez sur le bouton Mode pendant trois secondes pour allumer ou éteindre les lumières
d’objet. Les lumières d’objet se rallumeront automatiquement lorsque vous changerez de
mode.
Français Page 82
Page 85

Optelec Compact 4 HD
Utiliser le bouton photo instantanée
Le bouton photo instantanée vous permet de prendre une photo temporaire d’un texte ou
d’une image.
-Placez le Compact 4 HD sur le texte ou l’image que vous désirez voir à l’écran.
-Appuyez sur le bouton photo instantanée situé sur le côté droit au-dessus de l’unité.
o Vous entendrez un bip après que vous ayez pressé le bouton photo
instantanée.
o Maintenez le bouton photo instantanée enfoncé.
o Le Compact 4 HD affichera l’icône d’une caméra à l’écran, prendra une photo
et émettra deux bips sonores.
o Relâchez le bouton photo instantanée.
o Le Compact 4 HD affichera la photo prise.
- La photo se conservera temporairement dans la mémoire du Compact 4 HD. En tenant
le Compact 4 HD plus près de vos yeux, vous pourrez mieux visualiser l’image de l’objet
ou du texte.
-Pour modifier le niveau de grossissement de l’image, utilisez les boutons de
grossissement situés à la droite de l’écran.
Français Page 83
Page 86

Optelec Compact 4 HD
- Appuyez sur le bouton Mode pour changer le mode de visualisation.
- Appuyez de nouveau sur le bouton photo instantanée pour annuler l’image figée. Il est
maintenant possible de prendre une nouvelle photo.
Nota: Si vous relâchez le bouton photo instantanée avant l'émission des deux bips sonores,
la photo sera annulée et le Compact 4 HD reviendra à son niveau de grossissement et son
mode de visualisation d’origine (c’est-a-dire ceux définis avant que vous ayez appuyé sur le
bouton photo instantanée)
Français Page 84
Page 87

Optelec Compact 4 HD
3. Chargement de la pile
Charger le Compact 4 HD
Le Compact 4 HD est livré avec un câble d’alimentation ainsi que quatre adaptateurs
régionaux (Europe, États-Unis, Royaume-Uni et Australie). Choisissez l’adaptateur qui
convient à votre pays et connectez-le au câble d’alimentation.
Pour recharger la pile du Compact 4 HD, vous n’avez qu’à connecter le câble d’alimentation
à la prise d’entrée DC 5V, qui se trouve du côté gauche de l’unité. Branchez l’autre extrémité
du câble d’alimentation dans une prise de courant électrique. L’indicateur d’alimentation
situé à côté de la prise DC 5V se mettra à briller d’une couleur orange continue pour vous
indiquer que le chargement de la pile est en cours. Une fois le chargement terminé,
l’indicateur d’alimentation se mettra à briller d’une couleur verte. Si l’indicateur d’alimentation
se met à clignoter, cela indique un problème avec le chargement. Débranchez le câble
d’alimentation de l’unité, puis recommencez la procédure de nouveau. S’il fait trop chaud, ou
si l’unité est en marche pendant que vous la chargez, il est possible que le chargement
s’arrête et que l’indicateur d’alimentation clignote d’une couleur verte. Le Compact 4 HD
recommencera à charger lorsque son mécanisme de protection aura detecté une baisse de
température. Éteindre l’unité pendant le chargement aidera le Compact 4 HD à abaisser sa
température suffisamment pour pouvoir recommencer à charger.
Français Page 85
Page 88

Optelec Compact 4 HD
La recharge de la pile du Compact 4 HD peut durer environ 3,5 heures. La durée d’utilisation
du Compact 4 HD lorsque pleinement chargée est d’environ 3 heures, selon les paramètres
d’alimentation. Pour des raisons de sécurité, utilisez uniquement le câble d’alimentation qui
vous a été fourni avec votre Compact 4 HD pour recharger la pile.
Mise en veille et mise hors tension automatique
La mise en veille s’active automatiquement lorsque votre Compact 4 HD cesse d’être utilisé,
ou si aucun changement d’image n’est détecté depuis plus de deux minutes. Pour remettre
votre Compact 4 HD en fonction, appuyez sur n’importe quel bouton. Si le Compact 4 HD
reste en mode veille plus de quatre minutes, il s’éteindra automatiquement. Pour le rallumer,
il suffira d’appuyer sur le bouton orange de l’interrupteur. En passant par le menu du
Compact 4 HD, vous pourrez régler le temps des fonctions de la mise en veille et de la mise
hors tension automatique, ou désactiver ces fonctions. Veuillez consulter le chapitre suivant
pour connaître la procédure à suivre.
Français Page 86
Page 89

Optelec Compact 4 HD
Avis de pile faible
Lorsque la pile est à moins de 5% de sa capacité totale, le Compact 4 HD
émettra un avertissement à cet effet à toutes les minutes, en affichant
l’icône de pile faible pendant deux secondes et en émettant un bip sonore.
Vous devez alors brancher l’unité dans une prise de courant électrique
pour recharger votre unité le plus rapidement possible. Lorsque la pile est
complètement épuisée, l’unité s’éteint automatiquement.
Si votre unité ne s’allume pas, assurez-vous que la pile est bien chargée.
Français Page 87
Page 90
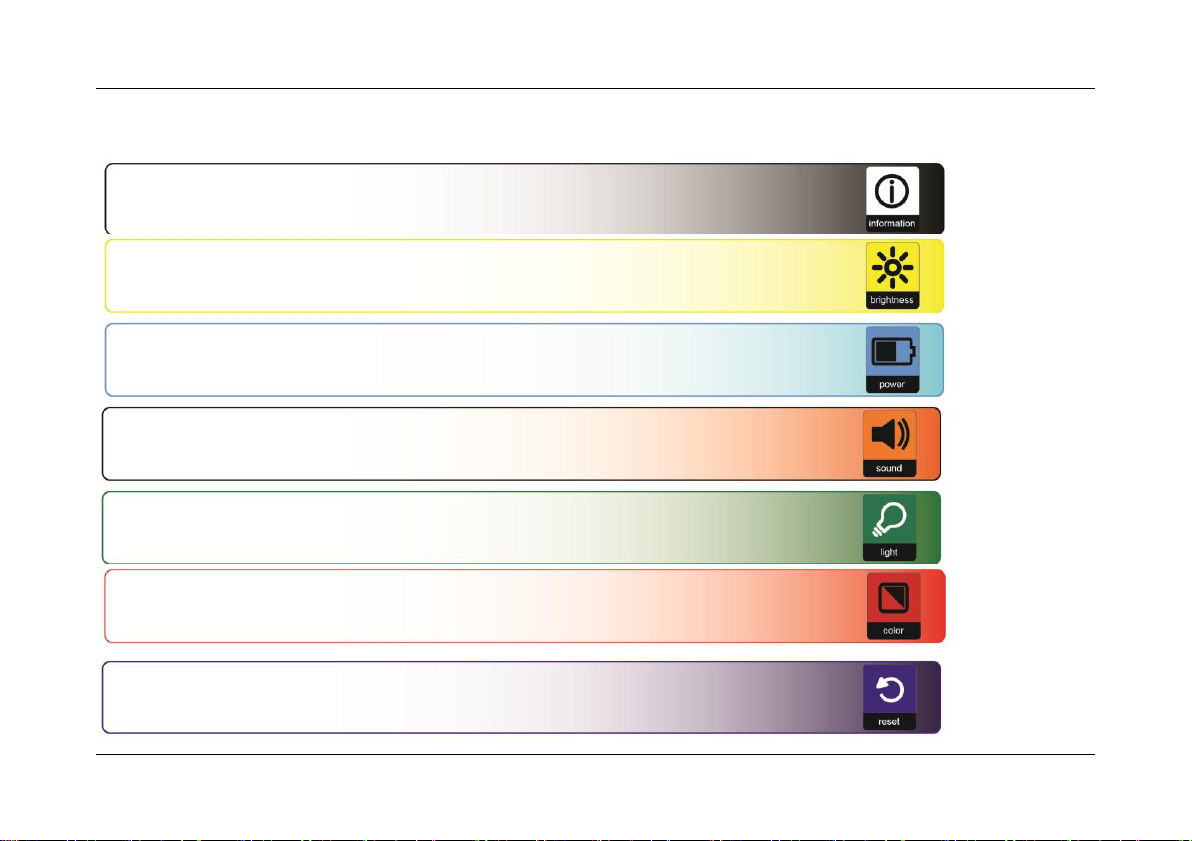
Optelec Compact 4 HD
Indique l’état de la pile et la version courante du logiciel.
Vous permet de régler la luminosité de l’écran.
Vous permet de définir les paramètres d’alimentation.
Vous permet d’activer ou de désactiver les signaux sonores.
Vous permet d’activer ou de désactiver les lumières d’objet.
Vous permet de sélectionner une combinaison de couleurs.
Vous permet de modifier la configuration par défaut.
4. Le menu du Compact 4 HD
Français Page 88
Page 91

Optelec Compact 4 HD
Ouvrir le menu
Pour ouvrir le menu, appuyez sur les boutons + et – simultanément pendant une
seconde.
Naviguer dans le menu
Utilisez les boutons + ou – pour naviguer parmi les options du menu. Le bouton
Mode à la gauche de l’écran vous permet d’activer l’option choisie ou de confirmer
la sélection. Pour modifier une sélection, utilisez les boutons + ou -.
Fermer le menu
Pour fermer le menu, appuyez sur les boutons + et – simultanément pendant une
seconde.
Français Page 89
Page 92

Optelec Compact 4 HD
Menu: Information
Cette option du menu indique l’état de la pile et la version courante du logiciel du Compact 4
HD. Il n’est pas possible d’effectuer des changements dans ce menu.
- Ouvrez le menu en appuyant sur les boutons + et – simultanément pendant une
seconde.
- La première option dans le menu est Information.
- Fermez le menu en appuyant sur le bouton Mode ou sur les boutons + et –
simultanément pendant une seconde.
Français Page 90
Page 93

Optelec Compact 4 HD
Menu: Luminosité
Cette option de menu vous permet de régler la luminosité de l’écran.
- Ouvrez le menu en appuyant sur les boutons + et – simultanément pendant une
seconde.
- Utilisez le bouton + pour naviguer vers le haut ou le bouton – pour naviguer vers le
bas du menu. Sélectionnez l’option Luminosité dans le menu, puis activez cette option
en appuyant sur le bouton Mode.
- Sélectionnez le niveau de luminosité en utilisant le bouton + pour l’augmenter ou le
bouton – pour le diminuer. Vous pouvez choisir entre cinq niveaux de luminosité. Par
défaut, le niveau de luminosité est réglé à 5.
- Appuyez sur le bouton Mode pour confirmer votre choix et pour fermer le menu.
Français Page 91
Page 94
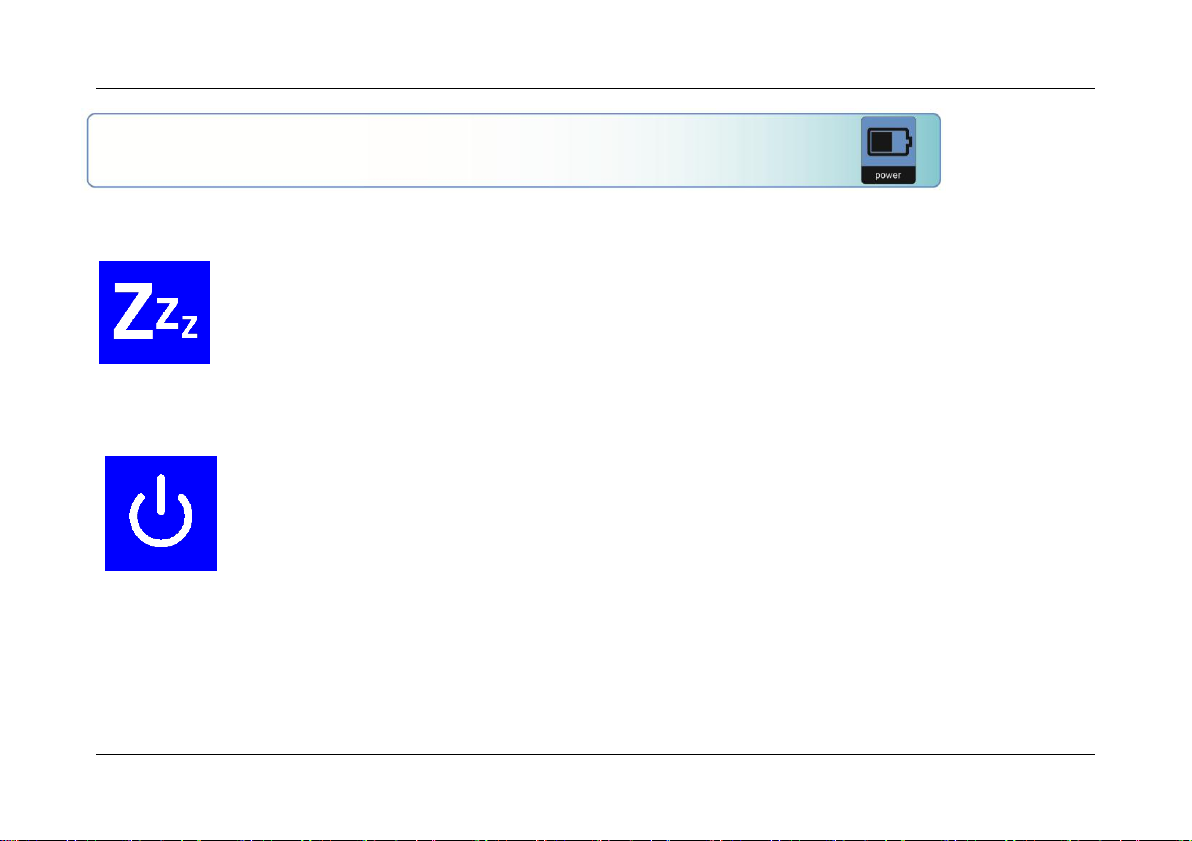
Optelec Compact 4 HD
Mise en
veille
Pour régler le temps de la mise en veille automatique du
Compact 4 HD afin d’économiser l’énergie de la batterie. Pour
annuler la mise en veille, appuyez sur n’importe quel bouton.
Par défaut, le temps requis pour que la mise en veille
automatique se mette en marche est réglé à deux minutes.
Éteindre
Pour régler le temps de la mise hors tension automatique du
Compact 4 HD. Par défaut, celui-ci est réglé à quatre minutes.
Ces quatre minutes prennent effet après que les deux minutes
(valeur par défaut) de la mise en veille automatique soient
expirées. Par défaut, l’unité s’éteindra donc automatiquement
après six minutes d’inactivité.
Menu: Alimentation
Cette option de menu comprend deux sous-menus:
Sous-menu Mise en veille
Français Page 92
Page 95

Optelec Compact 4 HD
Par défaut, le temps d'inactivité requis pour activer la mise en veille automatique est réglé à
deux minutes. Pour régler le temps de cette fonction :
- Ouvrez le menu en appuyant sur les boutons + et – simultanément pendant une seconde.
-Utilisez le bouton + pour naviguer vers le haut et le bouton – pour naviguer vers le bas dans
le menu. Sélectionnez l’option Alimentation dans le menu, puis activez-la en appuyant sur le
bouton Mode.
- Sélectionnez l’option Mise en veille en naviguant le menu avec les boutons + ou -, puis
appuyez sur le bouton Mode pour confirmer votre choix.
- Réglez le temps pour activer la mise en veille en utilisant le bouton + pour l’augmenter ou le
bouton – pour le réduire, puis appuyez sur le bouton Mode pour confirmer votre choix. Pour
désactiver la fonction de mise en veille automatique, choisissez l’option Aucune action.
-Appuyez sur le bouton Mode pour confirmer votre choix et pour fermer le menu.
Sous-menu Éteindre
Pour régler le temps avant la mise hors tension automatique du Compact 4 HD:
-Ouvrez le menu en appuyant sur les boutons + et – simultanément pendant une seconde.
-Utilisez le bouton + pour naviguer vers le haut et le bouton – pour naviguer vers le bas dans
le menu. Sélectionnez l’option Alimentation dans le menu, puis activez cette option en
appuyant sur le bouton Mode.
- Sélectionnez l’option Éteindre dans le menu, puis activez-la en appuyant sur le bouton
Mode.
- Réglez le temps de la mise hors tension automatique en utilisant le bouton + pour
l’augmenter et le bouton – pour le réduire. Appuyez sur le bouton Mode pour confirmer votre
Français Page 93
Page 96

Optelec Compact 4 HD
choix. Pour désactiver la fonction de mise hors tension automatique, choisissez l’option
Aucune action.
-Appuyez sur le bouton Mode pour confirmer votre choix et pour fermer le menu.
Français Page 94
Page 97
Optelec Compact 4 HD
Menu: Son
Cette option de menu vous permet d’activer ou de désactiver les sons (signaux sonores). Par
défaut, les sons sont activés.
- Ouvrez le menu en appuyant sur les boutons + et – simultanément pendant une
seconde.
- Utilisez le bouton + pour naviguer vers le haut et le bouton – pour naviguer vers le bas
dans le menu. Sélectionnez l’option Son dans le menu, puis activez-la en appuyant
sur le bouton Mode.
- Pour activer les sons, sélectionnez l’option Activer en utilisant les boutons + ou -, puis
appuyez sur le bouton Mode pour confirmer votre choix. Pour désactiver les sons,
sélectionnez l’option Désactiver.
- Appuyez sur le bouton Mode pour confirmer votre choix et pour fermer le menu.
Français Page 95
Page 98

Optelec Compact 4 HD
Menu: Lumière
Cette option de menu vous permet d’activer ou de désactiver les lumières d’objet lorsque
vous utilisez votre Compact 4 HD sans son support.Par défaut, les lumières d’objet sont
activées.
- Ouvrez le menu en appuyant sur les boutons + ou – simultanément pendant une
seconde.
- Utilisez le bouton + pour naviguer vers le haut et le bouton – pour naviguer vers le bas
dans le menu. Sélectionnez l’option Lumière dans le menu, puis activez-la en
appuyant sur le bouton Mode.
- Pour activer les lumières d’objet, sélectionnez l’option Activer (On) en utilisant les
boutons + ou -, puis appuyez sur le bouton Mode pour confirmer votre choix. Pour
désactiver les lumières d’objet, sélectionnez l’option Désactiver (Off).
- Appuyez sur le bouton Mode pour confirmer votre choix et pour fermer le menu.
Français Page 96
Page 99

Optelec Compact 4 HD
Menu: Couleur
Le Compact 4 HD offre quatre combinaisons de couleurs à contraste élevé. Pour chacune
de ces quatre combinaisons, vous pouvez sélectionner les couleurs de l’avant et de l'arrièreplan. Il est possible de désactiver trois des quatre combinaisons si une seule combinaison
de couleurs est requise.
- Ouvrez le menu en appuyant sur les boutons + et – simultanément pendant une
seconde.
- Utilisez le bouton + pour naviguer vers le haut et le bouton – pour naviguer vers le bas
dans le menu. Sélectionnez l’option Couleur dans le menu, puis activez-la en
appuyant sur le bouton Mode.
- Sélectionnez un mode de visualisation à contraste élevé en utilisant le bouton + pour
naviguer vers le haut ou le bouton – pour naviguer vers le bas dans le sous-menu
Couleur, puis appuyez sur le bouton Mode pour confirmer votre choix.
- Pour sélectionner une nouvelle combinaison de couleurs à contraste élevé pour
l’avant et l'arrière-plan, utilisez le bouton + pour naviguer vers le haut ou le bouton –
pour naviguer vers le bas dans la liste de combinaisons de couleurs. Sélectionnez une
combinaison de couleurs en appuyant sur le bouton Mode.
- Les modes de visualisation à contraste élevé 2, 3 et 4 peuvent être désactivés en
sélectionnant l’option Désactiver (Off).
- Appuyez sur le bouton Mode pour confirmer votre choix et pour fermer le menu.
Français Page 97
Page 100

Optelec Compact 4 HD
Menu: Configuration par défaut
Vous pouvez restaurer la configuration par défaut du Compact 4 HD. Tous les paramètres
ayant subi une modification reviendront alors à la configuration d’origine du fabricant.
- Ouvrez le menu en appuyant sur les boutons + et – simultanément pendant une
seconde.
- Utilisez le bouton + pour naviguer vers le haut et le bouton – pour naviguer vers le bas
dans le menu. Sélectionnez l’option Rétablir, puis activez-la en appuyant sur le bouton
Mode.
- Pour restaurer la configuration par défaut du fabricant, sélectionnez Oui en appuyant
sur les boutons + ou -. Pour annuler cette action et garder la configuration tel quel,
sélectionnez Non.
- Appuyez sur le bouton Mode pour confirmer votre choix et pour fermer le menu.
Français Page 98
 Loading...