

OPT Corporation NUD360-F Quick Manual
Step 5: Log-in
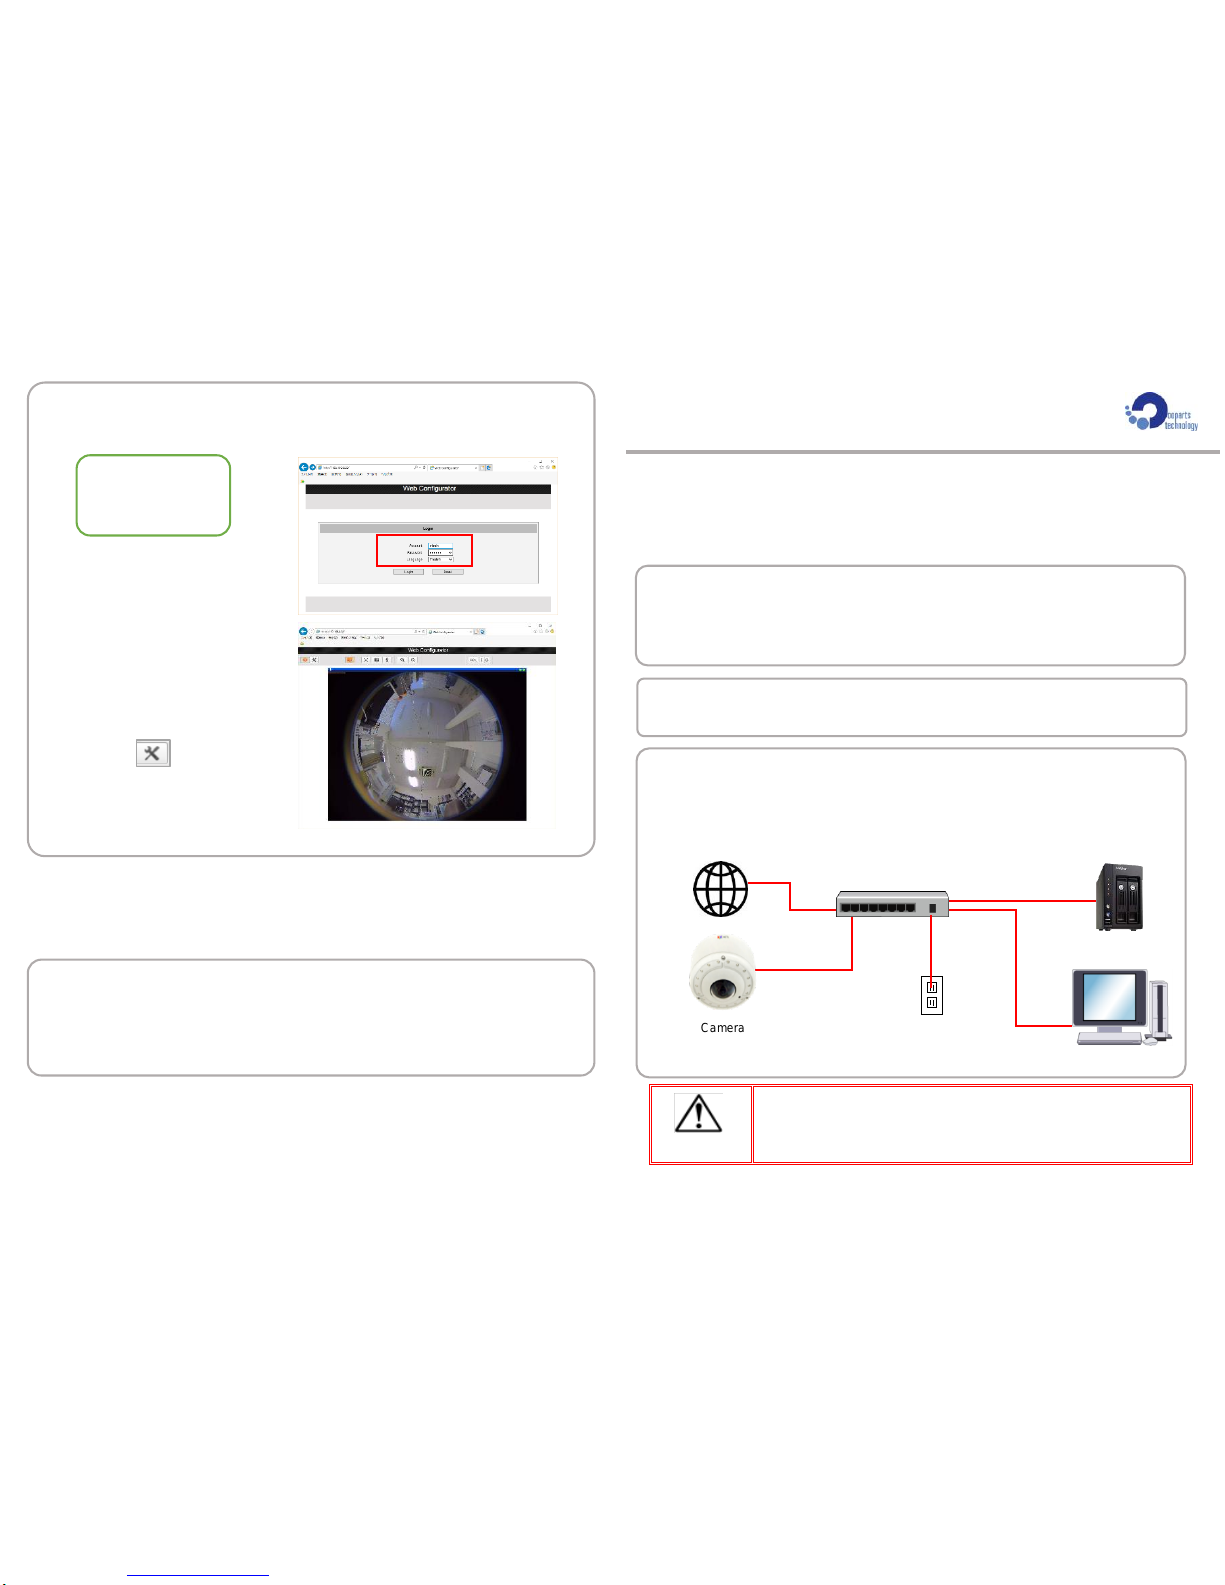
1. On the Login page, type the Account and Password.
2.Select Language, if
necessary.
3.Click Login.
The Live View screen
appears.
4.Click to access the
Setup menu to modify the
camera settings.
Important notice: As the default Account and Password are the
contents which are generally used and are something to tend to
access from outside. It's recommended not to use default ones just
as it is and to establish something peculiar.
Step 6: Live View Monitoring with dewarping
Using the exclusively designed application software “OPT360Viewer”
provided in the enclosed CD, you can monitor the live view in dewarped
patterns such as the e-PTZ, 180x2 panorama, digital auto panning, etc.
Note: As for the recording of image, please refer to the instruction manual
of recorder.
©OPT Corporation 2017.03.01 Ver.1.0
High resolution 360 degree Network Camera NUD360-F
Quick Manual
This guide contains the basic information you need to quickly setup the
Camera. For detailed information on installations or operations, please refer
to the Installation Manual, Software Manual, and IP Utility Manual in the CD
provided with the camera.
Step 1: Check the contents in the package
First of all, unpack the camera package and check if all contents are
surely contained. The contents are described in the Installation
Manual.
Step 2: Install the camera.
Following the Installation Manual, install the camera.
Step 3: Connect the devices.
Following the Installation Manual, connect all relevant devices.
The below shows a basic example of device connection.
Caution
Please read all instructions carefully and use safely.
Recorder
PoE Switch
Camera
Power outlet
PC
Internet
Default
Account: admin
Password: 123456
Step 4: Access the camera
A: On Network with DHCP Server / Router (Automatic IP)
1. Connect the camera and the PC within the same network
segment. Once connected, an IP address will be assigned to
the camera.
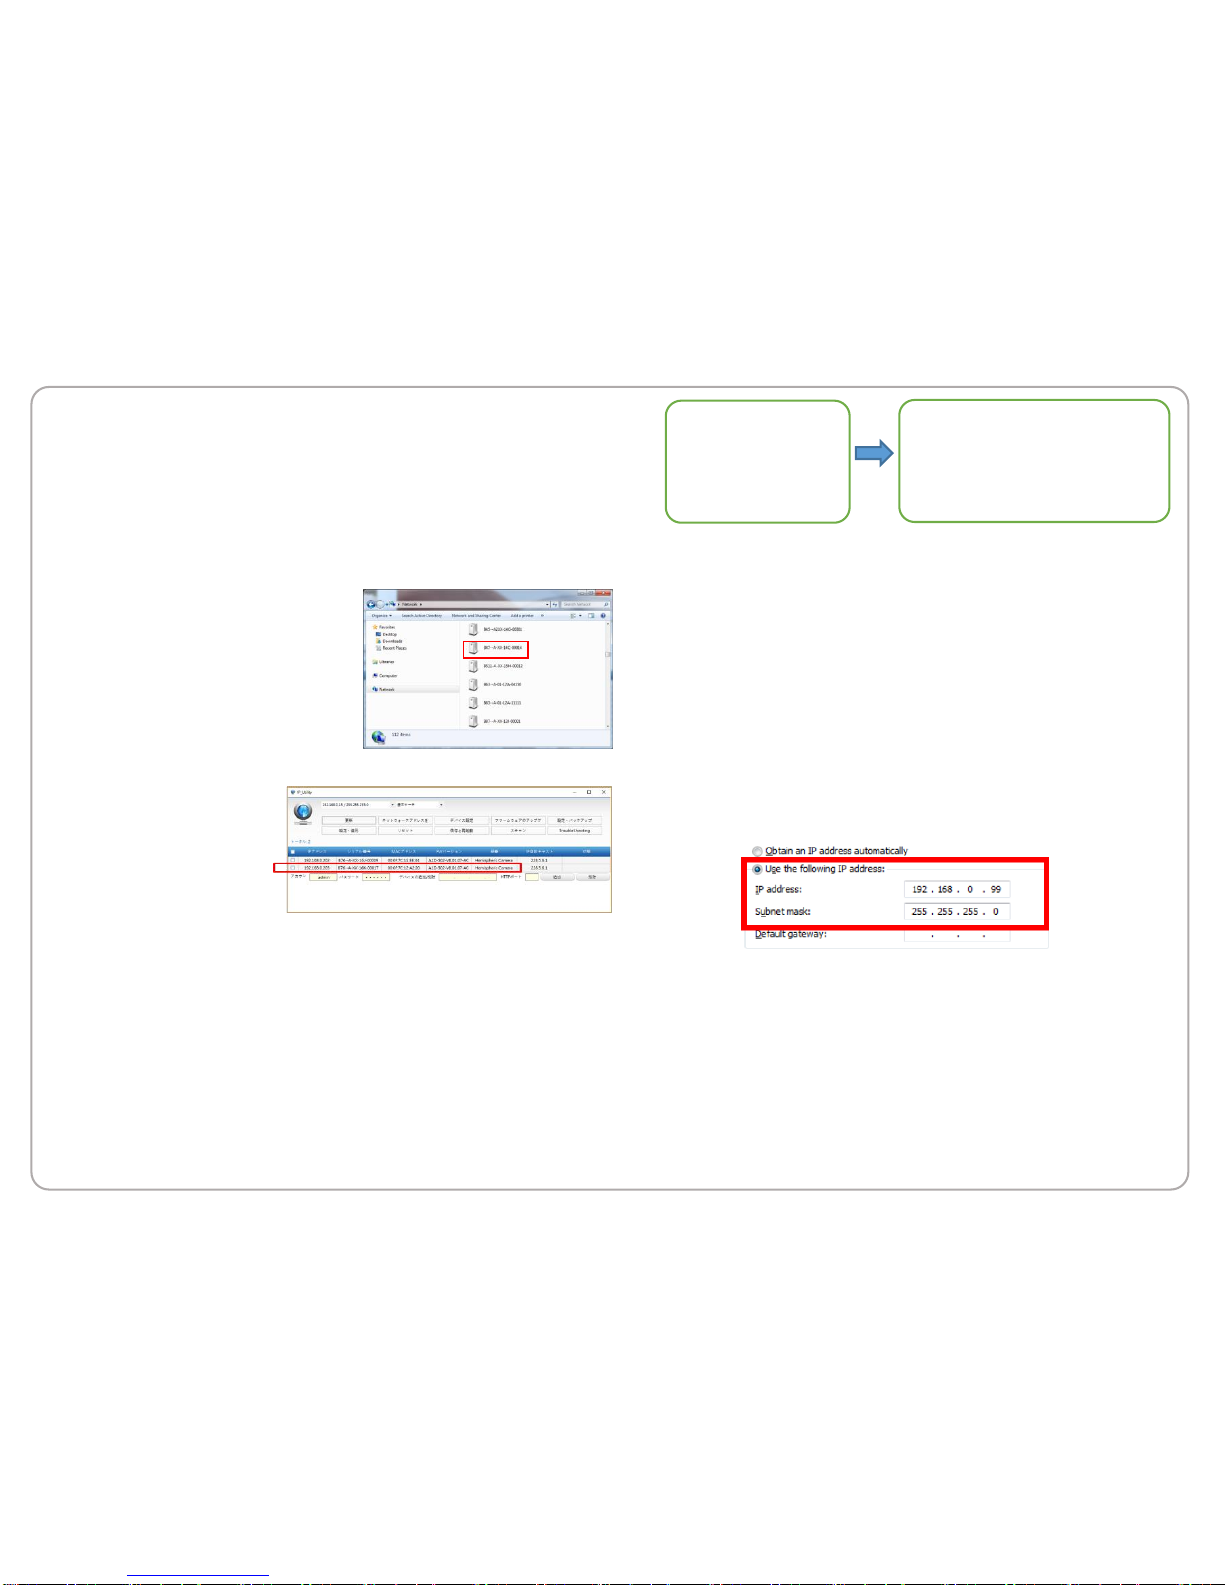
2. Find the camera via Windows Explorer or IP Utility.
By Windows Explorer
(1) Go to Start > My Computer >
Network.
(2) Double-click on the device
name.
Note: As a browser, Microsoft Internet
Explorer9.0and later is recommended.
By IP Utility
(1) Start IP Utility from
the CD provided
with the camera.
(2) Run IP Utility to
start searching for
network devices.
(3) Click the IP address of the camera intended to operate.
3. The Web Configurator appears with the IP address of the
camera on the URL bar. Login to access the camera.
B: On Network without DHCP Server (Default IP)
1. Configure the IP settings of your PC to match with the network
segment of the camera.
How to configure the PC IP address ? (in case of Windows 8.1)
1. Open Control Panel > Network and Internet > Network and
Sharing Center > Change adapter settings.
2. Local Area Connection > Properties > Internet Protocol Version 4
(TCP/IPv4) > Property.
3. In the window of Property of the Internet Protocol Version 4
(TCP/IPv4), make a check on “Use the following IP address” .
4. Input the IP address 192.168.0.99(number 1 ~ 254 unused in the
same network) and the subnet mask 225.255.255.0. Then press
[OK] button.
5. Open a web browser and type 192.168.0.100 on the URL address
bar. The Web Configurator appears. Login to access the camera.
Camera Defaults
IP Address :
192.168.0.100
Subnet :
255.255.255.0
PC can be assigned with
IP Address (different from camera)
Example: 192.168.0.99
Subnet (same with camera)
255.255.255.0
 Loading...