

OPT Corporation CFC-360F-IP User Manual
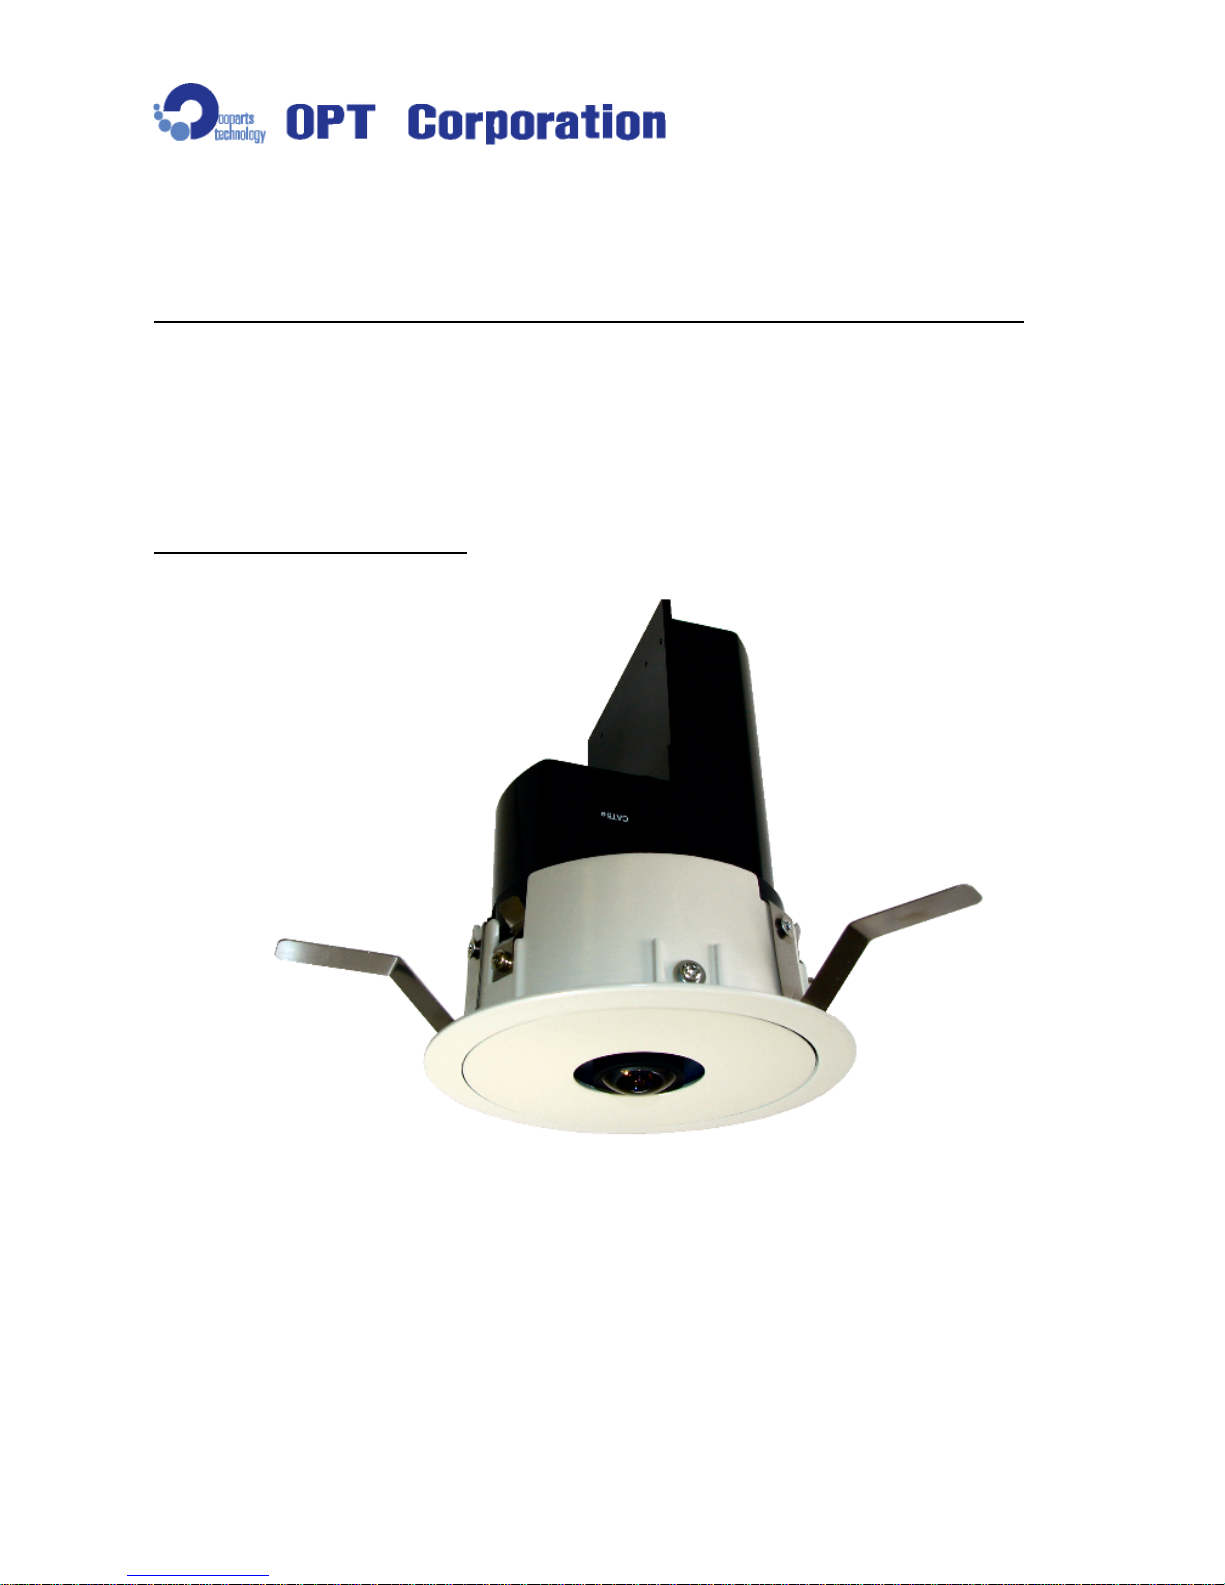
360 degree Omnidirection Network Camera
Ceiling Fit Type Model : CFC-360F-IP
User’s Manual
Thank you very much for purchasing the 360 degree omnidirection camera
CFC-360F-IP. Please read this manual carefully before using the product for
proper operation and your safety. Preserve this manual and use this when it
is necessary.
◆ The description may be modified without any notice.
V. 1.01

Contents:
1. Contents.........................................................................................................................................1
2. Operating Environment ..................................................................................................................1
3. Name of Part..................................................................................................................................2
4. Advice for Installing Camera (under Ceiling)..................................................................................3
5. Installation of Application Software ................................................................................................5
6. Connection (Initial Setting) ....................................................................................................... 7
6.1 PC IP Address Setting ............................................................................................................7
6.2 Connection ............................................................................................................................10
6.3 Setting of the “DDIPS Viewer”...............................................................................................11
7. Connection (Personal Setting) .....................................................................................................14
7.1 Change of the setting value for camera ................................................................................14
7.2 Connection ............................................................................................................................16
7.3 Setting of the DDIPS Viewer .................................................................................................16
8. Connections (connect to the multiple number of cameras).......................................................... 17
8.1 Registration the camera to the DDIPS Viewer ......................................................................17
8.2 Connection to the newly registered camera..........................................................................18
8.3 Switch the Cameras ..............................................................................................................19
9. About the Software ......................................................................................................................20
9.1 DDIPS Admin ........................................................................................................................20
9.1.1 Access by “Direct connect”.............................................................................................20
9.1.2 Access by “Auto Search Connect...................................................................................21
9.1.3 Admin Tool .....................................................................................................................22
9.2 DDIPS Viewer .......................................................................................................................25
9.2.1 Main Screen ...................................................................................................................25
9.2.2 Screen Setting................................................................................................................25
9.2.3 Date................................................................................................................................26
9.2.4 Network ..........................................................................................................................26
9.2.5 Camera Control Panel.................................................................................................... 27
About saving of the set value: .........................................................................................................27
About the Switching the camera mode............................................................................................28
9.2.6 Main Operation Button ...................................................................................................29
Select the Camera to connect
.........................................................................................................30
9.3 DDIPS Player ........................................................................................................................32
10. Product Specification................................................................................................................34
11. Appearance ..............................................................................................................................35

For Safety Use – Warning
Please read this manual carefully before using the product for proper operation.
The followings are very important notices for the safety use of the product. Make sure to
follow the instructions described here.
This product is a general operating-oriented product and not designed to treat people's
life, property, and etc… Please understand beforehand that our company cannot take any
responsibility for all losses that occurred as a result of using this product.
Neglecting the instruction may cause death or
serious injury.
• If smoke or nasty smell is observed from the unit, unplug LAN (PoE) Cable immediately.
Otherwise it may cause electric shock or fire.
• Do not let water or foreign items in the unit. If it happens, unplug LAN (PoE) Cable immediately.
Otherwise it may cause fire or electric shock.
• Do not damage the product and cables. Otherwise it would cause fire or electric shock.
- Do not modify or and repair the product and cables.
- Do not place heavy items on or drag LAN Cable.
- Do not heat LAN Cable as placing near thermal appliances.
• When LAN (PoE) Cable is damaged, or the plug is loose, do not use it.
Otherwise it may cause electric shock, short circuit, or fire.
• Make sure to plug firmly. Otherwise it may cause fire or electric shock.
• When installing the product, make sure to fix the product to the firm wall or ceiling.
Otherwise it may fall and cause injury.
• Do not disassemble or modify the unit. Otherwise it would cause fire, electric shock or malfunction
!
Warning

For Safety Use – Caution & Remarks
Neglecting the instruction may cause risks of
injury or property damages.
• Installation or wiring of the product must be done with the power off. Otherwise it may cause fire,
electric shock, or injury.
• Don’t use the product under the circumstance beyond the product specified range.
• Don’t use the product near the device to generate the electric noise.
• Don’t allow any foreign matters or fingers come into the LAN socket or other interface part to
external devices. Otherwise it may cause electric shock or injury.
• Don’t use the product at the circumstances of relatively low temperature or of large temperature
difference, where dew condensation tends to generate.
• When dew condensation occurs, disconnect the PoE LAN cable from the product and dry the
product or accustom it to the room temperature sufficiently before using the product.
• Don’t block the product with other items from the easiness for the maintenance and the heat
radiation purpose.
• Make sure all connectors firmly connect.
• Avoid using the product at the place of frequent vibration or physical shock
• Use the Ethernet cable of Caf5e and more for the communication cable.
• Without any notice, the product might be improved or changed in parts or design.
• If the camera lens becomes dusty or oily, the image may be garbled. Use a soft close with the lens
cleaner to wipe the dust or oil off.
!
Caution
Other Remarks
Note:
This System may malfunction when the voltage deterioration or electric waves radiated by the other
devices. Please note that the resolution of videos and captured images, including the case of dark
photogenic objects or surrounding environment, are not guaranteed.
This is a product to be used by connecting with the network. There is a possibility that the best
performance of the description in the product catalog etc cannot be achieved in accordance with the
network environment or the interface device.
1
1. Contents
(1) Camera (CFC-360F-IP) : 1 pc
(2) Application CD : 1 pc
2. Operating Environment
OS: Windows XP SP1 and later, Windows Vista, Windows 7
PC: The environment for proper functioning for the above OS and the below listed hardware
specification. .
Note: If the above requirements are not satisfied or other application is activated at the same
moment, the performance may be deteriorated.
CPU Intel PentiumⅢ 1GHz and more
RAM 512 MB and more
Hard disk
20 MB and more of empty capacity
(for recording the images, more empty capacity is
separately necessary.)
Display 32 bit color and more
Resolution 1,024×768 and more
CD-ROM Drive (need to install the application software)
LAN RJ45 (CAT category 5 and more)
others Internet connectable environment
(need for the remote control)
D・DIPS
2
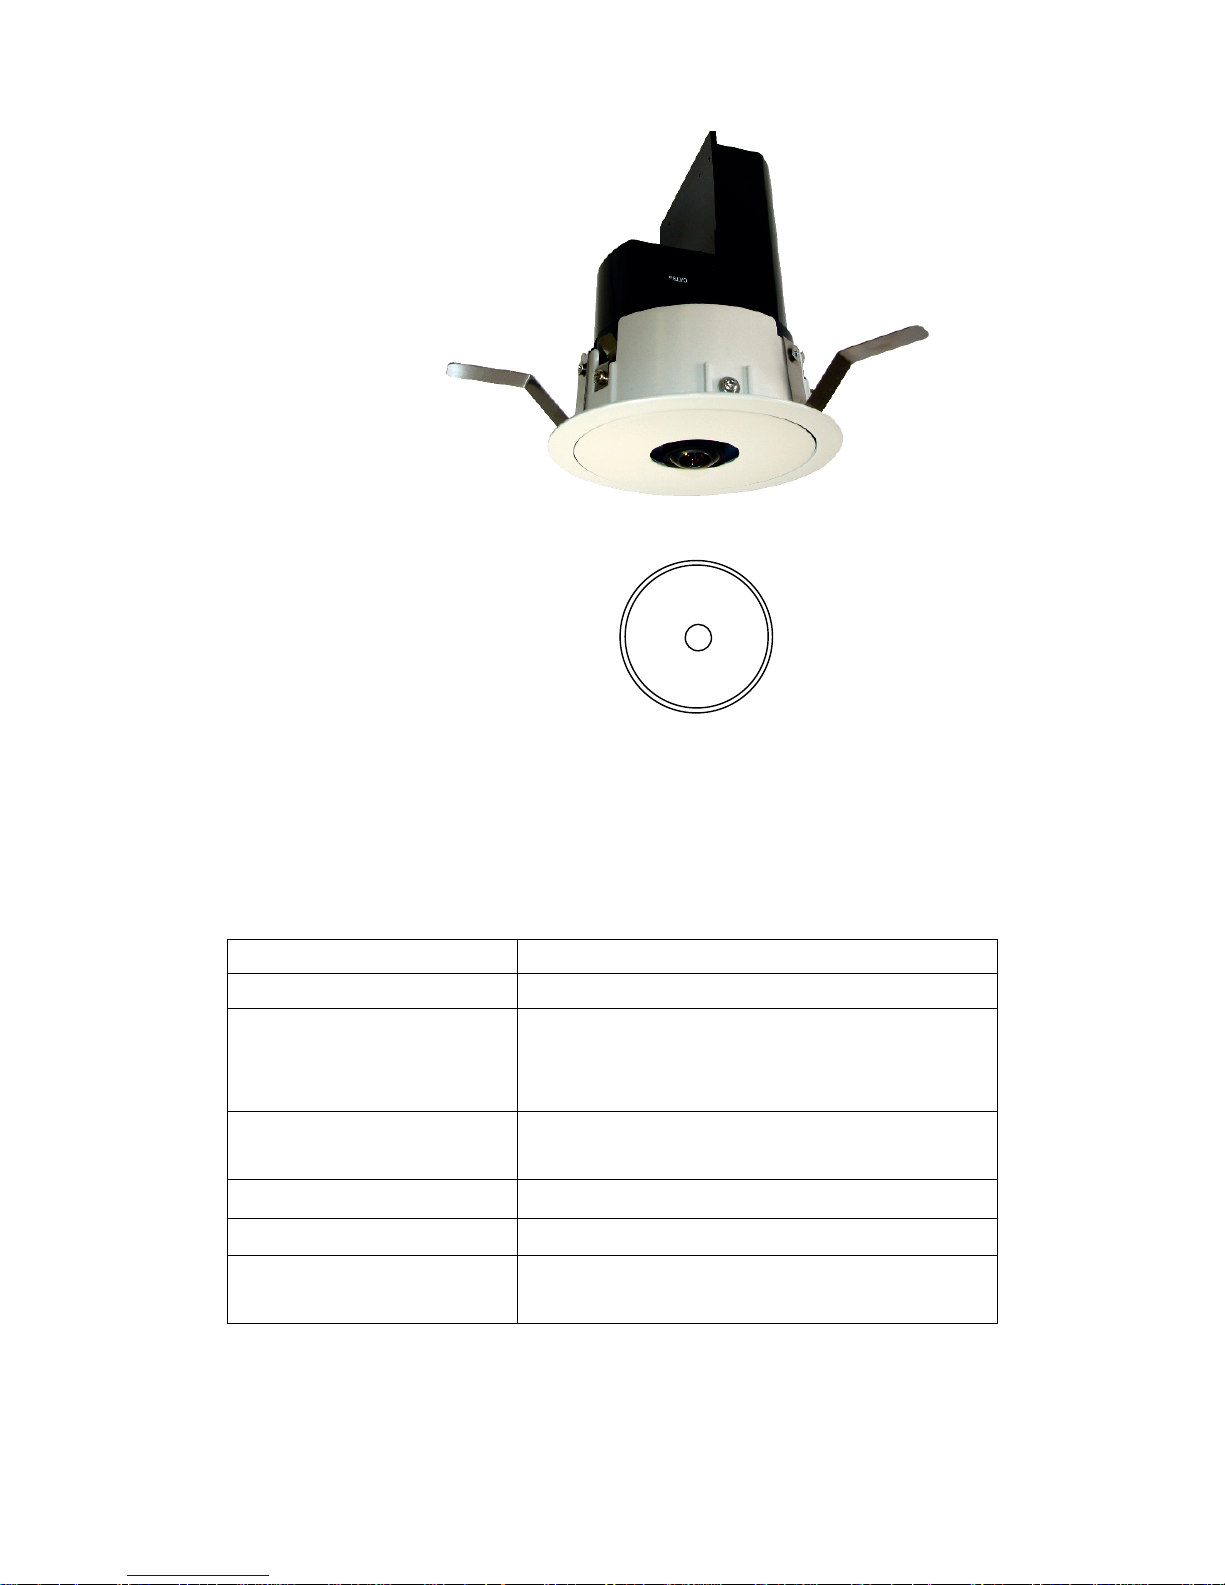
3. Name of Part
Name of Part
① Camera body
② Network Connector (PoE)
③ Blade Spring (3 directions)
②
①
③
③
3
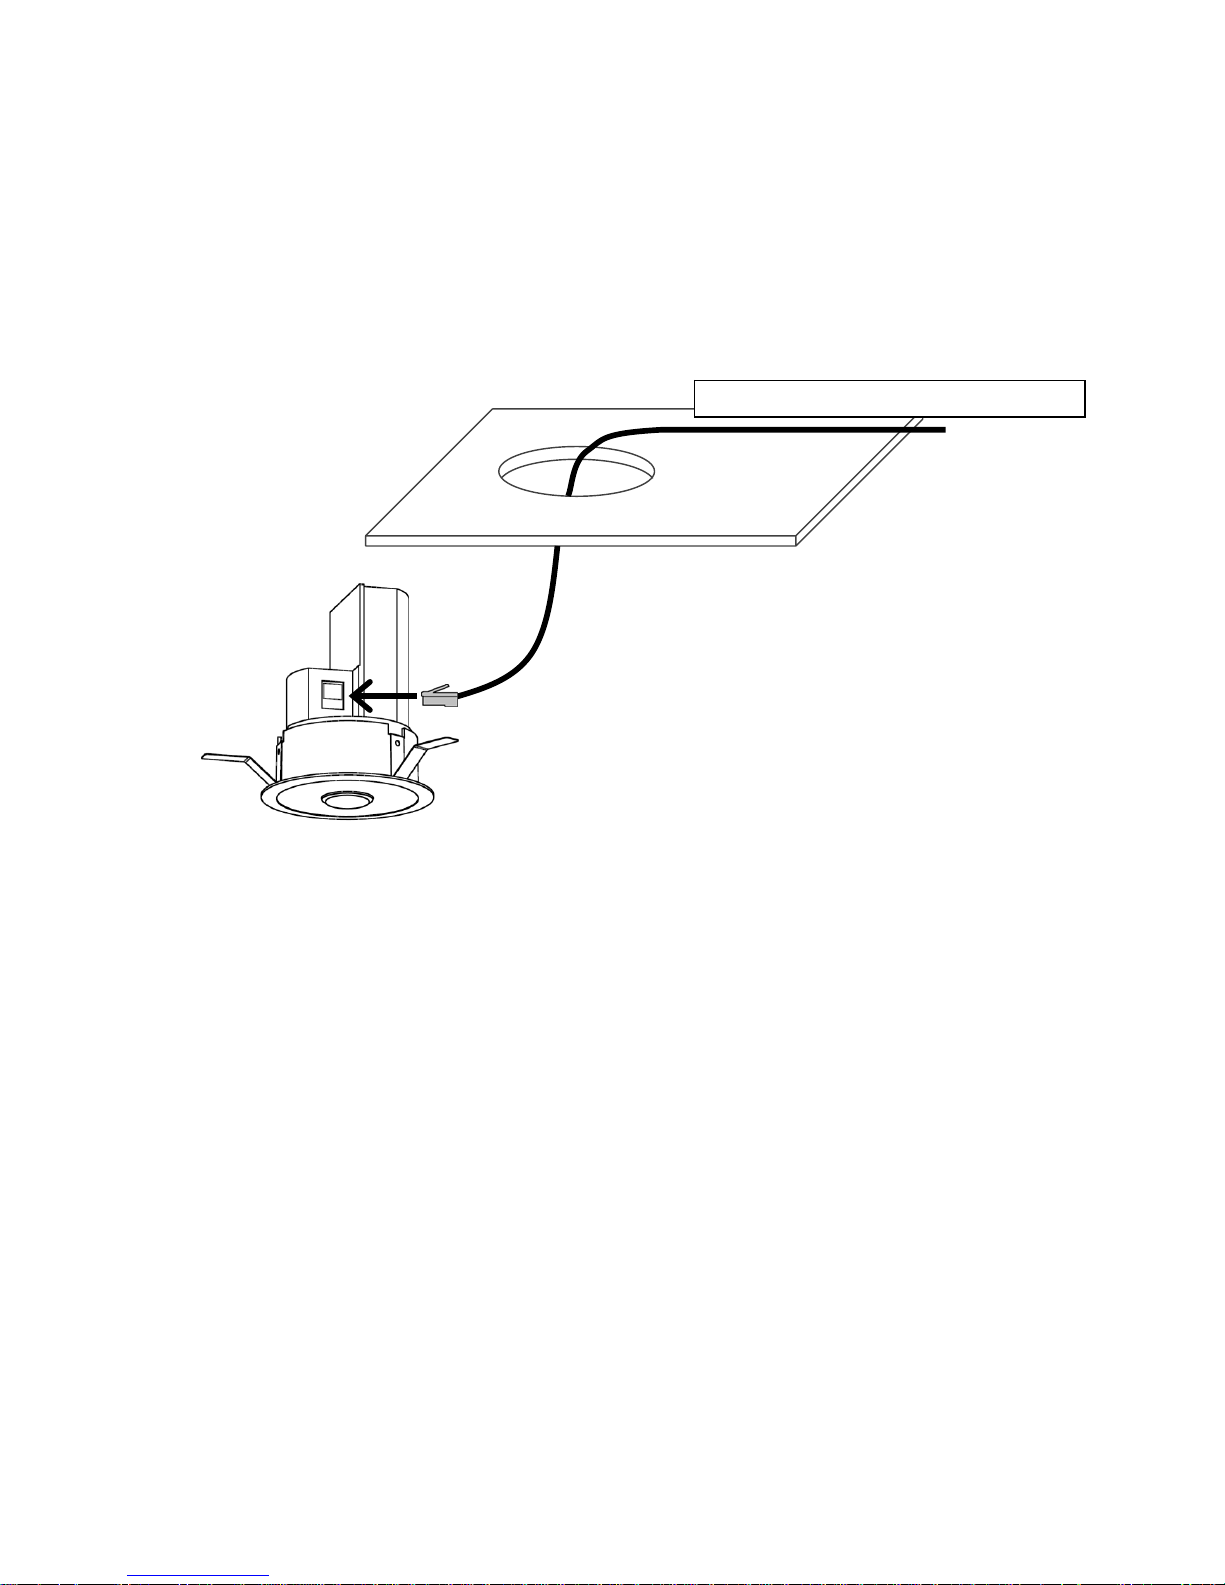
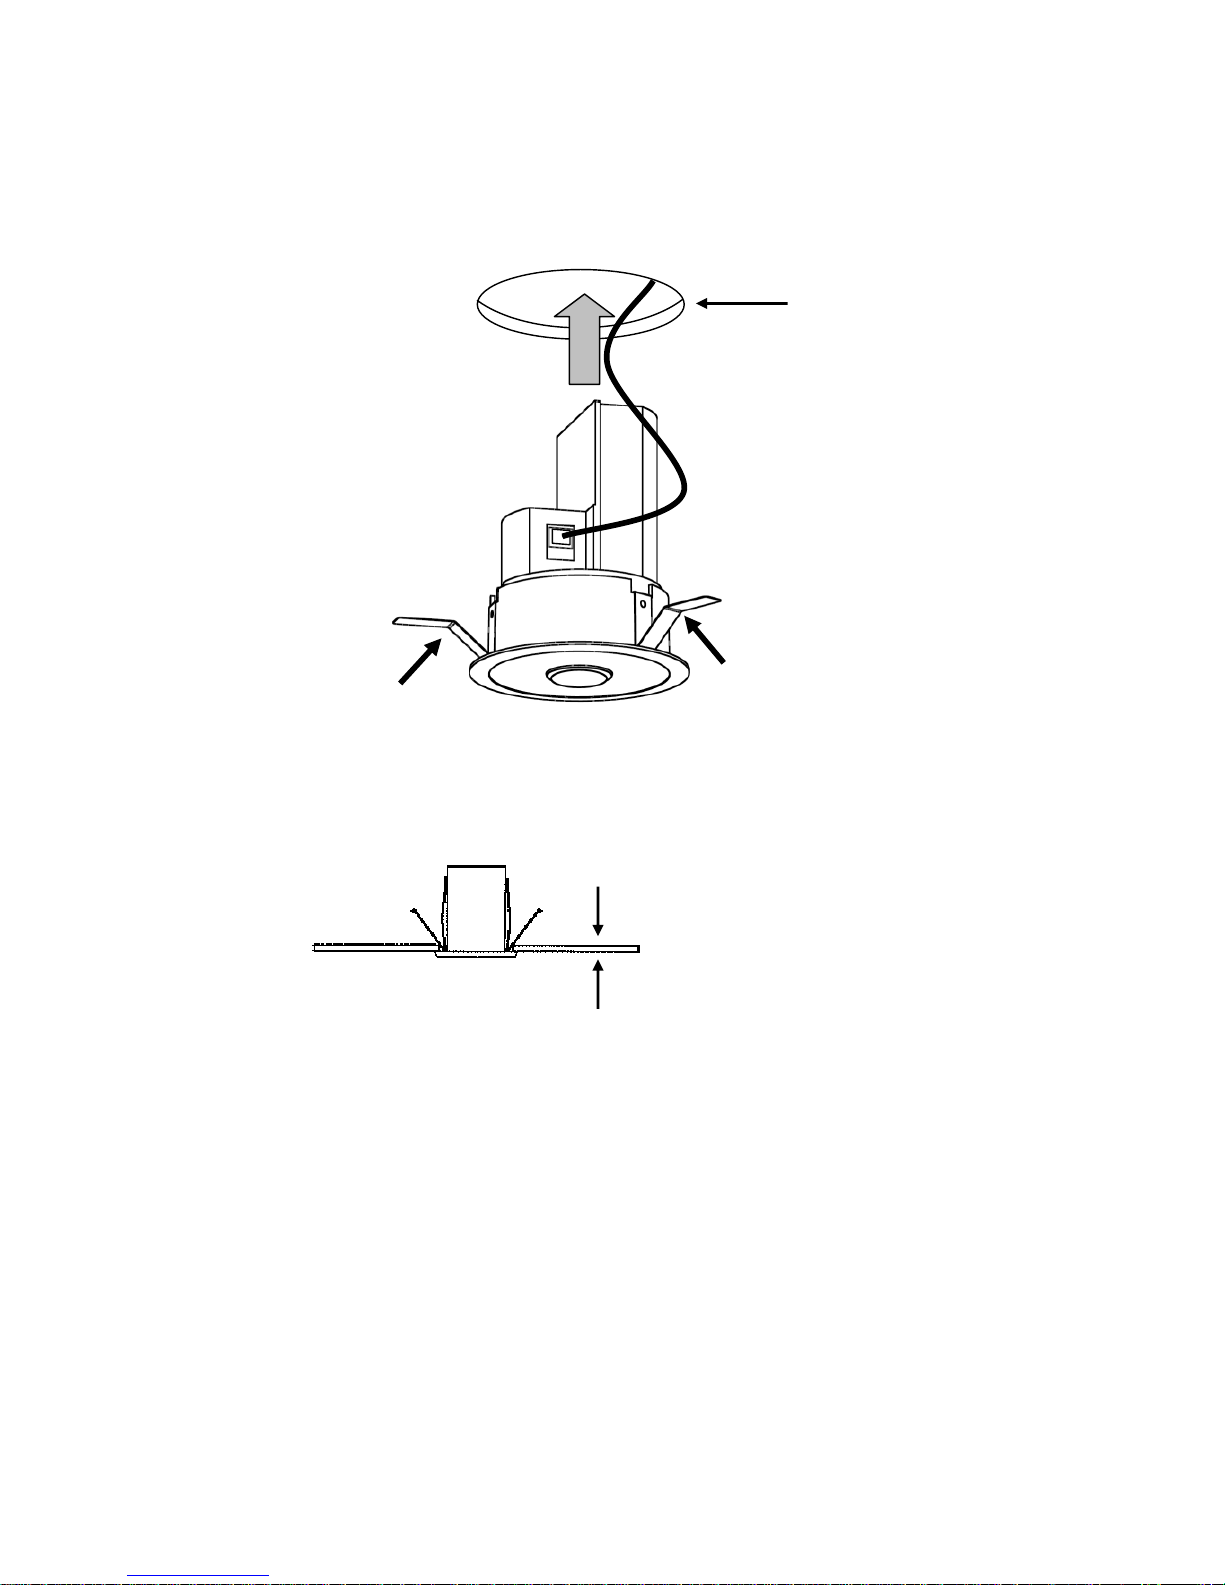
4. Advice for Installing Camera (under Ceiling)
(1) Drill a through hole of φ100 mm at the suitable place of ceiling to install the camera.
(2) Line a LAN cable come through the hole.
(3) Connect the LAN cable to the Network Connector (②) of the camera.
Note 1: If excessive load is applied on the connection of Cable to the product, the power line may be
disconnected. It is recommended to fix the connection firmly by taping.
Note 2: Line the LAN cable with sufficient length.
→ connect to PoE supported HUB
4
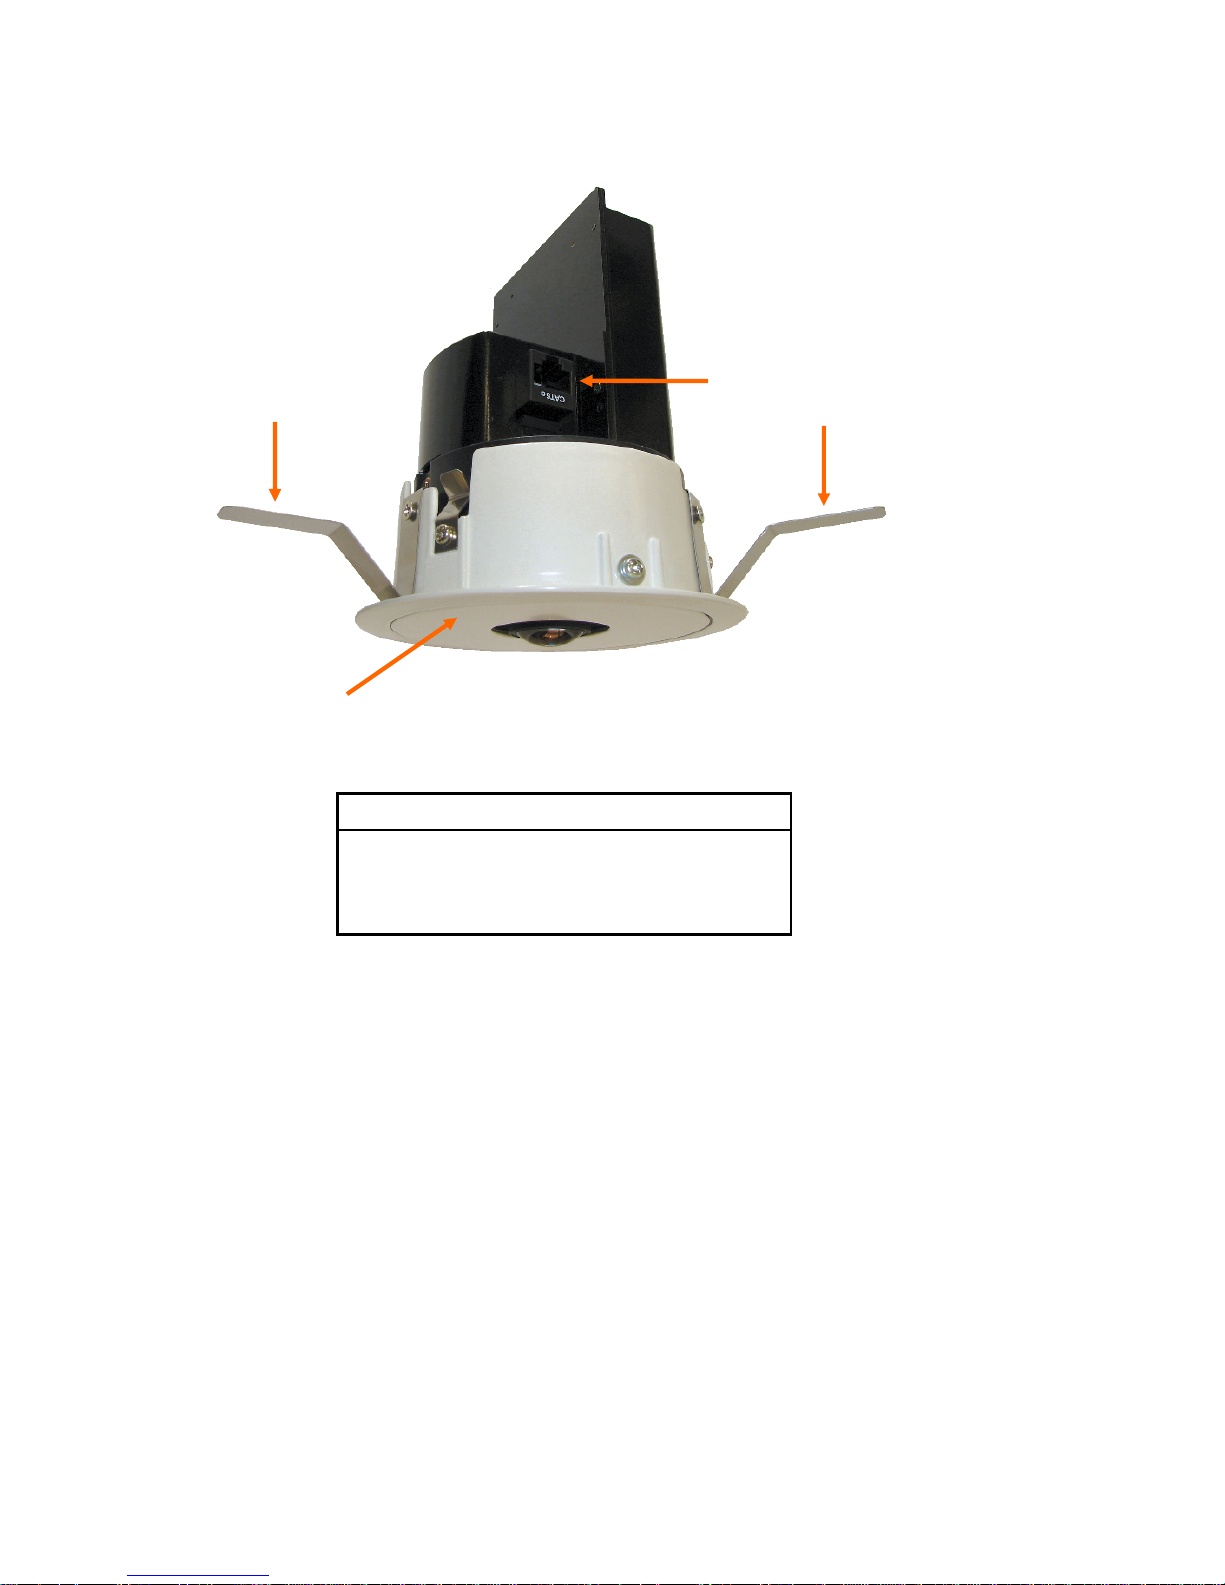
(4) Insert the camera into the hole with pushing three Blade Springs (③) toward the camera
body.
Note 1: Applicable thickness of the ceiling board is 5~25 mm. Any soft material such as the rock
wool is not acceptable.
Note 2: Although the pressure of the Blade Springs is powerful, push them until they touch to the
camera body. However in that case, please be careful not to injury your fingers and hand.
Applicable thickness of the
ceiling board is 5~25 mm
φ100 mm
Push three Blade Springs
toward the camera body.
Push three Blade Springs
toward the camera body.
5
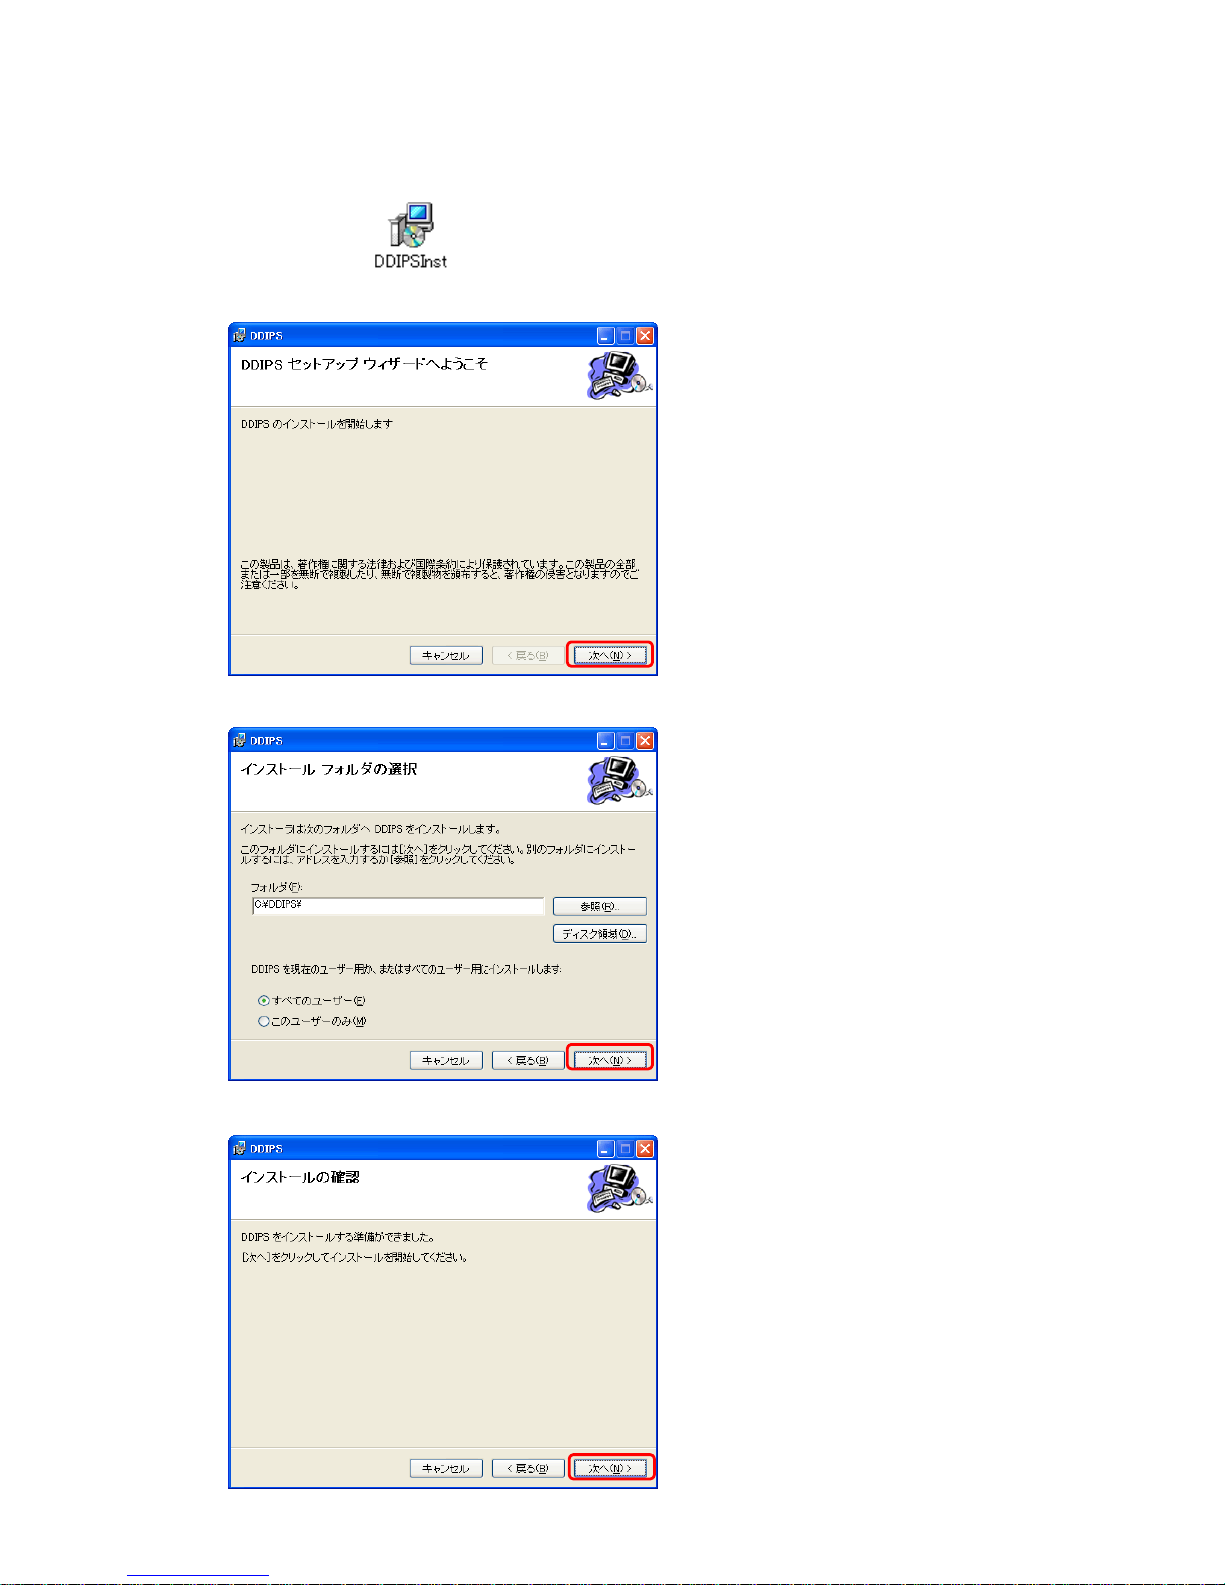
5. Installation of Application Software
① Execute “DDIPSInst” in the enclosed CD.
② The following window will open. Click 「次へ」.
③ The following window will open. Assign a folder to install the file, and then click 「次へ」.
④ Click 「次へ」 at the following window.
6
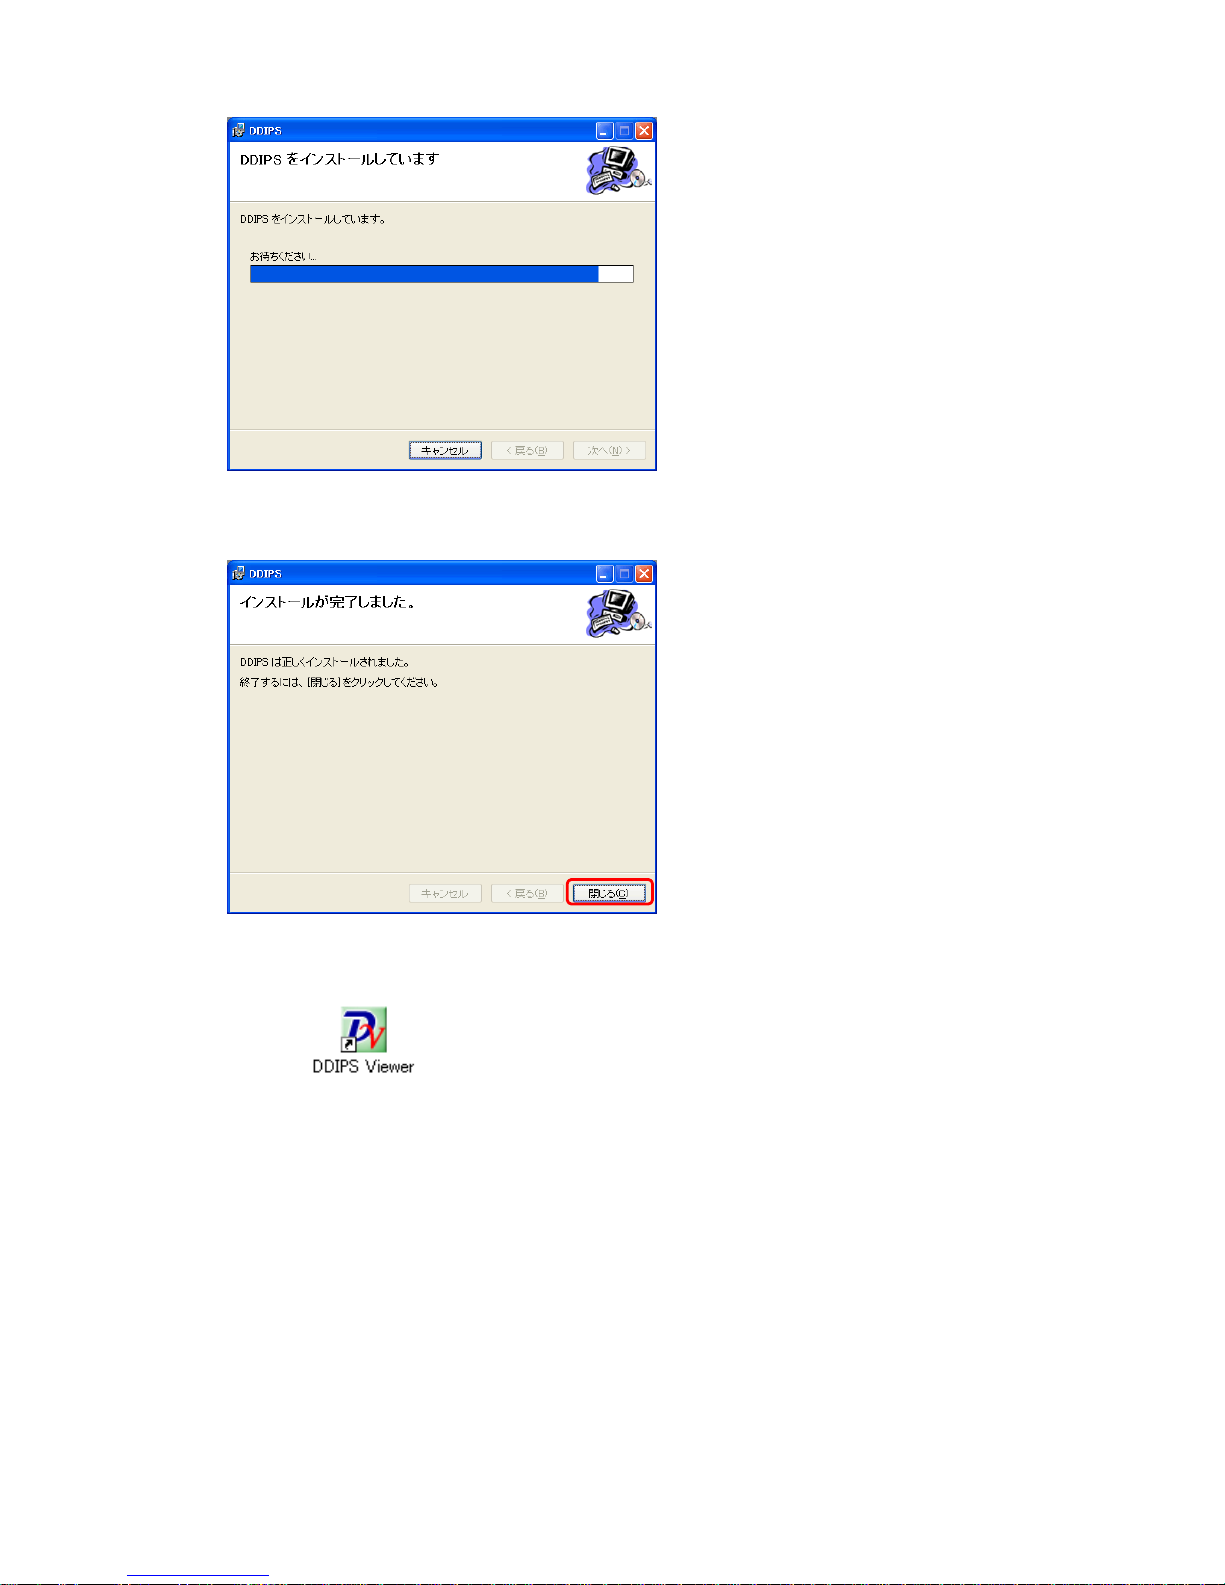
⑤ Installation is executed.
⑥ When the following window is indicated, the installation is completed.
Click 「閉じる」 to end up the process.
The below icon will appear on the display.
7
6. Connection (Initial Setting)
The setting process explained here indicates how to connect the Camera to your PC 1:1 directly with
keeping the IP address of camera as the default setting.
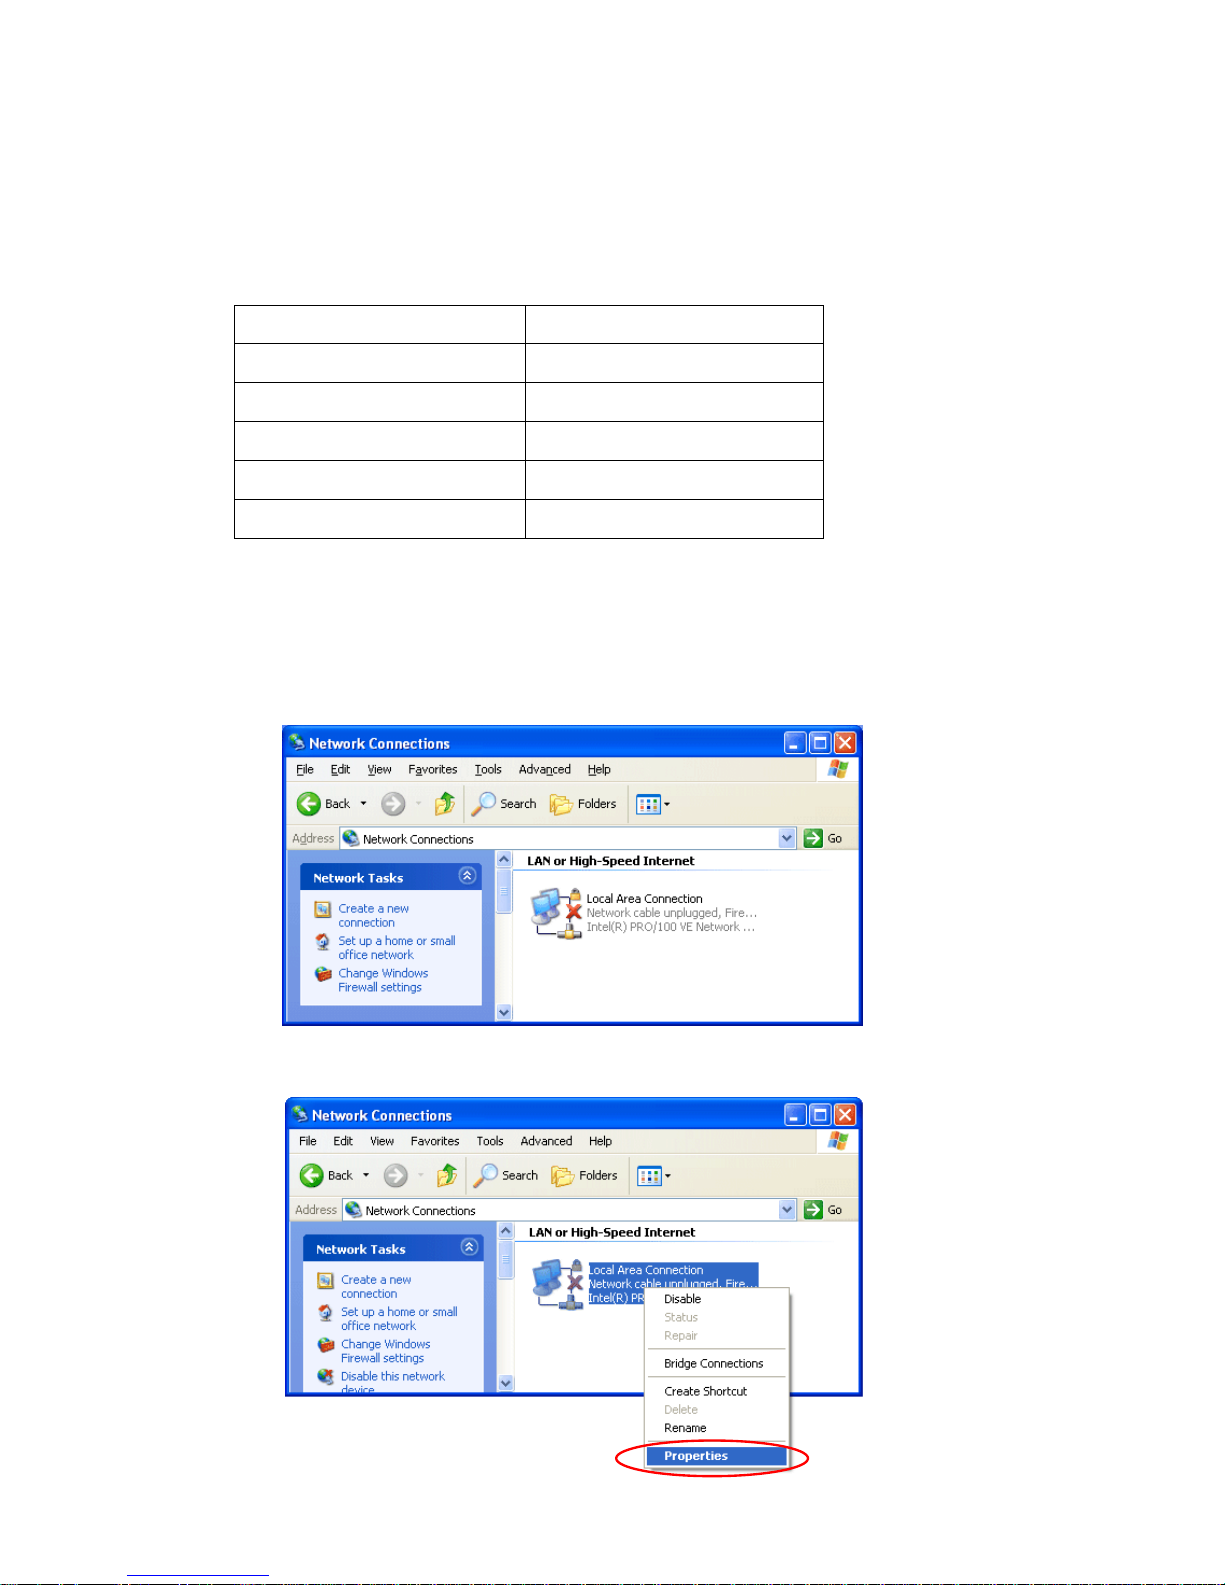
6.1 PC IP Address Setting
The default value for the IP address of the camera is the following:
(1) If a LAN cable is connected to your PC, first disconnect it.
(2) At the Windows menu, select “Start” -> “Control Panel” -> “Network Connections” and
activate the network connection.
(3) Right-click “Local Area Connection” and click “Properties”.
IP address 192.168.1.100
Sub net mask 255.255.255.0
Default gateway
192.168.1.1
Port to use 7501~7505
Admin ID root
Admin Password root
8
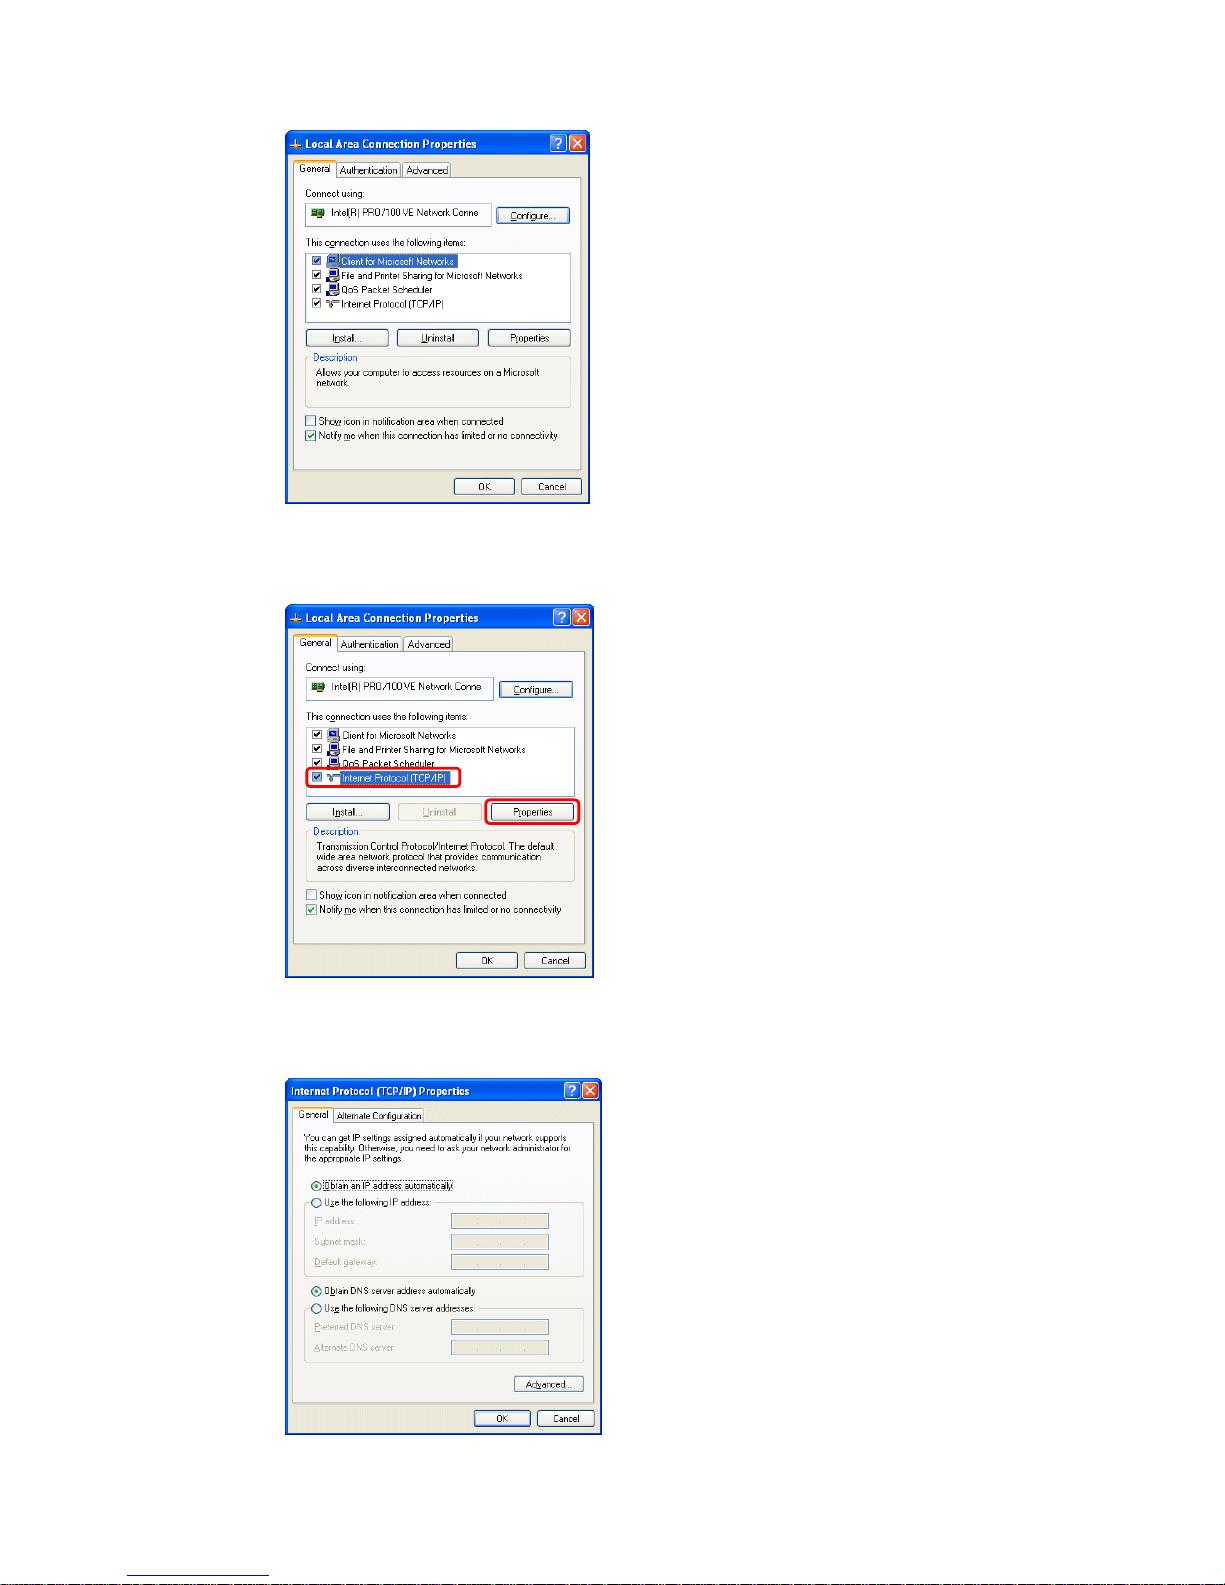
(4) “Local Area Connection Properties” is indicated.
(5) Select “ Internet protocol (TCP/IP)” and click “Properties”
(6) “Internet Protocol (TCP/IP) Properties” is indicated.
 Loading...