

Page 1
QUANTUM ROCK LIGHTS
INSTALL GUIDE
SPECIFICATIONS
8A
Watts
Amp Draw
8 LEDs
Raw Lumens
Voltage
Waterproof IP Grade
Operating Temperature
96W
Quad-Core CREE
3,600 (All 4 Pods Combined)
10-30V
IP67
65-120F
v3.3 (05.18.18)
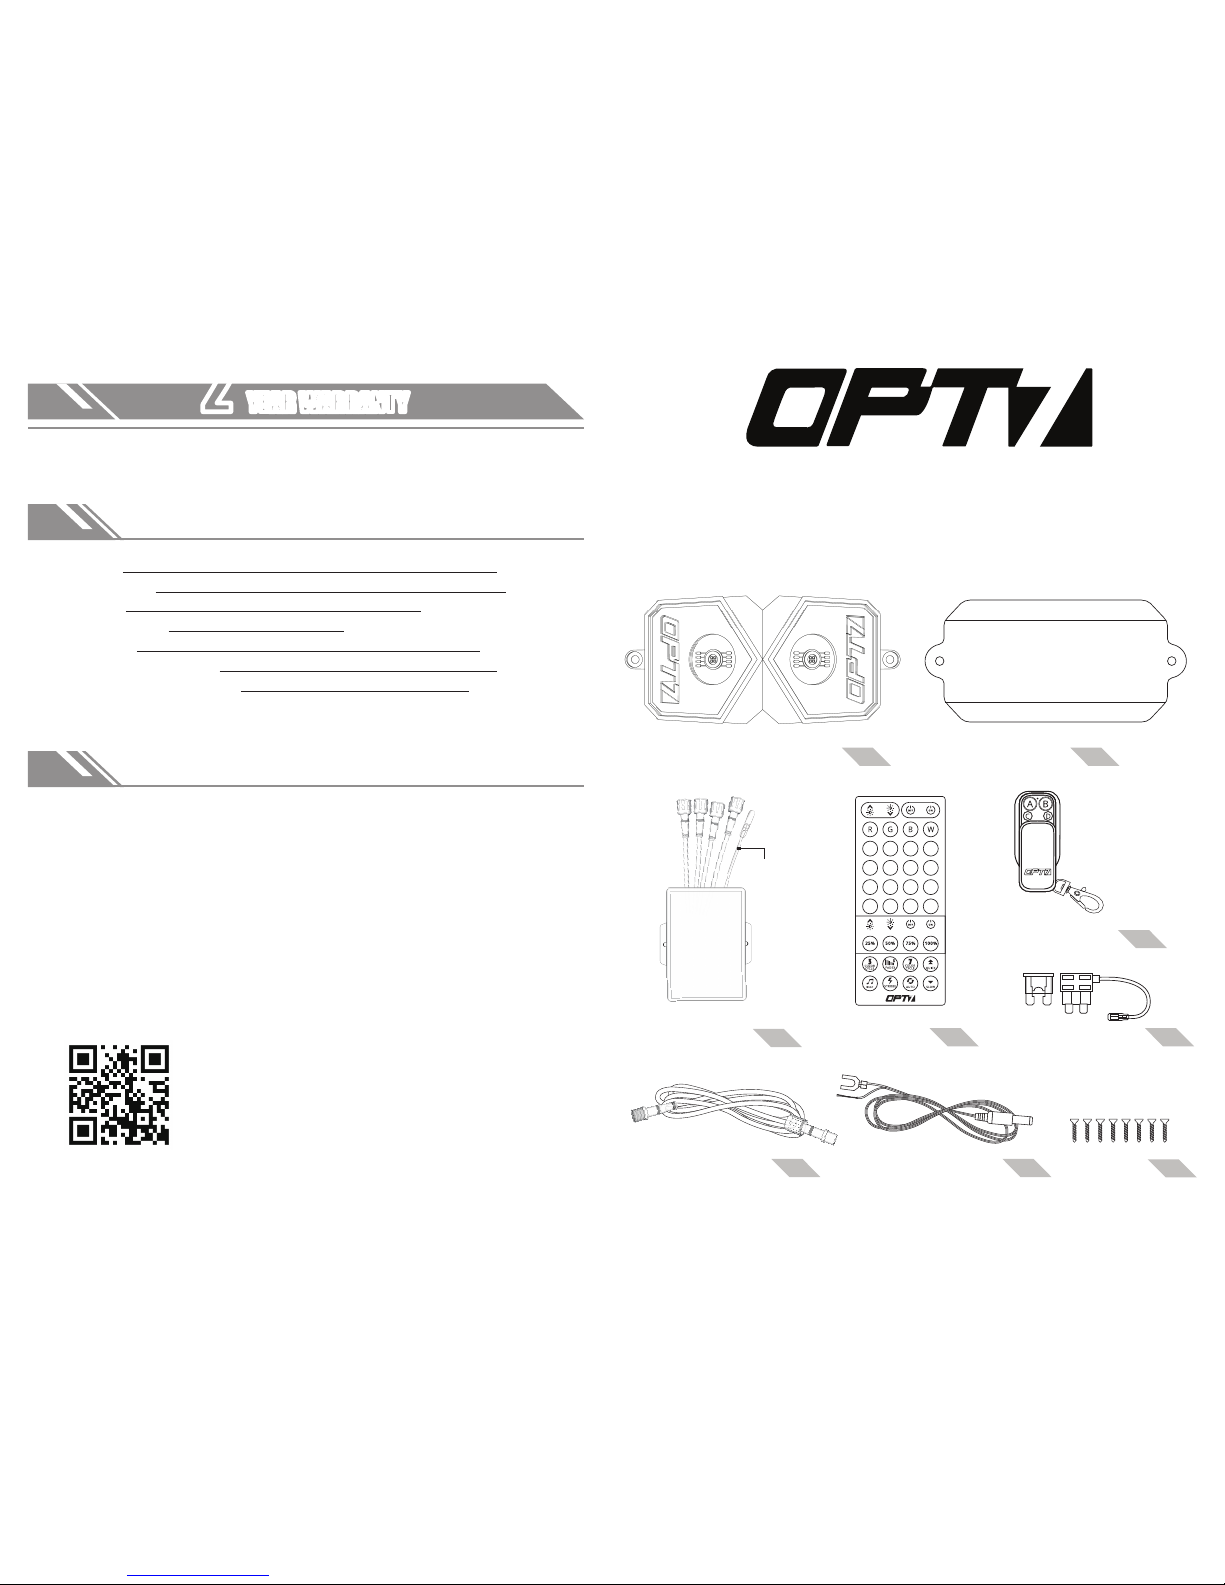
10ft Extension Cables
x4
Fuse Tap
(3 different sizes)
x1
Metal Screws
x8
12V Constant Power Wire
x1
Quantum Rock Light Pods
x4 Rubber Pads x4
14
Control Box with
Accessory Wire
x1
Full-Size Remote
x1
Keychain Remote
x1
12V
Accessory
Wire
OPT7 Lighting is not liable for damages, injuries, or death while
installing this product.
The Installation Guide is intended as assistance to reduce setup
time. OPT7 Lighting assumes no responsibility for improper
installation.
If you are unfamiliar with your vehicle or inexperienced with
aftermarket upgrades, please seek professional assistance.
NEED HELP?
Scan for tutorial videos, troubleshooting tips,
and more.
DISCLAIMER
YEAR WARRANTYYEAR WARRANTY
222
Page 2
FULL-SIZE REMOTE CONTROL BUTTON LAYOUT
INSTALLATION STEPS
Designate your mounting locations for each Rock Light Pod
and the control box. (Refer to page 3 for recommended
mounting locations)
Avoid hot surfaces and/or moving parts.
Use a pen to mark the holes where you want to mount the
Rock Light Pods. Then, drill a 5/32” hole(s) for the wire
connector to pass through.
Drill a 7/64” hole for each marked hole.
Secure the Rock Light Pods using the included screws. (If
mounting on a rounded or uneven surface, utilize the
optional rubber mounting pads.)
Caution: Rock Light Pods become extremely hot during
use - keep away from any vehicle parts that may be damaged by exposure to high temperatures.
Connect all Rock Light Pod lines to the control box connectors. Secure by twisting.
Connect the red positive line from the control box either
directly to the vehicle battery or by using an open fuse tap.
Ground the negative wire from the control box by connecting it to an unpainted area on your vehicle's frame.
Using a fuse tap, connect the 12V accessory wire from the
control box to a power source that turns on ONLY when
the key is turned to the ACC/ON (second) position.
Common power sources are the vehicle's radio or cigarette
lighter.
The kit will not function without this connection.
1.
2.
3.
4.
5.
6.
7.
8.
WHERE TO INSTALL
FRONT
REAR
FRONT
REAR
TOOLS REQUIRED
32
5/32-inch Drill Bit
7/64-inch Drill Bit
Phillips Head Screwdriver
•
•
•
RECOMMENDED LOCATIONS FOR ROCK LIGHT PODS
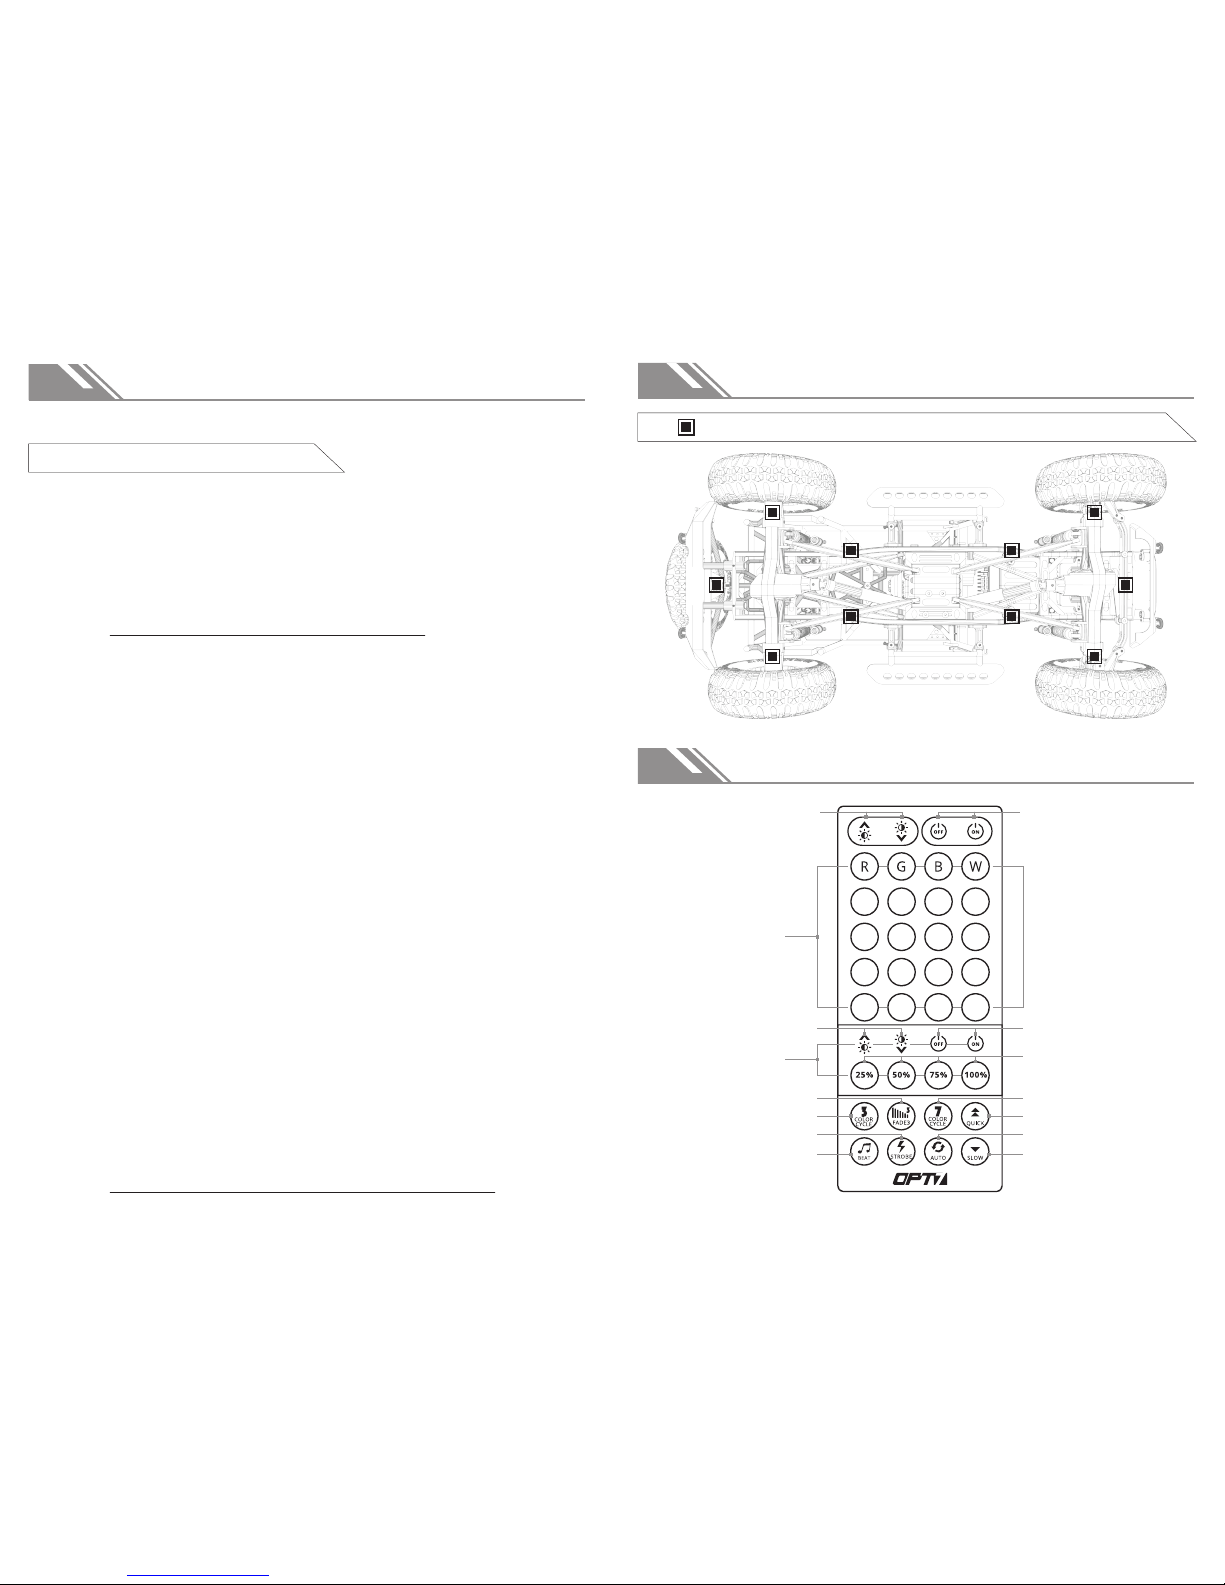
Brightness Up/Down
(RGB)
Colors
Brightness Up/Down
True White
3-Color Cycle
Sound Sync
(Pulses to the beat
of your music)
Color Fade
Color Strobe
Power Off/On
(RGB)
25%/50%/75%/100%
Brightness
Power Off/On
7-Color Cycle
DEMO Mode
Speed Up
Speed Down
 Loading...