

Page 1
For Enclosed Dust Covers
Plug Does Not Fit
Disconnect the plug adapter from the vehicle power harness
Flip the plug adapter 180° and re-connect.
For H11, you will need to file down the plastic tab located between the prongs in order to
re-connect flipped.
Neither Side Turns On
Visit our knowledge base for further assistance.
https:// goo.gl/QT9yC7 (URL is case- sensitive)
One Side Does Not Work
QUICK START GUIDE
flip 180 degrees
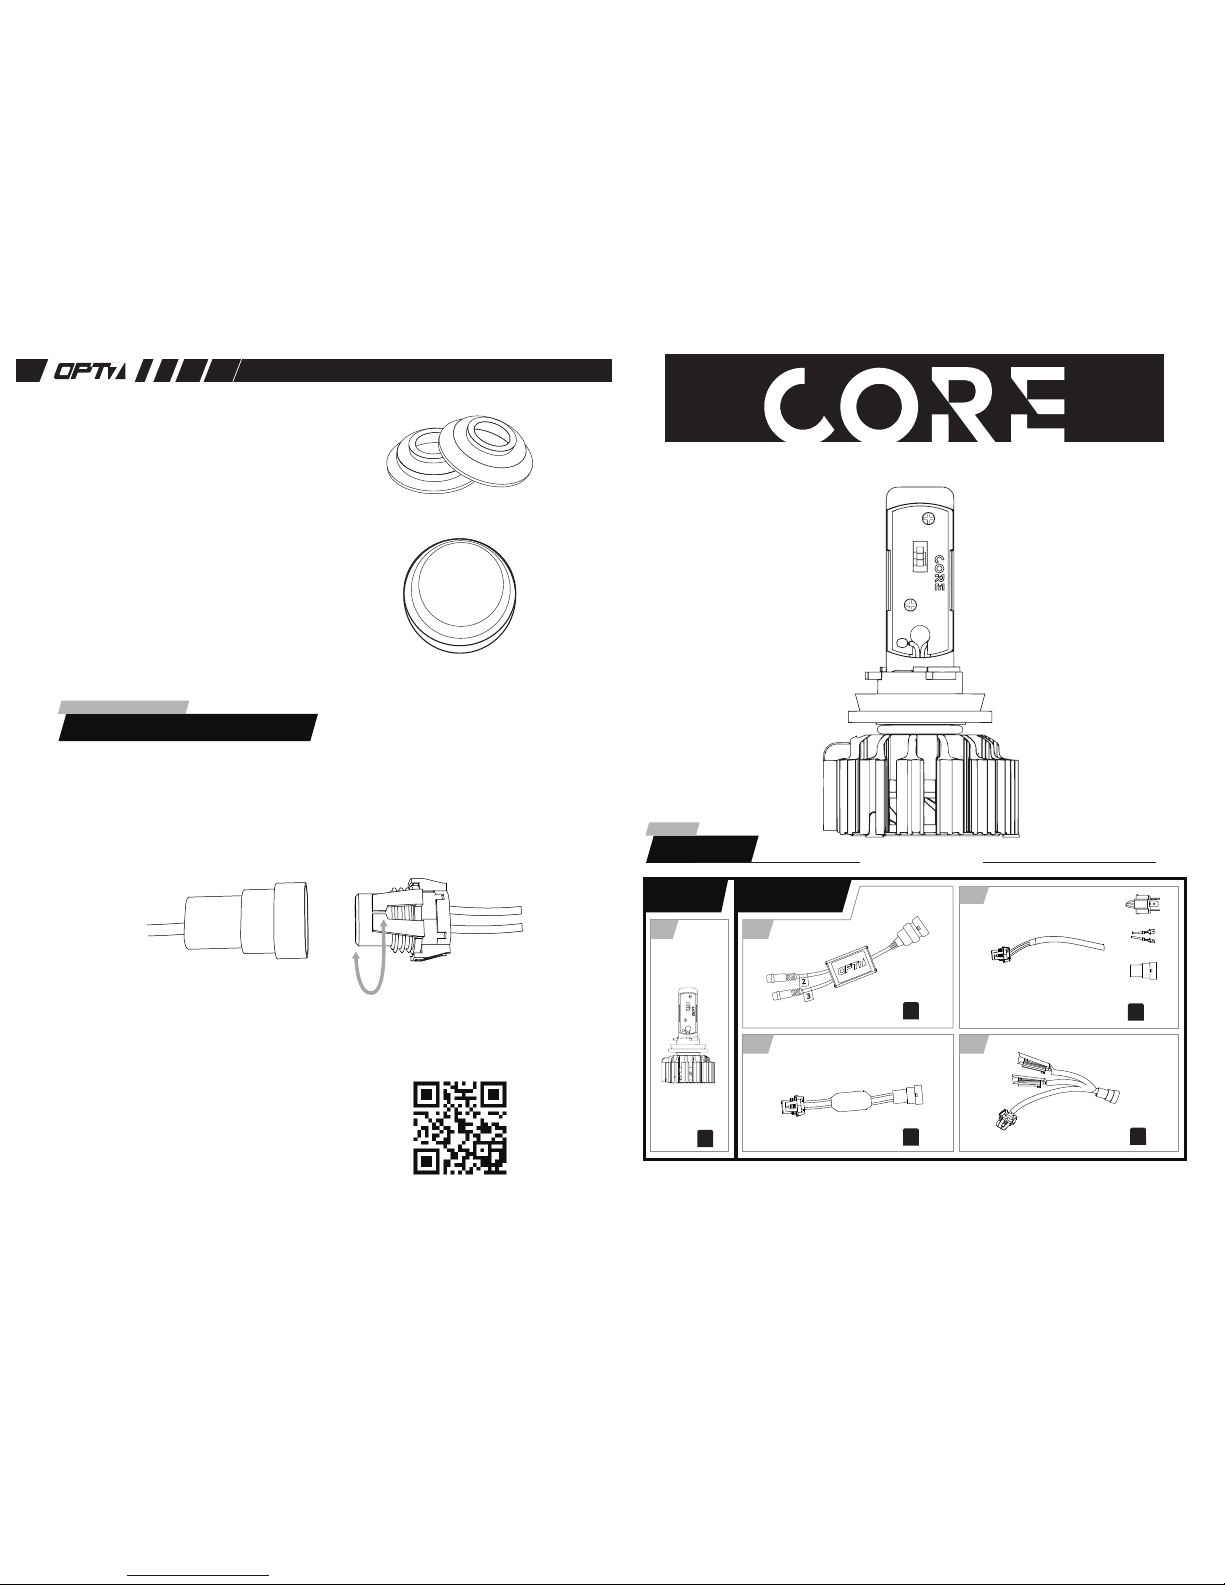
PACKAGE
CONTENTS
TROUBLESHOOTING
Pre-Drilled Cover
Enclosed Dust Cover
x2
LED Bulb
x2
Required Bulb Plug Adapters
x2
LED Driver
x2
Capacitors
(Not included w/ H4, H13, 9004, 9007)
x2
IF PURCHASED SEPARATELY:
50w TIPM Resistors- for most
07+ Chrysler, Dodge Jeep models
Legal Disclaimer:
TIPM WARNING:
Install at your own risk. OPT7 and its affiliates are not liable for any damages, costs,
or injury as a result of install or use.
ALL KITS INCLUDE
H1, H3, H7, H10,
H11, 5202, 9005, 9006
KITS INCLUDE
TIPM BUNDLE INCLUDES
Resistors get VERY HOT. Must be mounted on non-moving metal. Keep away
from wires and plastic. Do not touch during use.
Accessories
Product
.
Make sure you have the bulb plug adapter installed.
The FluxBeam CORE LED heatsink requires open
air flow to prevent early burnout.
If your light housing has an enclosed dust cover, you
will need to drill several small holes or one 4.5 cm
hole into the dust cover before reapplying. This
allows for proper ventilation and ensures the longest
possible bulb life.
v1.0 011018
H4
H7 H1 H3 5202
All Other Sizes
b
d1 d2
c
a
Page 2
STEP2
Please refer to your vehicle owner’s manual for removing the original bulb.
Due to the wide variety of vehicle headlights and placements, we are unable
to provide instructions for bulb removal.
.
DO NOT THROW AWAY ORIGINAL BULBS.
Removing the Original Bulb
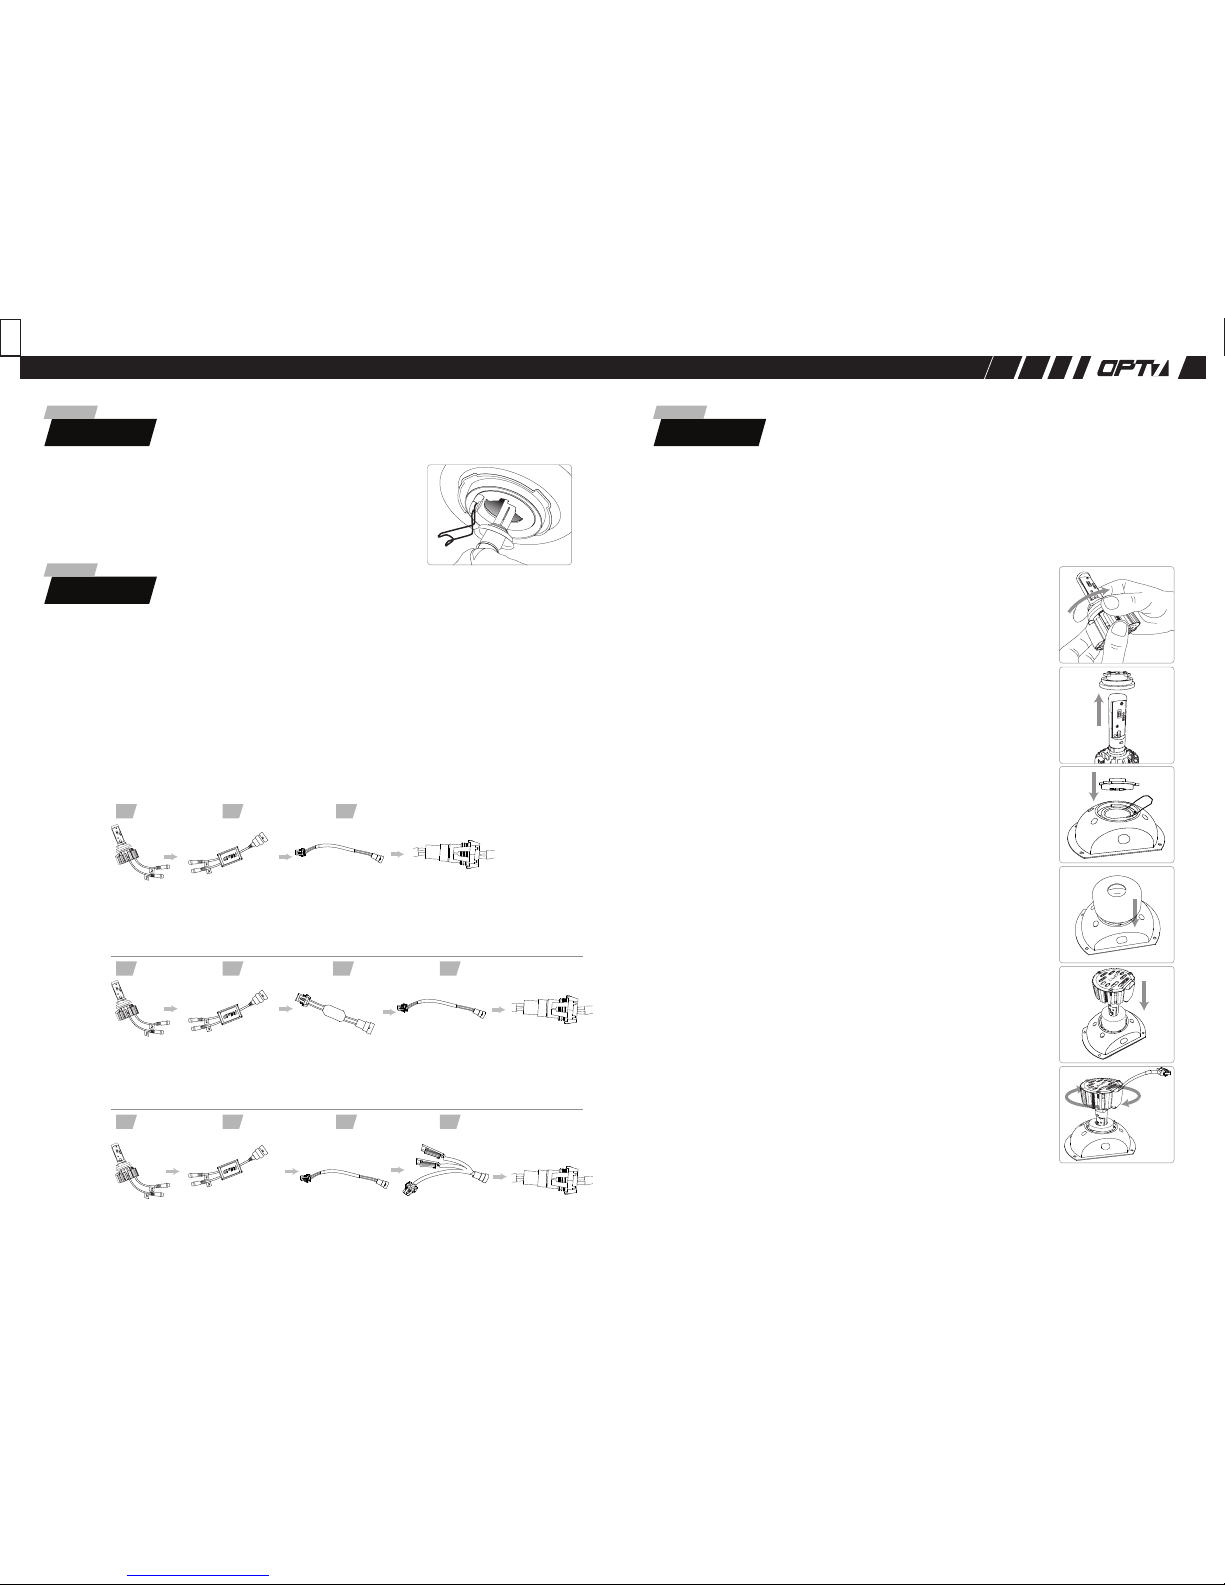
Connecting and Testing
STEP1
For most bulb sizes, re-insert the bulb into the light housing and secure.
For H4, H7, 9004, and 9007, you will need to install the locking ring first.
STEP3
Holding the bulb by the base, twist the locking ring
counter-clockwise until it unlocks.
1.
Remove locking ring from bulb.
2.
Place the locking ring into the light housing and secure.3.
4.
Insert the LED bulb through the secured locking ring.5.
Twist the LED bulb clockwise until it locks into place.6.
•
•
•
While we do our best to make our kit as user-friendly as possible, if you
feel you are unable to safely and properly install this kit, we recommend
seeking help from a professional installer.
I. Check the Accessories Box for the bulb plug adapter (see Package Contents: section c).
II. Follow steps explained in SETUP A below.
(If you ordered a TIPM bundle, follow SETUP C.)
III. Once connected, test the bulbs BEFORE installing.
Installing into the Headlight
If your dust cover has a bulb opening, reapply
the cover now. If not, please see instructions on
the back “For Enclosed Dust Covers.”
Check In
If lights turn ON and do not flicker, proceed to Step 3.
.
If lights turn ON and flicker, add the included Capacitors and use SETUP B.
If lights do not turn on, see “Troubleshooting.”
Check In
If lights turn ON and do not flicker, proceed to Step3.
If lights turn ON and flicker, see “Troubleshooting.”
If lights do not turn on, see “Troubleshooting.”
A
C
B
SETUP
SETUP
SETUP
FluxBeam CORE was developed as a universal product, meaning it was
designed to fit the majority of vehicles but not a specific vehicle. Since most
vehicles are not wired the same way, we include accessories and a list of
various setup option to increase the chance of a successful install.
a b cd1
a b c d2
a b c
LED Bulb
LED Driver
Plug Adapter TIPM Resistor Vehicle Plug
LED Driver
LED Bulb
Plug Adapter
Vehicle Plug
LED Driver
LED Bulb
Capacitor
Vehicle Plug
Plug Adapter
 Loading...