

Page 1
Digital Storage System
Hardware Manual
GraniteRack
G4
OE-GRANITE4U
www.openeye.net
Page 2

2
Page 3

OpenEye® G4 GraniteRack iSCSI Storage Server
Hardware Manual
Manual Edition 31822AE – OCTOBER 2013
©2000-2013, OPENEYE
All Rights Reserved
No part of this document may be reproduced by any means, electronic or mechanical, for any purpose, except as
expressed in the Software License Agreement. OPENEYE shall not be liable for technical or editorial errors or
omissions contained herein. The information in this document is subject to change without notice.
The information in this publication is provided “as is” without warranty of any kind. The entire risk arising out of the
use of this information remains with recipient. In no event shall OPENEYE be liable for any direct, consequential,
incidental, special, punitive, or other damages whatsoever (including without limitation, damages for loss of business
profits, business interruption or loss of business information), even if OPENEYE has been advised of the possibility of
such damages or whether in an action, contract or tort, including negligence.
This software and documentation are copyrighted. All other rights, including ownership of the software, are reserved
to OPENEYE. OPENEYE, OpenEye, HDDR, and High Definition Digital Recorder are registered trademarks of
OPENEYE in the United States and elsewhere; Windows, and Windows XP Embedded are registered trademarks of
Microsoft Corporation. All other brand and product names are trademarks or registered trademarks of the respective
owners.
The following words and symbols mark special mess age s througho ut this gui de:
Note Text set off in this manner indicates information that is necessary for proper operation of the
product.
Tip Text set off in this manner indicates information that may be helpful.
Caution Text set off in this manner indicates that failure to follow directions could result in damage
to equipment or loss of information.
OPENEYE
Liberty Lake, WA ● U.S.A.
31822AE 3
Page 4

IMPORTANT SAFEGUARDS
1. Read Owner’s Manual – After unpacking this product, read the owner’s manual carefully, and
follow all the operating and other instruction
2. Power Sources – This product should be operated only from the type of power source indicated on
the label. If not sure of the type of power supply to your home or business, consult produc t dealer
or local power company
3. Ventilation – Slots and openings in the cabinet are provided for ventilation and to ensure reliable
operation of the product and to protect it from overheating, and these openings must not be
blocked or covered. The product should not be placed in a built-in installation such as a bookcase
or rack unless proper ventilation is provided or the manufacturer’s instructions have been adhered
to.
4. Heat – The product should be situated away from heat sources such as radiators, heat registers,
stoves, or other products that produce heat.
5. Water and Moisture – Do not use this product near water. Do not exceed the humidity
specifications for the product as detailed in the Appendix section in this manual
6. Cleaning – Unplug this product from the wall outlet before cleaning. Do not use liquid cleaners or
aerosol cleaners. Use a damp cloth for cleaning.
7. Power Cord Protection – Power-supply cords should be routed so that they are not likely to be
walked on or pinched by items placed against them, paying particular attention to cords at plugs,
convenience receptacles, and the point where they exit from the product.
8. Overloading – Do not overload wall outlets, extension cords, or integral convenience receptacles
as this can result in a risk of fire or electrical shock.
9. Lightning – For added protection for this product during storm, or when it is left unattended and
unused for long periods, unplug it from the wall outlet. This will prevent damage to the product due
to lightning and power line surges.
10. Object and Liquid Entry Points – Never insert foreign objects into the recorder, other than the
media types approved by OpenEye, as they may touch dangerous voltage points or short-out parts
that could result in a fire or electrical shock. Never spill liquid of any kind on the product.
11. Accessories – Do not place this product on an unstable cart, stand, tripod, bracket, or table. The
product may fall, causing serious personal injury and serious damage to the product.
12. Location – Do not place this product on an unstable cart, stand, tripod, bracket, or table. The
product may fall, causing serious personal injury and serious damage to the unit.
13. Burden – Do not place a heavy object on or step on the product. The object may fall, causing
serious personal injury and serious damage to the product.
14. Disc – Do not use a cracked, deformed, or repaired disc. These discs are eas ily bro ken an d may
cause serious personal injury and product malf unc t ion .
15. Damage Requiring Service – Unplug the unit from the outlet and refer servicing to qualified
service personnel under the following conditions:
• When the power-supply cord or plug is damaged.
• If liquid has been spilled, or objects have fallen into the unit.
• If the unit has been exposed to rain or water.
• If the unit does not operate normally by following the operating instructions. Adjust only those
controls that are covered by the operating instructions as an improper adjustment of other
controls may result in damage and will often require extensive work by a qualified technician to
restore the unit to its normal operation.
• If the unit has been dropped or the enclosure has been damaged.
• When the unit exhibits a distinct change in performance – this indicates a need for service.
16. Servicing – Do not attempt to service this product as opening or removing covers may expose the
user to dangerous voltage or other hazards. Refer all servicing to qualified personnel.
4
Page 5

17. Replacement Parts – When replacement parts are required, be sure the service technician has
used replacement parts specified by the manufacturer or have the same characteristics as the
original part. Unauthorized substitu tio ns may result in fire, ele ctri c shoc k or other hazards.
18. Safety Check – Upon completion of any service or repairs to this unit, ask the service technician to
perform safety checks to determine that the unit is in proper operating condition.
NOTES ON HANDLING
Please retain the original shipping carton and/or packing materials supplied with this product. To ensure
the integrity of this product when shipping or moving, repackage the unit as it was originally received
from the manufacturer.
Do not use volatile liquids, such as aerosol spray, near this product. Do not leave rubber or plastic
objects in contact with this product for extended periods of time. Rubber or plastic objects left in contact
with this product for extended periods of time will leave marks on the finish.
The top and rear panels of the unit may become warm after long periods of use. This is not a
malfunction.
NOTES ON LOCATING
Place this unit on a level surface. Do not use it on a shaky or unstable surface such as a wobbling table
or inclined stand.
If this unit is placed next to a TV, radio, or VCR, the playback picture may become poor and the sound
may be distorted. If this happens, place the recorder away from the TV, radio, or VCR.
NOTES ON CLEANING
Use a soft dry cloth for cleaning.
For stubborn dirt, soak the cloth in a weak detergent solution, wring well and wipe. Use a dry cloth to
wipe it dry. Do not use any type of solvent, such as thinner and benzene, as they may damage the
surface of the recorder.
If using a chemical saturated cloth to clean the unit, follow that product’s instructions.
NOTES ON MAINTENANCE
This recorder is designed to last for long periods of time. To keep the recorder always operational we
recommend regular inspection maintenance (cleaning parts or replacement). For details, contact the
nearest dealer.
31822AE 5
Page 6

NOTES ON MOISTURE CONDENSATION
Moisture condensation damages the recorder. Read the following information carefully.
Moisture condensation occurs during the following cases:
• When this product is brought directly from a cool location to a warm location.
• When this product is moved to a hot and humid location from a cool locatio n.
• When this product is moved to a cool and humid location from a warm location.
• When this product is used in a room where the temperature fluctuates.
• When this product is used near an air-condition ing unit vent
• When this product is used in a humid location.
Do not use the recorder when moisture condensation may occur.
If the recorder is used in such a situation, it may damage discs and internal parts. Remove any CD
discs, connect the power cord of the recorder to the wall outlet, turn on the recorder, and leave it for two
to three hours. After two to three hours, the recorder will warm up and evaporate any moisture. Keep
the recorder connected to the wall and moisture will seldom occur.
WARNING
TO REDUCE THE RISK OF ELECTRICAL SHOCK, DO NOT EXPOSE THIS APPLIANCE TO RAIN
OR MOISTURE.
DANGEROUS HIGH VOLTAGES ARE PRESENT INSIDE THE ENCLOSURE.
DO NOT OPEN THE CABINET.
REFER SERVICING TO QUALIFIED PERSONNEL ONLY.
RACK MOUNT INSTRUCTIONS
Elevated Operating Ambient – If installed in a closed or multi-unit rack assembly, the operating
ambient temperature of the rack environment may be greater than room ambient. Therefore,
consideration should be given to installing the equipment in an environment compatible with the
maximum ambient temperature (Tma) specified by the manufacturer.
Reduced Air Flow – Installation of the equipment in a rack should be such that the amount of airflow
required for safe operation of the equipment is not compromised.
Mechanical Loading – Mounting of the equipment in the rack should be such that a hazardous
condition is not achieved due to uneven mechanical loading.
Circuit Overloading – Consideration should be given to the connection of the equipment to the supply
circuit and the effect that overloading of the circuits might have on over current protection and supply
wiring. Appropriate consideration of equipment nameplate ratings should be used when addressing this
concern.
Grounding – Grounding of rack-mounted equipment should be maintained. Particular attention should
be given to supply connections other than direct connections to the branch circuit (e.g. use of power
strips).
6
Page 7

Standard Warranty
OpenEye warrants all new products to be free from defects in workmanship and material under normal
use for a period of two years after the date of purchase. Any defective product that falls under this
warranty will, at OpenEye's discretion, be repaired or replaced at no additional charge. OpenEye may
elect to replace defective products with new or factory reconditioned products of equal or greater value.
Repairs made necessary by reason of misuse, alteration, normal wear, or accident are not covered
under this warranty.
Exceptions to this are listed below:
• Three Years on all Digital Recorders
• Three years on all fixed cameras
All products shall be covered by a one year advance replacement warranty*.
OpenEye will warrant all otherwise out of warranty replacement parts and repairs for 90 days from the
date of OpenEye shipment.
The above warranty is the sole warranty made by OpenEye and is in lieu of all other warranties by
OpenEye express and implied, including without limitation the warranties of merchantability and fitness
for a particular purpose. Under no circumstances will OpenEye be liable for any consequential,
incidental, special or exemplary damages arising out of or connected with the sale, delivery, use or
performance of the product, even if OpenEye is apprised of the likelihood of such damages occurring. In
no event shall OpenEye liability exceed the purchase price of the product.
This warranty gives you specific legal rights and you may also have other rights which vary from state to
state or country to country.
*Requires corresponding security deposit. Advanced Replacement limited to components only outside
of the USA and Canada.
For the most up to date information visit www.openeye.net
31822AE 7
Page 8

TABLE OF CONTENTS
Preface ................................................................................................................................................................... 10
About this Guide .............................................................................................................................. 10
Technician Notes ............................................................................................................................. 10
Introduction ........................................................................................................................................................... 11
Product Description ......................................................................................................................... 11
Features .......................................................................................................................................... 11
Controls and Connections ................................................................................................................................... 12
Front Panel Controls and LEDs ....................................................................................................... 12
Rear Panel Connectors ................................................................................................................... 12
Getting Started ...................................................................................................................................................... 13
Identifying Included Components .................................................................................................... 13
Keyboard Setup ............................................................................................................................... 14
Mouse Setup ................................................................................................................................... 14
Monitor Setup .................................................................................................................................. 15
Power Setup .................................................................................................................................... 15
Connecting the G4 GraniteRack ...................................................................................................... 16
G4 Front Bezel Installation .............................................................................................................. 17
Turning On the G4 GraniteRack ...................................................................................................... 17
Turning Off the g4 granite rack ........................................................................................................ 17
Configuring the G4 GraniteRAck ......................................................................................................................... 18
Initial Start Up .................................................................................................................................. 18
Logging in ................................................................................................................................. 18
Changing Your Password ......................................................................................................... 18
Network Configuration ..................................................................................................................... 19
Configure Team Networking ..................................................................................................... 19
Set Team IP Properties ............................................................................................................ 19
Storage Array Configuration ............................................................................................................ 20
Setting Up Storage Management Alerts ................................................................................... 20
Creating iSCSI Target Accounts ............................................................................................... 20
Creating Virtual Disks ............................................................................................................... 21
Recorder Configuration ................................................................................................................... 21
Configure iSCSI to Accept Communication from Recorder ...................................................... 21
Configure the Recorder to Communicate with the iSCSI .......................................................... 22
Format the iSCSI Volume ......................................................................................................... 22
Set the Volume Size .......................................................................................................... 22
Technical Specifications ...................................................................................................................................... 23
GRAN4U ......................................................................................................................................... 23
8
Page 9

Appendix A: RAID Concepts ............................................................................................................................... 24
Disk Striping .................................................................................................................................... 24
Definition of RAID Levels ................................................................................................................. 25
RAID Management .......................................................................................................................... 28
Appendix B: Array Definition .............................................................................................................................. 29
RAID Set ......................................................................................................................................... 29
Volume Set ...................................................................................................................................... 29
31822AE 9
Page 10

PREFACE
ABOUT THIS GUIDE
This manual is a setup and maintenance guide that can be used for reference when setting up the G4
GraniteRack and for troubleshooting when a problem occurs. Only authorized personnel should attempt
to repair this unit.
OpenEye reserves the right to make changes to the products represented by this manual without notice.
The following text and symbols mark special messages throughout this guide:
Note Text set off in this manner indicates topics of interests that can help the user understand the
product better.
Tip Text set off in this manner indicates topics and points of interests that can be helpful when
using or setting up the storage server.
TECHNICIAN NOTES
Warning Only authorized technicians trained by OpenEye should attempt to repair this storage
server. All troubleshooting and repair procedures that may be shown are for reference and
minor repair only. Because of the complexity of the individual components and
subassemblies, no one should attempt to make repairs at the component level or to make
modifications to any printed wiring board. Improper repairs can create a safety hazard. And
any indications of component replacement or printed wiring board modifications may void
any warranty
Warning To reduce the risk of electrical shock or damage to the equip ment:
• Do not disable the power grounding plug. The grounding plug is an important safety
feature.
• Plug the power cord into a grounded (earthed) electrical outlet that is easily
accessible at all times.
• Disconnect the power from the computer by unplugging the power cord either from
the electrical outlet or the computer.
Caution To properly ventilate your system, you must provide at least 3 inches (7.6 cm) of clearance
at the front and back of the G4 GraniteRack.
10
Page 11

INTRODUCTION
PRODUCT DESCRIPTION
OpenEye’s G4 GraniteRack solution is an enterprise-level IP-based central storage unit. With the ability
to support 10 simultaneous recorder connections, multiple sites can transmit video seamlessly over any
Gigabit network.
The G4 GraniteRack solves the distance and bandwidth limitations found with previous SCSI storage
units. iSCSI now employs an interoperable solution that encapsulates traditional SCSI packets over a
TCP/IP network, making it ideal for installations that cover multiple buildings or locations. Recording
video is no longer restricted to recorder-to-storage box installations.
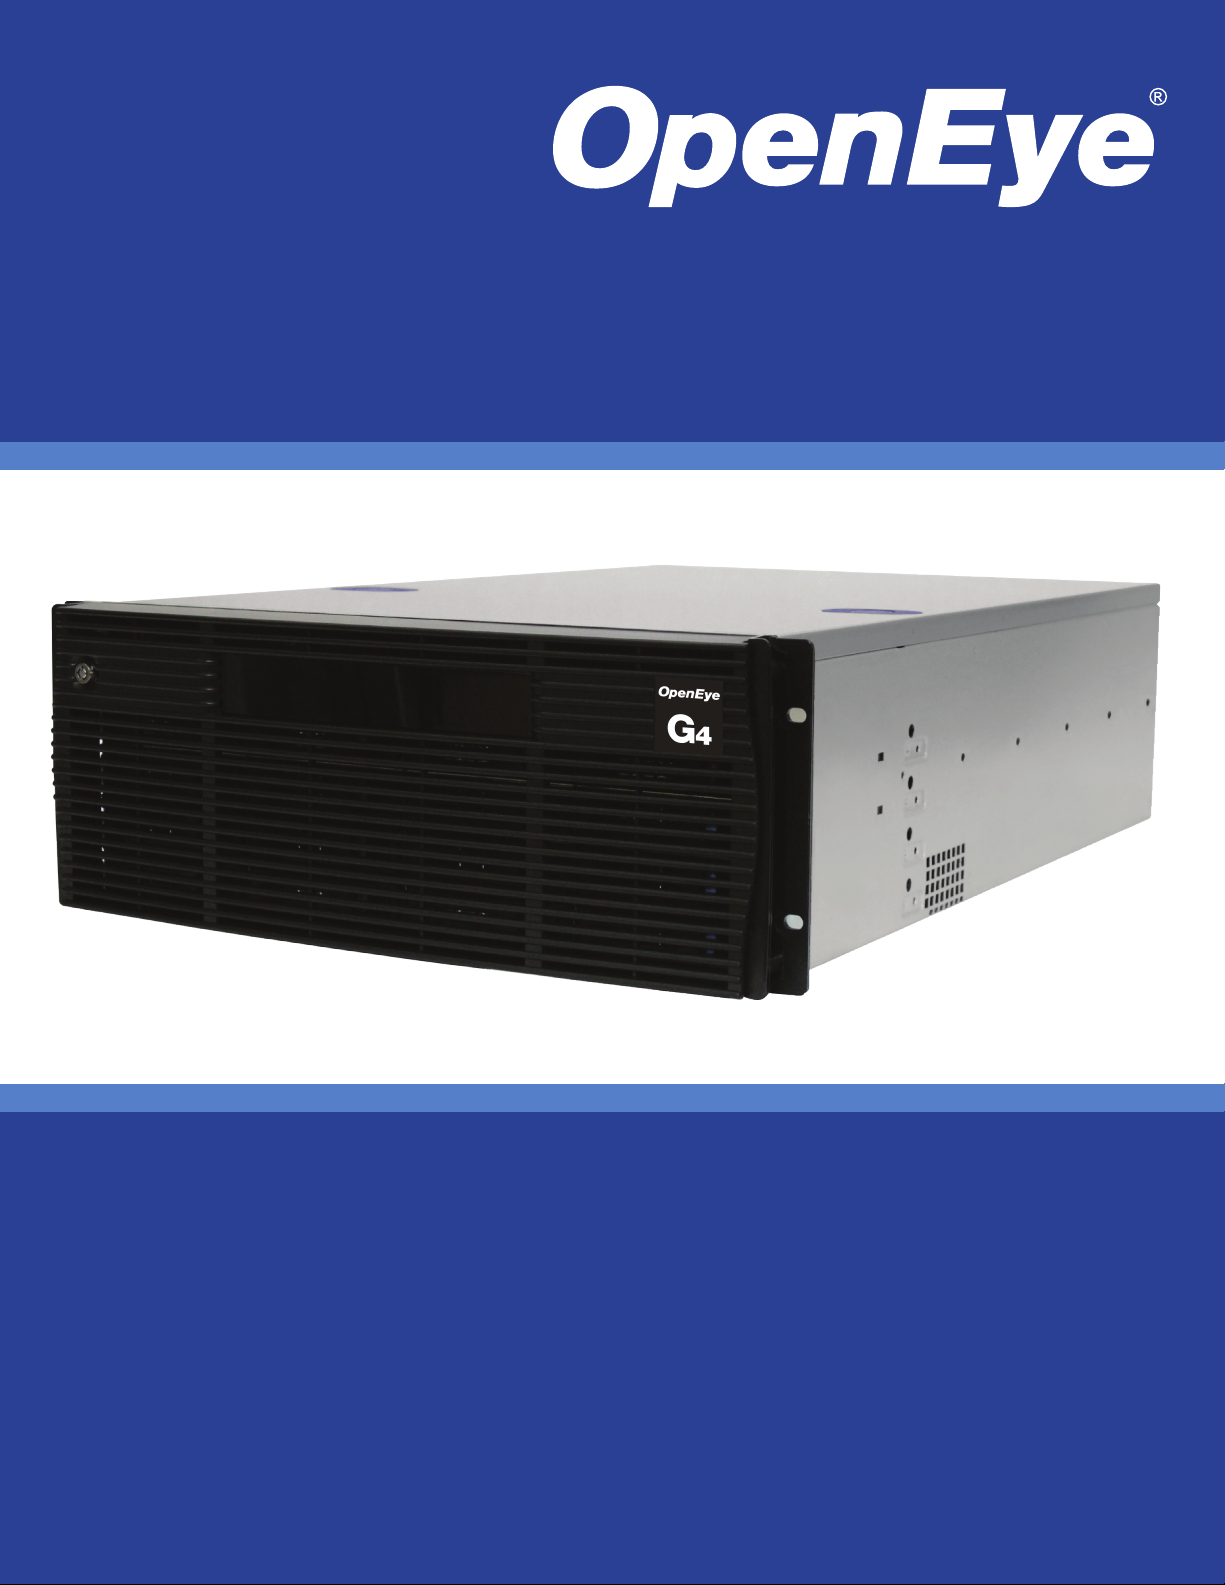
With a 4U chassis and 16 hot-swappable hard drive bays, the OpenEye G4 GraniteRack is capable of
aggressive IP recording with 900 megabits of video throughput and high-performance Ethernet
connectivity. It also features up to 64TB of storage for long term data retention, rack mount rails, and
enhanced RAID formats for superior data reliability.
FEATURES
The G4 GraniteRack iSCSI Storage Server includes the following features:
• Online RAID expansion
• Automatic drive insertion & removal detection/rebuilding
• 16 hot swappable HDDs
• Up to 900 Mbits/sec throughput
• Up to 10 simultaneous recorder c onnections
• Unlimited scalability
• Aggressive IP recording and data reliability
• Cost effective
• High performance
31822AE 11
Page 12

CONTROLS AND CONNECTIONS
Cooling fans
FRONT PANEL CONTROLS AND LEDS
The front panel of the iSCSI Storage Server houses the drive bays and LEDs.
13 14 15 16
9 10 11 12
5 6 7 8
2 43
1
1 2
!
REAR PANEL CONNECTORS
The rear panel of the iSCSI Storage Server contains virtually all of the connectors you will be using.
PS/2 mouse RS-232
AC power
PS/2 keyboard
USB
NetworkVGA
RAID
management
RS-232
Network
12
Page 13

GETTING STARTED
IDENTIFYING INCLUDED COMPONENTS
The OpenEye G4 GraniteRack comes with a mouse, keyboard and selected software and cables.
Identify the following components to make sure everything has been properly included with the new
recorder. If any of the following items are missing, contact the dealer to arrange a replacement.
G4 GraniteRack Case Key Mouse Keyboard
Repair Disc/ Software Disc Power Cable DVI to VGA Adapter
HDD Drives
(Shipped separately )
Bezel Cover
Rackmount Rail Kit
31822AE 13
Page 14

KEYBOARD SETUP
Left Button
To attach the keyboard to the G4 GraniteRack, plug the end of the keyboard into a USB port located on
the back of the machine. (A PS/2 keyboard may also be used)
MOUSE SETUP
To attach the mouse to the G4 GraniteRack, plug the end of the mouse into a USB port located on the
back of the machine.
The mouse uses a cursor called a pointer. Pointers come in many different shapes but are most
commonly shaped like an arrow.
The mouse has two buttons: a left button and a right button. Quickly pressing and releasing one of
these buttons is called clicking. Sometimes you will need to double-click – or click the same button twice
quickly.
In this manual:
Click means to position the mouse cursor over an item and to single click the left button.
Right click means to position the mouse cursor over an item and to single click the right button.
Double-click means to position the mouse cursor over an item and to click the left button twice.
Select means to position the mouse cursor over a radio button, checkbox, or list item and click on it.
The scroll wheel in between the two buttons is used for added navigation functionality. By moving the
wheel with index finger (scrolling), quickly move thro ugh mul t iple pag es, lin es, or w indow s. The wheel
may also function as a third button allowing the user to quickly click or double-click an icon or a selected
item
14
Scroll Button / Third Button
Right Button
Page 15

MONITOR SETUP
The G4 Granite Rack can be connected to a VGA Monitor. You will need to use the monitor during the
initial configuration of the unit.
Attach the monitor to the rear of the GraniteRack using the cable supplied by the monitor manufacturer.
Refer to the monitor manual for detailed informa tion regarding set up and use.
POWER SETUP
WARNING:
To reduce the risk of electrical shock or damage to the equip ment:
Do not disable the power grounding plug.
The grounding plug is an important safety feature.
If the electrical plug you are using does not have a ground plug receptacle
contact a licensed electrician to have it replaced with a grounded electrical
outlet.
Plug the power cord into a grounded (earthed) electrical outlet that is easily
accessible at all times.
Disconnect the power from the computer by unplugging the power cord either
from the electrical outlet or the computer.
VGA Output
To Monitor
31822AE 15
Page 16

CONNECTING THE G4 GRANITERACK
A single G4 GraniteRack can be connected to up to 25 network video recorders to provide up to 64TB
of pooled storage.
Note OpenEye recommends connecting no more than 10 recorders to a single G4 GraniteRack
unit.
To connect a G4 GraniteRack to one or more recorders, you can purchase a 24-port switch from
OpenEye. This switch is preconfigured with Gigabit networking and LACP. Ports 1-8 are to be used for
iSCSI connection. When connecting a G4 GraniteRack, use 2 connections per unit. (1 and 2, 3 and 4, 5
and 6, 7 and 8, respectively). Ports 9-16 are to be used to connect the recorders, and ports 17-24 can
be used to connect cameras to the recorders, if necessary.
CONNECTIONS
PoE SWITCH
1 34567829 1112131415
24-PORT SWITCH
VLAN 1
iSCSI Recorder
1 34567829 1112131415
G4 GRANITERACK
17 1920212223
1610
1610
VLAN 2
Camera
CAM 1
CAM 2
CAM 3
CAM 4
Recorder 1
2418
Recorder 2
Recorder 3
16
Cat5—IP Cameras to PoE switch
Recorder 4
Cat5—G4 to 24-port switch Cat5—24-port switch to Recorder
Cat5—Recorder to 24-port switchCat5—PoE Switch to 24-port switch
KEY
Page 17

G4 FRONT BEZEL INSTALLATION
The G4 GraniteRack is shipped with handles attached to the front of the unit. If you choose to mount the
front bezel to your recorder, you will need to remove the handles and attach the bezel before attaching
the rackmount rails.
1. Remove the two screws from each handle.
2. Install the include bezel clips and fasten with screws.
3. Align and slide the right side of the bezel into the right
clip.
4. Slide the left side of the bezel into the left clip.
5. Lock the bezel by turning the key counterclockwise.
TURNING ON THE G4 GRANITERACK
1. Plug in all the power cords and connectors to the appropriate ports on the rear of the unit.
Note The G4 GraniteRack is equipped with two full range power supplies.
2. Press the power button on the front of the unit.
3. The Power LED on the front panel will light up, indicating that the machine is running.
4. The G4 GraniteRack will run a series of self-tests. After two or three minutes, a series of messages
may be displayed as the various hardware and software subsystems are activated. Under normal
circumstances, users should not be asked to respond to these messages. If asked to respond to
the messages follow the instructions carefully.
5. Startup is complete when the machine is finis hed load ing all software and displays the main menu
screen.
TURNING OFF THE G4 GRANITE RACK
1. Click Start on the Windo ws desktop.
2. Select Shutdown. The machine may take several minutes to shut down completely.
Caution Always be sure to follow the proper procedures when turning off the power to the G4
GraniteRack. NEVER disconnect the power to the machine while it is still running or in the
process of shutting down. Doing so can cause data loss, file corruption, system instability
and hardware failure.
31822AE 17
Page 18

CONFIGURING THE G4 GRANITERACK
The G4 GraniteRack has a built-in setup configuration uti lity w ith import ant infor mat ion about the
configuration as well as settings for various optional functions on the subsystem.
INITIAL START UP
1. Ensure your G4 GraniteRack is connected to all necessary cables, and then push the power button
on the front of the unit.
2. When starting up for the first time, you will need to set your Country, Time and Currency, and
Keyboard layout. Set these items, and then click Next.
3. Type your Product Key. This can be found on the packaging.
4. Click Next.
5. Accept t he licensing terms to complete the startup.
Logging in
OpenEye recommends changing the username and password on your G4 GraniteRack. The default
Username and Password are as follows:
Username: DVRAdmin
Password: dvr4321
Changing Your Password
To change the username and password, follow these instructions.
1. To change your password, press CTRL+ALT+DEL, and then click Change Password.
2. Type your Old Password.
3. Type your New Password.
4. Type your new password again in the Confirm Password field, and then press ENTER.
18
Page 19

NETWORK CONFIGURATION
There are multiple network ports on your G4 GraniteRack. The most important connections are the two
network ports on the motherboard. Connect these as a bonded pair to the paired VLAN 1 portion of the
24-port switch.
Configure Team Networki ng
To configure these ports to operate as a bonded pair, follow these instructions.
1. In the Initial Configuration Tasks window, click Configure Networking.
2. Right-click 1st Local Area Connection Intel® 82579LM.
3. Click Properties.
4. Click Configure.
5. Click the Teaming tab.
6. Select Team This Adapter with Other Adapters, and then click New Team.
7. Type a Team Name. This name should be descriptive of the purpose or location of the storage unit,
such as “Warehouse,” or “West Campus.”
8. Click Next.
9. Select both 82574L Gigabit Network Connection, and 82579L Gigabit Network Connection.
10. Click Next.
11. Click Finish.
12. Click OK, and then click OK again to com plet e th is configuration.
Set Team IP Properties
Consult your system administrator before configuring the se set tin gs.
1. In the Initial Configuration Tasks window, click Team, and then click Properties.
2. Double-click Internet Protocol Version 4.
3. Select Use the Following IP Address.
4. Type the appropriate IP Address, Subnet Mask, and Default Gateway.
5. Type the appropriate DNS Server, and an Alternate DNS Server, if applicable.
6. Close the window.
You can also make the following adjustments as needed:
• Add computer Name and Domain
• Enable Automatic Updating and Feedback
• Download and Install Updates
Note Enabling Automatic Updating and Feedback could cause the G4 GraniteRack to restart
unexpectedly and lose data. OpenEye does not recommend enabling Automatic Updating and
Feedback.
31822AE 19
Page 20

STORAGE ARRAY CONFIGURATION
Your G4 GraniteRack is pre-configured with a RAID Array. Disk 0 is the Boot Drive, and Disk 1 is the
Storage Array. You can further partition Disk 1 depending on the storage needs of the recorders in your
system.
Setting Up Storage Management Alerts
Your G4 GraniteRack can be configured to send alerts when drives fail.
1. In the Initial Configuration Tasks window, click Configure Storage Array.
2. Select Controller #01(PCI), and then click Launch Browser.
3. Type the Username and Password of your G4 GraniteRack.
4. Click Add, and then click Add again.
5. Click Close.
6. Click System Controls.
7. Click Ethernet Configuration.
8. Type the appropriate IP Address, Gateway, and Subnet Mask.
9. Disable DHCP Function.
10. Select Confirm Operation an d the clic k Submit.
11. To enable drive failure alerts, click Alert by Mail Configuration, and then click Configure Your
Mail Server.
Creating iSCSI Target Accounts
OpenEye recommends creating a separate volume for each recorder on your system. The size of each
volume is dependent on the recording needs of each recorder. Repeat these ste ps as necessary to
create the appropriate number of volumes in the appropriate sizes for your needs.
1. Click Start > All Programs > Administrative Tools > Microsoft iSCSI Software Target.
2. Click Yes.
3. Right-click in the Virtual Disk field, and then click Create iSCSI Target.
4. This will open the iSCSI Target Wizard. Click Next to continue.
5. Type your iSCSI Target Name.
Note The iSCSI Target Name must consist of lowercase letters and numbers only. No spaces,
special characters, or underscores are to be used. For example: n1.3, meaning “NVR1 with
3TB storage.”
6. Type an effective description of the target.
7. Type the IP Address of the recorder you are assigning to this volume in the IQN field, and then click
Next.
Note The iSCSI Qualified Name (IQN) allows the iSCSI target to identify the iSCSI initiator
requesting access. OpenEye recommends using the IP address of the connecting recorder,
but you can also use the MAC address or DNS name.
8. Click Next, and then click Finish.
20
Page 21

Creating Virtual Disks
Create a virtual disk for a specific recorder on your syste m. Repeat these steps for each recorder on
your system.
1. In the iSCSI Target window, click Devices.
2. Right-click the Devices List field, and then click Create Virtual Disk.
3. This will open the Create Virtual Disk Wizard. Click Next to continue.
4. Type the location in the File field.
Note The location name should be the same as the iSCSI Target Name. The location should be
formatted as E:\[iSCSI Target Name].vhd.
5. Set the Size of the Virtual Disk (in megabits).
6. Type an effective Virtual Disk Description.
7. To assign a recorder cli ent to the volu me, cli ck Add.
8. Select the target recorder.
9. Click Next, and then click Finish.
RECORDER CONFIGURATION
Once your G4 GraniteRack is set up, you will need to config ur e the iSCSI unit and the recorder to be
able to communicate.
Note These instructions are for use with OpenEye Professional Recorders, embedded with
Windows 7.
Configure iSCSI to Accept Communi c a t ion from Recorder
1. On the iSCSI Initiators tab, click Identifier Type , and then select IP Address.
2. Type the IP address of your recorder in the Value field.
3. Click OK.
4. Click OK again.
31822AE 21
Page 22

Configure the Recorder t o Communica t e w it h t he iSCSI
1. Restart your recorder in Windows mode.
2. Click Start, and then type iSCSI Initiator in the Search field.
3. Click iSCSI Initiator.
4. In the Target field, type the IP add ress of your G4 GraniteRack.
5. Click Quick Connect. Once completed, the status will read “connected.”
6. Click Done.
7. Click the Volumes and De vices tab.
8. Click Auto Configure.
9. Click OK.
Format the iSCSI Volume
The volumes you have created in your G4 GraniteRack will be seen by your recorder as blank hard
disks. In order to save video, you must first format the volume.
Set the Volume Size
1. Click Disk Management.
2. In the Initialize Disk window, sele ct GBT.
Note GBT supports drives that are 3TB or larger, providing a large volume size for maximum
storage capacity.
3. Click OK.
4. Right-click Unallocated Volume, and then click New Simple Volume.
5. Click Next.
6. Type the Volume Size (in MB), up to 3TB (3,000,000 MB).
Note OpenEye recommends a maximum volume size of 3TB.
7. Click Next.
8. Click Next again.
9. Click Allocation Unit Size, and then select 64K.
10. Click Volume Label, and type DVR.
11. Click Next.
12. Click Finish.
To allocate any remaining space, repeat steps 1 ~ 13.
22
Page 23

TECHNICAL SPECIFICATIONS
GRAN4U
Model
Recorder Connections
Drive Capacity
Storage Capacity
Recording Throughput
RAID Formats Supported
RAID Management
Network Inputs
Video Outputs
Operating System
Client Compatibility
Operating Temperature
Operating Humidity
Dimensions
Chassis
GRAN4U
Up to 10
x16 Hot-Swappable SATA HDD
16TB, 24TB, 32TB, 48TB
Up to 900 mbits/sec
5, 5E, 6, 6E, 10, t0E
Web inte rface & Out-of-Band Ethernet Management Interface
Dedicated iSCSI 1GbE connections w/Load Balancing (x2) & 1GbE Network
Management Interface
1 VGA, 1 D-Sub
Microsoft Windows Embedded Storage Server 2008 R2
Microsoft iSCSI Initiator (Windows XP/7)
32˚F ~ 104˚F (0˚C ~ 40˚C)
0% to 90% non-condensing
L: 26” (660 mm) x W: 16.95” (430 mm) x H: 6.9” (176 mm)
4U Locking Front Bezel
Warranty
31822AE 23
3 years / 1 year advance replacement
Page 24

APPENDIX A: RAID CONCEPTS
Data stripes from each drive are interleaved
The purpose of RAID (Redundant Array of Independent Disks) is to combine multiple inexpensive disk
drives into an array of drives to obtain performance, capacity, and reliability that exceeds the capability
of a single large drive. The array of drives is recognized by the recorder as a single logical drive.
Six types of array architectures, RAID 1 through RAID 6 provide disk fault tolerance with different
compromises in features and performance. IN addition to these five redundant array architectures, it
has become popular to refer to a non-redundant array of disk drives as a RAID 0 array.
DISK STRIPING
Striping is fundamental to RAID technology. This is a method of combining multiple drives into one
logical storage unit. Striping partitions the storage space of each drive. These stripes can be as small as
one sector (512 bytes) or as large as several megabytes. These stripes are then inter leav e d in a
rotating sequence, so that the combined space is composed of stripes from each drive, alternately. The
specific type of operating environment determines whether large or small stripes should be used.
Most current operating systems support concurrent disk I/O operations across multiple drives. However,
in order to maximize throughput for the G4 GraniteRack, the I/O load must be balanced across all the
drives, so that each drive can be kept busy as much as possible. In a multiple drive system without
striping, the disk I/O load is never perfectly balanced. Some drives contain data files that are frequently
accessed and some drives are rarely accessed.
STRIPING DISK DRIVES
By striping the drives in the array with stripes large enough for each record to be contained within one
stripe, most records can be evenly distributed across all drives. This keeps all drives in the array busy
during heavy load situations. This situation allows all drives to work concurrently on different I/O
operations, and thus maximize the number of simultaneous I/O operations that can be performed by the
array.
24
to create one logical drive
Page 25

DEFINITION OF RAID LEVELS
RAID 0 is typically defined as a group of striped disk drives without parity or data redundancy. RAID 0
arrays can be configured with large stripes for multi-user environments or small stripes for single-user
systems that access long sequential records. RAID 0 arrays deliver the best data storage efficiency and
performance of any array type. The disadvantage is that if one drive in a RAID 0 array fails, the entire
array fails.
RAID 1, also known as disk mirroring, is simply a pair of disk drives that store duplicate data but appear
to the computer as a single drive. Although striping is not used within a single mirrored drive pair,
multiple RAID 1 arrays can be striped together to create a single large array consisting of pairs of
mirrored drives. All writes must go to both drives of a mirrored pair so that the information on the drives
is kept identical. However, each individual drive can perform simultaneous, independent read
operations. Mirroring thus doubles the read performance of a single non-mirrored drive while the write
performance is unchanged. RAID 1 delivers the best performance of any redundant array type. In
addition, there is less performance degradation during drive failure than in RAID 5 arrays.
31822AE 25
Page 26

RAID 3 sector-stripes data across groups of drives, but one driv e in the group is dedicated t o storing
parity information. RAID 3 relies on the embedded ECC in each sector for error detection. IN the case of
drive failure, data recovery is accomplished by calculating the exclusive OR (XOR) of the information
recorded on the remaining drives. Records typically span all drives, which optimizes the disk transfer
rate. Because each I/O request accesses every drive in the array, RAID 3 arrays can satisfy only one
I/O request at a time. RAID 3 delivers the best performance for single-user, single-tasking environments
with long records. Synchronized-spindle drives are required fro RAID 3 arrays in order to avoid
performance degradation with short records. RAID 5 arrays with small stripes can yi eld si milar
performance to RAID 3 arrays.
Under RAID 5 parity information is distributed across all the drives. Since there is no dedicated parity
drive, all drives contain data and read operations can be overlapped on every drive in the array. Write
operations will typically access one data drive and one parity drive. However, because different records
store their parity on different drives, write operations can usually be overlapped.
26
Page 27

RAID 6 is similar to RAID 5 in that data protection is achieved by writing parity information to the
physical drives in the array. With RAID 6, however, two sets of parity data are used. These two sets are
different, and each set occupies a capacity equivalent to that of one of the constituent drives. The main
advantage of RAID 6 is high data availability—any two drives can fail without loss of critical data.
Dual-level RAID achieves a balance between the increased data availability inherent in RAID 1 and
RAID 5 and the increased read performance inherent in disk striping (RAID 0). These arrays are
sometimes referred to as RAID 0+1 (or RAID 10), and RAID 0+5 (or RAID 50).
In summary:
• RAID 0 is the fastest and most efficient array type, but offers no fault tolerance. RAID 0
requires a minimum of two drives.
• RAID 1 is the best choice for performance-critical, fault-tolerant environments. RAID 1 is the
only choice for fault tolerance if no more than two drives are used.
• RAID 3 can be sued to speed up data transfer and provide fault tolerance in single-user
environments that access long sequential records. However, RAID 3 does not allow
overlapping of multiple I/O operations and requires synchronized-spindle drives to avoid
performance degradation with short records. RAID 5 with a small stripe size offers similar
performance.
• RAID 5 combines efficient, fault tolerant data storage with good performance characteristics.
However, write performance and performance during drive failure is slower than with RAID 1.
Rebuild operations also require more time than with RAID 1 because parity information is also
reconstructed. At least three drives are required for RAID 5 arrays.
• RAID 6 is essentially an extension of RAID 5, which allows for additional fault tolerance by
using a second independent distributed parity scheme (two-dimensional par ity ). Data is striped
on a block level across a set of drives, just like in RAID 5, and a second set of parity is
calculated and written across all the drives.; RAID 6 provides for an extremely high data fault
tolerance and can sustain multiple simultaneous drive failures.
31822AE 27
Page 28

RAID MANAGEMENT
The G4 GraniteRack can implement several different levels of RAID technology. These RAID levels are
supported by the system:
RAID Level Description Minimum Number of Drives
0 Block striping is provided, which yields higher
performance than with individual drives. No
redundancy.
1 Drives are paired and mirrored. All data is
duplicated on an equivalent drive. Fully
redundant.
3 Data is striped across several physical drives.
Parity protection is used for data redundancy.
5 Data is striped across several physical drives.
Parity protection is used for data redundancy
6 Data is striped across several physical drives.
Parity protection is used for data redundancy.
Requires N+2 drives to implement because of
two-dimensional parity scheme.
0 + 1 Combinations of RAID levels 0 and 1. This level
provides striping and redundancy through
mirroring.
1
2
3
3
4
4
28
Page 29

APPENDIX B: ARRAY DEFINITION
RAID SET
A RAID Set is a group of disks containing one or more volume sets. It has the following features in the RAID
subsystem controller:
1. Up to 16 RAID Sets are supported per RAID subsystem controller.
2. 1 to 16 drives can be included in an individual RAID Set.
3. It is impossible to have multiple RAID Sets on the same disks.
A Volume Set must be created either on an existing RAID set or on a group of available individual disks (disks that
are not yet part of a RAID set). If there are pre-existing RAID Sets with available capacity and enough disks for the
desired RAID level, then the Volume Set will be created in the existing RAID Set of the user’s choice. If physical disks
of different capacity are grouped together in a RAID Set, then the capacity of the smallest disk will become the
effective capacity of all the disks in the RAID Set.
VOLUME SET
A Volume Set is seen by the host system as a single logical device. It is organized in a RAID level with one or more
physical disks. The RAID level refers to the level of data performance and protection of a Volume Set. Volume Set
capacity can consume all or a portion of the disk capacity available in a RAID set. Multiple Volume Sets can exist on
a group of disks in a RAID Set. Additional Volume Sets created in a specified RAID Set will reside on all the physical
disks in the RAID Set. Thus each Volume Set on the RAID Set will have data spread evenly across all the disks in the
RAID Set.
Volume Sets of different RAID levels may coexist on the same RAID Set.
In this illustration, Volume 1 can be assigned a RAID 5 level of operation while Volume 0 might be assigned a RAID
0+1 level.
31822AE 29
Page 30

www.openeye.net
1-888-542-1103
© 2013 OpenEye
All rights reserved. No part of this publication may be reproduced by any means without written permission from
OpenEye. The information in this publication is believed to be accurate in all respects. However, OpenEye cannot
assume responsibility for any consequences resulting from the use thereof. The information contained herein is
subject to change without notice. Revisions or new editions to this publication may be issued to incorporate such
changes.
30
 Loading...