

Page 1
Installation Manual
1
Page 2
User Information
CAUTION! TO REDUCE THE RISK OF ELECTRIC SHOCK, DO NOT REMOVE COVER (OR BACK).
NO USER-SERVICEABLE PARTS INSIDE. REFER SERVICING TO QUALIFIED SERVICE PERSONNEL.
Explanation of Symbols
The lightning flask with arrowhead symbol, within an equilateral triangle
is intended to alert the user to the presence of un-insulated “dangerous
voltage” within the product’s enclosure that may be of sufficient magnitude
to constitute a risk of electric shock to persons.
The exclamation point within an equilateral triangle is intended to alert the
user to the presence of important operating and maintenance (servicing)
instructions in the literature accompanying the appliance.
THE GRAPHIC SYMBOLS WITH SUPPLEMENTAL MARKING ARE ON THE BOTTOM OF THE SYSTEM.
“WARNING - TO PREVENT FIRE OR SHOCK HAZARD, DO NOT EXPOSE THE UNIT TO RAIN OR MOISTURE”
2
Page 3

INFORMATION
This equipment has been tested and found to comply with limits for a Class A digital devices, pursuant to part 15
of the FCC Rules.
These limits are designed to provide reasonable protection against harmful interference when the equipment is
operated in a commercial environment.
This equipment generates, uses, and can radiate radio frequency energy and, if not installed and used in
accordance with the instruction manual, may cause harmful interference to radio communications.
Operation of this equipment in a residential area is likely to cause harmful interference in which case the user will
be required to correct the interference at their own expense.
WARNING
The manufacturer could void the user’s authority to operate the equipment.
CAUTION - To prevent electric shock and risk of fire hazards:
Do NOT use power sources except for that specified.
•
Do NOT expose this appliance to rain or moisture.
•
3
Page 4

Contents
Before using this camera, please read this operation manual carefully and keep this manual for future reference.
User Information ......................... 2
Contents ..................................... 4
Safety Instructions ..................... 5
Precautions ................................. 6
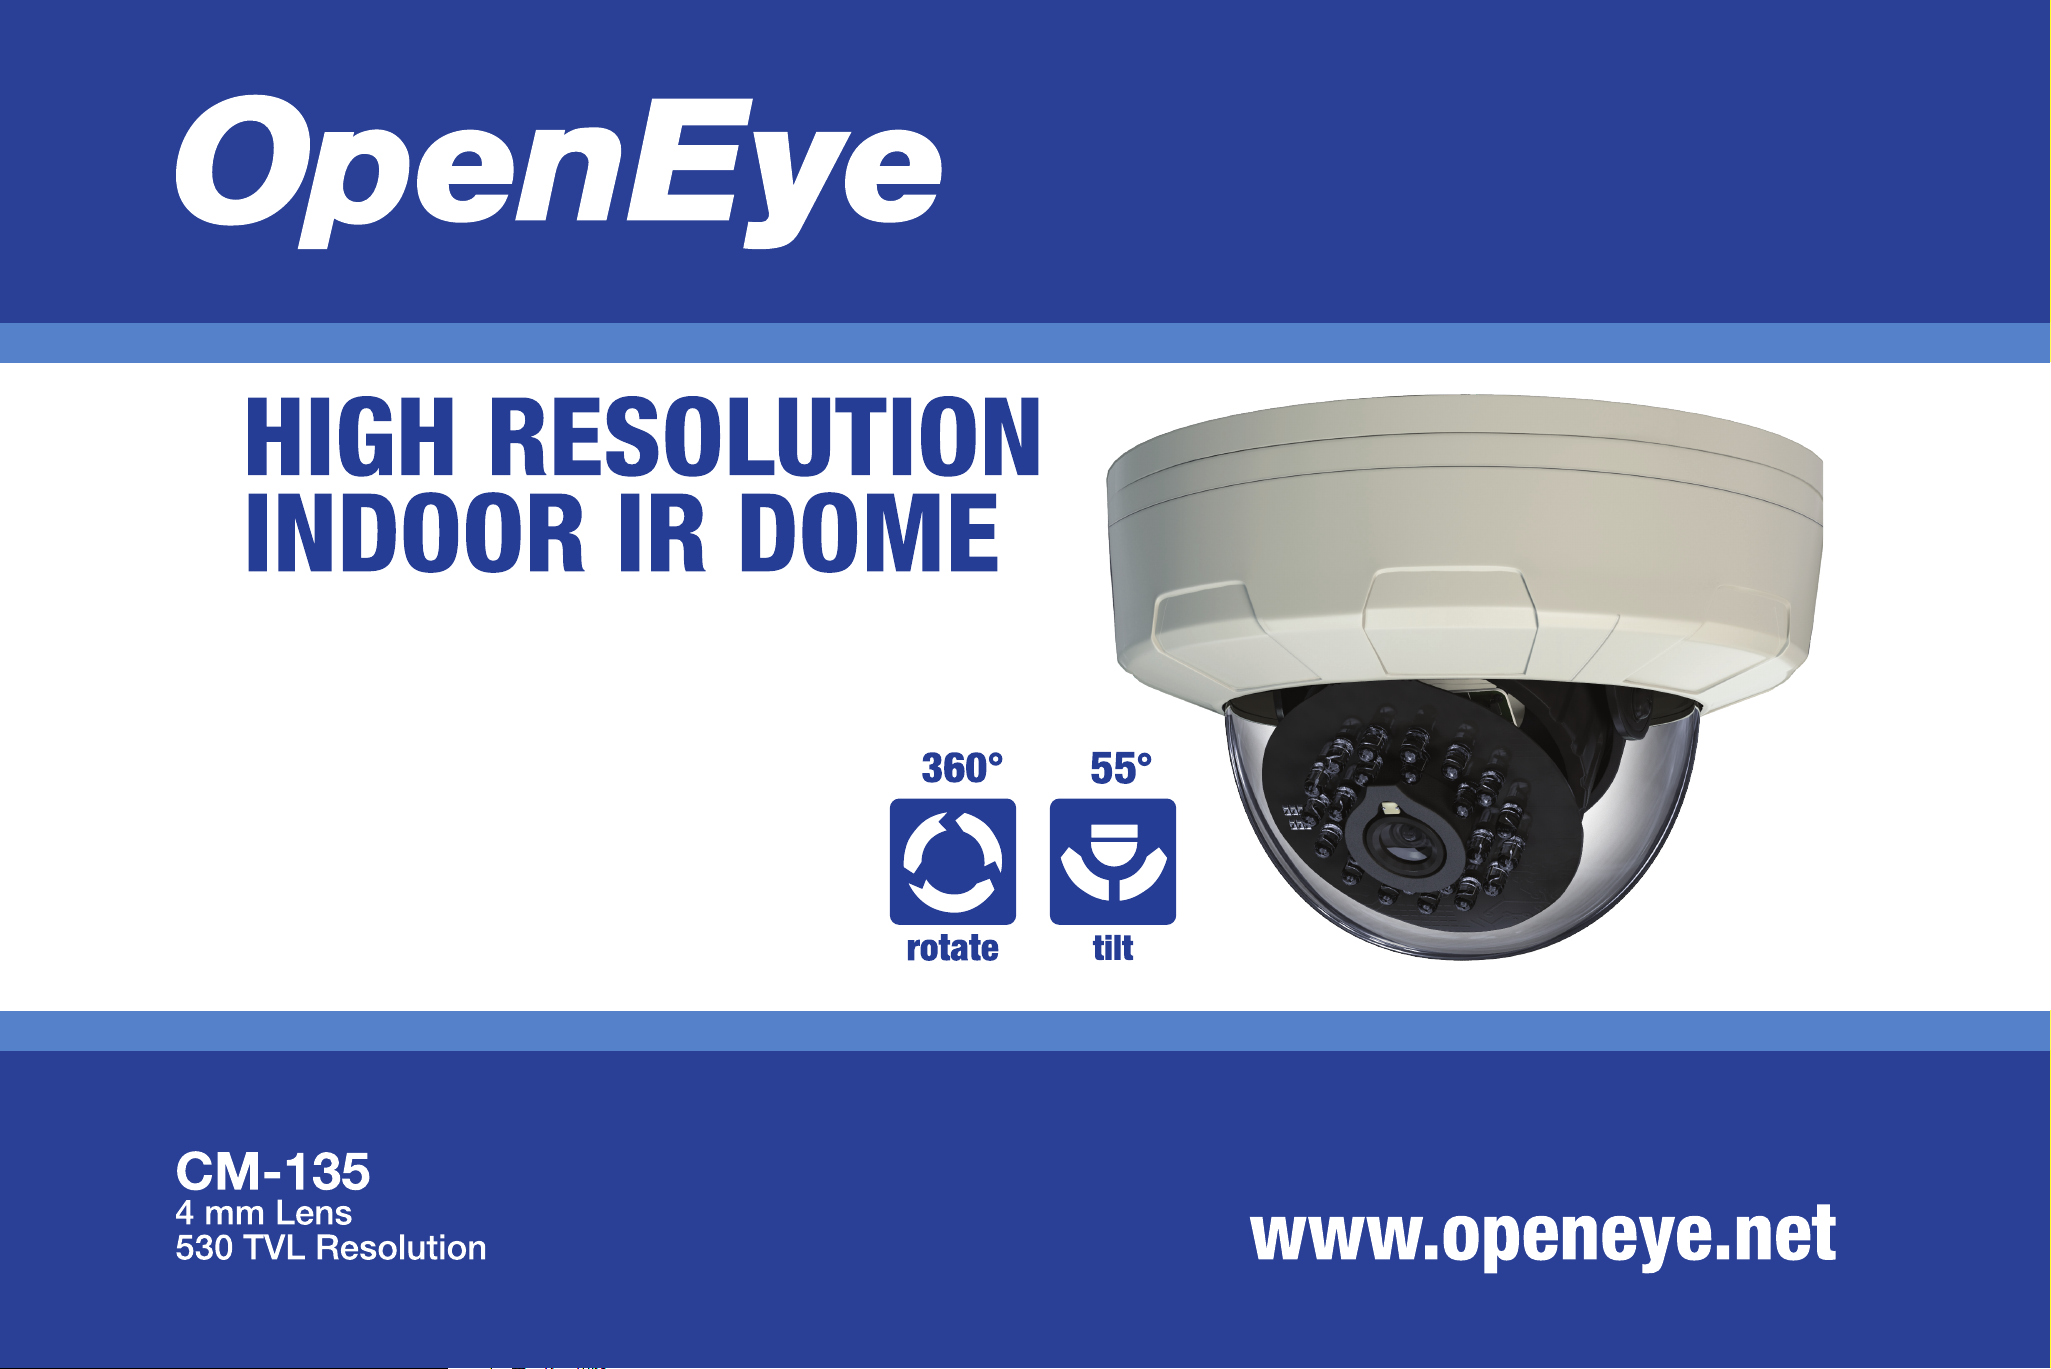
Features ...................................... 7
Installation .................................. 8
Camera Operation .................... 12
Troubleshooting ........................ 35
Specifications ........................... 36
4
Page 5

Safety Instructions
Read Instructions
Installation
Read all of the safety and operating instructions
before using the product.
Retain Instructions
Save these instructions for later use.
Cleaning
Unplug this appliance from wall outlet before cleaning.
Do not use liquid leaners or aerosol cleaners. Use a
damp cloth for cleaning.
Water and Moisture
Do not place this product on an unstable cart, stand,
or table. The product may fall causing serious injury to
a child or adult, and damage to the product. Mounting
should follow the manufacturer’s instructions and
should use a mounting accessory recommended by
the manufacturer.
Power Source
This product should only be connected to the type
of power source indicated on the packaging. If you
are not sure of the type of power supplied to your
location, consult your dealer or local power company.
Do not use this product near water or moisture. For
example: near a bathtub, wash bowl, kitchen sink,
laundry tub, in a wet basement, or near swimming
pools.
5
Page 6

Precautions
Handling
Do not disassemble the camera.
•
Never touch the parts inside the camera.
•
Do not drop the camera or subject it to shocks and
•
vibrations to avoid possible damage.
When attaching or removing the lens, handle with
•
care so that moisture and dust do not enter the
camera.
Installation and Storage
Do not point the camera at the sun. This could
•
damage the camera whether or not it is operating.
Do not install the camera where the temperature
•
could exceed the allowable range.
Be sure the ambient temperature is less than 40ºC
•
in installations intended for long term continuous
operation.
Avoid installing in a humid or dusty location.
•
Avoid installing in locations where there are strong
•
magnetic fields and electric signals.
6
Avoid installing in locations where the camera would
•
be subject to strong vibrations.
Never expose the camera to rain or water.
•
Page 7

Features
High Sensitivity 1/3 Inch Sony Super HAD CCD
•
Min. Illumination (F1.2, 30 IRE): 0.1 Lux (Color)
•
0.05 Lux (BW, ICR)
0.0 Lux (IR Led On)
Day & Night (Programmable or ICR)
•
OSD (On Screen Display)
•
High Performance Menus for Functions
•
Privacy Zone Selectable (4 Programmable Zones)
»
Motion Detection Selectable (64 Programmable Zones)
»
Sharpness Enhanced Adjustable
»
Flickerless Selectable
»
Gamma Enhanced Selectable
»
BLC Zone Selectable (64 Programmable Zones)
»
7
Page 8
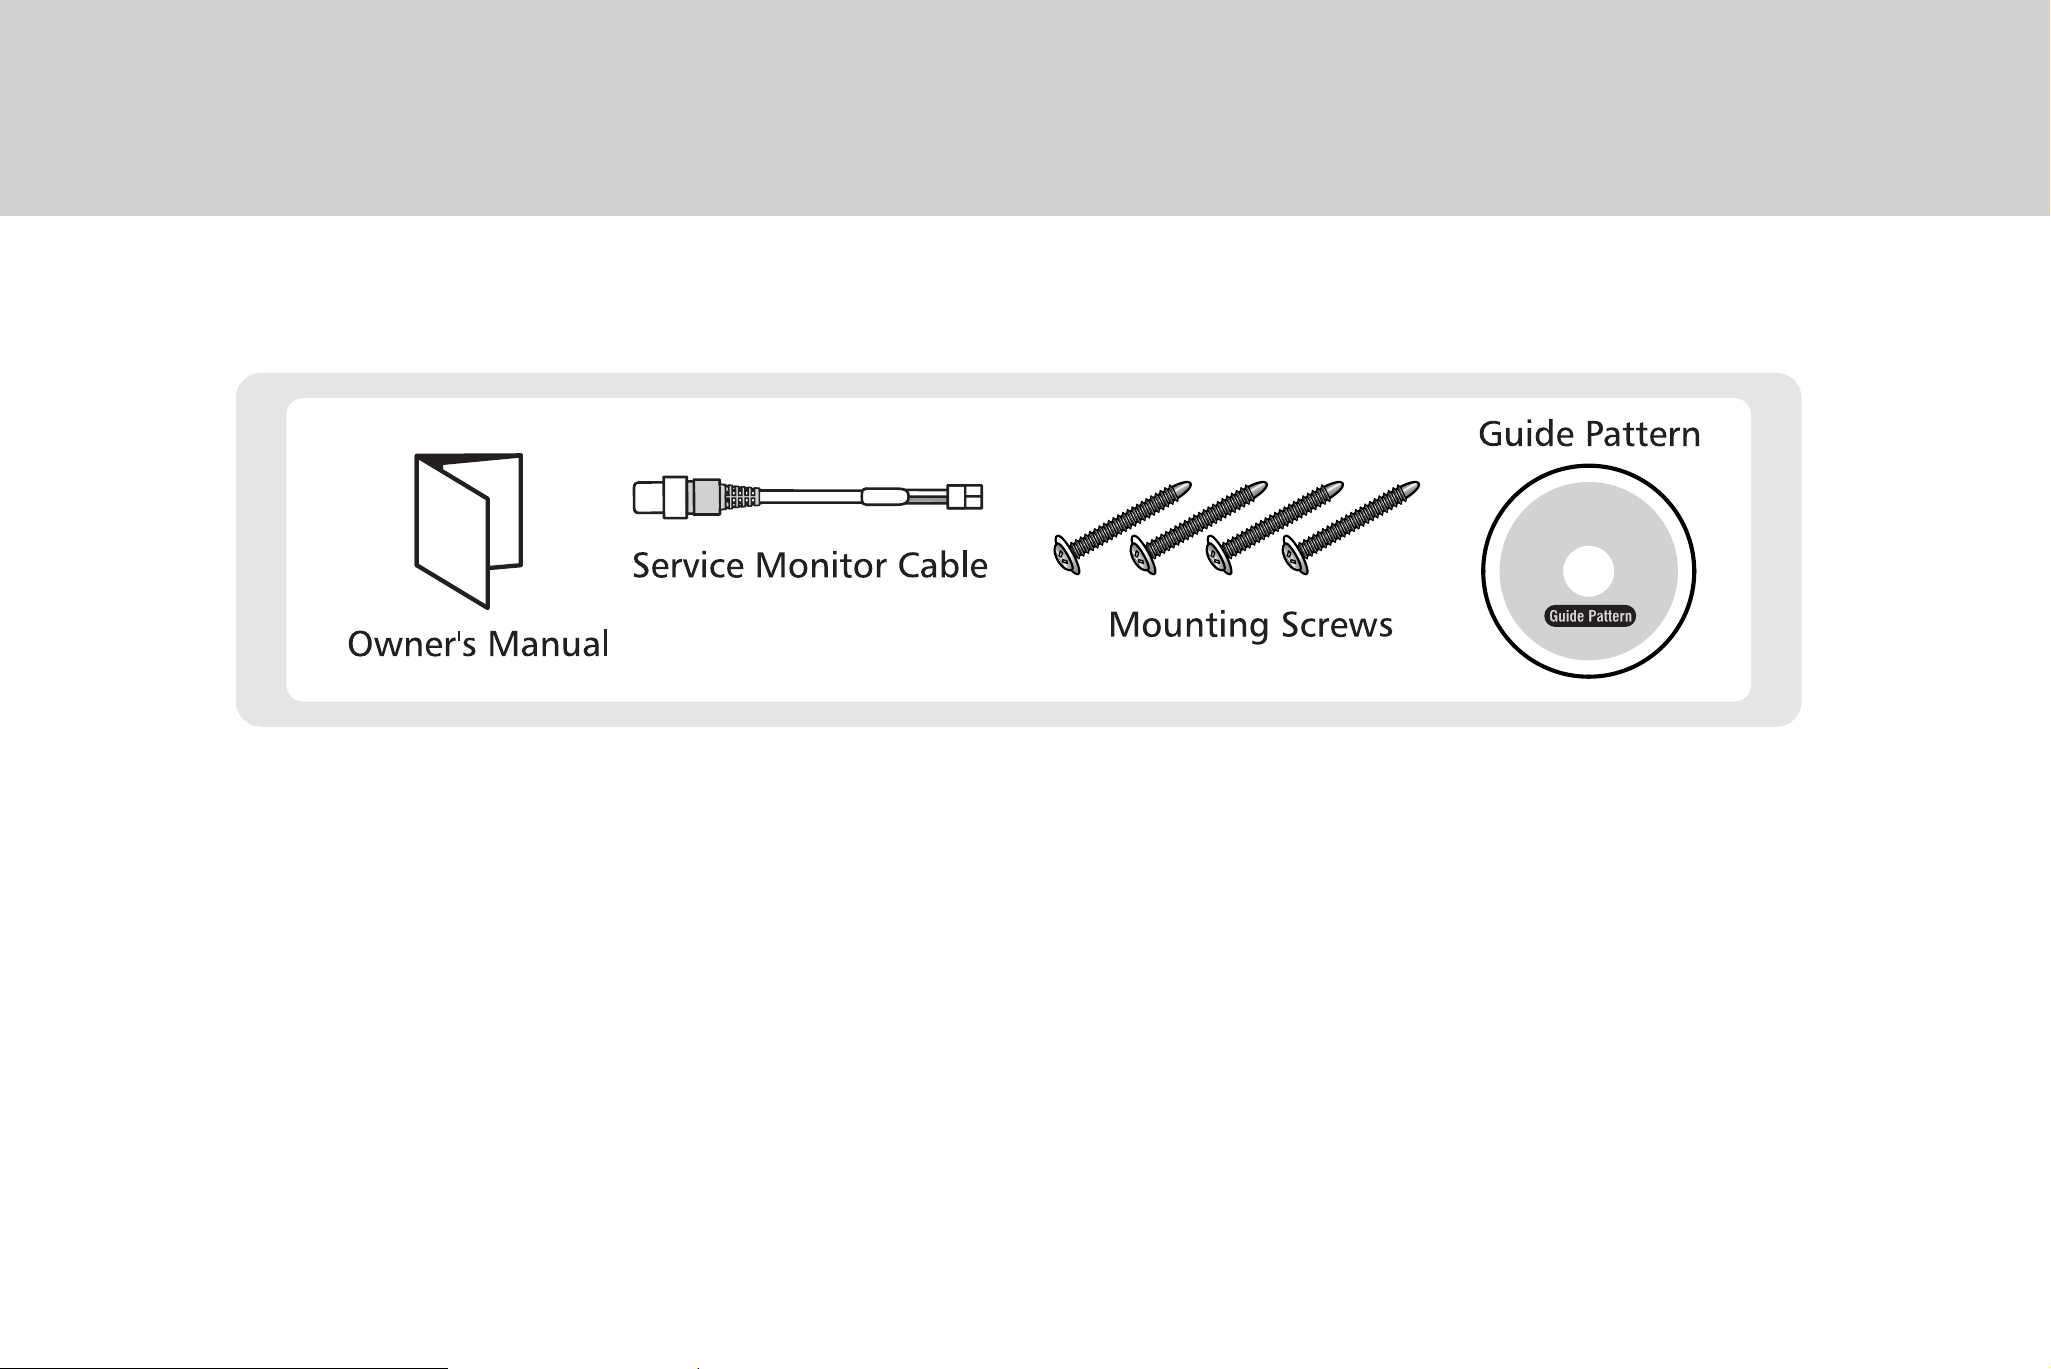
Installation
Box Contents:
8
Page 9
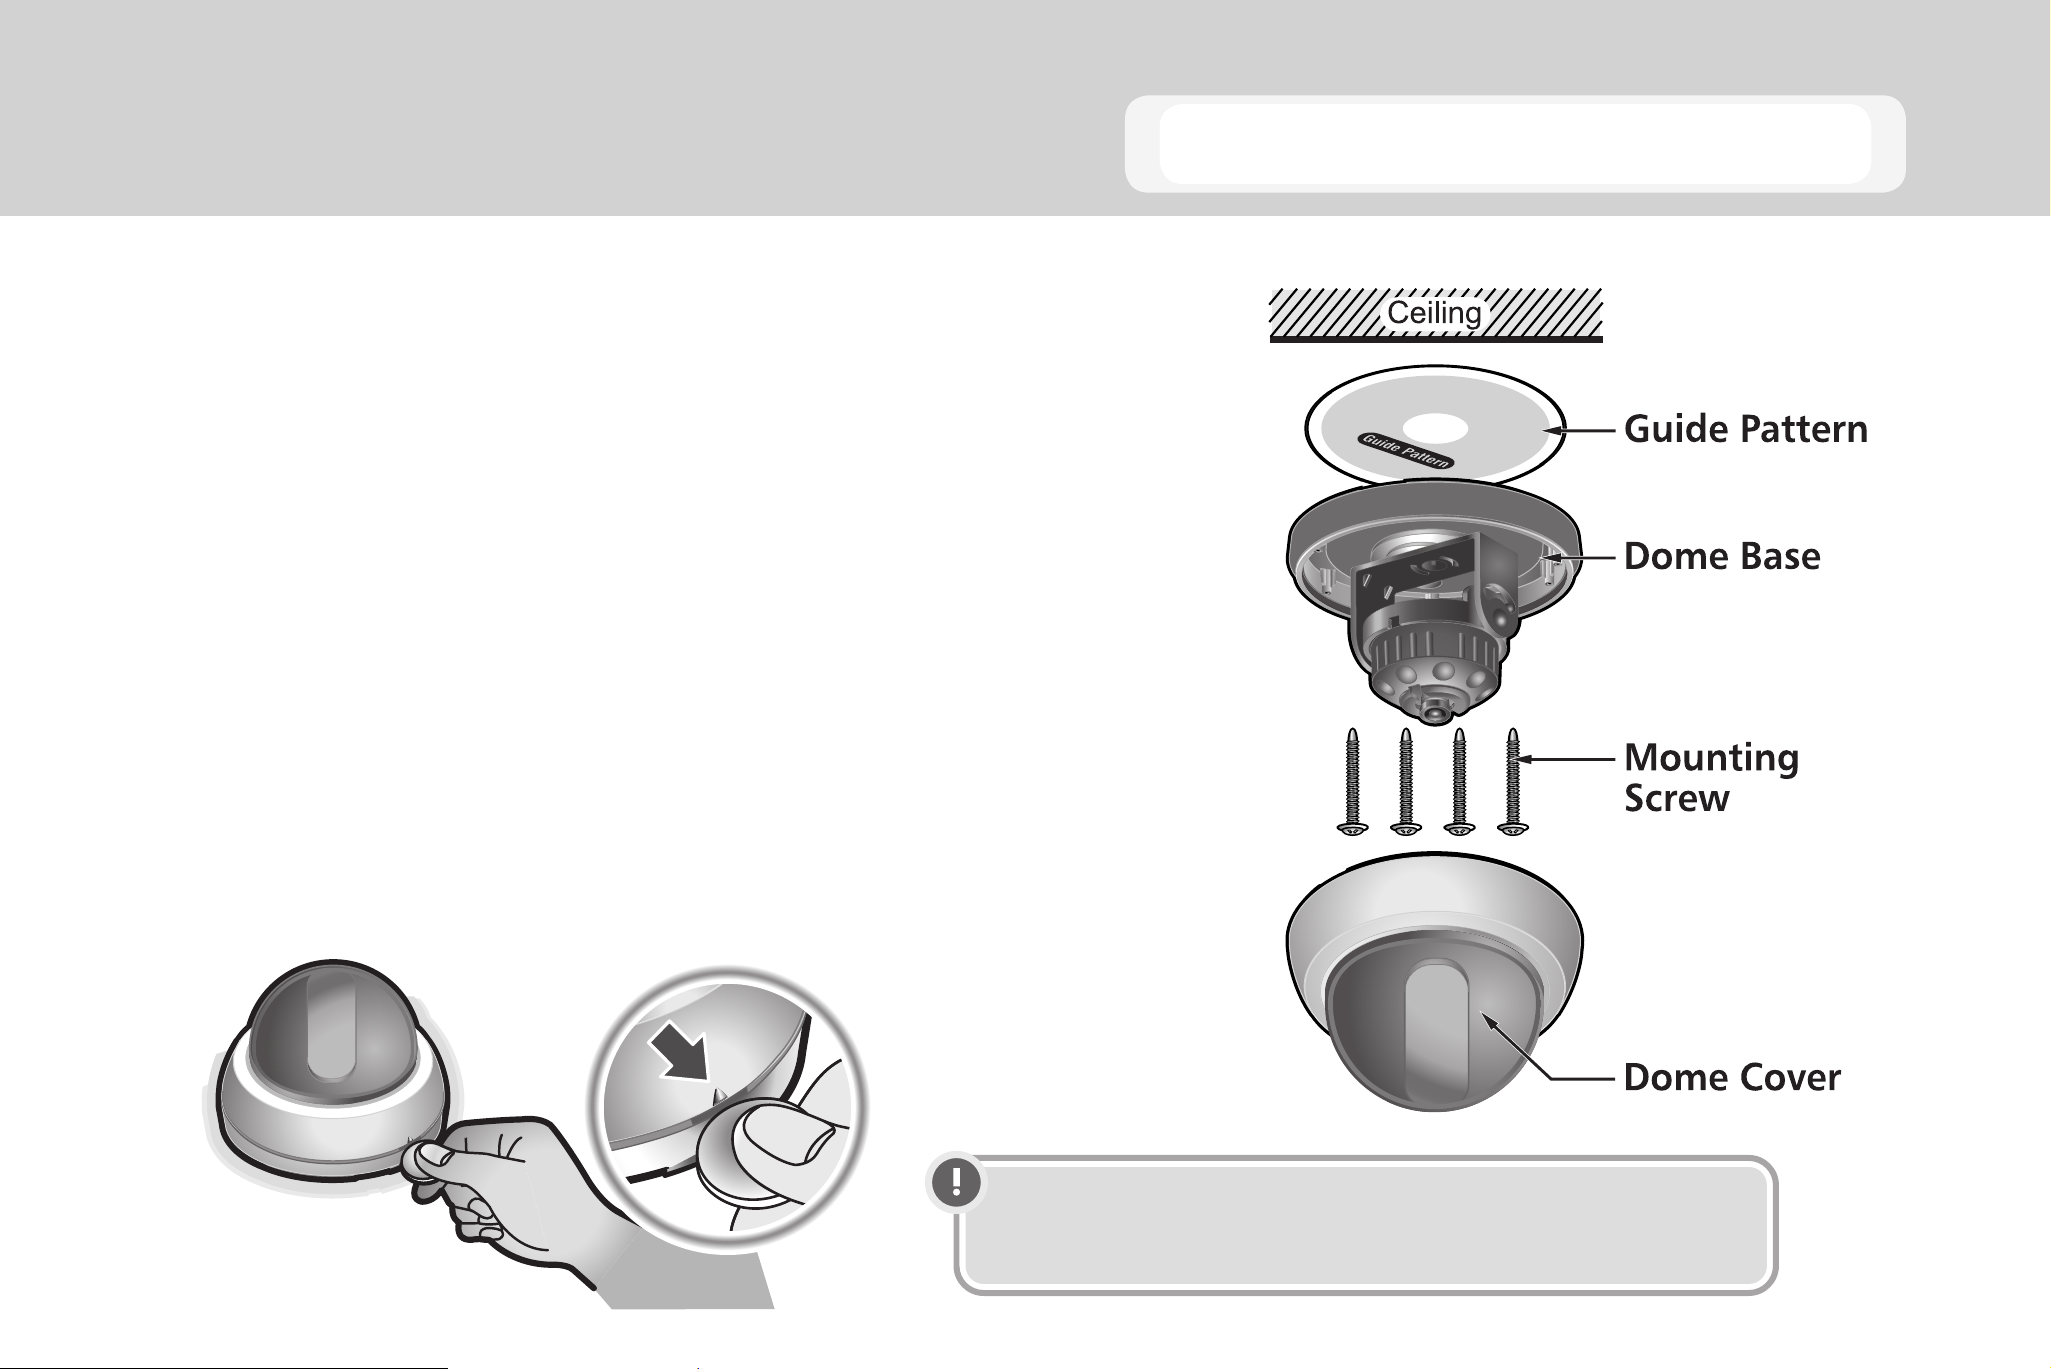
Stick the guide pattern on the wall or ceiling.
1.
Drill four holes according to the guide pattern, then insert
2.
anchors into the holes.
Pull the power / video cables to the installation point and
3.
connect to the camera.
Attach the camera to the ceiling using the included screws.
4.
Installing the Dome Camera
Adjust the camera view and focus by turning and moving the
5.
3-axis camera by hand.
Place the dome cover over the base and press it into place.
6.
Note Insert a coin in the slot on the side of the camera
and twist to remove the dome cover.
9
Page 10
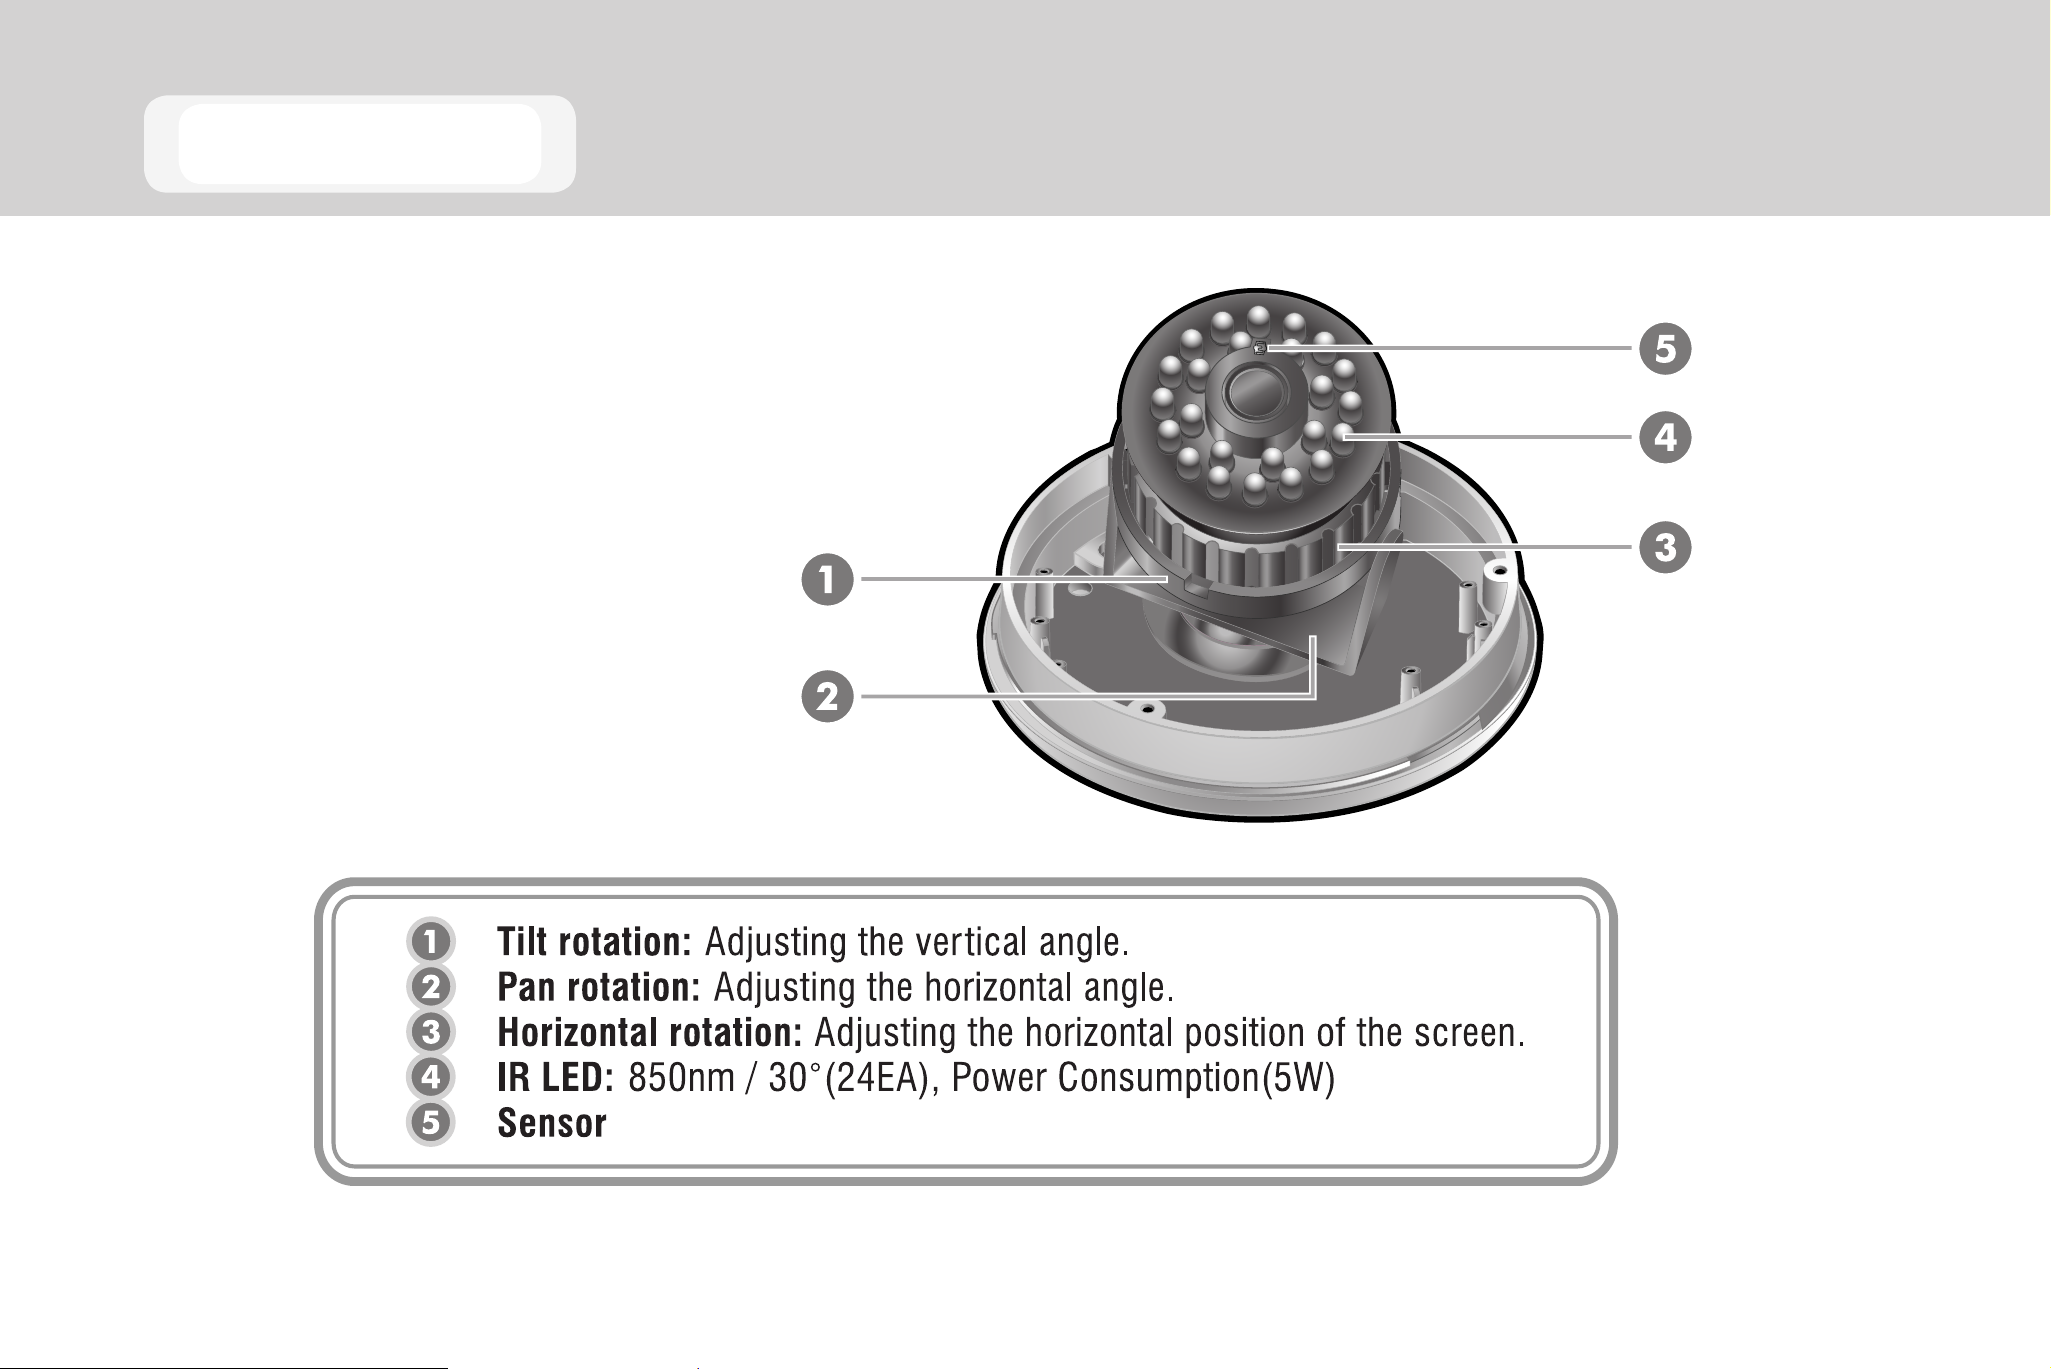
Camera Lens
10
Page 11
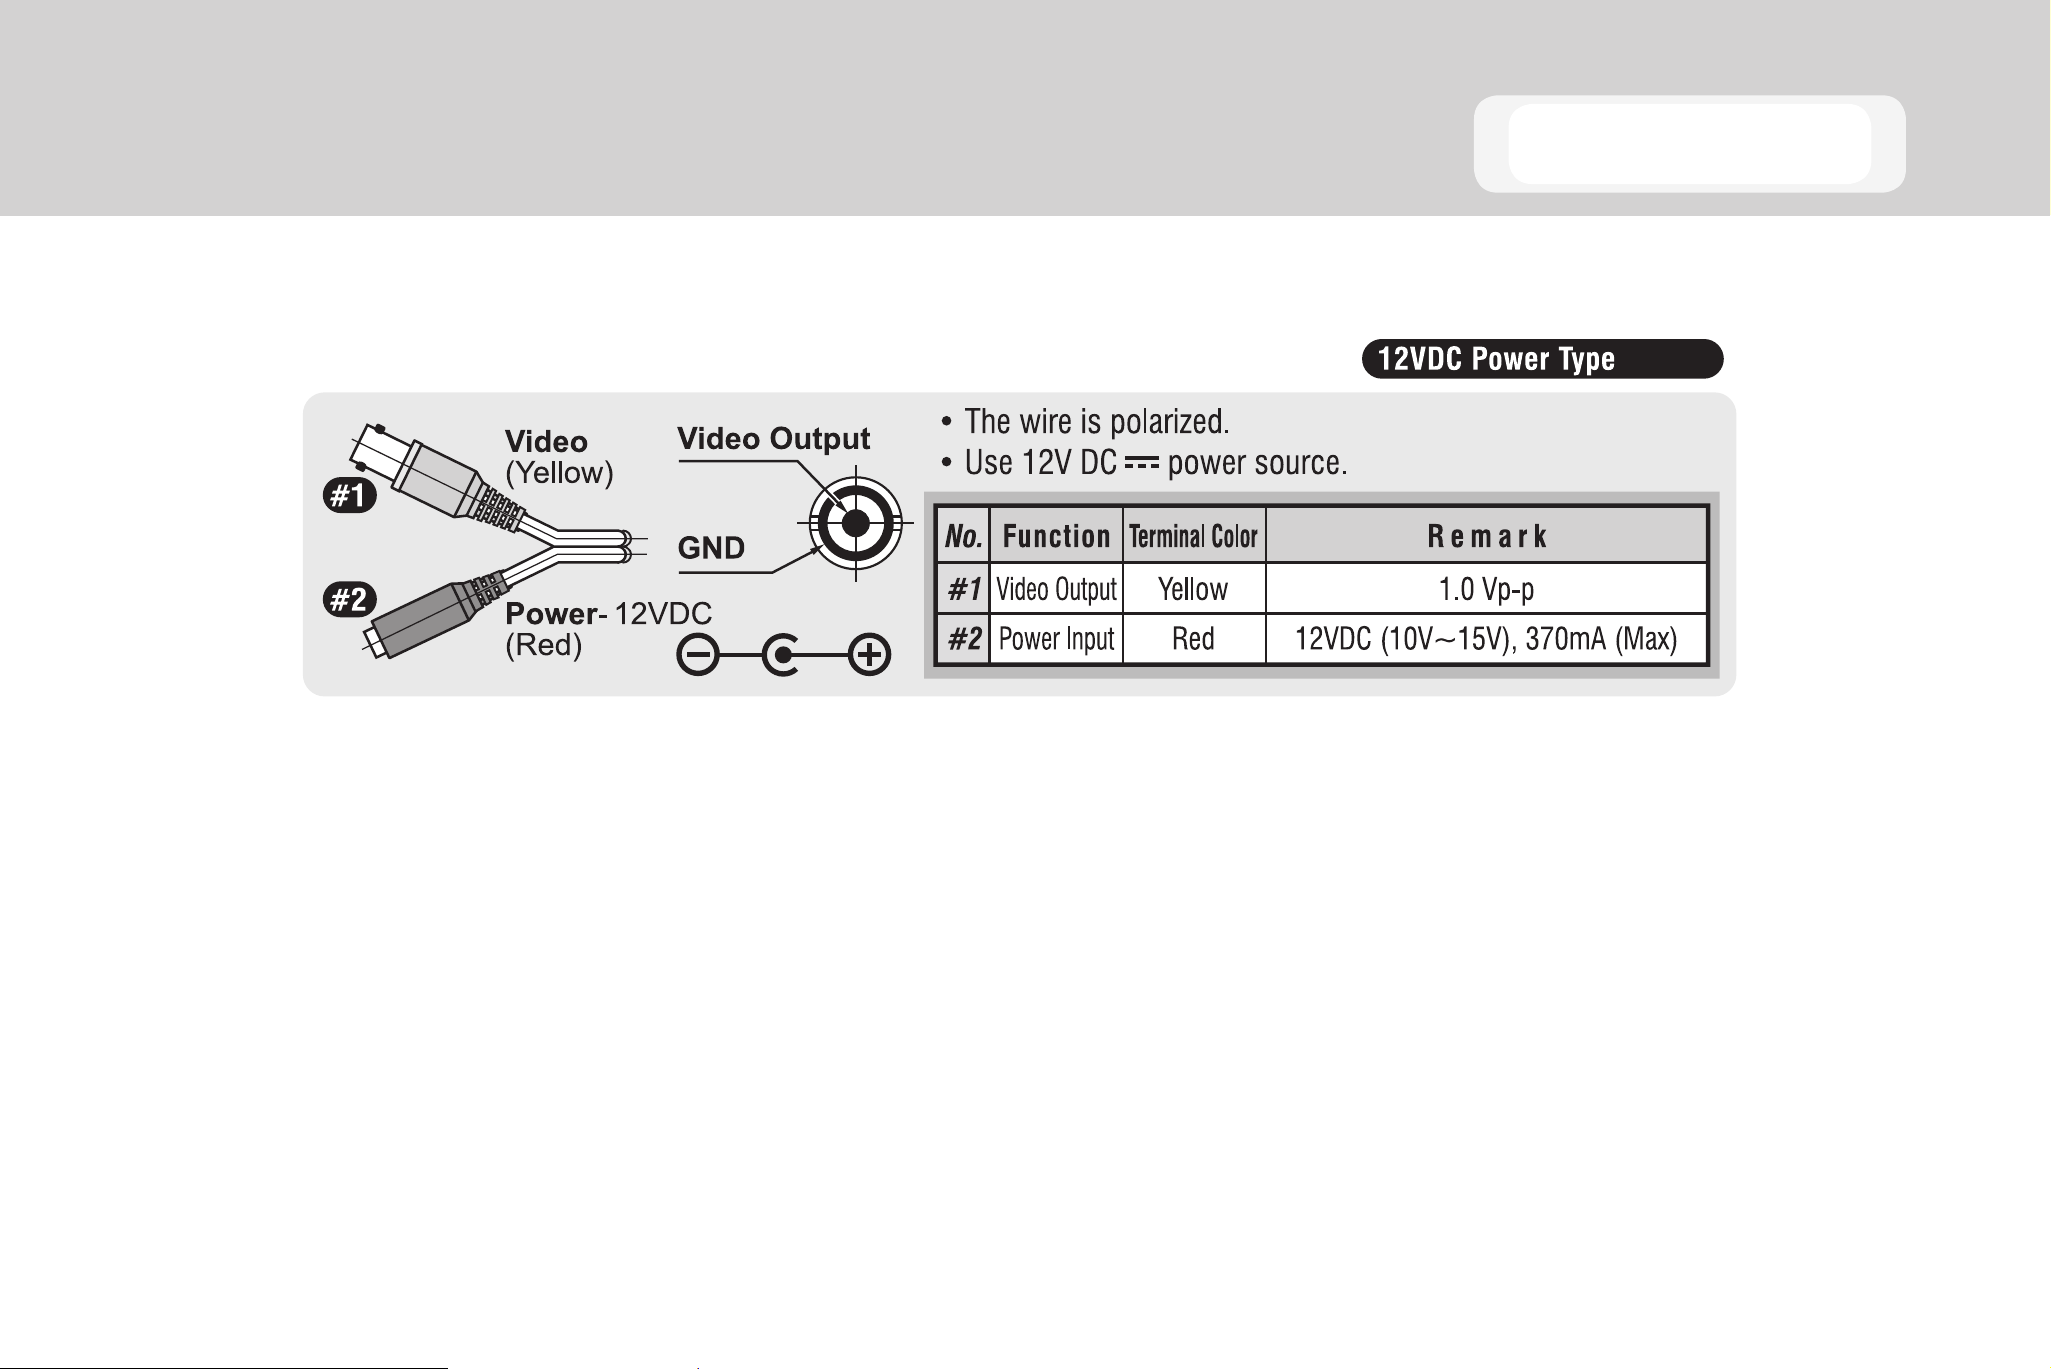
Connections
11
Page 12
Camera Operation
SETUP MENU
CAMERA ID ON• OFF•
SHUTTER AUTO• FLK• FIXED• MANUAL•
WHITE BAL. ATW• AWB• FIXED• MANUAL•
FUNCTION BLC• AGC• DAY NIGHT• PRIVACY•
MIRROR• GAMMA• MOTION•
ADJUST CONTRAST• SHARPNESS•
CB_GAIN• CR_GAIN•
LANGUAGE ENGLISH• KOREAN• CHINESE1• CHINESE2• JAPANESE•
RESET
EXIT
12
Page 13

Press the joystick for one second and the OSD
will appear on the screen. Move the joystick up,
down, left & right to control the OSD functions
Setting up the Menu
Setup
Press and hold the joystick 1
•
second to access the SETUP
mode.
Select menu options using the
•
joystick. (up, down, left, right)
13
Page 14

Main Menu - SETUP
Press the joystick to open SETUP mode.
1.
The MAIN SETUP menu is displayed on the monitor.
Select an OSD item using UP, DOWN.
2.
Set details using LEFT, RIGHT.
3.
Select EXIT and then press the MENU button to finish SETUP
4.
(Save and Exit).
14
Page 15

Camera ID setup (default setting OFF)
Select CAMERA ID on the SETUP menu.
1.
Use the joystick (LEFT, RIGHT) to set CAMERA ID to ON .
2.
Press the joystick to open ID SETUP.
3.
Use the joystick to change the character. The camera name
4.
can be up to 63 characters.
Main Menu - CAMERA ID
Select C and press the joystick to clear the ID.
5.
Select and press the joystick to exit the ID setup mode.
6.
POSITION setup
Select POSITION press the joystick.
1.
Move the camera name using UP, DOWN, LEFT, RIGHT.
2.
Press the joystick to confirm the camera name location.
3.
15
Page 16

Main Menu - SHUTTER
SHUTTER setup (default setting OFF)
Select SHUTTER on the SETUP menu.
1.
Use the joystick (LEFT, RIGHT) to set the desired SHUTTER
2.
mode: AUTO FLK FIXED MANUAL .
16
Page 17

FIXED setup
Select SHUTTER on the SETUP menu.
1.
Use the joystick (LEFT, RIGHT) to set SHUTTER to FIXED .
2.
Use the joystick (LEFT, RIGHT) to set the shutter speed:
3.
1/60 ~ 1/100,000
Menu [SHUTTER] - FIXED
17
Page 18

Main Menu - WHITE BALANCE
WHITE BALANCE setup
Select SHUTTER on the SETUP menu.
1.
Use the joystick (LEFT, RIGHT) to set the desired mode:
2.
ATW AWB FIXED MANUAL .
FIXED setup
Set FIXED mode: MODE 1 ~ MODE 4
1.
18
MANUAL setup
Set the RED and BLUE color value temperature.
1.
Page 19

FUNCTION setup
Select FUNCTION on the SETUP menu.
1.
Use the joystick (UP, DOWN) to select items.
2.
Use the joystick (LEFT, RIGHT) to set details.
3.
Main Menu - FUNCTION
19
Page 20

Menu [FUNCTION] - Back Light Compensation 1
BLC SETUP mode (Back Light Compensation)
Select FUNCTION on the SETUP menu.
1.
Use the joystick (LEFT, RIGHT) to set FUNCTION to BLC ON .
2.
BLC AREA setup
Use the joystick (UP, DOWN, LEFT, RIGHT) to move the AREA
1.
setup position.
20
Press the joystick to set or release BLC AREA.
2.
Press and hold the joystick to open the BLC AREA MODE
3.
menu.
Page 21

Menu [FUNCTION] - Back Light Compensation 2
BLC AREA menu
ALL CLEAR - Clear all set AREA blocks.
•
ALL SET - Set all 64 AREA blocks.
•
RETURN - Return to BLC AREA setup mode.
•
EXIT - Save AREA and return to BLC SETUP mode.
•
21
Page 22

Menu [FUNCTION] - Back Light Compensation 3
BLC RATIO mode
Use the joystick (UP, DOWN) to move to BLC RATIO.
1.
Use the joystick (LEFT, RIGHT) to change the BLC RATIO level
2.
(0 ~ 63).
0 : MIN
63 : MAX
22
Page 23

Menu [FUNCTION] - Auto Gain Control
AGC CONTROL setup mode (Auto Gain Control)
Select FUNCTION on the SETUP menu.
1.
Use the joystick (LEFT, RIGHT) to set FUNCTION to AGC ON .
2.
Press the joystick to open the AGC CONTROL screen.
3.
Use the joystick (LEFT, RIGHT) to adjust the AGC GAIN value
4.
(0~255).
0 : MIN
255 : MAX
23
Page 24

Menu [FUNCTION] - DAY NIGHT 1
DAY NIGHT setup
Use the joystick (UP, DOWN) to move to DAY NIGHT.
1.
Use the joystick (LEFT, RIGHT) to set the desired mode:
2.
AUTO B/W COLOR.
AUTO mode setup
Press the joystick to select AUTO .
1.
24
Use the joystick (UP, DOWN) to select items.
2.
Use the joystick (LEFT, RIGHT) to change the value.
3.
Page 25

Menu [FUNCTION] - DAY NIGHT 2
DAY NIGHT AUTO OSD description
DELAY
•
DAY --> NIGHT or NIGHT --> DAY conversion time setup
0 : No DAY NIGHT AUTO conversion
1~63 : You can set from 1 second to 15 seconds.
START LEVEL
•
DAY --> NIGHT conversion illumination intensity setup 0~255 (DEFAULT : 4 Lux)
0 : High illumination intensity
255 : Low illumination intensity
Initial value setup is recommended.
END LEVEL
•
NIGHT --> DAY conversion illumination intensity setup 0~255 (DEFAULT : 12 Lux)
0 : High illumination intensity
255 : Low illumination intensity
Initial value setup is recommended.
25
Page 26

Menu [FUNCTION] - DAY NIGHT 3
B/W mode setup
Press the joystick to select B/W .
1.
Use the joystick (LEFT, RIGHT) to set BURST ON or OFF.
2.
26
Page 27

PRIVACY setup
Default setting OFF - Use the joystick (LEFT, RIGHT) to select
1.
ON .
When PRIVACY is set to ON four AREA groups will display behind
2.
the setup screen.
Press the joystick to open the PRIVACY details.
3.
Menu [FUNCTION] - PRIVACY
PRIVACY details setup
AREA SEL - Select the PRIVACY AREA (0~3)
•
AREA STATE - ON/OFF
•
LEFT - Expand/Reduce size of the left side of the selected AREA
•
RIGHT - Expand/Reduce size of the right side of the selected AREA
•
TOP - Expand/Reduce size of the top of the selected AREA
•
BOTTOM - Expand/Reduce size of the bottom of the selected AREA
•
COLOR - Change the color of the PRIVACY AREA (16 colors)
•
27
Page 28

Menu [FUNCTION] - MIRROR
MIRROR setup
Use the joystick (LEFT, RIGHT) to set MIRROR ON or OFF.
1.
Default setting is OFF.
28
Page 29

GAMMA setup
Use the joystick (UP, DOWN) to select GAMMA.
1.
Default setting 0.45
Use the joystick (LEFT, RIGHT) to adjust the GAMMA value:
2.
USER 0.05 0.10 0.15~1.0
Menu [FUNCTION] - GAMMA
29
Page 30

Menu [FUNCTION] - MOTION
MOTION DETECTION setup
Use the joystick (LEFT, RIGHT) to set MOTION ON or OFF.
1.
Default setting is OFF.
When MOTION is set to ON press the joystick display the
2.
MOTION details.
AREA setup
Select AREA and press the joystick to open the MOTION
1.
30
AREA setup
MOTION TH. setup
Use the joystick (LEFT, RIGHT) to set motion sensitivity
1.
0 (MAX ~ 255 MIN
MOTION TRACE setup
Display (ON) / Hide (OFF) the motion detection AREA.
1.
Page 31

Menu [FUNCTION] - MOTION AREA 1
MOTION AREA setup
Use the joystick (UP, DOWN, LEFT, RIGHT) to move the AREA
1.
setup position.
Press the joystick to set or release MOTION AREA.
2.
Press and hold the joystick to open the MOTION AREA menu.
3.
MOTION AREA menu
ALL CLEAR - Clear all set AREA blocks.
•
ALL SET - Set all 64 AREA blocks.
•
RETURN - Return to MOTION AREA setup.
•
31
Page 32

Main Menu - ADJUST
ADJUST setup
Select ADJUST on the SETUP menu and press the joystick
Use the joystick (LEFT, RIGHT) to change the level values.
CONTRAST setup
Adjust Y-gain value (0 ~ 255).
SHARPNESS setup
Adjust aperture value (0 ~ 31).
32
CB_GAIN setup
Adjust color CB_GAIN value (0 ~ 255).
CR_GAIN setup
Adjust color CR_GAIN value (0 ~ 255)
Page 33

LANGUAGE setup
Use the joystick (UP, DOWN) to select LANGUAGE on the SETUP
1.
menu.
Use the joystick (LEFT, RIGHT) to change the LANGUAGE.
2.
ENGLISH
•
Korean
•
Main Menu - LANGUAGE
Chinese1
•
Chinese2
•
Japanese
•
33
Page 34

Main Menu - RESET
RESET
Select RESET on the SETUP menu and press the joystick.
1.
Select YES to reset the camera to default factory settings.
2.
34
Page 35

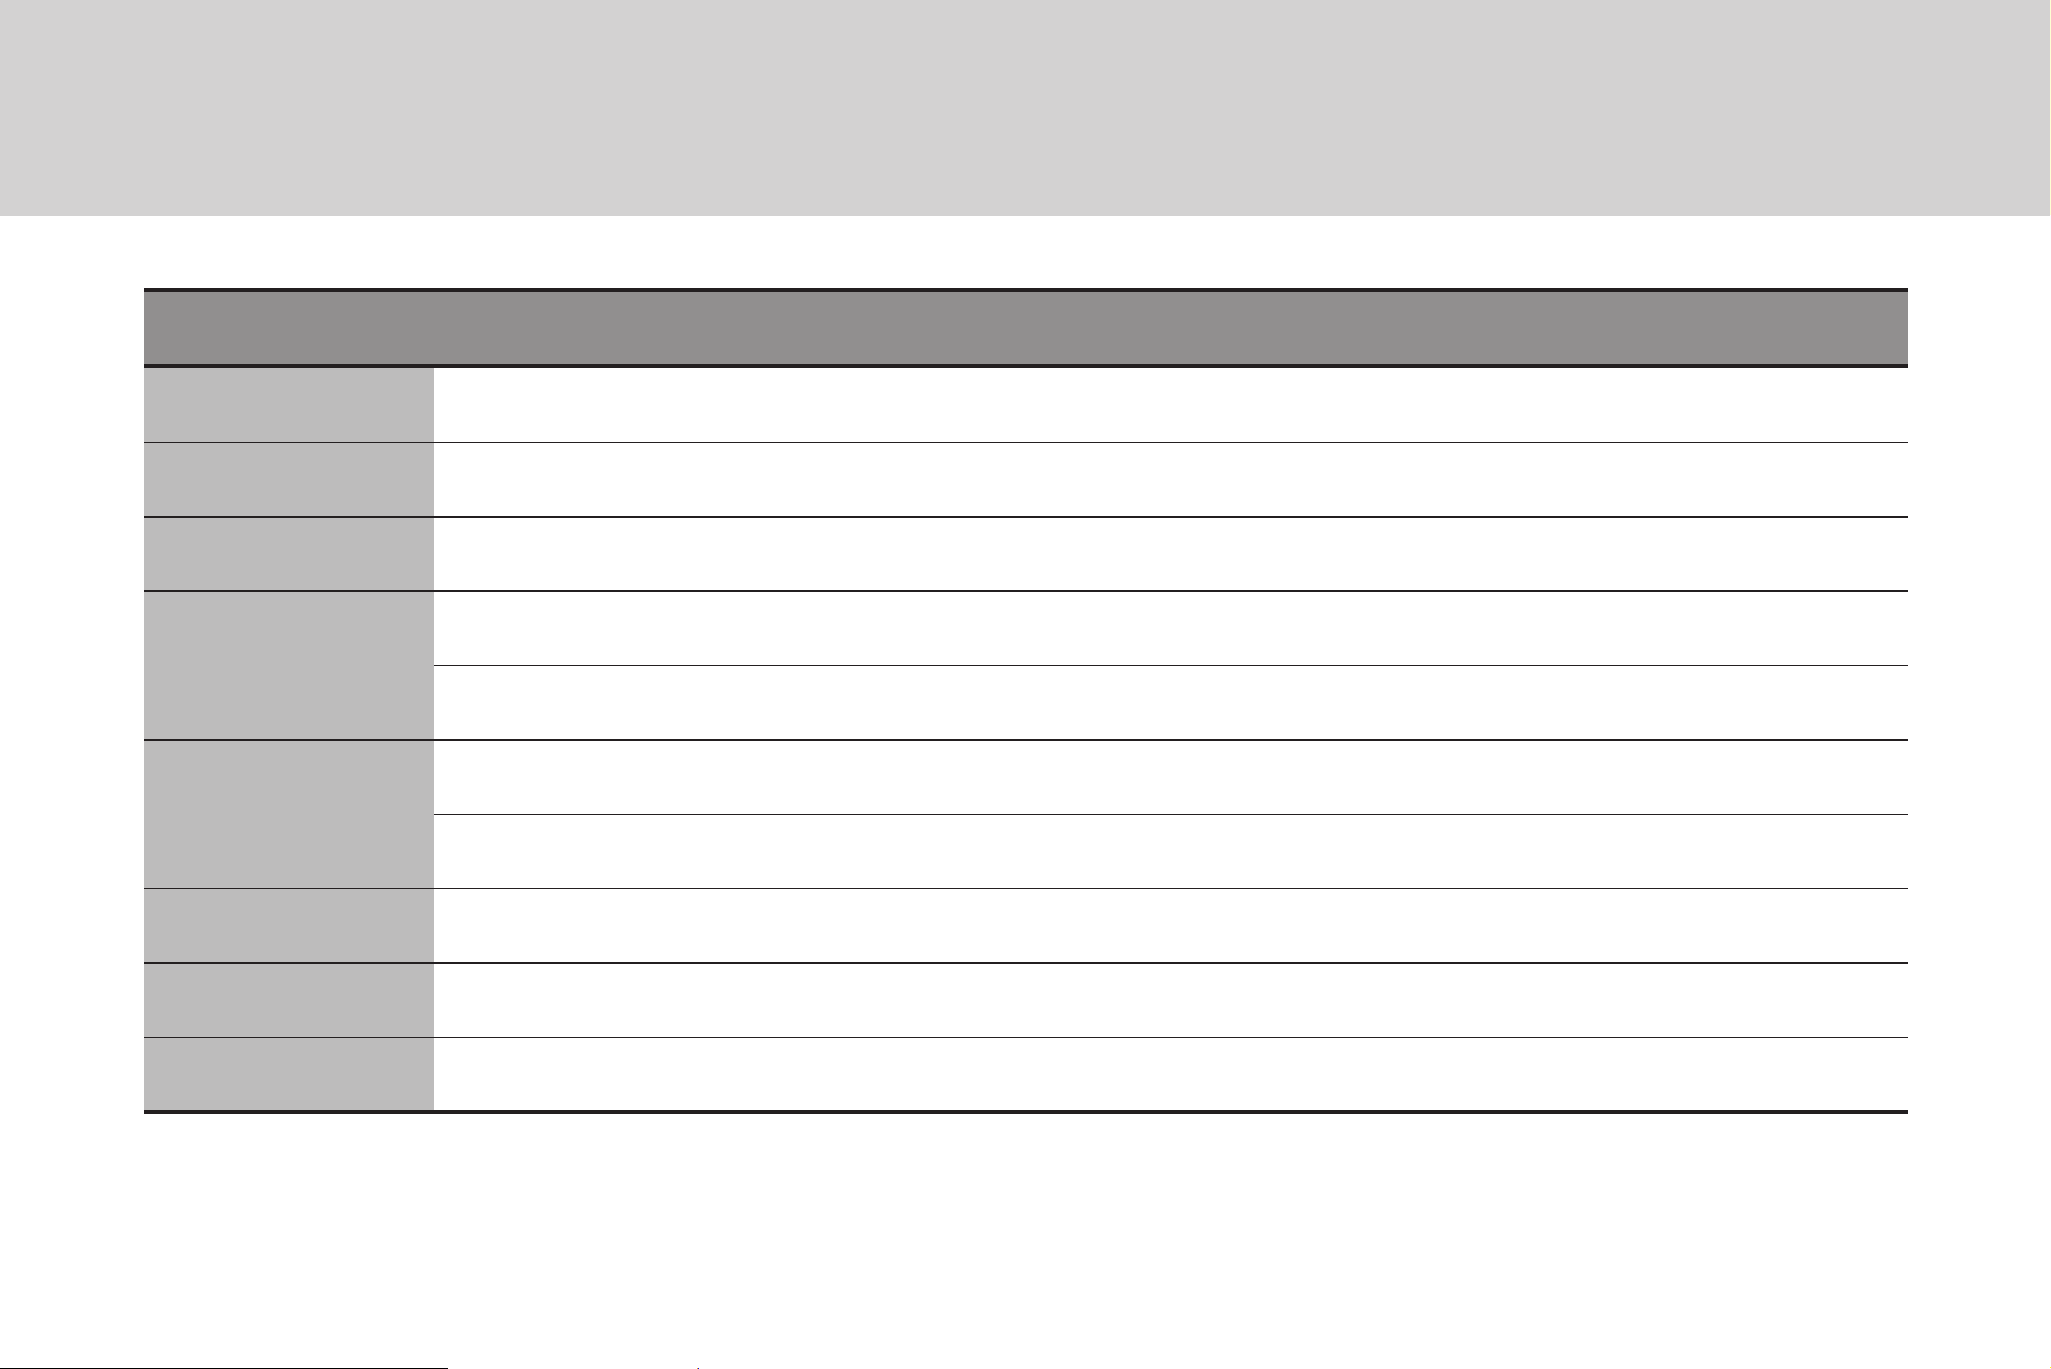
Troubleshooting
If you have trouble operating your camera, refer to the following table. If the information provided in this manual
does not enable you to solve the problem, contact an authorized technician.
Problem Solutions
Nothing appears on the
screen
The image on the screen is
dim
The image on the screen is
dark
The camera is not working
Check that the power cord and line connection between the camera and
•
monitor are fixed properly.
Check that you have properly connected the VIDEO cable to the camera
•
VIDEO output jack.
Is the lens dirty? Clean your lens with a soft, clean cloth.
•
Change the monitor settings
•
If the camera is exposed to too strong light, change the camera position.
•
Adjust the lens’ focus.
•
Adjust the contrast feature of the monitor.
•
If you have an intermediate device, set the 75Ω / Hi-z properly.
•
Adjust the DC level on the OSD menu.
•
Check that you have properly connected the camera to an appropriate
•
properly, and the surface
of the camera is hot.
The image on the screen
flickers
power source.
Is the camera facing direct sunlight or fluorescent lighting? Change the
•
camera position.
35
Page 36

Specifications
Model CM-135
Image Sensor 1/3” Sony SuperHAD
Imaging DSP NEXT NVP2020
IP Rating None
Type / Format NTSC
Wide Dynamic Range No
36
Minimum Illumination 0.3 lux @ F1.2 (30 IRE, AGC ON)
0.5 lux @F1.2 (50 IRE, AGC ON)
Day / Night IR Emitting TDN
Horizontal TVL 530 TVL
Service Monitor Jack Yes
S/N Ratio >48dB (AGC Off)
Focal Length 4 mm
Iris Control N/A
Synchronization INT
Video Output 1.0Vpp, 75Ω Unbalanced
0 lux @ F1.2 (IR LED)
Page 37

Model CM-135
White Balance ATW
Auto White Balance Range 1800 K ~ 11000 K
Backlight Compensation On/Off (Level Adjustable)
Auto Gain Control On/Off (Level Adjustable)
Operating Temperature 14ºF ~ 122ºF (-10ºC ~ 50ºC)
Heater No
Power Consumption 3.6W (Max)
Rated Amperage 0.28A
Input Voltage 12vDC ±10%
IR Range Up to 50 ft (15 m)
IR LEDs 24 (850nm / 30º)
Weight 0.8 lbs (0.366 kg)
Dimensions Dome: ø3.9” (100 mm) x H: 2.2” (56 mm)
Housing: ø5.5” (140 mm) x H: 2.15” (55 mm)
Housing / Dome Cover White / Smoke
37
Page 38

NOTES
38
Page 39

NOTES
39
Page 40

40
A12931
29697AA
©2009 OpenEye. All Rights Reserved. Information contained in this document is
subject to change without prior notice. OpenEye does its best to provide accurate
information but cannot be held responsible for typos or mistakes.
 Loading...