

Open Country Tumble Drumm TD-6065-13, Tumble Drumm TD-6065-13L User Manual
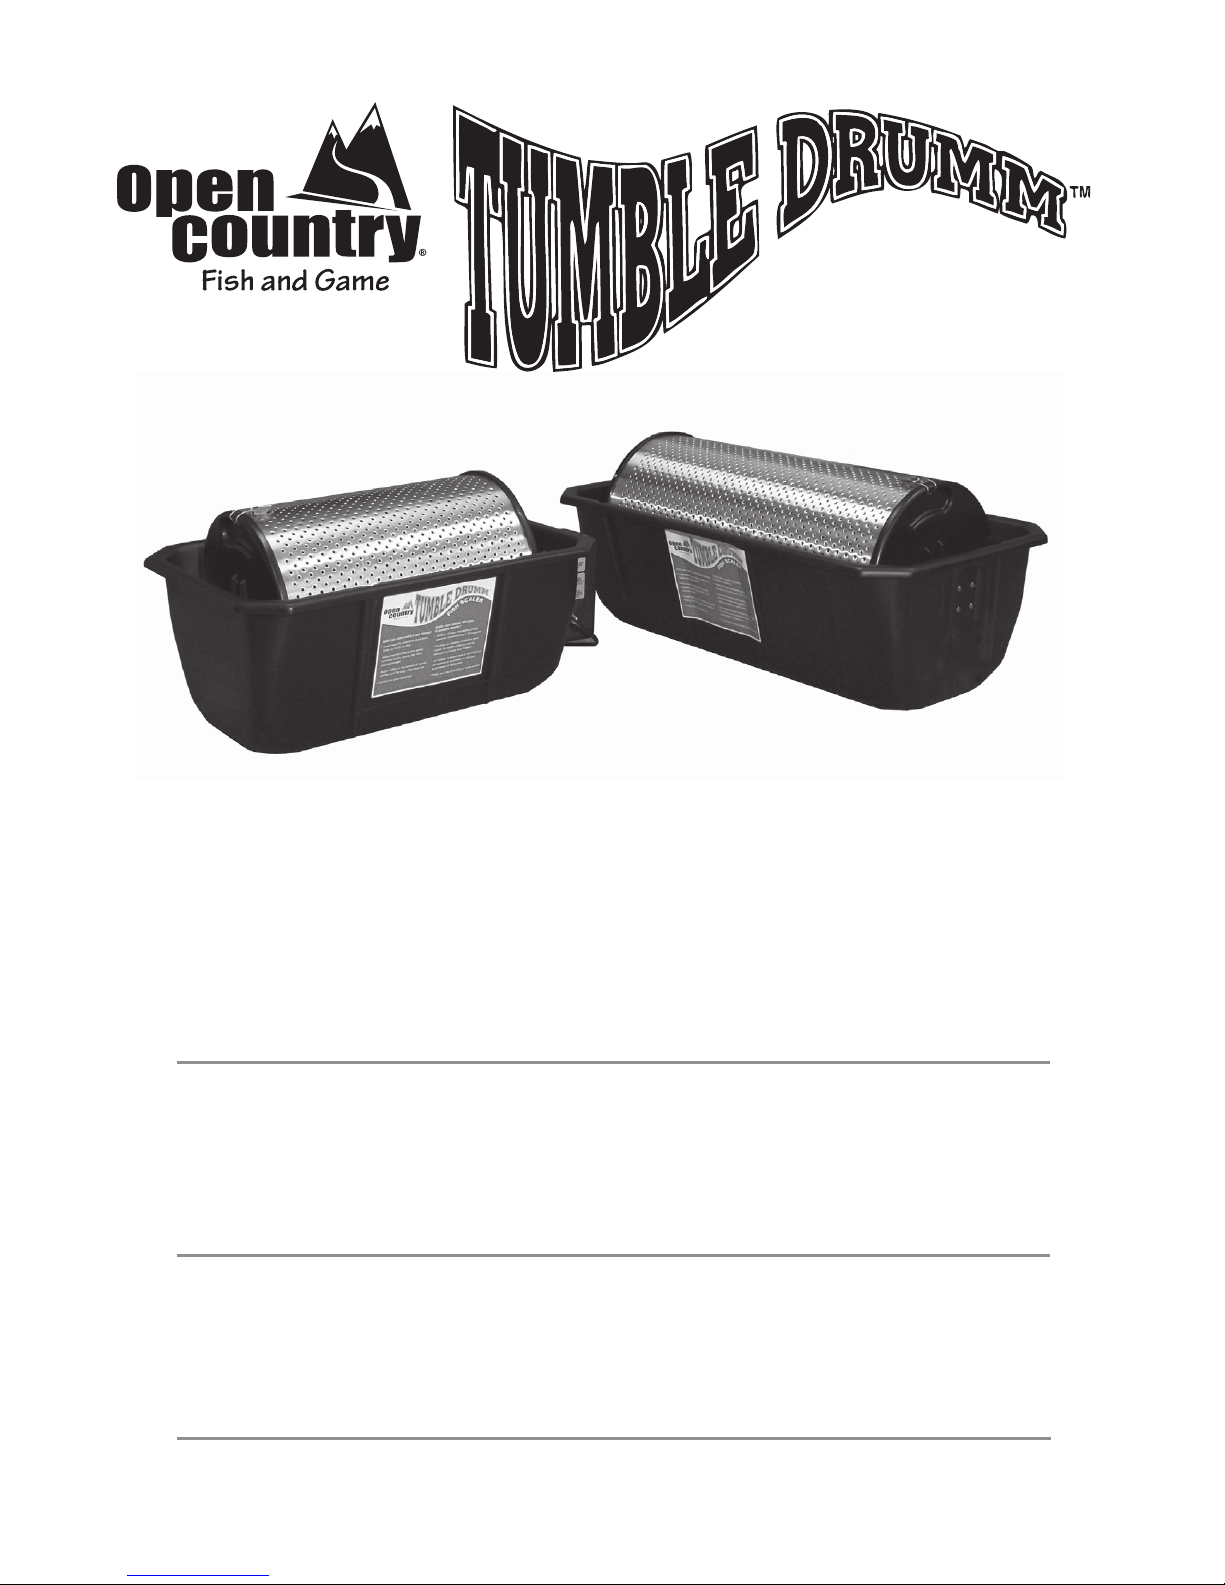
Automatic Fish Scaler
Model: TD-6065-13 and TD-6065-13L
Care/Use Guide
Guide d’entretien/d’utilisation
Écailleur à poissons automatique
Modèle: TD-6065-13 et TD-6065-13L
Guía del usuario/mantenimiento
Escalador automático de pescado
Modelo: TD-6065-13 y TD-6065-13L
TD-6065-13
(18 in. long drum)
(45,7cm long tambour)
TD-6065-13L
(26 in. long drum)
(66,0 cm long tambour)
A
U
T
O
M
A
T
I
C
F
I
S
H
S
C
A
L
E
R

Table of Contents
Important Safeguards ......................................................................... 1
Grounding Instructions ........................................................................ 2
Parts and Accessories ........................................................................ 3
Operating Instructions ...................................................................... 3-4
Care and Cleaning .............................................................................. 4
One Year Limited Warranty ................................................................ 5
Model #: TD-6065-13 (18 in. long drum) Electric Fish Scaler
Model #: TD-6065-13L (26 in. long drum) Electric Fish Scaler
Tumble Drumm™ is a registered trademark of:
The Metal Ware Corporation
1700 Monroe St., P.O. Box 237
Two Rivers, WI 54241-0237, USA
Phone: (800) 288-4545
Table des matières
Mesures de Sécurité Importantes ....................................................... 6
Mise à la Terre .................................................................................... 7
Pièces et Accessoires ......................................................................... 8
Mode d’Emploi .................................................................................8-9
Entretien et Nettoyage ........................................................................ 9
Garantie Limitée de un an................................................................. 10
Índice
Precauciones Importante .................................................................11
Instrucciones de Puesta a Tierra .....................................................12
Piezas y Accesorios .........................................................................13
Manual de Instrucciones .............................................................13-14
Cuidado y Limpieza ......................................................................... 14
Garantía Limitada de 1 año ............................................................. 15
Part No.: 65844 rev 03/30/11
A
U
T
O
M
A
T
I
C
F
I
S
H
S
C
A
L
E
R

1
English
IMPORTANT SAFEGUARDS
- THIS APPLIANCE IS INTENDED FOR HOUSEHOLD USE ONLY -
When using electrical appliances, basic safety precautions should always be
followed, including the following:
1. READ ALL INSTRUCTIONS BEFORE USING APPLIANCE.
2. To protect against electrical hazard, do not immerse cord, plug or motor drive
unit in water or other liquid.
3. Close supervision is necessary when an appliance is used by or near children.
4. Always turn power switch ‘OFF’ before plugging and unplugging appliance cord
into wall outlet.
5. Connect to a polarized, grounded-type receptacle or use an acceptable
adaptor. See page 2 “Grounding Instructions” for details.
6. Unplug appliance from power outlet when not in use, before putting on or
taking off parts, and before cleaning.
7. Do not operate an appliance with a damaged cord or plug or after the
appliance malfunctions or has been dropped or damaged in any manner.
8. If an extension cord is used, follow the instructions given by the cord
manufacturer. See Instructions on Page 2 for recommended cord type.
9. The use of accessories and attachments not recommended by the
manufacturer may cause re, electrical shock or injury.
10. Do not let cord hang over the edge of the table or counter, or touch hot surfaces.
11. Do not place on or near a hot gas or electric burner, or in a heated oven.
12. Keep hands, hair and clothing away from drum during operation to reduce the
risk of injury to persons, and/or damage to the appliance.
13. Do not use appliance for other than intended use as described in this manual.
14. Do not use this appliance in rain or wet conditions.
15. Do not pour water over or direct a stream of water directly at the motor drive.
16. To avoid ELECTROCUTION HAZARD! Never place the appliance in standing
water while it is plugged into a wall outlet.
17. Do not plug into outlet if hands are damp or wet. Dry hands rst.
SAVE THESE INSTRUCTIONS
Polarized Plug: This appliance has a polarized plug (one blade is wider than the
other). To reduce risk of electric shock, plug is intended to t into polarized outlet
only one way. If the plug does not t fully into the outlet, reverse the plug. If it still
does not t, contact a qualied electrician. Do not try to modify the plug in any way.
Short Cord Instructions: A short power supply cord is provided to reduce the risk
resulting from becoming entangled in or tripping over a longer cord. Extension
cords may be used if care is exercised in their use. If an extension cord is used,
the marked electrical rating of the cord should be at least as great as the electrical
rating of the appliance. The longer cord should be arranged so that it will not
drape over the tabletop where it can be pulled on by children or tripped over
unintentionally.
2
English
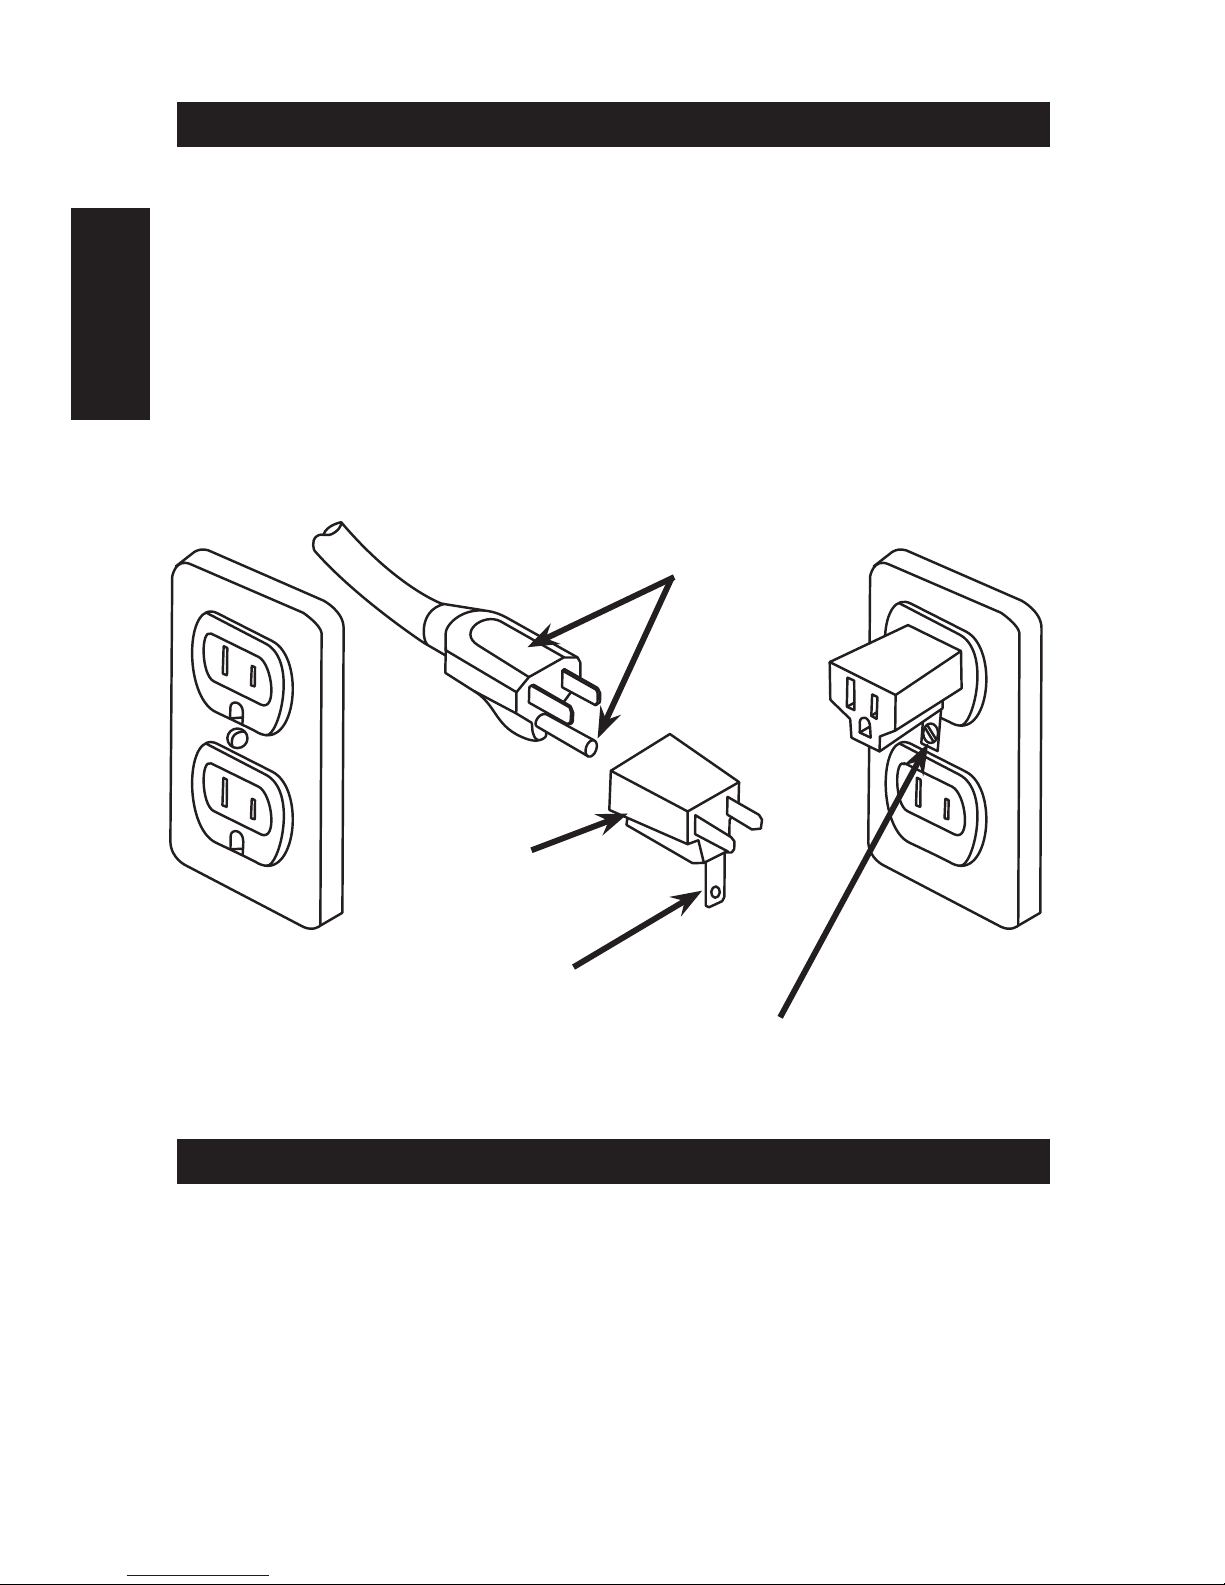
Grounding Instructions
Extension Cords
This appliance is equipped with a 3-conductor cord and 3-pin plug (NEMA
5-15P) to t into standard 15A grounded receptacle (NEMA 5-15R). The
appliance must be grounded while in use to protect the operator from an
electrical hazard or shock.
Grounding Adapter may be used if you are using a 2-conductor receptacle.
The grounding means, which extends from the adapter body, must be
connected to the screw in a properly grounded outlet box. See diagram for
reference.
Grounding
Adapter
3-conductor
Grounded
Outlet
(NEMA 5-15R)
Grounding Plug
with Grounding Pin
(NEMA 5-15P)
Grounding
Means
2-conductor
Outlet.
(NEMA 1-15R)
Center screw
grounded
Grounding
Screw
Use only polarized grounded-type extension cord that is rated 15A
(minimum). We recommend using an extension cord that is intended for
outdoor use. Do not use damaged extension cords. Extension cords are
only to be used for temporary purposes. They do not replace the need for
installation of outlets and proper wiring where necessary. Do not pull on
cord to disconnect. Keep away from heat and sharp objects.
3
English
Operating Instructions
1. Remove all packaging materials before using the rst time.
2. Wash parts with soapy water and rinse. Reduce splashing and dump
dirty water by lifting Tub from Motor Drive to keep water from entering
Motor Drive area. CAUTION: ALWAYS WEAR SAFETY GLOVES
WHEN REACHING INSIDE OF DRUM!
3. Rotate Drive Coupling until slot is horizontal. Using Tub handles, lift
Drum and insert Drive Shaft into Drive Coupling. Lower the opposite
end shaft of Drum into groove on Bearing Block.
4. Place unit on level surface and add water to the “Maximum Fill Line”.
Water level inside of Drum should be 1/4” to 1/2” above the bottom.
CAUTION: DO NOT POUR WATER OVER MOTOR DRIVE!
5. Release Latch by lifting and open door, place sh into Drum. For best
results load scaler by similar size and types of sh.
6. Note: TD-6065-13 (18” long drum) will scale up to 50 small pansh
and TD-6065-13L (26” long drum) is designed to scale large s up to
22” in length.
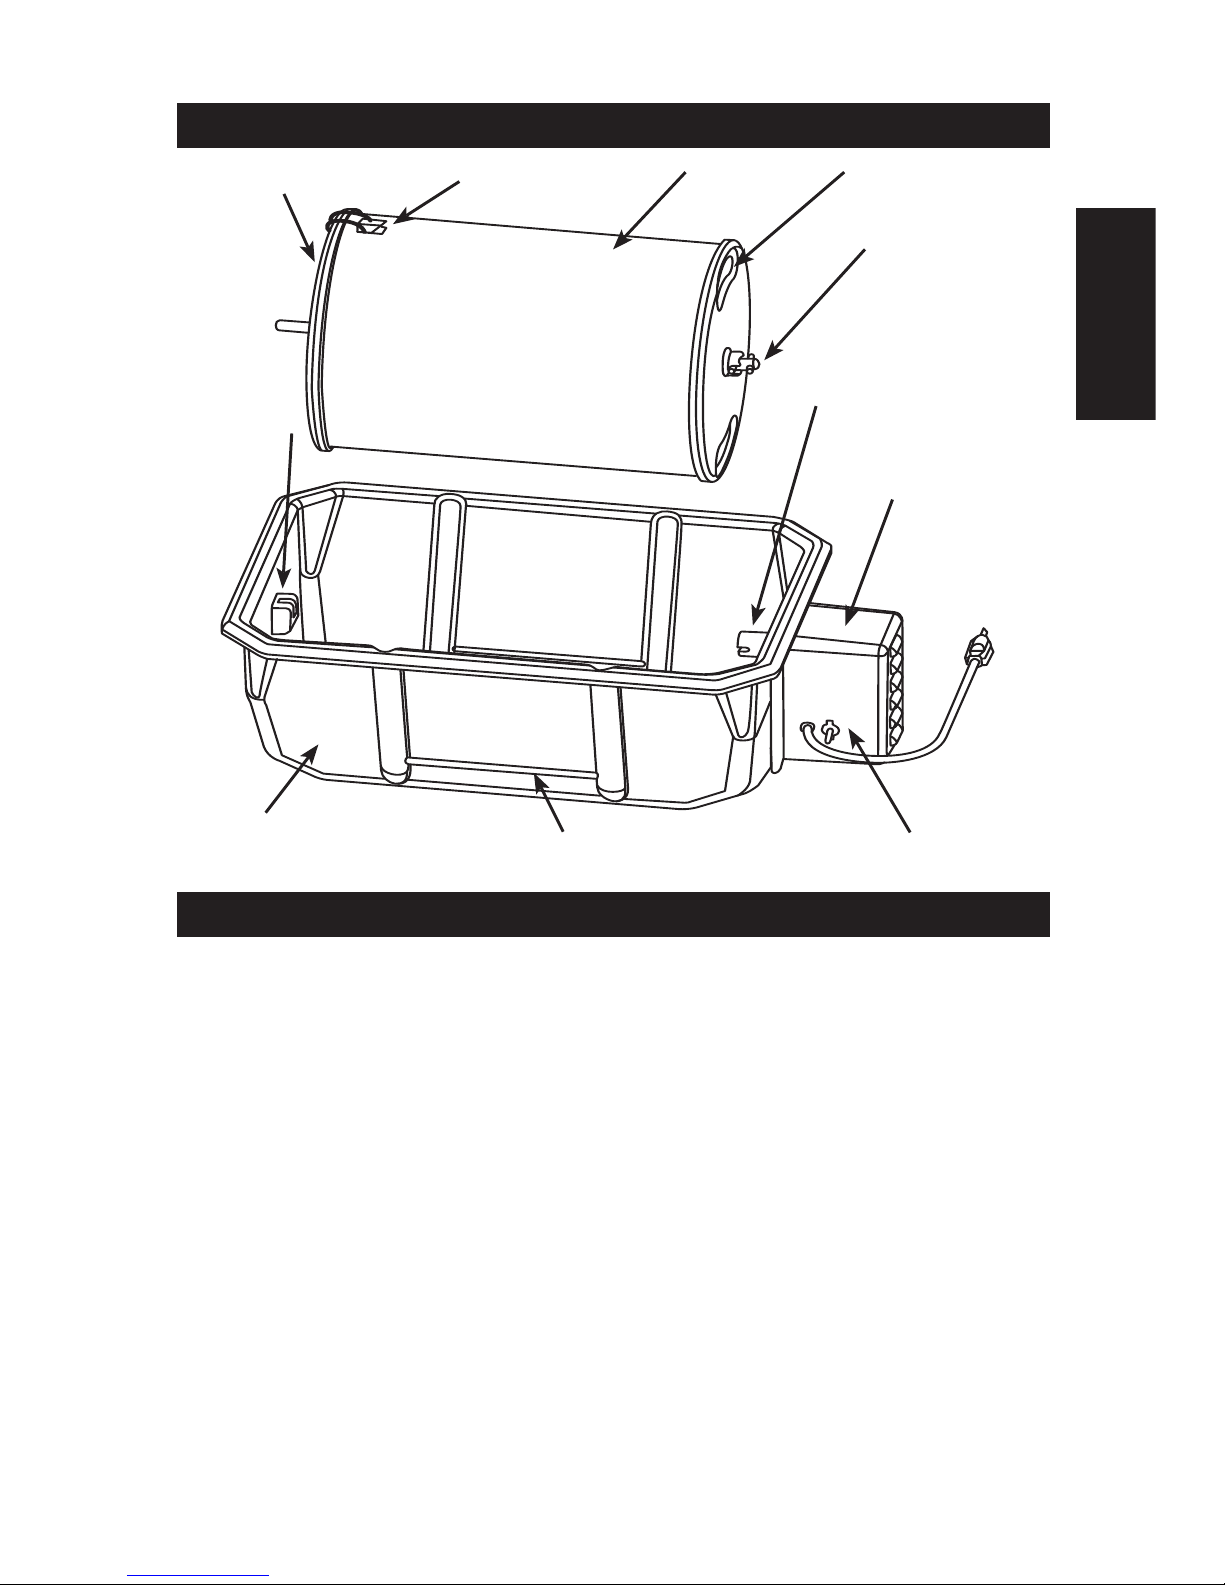
Parts and Accessories
Locking
Latch
Water
Tub
Drum
On/Off
switch
Handle
Motor
Drive
Hinged
Door
Drive
Coupling
Bearing
Block
Maximum
Fill Line
Drive Shaft

4
English
7. Close door and lock the Latch by pressing rmly.
8. Check that Switch is in OFF position and hands are dried. Plug cord
into standard grounded 120 V.a.c. outlet. If grounded outlet is not
available use adapter as shown on page 2.
9. Flip Switch to ON position and allow “Tumble Drumm™” to operate
about 10 to 25 minutes. Times will vary due to size / type / number of
sh per load.
10. Turn switch to OFF position and allow Drum to stop rotating. Release
latch, open door and inspect sh. Drum has sharp edges that can
cause cuts and abrasions. CAUTION: ALWAYS WEAR SAFETY
GLOVES WHEN REACHING INSIDE OF DRUM!
11. If more time is needed to remove scales, close door and lock latch.
Operate a few minutes longer, check frequently to avoid damaged
sh.
12. When sh are completely scaled, turn Switch to OFF position and
unplug cord from outlet.
13. Remove Drum from Tub by lifting opposite end of Motor Drive, then
slide Drum away from Motor Drive while lifting to remove.
14. Release Latch and open door. Dump sh into suitable container.
15. Rinse Drum with hose. Repeat steps as needed.
Care and Cleaning
1. Be sure cord is disconnected from outlet and switch in OFF position.
2. Remove Drum from Tub and rinse with clean water. Drum has sharp
edges that can cause cuts and abrasions. CAUTION: ALWAYS
WEAR SAFETY GLOVES WHEN REACHING INSIDE OF DRUM!
3. Dump the dirty water by tilting Tub with Motor Drive upwards. Rinse
with clean water. NOTE: If scales are dried, try soaking parts by lling
Tub with warm soapy water to the Maximum Fill Line, add Drum and
cycle without sh for several minutes.
4. Rinse all parts separately and allow to dry thoroughly. The Tub and
Motor Drive can be wiped with dry cloth.
5. When all parts have dried, assemble Drum or store Drum in bottom of
Tub.
6. Store indoors in a dry place. Do not expose to rain.
 Loading...