

Onvif DHA1044BM, DHA1088BM, DHA1166BM Quick Operation Manual
Page 1 / 23
HD HVR 1080P IP Camera + Analog Solutions
Quick Operation Guide rev-3
This product is designed specifically for security and surveillance purposes. Outstanding digital surveillance product it introduces
embedded LINUX operating system which is more stable. It introduces standard H.264mp video-compressed format and G.711A audio
compressed format which insures high quality image and low error coding ratio. Cloud network services greatly enhance the network
data transmission capacity and remote control capabilities.
NVR, DVR andHVR, 3 in 1
H.264High profilecompressionalgorithmidealfor standalone DVR
Realtimelive display up to 24/32cameras.
Pentaplexfunction:live, recording,playback,backup & remote access;
Support Dual-streams,to makemobilemonitoringvery easy,flexible fornetworktransmission
Multiple control methods:IR Remotecontroller,USBmouseandfrontpanelpress button.
Smartvideodetection: motiondetection,video blind,videoloss
Smartcamerasettings:privacy masking,camera lock,colorsetting,andtitledisplay
Pan Tilt Zoom and Speed DomeControl: more than 60 protocols supported, preset, scan, autopan, auto tour,pattern,
auxiliary functionsupported.
Easy backupmethods: USBdevices, remotenetworkand client software backup
Alarmtriggering screentips,buzzer,PTZ preset, e-mail& FTP upload
SmartHDDsManagement:non-workingHDD hibernation, HDD faultyalarm,RAIDfunction
Powerful network software: built-in web server, multi-DVR client & SMS Networking access for remote live viewing,
recording,playback, setting,system status,eventlog, email & ftpfunction
Support DHCP / PPPoE / FTP / DNS / DDNS/ NTP / Email alarm / IP right management / IP search / network alarm
center functions,
support webclient,standalone clientand SDK
With the sound system for the protection circuit, unique triplewatchdogfunction and very low power consumption, it
ensurestechnologycanmonitorthewholerun processof the equipmentand greatlyreducethemaintenancecost.
Enable strong multi-way synchronization with max 16 channels playback, realize the zero-delay between playback
channels
NetworkingProtocol: supportsONVIF2.0, Support80% IPCamerain the market
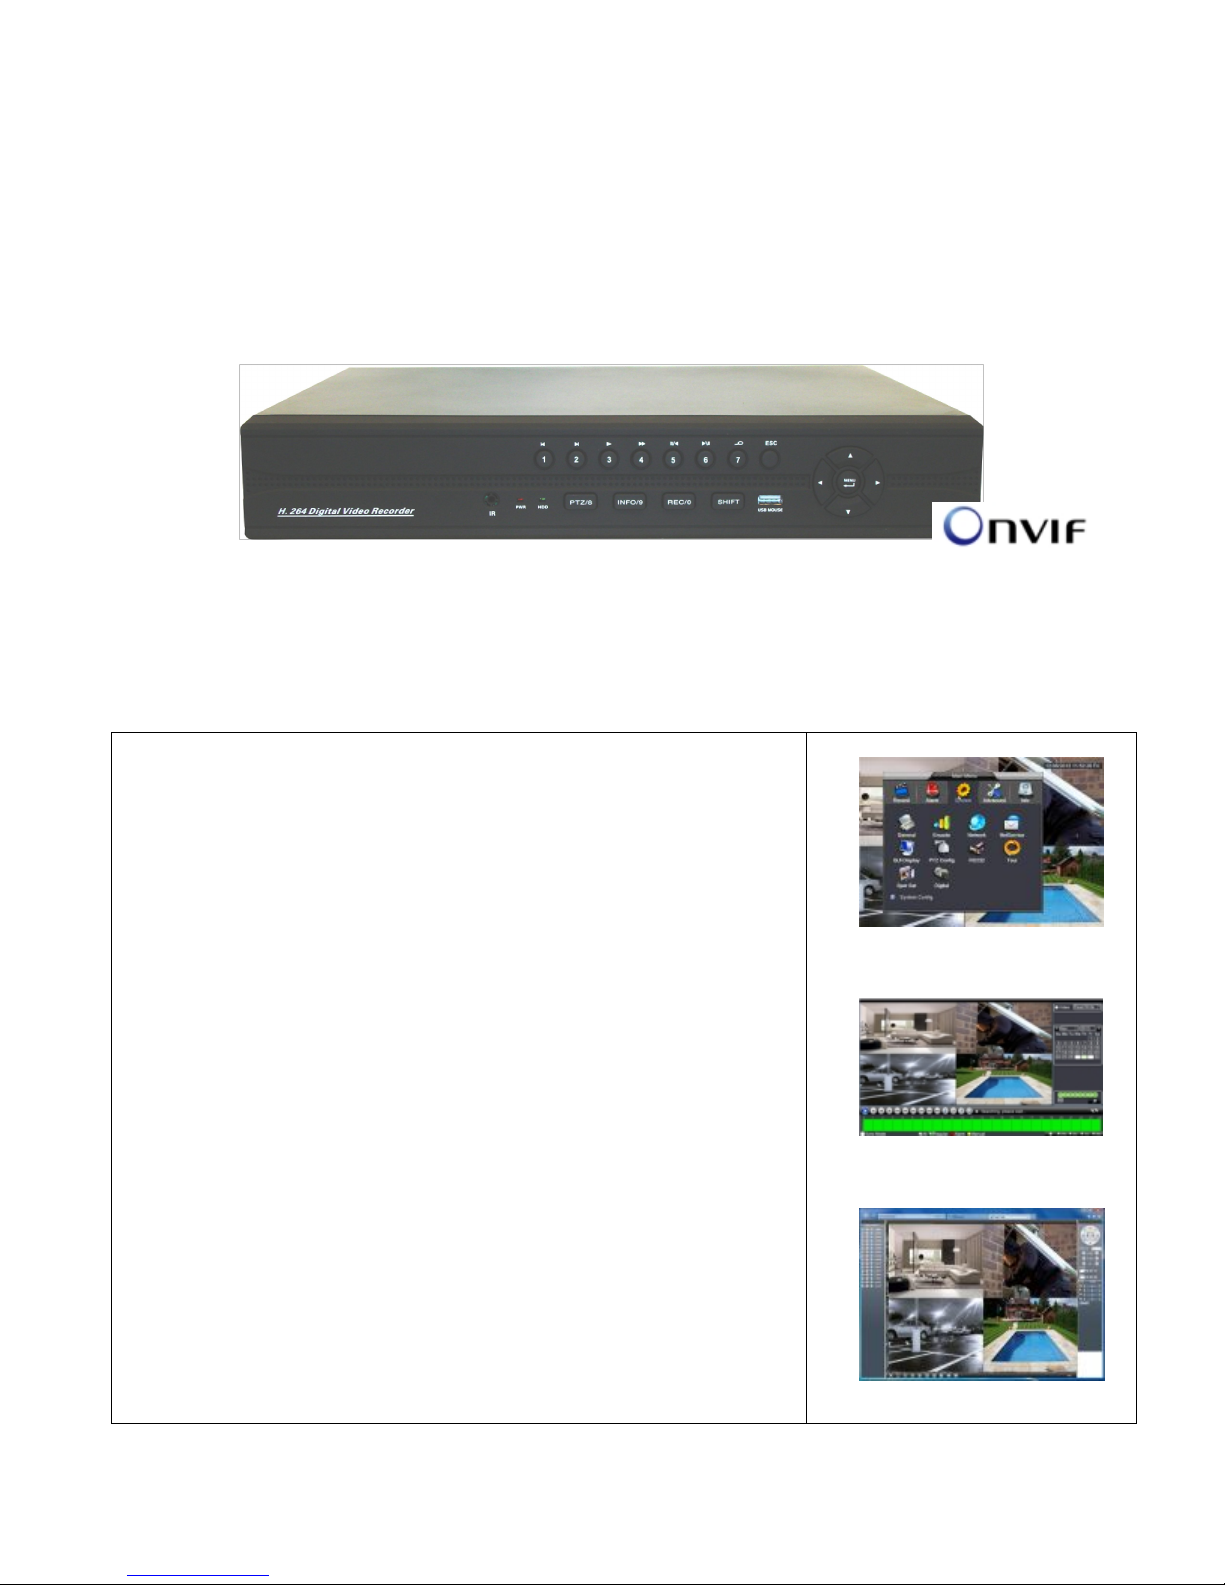
Main Screen & Setup
Playback
IE

Page 2 / 23
System
Main processor Technical grade embedded microprocessor
Operating system Embedded LINUX operating system
System resource
Multi-channel real-time recording synchronously, multi-channel realtime playback, multi-channel
multi-user network operation, USB backup.
Interface
Operation interface 16bit real color GUI interface support mouse operation
Display screen 1/4/9/16screen (take analog channel as an example, other based on the selected channel mode)
Video
Video standard NTSC
Image encode H.264 (High Profile)
Monitor quality
Monitor: D1 ; VGA , HDMI : High definition (Support 1920x1080, 1280x720, 1440x900, 1280x1024,
1024x768, 800x600)
Playback quality 1080p / 720p / D1 / HD1 / CIF
Encode capability 4ch 960H real-time | 8ch D1 real-time | 2ch D1 + 14ch CIF real-time
Decode capability 4ch 960H real-time | 1ch D1 real-time | 2ch D1 + 6ch CIF real-time
Multi-mode video input Local analog input .. 4*960H 8CH*D1 16CH*D1
Local analog + network digital input .. 2*D1+(1*1080p+1*720p)
Network digital input ... 8*960H / 4*720p / 2*1080p / 1*720p+7*D1 / 1*1080p+1*720p+2*D1)
Motion detection
Each channel can set 192(16*12) detection area, can set multi-level of flexibility (for local analog
channel only)
Audio
Audio compression G711A
Record and
Playback
Bidirectional talk support
Record Mode Manual > alarm > motion detection> timing
Local playback 1-8ch playback synchronously (take local analog input for example, others depend on the selected
channel mode)
Storage and
backup
Space occupation Video: CIF 4~5G/day*channel, D1 16~20G/day*channel
Audio: 691.2M/day*channel
Video storage Local HDD, Network
Backup mode Network backup, USB portable HDD, USB imprint, SATA imprint
Interface
Video input 4ch CVBS/BNC (1.0Vp-p, 75ohm)
Video output 1ch CVBS/BNC (1.0Vp-p, 75ohm), 1ch VGA, 1ch HDMI
Loop output optional
Audio input 4ch RCA, | 8ch RCA | 4ch RCA
Audio input 1ch RCA
Alarm input (available for 16ch model)
Alarm Output (available for 16ch model)
Network port RJ45 10M/100M
PTZ control 1RS485, 1RS232 ; support most kinds of PTZ protocol
USB port 2*USB 2.0
HDD port 4ch model 1SATA (max to 2TB) | 2SATA ports (max to 2TB each)
Other
Power 12V/2A
Consumption <15W (not include HDD)
Temperature 0C ~ 55C
Humidity 10% - 90%

Page 3 / 23
HVR System APP -- Support PC / Android / iPhone / iPAD
1
HD HVR 1080P
Support Windows XP / Windows 7 / Windows 8.1
Support Android 4.x
Support iPhone / iPAD
Other OS: Mac (Safari, LAN), Chrome Browser Yes
Introducing Cloud Feature
1
Your HVR SN number will be use as Cloud ID Number
How to find my Cloud ID?
Go to Main Menu -> Inf o -> Version
Make sure Net Status: Connected
2
Android APP:
VMEYE Cloud
Go to bottom [Device]
Add new, enter Cloud ID, user, pass.
3
iPhone / iPAD APP:
VMEYE Cloud Lite /
VMEYE Cloud / VMEYE Cloud HD
Go to bottom [Device]
Add new, enter Cloud ID, user, pass.
4
PC: Cloud login
Go to www.XMEYE.net
Click Red Tag [By Dev ice]
Id: [Cloud ID]
Verify pass [ w ebpage verif y]

Page 4 / 23
HDD Installation
1
For the first use,please install the hard disk.
Support 4CH HVR 8CH HVR 16CH HVR
HDD # 1 SATA 2 SATA 2 SATA
USB 4CH HVR 8CH HVR 16CH HVR
Connector 2 (Rear)
1 Front
1 Back
1 Front
1 Back
Note: DVR can run and monitor normally without hard disk,
while it can’t record and playback.
Start Up
3
Live Display
After boot up Successfully, you should see the Live Display.
Guide
When you first time open, you should see Cloud Enable.
If you don’t want to see this message anymore, then click Will no
longer be prompted Click OK to bypass.
4
In each viewing window, camera channel number and recording
symbol status icon will list on each channel window corner.
1
Recording
3
Video loss
2
Motion
4
Camera
System Date / Time is list on the top right corner
Use Mouse Control & System Login
5
Right Click Mouse
Button
see the Popup
Menu.
And, Choose
Main Menu
Super User Name: admin
Password: (no password)
Basic User Name: guest
Password: (no password)
Enter Wrong Password protection:
Enter wrong password 3 times, then
Alarm Beeps.
Enter wrong password 5 times, HVR will Lock User and prevent to enter anymore.
To Release from Lock down, wait for half hour will allow you try again, or you need to
Power Off & Power on to release the Lock down.
Page 5 / 23
HDD Management
6
Right Click Mouse button and enter
[Main Menu]> [ Advanced ]> [ Storage ]
7
Storage
Select HDD, and click Format Storage.
It will format your HDD.
(For more detail functions please read User Manuals)
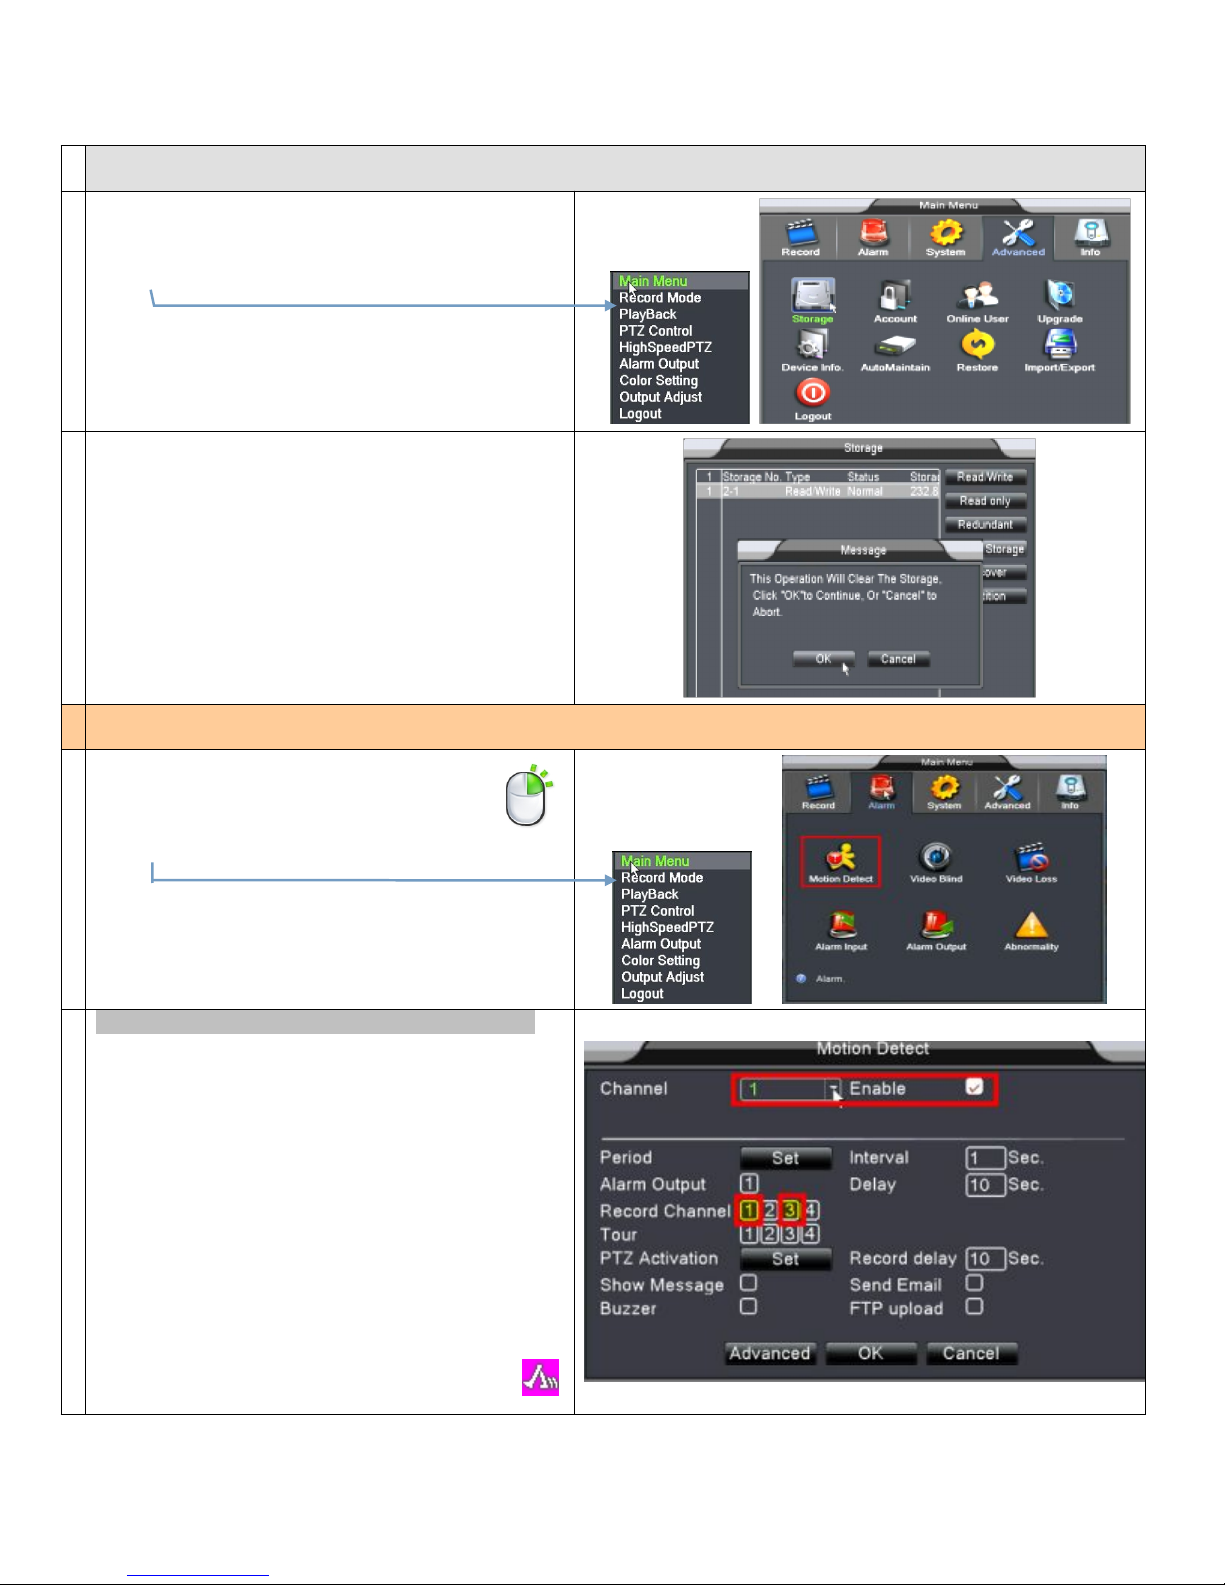
Setup Motion Detect
8
Right Click Mouse button and enter
[Main Menu]> [Alarm]> [Motion Detect] to set.
9
Enable Motion Detection (
for each Channels)
For Example:
Select Channel [1] Enable [√ ] first.
Select Record Channel [1] [3]
When Channel [1] detect motion trigger, it
will enable recording on Channel 1 and Channel 3.
Then, switch to Channel [2] on the top ...
Repeat same steps until finish all channels and corresponding
recording channels.
Click OK when finish.
After adjust to Schedule Recording and Alarm Motion Detect.
Remember, you need to Complete Step 7 - 10, then you will
have M otion Detection Recording.
Page 6 / 23
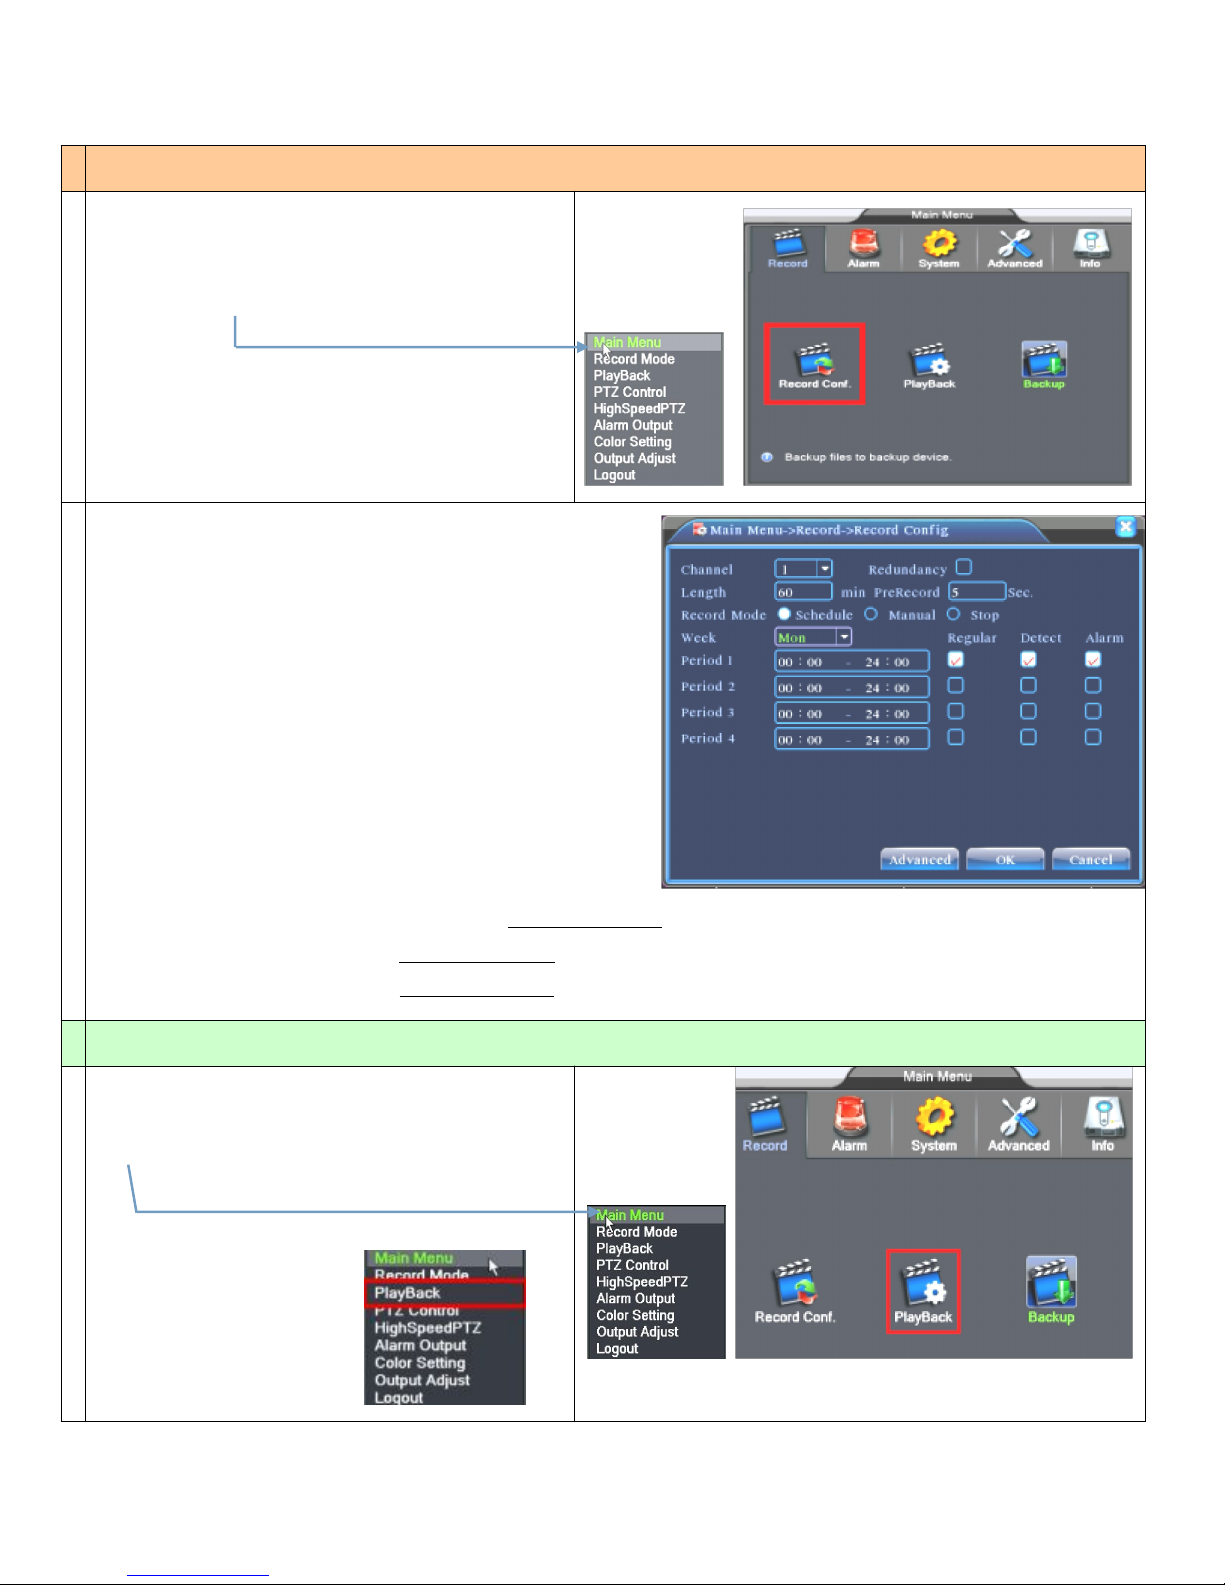
Enable Schedule Recording
1
0
By Default: Normal recording
The system’s default set is 24 hours continuous recording.
Set the recording parameters in the surveillance channel.
You can enter [Main Menu]> [Record]> [Record Config] to set.
Note:
There is at least one read-write hard disk if the DVR records
normally.
1
1
Description:
【Channel】 Choose the corresponding channel number to set the channel. Choose
the “all” option to set the entire channels.
【Redundancy】Choose the recording file and backup in two hard disks.
The one is read-write disk, another is redundant disk.
【Length】 Set the time length of each video file. 60minutes is default length.
【Prerecord】 Record 1-30 seconds before the action. (file length is decided by
the code stream)
【Record Mode】Setvideostate:configuration,manualandstop.
Schedule:Record according to the set video type (regular, detect and alarm)
and time section.
Manual: Click the “all” button & make the corresponding channel recording
no matter its state.
Stop: Click the “stop” button & make the corresponding channel stop
recording no matter its state.
【Week】 Weekday
【Period】Set the time section of common recording, The recording will start only in the
set range.
【Recording Type】Set recording type: regular, detection or alarm.
regular:Perform the regular recording in the set time section. The video file type is “R”.
detect:Trigger the “motion detect”, “camera mask” or “video loss” signal. When above alarm is set as opening recording,
the “detection recording” state is on. The video file type is “M”.
alarm:Trigger the external alarm signal in the set time section. When above alarm is set as opening recording,
the “detection recording” state is on. The video file type is “A”.
How to Playback Video
1
2
Right Click Mouse button and enter
[Main Menu]> [Record]> [Record Config] to set.
OR
Right Click Mouse button
and enter Playback
Page 7 / 23
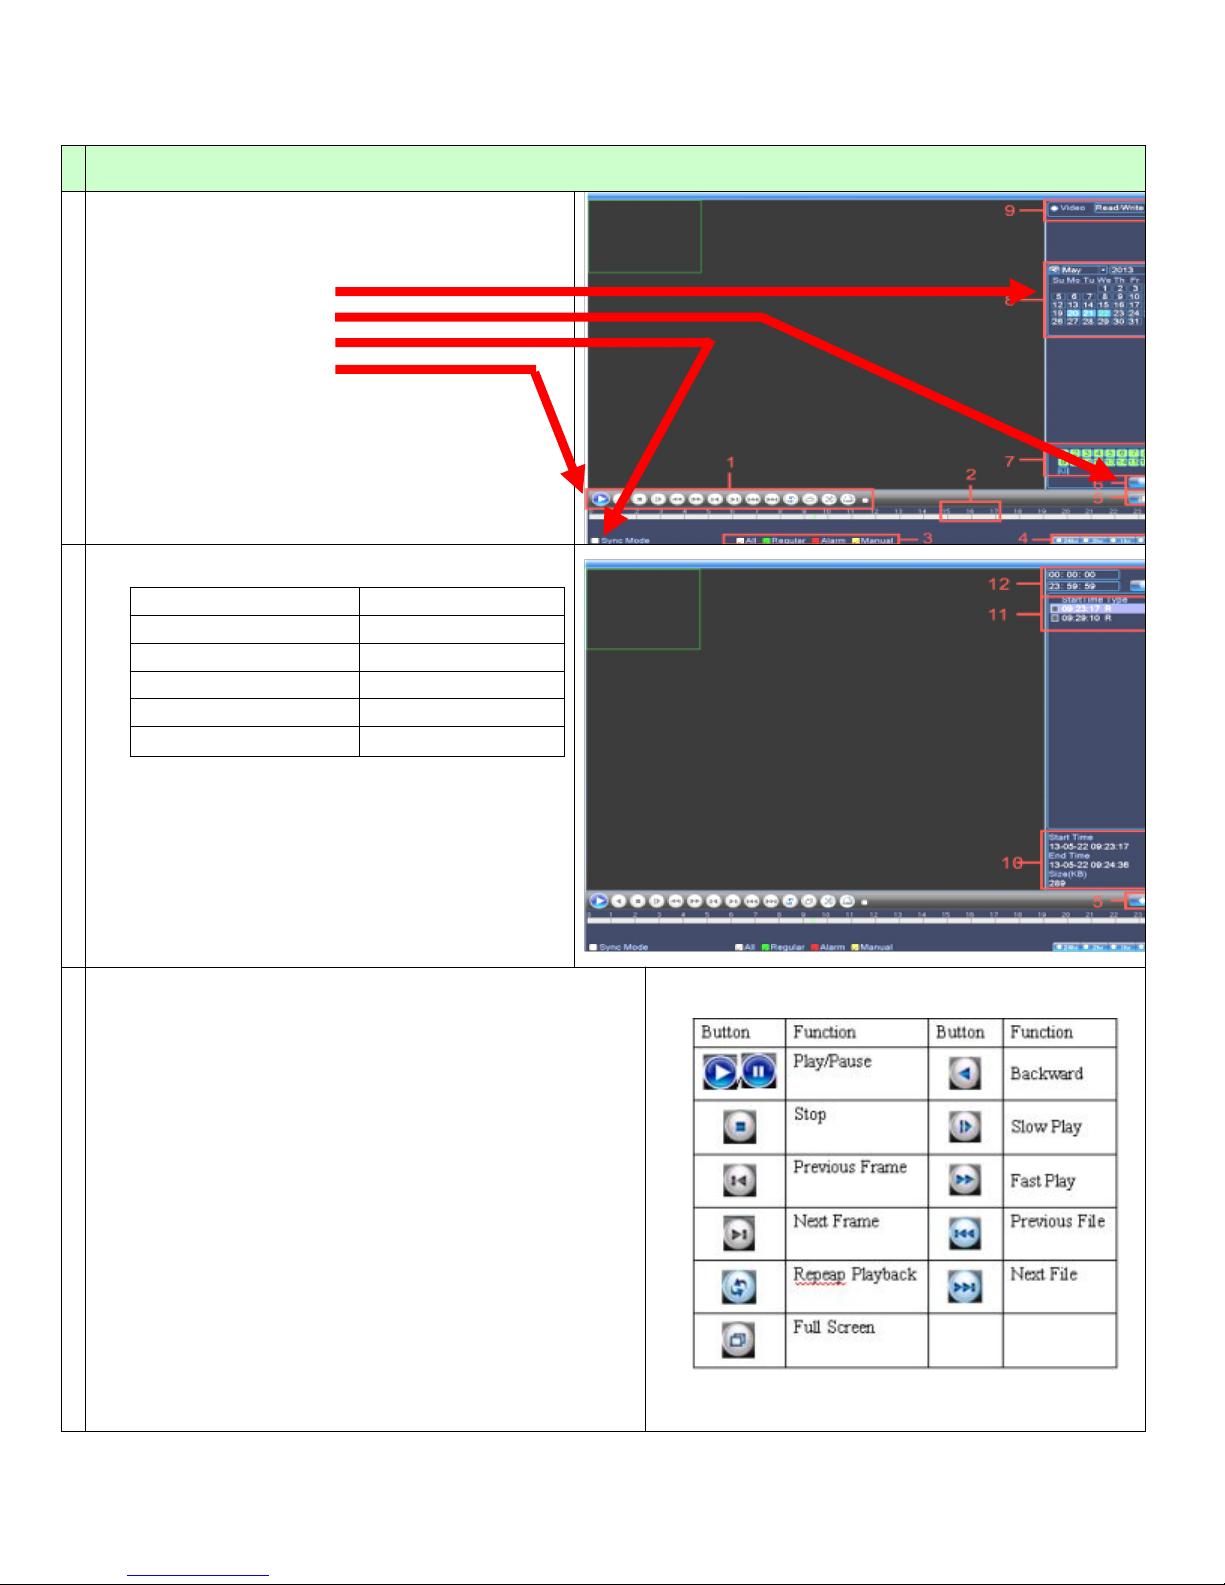
How to Playback Video
1
3
How to Play:
1) Select Calendar Date
2) Click Search Button
3) Check Sync Button
4) Click Play Button
*Note -- What is Sync Mode?
During the Play, each channel can perform
different time lines. With the Sync mode
turn ON, it will force to play on the every channel same time line.
1
4
Description:
1.Playback control 7.Channel option
2.Operating Tips 8.Date option
3. Record type 9.Storage Device option
4.Time progress bar options 10.File information
5.Switching time or file mode 11.File Option
6.File Search 12.Time
Import ant Note: View Multi-Channel has limitations.
For example, if you have 8 Channel, but you only can view 4
channel at same time. Then, you need to click Stop Playing.
Then you can select other channel to watch. (see next page)
【
File information】Start time,end time and size.
【
File option
】
Choose the file to playback/backup.
【 playback control 】 Refer to the following sheet for more
information.
1
5
How to Play Another Channel?
1) Press Stop first.
2) Uncheck one of the channel from the Channel Num ber
3) Select the channel number you want.
4) Click Search icon one time.
5) Then, click Play
Note:
Frame by frame playback is only performed in the "pause"
playback state.
Partial enlarged: single pictures full-screen playback, can use the
left mouse button box to choose any size area on the screen, click
the left mouse button, the selected area will enlarge the regional
image, double click the left mouse button to exit the partial
enlarged images.
Note:
If the current resolution of one channel is beyond
maximum resolution, it will be displayed as a red “X” when played
back.
 Loading...