

Page 1

™
DataEraser
Copyright © 2000 ONTRACK Data International, Inc.
Users Manual
Explanation of Operation and Use
Table of Contents
1. Brief Overview Page 2
2. Hardware/System Requirements Page 3
3. Distinctions between Personal and Professional Versions Page 3
4. Verification of data overwriting Page 4
5. DataEraser startup and operating procedures Page 4
Screenshots - All screens are the same between versions except as noted
Figure 1 Load ASPI drivers (Professional version only) Page 5
Figure 2 Welcome screen Page 6
Figure 3 Main menu (Provides an overview of the DataEraser steps) Page 7
Figure 4 Drive selection Page 8
Figure 5 Individual partition or full drive selection Page 9
Figure 6 Overwrite options (Professional version only) Page 10
Figure 7 Select number of passes (Professional version only) Page 11
Figure 8 Final overwrite pattern Page 12
Figure 9 Verification selection (Professional version only) Page 13
Figure 10 Validation Certificate comment entry (Professional version only) Page 14
Figure 11 Final confirmation of overwrite options Page 15
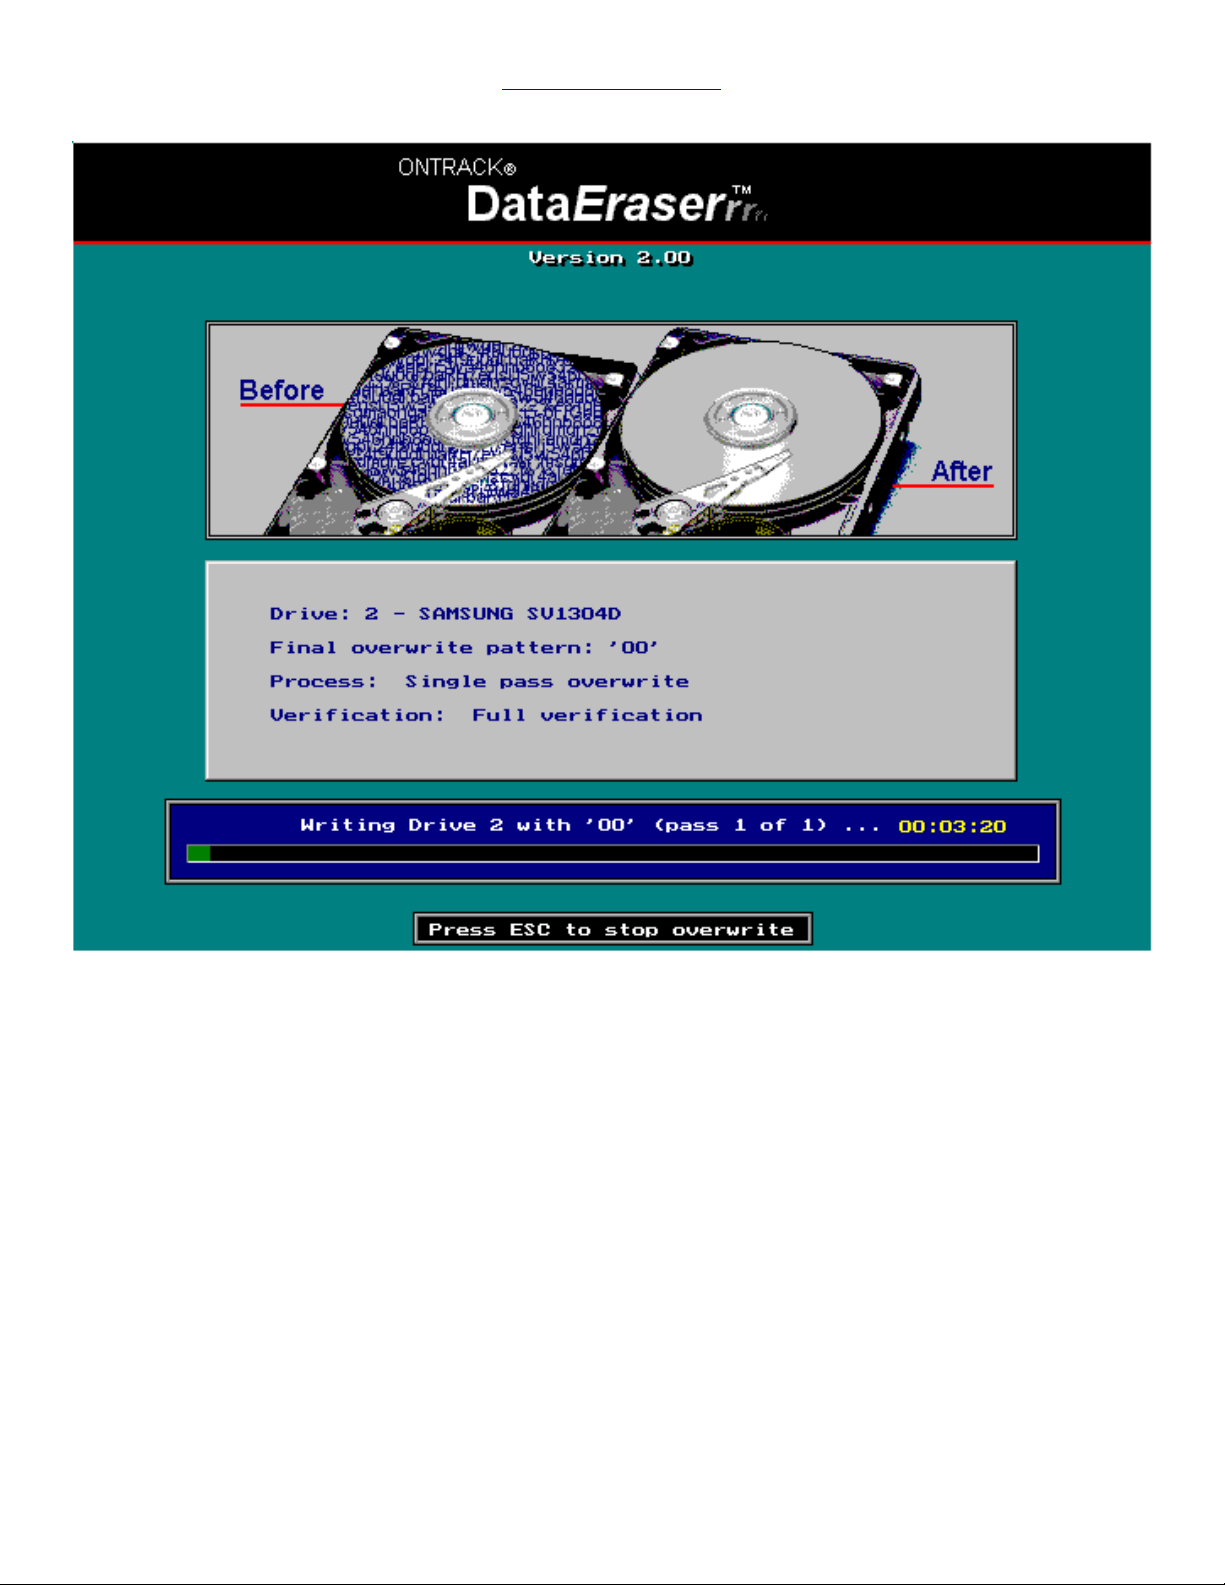
Figure 12 Overwriting Page 16
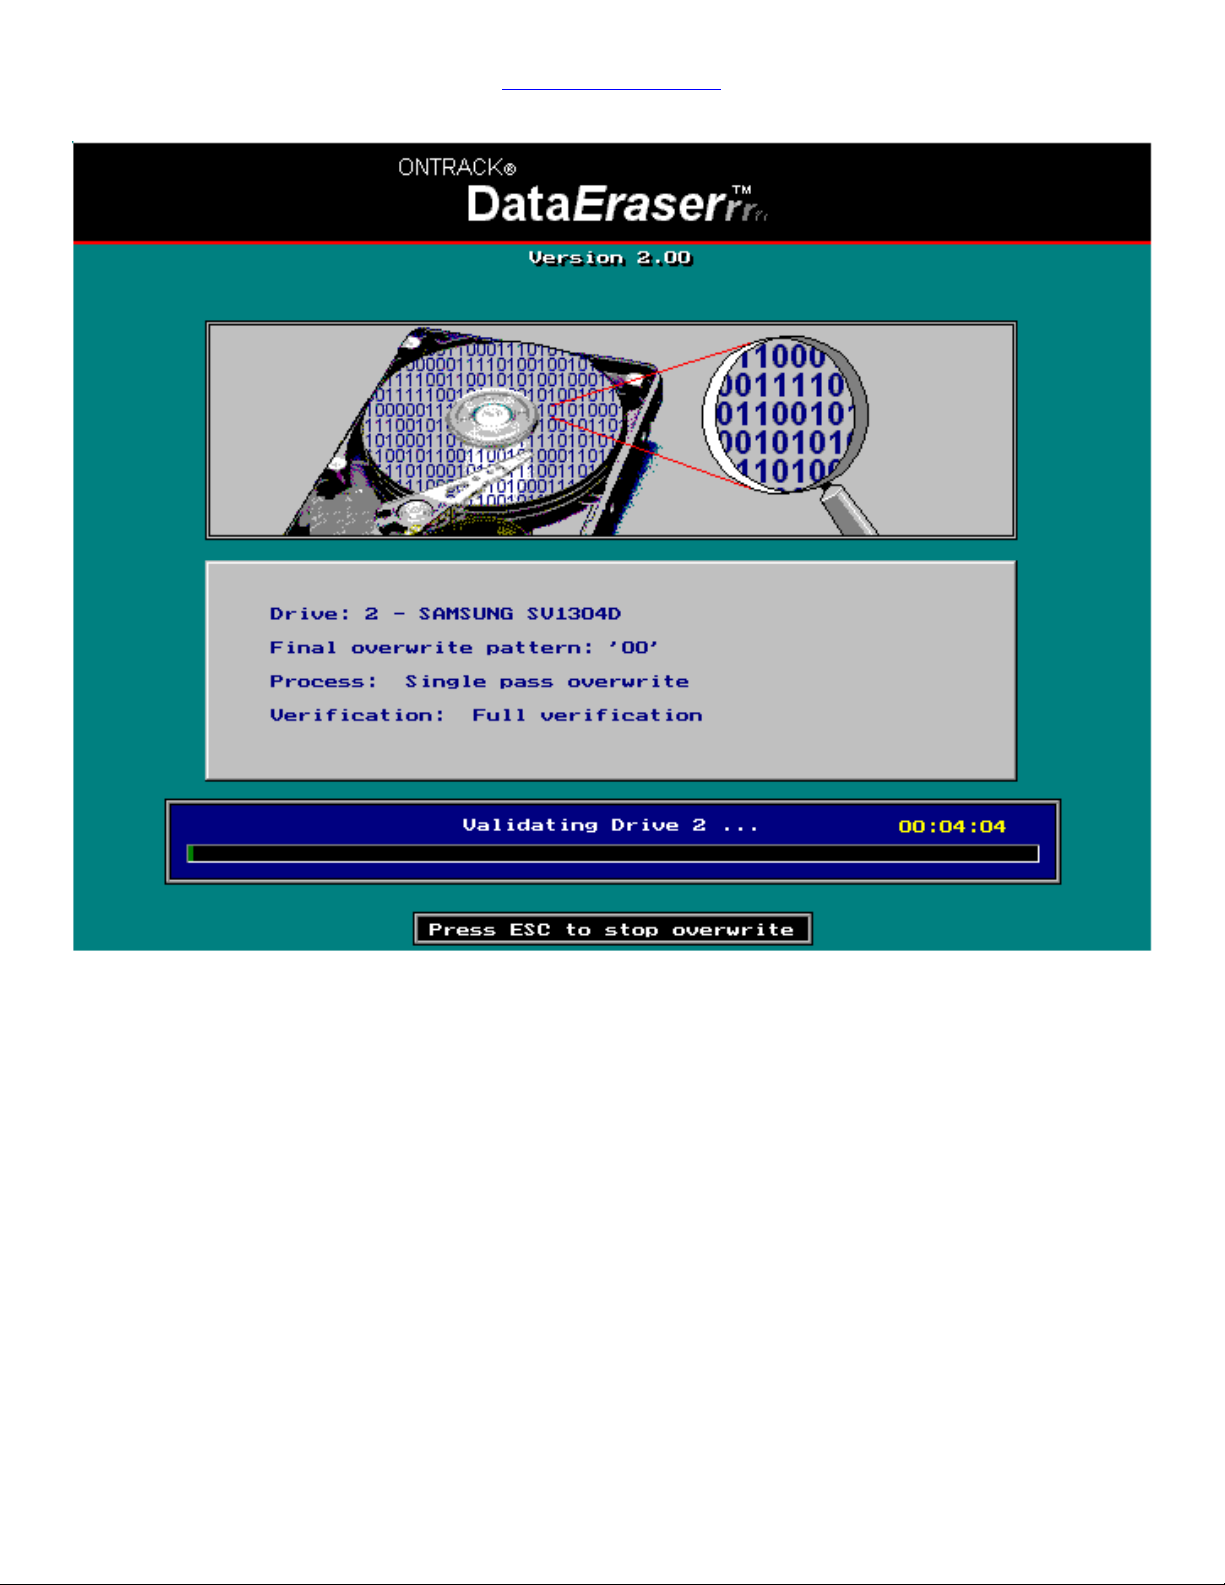
Figure 13 Verifying Page 17
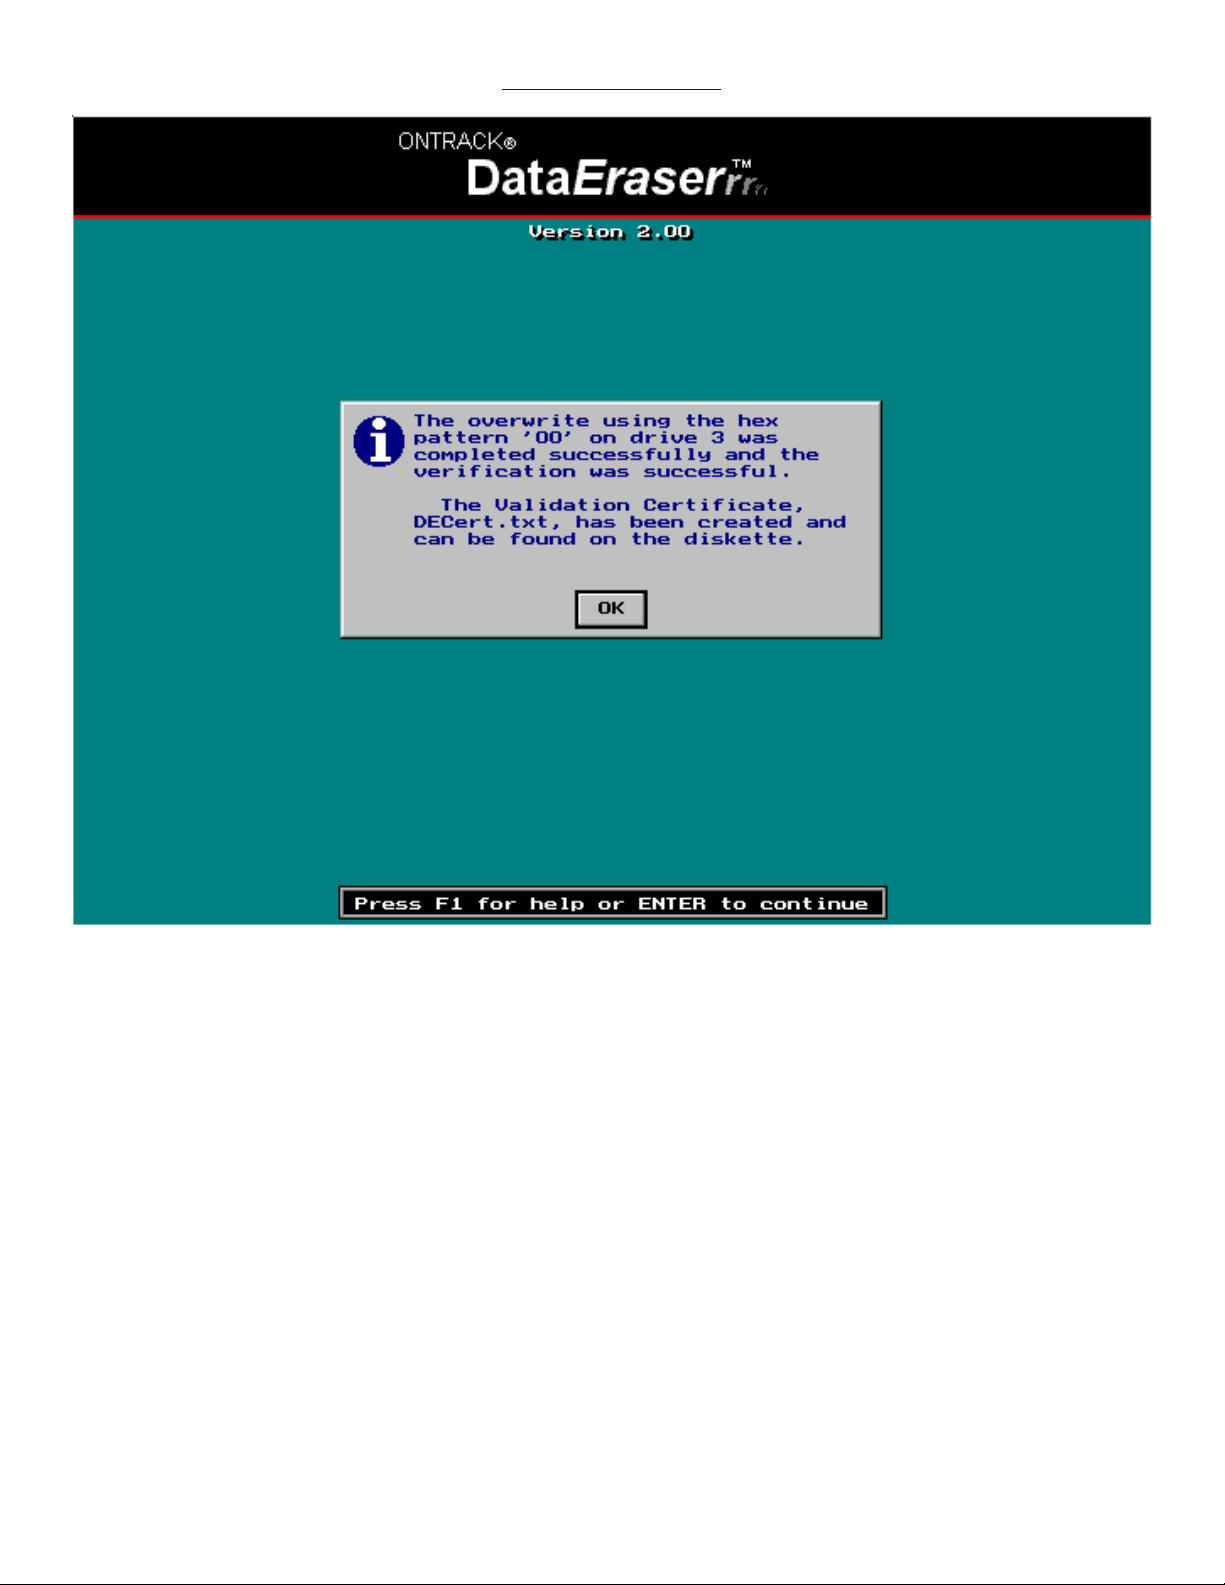
Figure 14 Successful Overwrite Completion Page 18
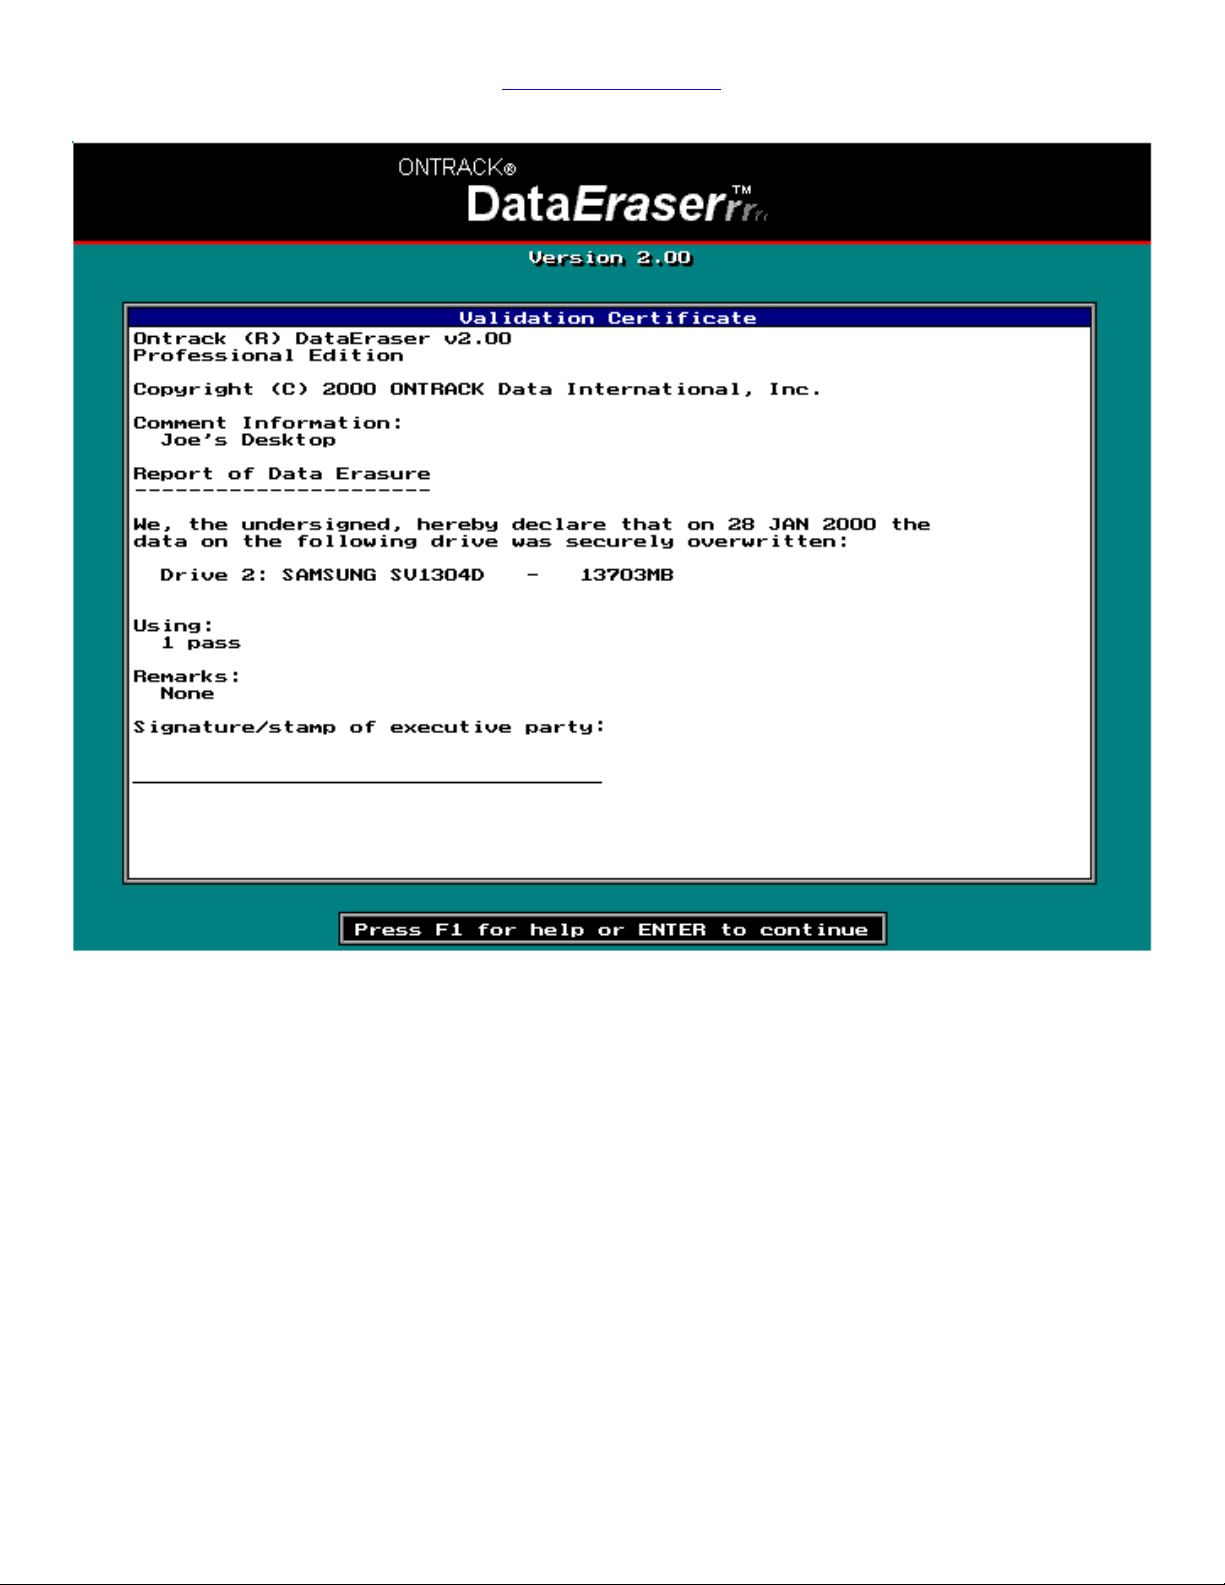
Figure 15 Validation Certificate (Professional version only) Page 19
Figure 16 View Drives menu selection Page 20
Figure 17 View Drive/Disk Look opening screen Page 21
Figure 18 Disk Look screen with a typical example of data on a drive Page 22
Figure 19 Disk Look screen after DataEraser overwrite with 00 pattern Page 23
Figure 20 Exit dataEraser menu selection Page 24
6. Professional version database methods Page 25
7. Errors and known limitations Page 25
8. SCSI Issues Page 27
1
Page 2

Return to Table of contents
1. Brief Overview
Most computer users have come to realize that data saved to a hard drive is left on the drive
after deleting or sending the data to the Recycle bin. Deletion only means that the operating
system no longer has access to the data, not that the actual information has been removed.
The closest analogy is likened to removing the specific entry in the table of contents of a book
without going out to the chapter area to rip out the associated pages. All operating systems
currently employ this timesaving method of deletion.
DataEraser is designed to eliminate data from any portion of a hard drive, since it can
completely overwrite the entire drive. Options to erase (overwrite) a single partition, or all
areas of a hard drive are provided as choices in a simple menu system. DataEraser writes predetermined character patterns (the final pattern is a selection choice in some cases) to the
surface of the hard drive. When a pattern (any character or combination of characters) is
written to a data area, any previous information is lost so far as any operating system can
access. If the full drive option is chosen, all data in normal file areas, hidden files, or protected
areas will be erased. Previous installations that failed, viruses and other troublesome situations
may be cleared.
The obvious danger inherent is that no keyboard level data recovery process can retrieve the
data once DataEraser has been run on that area. Ontrack recommends creating a backup
before using DataEraser if there is any concern for accessing that data again.
The following are typical uses for DataEraser:
• Drive or system recycling from one user or company to another (especially good in leased
situations)
• Donations or other transfers of hard drives, including warranty replacement
• Eliminating unwanted email or other data from a system.
• Purging all data for a known clean re-installation
• In some cases DataEraser can be valuable to “start from scratch” when completely
reinstalling an operating system or attempting to clean up a virus.
One issue of eliminating sensitive data on a system has to do with the duplication of data to
another partition or another hard drive as a background process. Many programs rely on
temporary directories, especially on the first hard drive to store data while an application
program edits or handles that data. Remember that these sorts of possibilities exist beyond the
drive where the data is ultimately stored. It may be necessary to overwrite more than just the
storage drive to eliminate deleted temporary file remnants on other drives in the computer
system.
2
Copyright © 2000 ONTRACK Data International, Inc.
Page 3
Return to Table of contents
2. Hardware/System Requirements
DataEraser requires:
• AT compatible CPU chipsets with a minimum of 386 or greater processor
• 8 Mb of RAM
• 1.44 Mb floppy diskette drive
• EGA 640 x 480 or above graphics
• Hard drives must be SCSI or IDE technology (EIDE/Fast-ATA) drives attached in common
controller methods. No guarantees of drive access are made with proprietary IDE controller
cards.
3. Distinctions between Personal and Professional Versions
DataEraser is available in a Personal or Professional version.
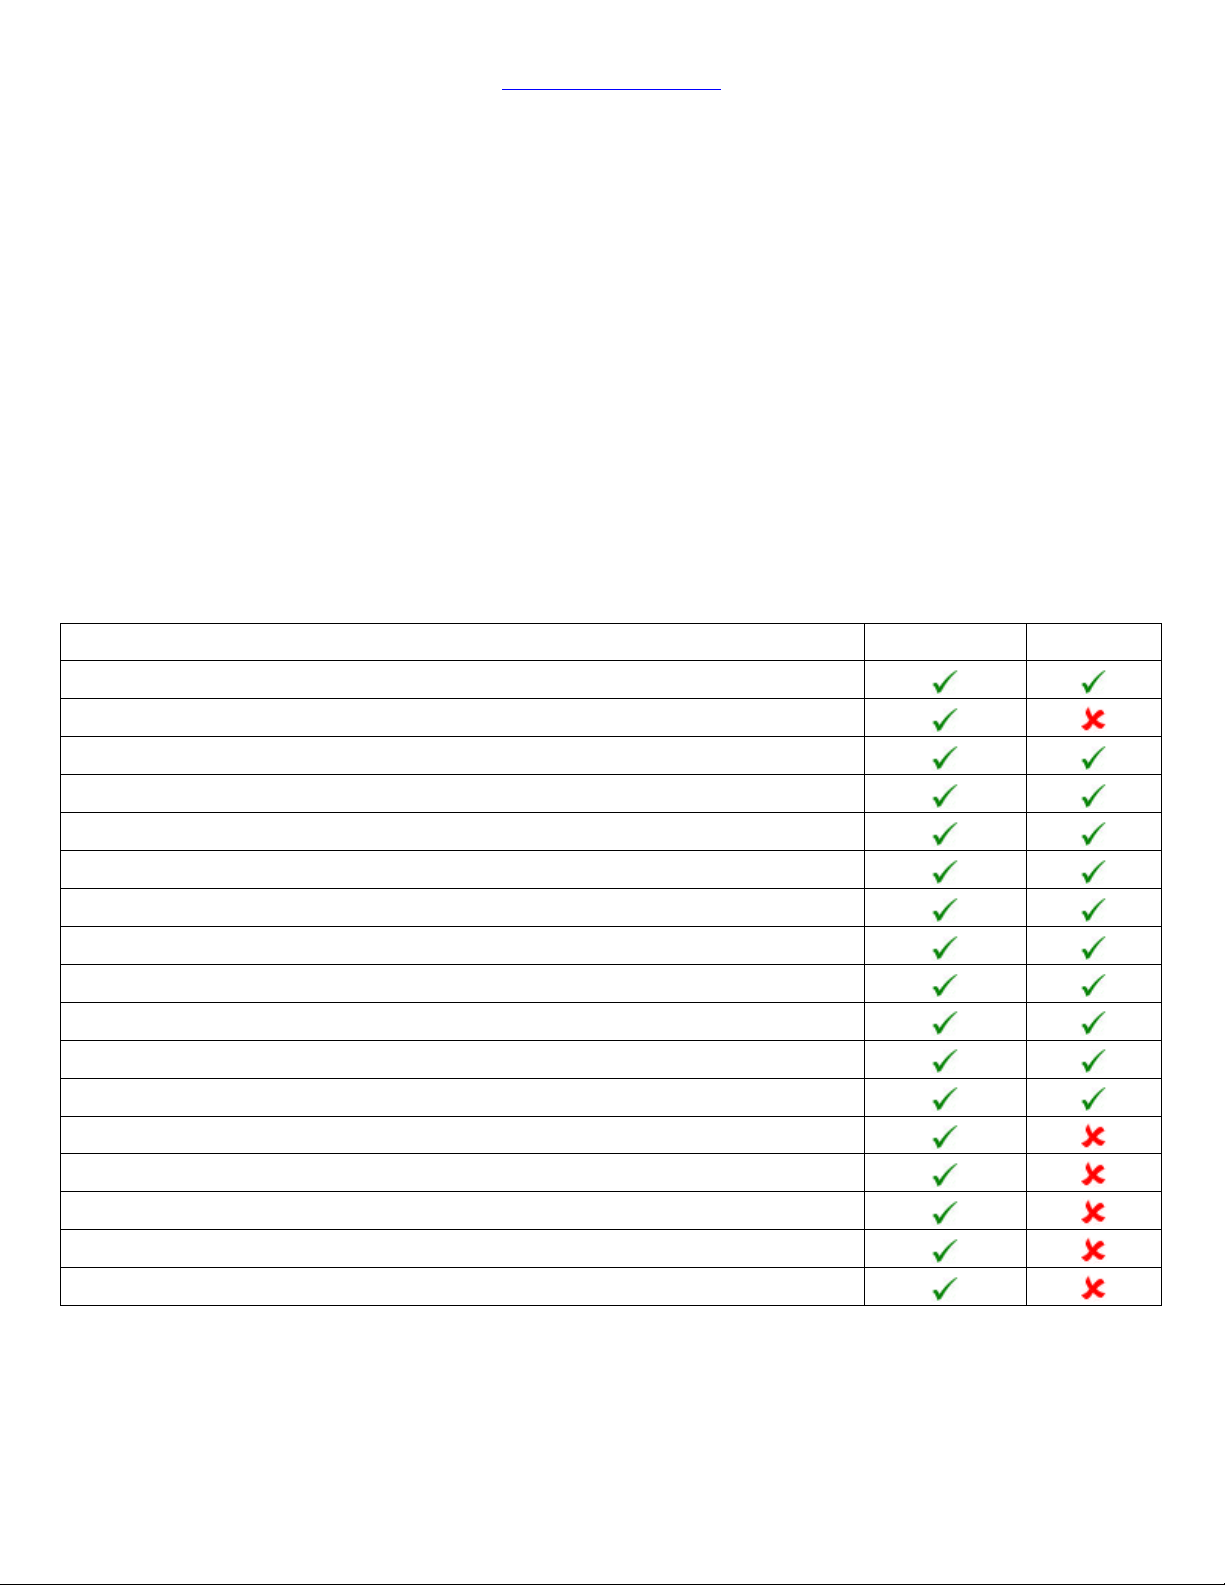
Product Features Professional Personal
Ability to overwrite IDE/ATA drives
Ability to overwrite SCSI drives
Graphical user interface
Time remaining and grow bar displayed
Self-booting capability for use on all Intel PCs - and all operating systems
Ability to overwrite entire drive no matter what BIOS limitations exist
Option to overwrite one or more partitions or the entire drive
Logs bad sectors encountered during overwrite
Automatically includes drive model and serial number in reports
View Drive application allows viewing drive sectors before or after overwrite
Full Verification option verifies the complete drive
Quick Verification option verifies 1% of the drive
Creates validation certificate if Full Verification option is used
Creates a database of overwritten drives to import into Microsoft Access
Three pass overwrite meets U.S. Department of Defense specifications
Seven pass overwrite meets German standards
User-defined option to overwrite from 1 to 99 times
Copyright © 2000 ONTRACK Data International, Inc.
3
Page 4

Return to Table of contents
4. Verification of data overwriting
Since, in many cases, data elimination is an important part of personal or company security, a
verification process is incorporated in DataEraser. The user has a choice of Full or Quick
verification. The Full Verification choice reads every sector, while Quick Verification spot-checks
1% of the overwritten area.
Disk Look, (View Drives menu selection) an absolute sector viewer, is an additional utility
provided for viewing sectors on the hard drive. Any sector on the hard drive may be viewed to
verify no data exists on the drive. For those cases where manual spot-checking is desired, this
utility may offer visual verification of any area.
The following files will be created after erasing and verifying a drive:
REPORT.TXT
DE_CERT.TXT (Professional version only)
DE_DATA.TXT (Professional version only)
5. DataEraser startup and operating procedures
Do not remove the DataEraser diskette while the tests are running. Information from the
diskette is used throughout the testing process.
Shut down Windows. Insert the DataEraser diskette in the A: drive and reboot or power on the
computer. The Caldera DR-DOS Operating System starts up. If the system fails to boot from
the diskette, see Errors and known limitations section later in this file.
4
Copyright © 2000 ONTRACK Data International, Inc.
Page 5
Return to Table of contents
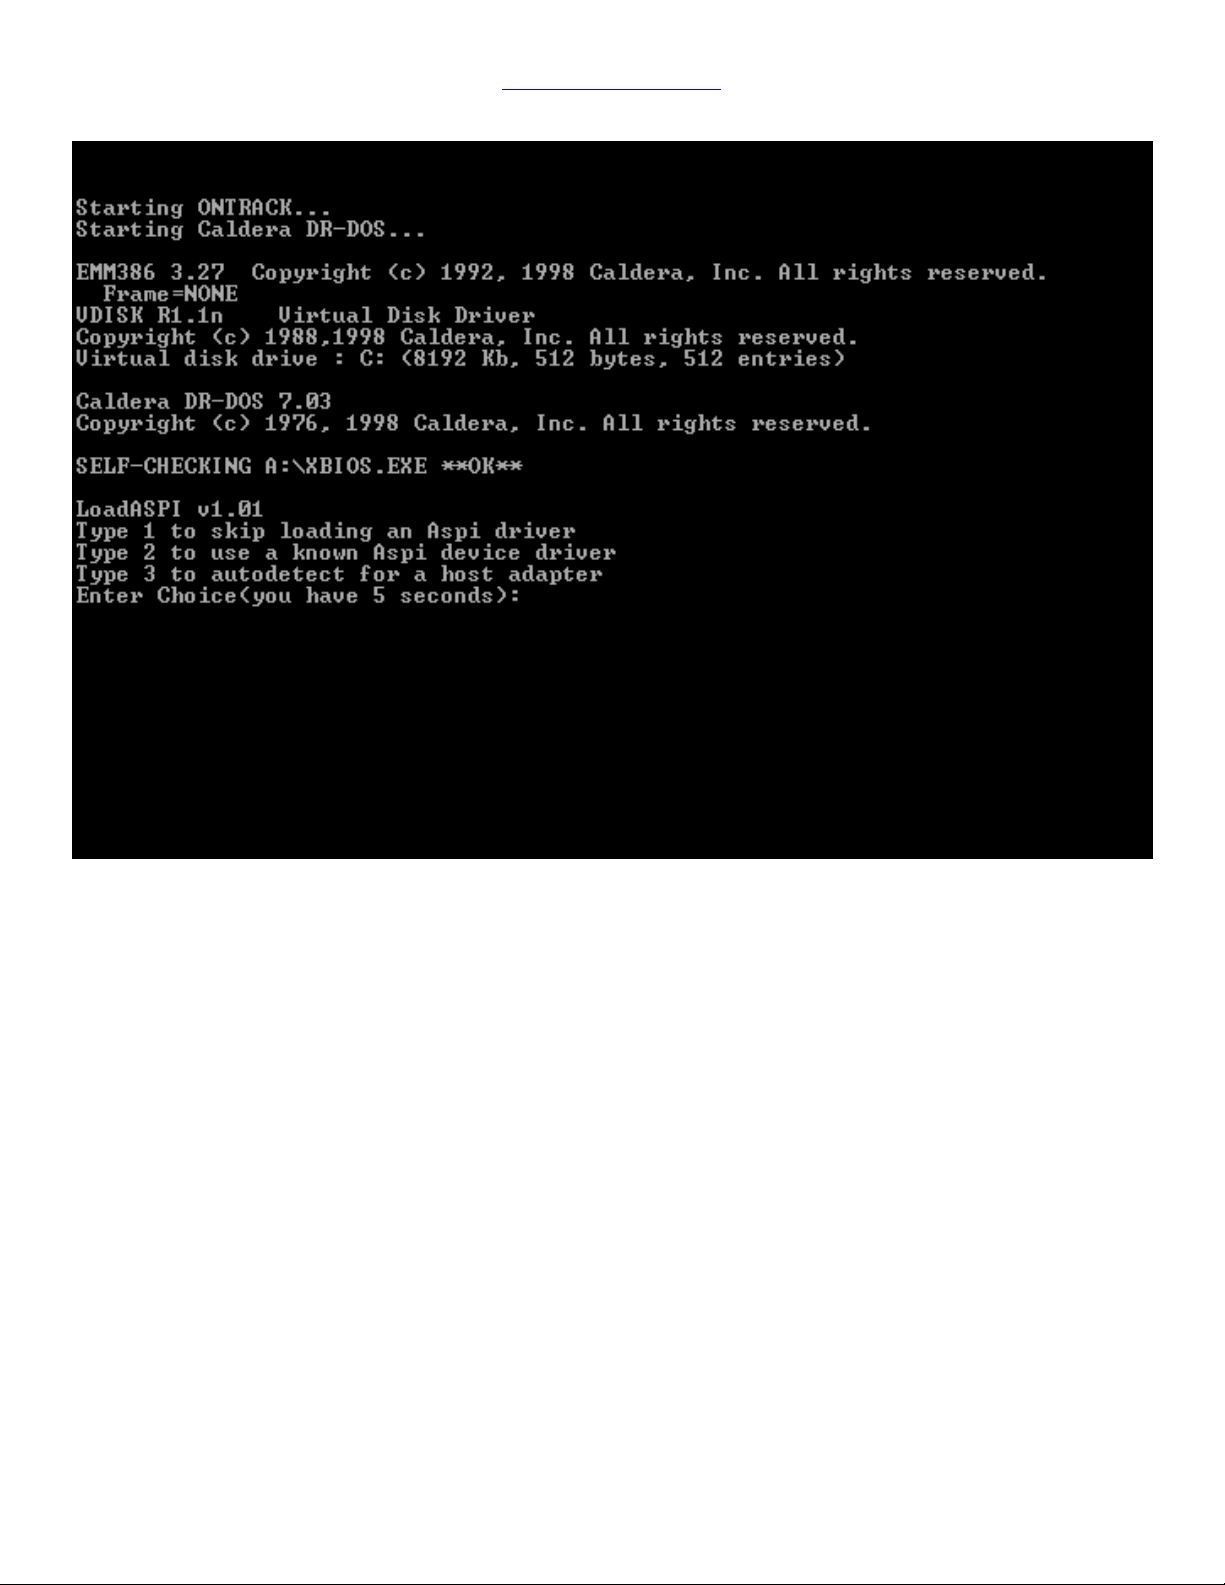
Figure 1: Load ASPI drivers (Professional version only)
If the system contains SCSI hard drives, in order to access the drives the ASPI drivers need to
be loaded. During boot up a LoadASPI program will present 3 options:
1) Skip loading an ASPI driver
2) Use a known ASPI device driver - offers the option to enter the location (path) and name of
an ASPI driver.
3) Autodetect for a host adapter - the program will detect what type of ASPI driver is required
and automatically load it.
If there are no SCSI devices on the system, either skip loading an ASPI driver or let the program
default to auto-detect.
5
Copyright © 2000 ONTRACK Data International, Inc.
Page 6
Return to Table of contents
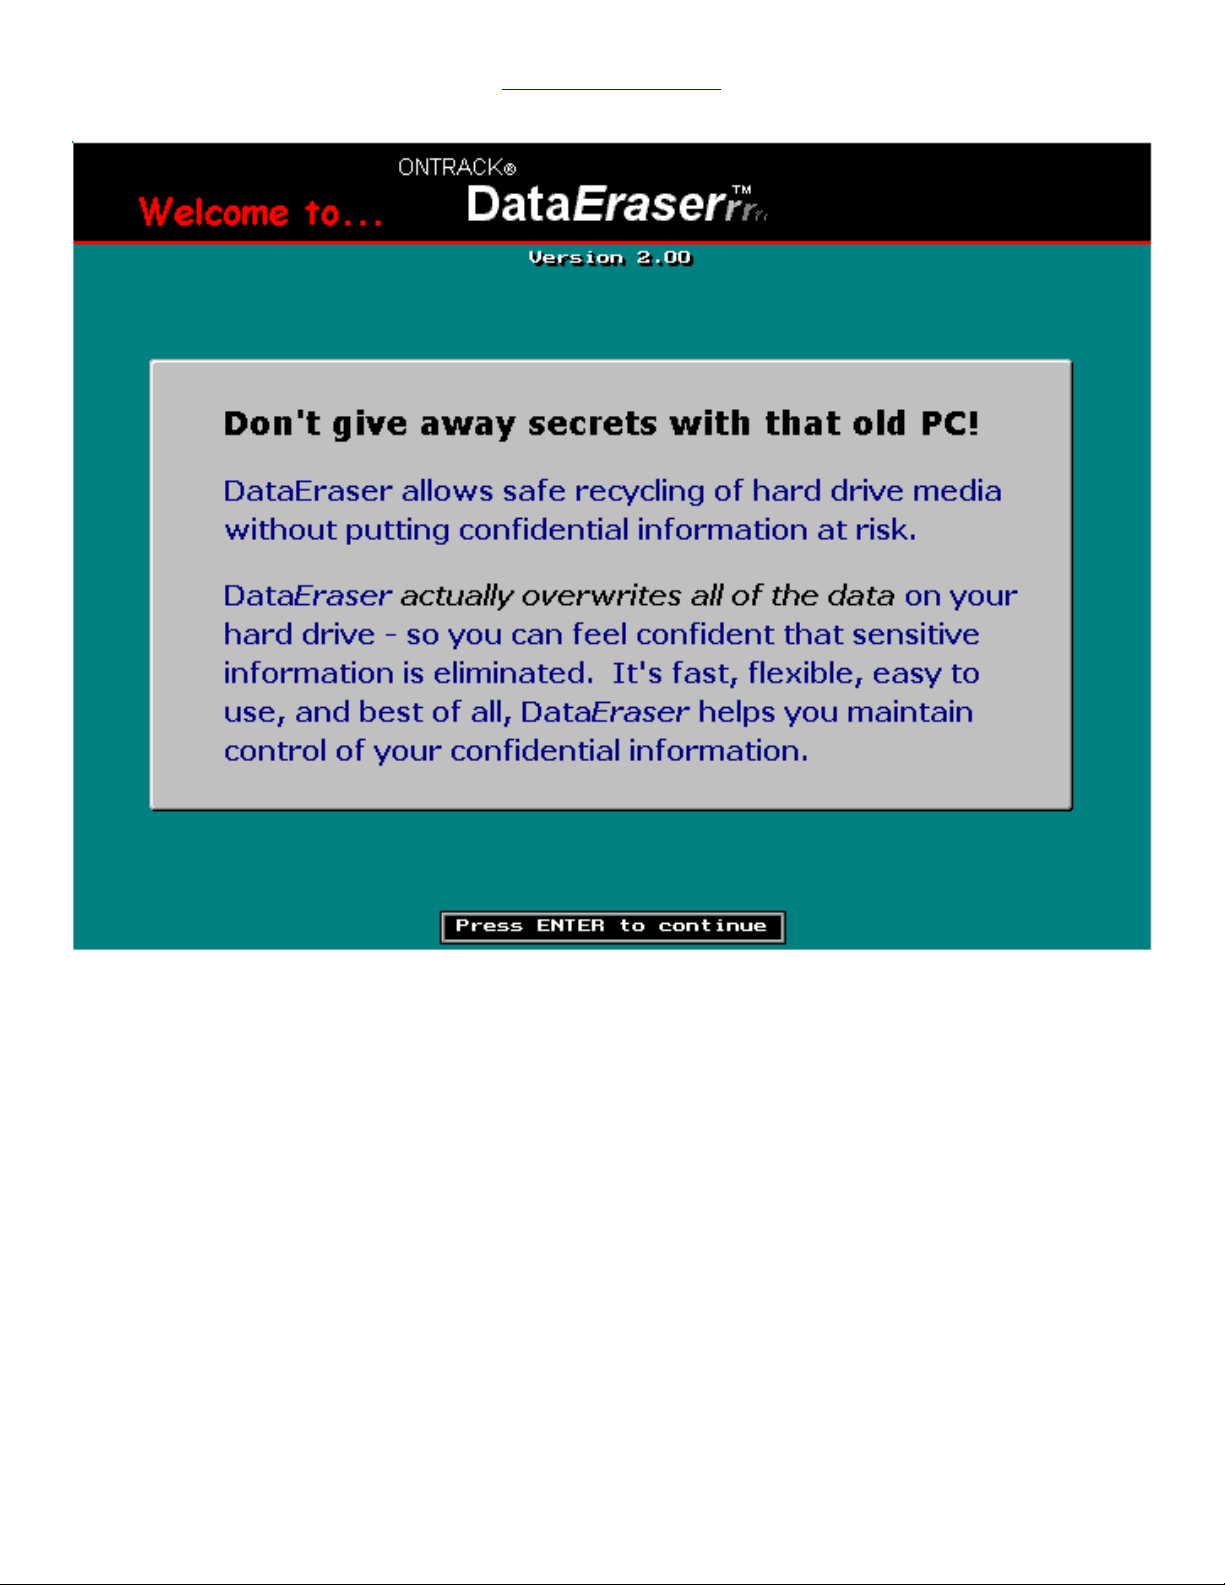
Figure 2: Welcome screen
Copyright © 2000 ONTRACK Data International, Inc.
6
Page 7
Return to Table of contents
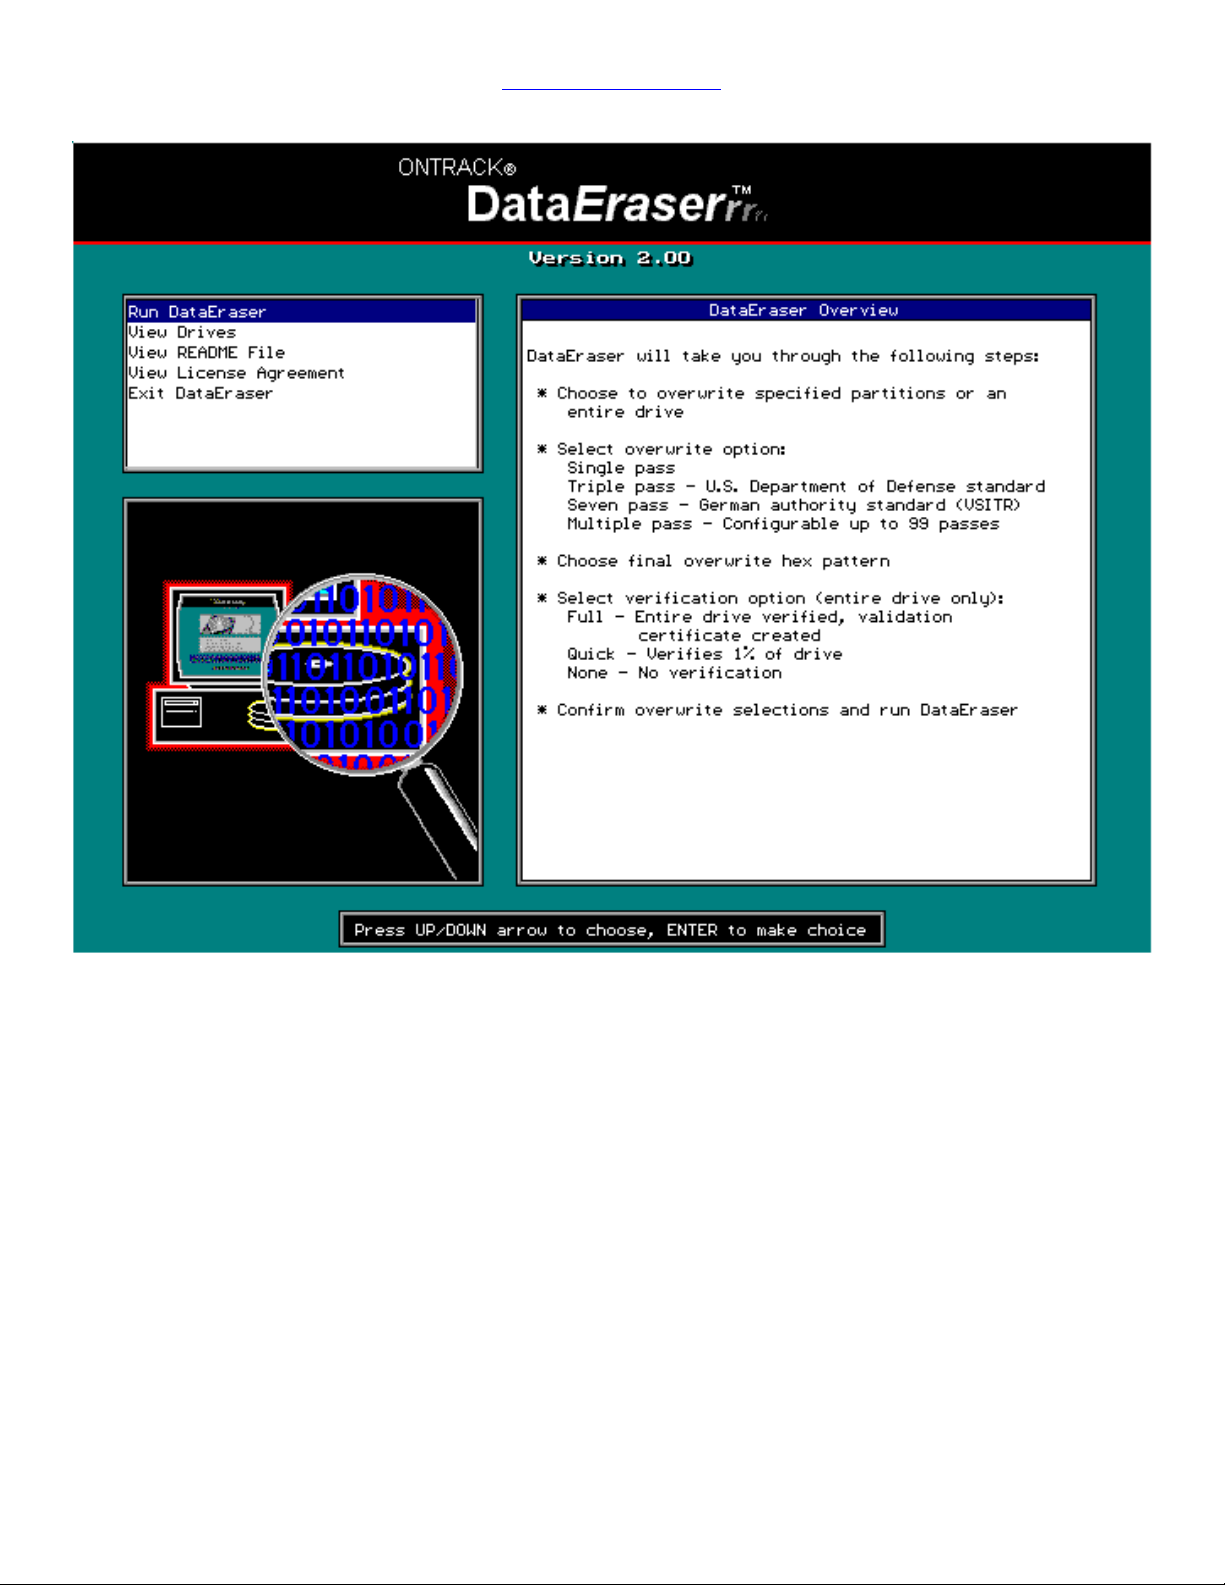
Figure 3: Main menu (Provides an overview of the DataEraser steps)
The DataEraser Overview dialog on the right side displays the steps.
The menu provides the following options:
• Run DataEraser
• View Drives
• View README File
• View License Agreement
• Exit DataEraser
7
Copyright © 2000 ONTRACK Data International, Inc.
Page 8
Return to Table of contents
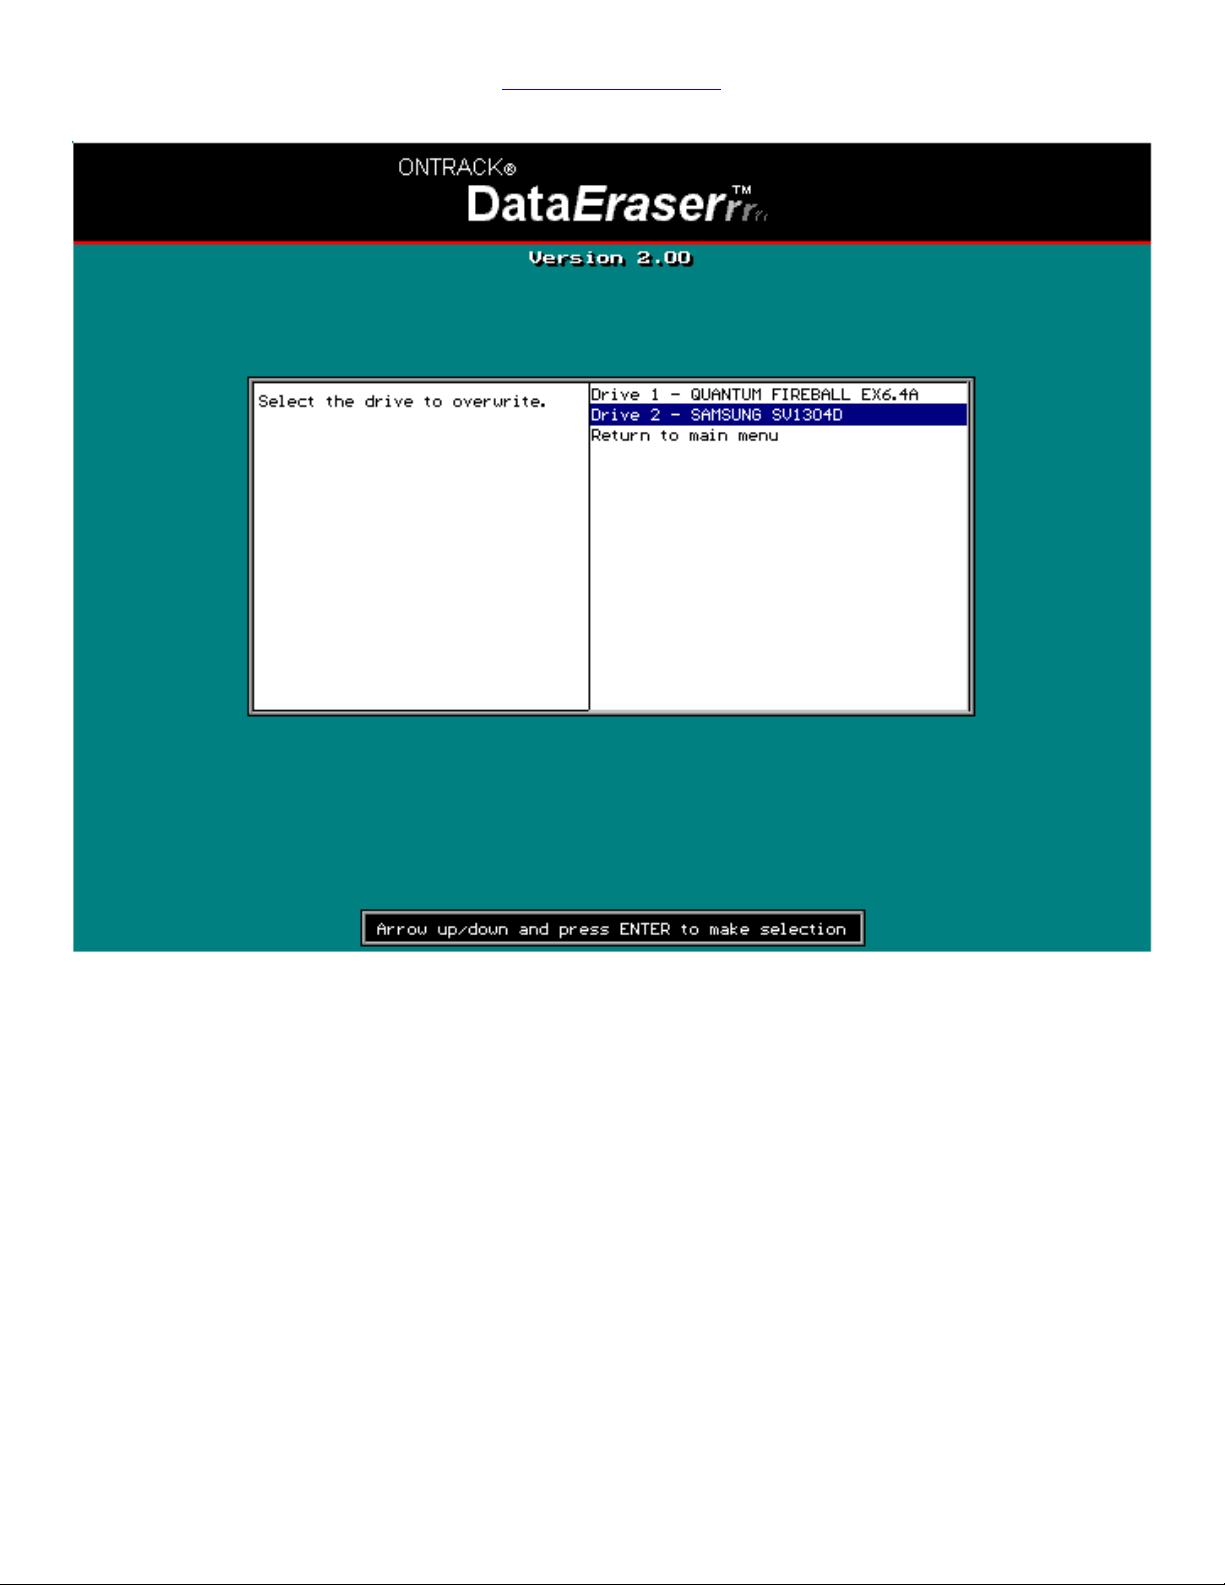
Figure 4: Drive selection
Please be careful in selecting the appropriate hard drive on this screen. There will be a display
just before erasing data that provides a description of all selections made.
Normally all drives are displayed one this screen. See Errors and known limitations section
later in this manual if not all hard drives are shown.
8
Copyright © 2000 ONTRACK Data International, Inc.
Page 9
Return to Table of contents
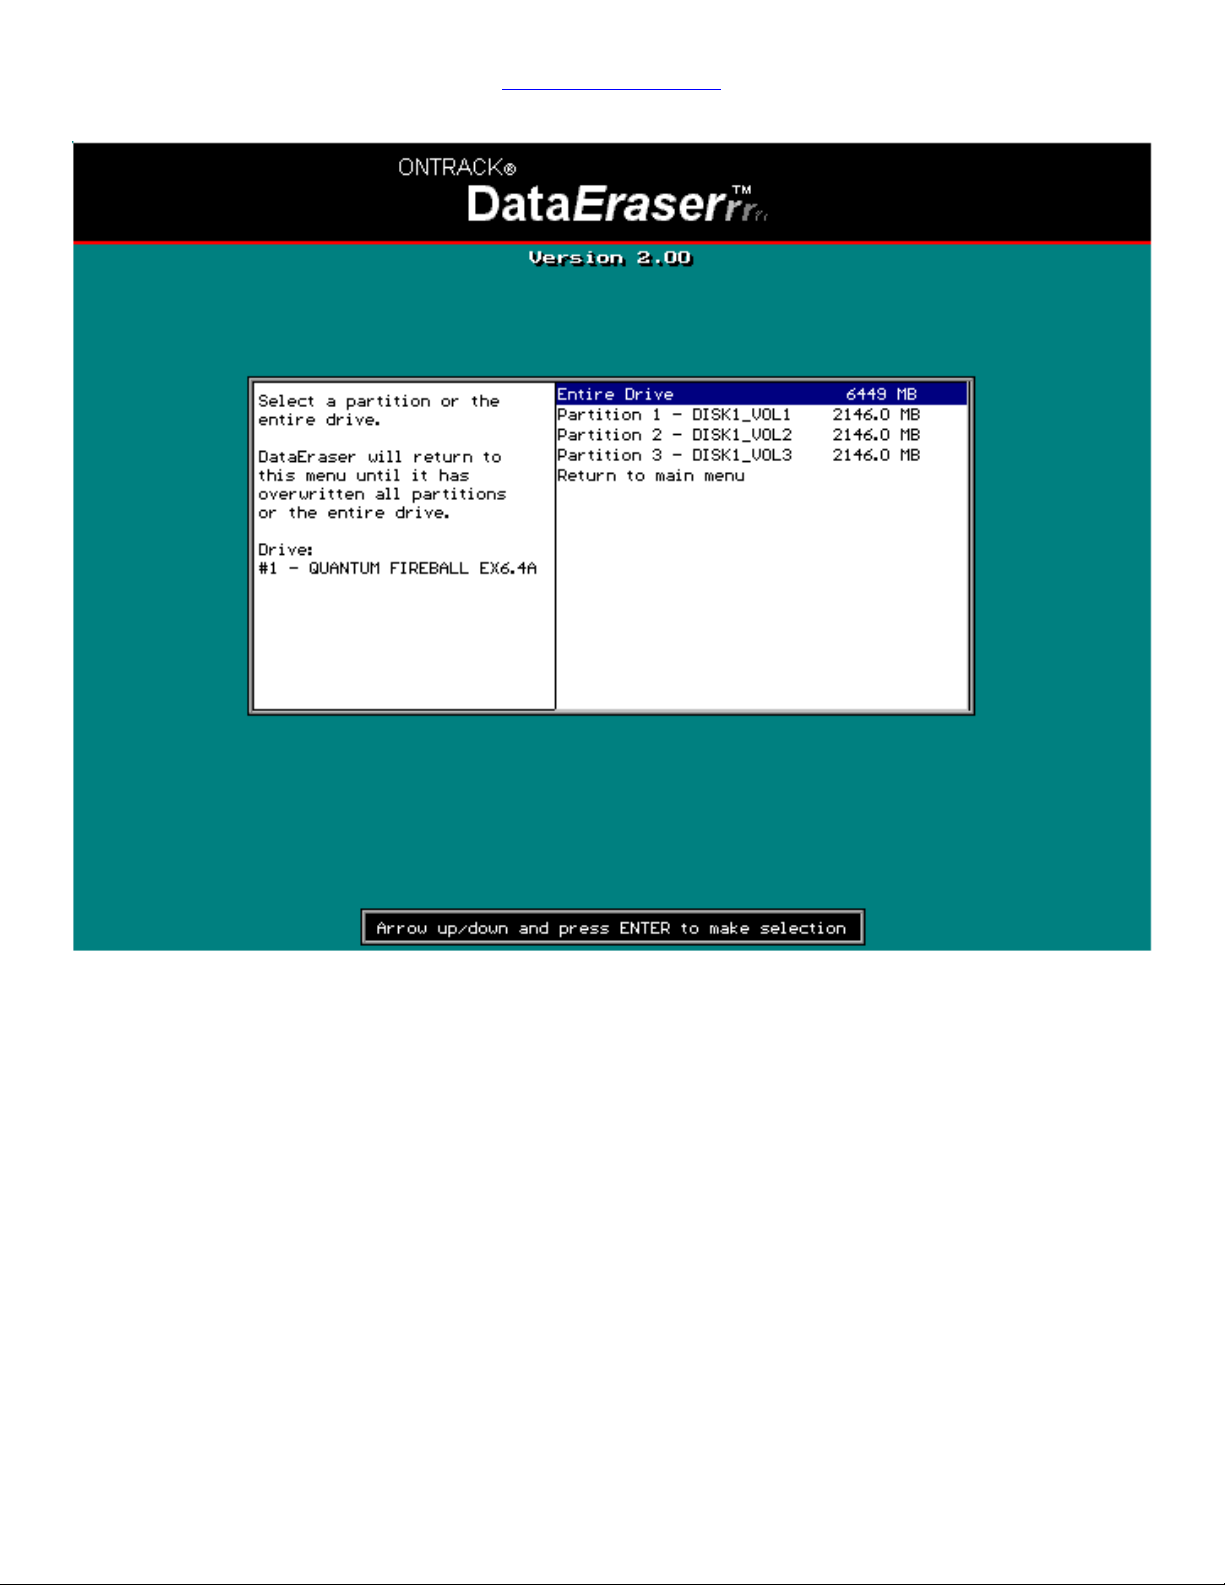
Figure 5: Individual partition or full drive selection
Select the specific partition to overwrite or the Entire Drive and press enter. If a partition was
chosen to overwrite, DataEraser will return to this menu until all the partitions or the entire drive
has been overwritten.
Professional Version note: A Validation Certificate will be created only if the entire drive is
overwritten using the Full Verification option.
9
Copyright © 2000 ONTRACK Data International, Inc.
Page 10
Return to Table of contents
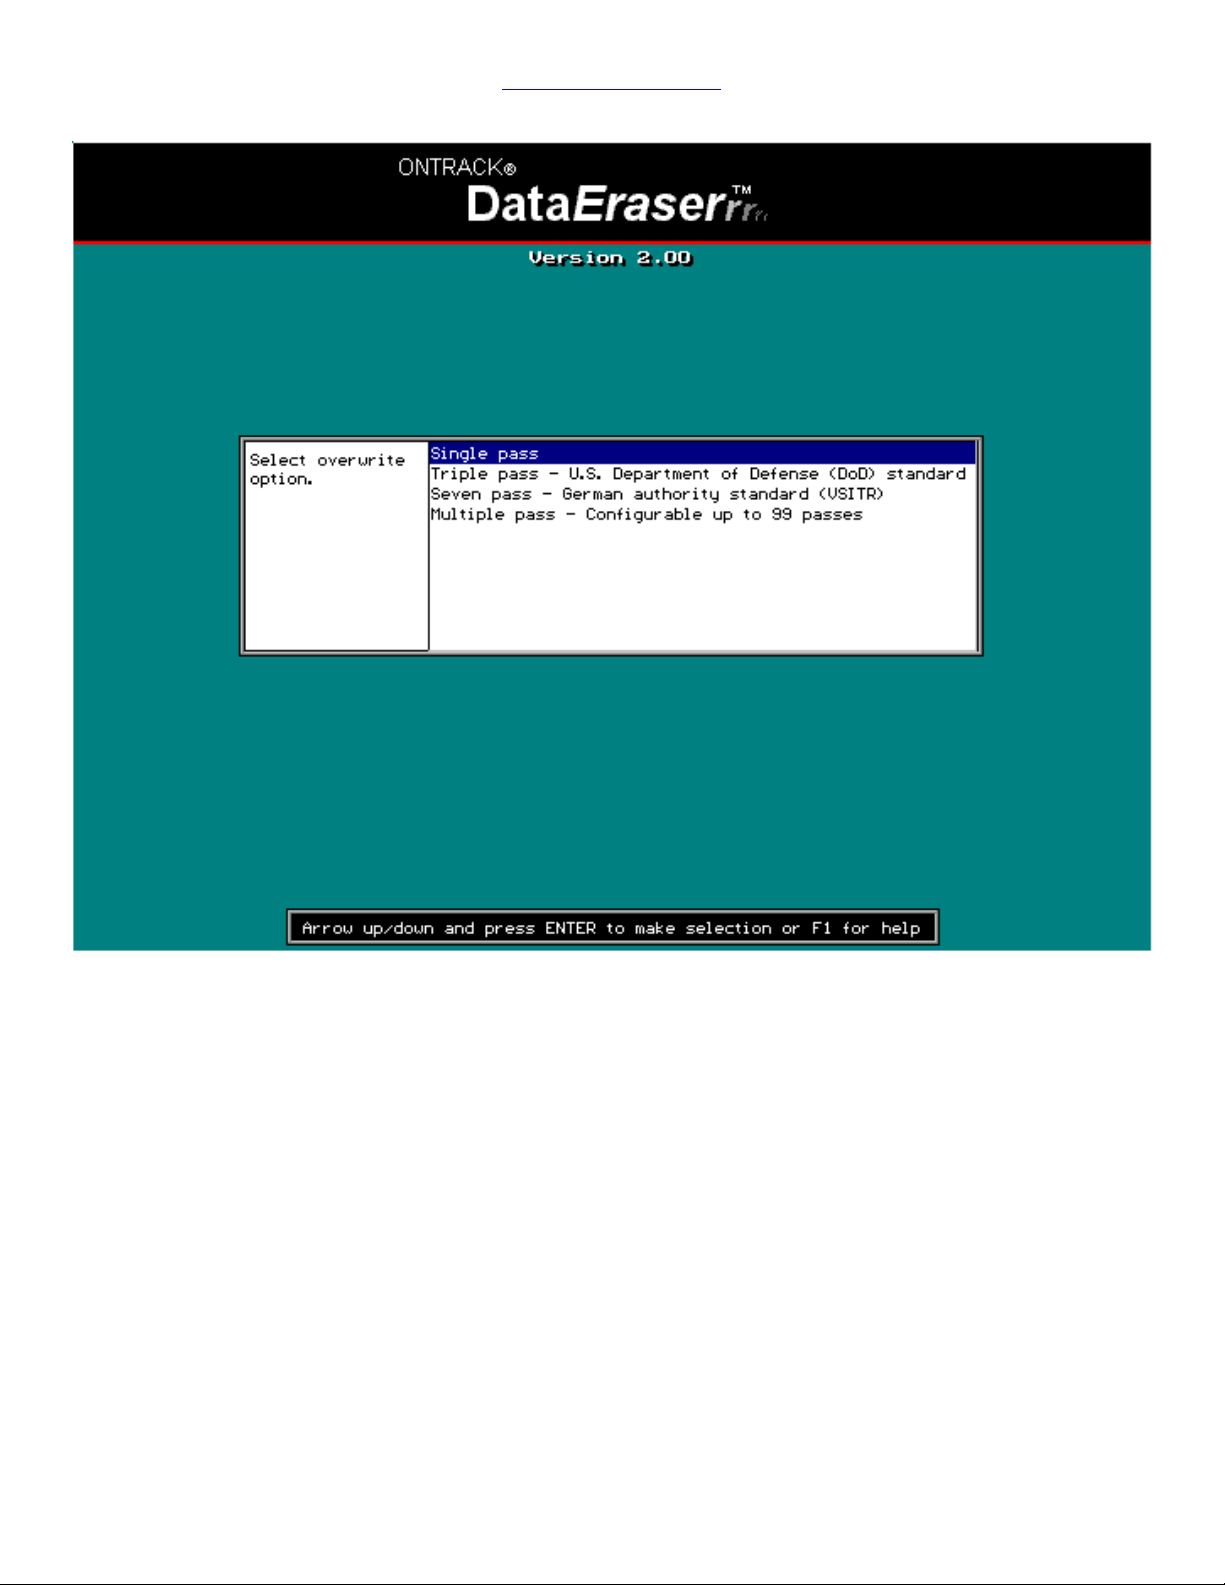
Figure 6: Overwrite options (Professional version only)
Select the type of overwrite to run. There are four to select from:
1) Single pass
2) Triple pass - U.S. Department of Defense (DoD) specification
3) Seven pass - German standard
4) Multiple pass - Configurable up to 99 overwrite passes
10
Copyright © 2000 ONTRACK Data International, Inc.
Page 11
Return to Table of contents
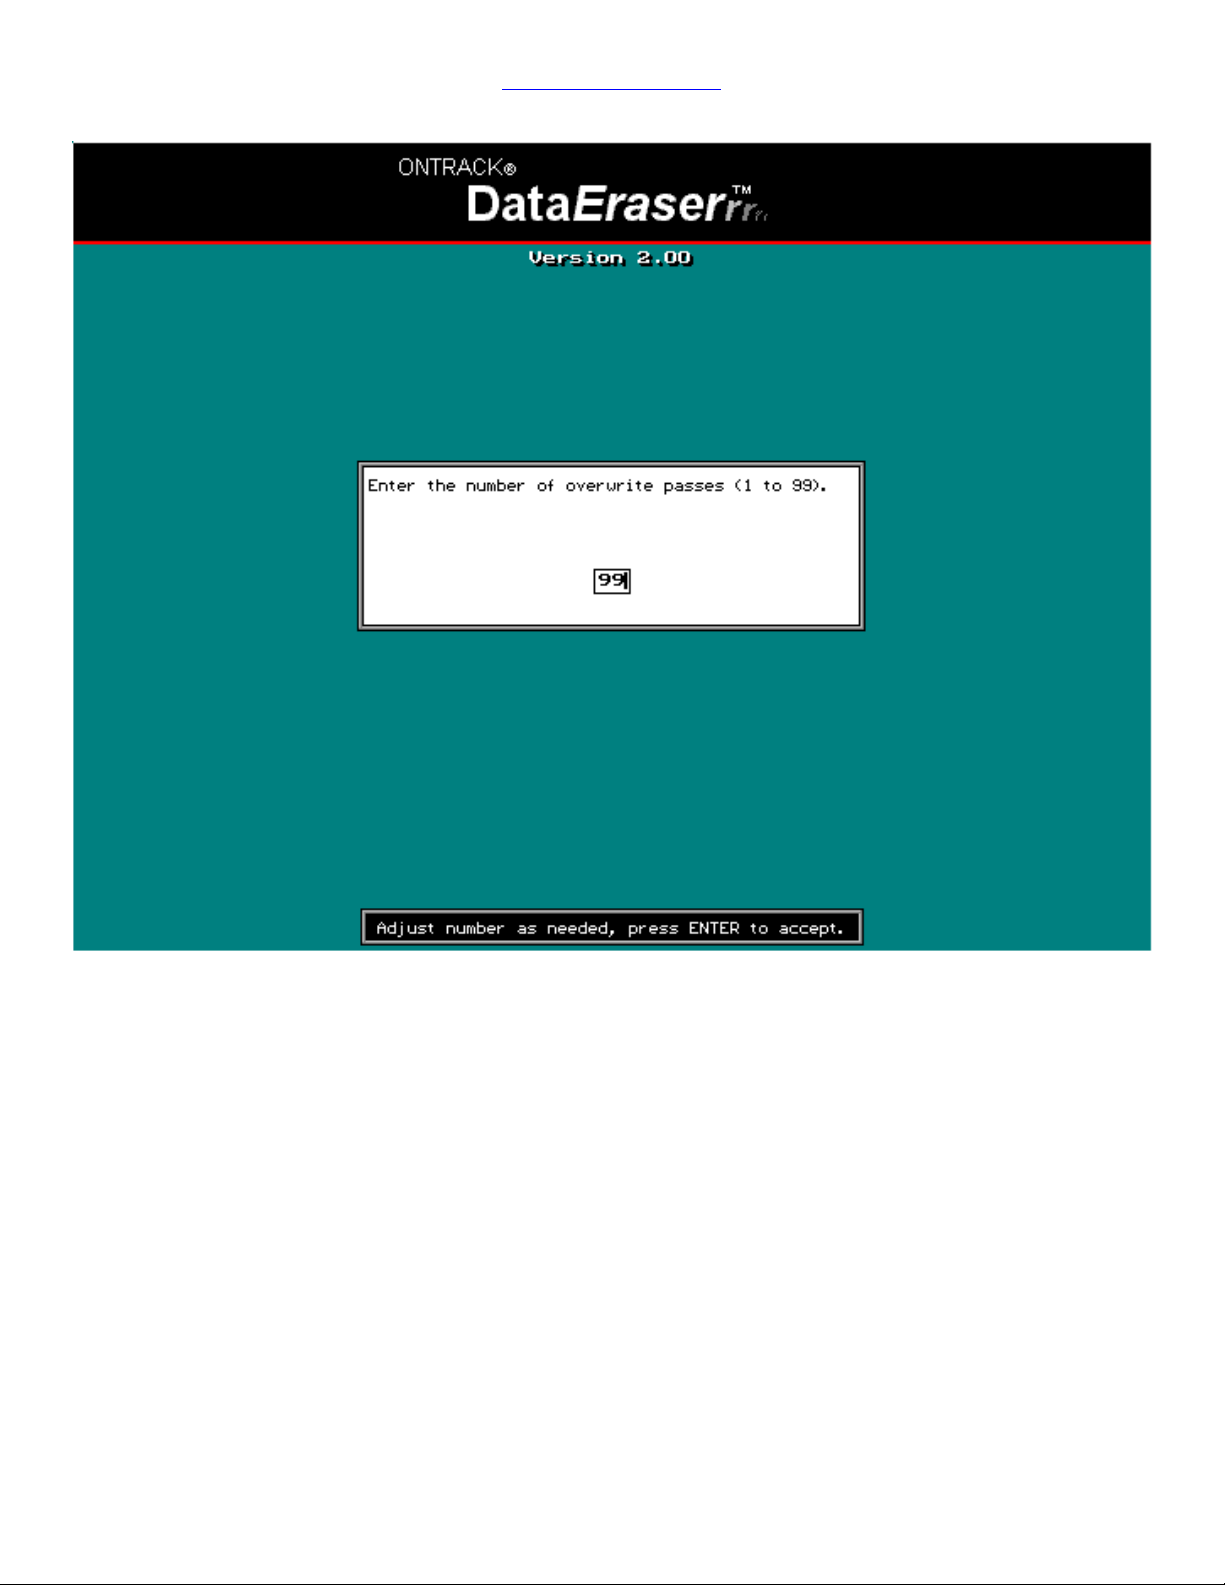
Figure 7: Select number of passes (Professional version only)
This screen will appear if the Multiple pass option was selected on the previous screen. The
default is 99 passes. To change the number of passes, simply backspace then type the number
of passes to run.
11
Copyright © 2000 ONTRACK Data International, Inc.
Page 12
Return to Table of contents
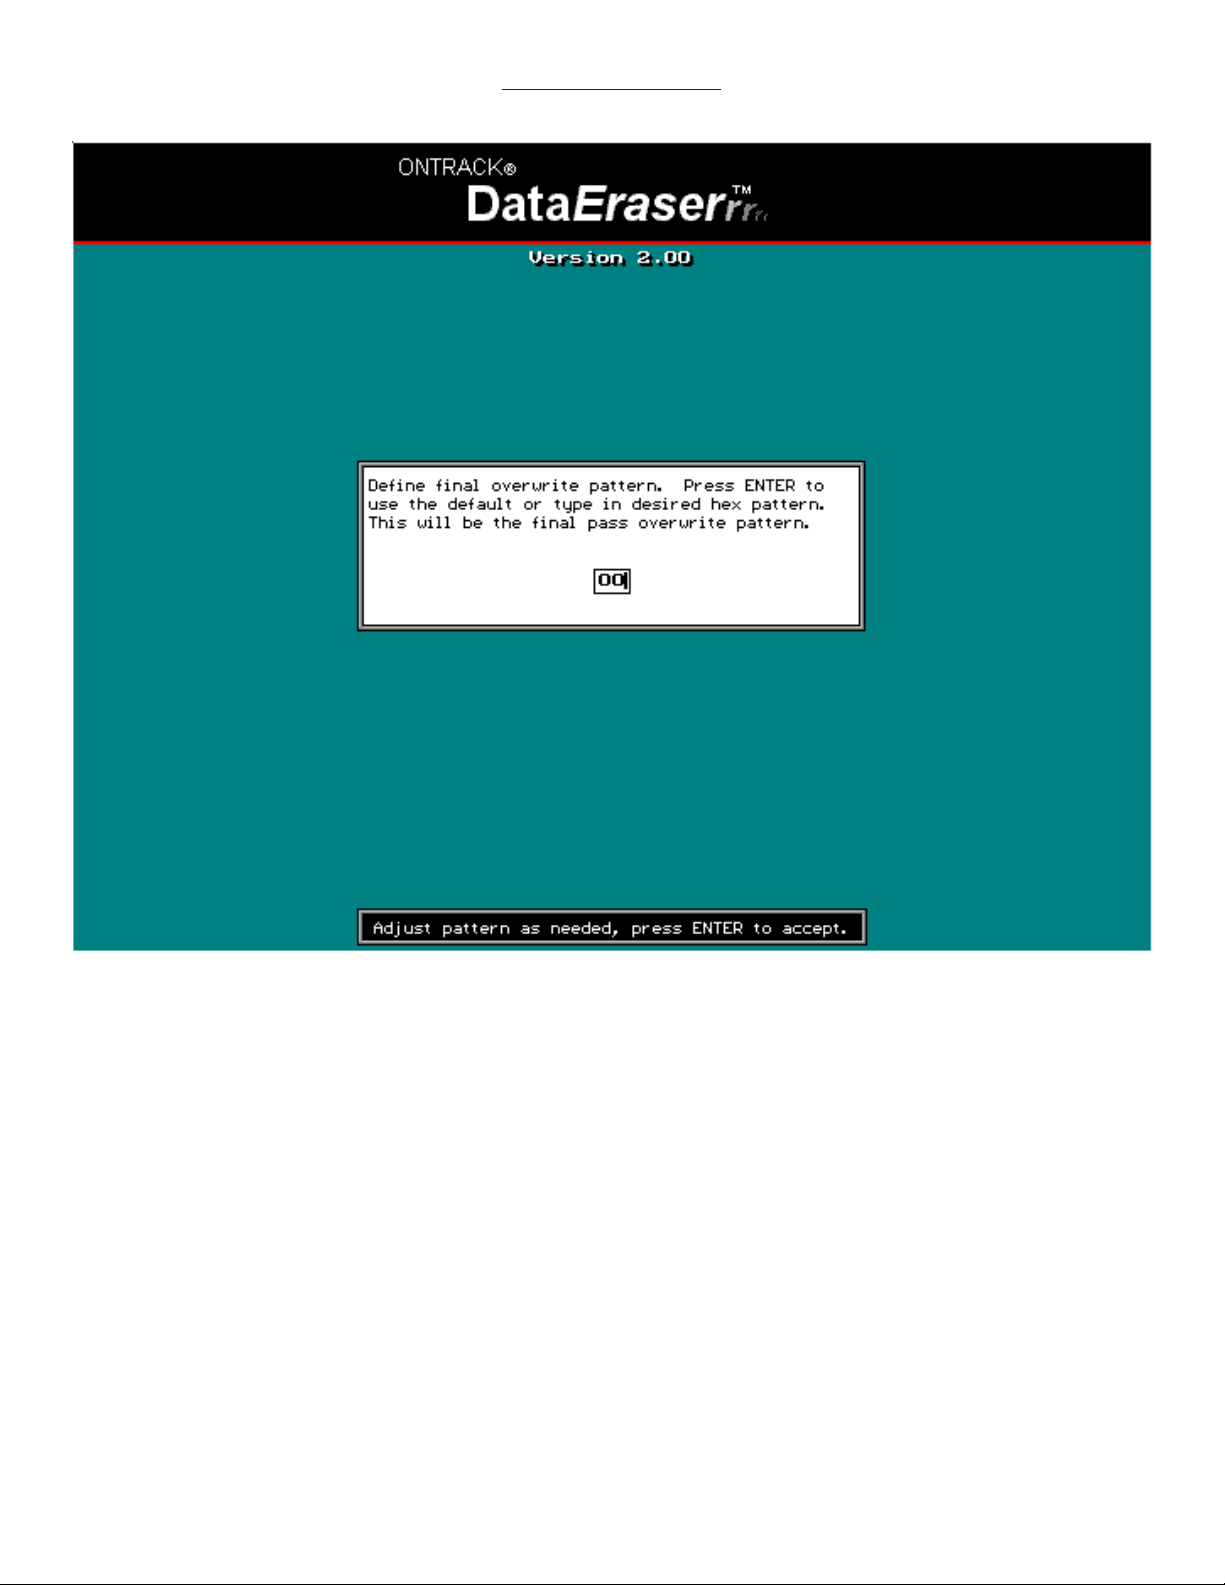
Figure 8: Final overwrite pattern
Enter the hex pattern to be used on the final overwrite pass or press Enter to use the default
'00'.
Valid hexadecimal characters include 0 through 9 and A through F and DataEraser will overwrite
using any combination of two hexadecimal characters.
12
Copyright © 2000 ONTRACK Data International, Inc.
Page 13
Return to Table of contents
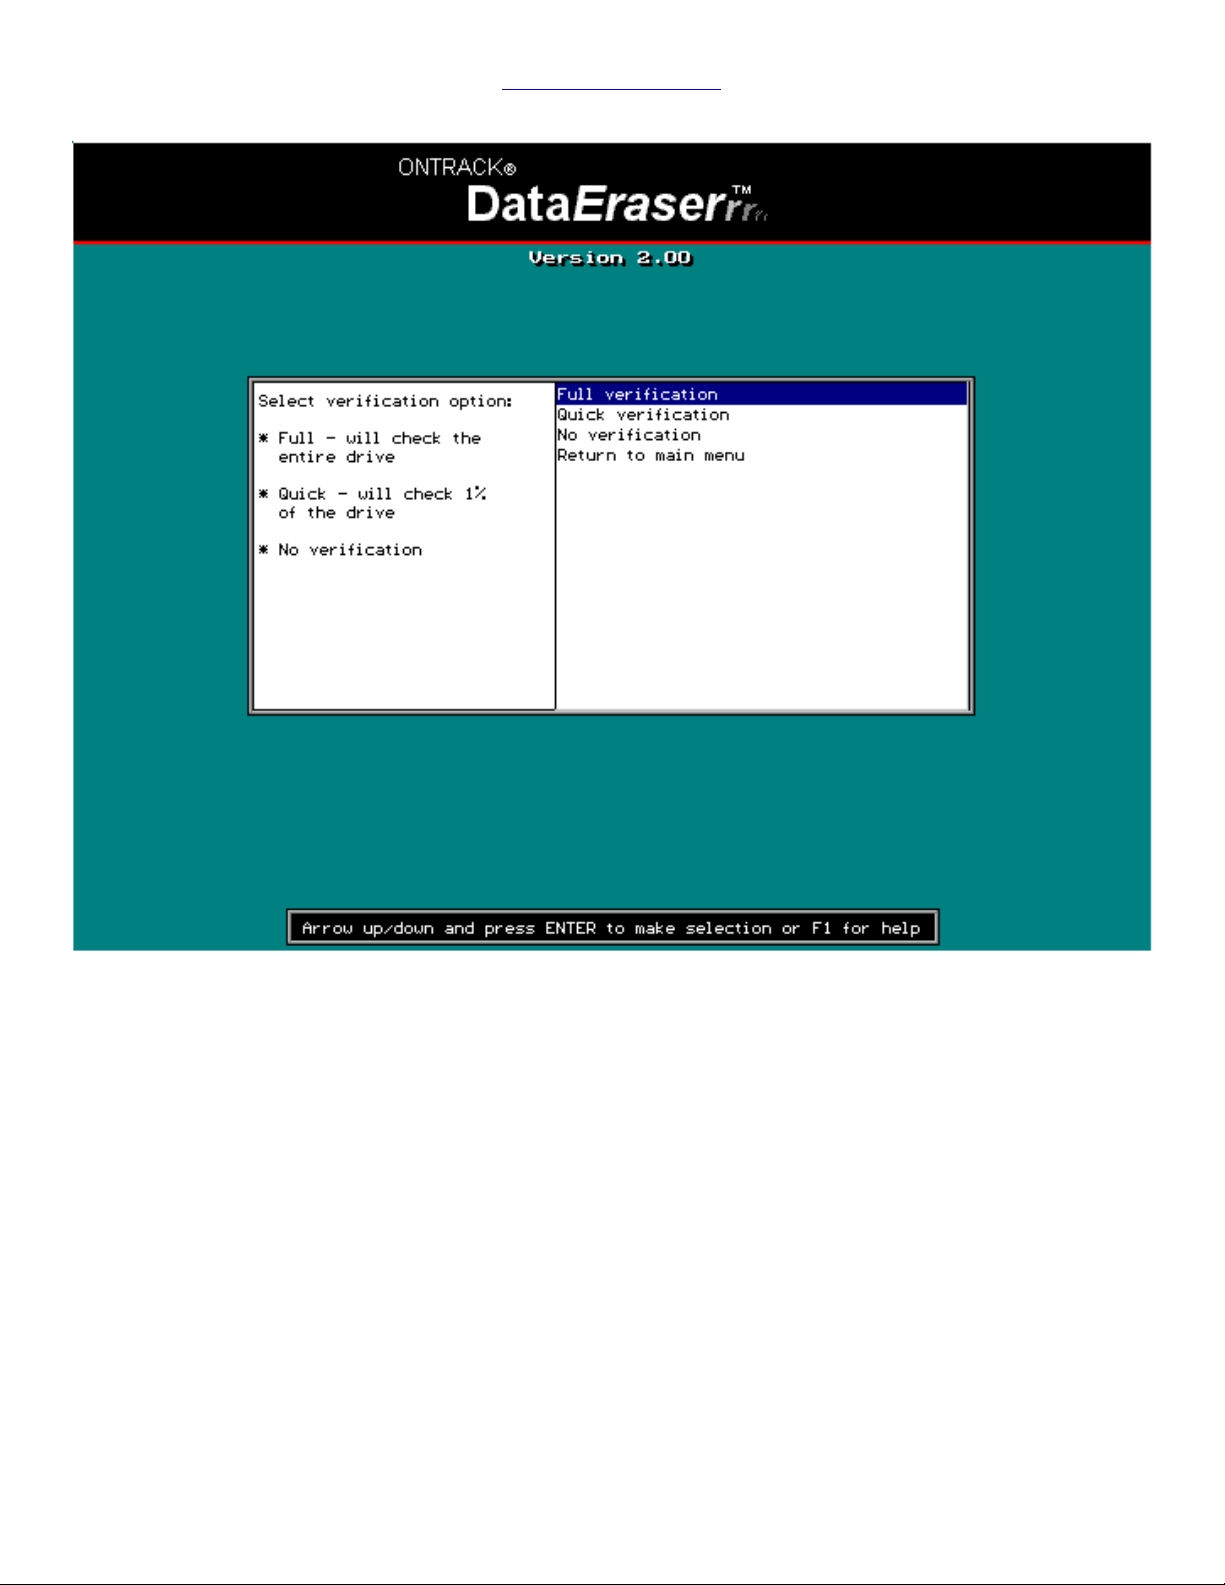
Figure 9: Verification selection (Professional version only)
If the overwrite entire drive options was chosen, select the type of verification to use. Choose
from Full verification which reads and verifies the entire drive; Quick verification which randomly
verifies approximately 1% of the drive; or choose No verification.
NOTE: A Validation Certificate will only be created if Full verification is selected.
13
Copyright © 2000 ONTRACK Data International, Inc.
Page 14
Return to Table of contents
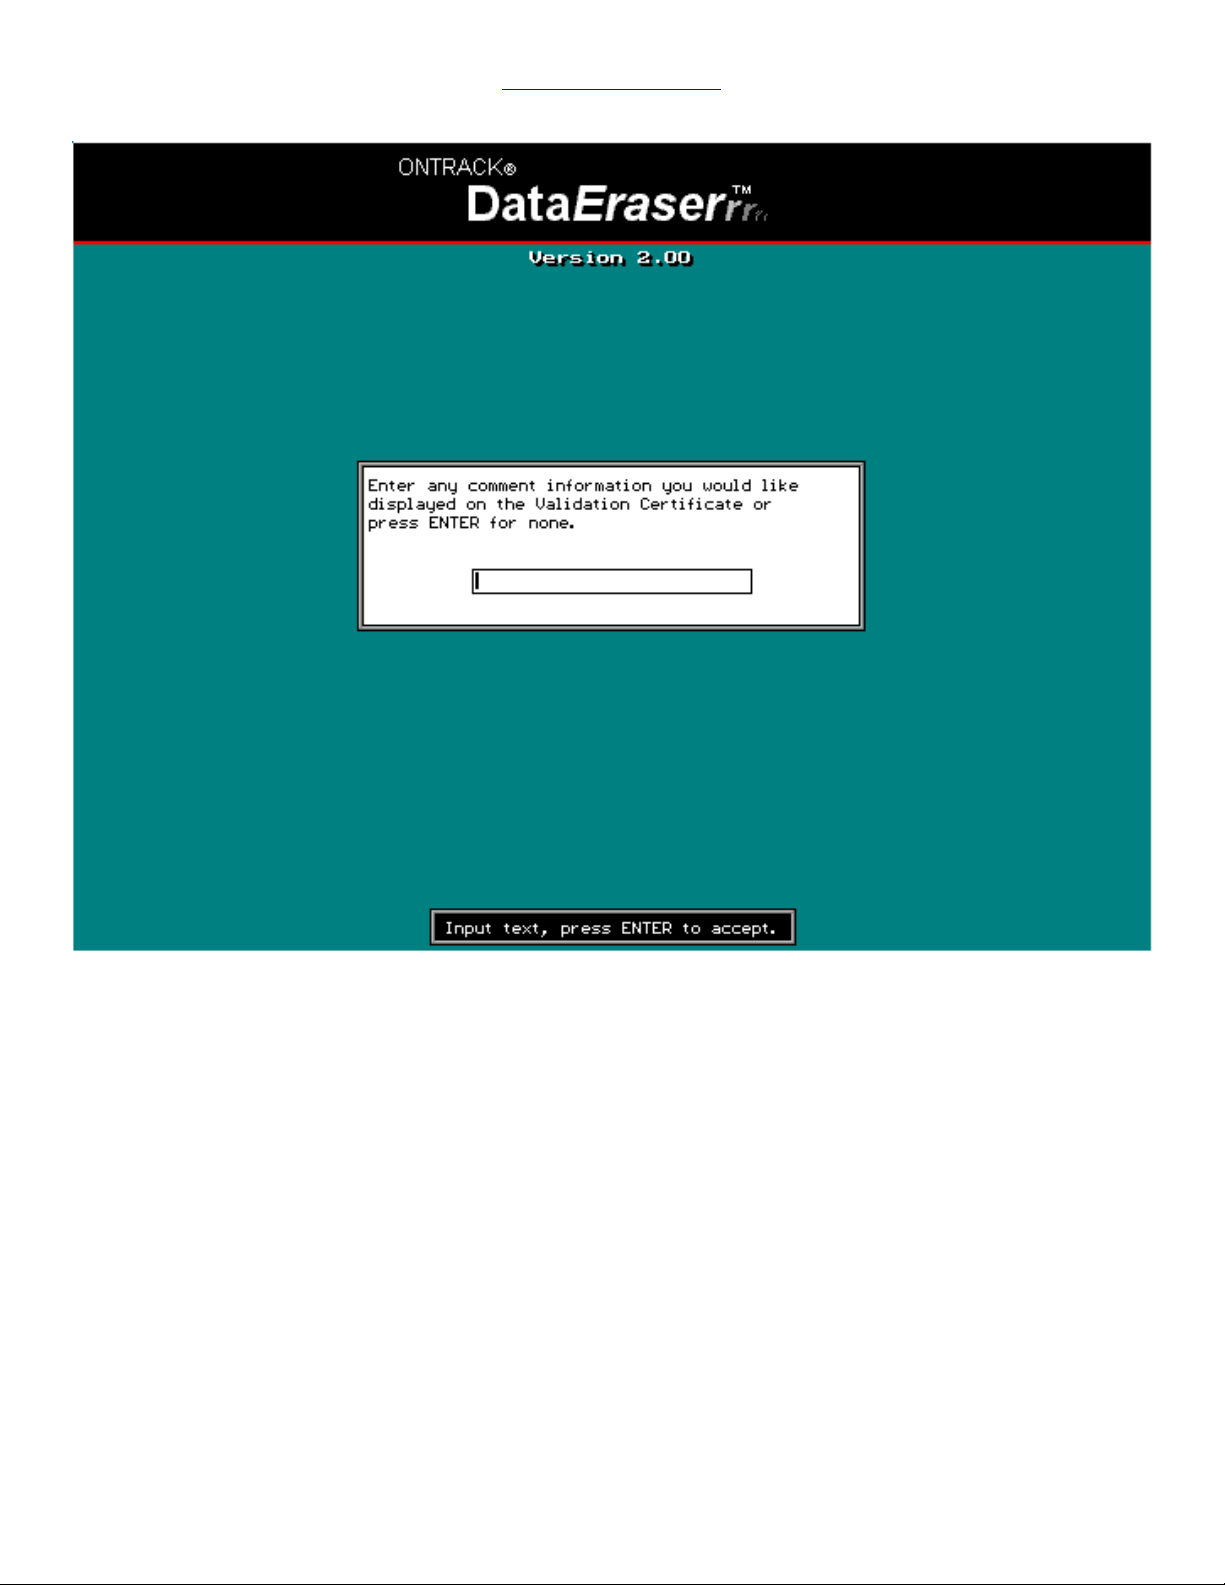
Figure 10: Validation Certificate comment entry (Professional version only)
If Full verification was chosen any comments to be included in the Validation Certificate may be
entered.
The information from each Validation Certificate is written to a comma-delimited database file,
DE_DATA.TXT, which can be imported to a database for easy tracking of erased drives. An MS
Access 97 template is provided with the Professional Version. Instructions on how to import the
data into the template are included in the IMPORT.HLP file.
14
Copyright © 2000 ONTRACK Data International, Inc.
Page 15
Return to Table of contents
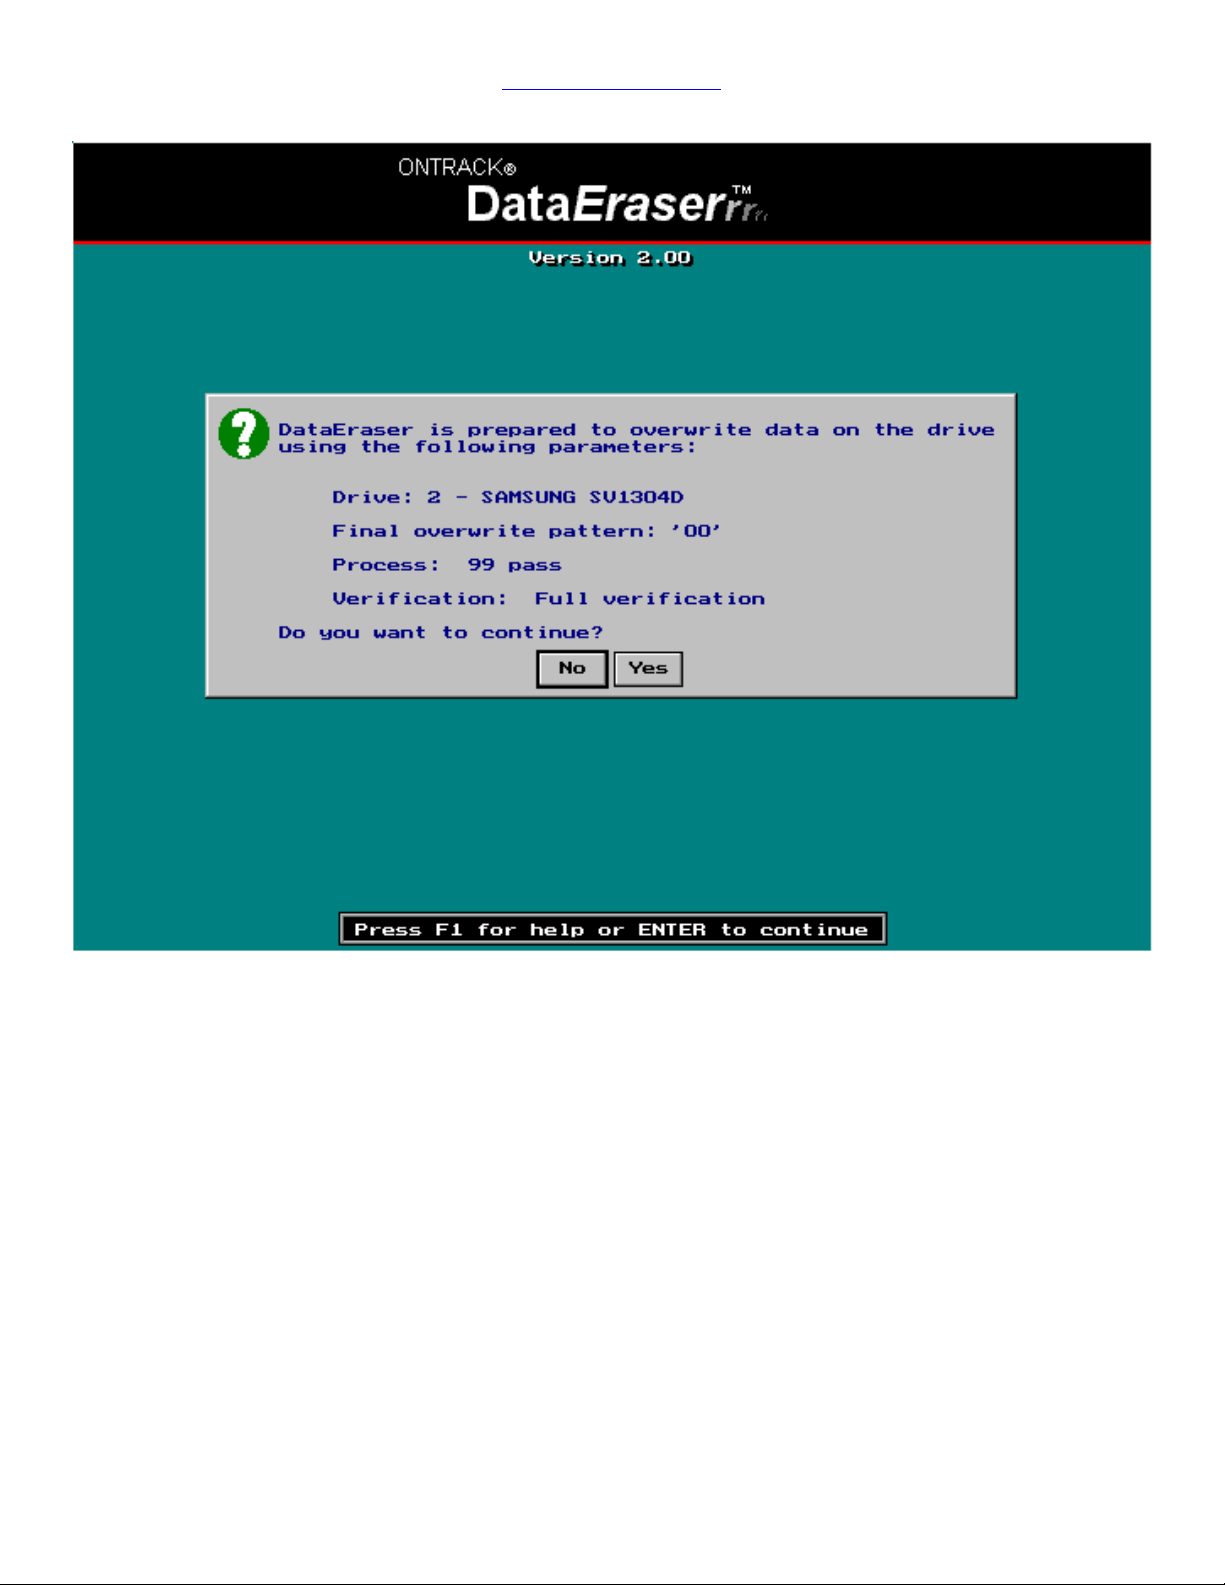
Figure 11: Final confirmation of overwrite options
Before the overwrite and verification is completed, a review screen is presented to verify the
options chosen. Tab or arrow to [Y]es to continue or [N]o to return to the main menu. The
default setting is No, therefore the overwriting process cannot be started accidentally.
The overwrite and verification are performed without interruption. To cancel the overwrite at
any time press ESC.
When the overwrite and verification are completed, a dialog box will display the results. If any
read/write errors were detected on the drive, they are reported in the report.txt file on the
diskette. See Errors and known limitations section on how to view this file.
Professional version only:
If the verification was successful, a Validation Certificate is written to the diskette and will be
displayed following the results dialog box.
15
Copyright © 2000 ONTRACK Data International, Inc.
Page 16
Return to Table of contents
Figure 12: Overwriting
While the overwrite is taking place, the time remaining for the current pass is displayed in an
hours, minutes, seconds (00:00:00) format. The overwrite progress can also be observed by
monitoring the growbar.
16
Copyright © 2000 ONTRACK Data International, Inc.
Page 17
Return to Table of contents
Figure 13: Verifying
While the verification is taking place, the time remaining for the current pass is displayed in an
hours, minutes, seconds (00:00:00) format. The verification progress can also be observed by
monitoring the growbar.
17
Copyright © 2000 ONTRACK Data International, Inc.
Page 18
Return to Table of contents
Figure 14: Successful Overwrite Completion
If any errors were encountered during the overwrite or the verification process, they will be
written to the REPORT.TXT file on the diskette. This file will provide further details of each
specific error, including the sector location where an error occurred.
18
Copyright © 2000 ONTRACK Data International, Inc.
Page 19
Return to Table of contents
Figure 15: Validation Certificate (Professional version only)
This is a sample of the Validation Certificate.
Any comment entered on the Validation Certificate comment entry screen will appear in
the Comment Information. In the example above, Joe's Desktop is the comment.
19
Copyright © 2000 ONTRACK Data International, Inc.
Page 20
Return to Table of contents
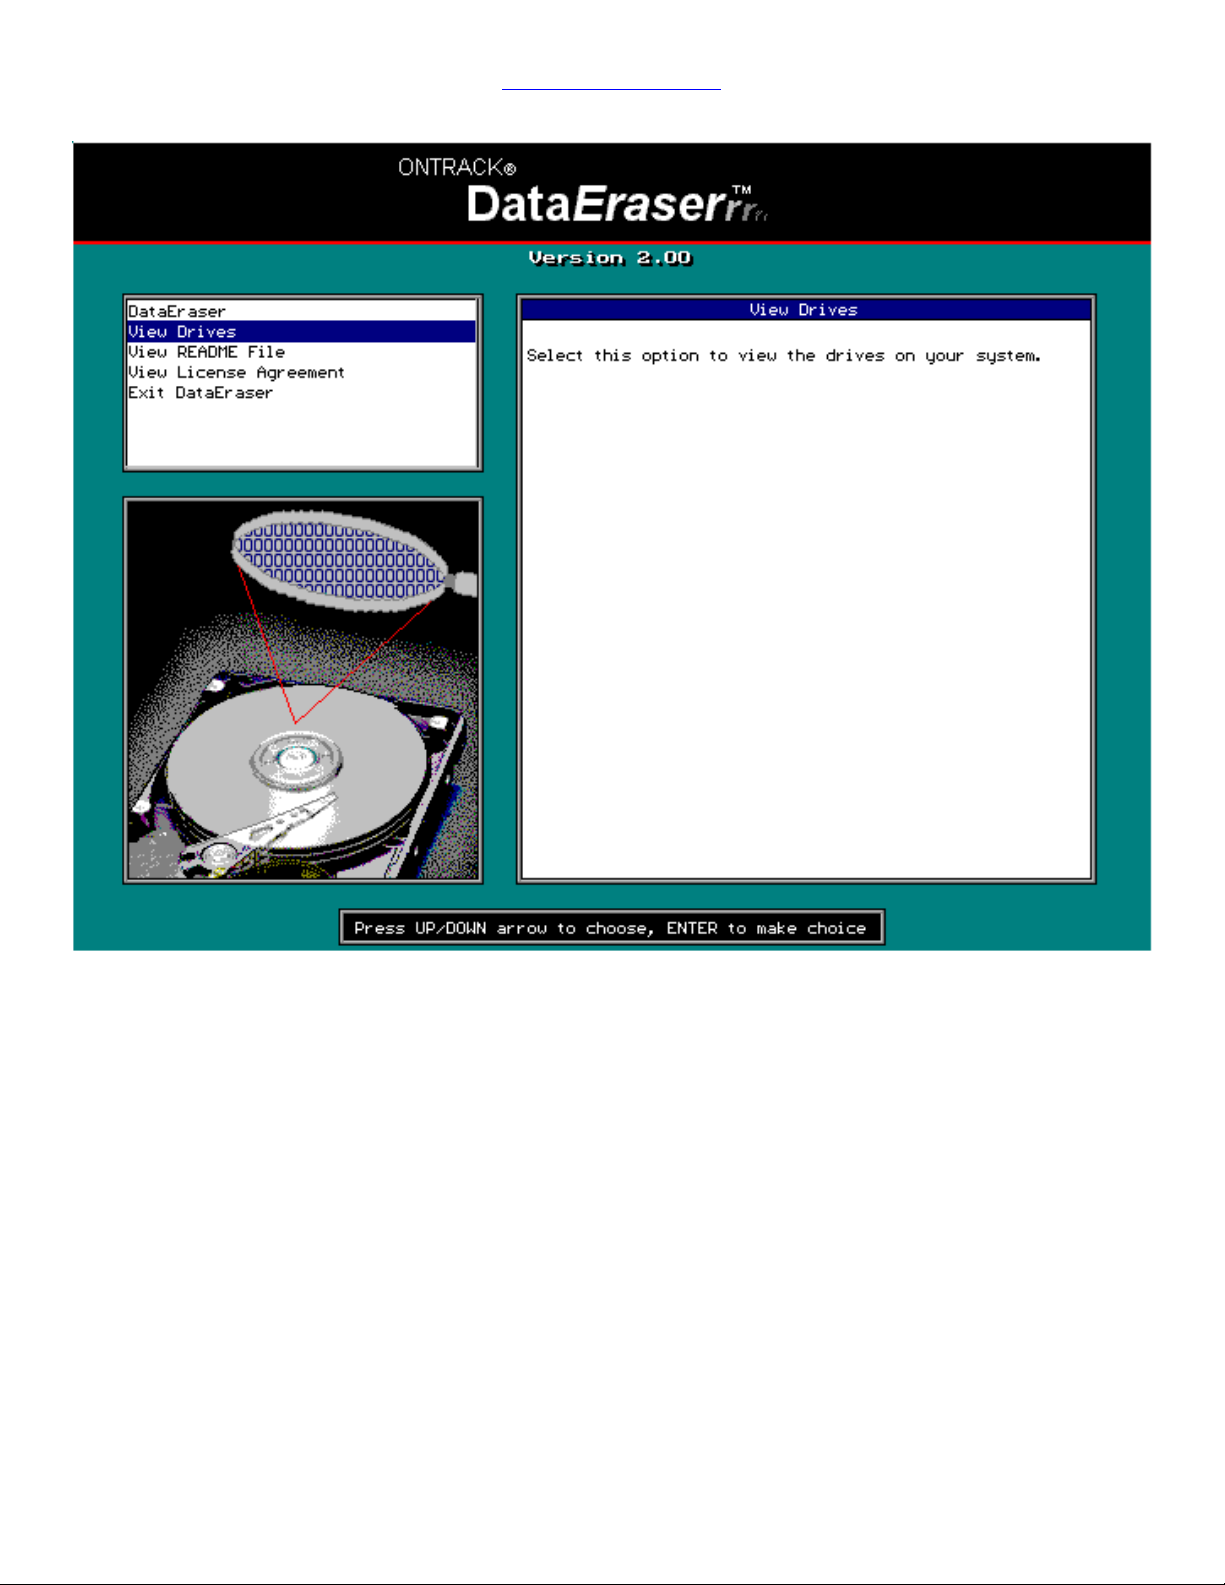
Figure 16: View Drives menu selection
Upon returning to the main menu after an overwrite, the View Drives option is automatically
highlighted. Press Enter to view the drive on a sector level for visual verification of the
overwrite.
20
Copyright © 2000 ONTRACK Data International, Inc.
Page 21
Return to Table of contents
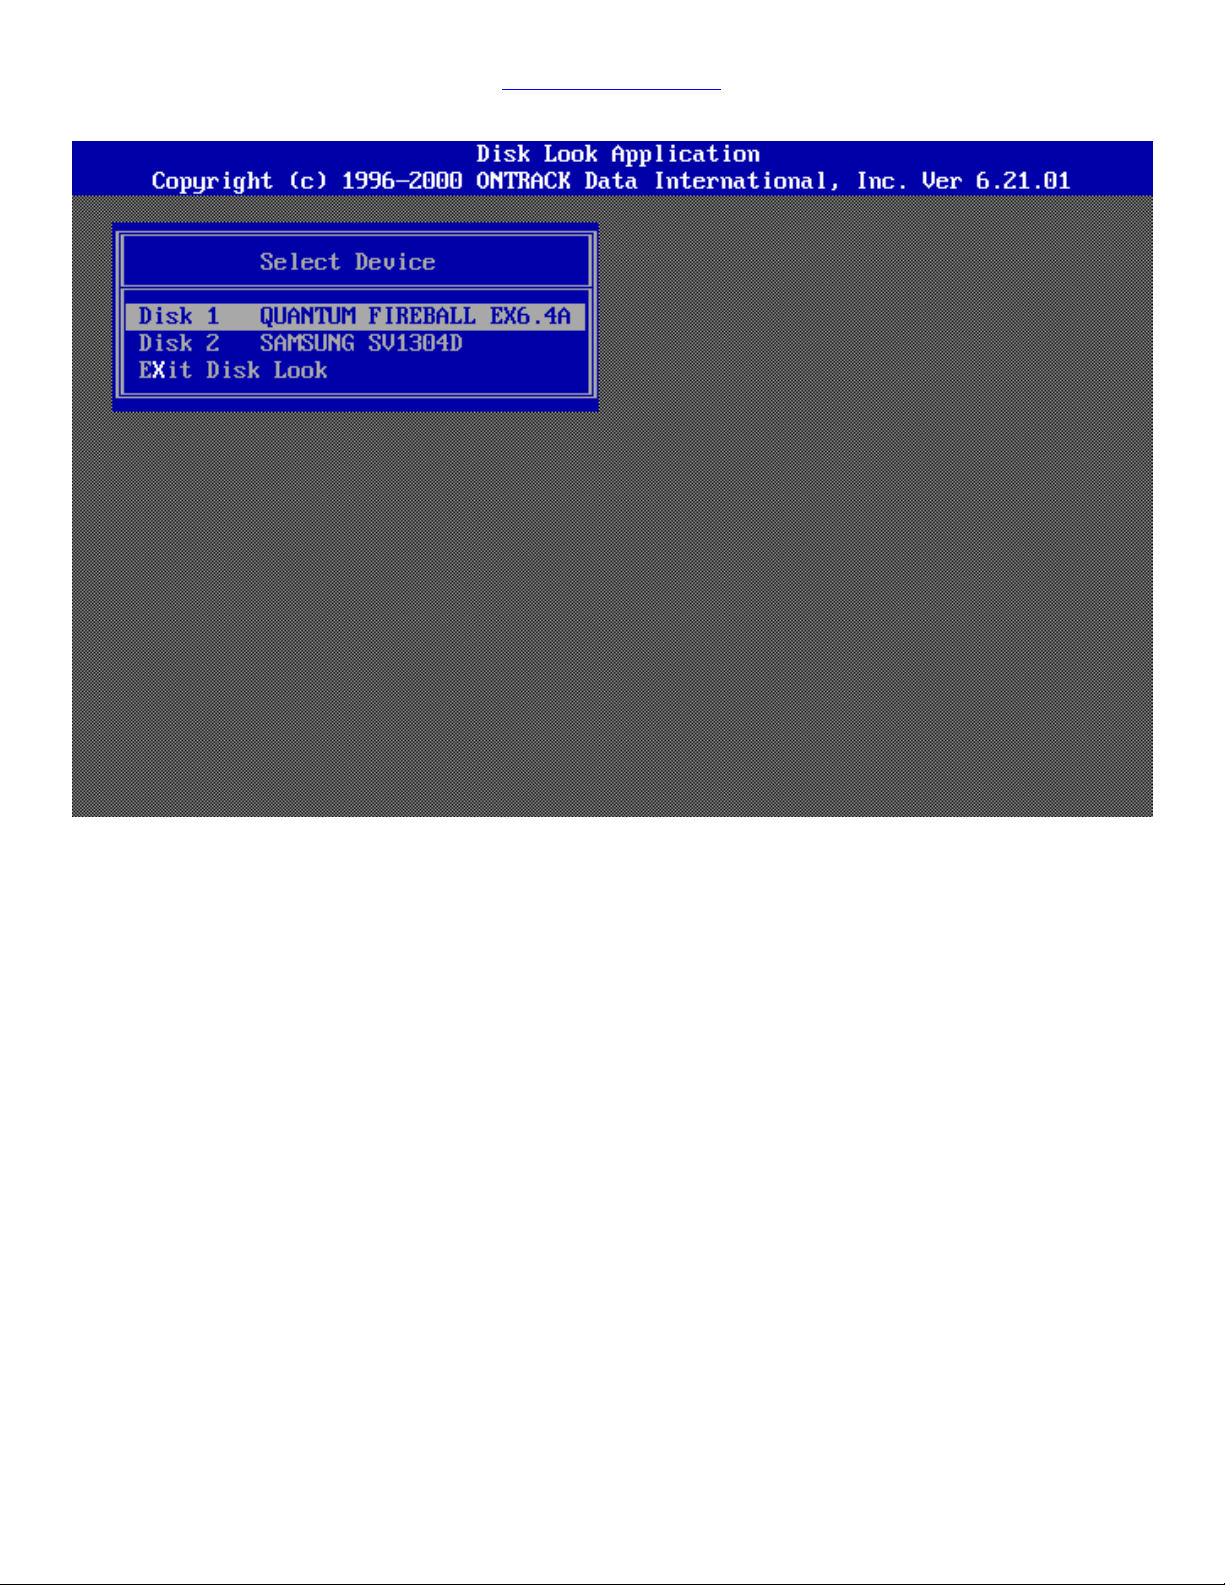
Figure 17: View Drive/Disk Look opening screen
The Disk Look Application provides an optional visual verification of the overwritten drive.
To use the Disk Look Application, select View Drives from the menu. At the opening screen use
the Up/Down Arrow keys to highlight the appropriate drive and press Enter.
21
Copyright © 2000 ONTRACK Data International, Inc.
Page 22
Return to Table of contents
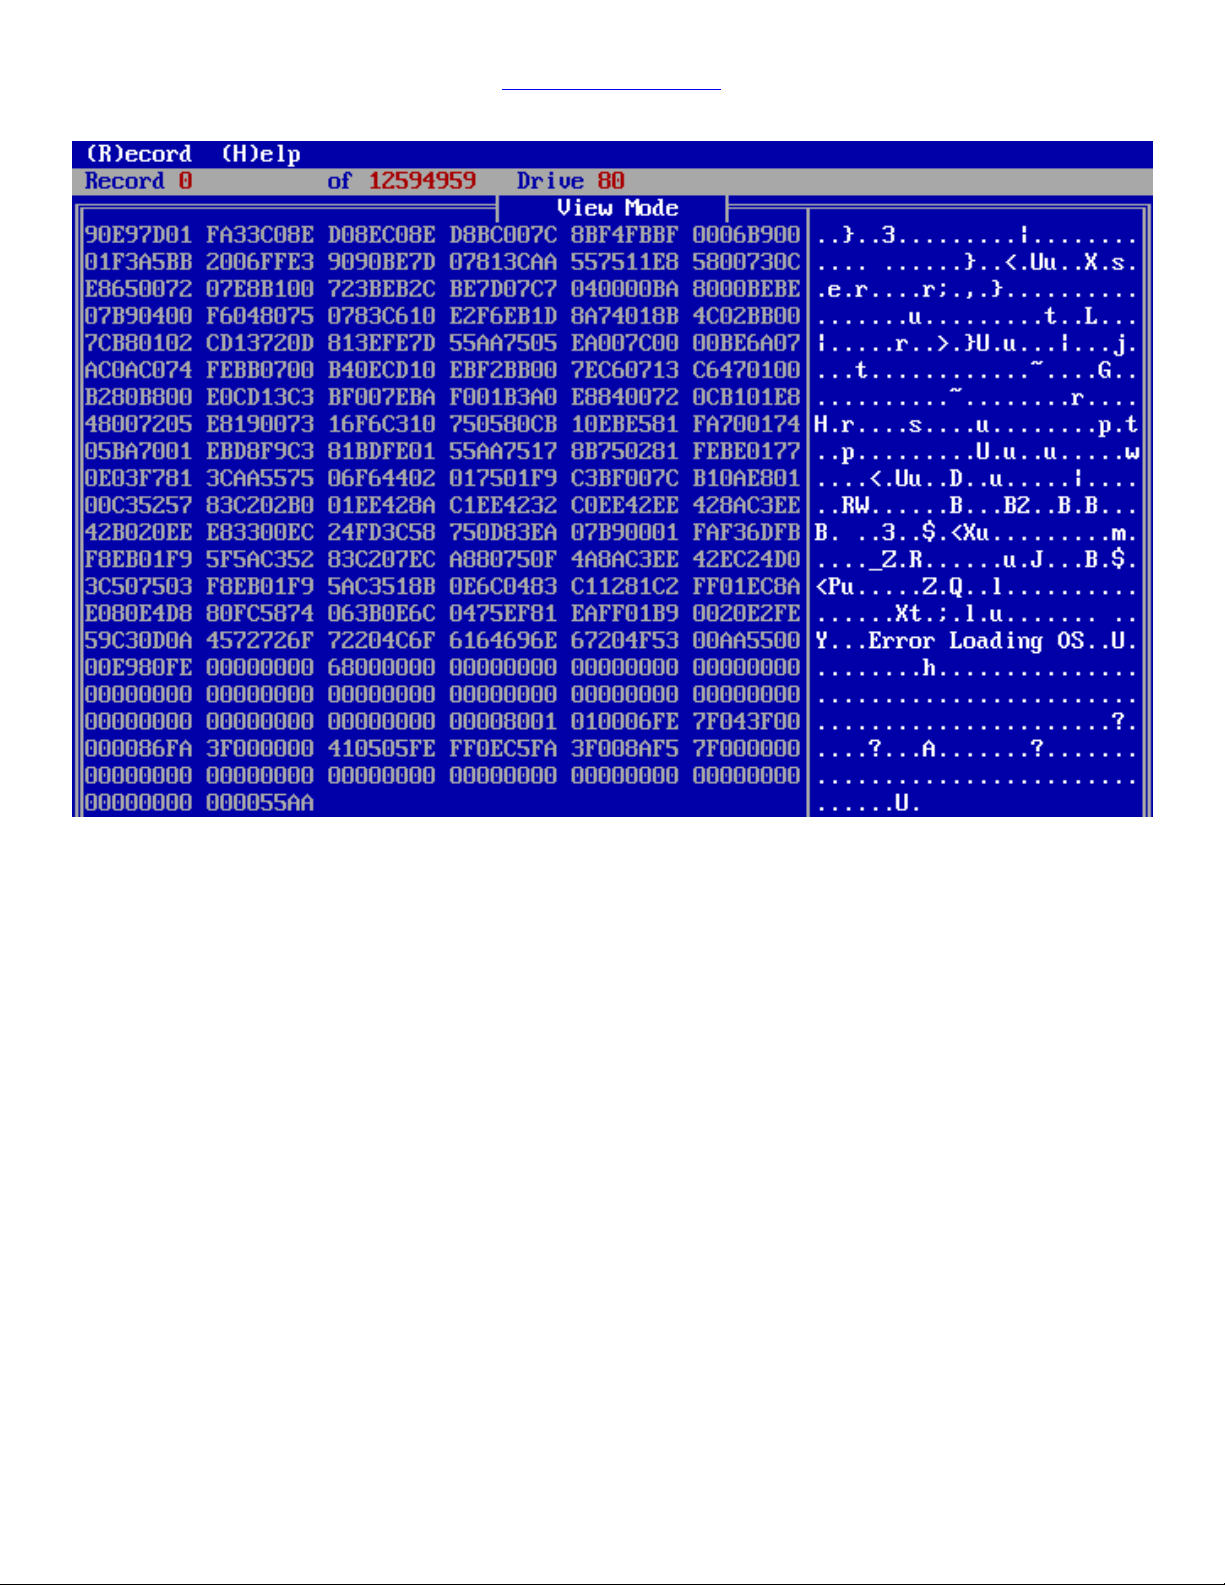
Figure 18: Disk Look screen with a typical example of data on a drive
To move forward or back one sector at a time use the Right/Left Arrow keys.
Press ALT-R for additional options.
Press ALT-H or F1 for help.
22
Copyright © 2000 ONTRACK Data International, Inc.
Page 23
Return to Table of contents
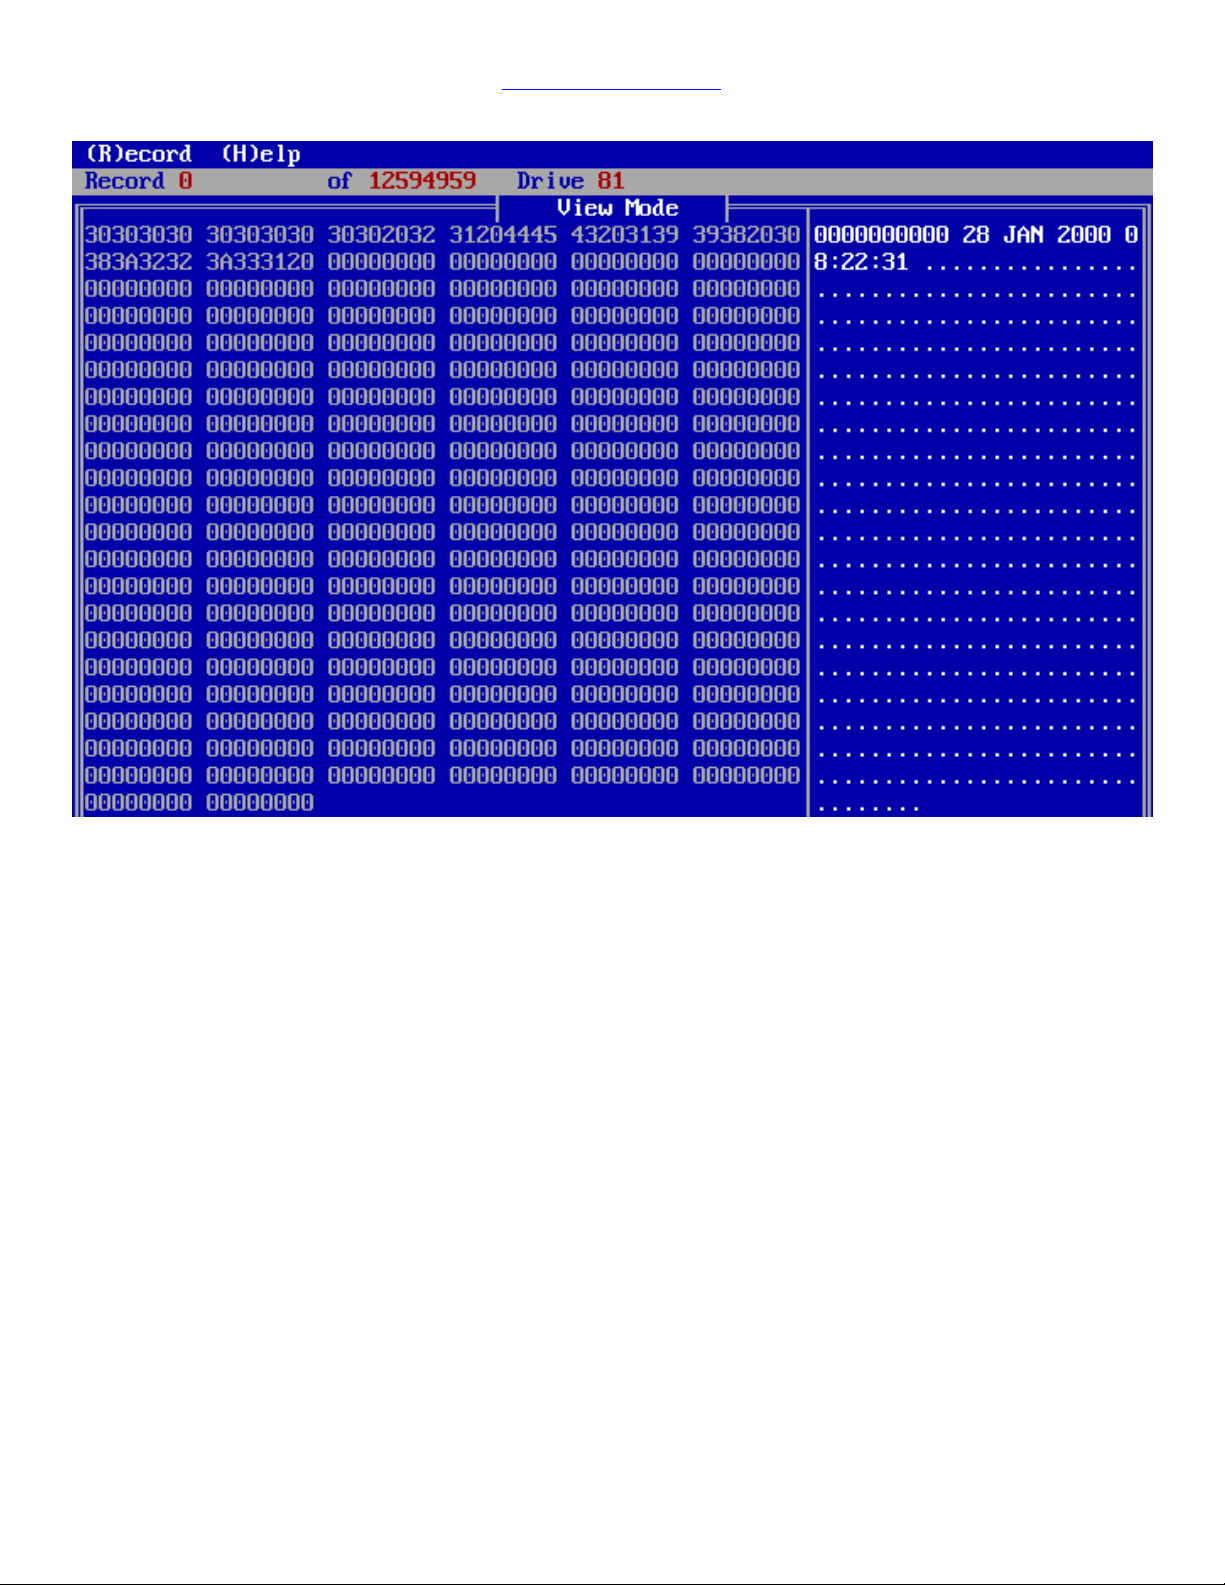
Figure 19: Disk Look screen after DataEraser overwrite with 00 pattern
The first 10 digits is the unique individual sector signature, followed by the date and time of the
overwrite.
23
Copyright © 2000 ONTRACK Data International, Inc.
Page 24
Return to Table of contents
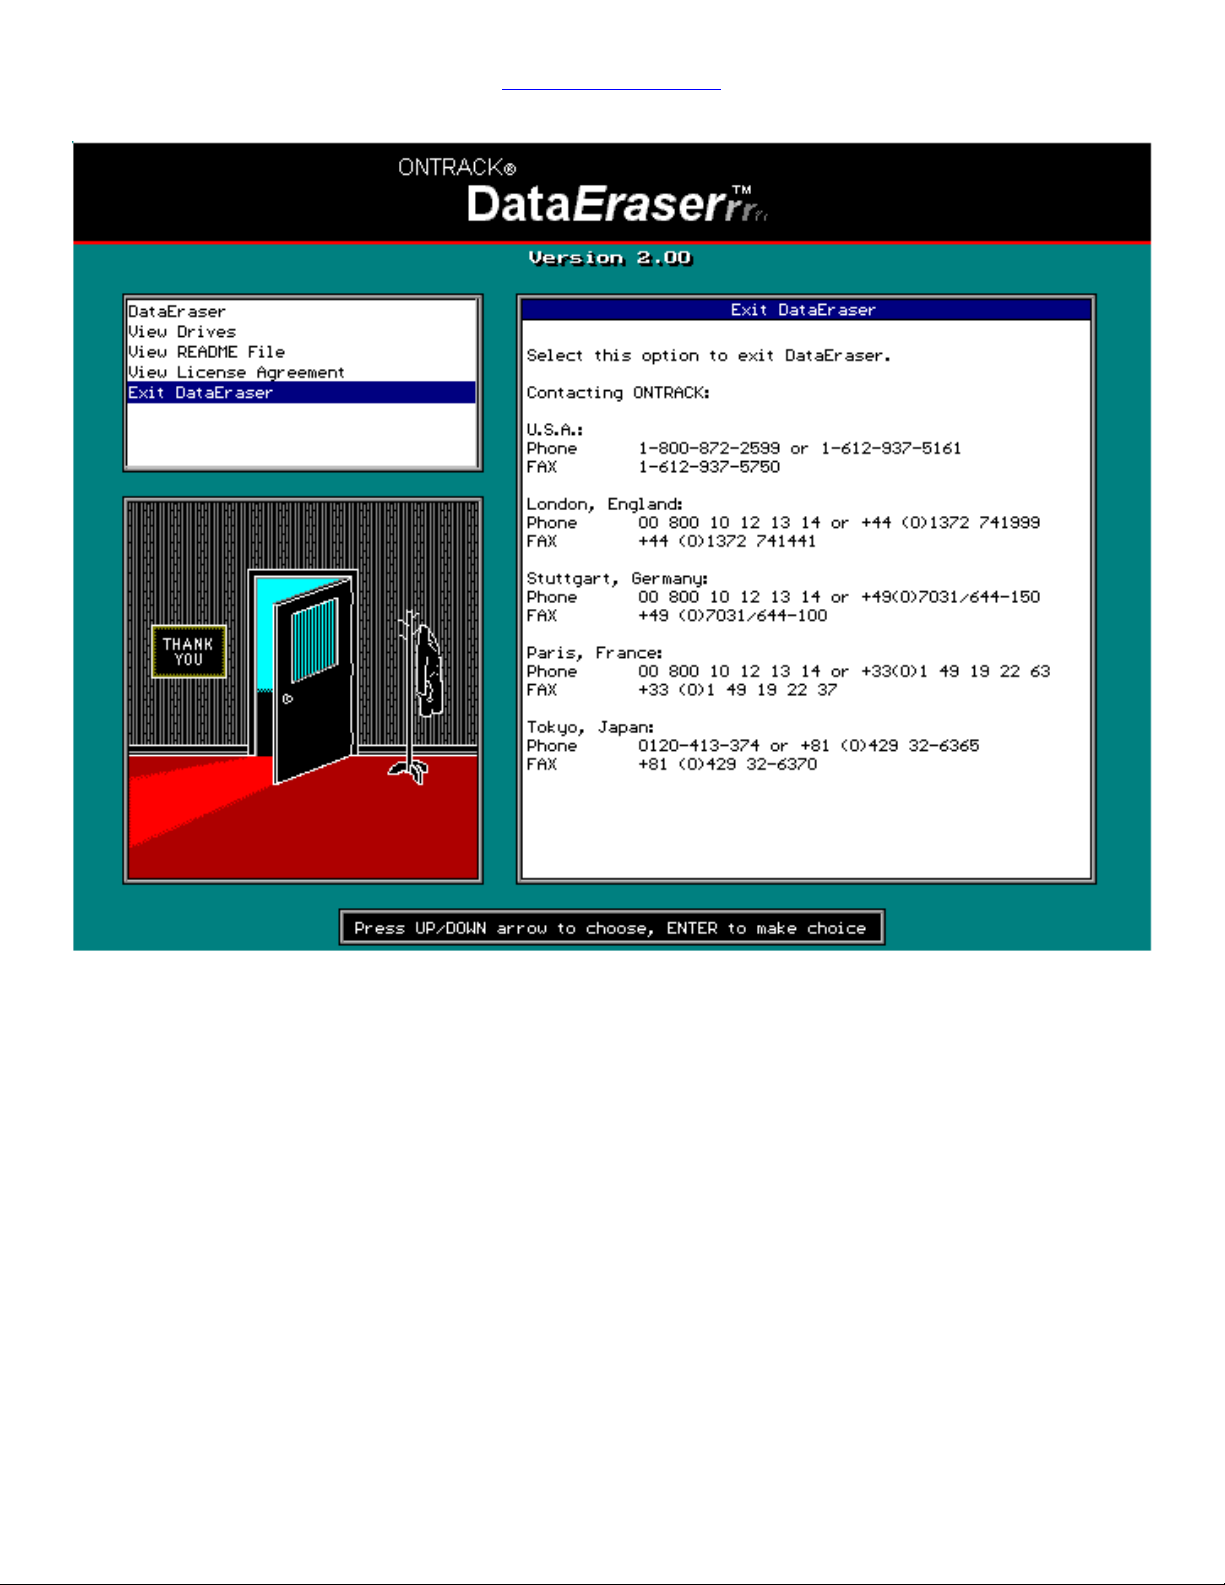
Figure 20: Exit DataEraser menu selection
Ontrack contact information is provided in the right window.
Free Technical Support is available
24
Copyright © 2000 ONTRACK Data International, Inc.
Page 25

Return to Table of contents
6. Professional version database methods
DataEraser automatically creates a comma-delimited file of erased drives that can be imported
into almost any database or into the MS Access 97 template provided. A Windows Help file is
included to assist with file import procedures.
The data source file, DE_DATA.TXT is created automatically as part of the overwrite process and
can be found on the diskette. If the same diskette is used for a number of machines, the results
for each machine are appended to the text file. If a separate diskette is used for each machine,
it will be necessary to import the text file from each diskette.
Important files provided for the Professional version of DataEraser:
D-ERASER.MDB
The pre-built MS Access 97 template file for customized reporting of the test results that Ontrack
DataEraser generates.
IMPORT.HLP
The Windows-based help file that provides instructions on importing the overwrite log that
Ontrack DataEraser generates into the pre-built database.
7. Errors and known limitations
Errors encountered during the overwriting or verification process:
We know that there are possible hardware attachment, jumpering, or actual electronic or
physical hard drive problems that could indicate to DataEraser that a command was successfully
completed, when, in fact, hardware difficulties prevented actual writing.
If for any reason verification fails or there is any indication of write or read errors after running
DataEraser, use the View Drives menu option to spot check several areas of the hard drive. If
any sector does not contain the unique sector signature and final overwrite pattern, recheck
jumpers, connections, and cables and run DataEraser.
Diskette Read Errors:
If an error message says DataEraser could not read strings from the diskette, make sure the
diskette is still in the floppy drive. If the message persists, there may be an error on the
diskette. Create a new DataEraser diskette and run again.
Diskette Write Errors:
• The diskette may not have enough free space to write to a report file. Normally this would
only happen if the database file has gotten too large. If this is the case, copy the
DE_DATA.TXT file to another location and run the utility again.
• The diskette may have a bad sector and writes cannot occur. If this is the case, create a new
DataEraser diskette and run the overwrite again.
NOTE: The overwrite may continue with this condition, however no report file will be generated.
25
Copyright © 2000 ONTRACK Data International, Inc.
Page 26

Return to Table of contents
Hardware limitations – drive, controller, channel
• DataEraser may not find or access hard disk drives when CMOS is set to "None" for those
drives. If the CMOS is set to "None", try setting it to "Auto" or set it "User Defined" with
parameters as follows: 1024 cylinders, 16 heads, 63 sectors per track.
• DataEraser may hang on an Adaptec 2940 PCI SCSI controller.
BIOS issues
If you insert the DataEraser diskette in the A: drive, power on the computer and it does not load
DataEraser, the "boot sequence" may be set to boot to the hard disk drive first.
To change the boot sequence, you must enter the "Setup" or "CMOS Setup" of your computer
and change the sequence to boot from floppy first. There are several ways to enter the setup
depending on your computer make and model. Usually on the initial power up there will be a
message stating "Press DEL to enter Setup" or something similar. It may be necessary to press
the key quickly as the boot sequence may continue on momentarily.
The most common keys or key sequences to enter setup are:
- Delete
- F1
- F2
- CTRL-ALT-S
- CTRL-ALT-T
- CTRL-ALT-ESC
- CTRL-ALT-Enter
NOTE: Some computers that use the "CTRL-ALT-___" sequences must be at a prompt before
pressing the keys. If unsure how to enter the setup, see the owner's manual for your computer
or seek assistance from the system, BIOS, or motherboard manufacturer or where you
purchased the computer.
It is also possible that the BIOS hard drive settings need to be corrected (not No Drive Installed)
if there is an error in DataEraser. A typical case would be an error message indicating incorrect
drive parameters.
Boot platform limitations
Caldera DOS 7.03 is the operating system used by DataEraser. In some cases there may be
some compatibility issues. Check the FAQ's on the Ontrack web site for up-to-date information.
International keyboard support: beyond US keyboard layouts
The diskette FOREIGN directory contains different sub-directories distinguished by country.
Copy the two files from the country sub-directory root of the diskette and run DataEraser.
26
Copyright © 2000 ONTRACK Data International, Inc.
Page 27

Return to Table of contents
8. SCSI Issues
Hardware – host adapters and/or SCSI calls
DataEraser Professional version is designed to automatically support over 75 percent of SCSI
host adapters in service today. If you do not have an Adaptec compatible SCSI card, it may be
necessary to replace the Adaptec drivers with your card specific drivers and DOS support files.
Normally these drivers come on the SCSI support floppy or CD-ROM, but may be available from
the manufacturer's web site.
BIOS issues
DataEraser will not go beyond the SCSI host adapter's BIOS support.
27
Copyright © 2000 ONTRACK Data International, Inc.
 Loading...